If you’ve ever tackled just the tiniest home improvement project you’ll probably know that things have a way of taking way longer than you expect them to and also costing a lot more than you want them to.
Considering that we’ve been renovating our homes for over 9 years, you would think that we’d learned how to estimate the cost and time aspect by now!
To be fair, I’m an obsessive and meticulous planner so we usually know what a project will cost – which is also why we’ve not done many of them!
I’m guessing we’re not the only ones who want their home to be renovated, finished and dust-free on a pretty much non-existent budget?
So, why am I telling you all of this?
Because budget makeovers are the best thing ever! Okay, so cheese is the best thing ever, but in terms of home improvement, budget-friendly makeovers are pretty much as good as it gets – especially when you end up with a result that looks amazing!
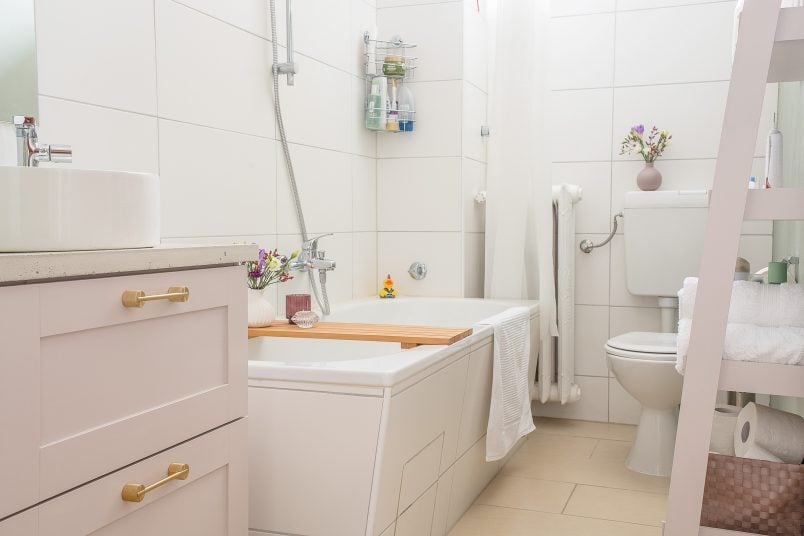
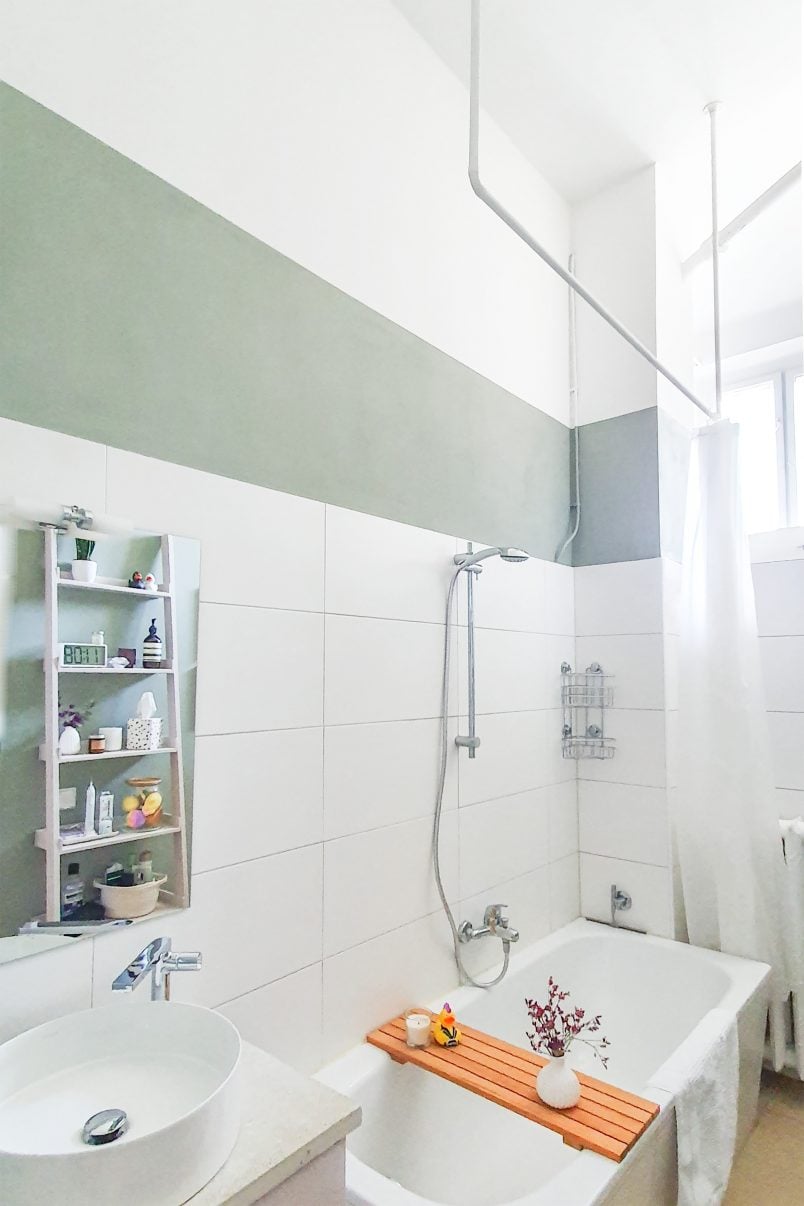
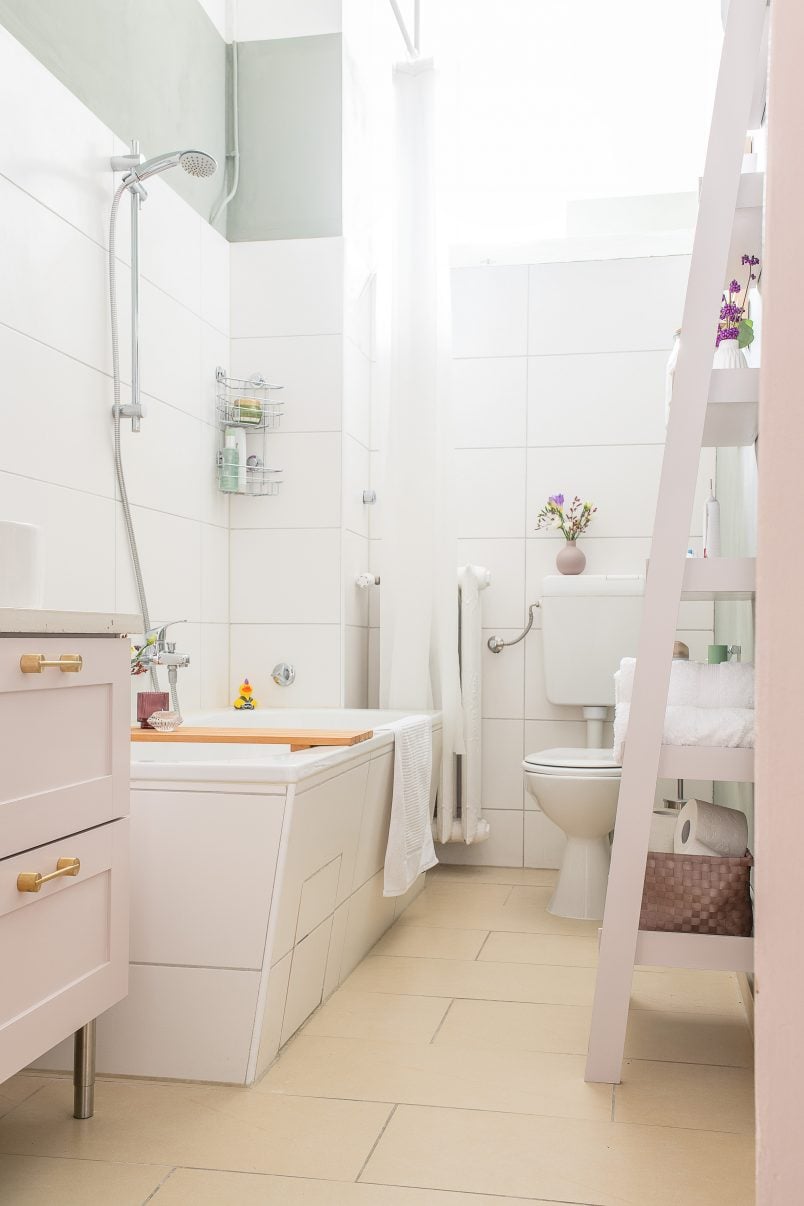
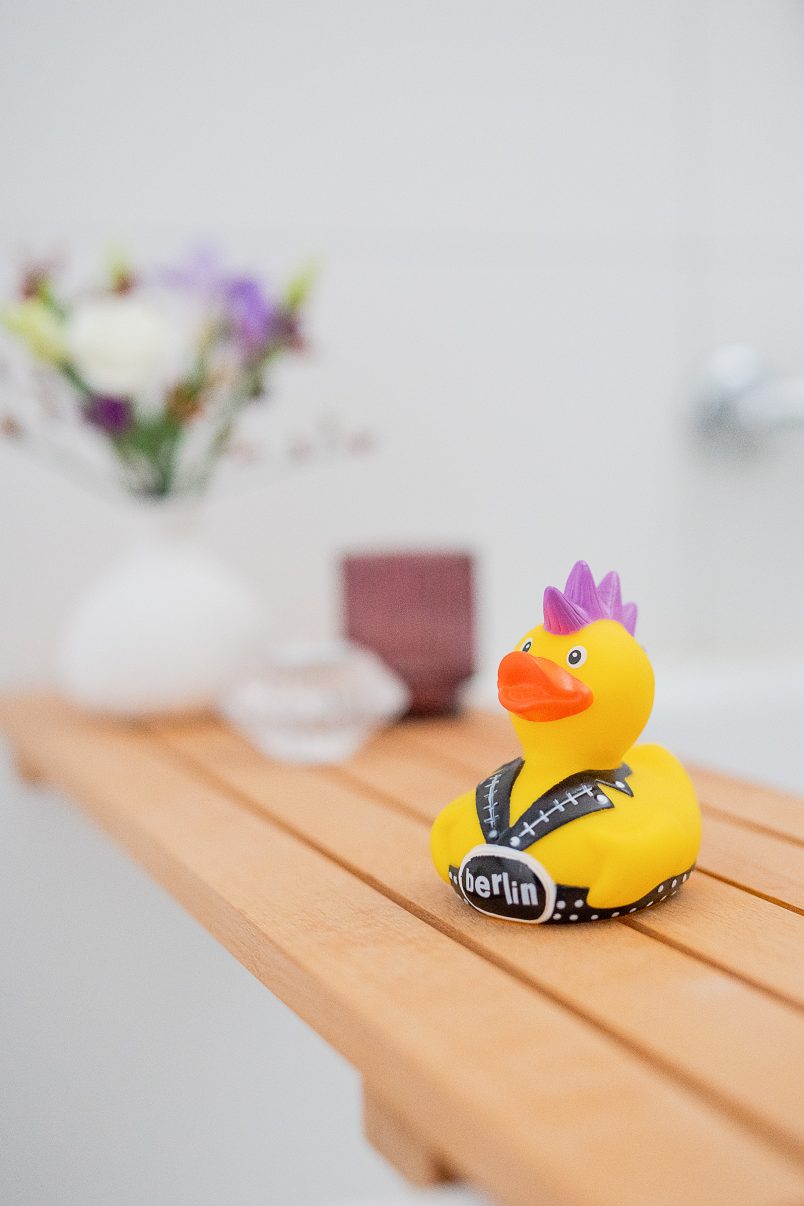
And, if you caught our bathroom makeover reveal that we shared a while ago, you’ll already know that it’s one room jam-packed with loads of easy and affordable projects.
We built the ladder shelves, made our bath caddy, installed a new vanity unit and washbasin, built the concrete vanity countertop and even built our new DIY shower curtain rail!
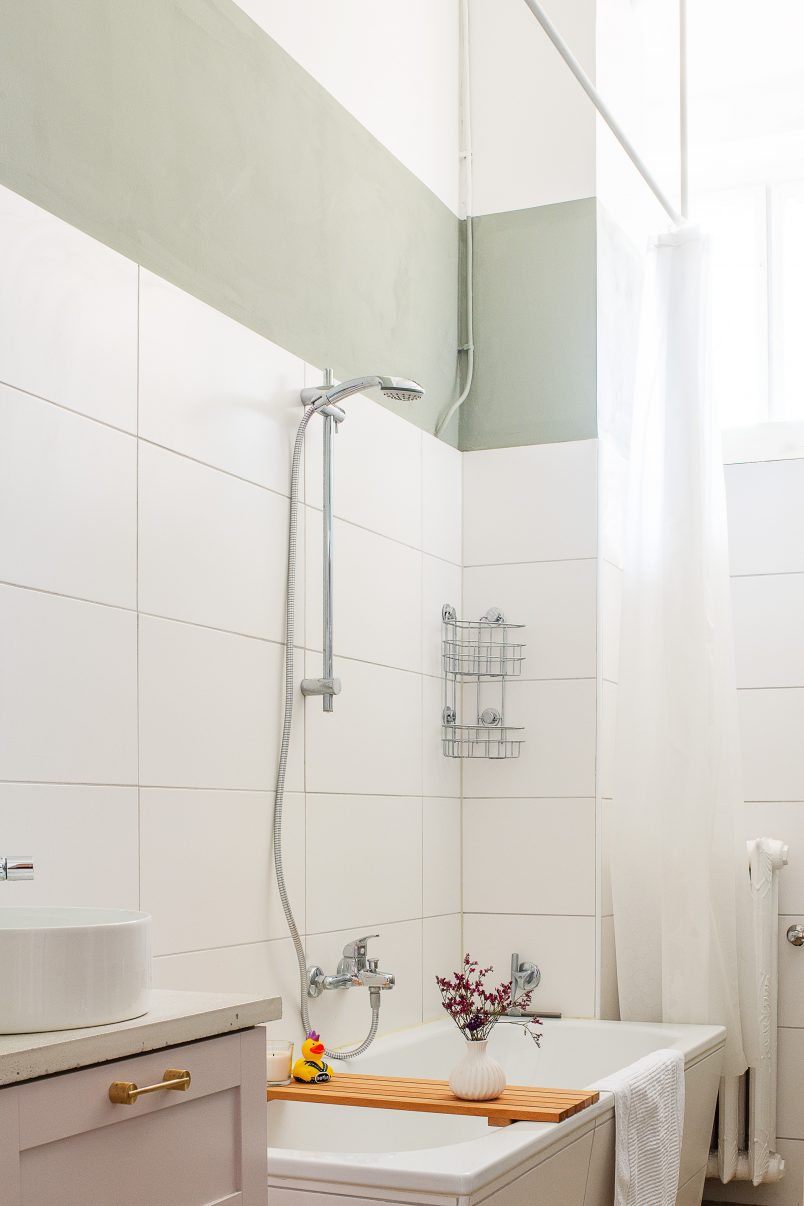
If I’m completely honest, building a DIY shower curtain rail isn’t something that I would ever have thought about if our bathroom didn’t have such a weird layout where it’s almost impossible to find an affordable shower rail in a store.
When we moved in, the only one we could find was this chunky one from Ikea which, don’t get me wrong, served us well, but it’s not exactly the prettiest thing you’ve ever seen, is it?
One of the best things about DIY is that you can create totally bespoke and affordable solutions to solve your home improvement projects, so that’s exactly what we did here and our new shower rail came in at 40€. (Which is a saving of 260€ compared to the shower rail I would have liked!).
If you’d like to build your own DIY shower curtain rail, this is what you will need:
This post contains affiliate links. We only recommend products we love and think that you will, too! Read our full disclaimer here.
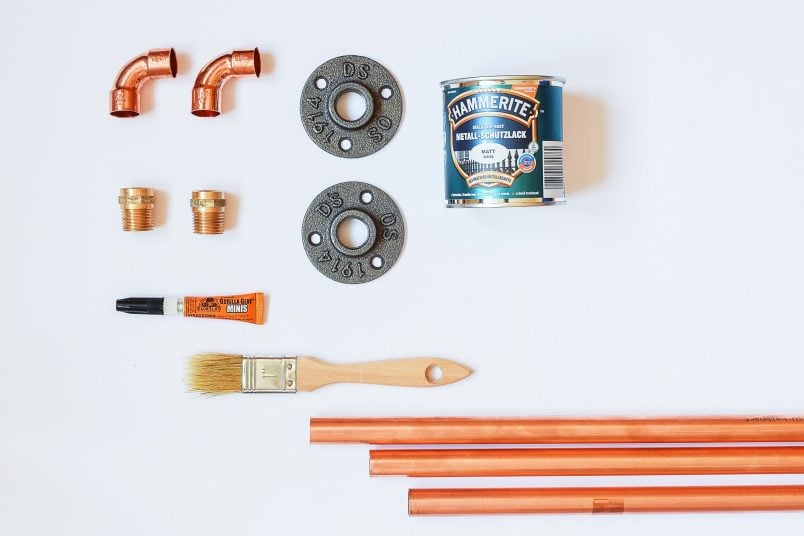
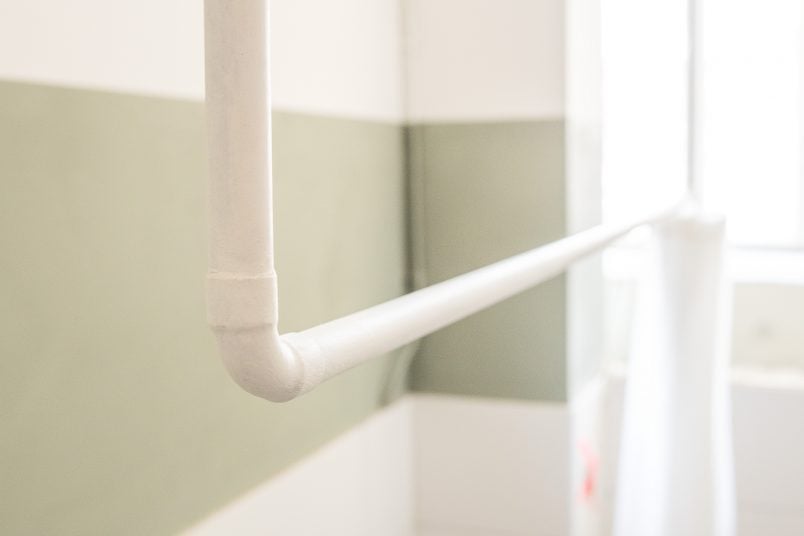
- 18mm Copper pipe – The length you need will depend on your project. In our case, it’s the length of the bath (170cm) plus twice the distance from the top of the shower curtain height to the ceiling (which in our case is a whopping 120cm).
- 2 x 18mm Copper curves
- 2 x ½” to 18mm Connecting Nipples (yes, that’s really what they are called)
- 2 x ½” Floor Flange
- Hammerite Paint (we used white satin)
- Paintbrush
- Gorilla Glue
- Pipe cutter (or a saw)
To attach it to the ceiling:
- Cordless drill
- Wallplugs
- Screws
This is how to build a DIY shower curtain rail:
1. Measure & Cut
Start by cutting the pieces of copper pipe to the lengths you need.
In our case, we cut the first pipe (the one that will be horizontal and hold your shower curtain) just slightly shorter than the length of the bath (you’ll still be adding the curves which will make it a bit longer again).
The next two pieces of pipe are the ones that will hang from the ceiling. They should be the same length as each other. The length will obviously depend on how high your ceilings are. Our ceilings are a whopping 3.60m high which is why our vertical pieces are still really long.
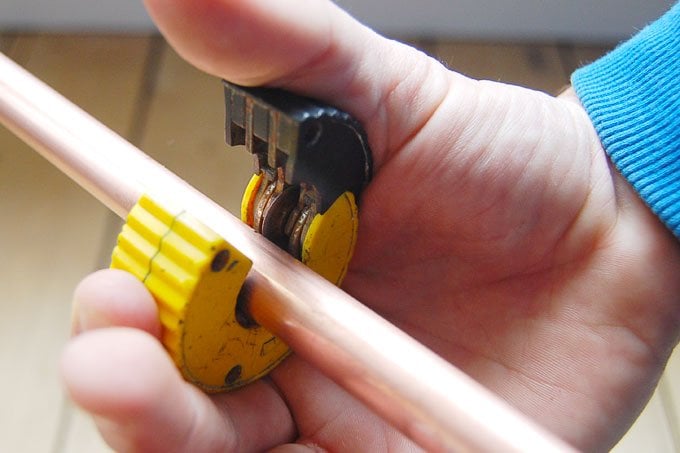
We cut our pipe with our mitre saw because our pipe cutter wasn’t large enough for the thickness of the pipe we used. Copper is fairly soft, so you can use a pipe cutter, a small metal saw or a mitre saw to cut it. There’s definitely no need to go out and buy a tool just for this project!
Make sure that you sand any rough edges before moving on to the next step.
2. Glue or Solder
It’s always a good idea to make sure that all of your pieces fit together before actually glueing them together.
It’s important to make sure that the pieces are firmly connected to each other, especially as the shower rail will hang from the ceiling.
Ideally, you would probably solder them together (by all means do that if you have the necessary skills and tools) but we opted to glue them.
If you do just glue the pieces together, it’s obviously a good idea to use the strongest possible glue you can find.
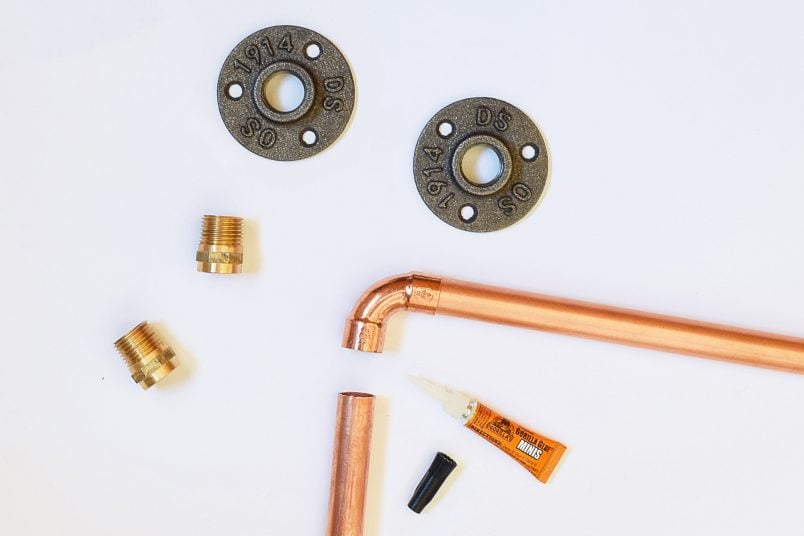
We used Gorilla glue which is waterproof (we still had a little sample tube lying around) and it worked really, really well as it expands and fills any gaps making firmly securing the two copper pieces together. Just remember to follow the instructions of whatever glue/method you opt to use.
The floor flanges and brass hex nipple screw together and there’s no need to glue them!
3. Paint
When you’ve glued everything together it’s time to paint your DIY shower curtain rail.
We painted it white but you can obviously choose whatever colour you want. Just make sure to use a super-durable paint (we used Hammerite in white satin)
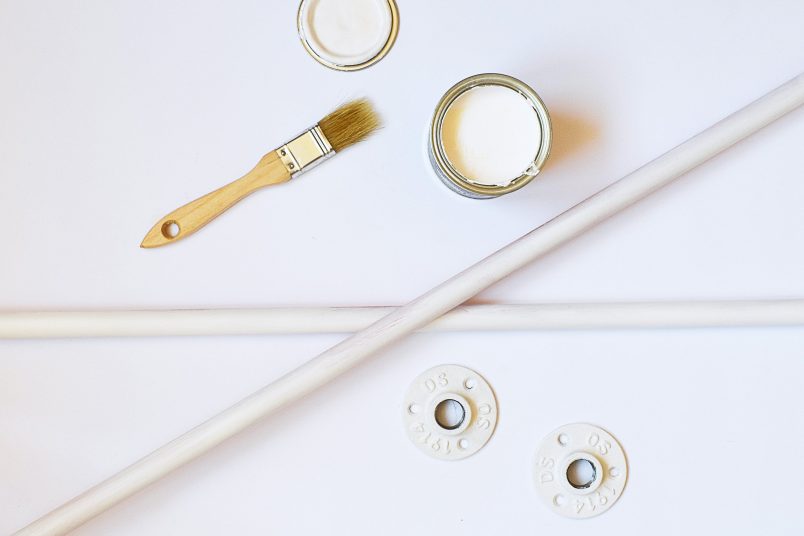
Always make sure the surface you’re painting is clean before applying a coat of paint.
4. Attach
When you’ve finished constructing your shower rail it’s time to attach it to the ceiling.
This part is definitely a two-man job as it’s almost impossible to hold the shower rail and mark drill holes at the same time!
Given our ridiculous ceiling height and how narrow the room is, this still resulted in a rather precarious balancing act of me tiptoeing along the edge of the bath while Jan awkwardly hung off the ladder trying to pencil in the drill marks.
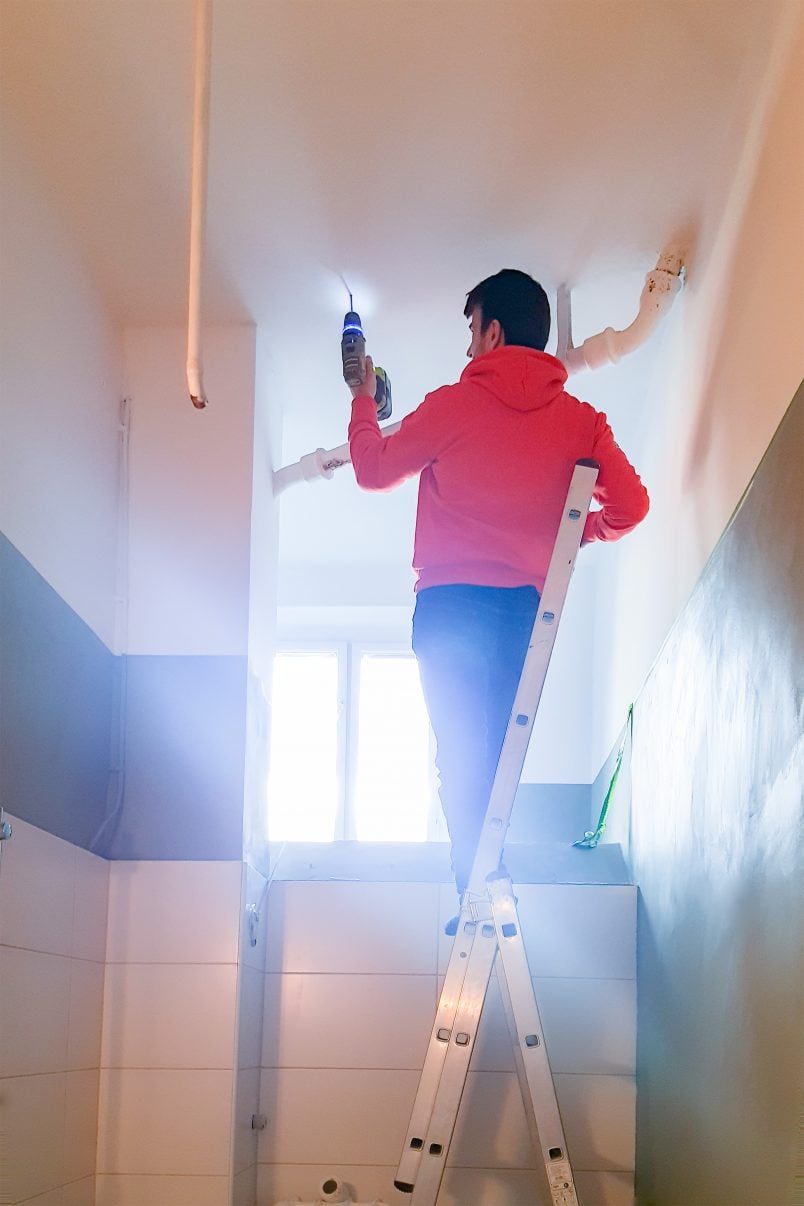
Having said that, drilling a couple of holes into the ceiling obviously isn’t a difficult thing to do and, if you’re working in a room where you can actually move (or reach the ceiling), it should be pretty straightforward.
Just remember to check for any cables or pipes before you drill into the ceiling!
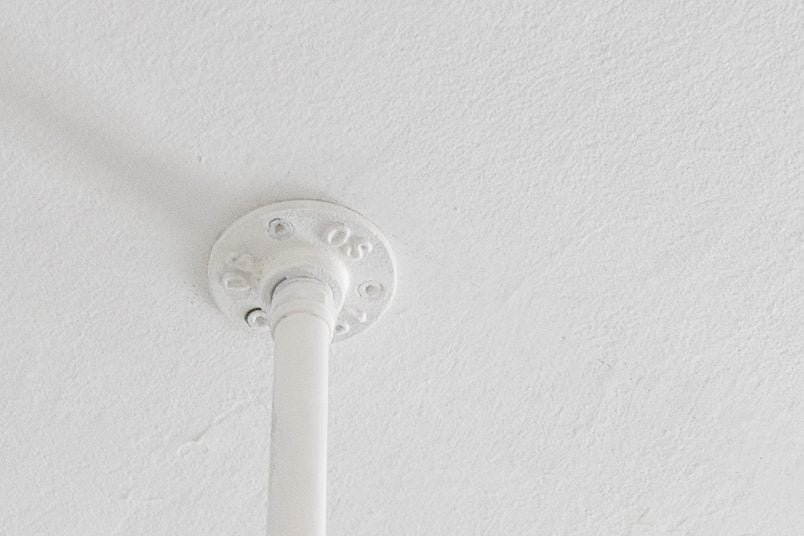
Position the shower rail before marking where you have to drill. Then, drill the holes, pop in a wall plug and screw your DIY shower curtain rail to the ceiling. Make sure it’s securely attached before hanging up your shower curtain!
This was a really quick, really easy and super budget-friendly DIY project to do. As usual, I’ve probably made it sound way more complicated than it was!
Our DIY shower rail is really stable but our super high ceilings aren’t ideal for this project and shorter vertical shower rail pipes would definitely be a better option.
I love how much slimmer and more elegant it looks, especially compared to the chunky shower rail we had there before.
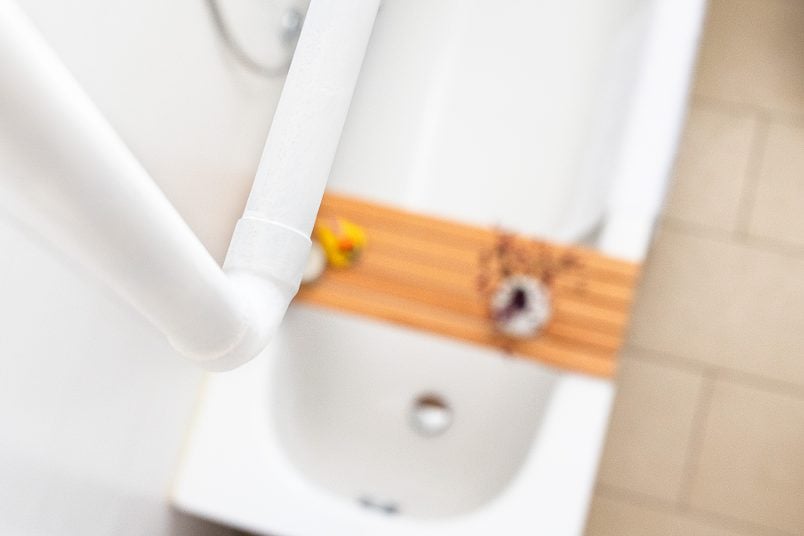
In case you’re wondering, yes, the short sides of our bath are now open when we shower. Because our shower head is in the centre of the bath, we figured that we could get away with just one long shower curtain running the length of the bath.
Luckily, we were right and we don’t end up flooding our bathroom every time we shower!
Don’t forget to check out our full bathroom makeover which you can see here!
Have ever DIYed to save money? What kind of DIY projects do you like most? Do you have a favourite project of all time?
Love budget-friendly projects? Here are some more you might like to try!
- DIY Copper Ladder
- DIY Picture Shelf
- DIY Geometric Chopping Boards
- How To Lay A Plywood Floor
- How To Paint Switches & Sockets
- DIY Poster Hangers
SHOP OUR DIY ESSENTIALS


Eina says
The vertical lines fit so well with the space! Love the look.
Some questions:
1. Why copper instead of another type of metal pipe or metal rope?
2. Is that the pantry below the window?
3. Is that plumbing from a flat above you?
I lived in the garret of a late 19th c. building as a student, with what seemed like every pipe running through the room. All retrofitted, of course. I think some were hot water pipes as I could leave the super tall window open even in cool weather.
Christine says
Thanks! It works really well and we’re so pleased with it! We chose copper pipe because it’s easy to use and affordable. I also wanted something ridged rather than a rope – ultimately it was a design choice. Yes, it’s the pantry below the window. We have now come up with a bathroom design that I think will work and will keep the two rooms separate! It looks like work will start around September so watch this space! :)
The plumbing you can see will also be removed when we redo the bathroom. We only have the loft above us and there must have been a bathroom up there at some point but it’s completely empty now. Just the pipe has never been removed.
Cx