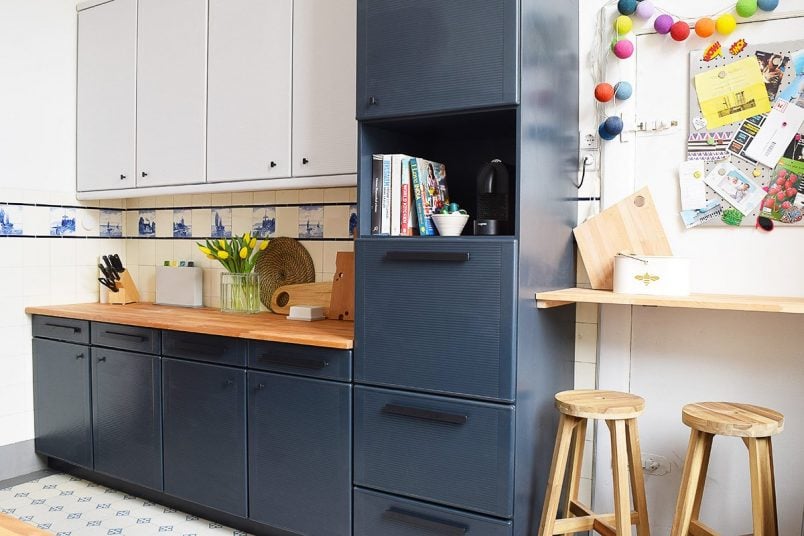
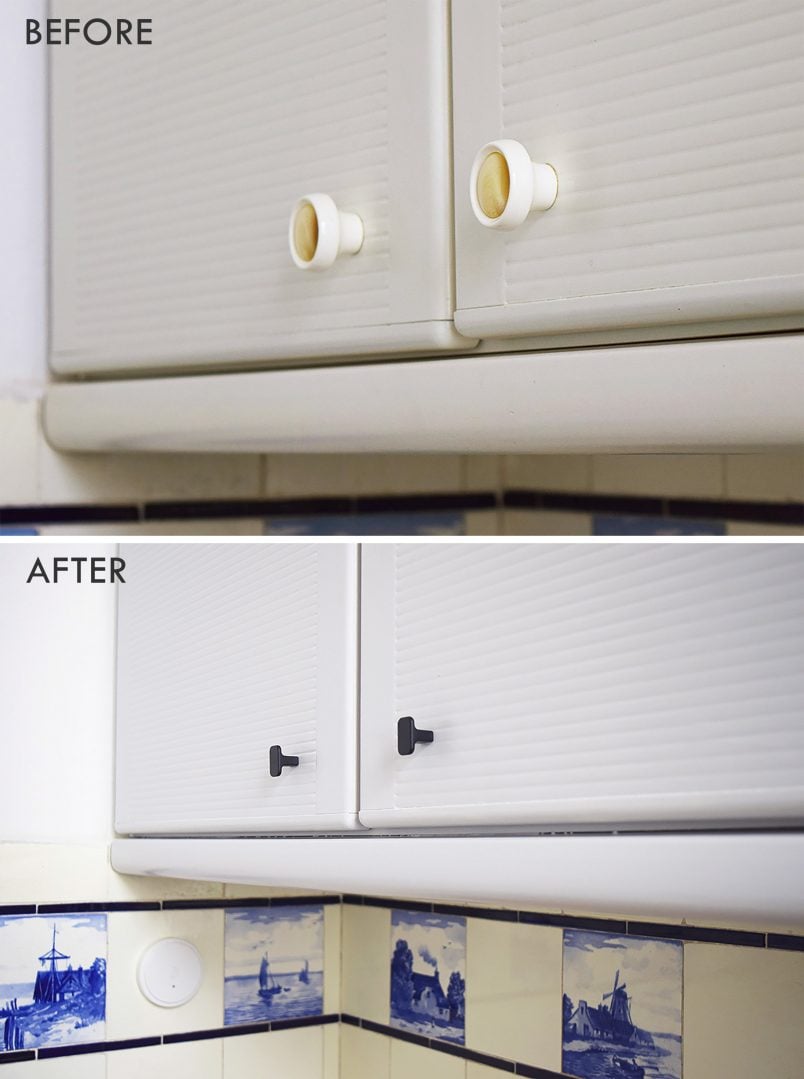
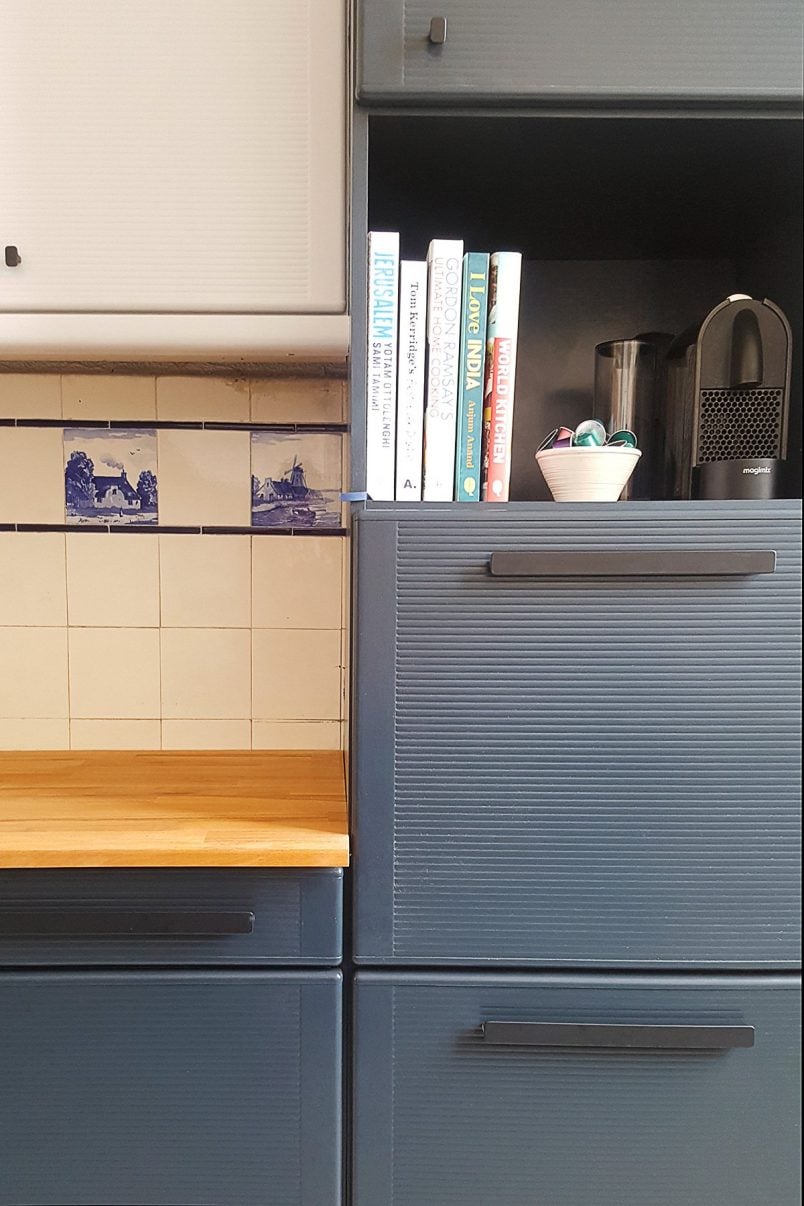
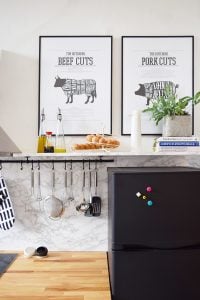
As you probably know, we gave our kitchen a dramatic makeover earlier this year and turned it from a bland and boring space with plain off-white cabinets into a modern and way more stylish tuxedo kitchen (yep, that’s actually what they’re called!).
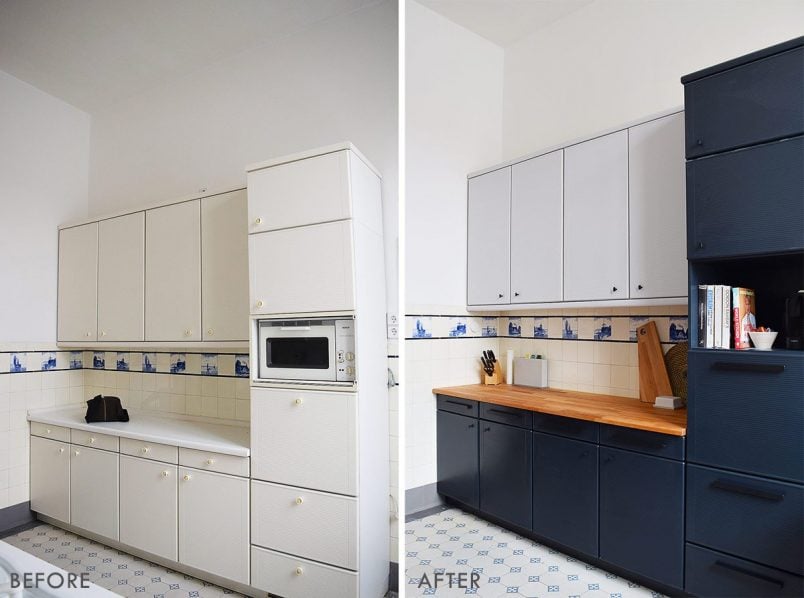
We absolutely love how it turned out and painting it was one of the best home improvement decisions we’ve made so far!
Painting is always one of our favourite projects to do. It’s easy, cheap and such an effective way to transform a space. Painting walls and ceilings is really straightforward but we had a few concerns about painting our cabinets.
Would the finish hold up? Would it be easy to do? Would we manage to achieve a flawless finish? Is painting laminate kitchen cabinets really a good idea?
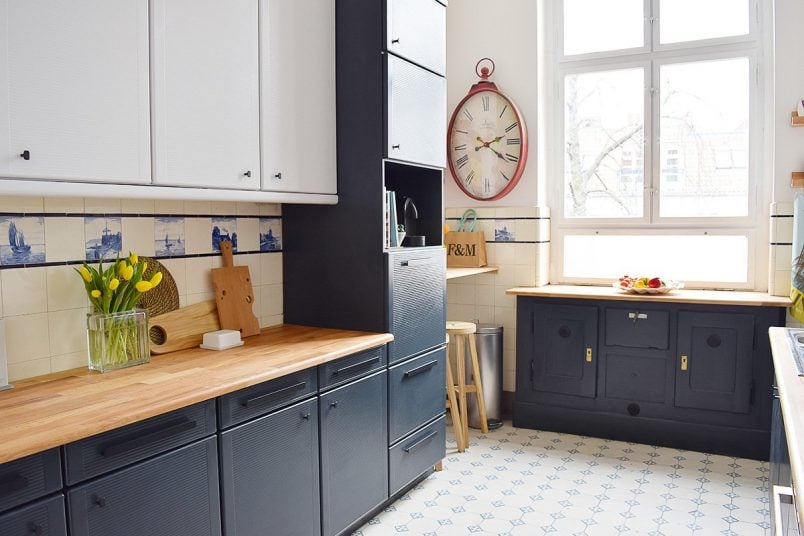
Well, I’m happy to say that they turned out amazingly well.
As always though, the true test is seeing how the finish holds up over time. Our cabinets have been painted for over 7 months now and I’m happy to say that they look exactly as they did on the first day!
DIY UPDATE
Want to know what our cabinets look like now?
Click here to see what our painted kitchen cabinets look like two years after painting them!
Spoiler: They still look perfect!
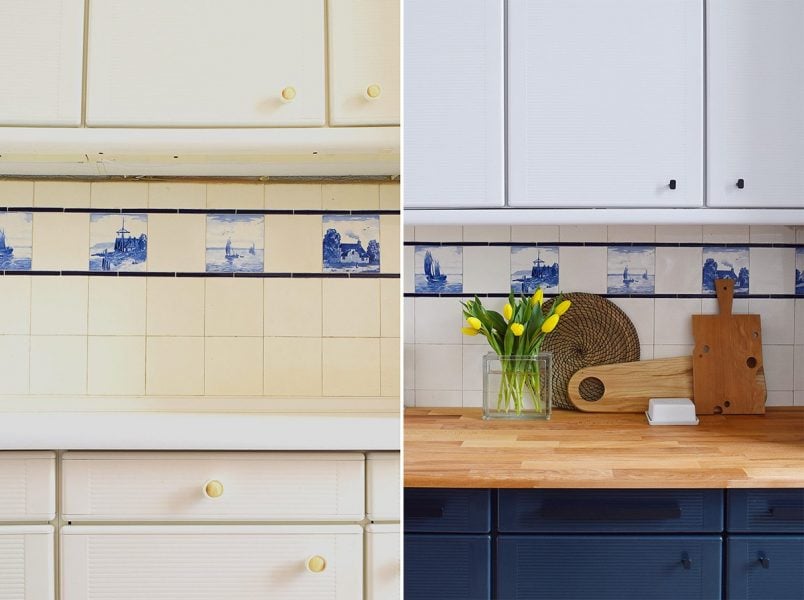
There’s not a scratch or mark in sight, even in areas that get a lot of wear and tear like around the handles or edges of cupboard doors. I honestly couldn’t be happier with how it looks and how it’s holding up!
I’m totally aware that painting kitchen cabinets can seem like a daunting thing to do – we definitely had our concerns – but it’s not as difficult as it may seem and achieve a flawless finish where you wouldn’t know that the cabinets are painted is possible!
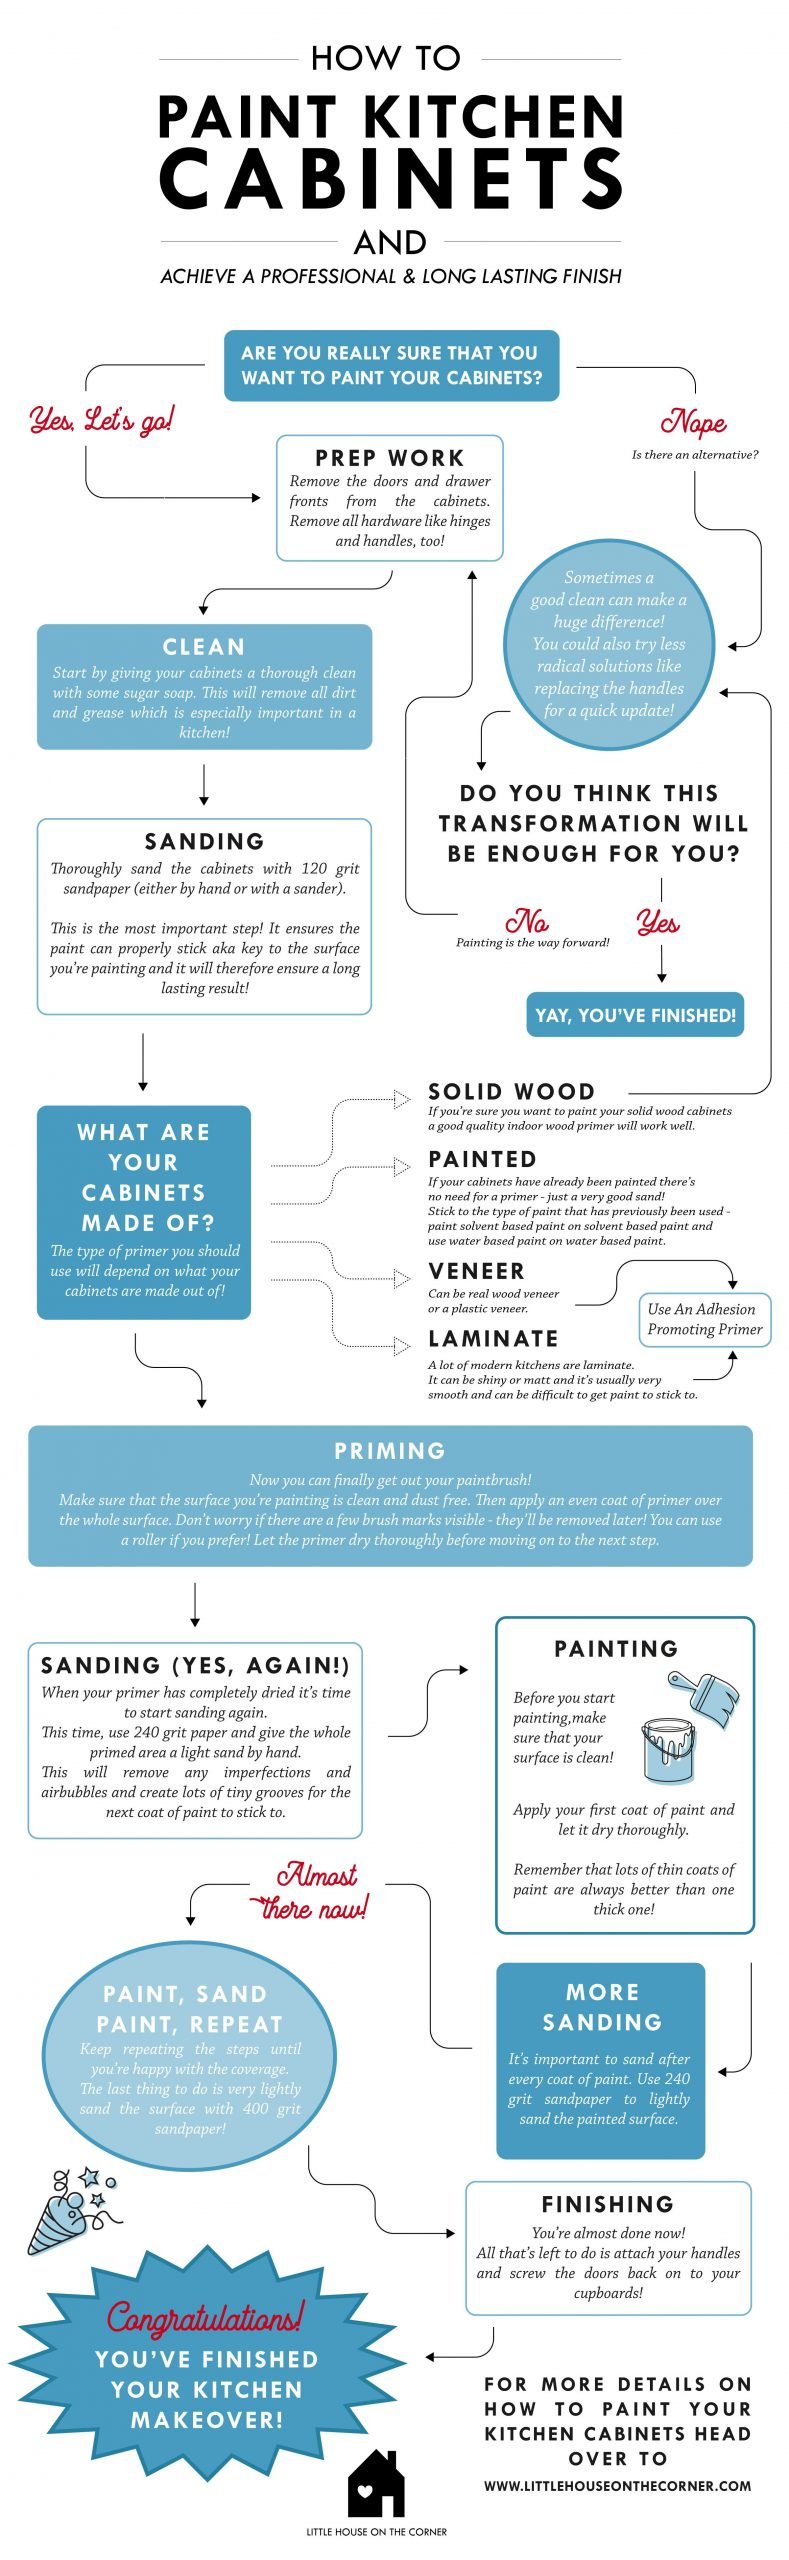
With all of that said, here’s a flowchart to give you an overview of what’s involved when painting kitchen cabinets. And, if you’re planning on painting your kitchen cabinets, we’re also sharing a helpful step-by-step checklist that you can download at the end of this post.
This post contains affiliate links. We only recommend products we love and think that you will, too! Read our full disclaimer here.
Materials and Tools To Paint Kitchen Cabinets
- Sugar Soap | To give everything a thorough clean before painting use sugar soap.
- Sandpaper | You’ll need a couple of different grits of sandpaper. 120 grit is perfect for the initial sanding and 240 to 320 grit for sanding in between coats.
- Orbital sander | You could sand by hand but a sander will make the whole process much quicker.
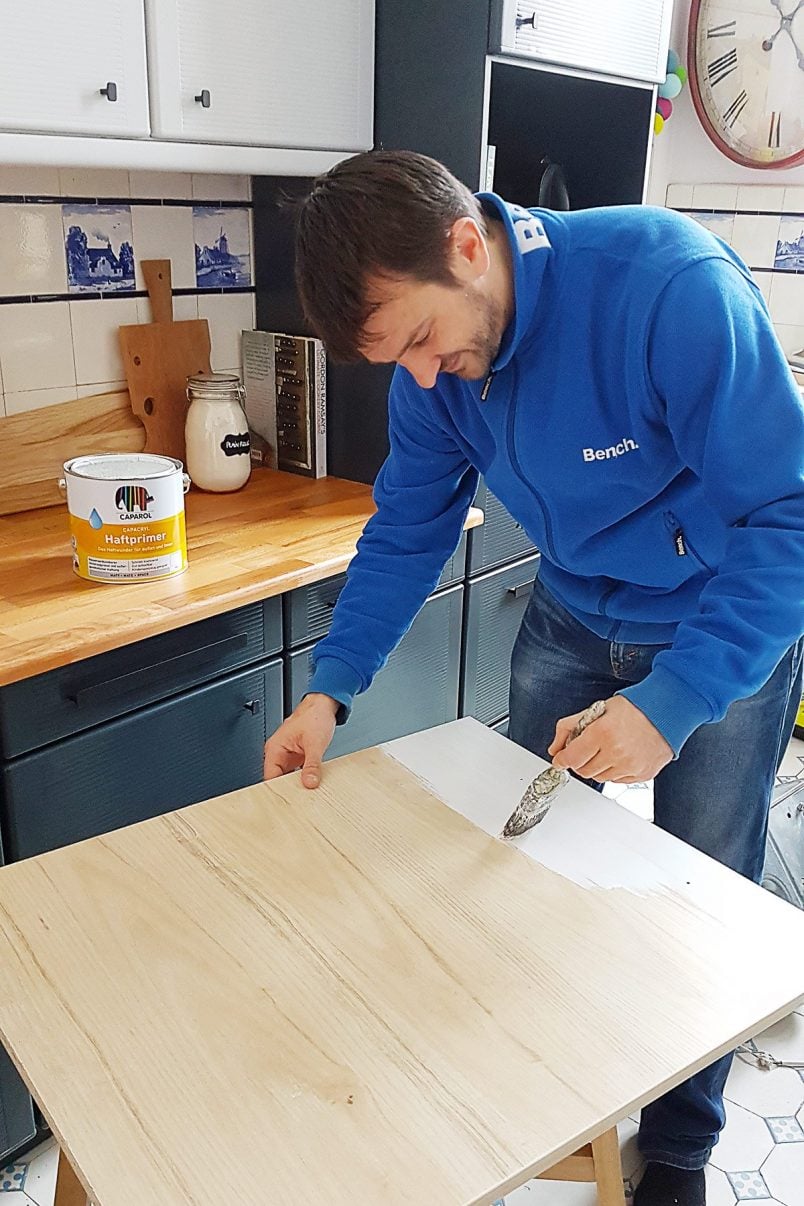
- Primer | A good adhesion-promoting primer is essential for achieving a long-lasting finish. We used this Caparol water-based primer, which is amazing, easy to work with and we highly recommend it because it gives you a super durable finish. A good alternative would be Zinsser BIN primer which everyone raves about.
- Paint | We love Farrow & Ball Modern Eggshell paint as it’s super durable and makes it easy to achieve an excellent finish. We used this colour on the bottom cabinets and this colour on the upper cabinets.
- High-quality paint brushes | Investing in great paintbrushes is a must! We bought our first set of these Purdy paintbrushes over 8 years ago and still use them for every project. They’re still amazing, help to achieve a perfect finish and we highly recommend them!

Preparation Is Everything
The most important step when painting your kitchen is planning and preparation.
What is your kitchen made of? Is it solid wood, laminate, or something else? Has it been previously painted? All the choices you make will depend on what your kitchen is made of and what condition it’s in!
Our cabinets have a laminate finish which means that they’re really smooth and getting paint to adhere to them can be tricky. The secret to achieving a long-lasting finish is sanding and using the right primer.
How To Paint Laminate Kitchen Cabinets
Before starting to do any painting or sanding we gave our cupboards a very thorough clean.
We always use sugar soap for cleaning cupboards and furniture we’re going to paint as it’s really good at removing all grime and grease which is obviously especially important in a kitchen!
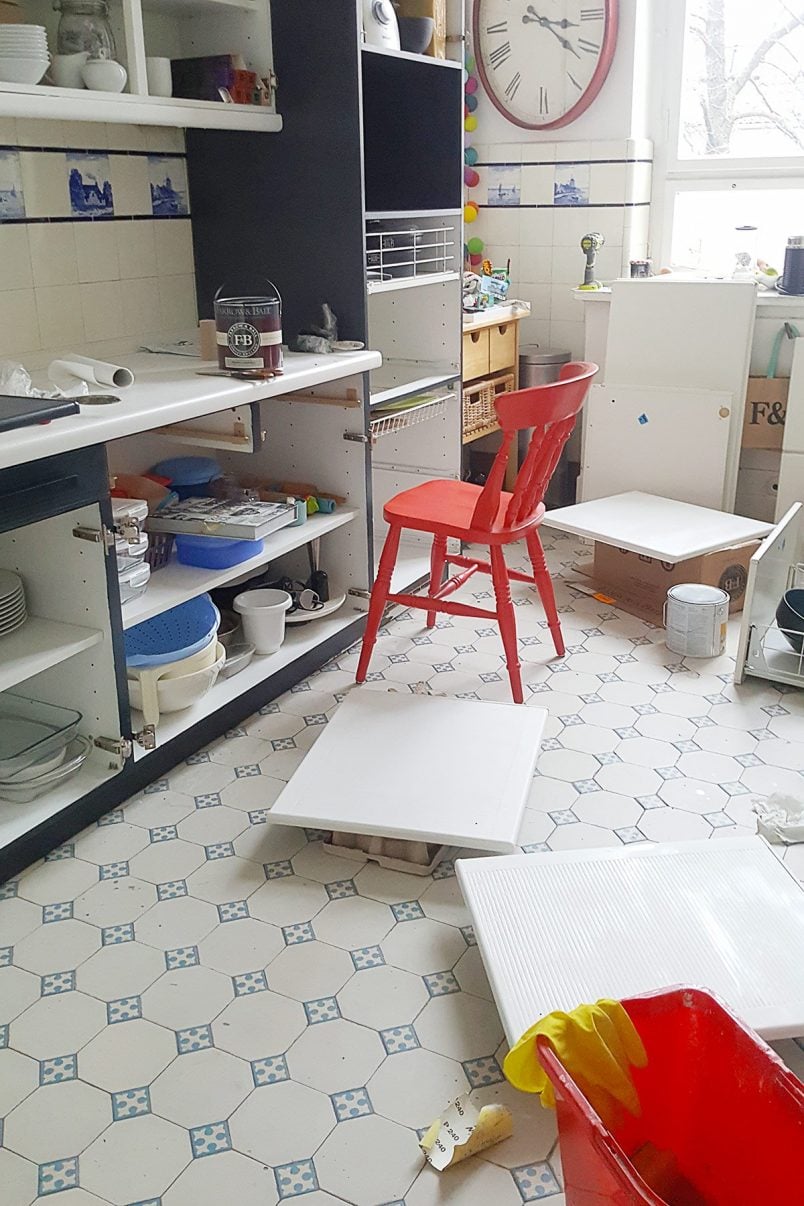
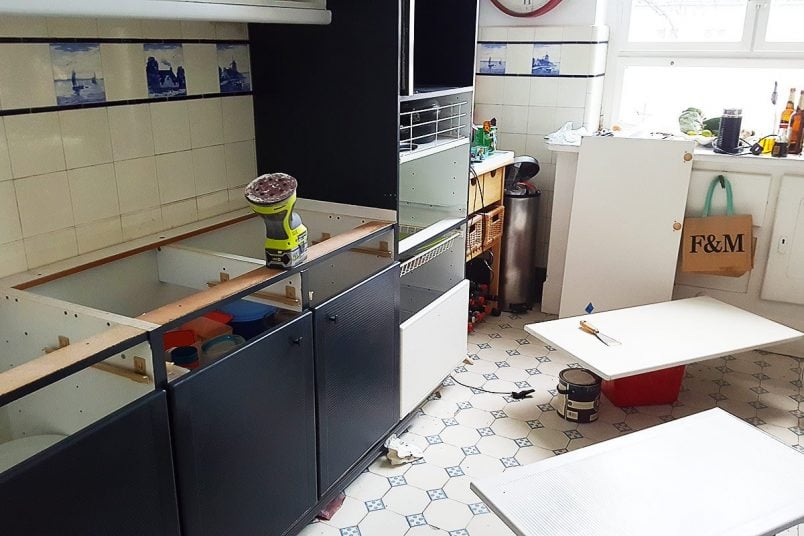
We also took the cupboard doors and drawer fronts off the cabinets before painting and removed all handles. Even if you’re planning on using the same handles again, we’d definitely recommend removing them because it’ll make the whole sanding and painting process much easier.
Sanding & Priming & Painting
I say it every time we paint something, but I honestly can’t emphasise enough just how important sanding is!
It makes the difference between an okay finish and a professional and long-lasting finish. And sanding isn’t just important before you apply the primer – you have to sand after every coat of paint!
Sanding makes lots of tiny grooves for the paint to stick in, therefore, ensuring a longer-lasting finish, sanding removes any imperfections (both before painting and after painting) and sanding leaves a super smooth and professional finish.
In terms of paint and primer, there are so many options that choosing the right paint can seem overwhelming. There are specialist paints for pretty much everything!
To be able to paint the super smooth laminate you’ll need a primer with adhesion-promoting properties. The right primer will stick to the surface and provide the perfect base for your chosen paint finish.
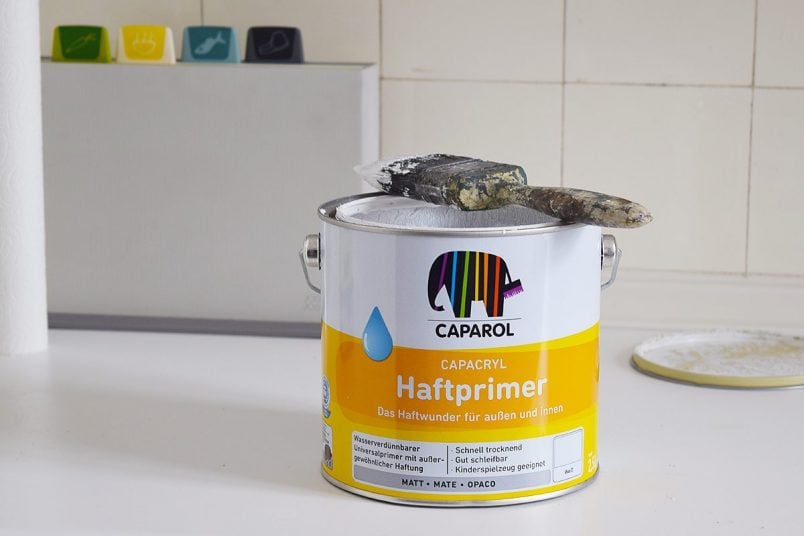
We did a ton of research on primers, and this is the primer that we eventually used and are really happy with. A good alternative seems to be Zinsser BIN (although we’ve not tried it ourselves).
In terms of paint, any high-quality paint that’s suitable for painting wood will be fine. Just be sure not to choose a completely matt finish as it’ll show up every greasy fingerprint! We used Farrow & Ball Wood & Metal paint in Modern Eggshell (the dark cupboards are Railings and the light cupboards are Dimpse).
No matter how good your primer and paint are, the other vital step is sanding your cupboards.
I know that there are lots of tutorials out there saying you can paint without sanding but honestly, don’t even think about it. If you’re too lazy to sand, there’s no point even doing the project in the first place. It’s vital to achieving a long-lasting finish!
How To Sand Laminate Cupboards
Before painting the cupboards, we gave them a sand with 120 grit sandpaper. Being lazy as usual, we used our orbital sander but you could totally sand by hand. You only have to roughen up the surface so it shouldn’t take more than a couple of minutes per cupboard door even if you sand by hand.
Then clean the cupboards and make sure they’re completely dust and dirt-free before giving them a coat of your chosen primer. When the primer has dried, give the door a light sand with some fine sandpaper (around 240 grit). This will remove any imperfections and create more grooves for the next coat of paint to stick to.
It’s really important to sand between every coat of paint! This ensures that each coat of paint sticks to the previous one and helps achieve a perfectly smooth and flawless finish.
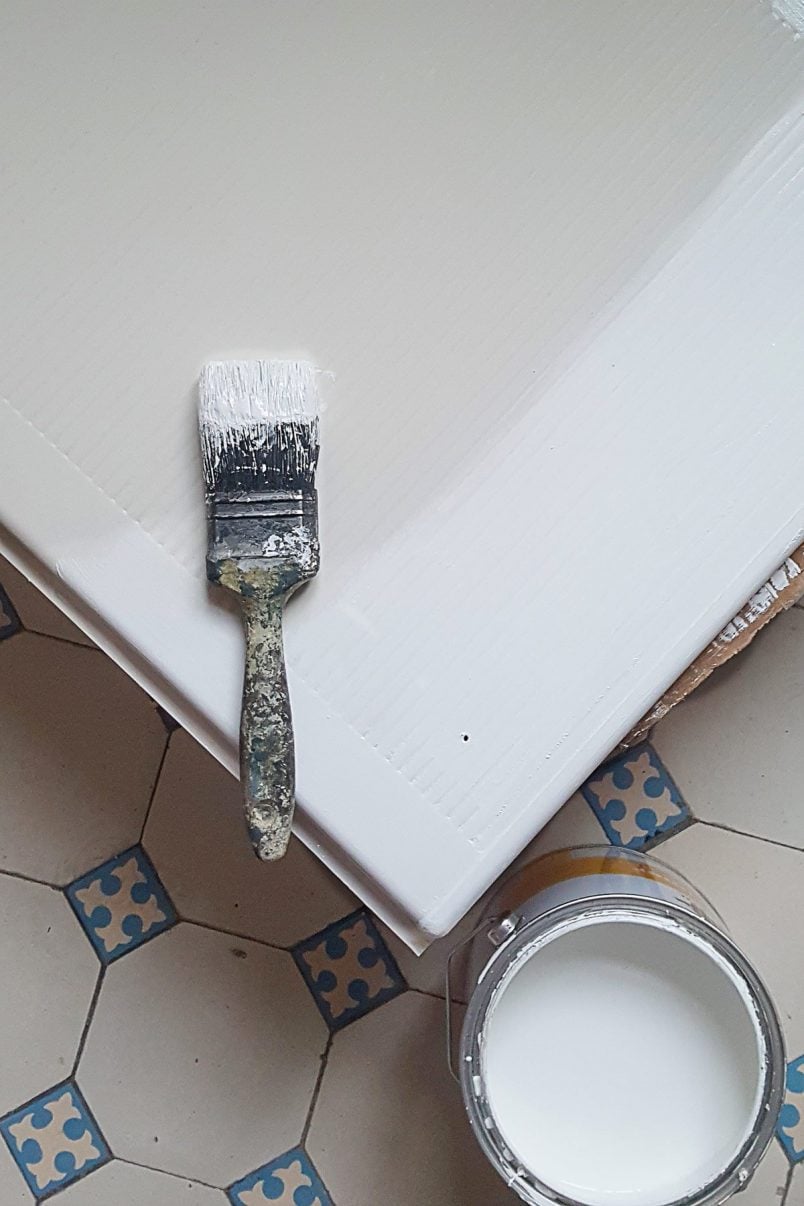
I always prefer painting with a brush, but you can, of course, use a roller, too.
It probably goes without saying that the quality of your tools makes a huge difference to the end result of your work. We still have the same paintbrushes that we bought just after moving into our first home (over 8 years ago now!), and they’re still in great condition!
Keep repeating the painting, drying and sanding process until you’re happy with the coverage of your paint. It’s always best to apply lots of thin coats of paint rather than one thick one. This will result in a much more even finish without the dreaded visible brush strokes!
Finishing
After you’ve finished painting and everything has dried, give your cupboards one last sand with super fine (about 400 grit) sandpaper or some fine steel wool. This will remove any tiny imperfections and leave you with a super smooth and professional finish!
There’s really no need for something that’s painted to actually look painted!

All that’s left to do is attach your handles (new handles can already make a huge difference to the way your kitchen feels) and re-attach the doors and drawer fronts before enjoying your new kitchen!
These are our Top Tips On How To Paint Laminate Kitchen Cabinets
1. The Correct Primer & Paint Are Key (Literally!)
If you’ve not already guessed it, using the right products is vital. Using an adhesion-promoting primer will provide the right surface for your chosen paint finish to stick to. We recommend using the professional primer we used for a long-lasting result!
Don’t use chalk paint, and don’t use matt paint as it’ll show up every greasy fingerprint. Use high-quality paint to paint the cupboards, as it’ll be more durable and less likely to chip.
2. Sanding
Yes, I know I’ve already gone on and on about sanding, but it really is that important!
Sanding before you apply the first coat of primer is important, but sanding between each layer of primer and each layer of paint is equally important. It really is the only way to ensure a flawless and long-lasting finish!
3. Paint Brushes & Rollers
Just as important as the products you use are the tools you use. Invest in quality brushes – there’s nothing worse than painting with a brush that loses its bristles!
Make sure to also use the right brushes for the paint you’re using. There are different brushes for solvent-based and water-based paints and they really do make a difference!
Get Our Favourite Painting Essentials
4. Wait
It’s important to wait for each layer of paint to thoroughly dry before you move on to the next. If you start sanding or painting too soon it’ll mess up your paint finish.
It’s also important to be careful for the first couple of weeks after painting. It takes a while for the paint to fully cure and the finish can easily scratch or chip while the paint is still soft.

I’ve probably made painting a laminate kitchen sound way more complicated than it is and it’s really no different than any other painting project! You really wouldn’t know that it’s painted and a few people actually thought we’d bought a new kitchen!
How To Sand Laminate Cabinets FAQ
You can use any kind of paint that’s suitable to paint wood on your laminate cabinets, too. We recommend a satin finish as it’s durable and easy to keep clean.
The paint you use isn’t as important as the primer, which is the secret to getting the paint to stick to the smooth laminate.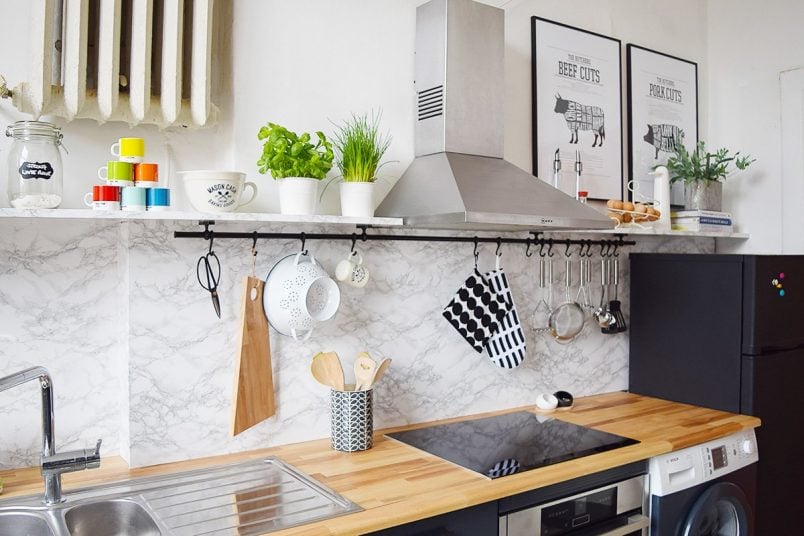
Don’t skip the prep work when painting your laminate cabinets, as sanding will result in a finish that not only looks and feels better but is more durable, too.
It will only take about 2 minutes to sand an average-sized kitchen cabinet door as you are just roughing up the surface to provide a key for the paint to stick to.
Use 120 grit sandpaper to sand the whole surface by hand or with a sander. Pay special attention to the edges. You only have to lightly sand the laminate to create lots of little scratches to give the paint a better surface to stick to.
Yes! It’s easier than you think to transform your laminate kitchen with paint. If you use the right products and follow this step-by-step guide, you’ll end up with a durable and long-lasting finish that will look great for a long time. Even after years of daily use, our cabinets still look perfect.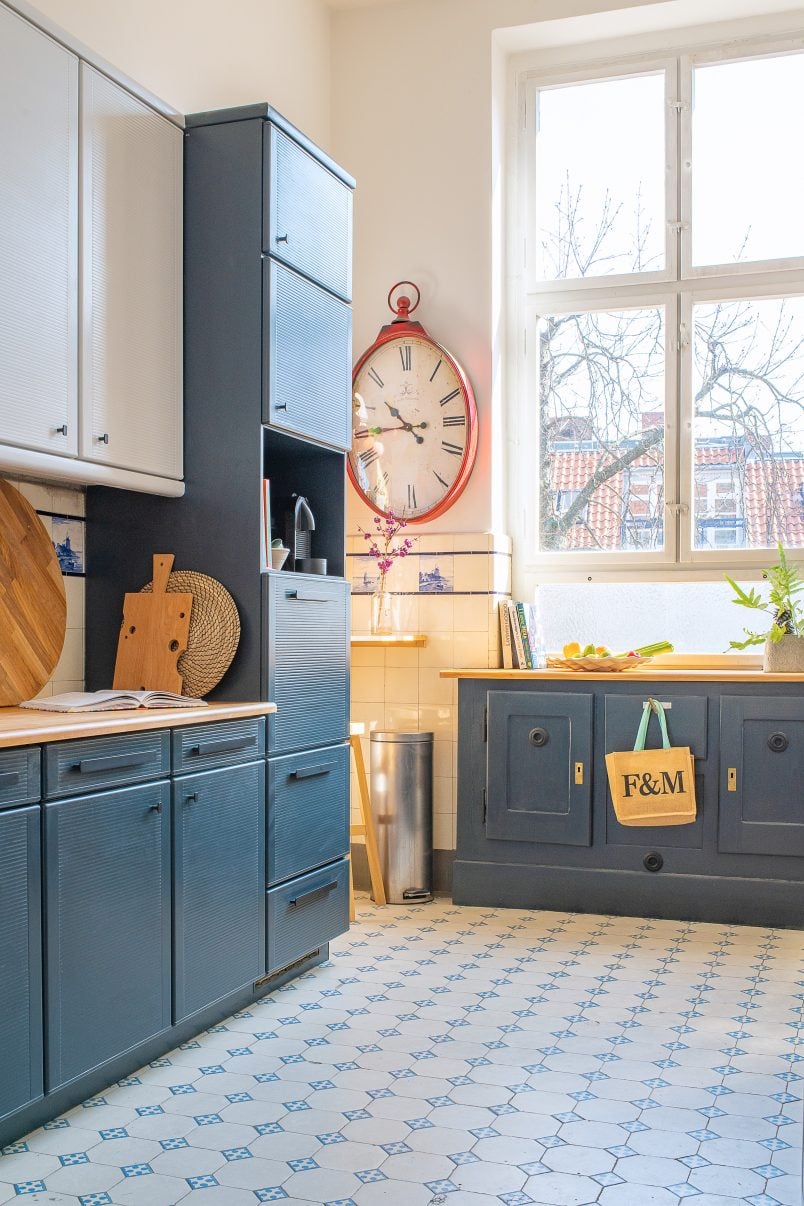
Using the right primer is the secret to getting paint to stick to laminate. Use an adhesion-promoting primer to give you the best results. The right primer will ensure that the paint sticks to the laminate and will help you achieve a long-lasting finish that’s durable.
When painting glossy cabinets you can use the same step-by-step method we used to paint our laminate kitchen cabinet. When painting smooth surfaces like laminate, glossy doors or shiny kitchen cabinets it’s important to use the right primer so the paint will stick to the surface.
Have you ever painted a kitchen? – We’d love to hear about your experience! Are you a fan of tuxedo kitchens? What would your dream kitchen look like?
And, if you’re wondering how well the finish on painted kitchen cabinets last, head over to this post, where we share what our painted kitchen looks like two years later!
PS. Here are some of our other kitchen projects & updates!
- How To Build Super Slim Floating Shelves
- DIY Picture Shelf
- How To Paint A Fridge
- How To Build & Install A Faux Marble Backsplash
- Do Painted Kitchen Cabinets Last? What our painted kitchen looks like after 2 years!
Get Our Favourite DIY Essentials
Fran says
Hi, I followed all your instructions but had a few problems:
1. Using an orbital sander just took the laminate off down to chipboard in a 1 second. It looked like a laminated paper?
2. I used Zinsser 123 and it hasn’t adhered even though I did lots of sanding. Not sure why? I applied a lacquer after only because paint chipped off so easily and that helped a bit but still chips quite easily.
Any help on this?
Thanks
Fran
Christine says
It’s difficult to say what the problem is without knowing your cabinets and what paint you used to finish them, Fran. We always sand any surface before painting and generally use an orbital sander. This includes projects like the laminate kitchen cabinets and laminate Ikea furniture. If you find that too much is being removed, I’d recommend switching to finer sandpaper or sanding by hand.
Remember that it takes time for the paint to cure fully, so it will be more susceptible to scratches and chips for the first few weeks. You might want to check out this post, where we cover the most common mistakes we see when painting kitchen cabinets.
Cx
Emma says
Love your kitchen. How did you paint the panel next to the oven? Did you leave it in place?
Christine says
Thank you so much, Emma! We removed everything, but you can paint around thingsCleaning Fireplac if you have to. I wouldn’t worry about it at all, it’ll just take a bit longer to do. The large panel next to the oven is actually the dishwasher front which is easy to remove.
Cx
Albat says
Thanks for share…….
Christine says
You’re very welcome, Albat!
Cx
Jenna Z says
Thanks for all of the details in process!! I agree sanding and prep and priming seems so important. I would like to undertake this task on my laminate cupboards soon but still in the researching phase and your blog post has been super helpful!!! Thank you!
Christine says
You’re welcome, Jenna! So glad you found the post helpful. Our cabinets held up perfectly and we would use exactly the same process if we were painting our cabinets again. Always happy to help, so let us know if you have any specific questions.
Happy painting!
Cx
Lyndie Parks says
I would like to add handles to my laminate door. Should I drill the holes before the painting process begins or after?
Christine says
It’s really up to you, Lyndie! We always drill our holes afterwards. Attaching the handles is obviously the last step, so we just do all measuring and drilling then, there’s nothing stopping you drilling the holes first though.
Cx
Givona says
Your kitchen turned out so beautifully ???? I am planning to paint our utility cupboard doors in farrow and ball cinder rose and use dc fix over the counters. I wondered approximately how long it takes for the paint to dry between each layer?
Christine says
Thank you so much, Givona! The paint doesn’t take long to dry but it’ll depend on a few things like the paint you’re using, how warm it is, etc. I’d wait about 3-4 hours before adding a second layer of paint (although the paint you’re using will have advice on the back of the tin, too).
Hope that helps!
Cx
Corinne says
Thank you for this fab tutorial! Feeling very inspired. I have just bought my first house and the kitchen has purple and white cabinets with black tiles ????
I can’t afford to change them all so painting them sounds like the best bet.
Silly question I am sure, but did you paint the inside of the doors too? And if you did, did you paint them first or last?
Thank you for sharing so much info. Love the colour of your kitchen ????
Christine says
Congratulations on your new home, Corinne! So glad you found the post helpful and painting your cabinets sounds like a great idea! We didn’t bother to paint the inside of the cabinets (we were way too lazy for that), but it’s something you can do if you want. The order in which you paint them doesn’t really matter but I’d probably see the whole door as one and paint everything with primer, then sand everything, then paint everything the first time, then sand everything, then paint the whole door again, etc. (you’ll obviously have to let the paint dry before you can turn the door over). The reason I’d see it as one paint job is that paint around the edges can get a bit gloopy (especially if you use too much paint) so what I like to do when painting around the edge of the door is to hold it upright and lightly brush over any paint that collects on the front and back of the door to smooth it out. (Hope that makes sense).
Cx
PS. We also painted tiles and you might find that post helpful, too!
Olivia phillips says
Hi I love what you’ve done. I have a similar sized kitchen so wondered how much paint of the railings did you use.? I think 2.5l might be enough but be good to know what you did. Thanks
Christine says
Thank you so much, Olivia! We had a 2.5l tin and still had lots leftover. I’d guess we used just over half of the tin.
Cx
Veronica says
This is hands down the best tutorial I have seen on how to paint laminate cabinets. I especially appreciate the infographic. Are the painted cabinets as easy to clean as the laminate? Thank you so much for sharing!
Christine says
Thank you so much for the feedback, Veronica! I’m so glad that you found our tutorial helpful. The painted cabinets are just as easy to clean as the laminate ones. I cleaned them exactly the same way as I cleaned the laminate before which was basically just an occasional wipe with a damp cloth and sometimes a spray with a cleaner (I love the Method all-purpose cleaner *affiliate link’*) but I’m sure lots of other cleaners will work just as well, too.
Hope that helps and thanks again for the compliments!
Cx
Evie says
Thank you so much for sharing this tutorial! I have been moaning to my parents about how our family bathroom needs a revamp so over lockdown I offered to give it a spruce up on a very small budget. When I told them I was going to paint the laminate cabinets they were sceptical but following your method has produced such fab results! My parents are very impressed with our lovely fresh cabinets.
Thanks again!
Evie x
Christine says
Aww, thank you so much for sharing your feedback, Evie! I’m so glad that this method worked for you, too! Your parents are super lucky that they have a refreshed bathroom without having to do any of the work themselves!
Cx
Clare Parsons says
Hey Christine I absolutely love your kitchen! Do you think painting the door handles with black chalk paint would work? Mine are just regular silver handles.
Thanks so much!
Clare
Christine says
Thank you so much, Clare! I think painting your handles will work but… I would use really hard-wearing paint like Hammerite metal paint which is super thick and durable. And, even then I’m almost certain that they’ll need the odd touch up over time just because they will get so much wear and tear.
Cx
Kira says
Hi! I’m in the US and cannot order the primer you have here :( Do you know of a great US product equivalent? Thanks!!!!
Christine says
I mentioned a Zinsser primer in the post which seems to be a good alternative to the primer we used, Kira. Whatever you opt for, just make sure that the primer has adhesion-promoting properties and you shouldn’t have any problems.
Hope that helps & happy painting!
Cx
Betsy says
Beautiful job! What type of rollers did you use?
Christine says
Thank you, Betsy! We only used a paintbrush! We always use the same paintbrushes which we’ve had for over 8 years and use for every DIY project. They’re still perfect, even after so much use and we highly recommend them. You can find a link to the exact brushes we have in the post! Hope that helps!
Cx
Vicki says
I am about to paint laminate doors.
Do you advise water based paint or oil based?
Christine says
I assume you’re talking about indoor doors (like for your kitchen)? Generally, oil-based paint is more durable but take a long time to dry and I’m just a bit too impatient to wait most of the time. A high-quality water-based paint will give you great results, too! You might want to check out this post where we share what our cabinets look like two years after painting them.
Hope that helps!
Cx
Rosie says
Hi! My fiancee and I absolutely love this blog and we have almost finished painting our 34(!!) kitchen cabinet doors (just waiting on the handles before we do the drawers). We might have stolen your look as we went with both your colour (railings) as well as the door handles from Ikea haha. We were just wondering whether we should do a final protective coat of paint over the last railings layer? A few blogs recommend this but we have been following your steps so were keen to get your views! Thanks for your help in advance!
Christine says
Aww, thank you so much, Rosie! Wow – 34 doors is a lot! I’m really flattered that you went for the same look as our doors. I’d LOVE to see a picture when you’ve finished!
I read about the top varnish coat a few times, too. Honestly, I find it really weird advice. If you’re using the right paint for painting timber you shouldn’t have any problems as it’s made to be durable. After all, it’s meant for doors, skirting boards and furniture and you wouldn’t add a protective layer over a painted door. We didn’t add a protective layer and our doors still look the same as they did just after painting them. And, even if you should end up with a small chip or scratch you can just touch it up with the paint you used in the first place.
Hope that makes sense & enjoy your finished kitchen!
Cx
Nicholle says
Hi I love this blog. I am wanting to paint an oak effect laminate cot bed. It has a slight wood/rough effect texture to it. Do I have to sand it flat? It also has plastic edging, do you think the primer will adhere to this? Sorry for all the questions.
Thanks for your help in advance x
Christine says
Thank you so much, Nicholle – we’re always happy to help if we can! I don’t think you need to sand it so that it’s completely flat. Just make sure to sand every bit of the surface before priming it and it should be fine. The primer should stick to the edging, but painting plastic is never ideal. I would pay extra attention to the plastic edging and make sure that you’ve thoroughly sanded it and I’d also apply at least two coats of primer to make sure that it’s properly covered. I think it should be fine, but you may want to try a test position first. If you have any problems painting the plastic, you may also want to try the method we used to paint our plastic light switches and sockets (you can read about how we painted our switches here)
Basically, I think it should be fine, just be super thorough!
Cx
PS. Make sure to use suitable paint for children with low VOCs!
Sven says
Hey guys excellent job on the web site. I bought a flat which I’m looking to renovate in most cost effective way and found you blog. Spend considerable amount of time on it since :)
I have an old MDF laminate kitchen which I’d like to get to a better look until I get a new one. I was told I cannot sand or paint the laminate MDF but reading through your post that’s not the case. I’d like to paint the kitchen cabinets, apply new kitchen tiles on top of the old tiles (simiar to Tic Tac Tiles) and also vinyl wrap the worktops with some marble effect from d-c-fix. Last if I have time and will I plan to spray the door handles as they are a bit old. I also plan to renovate the flat front door but not sure if I can use the same primer ?
Do you think that’s all possible ? Any particular suggestions are welcome :)
Thanks and keep up the good work!
Christine says
Thank you so much, Sven! Yes, you can paint laminate – our painted kitchen has lasted well over two years now and looks exactly the same as it did the first day we painted it. It’s really important to sand, prime and paint it with the right cupboards, though!
We used d-c-fix on the backsplash which turned out really well and has easy stood the test of time, I’m not sure how well it would last on worktops though. If you opt to spray your handles, I’d recommend using a spray primer on them first, (obviously, depending on what they’re made of) to make sure the finish lasts. You may want to read our post on how we painted our switches and sockets which may help you with this.
How you paint the front door will very much depend on what it’s made of. If it’s made of timber, you won’t need to use a special primer.
Hope that helps!
Cx
Peter Miley says
Hi. Love your work.
I’m about to embark on 27 cabinet doors during covid.
Just wondering if I should use a high gloss on my laminate that is in a slightly textured matt finish.
Thanks for your very helpful site.
Stay safe
Peter
Christine says
Thank you so much, Peter! Wow, 27 doors are a lot of doors! I personally wouldn’t use gloss paint. Generally, I don’t see a problem with you painting over your textured cabinets with it (as long as you do the necessary prep work beforehand) but the problem with gloss paint is that you see every tiny imperfection. It can look amazing, but it’s very difficult to achieve a perfect finish. A semi-gloss or satin finish would definitely be easier to work with!
Hope that helps a bit and hope you stay safe during these weird times!
Cx
Poppy Ebsworth says
Hello!
I will be attempting this over lockdown with my household hopefully, have a quick question about primer. How many litres did you go through? It is pretty expensive so don’t want to over buy : )
My kitchen is smaller than yours, we will be painting a total of 8 doors and 2 small drawers.
Christine says
That sounds like a great way to spend lockdown, Poppy!
Yes, the primer is expensive but it really works. I’m not exactly sure how much I used but we definitely had some (maybe about a third) of the 2.5l tin of paint leftover. Looking back, I’d probably paint give everything two coats of primer just to make sure that every bit of surface is properly covered (painting one layer worked fine, though).
Hope that helps & have fun transforming your kitchen!
Cx
Maria says
Hello so my husband and i want to paint over my PINK laminate cabinets, so do we do all the same steps with the edges of the cabinets that are not the doors? if that makes sense. we moves into our house almost 4 years now and i just cannot take the PINK cabinets and PINK backslash and counters!!! I’m praying this all works!!
Christine says
Wow, pink is an interesting choice, Maria! Basically, you paint everything you want to change the colour of and will see once you’ve put all of the doors back on. There’s a picture in the post where the doors aren’t on our cabinets and you can see that we’ve painted the edge of the cupboards, too. Just remember to pay special attention to the corners and edges of the doors and make sure to sand and prime them really well!
Happy painting!
Cx
Maria says
Yes pink is terrible! Haha one more question i live in New York and i don’t think they sell sugar soap here what would i use? Also is there a special paint you use?
Christine says
Any cleaner that’s strong will work fine as you’re doing a lot of sanding afterwards anyway. I did have a quick google though and managed to find some Sugar Soap on Amazon in the US if that’s what you want to use though. In regards to the paint, the answer is yes and no. :) Using a high-quality primer is a must! It has to have adhesion-promoting properties otherwise it won’t “stick” to the laminate. The final paint finish is essentially up to you. I’d recommend a Satin (or Eggshell) wood paint. You can find links to the exact products we used in the post.
Hope that helps & we’d love to see a picture of your finished kitchen!
Cx
Gali says
Hello
Thank you for your great tips. I’ve just started painting my laminated kitchen. A quick question about my bench. Unfortunately its laminated as well and i was wondering how the paint is going to hold? I use my bench as my cooking area.
Christine says
Thank you, Gali! I personally would avoid painting any worktop areas as I’m almost certain that the day-to-day use would end up wearing the paint away, leaving it looking a bit messy. If you must paint it, be meticulous about sanding and priming and add a couple of extra coats of primer and paint just to make sure it’s perfectly covered.
I’m not sure if that helps but do let me know if you have any more questions!
Happy painting!
Cx
Kylie Whelan says
Did you bother painting the inside of the cupboard doors?
Christine says
Nope, they’re still the original finish on the inside, Kylie. We have painted the inside of cupboards before and it’s fun to add a surprising pop of colour on the inside but it didn’t seem worth it in our kitchen.
Cx
Rose says
This article is great, we are spending some of our time in quarantine re-doing our kitchen and this guide is going to be our bible in the coming weeks! Just ordered all the tools and paint and super excited. I was wondering where you got those beautiful doorhandles / doorknobs?
Rose
Christine says
That sounds like a great way to spend your time, Rose! Painting your cabinets isn’t the quickest thing to do but it’s sooo worth it!
The handles and knobs are from Ikea – you can see a full source list of everything we used in the kitchen in the original kitchen reveal post which you can read here.
Before you get stuck into your kitchen makeover, you may also want to have a look at the post we recently shared about how our kitchen is holding up 2 years after painting it!
Hope that helps and happy painting!
Cx
Carly says
Hi,
I basically followed your instructions to a T, but I sanded with 600 grit paper at the end. It took off all the coats of paint on one corner? Do you think I missed this area in sanding? I used a good primer with adhesion qualities? The edges and corners are a shiny plastic but the door faces are a roughened Matt texture.
Christine says
Oh, how annoying, Carly! Corners are always a bit tricky and you have to pay special attention to them. Having said that, the paint shouldn’t have come off so easily. I’d recommend giving the corners another sand, prime and a couple of coats of paint. When you sand with the fine paper at the end it should only be a very light rub to remove any fine imperfection. Hope that works but do let me know if you have any other problems!
Cx
Sonia says
Hi! Would you clarify my personal confusion regarding laminate. Is that the covers that can be removed off kitchen cabinets with the help of a heat gun? If so, can you keep them on and paint that or is it best to remove and paint what’s underneath which I suspect is particle board. I was hoping to eliminate the removal step although one of them is peeling off on it’s own a bit. Appreciate any feedback and thank you!
Christine says
I wouldn’t attempt to remove the laminate as it’s not really something that’s mean to be removed (yes, it’s the top layer of your cabinets). Apart from it being a lot of work, you’ll probably have a layer of glue underneath it which would also need to be removed. To be able to paint over the smooth laminate we used a primer that would give us a good surface to be able to paint on with our chosen paint finish.
If your laminate is damaged, I’d just glue it back (if possible) and give it a good sand.
Hope that helps!
Cx
Rickie-lee Gardiner says
Thank you! Amazing explanation and answered every question I would ask.
Well done guys, I shall be definitely taking on the cupboard challenge this weekend. Party’s are always on the kitchen lol
Brilliant thank you x
Christine says
You’re welcome! Glad we’re able to help get your kitchen party-ready ;)
Good luck!
Cx
Handy Squad says
Great work! It’s incredible how impactful a paint job can have in a room!
Christine says
Thanks! It’s always amazing what a difference a bit of paint can make!
Cx
Lucy Wynne says
I’ll let you know :-)
Lucy
Lucy Wynne says
Thank you and who knows one day maybe :-)
My big adventure this Sept is 5 nights aboard here with power wheelchair!
Lucy
Christine says
Oh, wow! That looks amazing – I’m sure you’ll have an amazing time!
Cx
Lucy Wynne says
Kitchen looks great! A small tip, putting long (spent) match or toothpick in screw holes prevents them clogging up with paint.
Your home is def making really noticeable progress which I could travel to Berlin and see it :-)
Christine says
Thank you & thanks for the great tip, too, Lucy!
You’d be welcome any time if you should make it to Berlin one day!
Cx