Are you also constantly imagining relaxing on a cabana by the pool with palm trees swaying in the wind while someone brings you little bowls of frozen grapes and the occasional fancy cocktail?
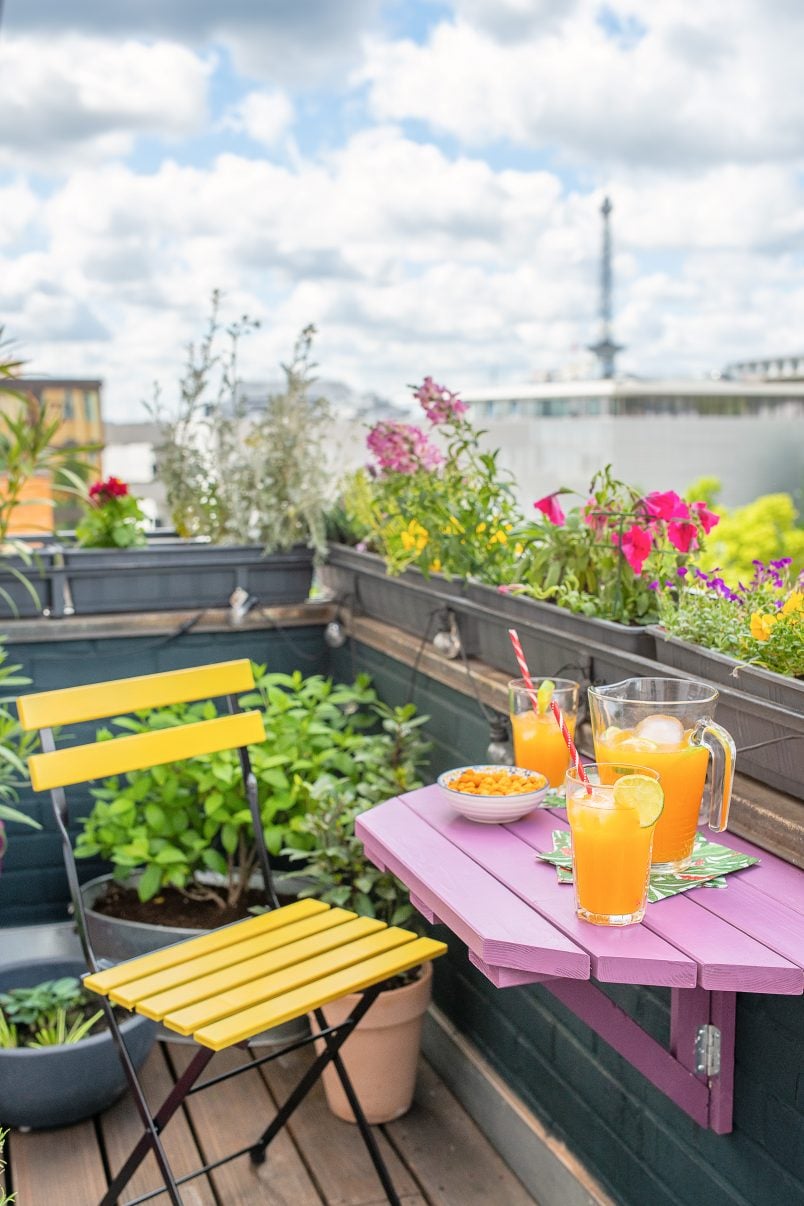
With tropical holidays still not happening anytime soon, we’re even more determined to make the most of our outdoor space and have been working on lots of projects to make this summer on our balcony as chilled and fun as possible.
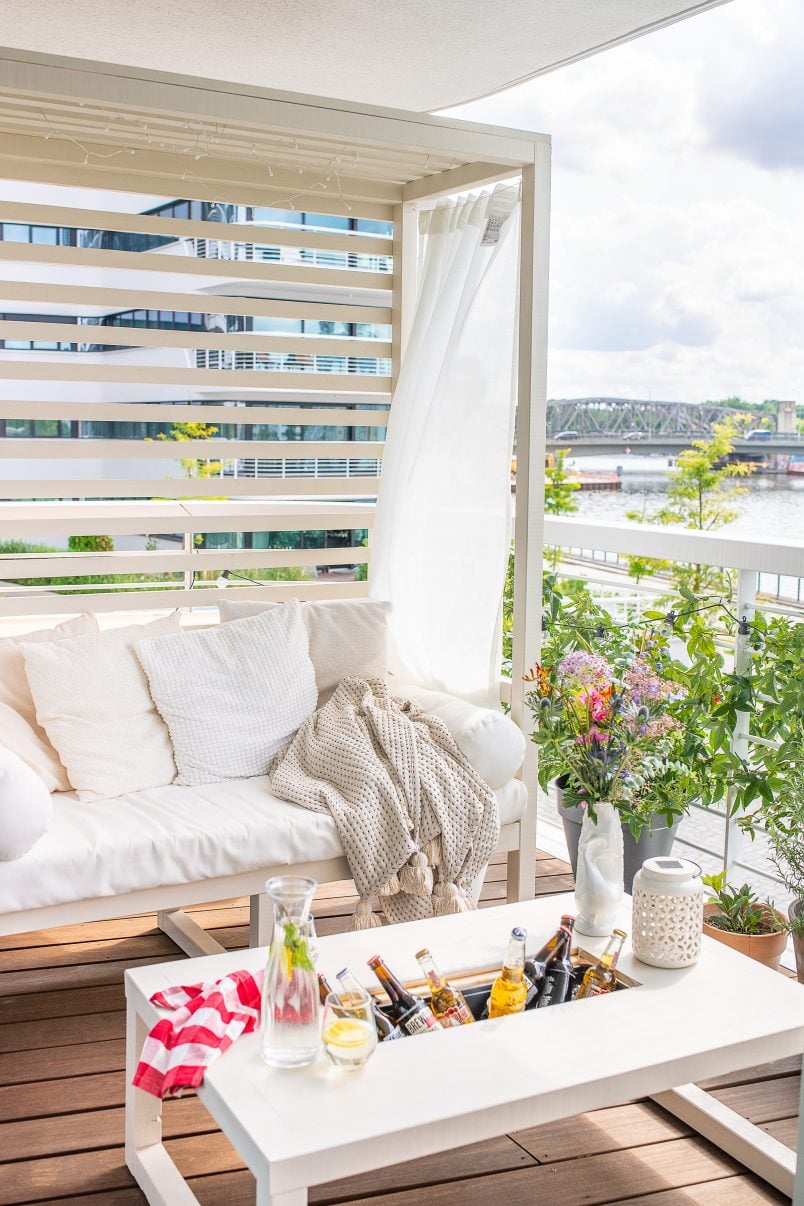
And, we’ve just finished building our first “holiday at home” project – a DIY outdoor daybed!
This DIY cabana daybed looks like it might be complicated to build, but it’s actually a really easy DIY project that even inexperienced DIYers could easily accomplish. You only need a few tools and supplies to build this daybed and it’s not too expensive to build either!
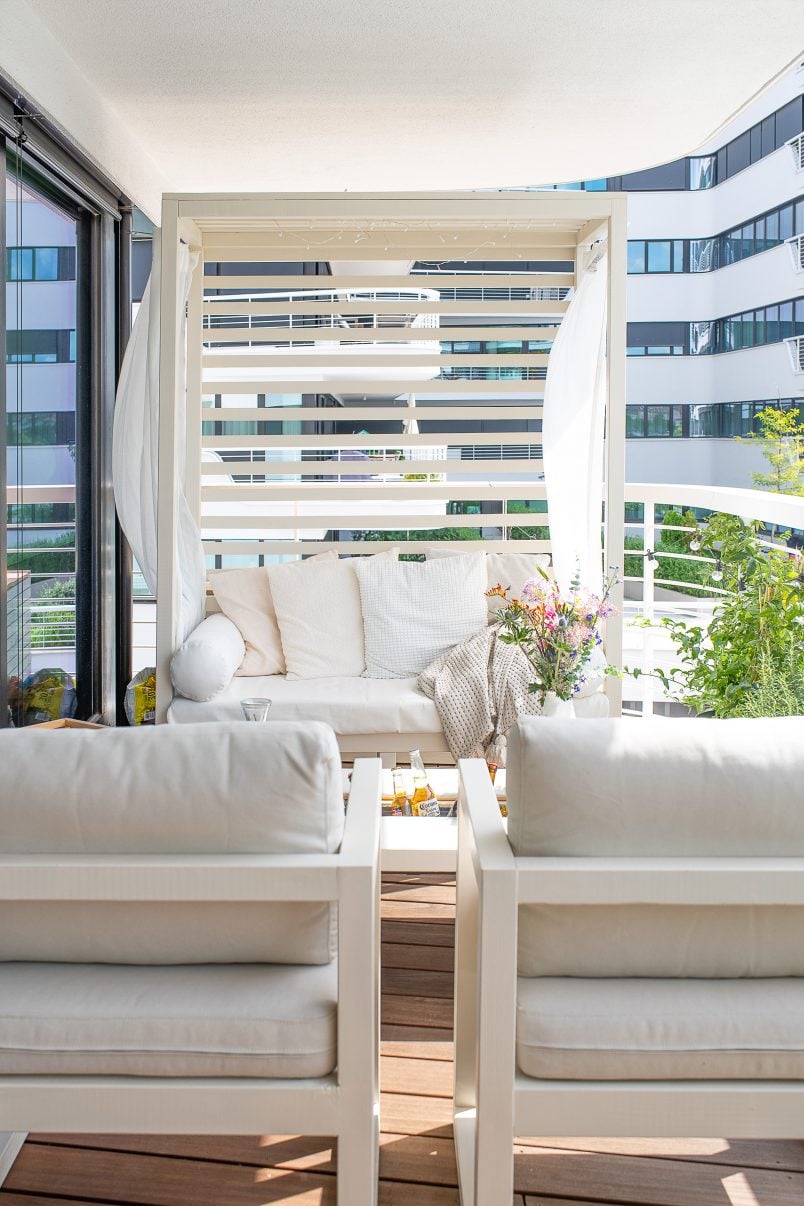
If you love our DIY daybed, you’ll probably love the other outdoor furniture we built, too. You can see the full tutorial on how to build an outdoor coffee table with hidden drinks cooler here and how to build outdoor armchairs here.
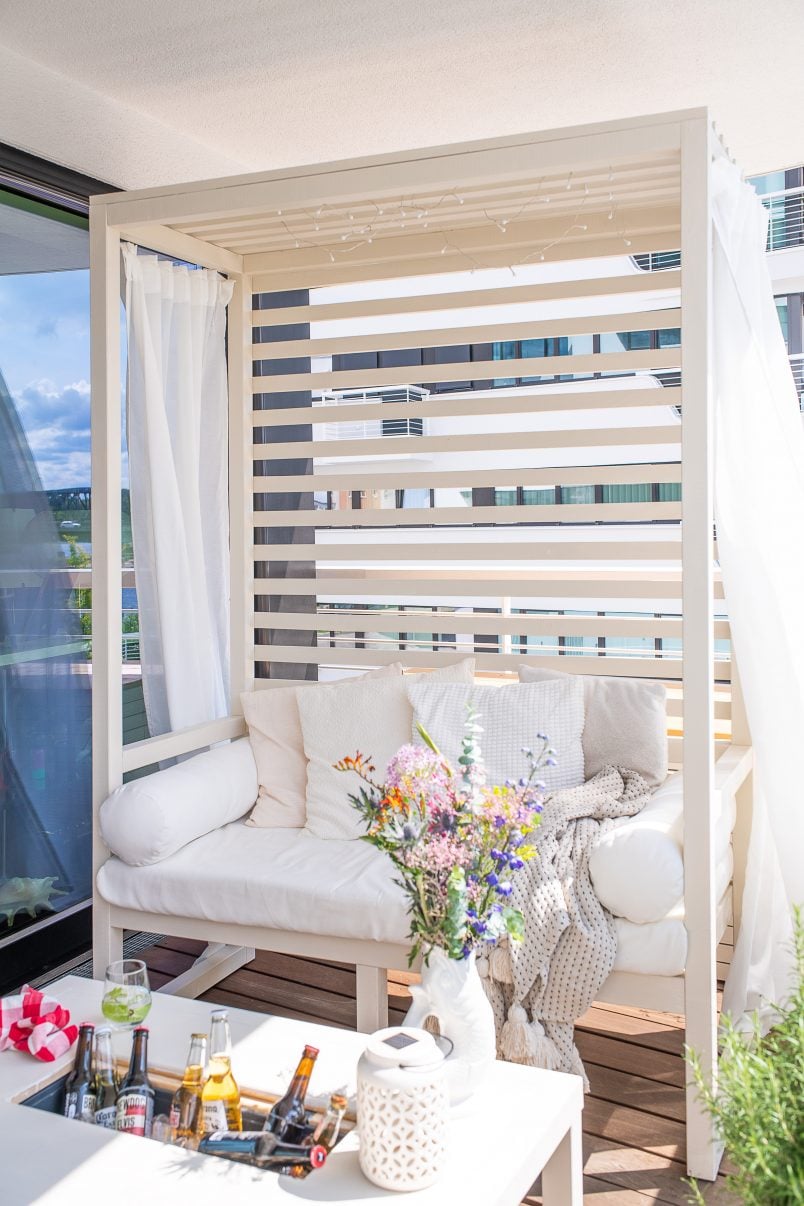
This outdoor daybed is already one of my favourite ever projects we’ve built and I think everyone should have one!
Here’s what you will need to build your own DIY outdoor daybed:
This post contains affiliate links. We only recommend products we love and think that you will, too! Read our full disclaimer here.
Tools:
- Cordless drill & drill bits
- Nailer
- Mitre saw – this is our budget-friendly mitre saw that we use for all projects
- Kreg Jig HD
- Clamps
- Paintbrush – these are the paintbrushes that we love
- Tape measure & pencil
Supplies:
- Timber (we’ve shared the exact quantities and measurements we used below)
- Screws (for the Kreg Jig pocket holes and around 50mm screws to attach the seat supports)
- Brad nails (suitable for outdoors)
- 4 Small hooks & some cord
- Sandpaper about 120 grit is ideal
- Wood glue
- Wood filler
- Paint & primer
- Cushions
- Outdoor fabric
- Small mattress
- Curtains
Here’s how to build your own DIY outdoor cabana daybed:
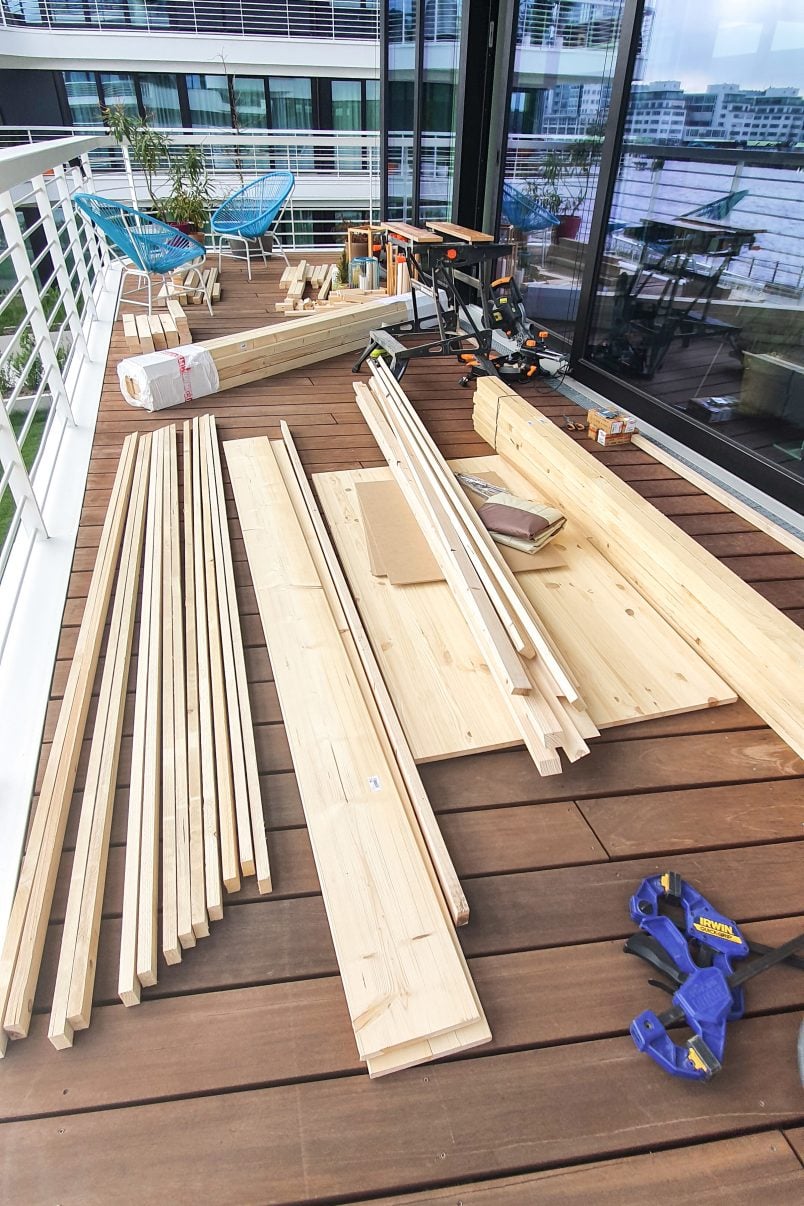
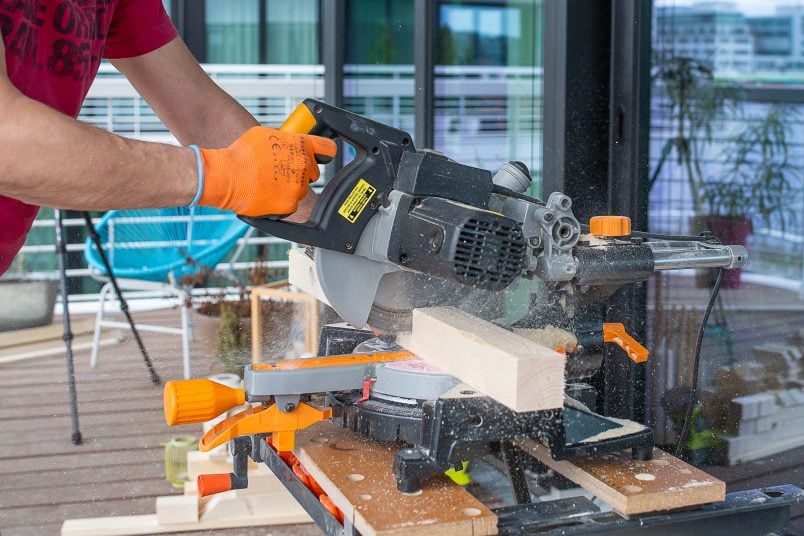
1. Cut all timber battens to the right lengths
Our daybed is medium-sized and perfect for two people to comfortably sit on. The overall dimensions of our finished cabana daybed are 150 cm wide, 70 cm deep and 210 cm high.
All measurements to build this bed are included here but if you’d like to make your daybed larger, just increase the length of the two long seat supports and two roof pieces. Obviously, any slats that you clad the outside and roof with will have to be a bit longer then, too.
Cut all of the strips of timber to the required lengths with a mitre saw and sand any rough edges with some medium-grit sandpaper (around 120 grit is ideal).
You’ll need the following pieces of timber to be able to build this outdoor daybed:
Timber Battens 54 x 54mm
Vertical Posts
4 x 2.1m
Long Roof Beams and Long Back Support
3 x 1.4m
Short Roof Beams, Short Back Supports and Short Floor Supports
7 x 0.59m
Short Middle Vertical Posts
2 x 0.23m
Timber Battens 54 x 74mm
Long Frame of Seat
2 x 1.4m
Short Seat Frame
2 x 0.59m
Timber Battens 24 x 48mm
Seat Support For Slats
2 x1.29m
Back and Roof Cladding Slats
26 x 1.508m
Timber Battens 24 x 74mm
Seat Base
11 x 0.59m
There are a few tools we use again and again and our mitre saw and cordless drill are easily two of our most used tools ever and, even if you only occasionally DIY, are two that we highly recommend investing in both.
You could cut the timber by hand but there are a lot of cuts to make to build this DIY outdoor daybed and a mitre saw will make the whole process so much quicker and easier!
These are the 3 tools we use all of the time and recommend for every DIYer:

As much as we love our nailer, it is expensive. We use it for more projects than we ever thought we would and highly recommend it but, if you’re only planning on using it for this project, we recommend borrowing or hiring one if possible.
Alternatively, you could nail it by hand. It’s totally possible but it will take you a bit longer to finish building the outdoor daybed.
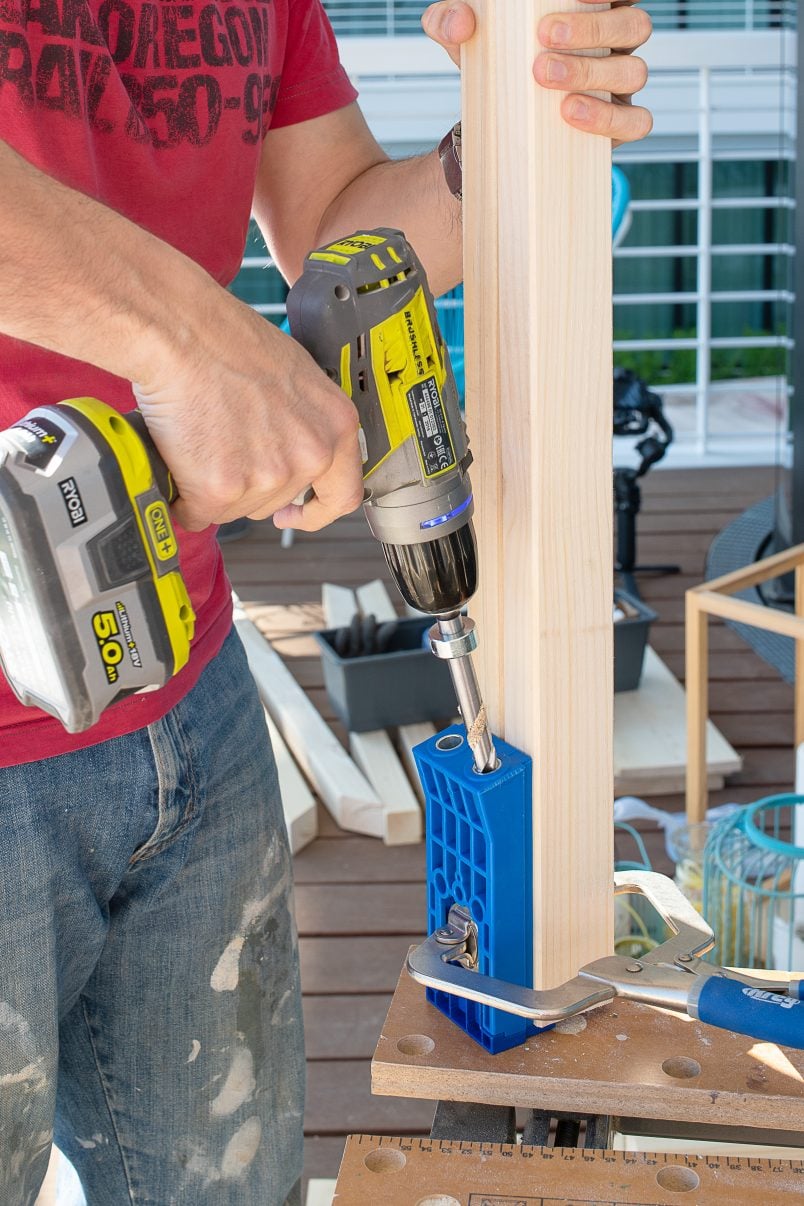
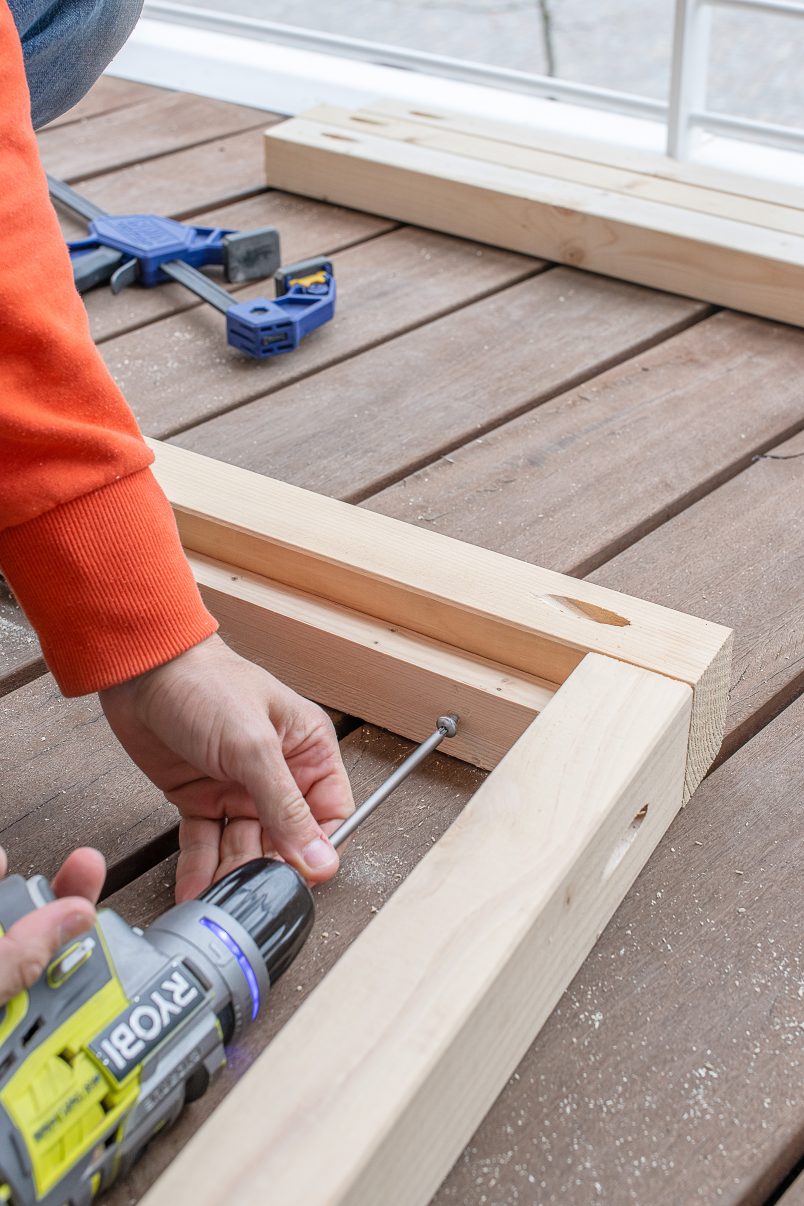
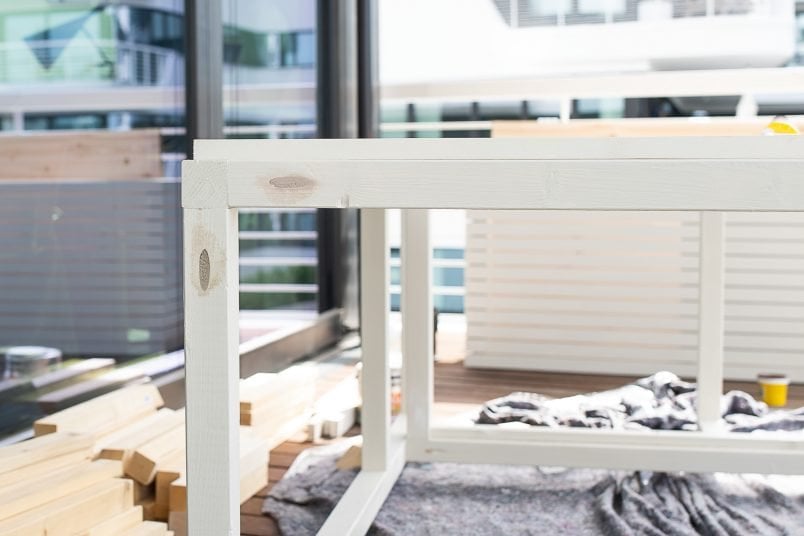
2. Drill the pocket holes
To drill all of the holes we used our newest tool – a Kreg Jig HD.
This clever tool allows you to drill holes and connect pieces of timber really quickly and easily.
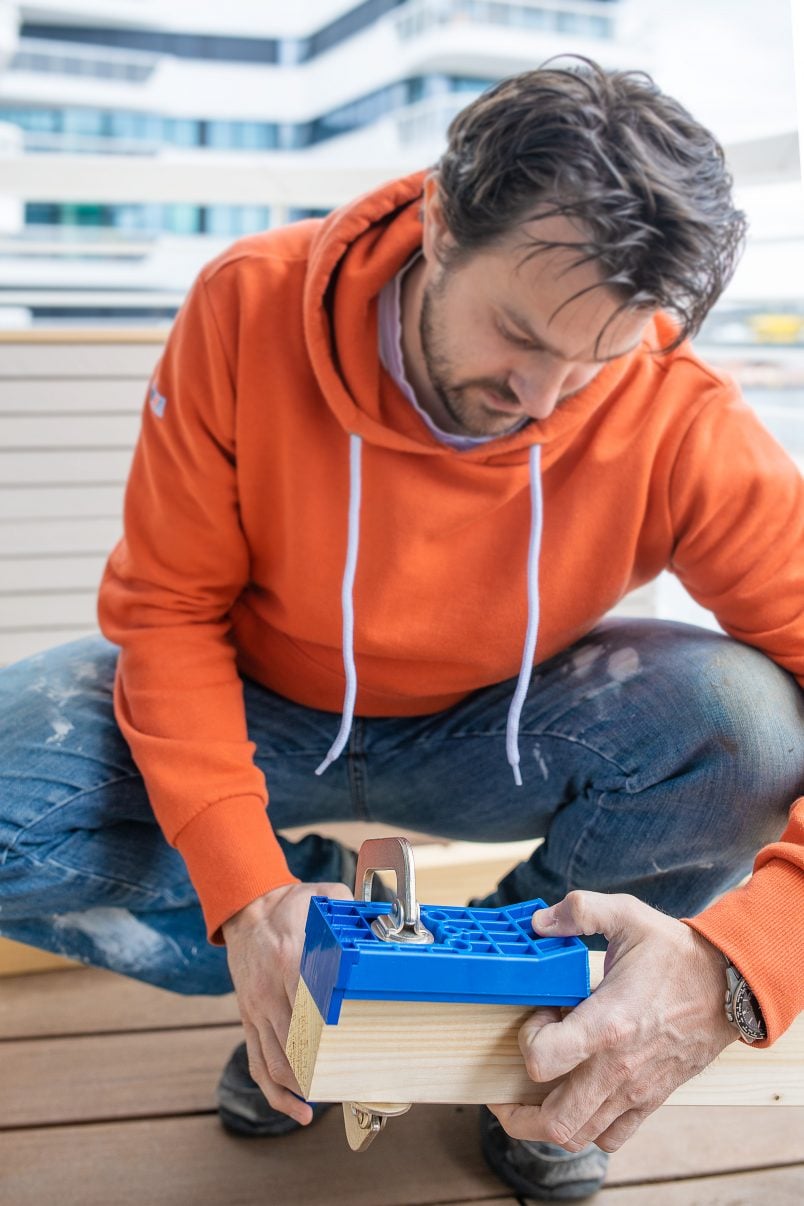
We’d never used one before, so really didn’t know what to expect but it’s actually easy and almost self-explanatory to use. You clamp it to the piece of wood you want to drill the holes into, use the special drill bit that comes with the set and drill a hole at an angle through the timber.
After drilling the hole, you place the two pieces of timber that you want to connect together and screw straight through the prepared pocket hole to join the two pieces together.
That’s really all there is to it!
The only important thing is to plan the positions of the pocket holes so that you end up with really secure connections. Don’t worry though, we’ve done all of the planning for you!
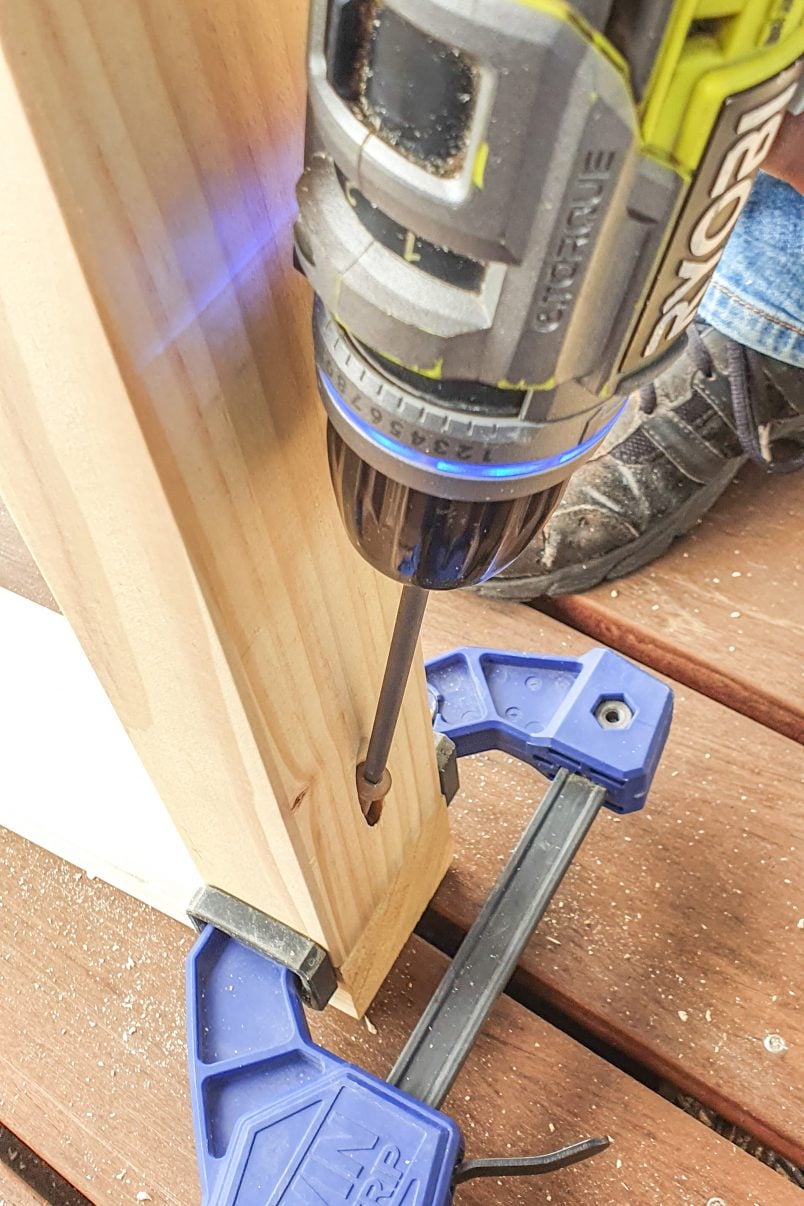
Almost all of the connections will be in places where they won’t be visible but a couple of connections had to be in positions where they will have to be filled with some wood filler to be hidden. Here’s what the (almost) finished underside of the cabana looks like and you can see exactly where we filled all of the holes.
3. Assemble the daybed seat
Now the fun part of the project can begin! Start by assembling the frame of the seat.
Lay out the four pieces of 74 x 54 mm timber to create the edge of the seat (2 x 1400 cm & 2 x 59 cm) in a rectangle and join them using the pocket holes you’ve already pre-drilled.
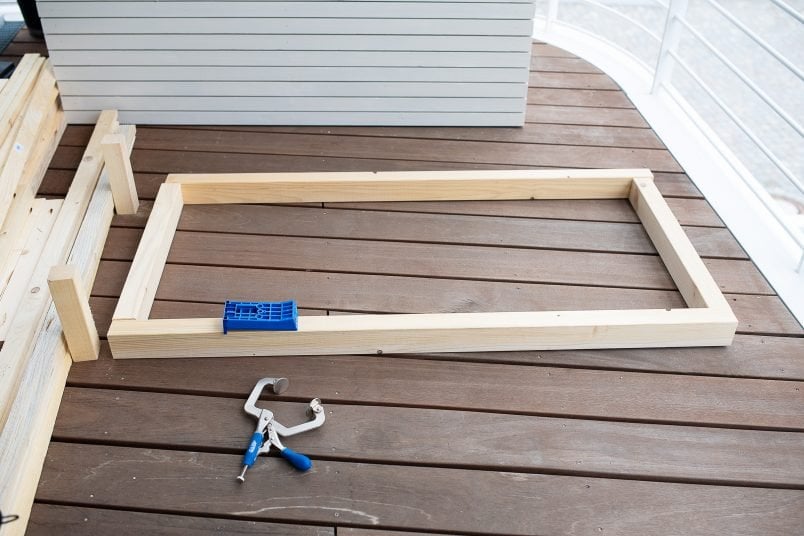
Screw two pieces of timber (2 x 129 cm) to the inside of the seat frame making sure to leave 24mm at the top for the slats of the finished seat to rest on.
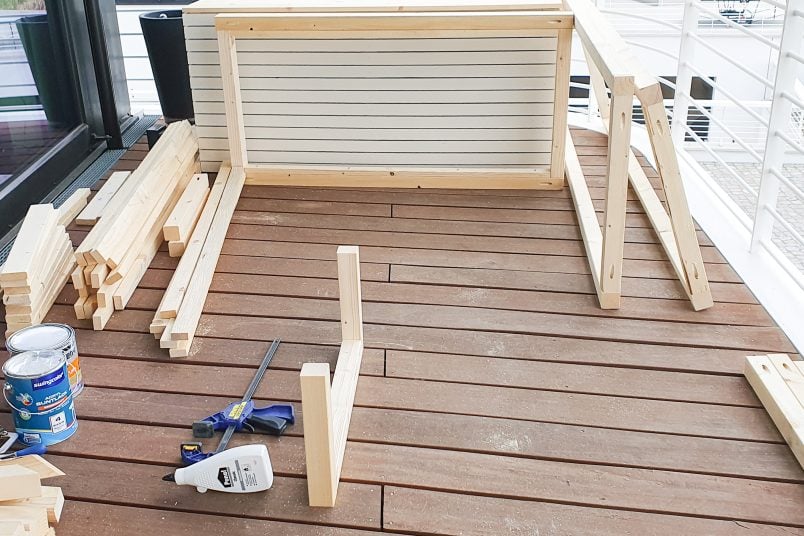
4. Assemble the central base support & sides of the daybed
After assembling the base of the seat you can move on to building the sides of the daybed.

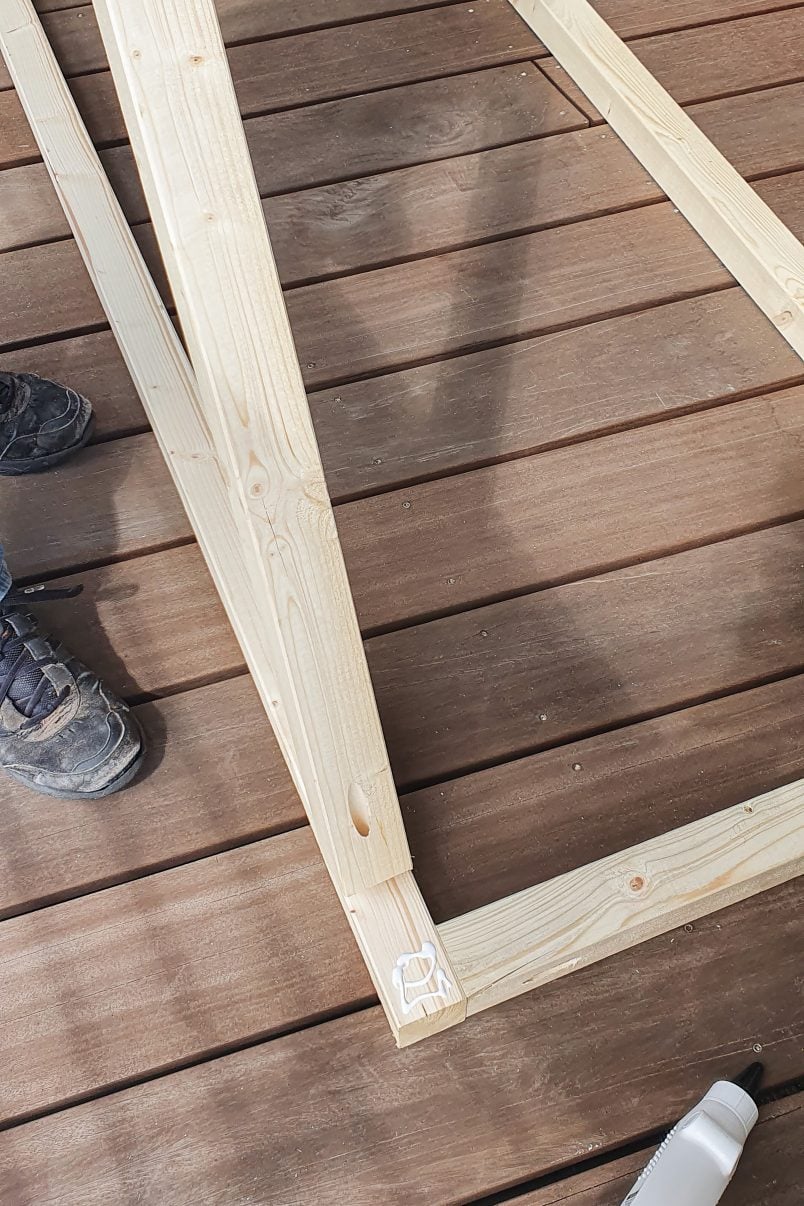
For the sides of the daybed, you have to build two rectangular frames out of the 54 x 54 mm timber that you attach to each side of the seat.
Lay out four of the side pieces (4 x 2100 cm and 4 x 59 cm) of the outdoor daybed and screw them all together to create a rectangle.
To avoid the seat sagging in the middle, we added a support in the centre of the seating area. This u-shaped piece will help distribute the weight of anyone sitting on the bench more evenly.
Just lay out the pieces exactly as you did for the other frames you’ve already assembled (2 x 23 cm & 1 x 59 cm) and screw them together.
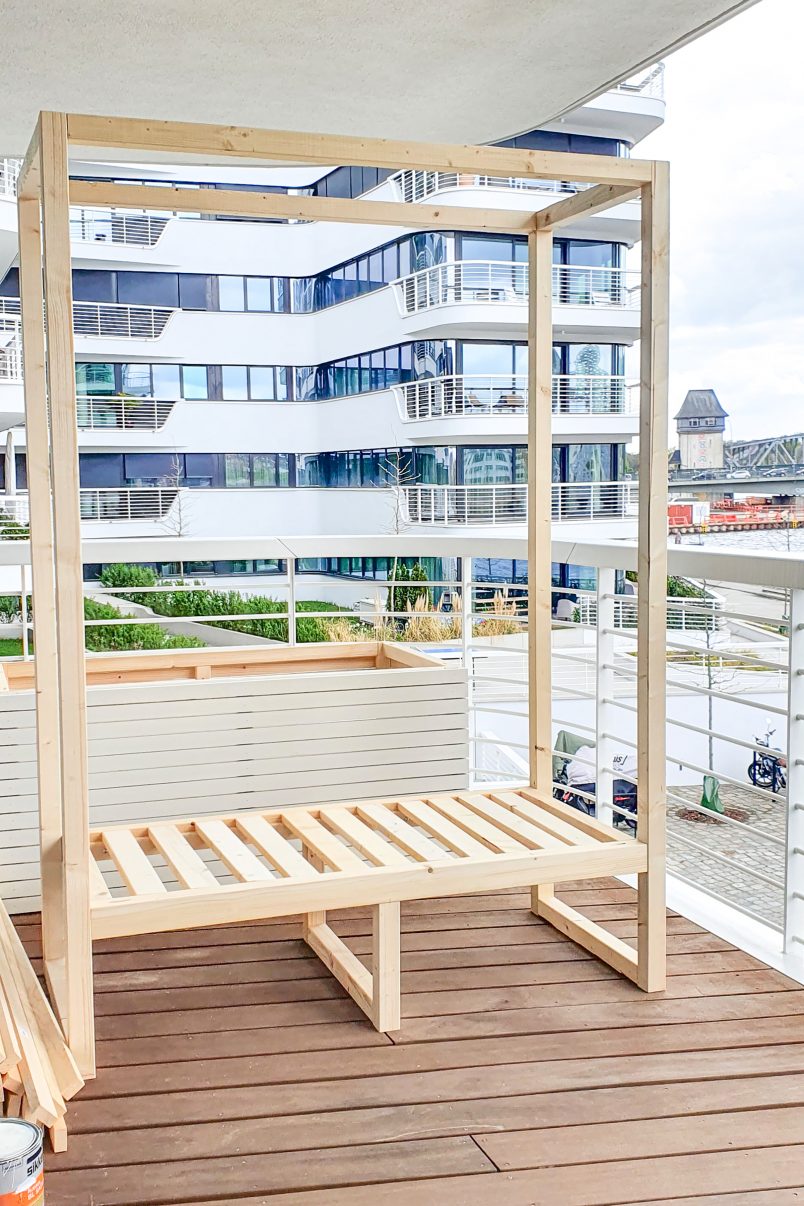
5. Assemble the daybed
Now that you’ve built the two side frames and the seat frame, you can assemble the outdoor daybed!
Lay the first rectangular frame onto the floor and attach the two long remaining roof pieces (2 x 1400 cm) to the top of the frame.
Then place the assembled seat on top and attach it to the frame, leaving 23 cm distance to the bottom edge of the frame, before placing the remaining side frame on top and attaching it to the roof, base and seat with screws in the prepared pocket holes.
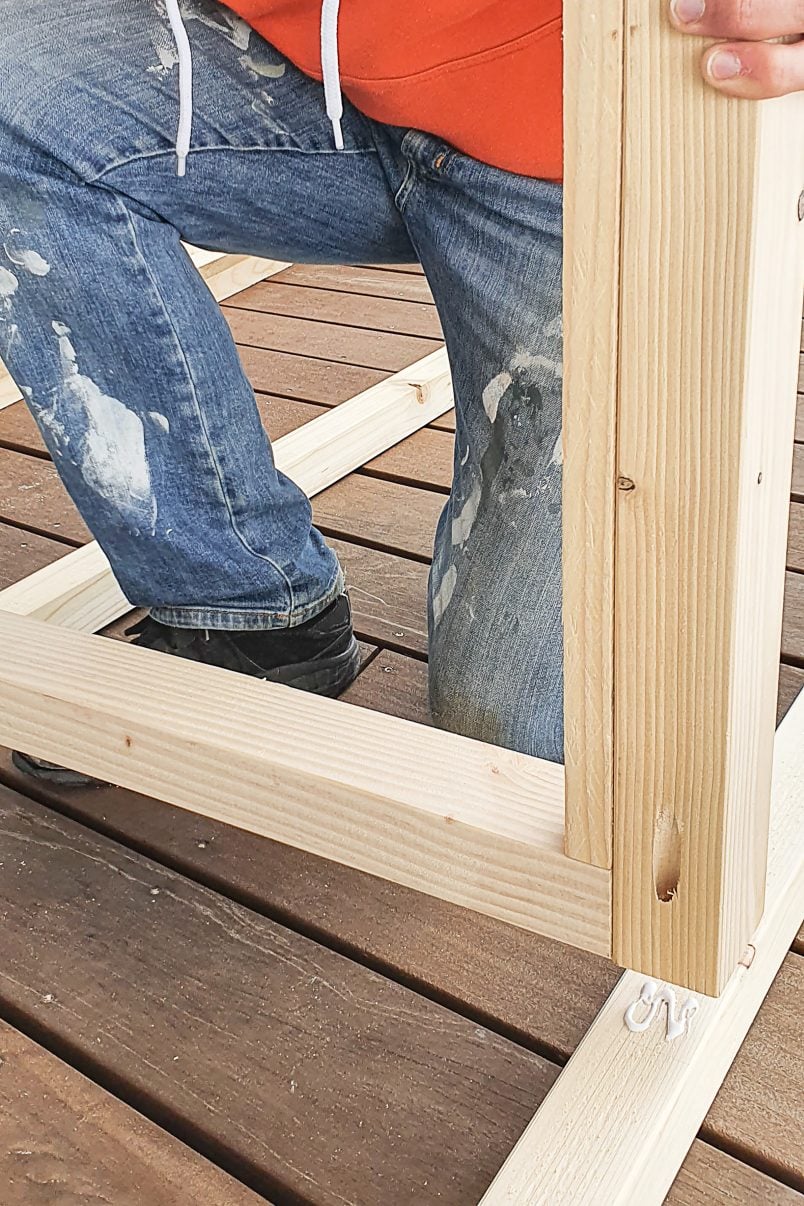
Your outdoor daybed construction should now be fairly stable but don’t worry if it’s a bit wobbly as the cladding you’ll be adding later will make it more stable.
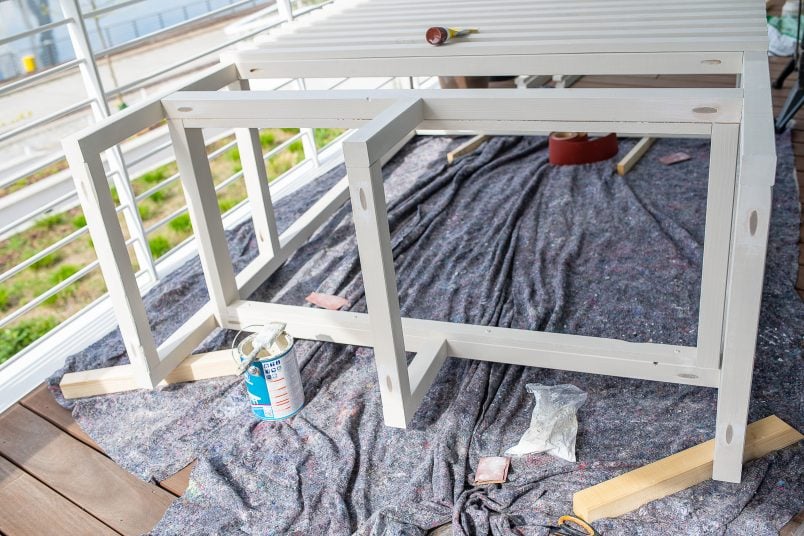
6. Paint everything
You still need to attach all of the roof, back slats and seat but painting everything before you attach them all makes it easier and quicker to cover everything.
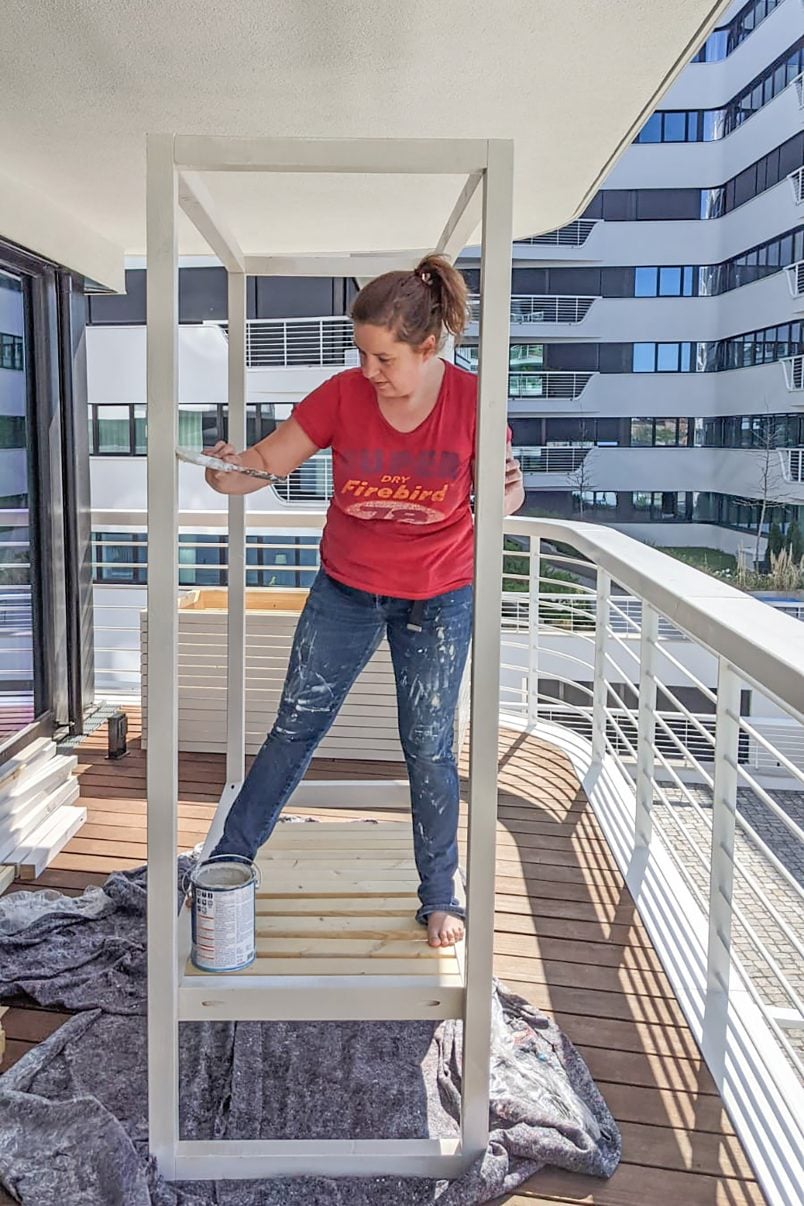
Fill any holes with some wood filler and sand it smooth when it’s dried. Then all that’s left to do is give the daybed a couple of coats of primer and paint.
Don’t forget to lightly sand between each coat of primer or paint to remove any imperfections and air bubbles. This will not only give you a really smooth and professional finish but it’ll also make the paint finish more durable, too.
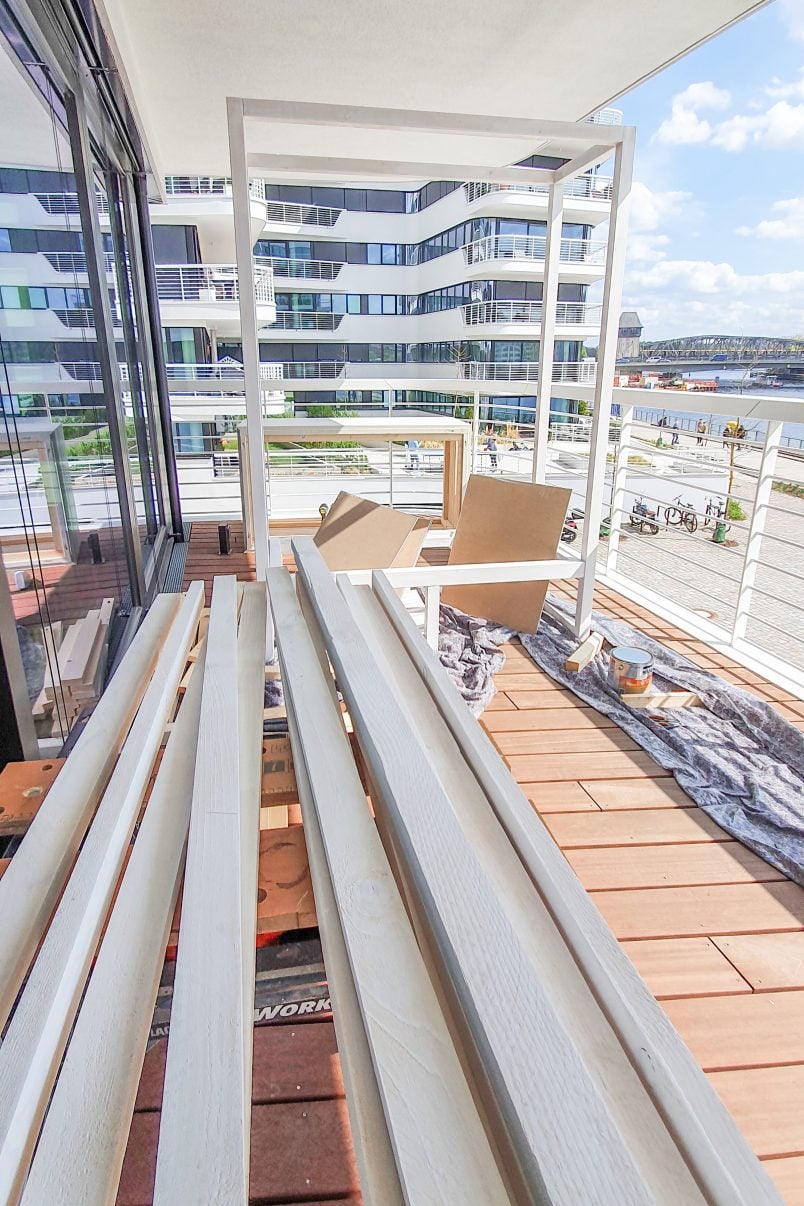
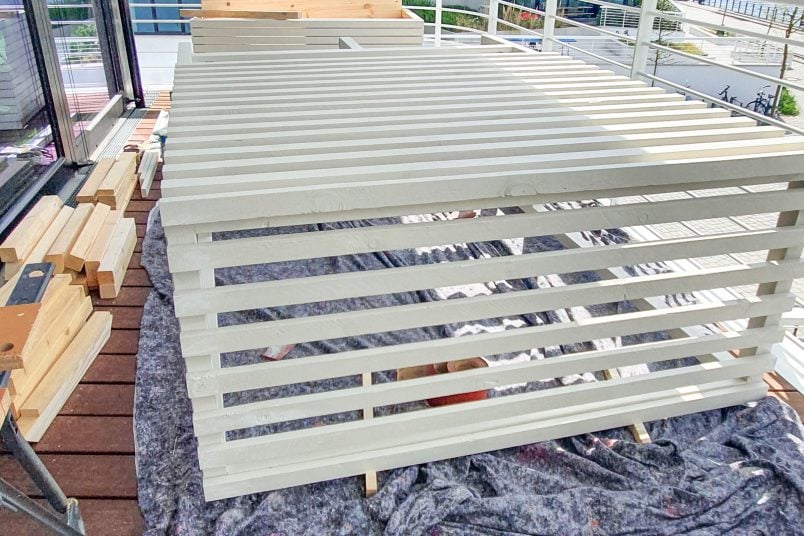
7. Attach the roof and cladding
This wouldn’t be a cabana-style daybed if it didn’t have a back and roof, would it?
Start at the top back edge of the daybed and nail the first slat to the back with a couple of nails. Place another two slats underneath the one you’ve already nailed in place and nail the bottom one to the daybed frame.
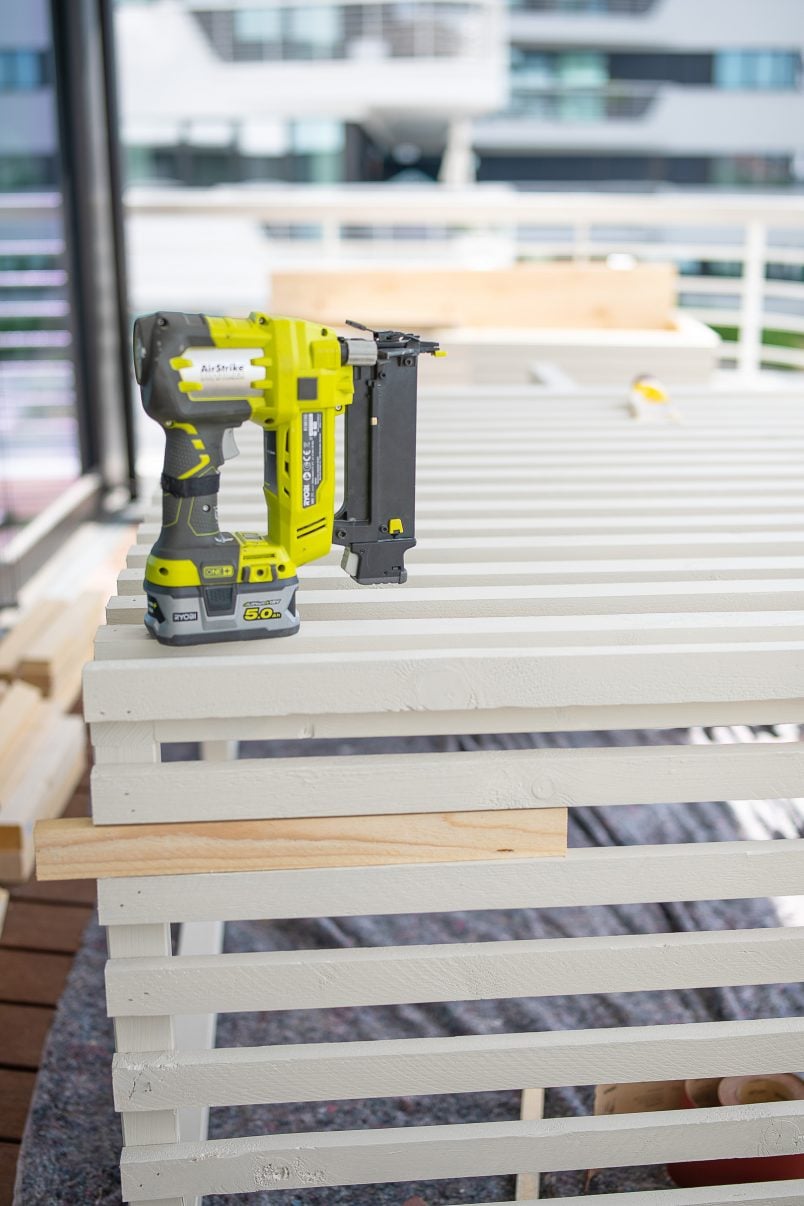
Using an additional batten as a distance holder between the battens you’re nailing in place saves a lot of time measuring. Once you’ve nailed the battens in place you can remove the slat that you’ve been using as a distance holder and you’ll have a perfectly level and equal distance between each of the slats.
Continue doing this until you’ve nailed 18 slats to the back of the outdoor daybed.
Next, attach the slats for the roof to the frame using the same method. This time, start at the front of the daybed and work your way to the back.
Instead of using a 48 mm slat, use one of the 54mm slats that you used to build the frame of the daybed as a distance holder.
The distance between the slats on the roof and the slats on the back of the daybed is slightly different but you won’t notice it once it’s all assembled.
When you’ve attached all of the slats, fill any holes, give the filler a sand when it’s smooth and then touch up the paintwork.
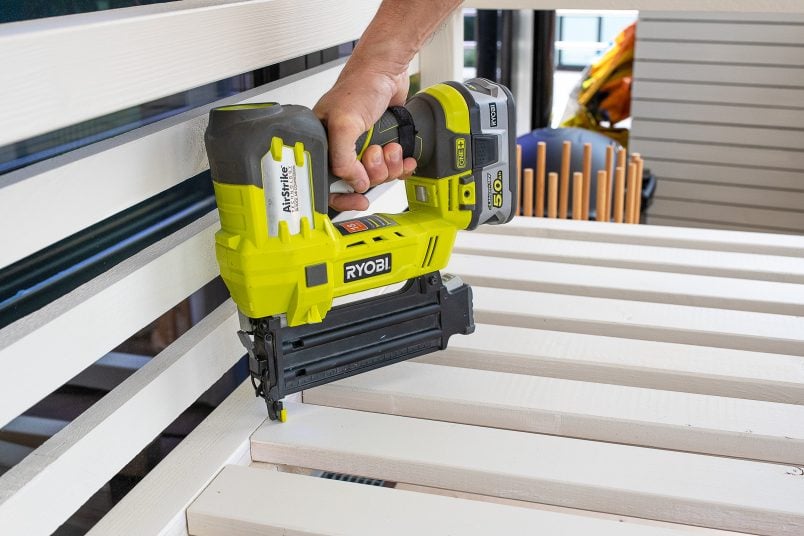
8. Add the seat
All that’s left to do now is add the seat.
Space out the slats for the seat – we didn’t bother to measure and just eyeballed the distance between them – and nail them into place with a couple of nails.
9. Add the finishing touches (cushions & curtains)
Now that the actual cabana daybed is built, all you need to do is add the finishing touches like cushions, seat base and curtains.

We made a basic cover for the mattress out of some outdoor fabric that we bought online. As we opted for white fabric, we made sure to include a long zip at the back so that we can remove it when it gets dirty.
Now, if there’s one thing I admit to, it’s not being able to sew and thankfully my Mum made the cover for us! (Thanks, Mum!)
She also made some bolster cushions out of the same fabric, but you don’t have to make them to complete this project as it works great without them, too.
Having said that, we love how they finish off the sides of the cabana.
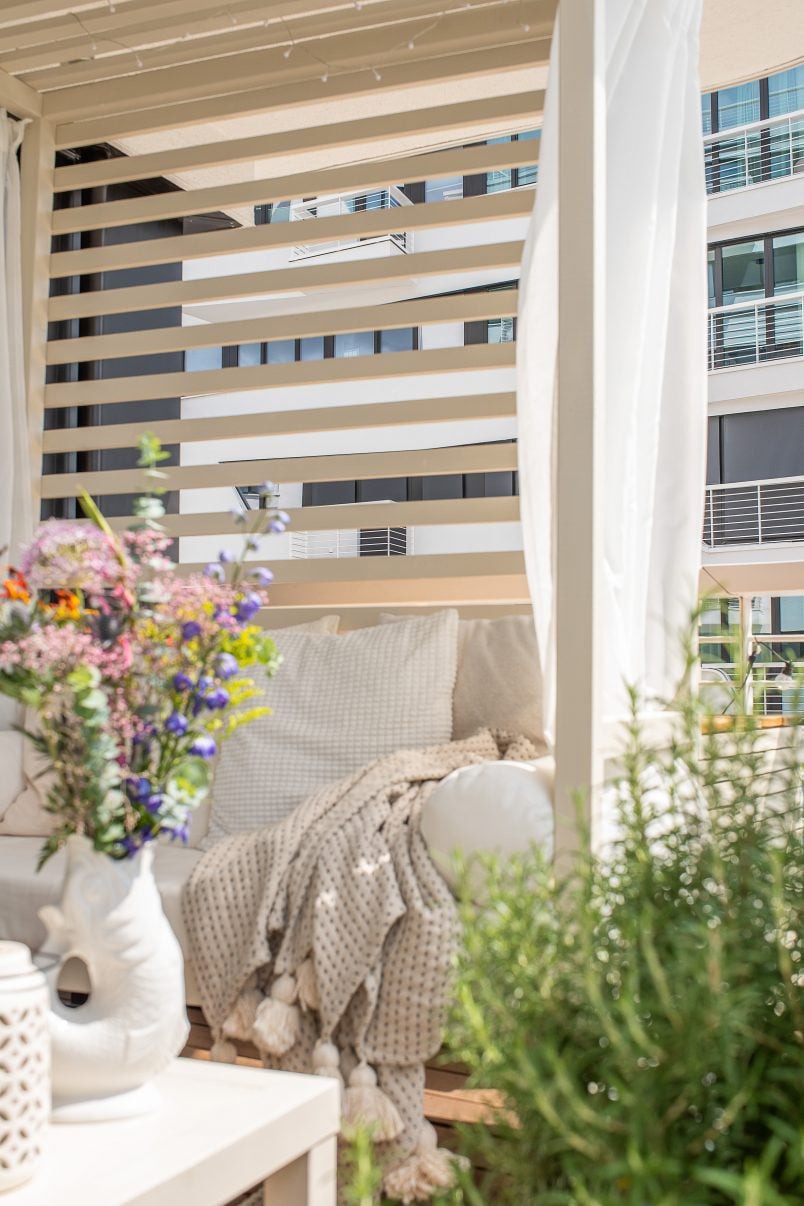
The very last thing to do is add the curtains.
We used Hilja curtains from IKEA. We had to shorten them quite a bit so I cut off a chunk of fabric and hemmed the edge with some hemming tape.
Screw some hooks into the top of each short side of the daybed and just hook the curtains into place – we just threaded ours onto some string!
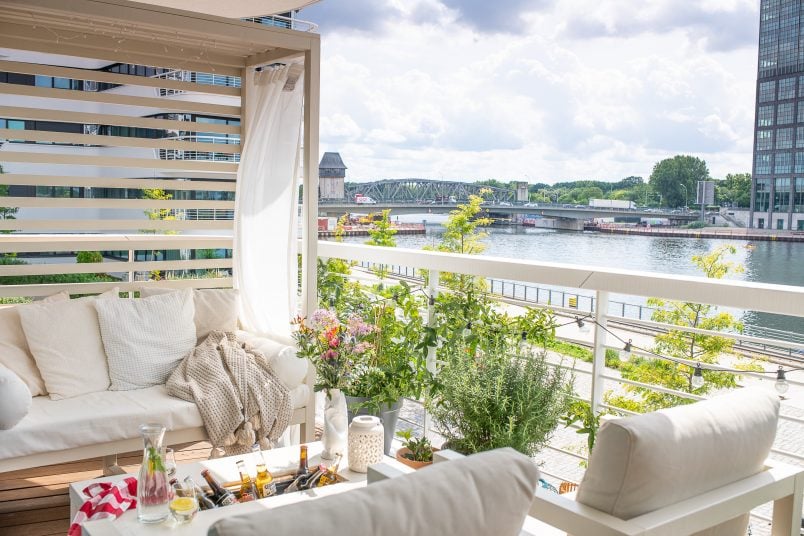
Our balcony is the only reason we moved into our current apartment and I’m so pleased with how our outdoor living area has turned out.
I know how helpful it can be to see how much it costs to build the projects we share, so here’s a full breakdown of how much it costs to build an outdoor daybed like this one.
Cost Breakdown (Approximately):
Timber | 150€
Nails | 3€
Screws | 5€
Mattress | 25€
Outdoor Fabric & Zip | 37€
Cushions | 35€
Curtains | 15€
Primer | 20€
Paint | 20€
Total: approximately 310€ (this does not include the cost of the tools)
As you can see, it’s not the cheapest of projects ever but it’s still a much more affordable option than buying an outdoor daybed.
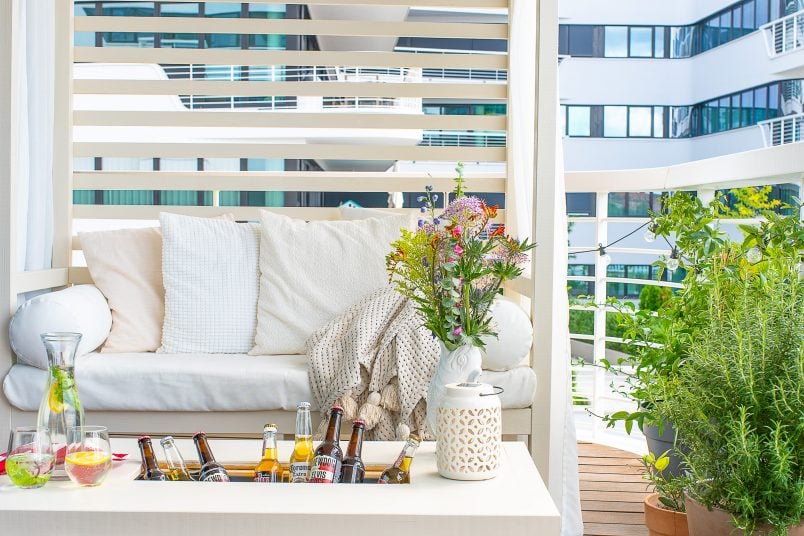
We’re so happy with how this cabana-style daybed turned out and the slatted back throws lovely shadows across the balcony and the curtains give us a bit of much-needed protection from the sun rays as well as a bit of privacy from the hundreds of people that jog or stroll along our stretch of river every day.
We’ll be sharing how we built our other fun and budget-friendly outdoor projects including an outdoor table and armchairs over the next couple of days, so pop back to see how you can build them, too.
Right, I’m off to find myself a tropical cocktail for some full-on holiday vibes.
Do you have any holiday plans for this year? Have you ever built furniture yourself? What’s your favourite way to relax?
Kinya says
This is absolutely fabulous! Well done. How is it holding up?
Christine says
Thank you so much, Kinya! We still love it and it looks exactly the same as when we first built it. We moved it halfway across Europe and left it outside for 2 winters now and it looks the same. It is slightly covered by the pergola roof though, so doesn’t get a lot of rain on it.
Cx
Tamika says
Hello
I loveeeeeeee this daybed. I’m in the US and wonder if you have the plans or video for this? I’m planning on making it this week. Thank you so much. Great great job!!!!
Christine says
Thanks, Tamika! All instructions and measurements are in the post. I have a half-finished video I’ve been working on and I keep meaning to put some plans together but just haven’t had the time. Everything you need is in the post though!
Cx