[Ad – This post is in collaboration with Ronseal and contains affiliate links. All opinions, thoughts and images are our own. Read our full disclaimer here.]
With the first signs of spring finally making an appearance, our attention has turned to giving our outdoor space a much-needed update.
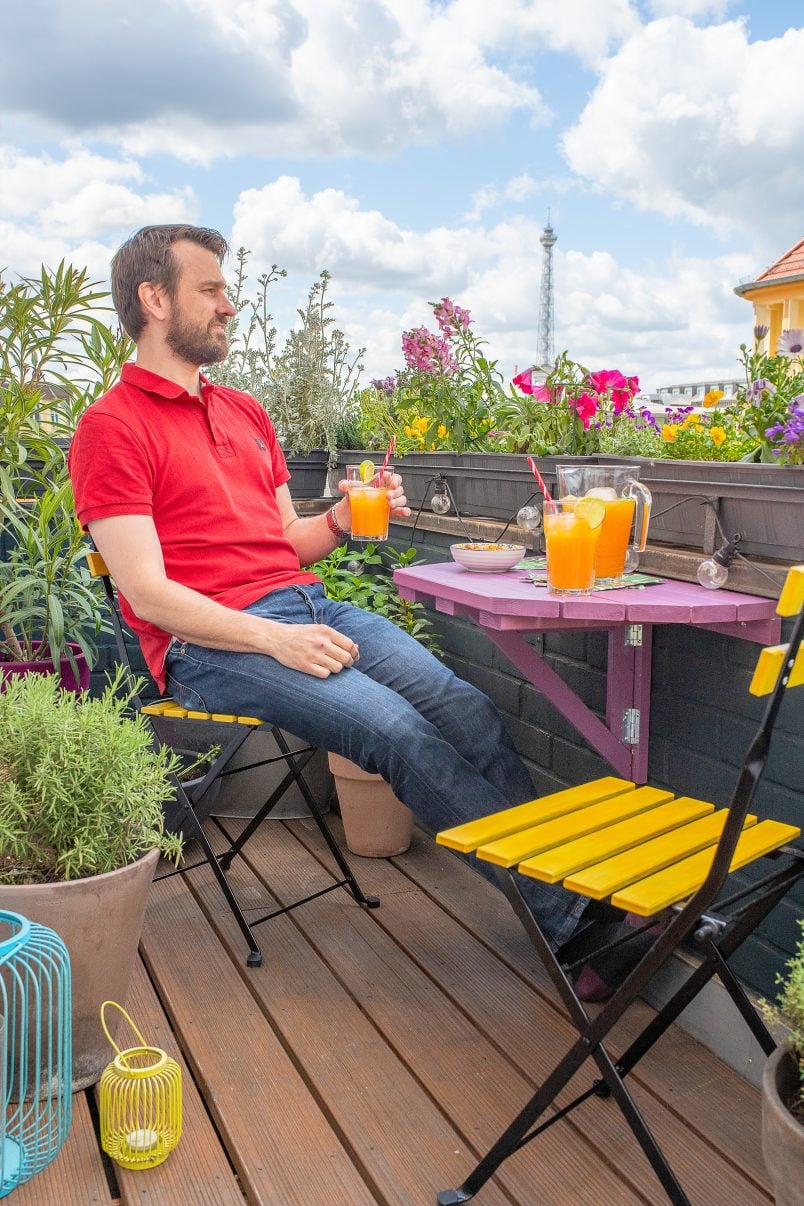
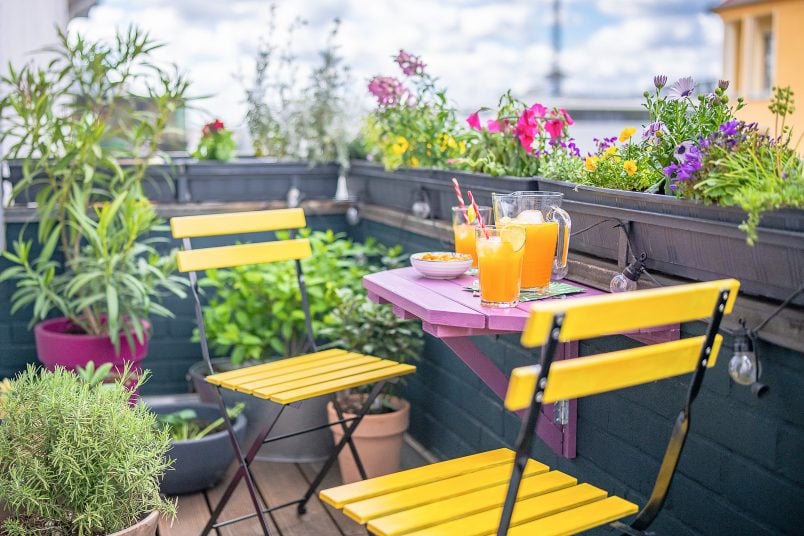
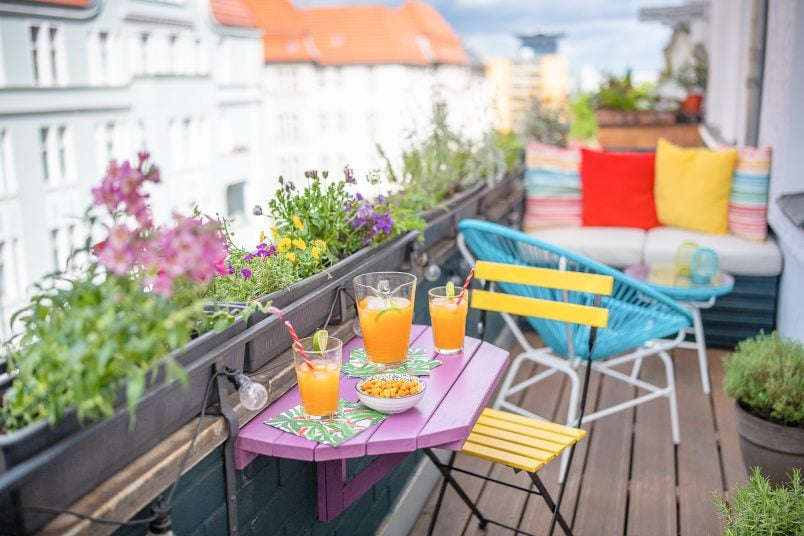
We only have a small balcony, so are constantly looking for ways to make the most out of the dinky space. Last year, we already built an outdoor lounge area and we’ve just finished building our newest addition – a space-saving foldable table and outdoor seating area!
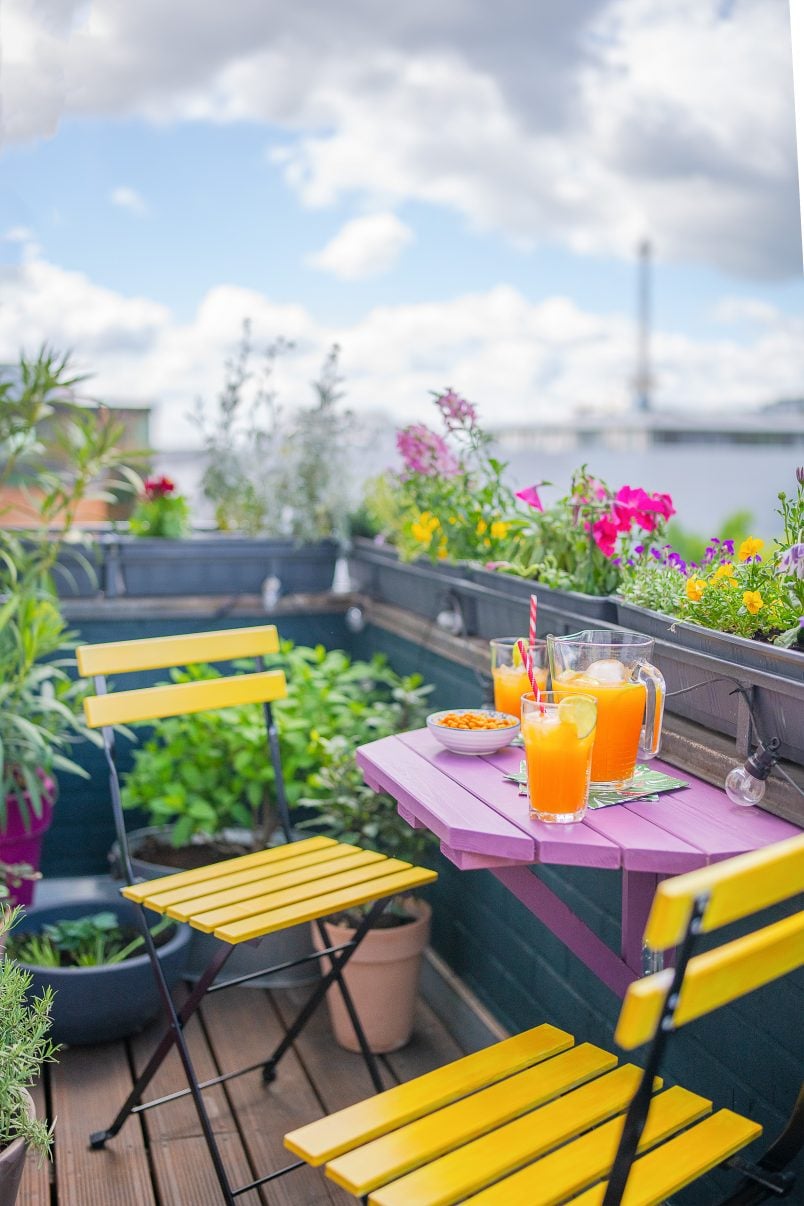
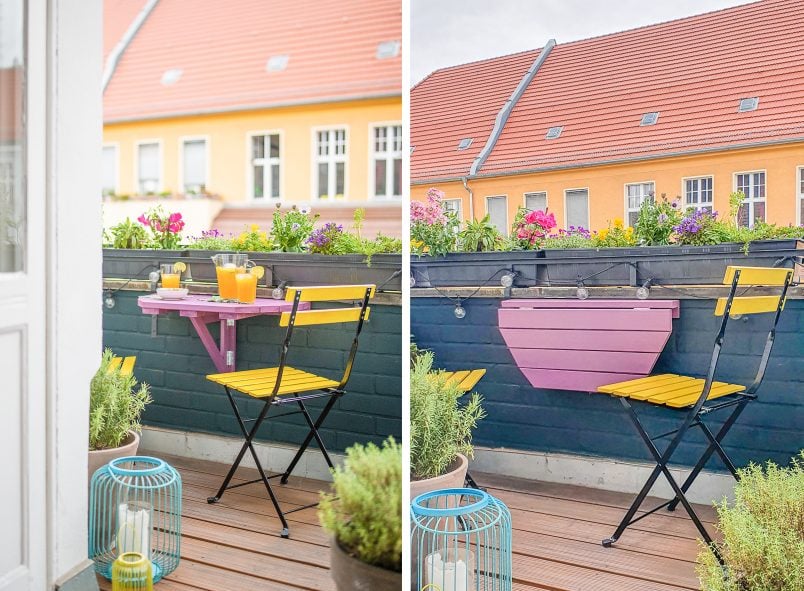
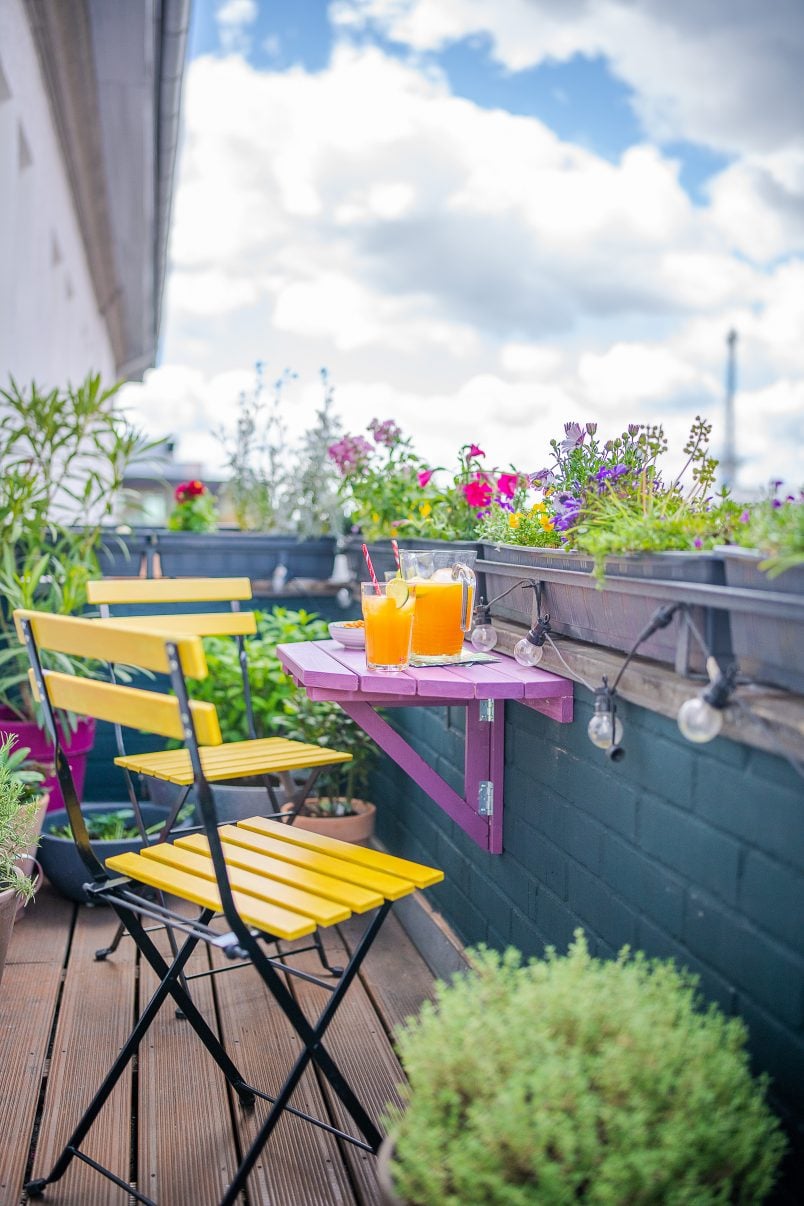
The foldable table is the perfect size for two people and we’ve already enjoyed a couple of alfresco drinks out there while soaking up the spring sunshine!

I’m sure you know how much I love a quick and easy project and this space-saving foldable table is super easy, quick and affordable to build!
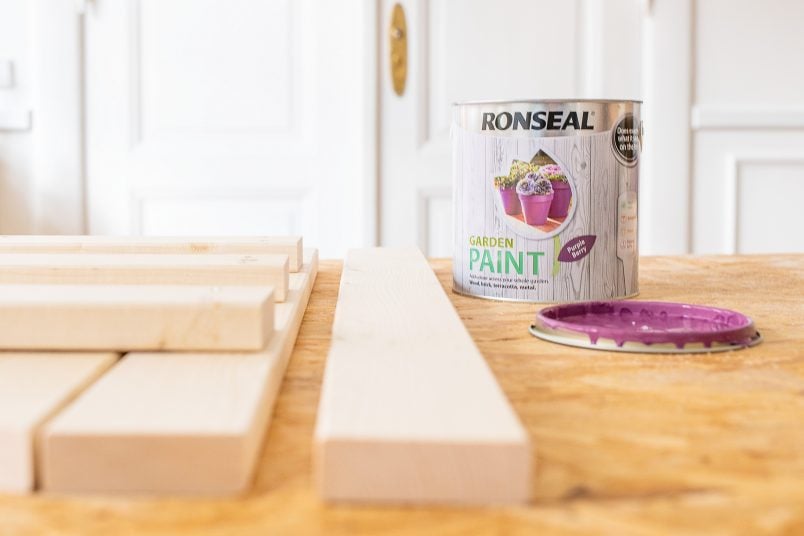
Here’s what you will need to build a DIY space-saving foldable table:

Supplies:
- 2 x 2.5m x 7.4cm x 2.4cm Timber Batten
- 1 x 2.1m x 4.ocm x 1.8cm TimberBatten
- 4 x Hinges
- Ronseal Garden Paint – There are 26 gorgeous shades to choose from! We used Purple Berry for the table & Sundial for the chairs.
- Ronseal High Performance Wood Filler
- 4 x Masonry Screws (about 6 x 70mm) to attach the table frame to your wall
- 8-12 x Screws (around 4 x 10mm) to attach the hinges (the amount will depend on how many holes you have in your hinges)
- 4-5 Screws (about 5 x 50mm) to attach the table to the frame on the wall
- Sandpaper (about 120 grit and 240grit)
- Wood Glue
- Garden chairs (ours are Tärnö from Ikea)
Tools:
- Spirit Level
- Mitre Saw (or a Fine Saw and mitre box)
- Cordless Drill & Drill Bits
- Fine Saw
- Pencil & Tape measure
- Paintbrush – we use these paintbrushes which we highly recommend and love!
- Filling Knife
Here’s how to build a space-saving foldable table:
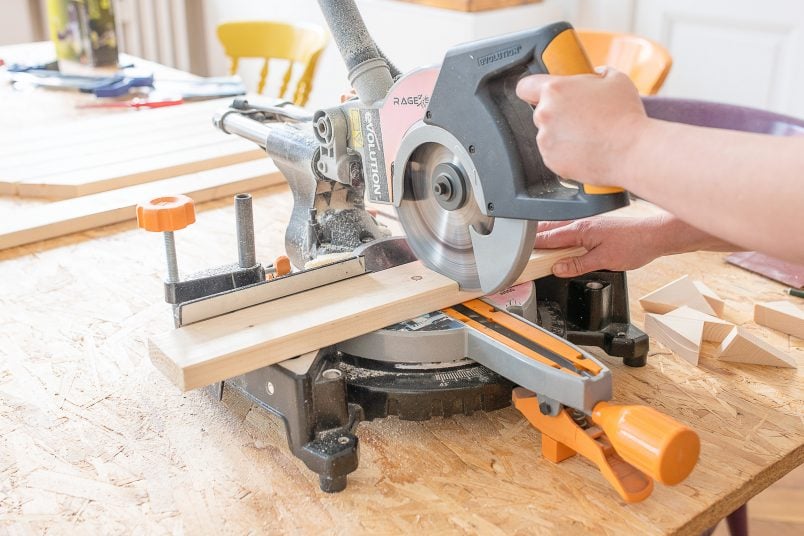
Step 1
Cut Everything To Size
Start by cutting all of the pieces you’ll need for your table to the size you need. If you’re building a table that’s the same size as ours, you’ll need to cut them as follows.
For the table (2.5m x 7.4cm x 2.4cm timber):
- 2 x 70cm
- 1 x 70cm (with each end cut at a 29° angle)
- 1 x 61.3cm (with each end cut at a 29° angle)
- 1 x 52.6cm (with each end cut at a 39° angle)
- 3 x 28cm
For the table support (2.1m x 4.0cm x 1.8cm):
- 1 x 70cm
- 1 x 28.4cm
- 2 x 30cm (one end cut at a 45° angle)
- 1 x 42.4cm (both ends cut at 45° angle)
When you’ve cut all pieces give them all a quick sand and make sure that everything is smooth with no rough edges.

Step 2
Assemble The Table
When you’ve finished cutting all the pieces, it’s time to start assembling the table.
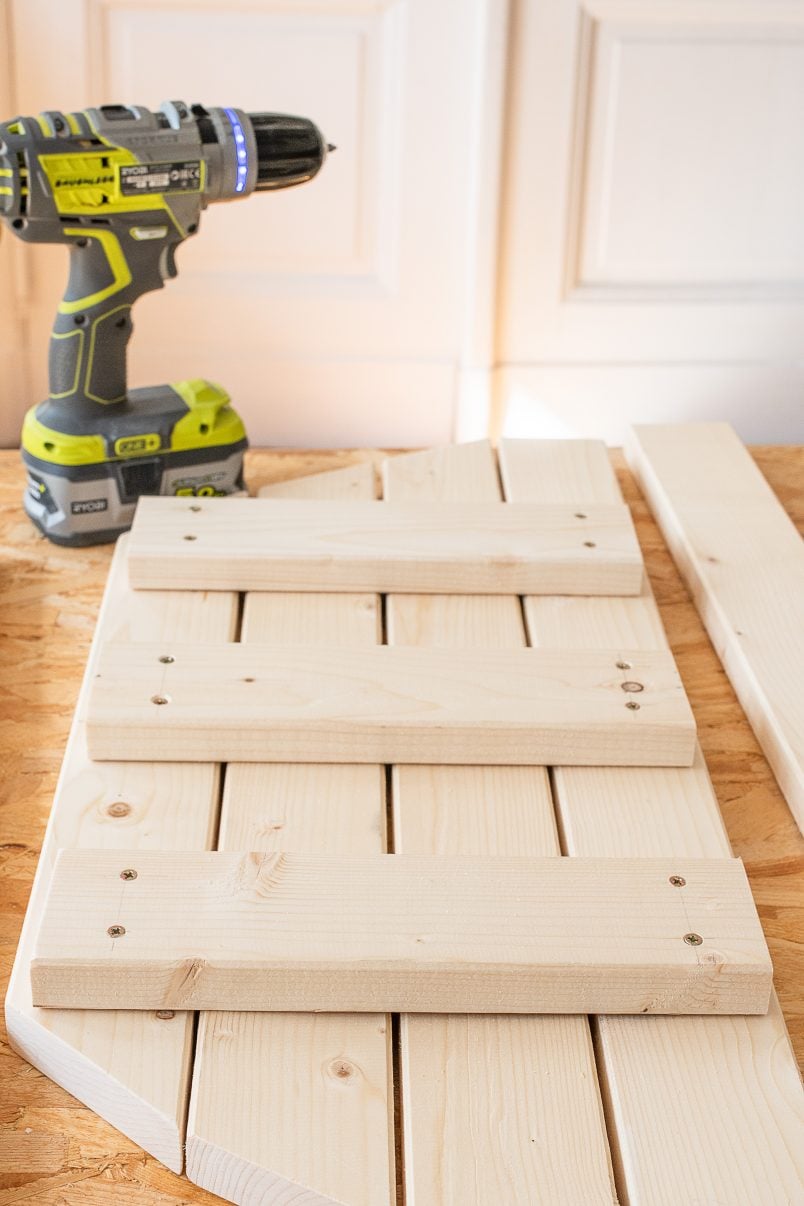
Place 4 of the long slats next to each other with the smallest piece at the bottom leaving a roughly 3 mm gap between each piece.
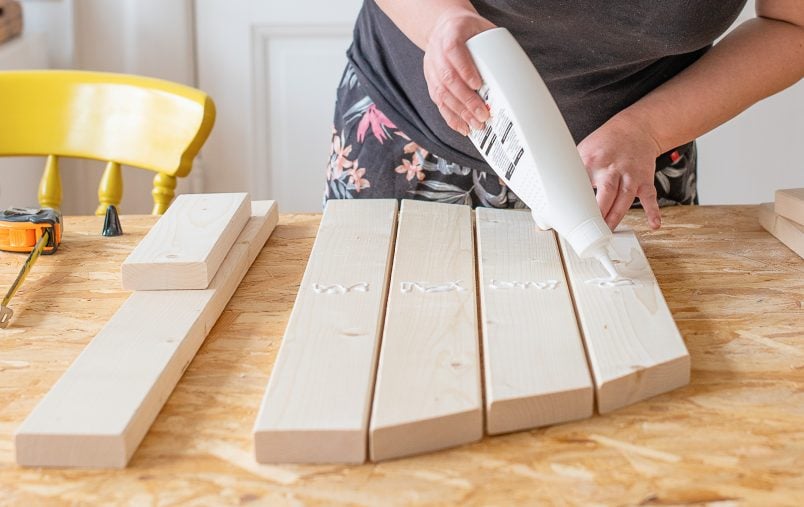
Then, glue the 28 cm long bottom table support slats to the ones you just laid out with some wood glue and let everything dry.
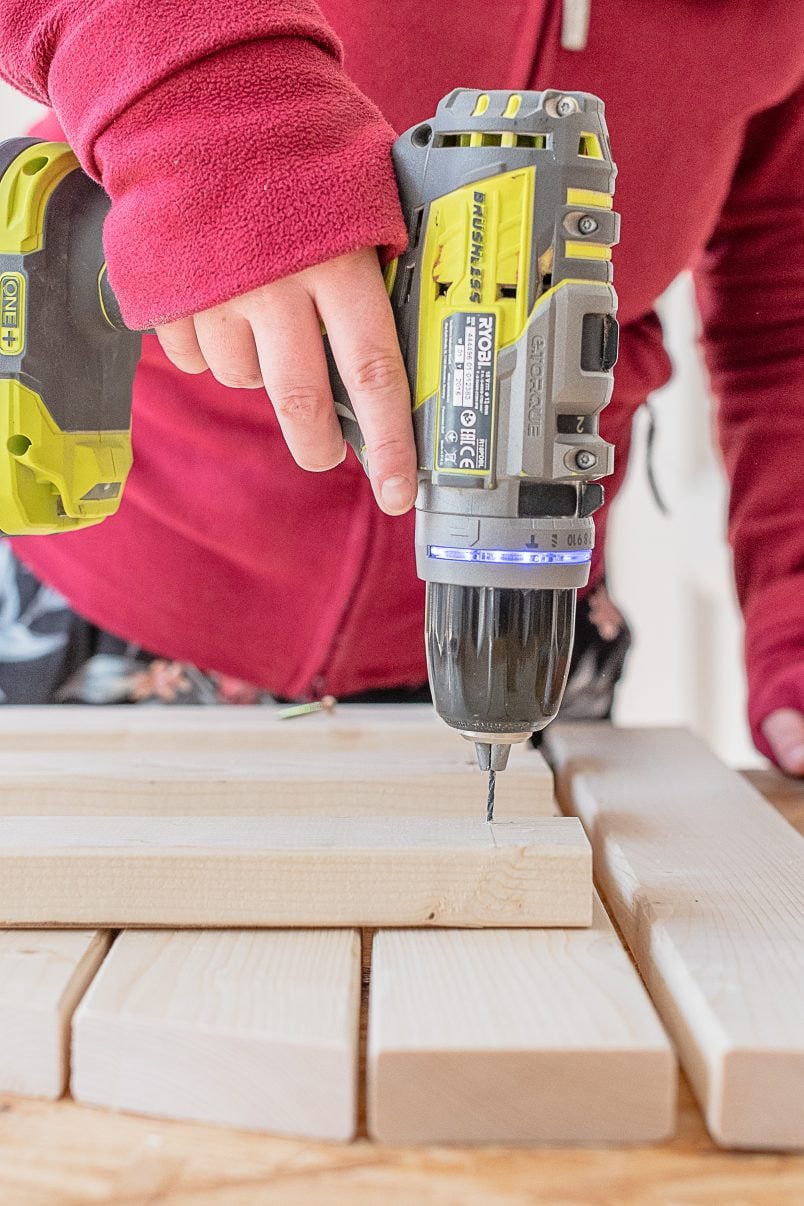
When the glue has dried, add a couple of screws through each of the vertical support slats to make sure they are securely fastened to the slats that make up the top of the table.
Step 3
Assemble The Table Support
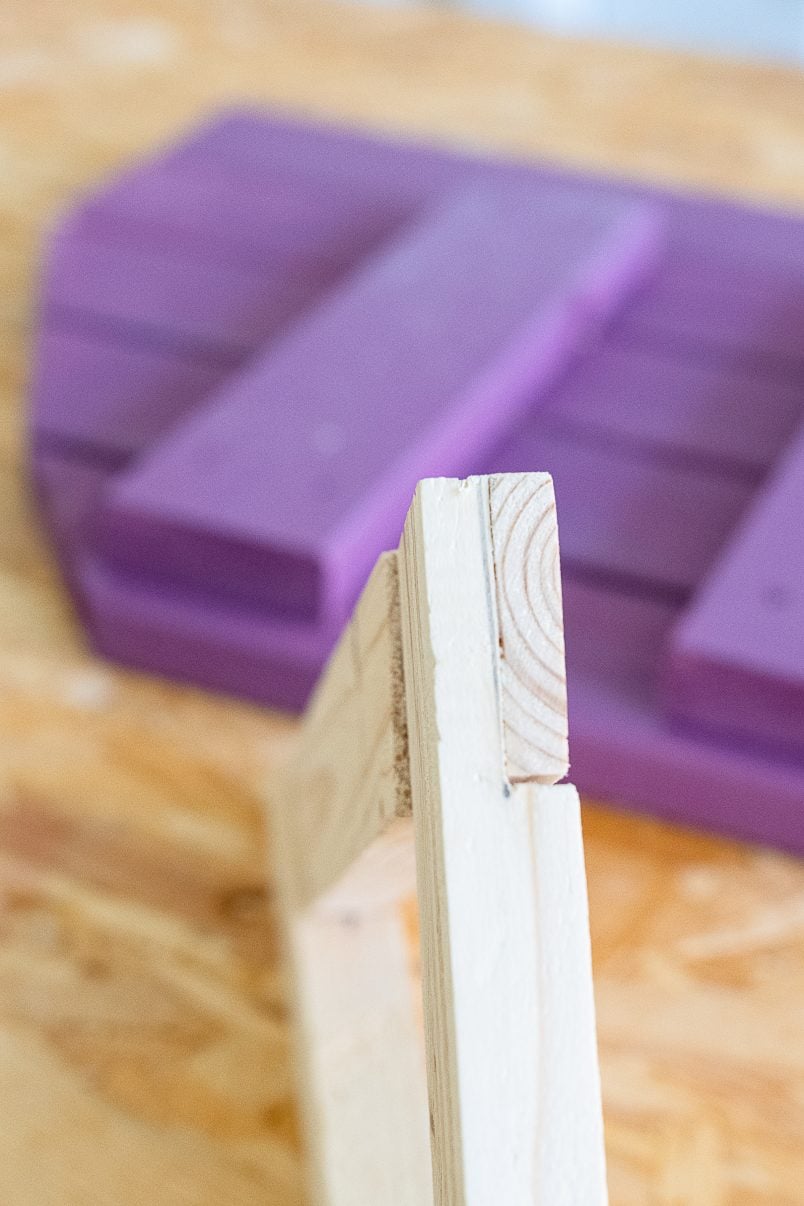
Next, assemble the triangular table support. Place the three pieces of timber on top of each other in a triangular shape. Mark the overlap of each piece and cut out a section of each end that’s half the depth of the timber with a fine saw.
By doing this, you’re creating a half-lap joint which means that you’ll be able to slot the pieces together.
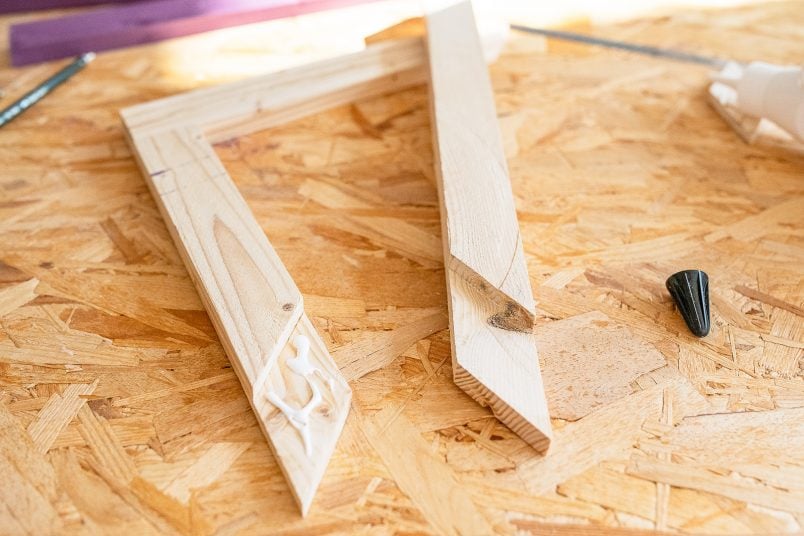
Make sure that everything fits and then glue the pieces of the triangular table support together.
As you can see, our joint turned out a bit messy but, as it will be hidden under the table and will be painted, it doesn’t matter too much and you can just fill any imperfections with some wood filler.
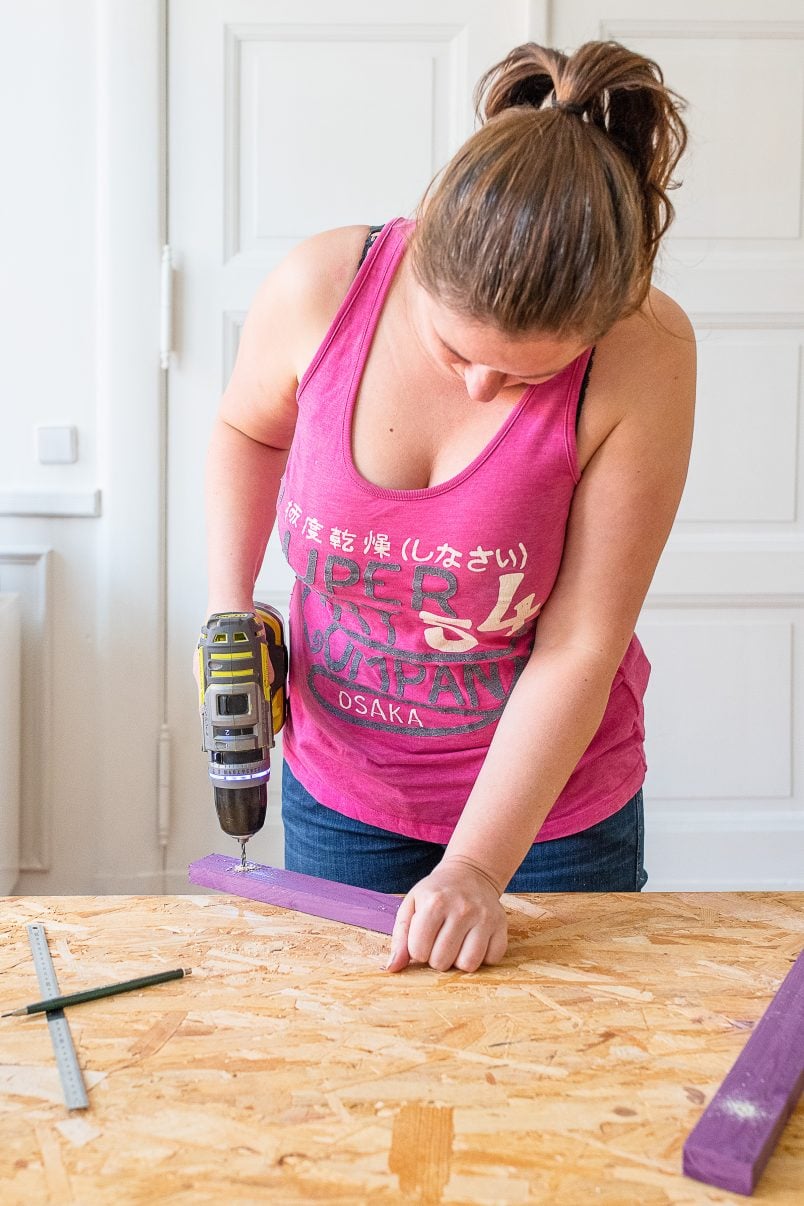
Step 4
Paint Everything
Now that you’ve assembled the main parts of the space-saving folding table it’s time for the fun to start!
Make sure that everything is smooth and clean before giving the table and table support a couple of coats of paint. We used Ronseal garden paint which is perfect for this outdoor project and is available in 26 amazing colours!
After applying the first coat of paint, let it dry and then give everything a very light sand with some fine sandpaper to remove any imperfections and air bubbles.
As before, make sure the surface is clean and then apply another two coats of paint, sanding and cleaning between each of them.

The Ronseal garden paint is so lovely to work with. It has a really creamy texture and covers amazingly well! It covers so well in fact, that you’ll be tempted to just paint everything once (I know I was).
Along with building our space-saving foldable table, which we painted in Ronseal Garden Paint in Purple Berry, we also gave our new garden chairs a colourful coat of paint in a lovely yellow shade of Ronseal paint called Sundial!
Step 5
Attach The Table To The Wall
When you’ve finished painting the table, it’s time to assemble and install everything.
There are three parts to this assembly:
- Attach the supporting frame to the wall.
- Attach the hinges to the folding elements.
- Attach the folding table and triangular support to the frame on the wall.
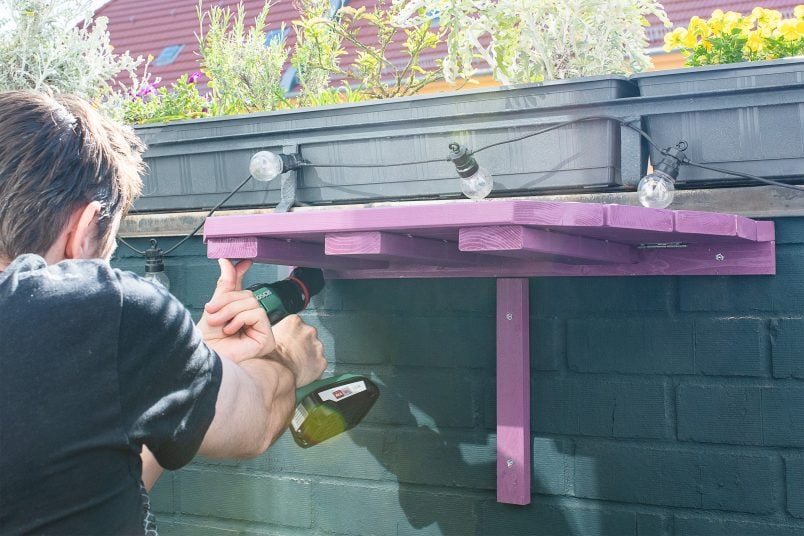
Drill two holes through each end of the battens (about 5cm from the edge) that will make up the T-shaped wall-mounted pieces of the table.
Use these holes to measure and mark where you’ll be attaching these battens to the wall. Don’t forget to use a spirit level to make sure that everything is level.
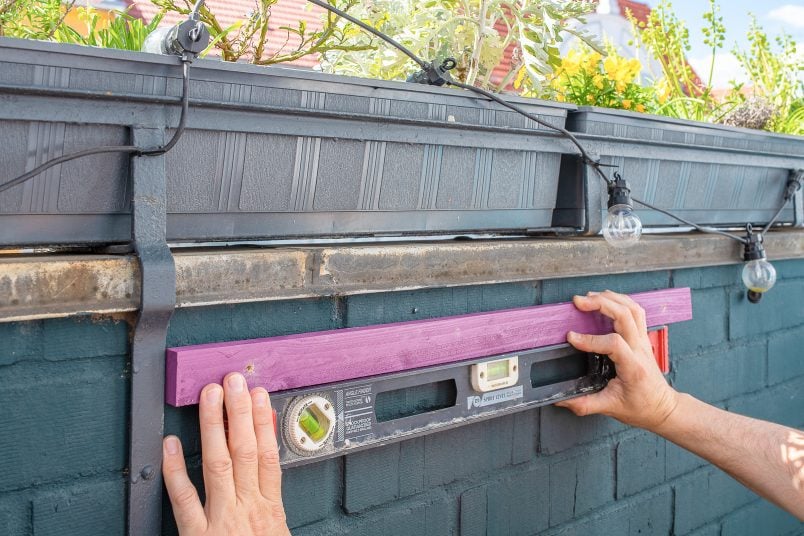
Then drill the corresponding holes into the wall and screw the battens to the wall with some masonry screws.
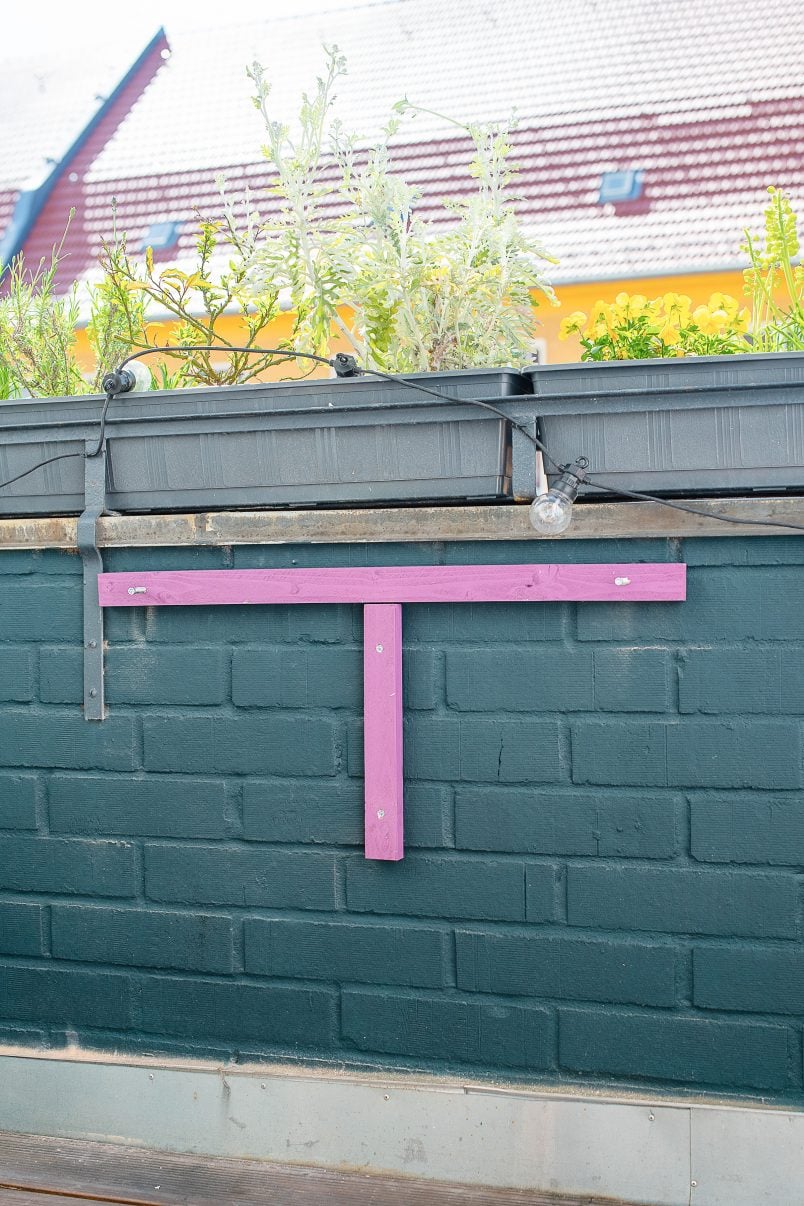
You only need to roughly attach the top horizontal batten (you have to attach it to be able to work out where to position the shorter vertical one) as the next thing you have to do is remove it so that you can attach the first, fixed slat of the table to it.

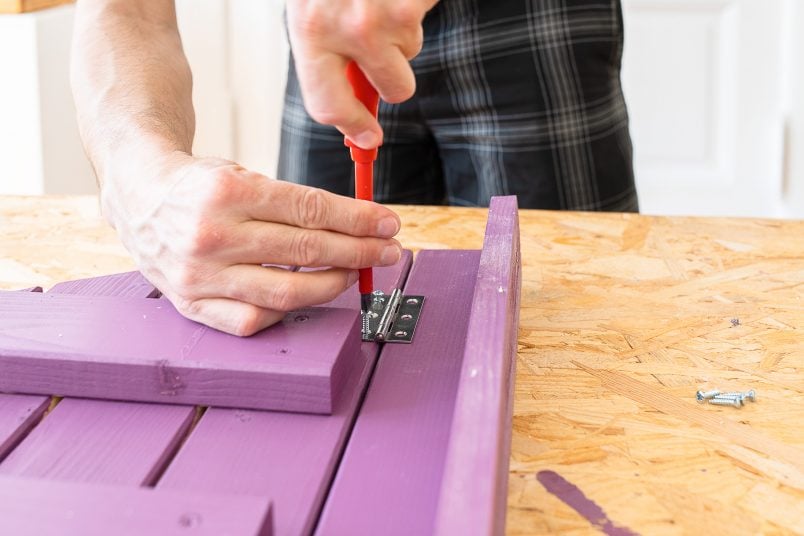
Drill and screw straight through the top of the table to attach it to the supporting batten before hiding the top of the screws under a little bit of filler and then touching up the paint so that the fixings are invisible.
Next, join the two parts of the table (the foldable part and the fixed part) together with two hinges.
Then, attach the table and batten to the wall.
The last thing to do is attach the triangular table support that holds up the folding table leaf. Position it on the vertical batten that’s attached to the wall. Make sure it’s at the right height to hold up your table leaf before screwing the hinges to the batten.

Finally, make sure everything is firmly attached and that everything moves as it should!
Step 6
Enjoy!
I absolutely love how this table turned out! It’s a great addition to our small space and being able to fold it away gives us loads of flexibility.
It was really easy and quick to build – it only took us about 3 hours to build this table (plus drying time) – and it’s a super affordable project, too!

Here’s a rough cost breakdown:
- Timber | £11
- Paint | £18 (there’s lots left over for some more fun projects)
- Screws & Hinges | £3
- Wood filler & Sandpaper | £1
Total: £33 (+ chairs which were £10 each)
With us all spending more time at home than ever, it’s important to make the most out of the space you have and I can’t wait to spend more time relaxing on our finished balcony!
Do you have any fun projects planned for this summer? Have your home improvement priorities changed now that you’re spending more time at home? Do you have somewhere to relax outside and enjoy the summer sunshine?

Maaike says
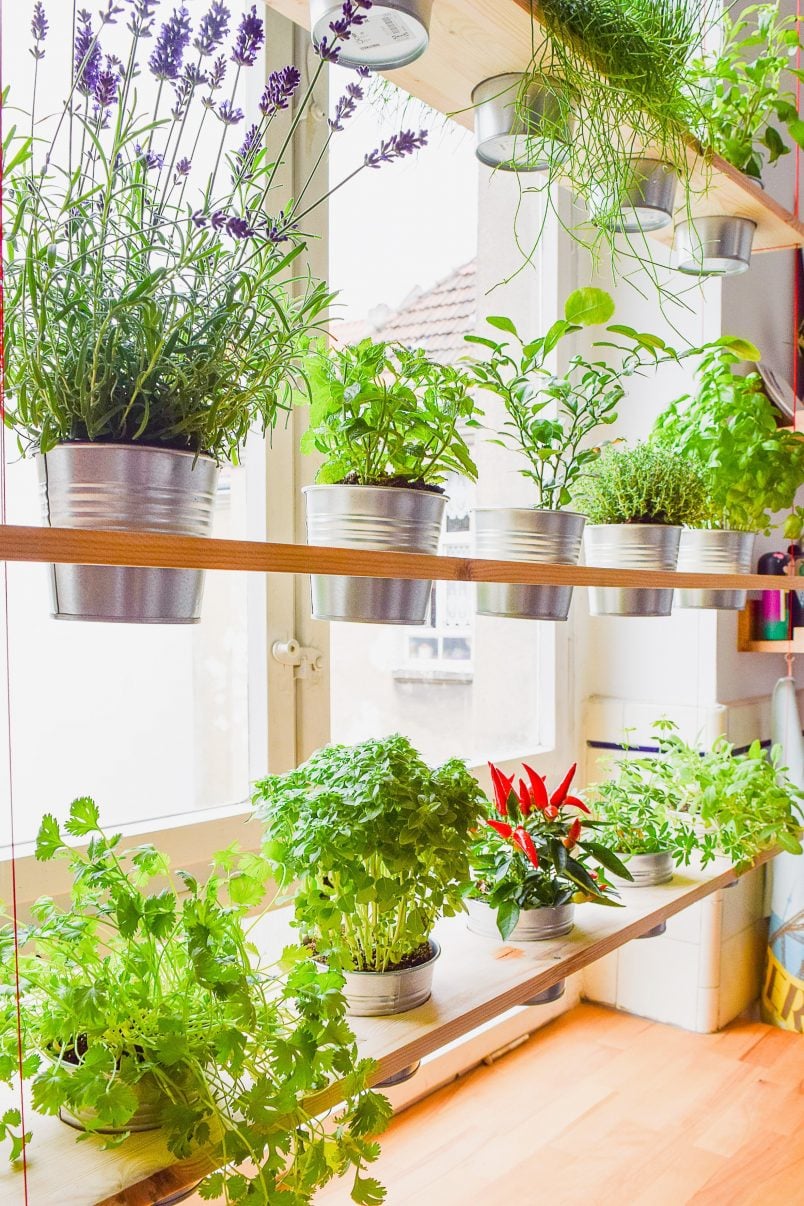
Looks really cute Christine! But could you please do a post on how you’re keeping those gorgeous plants and flowers alive? Mine all die… I’m so bad with plants and I’d love a colourful balcony… ;-)
Christine says
Thank you so much, Maaike! I’m really not the right person to talk about keeping plants alive. It was definitely easier to keep plants alive in the garden than on the balcony. Basically, I water them every day (sometimes twice a day) and give them an occasional feed. The one thing I do (that’s probably completely weird) it to give my plants names. Not necessarily all of the little ones but the bigger ones all have a name. That way they’re kind of my friends and I don’t forget to water them. I know it’s weird, but it works for me! :)
Cx
Maaike says
That is very unusual advice!! :-D I love it!! I’m going to try it as well!
Christine says
Haha, just don’t tell anyone that’s what you do – people look at me like I’ve lost my mind when I tell them! ;)
Cx
Maaike says
Hi Christine, I just wanted to give you an update. I think it works! They are all still alive! :) I did have an awkward conversation with my partner when he told me he loved the plant with the orange flowers, to which I replied: “You mean Christine?” (yes, I named one after you of course) He looked very confused! ;-D
Christine says
Haha! I love it, Maaike! That’s the best thing I’ver heard all year! Fingers crossed you manage to keep “Christine” alive… ;)
Cx