If there’s one thing you can never have enough of, it’s storage!
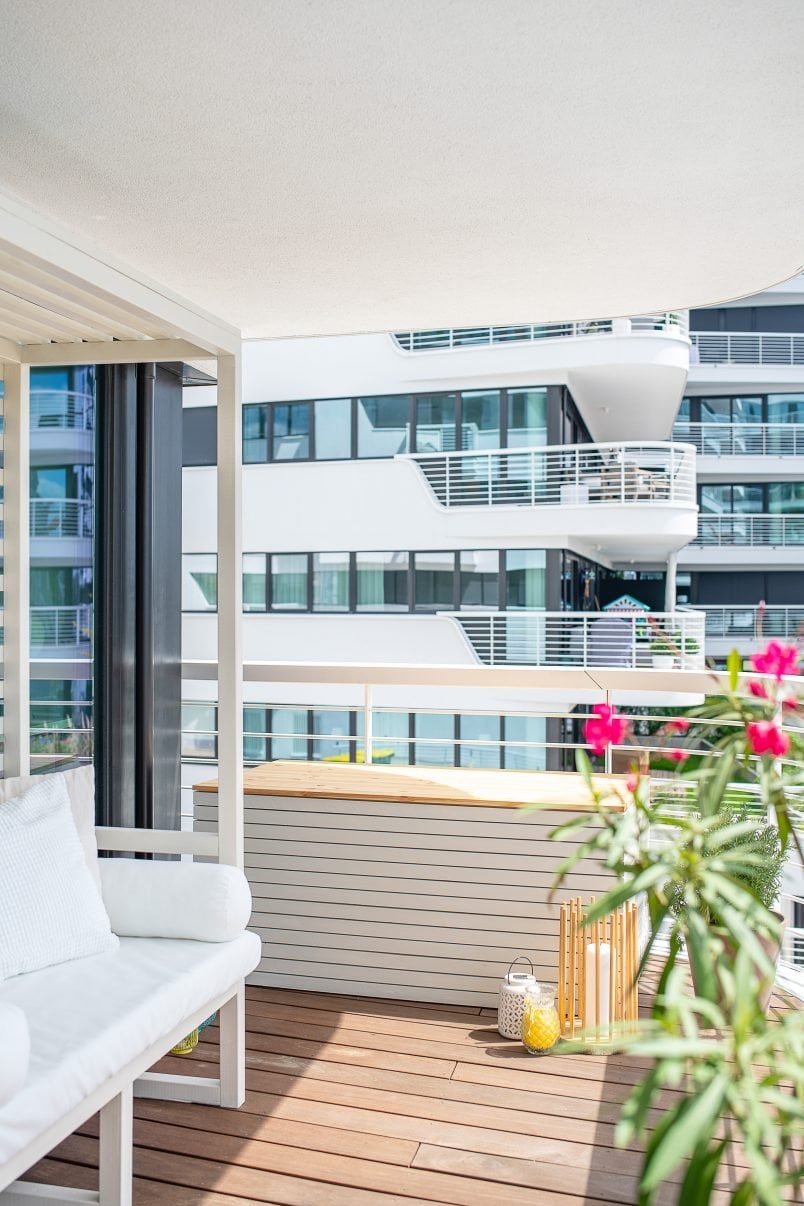
No matter how minimal you are, there are always things you want to keep and there’s definitely always clutter to hide. Our new DIY outdoor storage box is the perfect place to store all of our garden cushions and outdoor accessories.
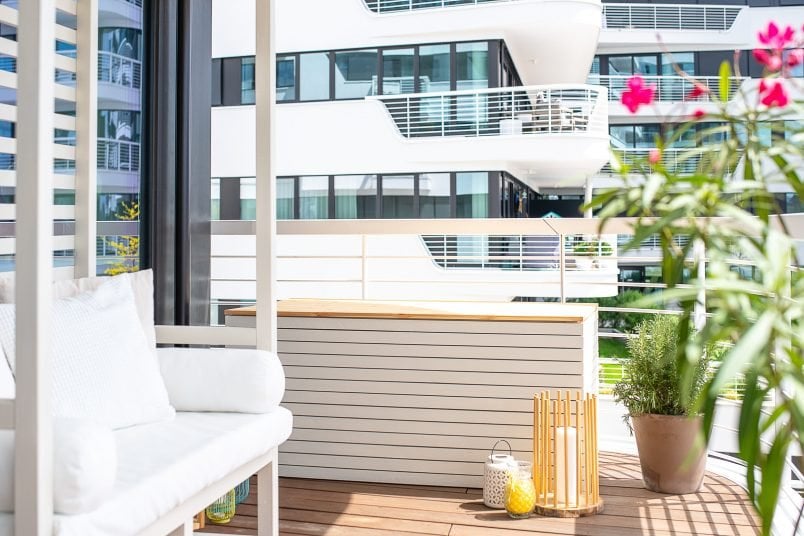
Until now, we’ve had all of our garden supplies dotted around the apartment crammed into random cupboard spaces and even under the bed but now we can neatly store everything in this super practical and pretty wooden outdoor storage box!
I know that you might find building your own furniture daunting, but it’s really only like assembling flat-pack furniture. The only difference is that you have to cut the timber to the right sizes first.
So, how do you build an outdoor storage box? Here’s the step-by-step tutorial!
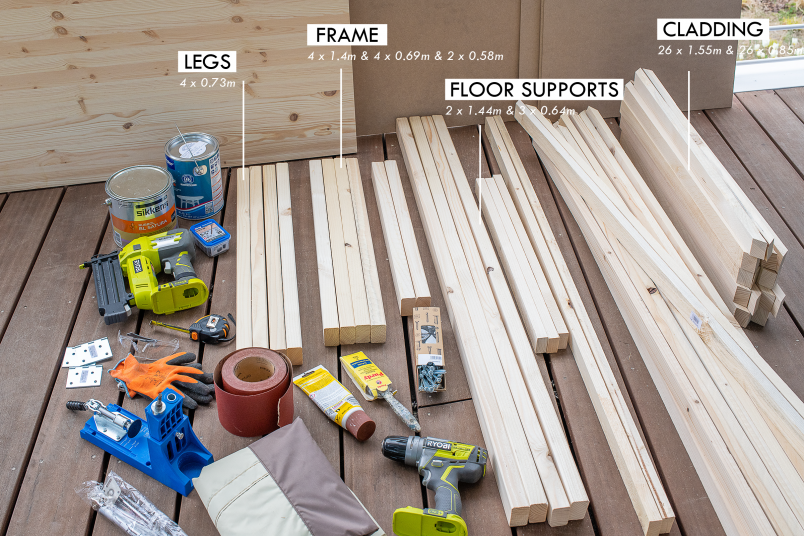
This is what you will need to build a DIY wooden outdoor storage box:
This post contains affiliate links. We only recommend products we love and think that you will, too! Read our full disclaimer here.
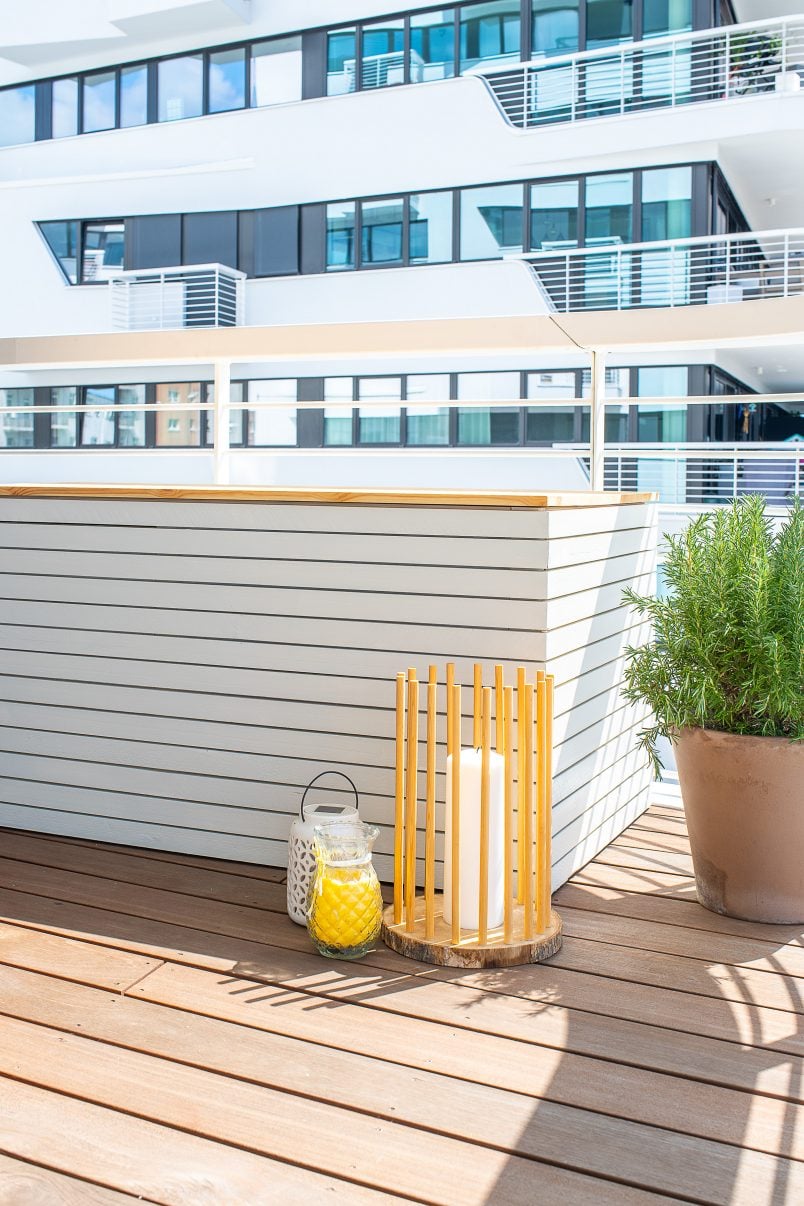
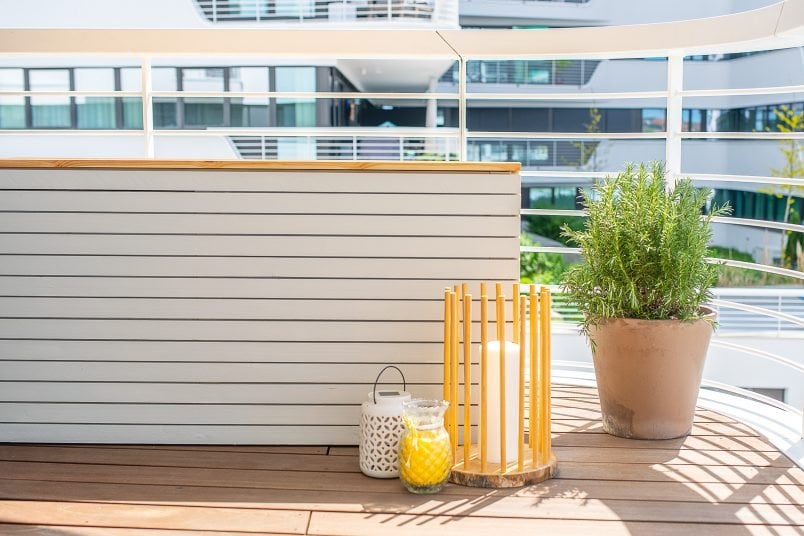
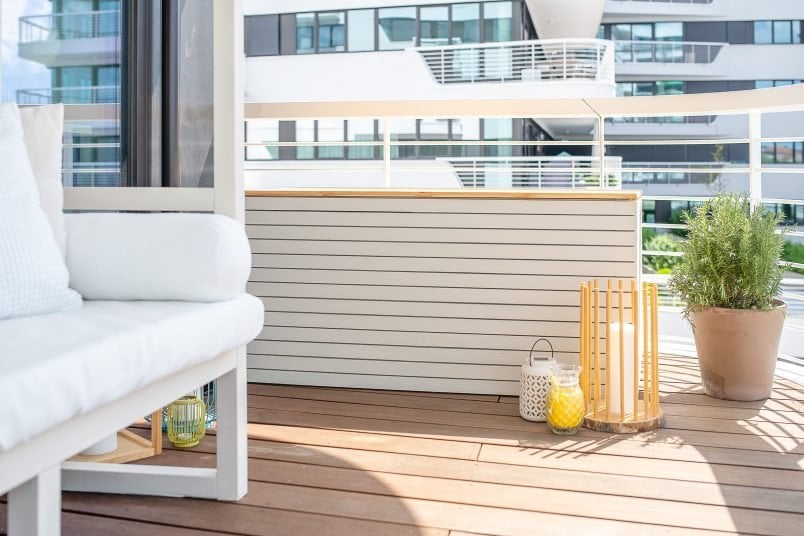
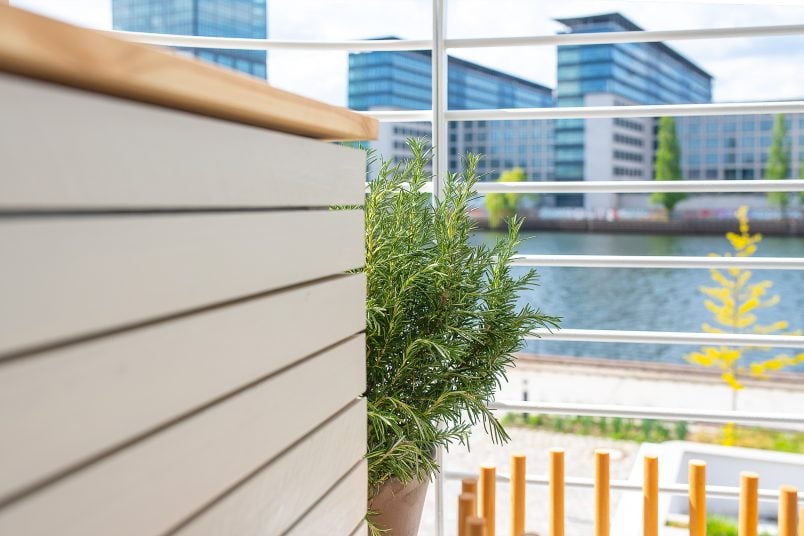
This storage box is really large as we wanted enough space to easily be able to store all of our outdoor cushions, blankets and other bits and pieces. Overall, the box is 155cm x 85cm x 75cm but, as always, you can adjust the measurements to suit your space!
TOOLS
- Mitre saw
- Cordless drill & drill bit
- Kreg Jig HD (this is our newest tool and we already love it!)
- Nailer
- Paintbrush
- Optional: Palm sander or orbital sander & sanding disks (optional)

SUPPLIES
- Timber battens, solid timber top & a couple of sheets of MDF (you can see the exact measurements we used below) – you should use wood that’s suitable for outdoor use! (more later in the post)
- Wood glue
- Sandpaper
- Wood filler
- Wood chisel & hammer
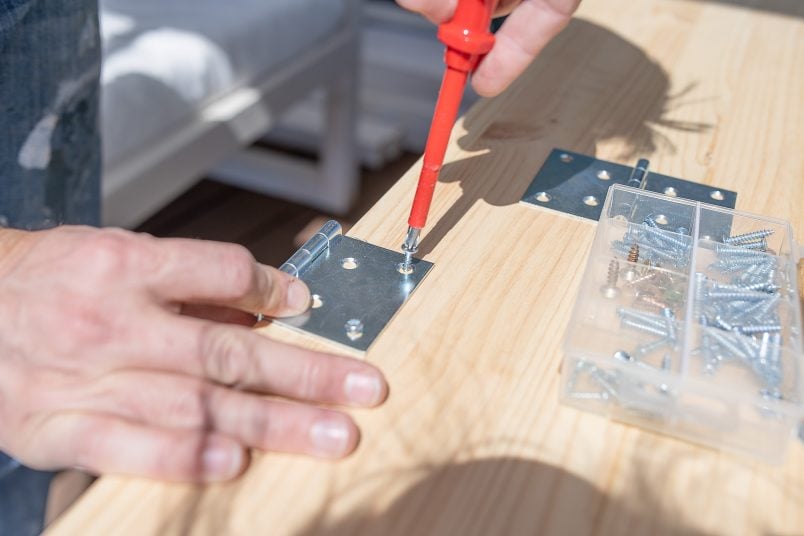
- Screws (small ones for the hinges)
- Kreg Jig Screws – 64mm for the frame (suitable for outdoors)
- Lots of nails (suitable for outdoor)
- Hinges
- Waterproof storage bag
- Hydraulic hinges
- Primer & Paint
This is how to build an outdoor storage box:
STEP 1
Cut & Sand the Timber
Start by cutting the timber to the lengths you’ll need.
For this project, you’ll only need two sizes of timber – thicker pieces (54 x 34mm) for the frame and thinner pieces (24 x 48mm) for the cladding and floor support.
Along with the slats for the frame and cladding, you’ll also need a couple of sheets of MDF and a solid piece of timber for the top of the storage box. We had these cut to size at the DIY store we bought them at.
These are the lengths and sizes you’ll need:
Timber Battens 54 x 34mm
Long Side of Storage Box
4 x 140cm
Short Side of Storage Box
4 x 69cm
Legs of Storage Box
4 x 73cm
Central Vertical Support of Box
2 x 58cm
Timber Battens 24 x 48mm
Long Side of Storage Box – each end cut at a 45° angle
26 x 155cm
Short Side of Storage Box – each end cut at a 45° angle
26 x 85cm
Bottom Frame Long Side
2 x 144cm
Bottom Frame Short Side
2 x 64cm
MDF 3mm
Inner Sides of the Box
4 x 67cm x 58cm
2 x 72cm x 58cm
MDF 5mm
Base of the Box
1 x 143 x 73cm
Pine 18mm
Lid of the Box
1 x 155 x 85cm
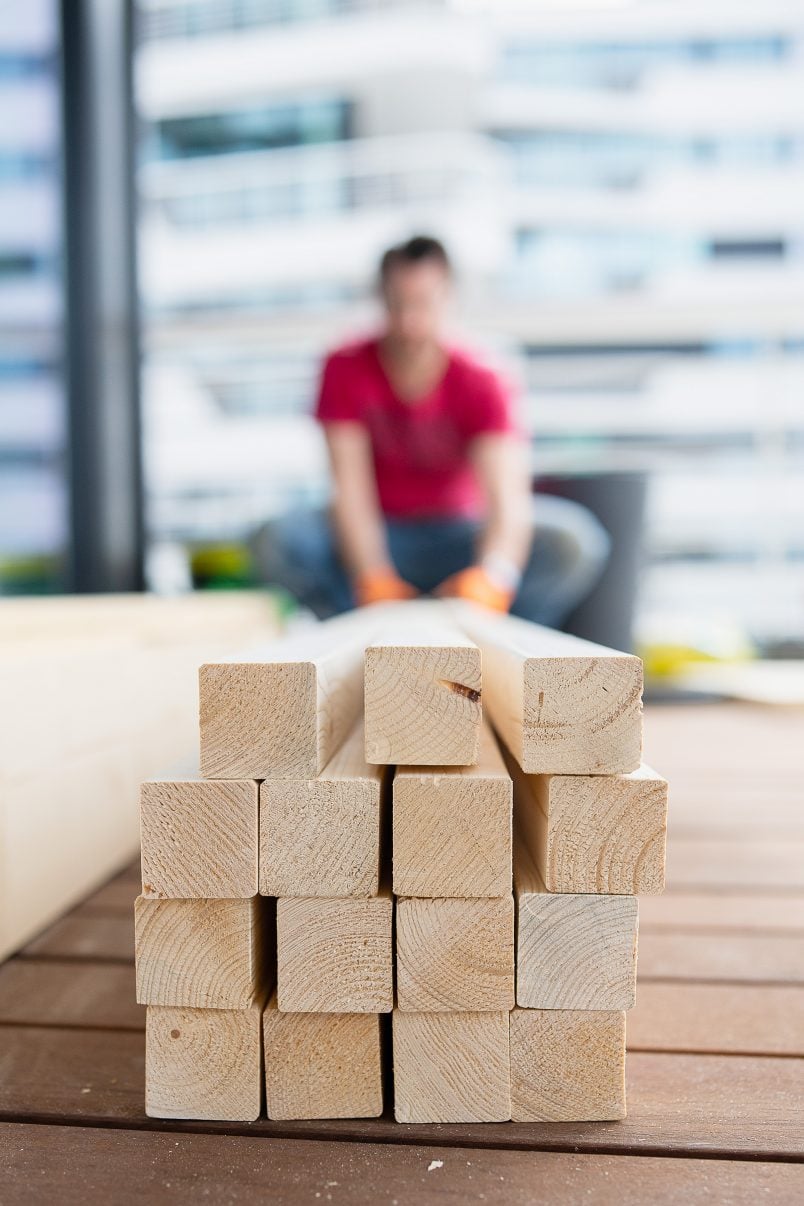
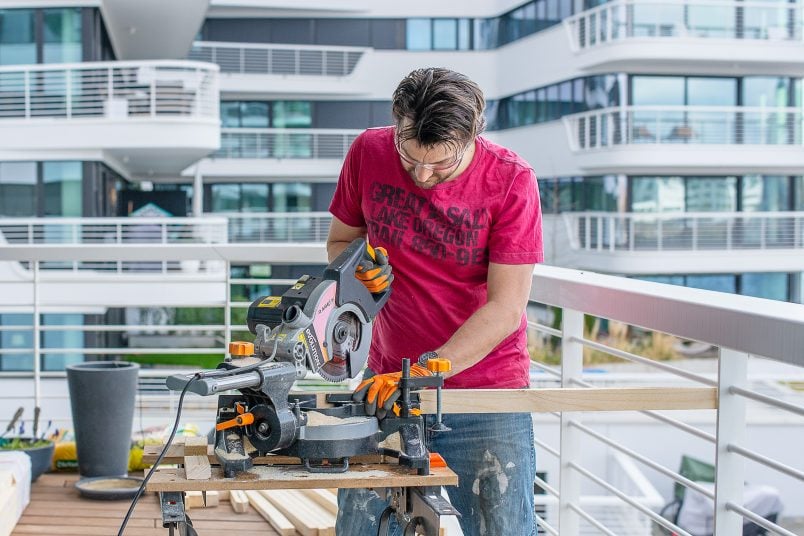
Measure and mark where you have to cut and then just chop the timber into pieces with your mitre saw.
Always check your measurements as you go. Sometimes the thickness of the timber will vary so it’s important to double-check that everything fits before you cut dozens of slats that end up too short (trust me, I’m talking from experience!).
All of the cuts for this box are straight forward but, as the whole box consists of 70 individual pieces of timber (plus the sheets), there is a lot of cutting involved which is why we recommend using a mitre saw for this project. It’s by far our most used power tool and will make it a lot quicker and easier to cut all of the pieces you need to build this DIY wooden outdoor storage box.
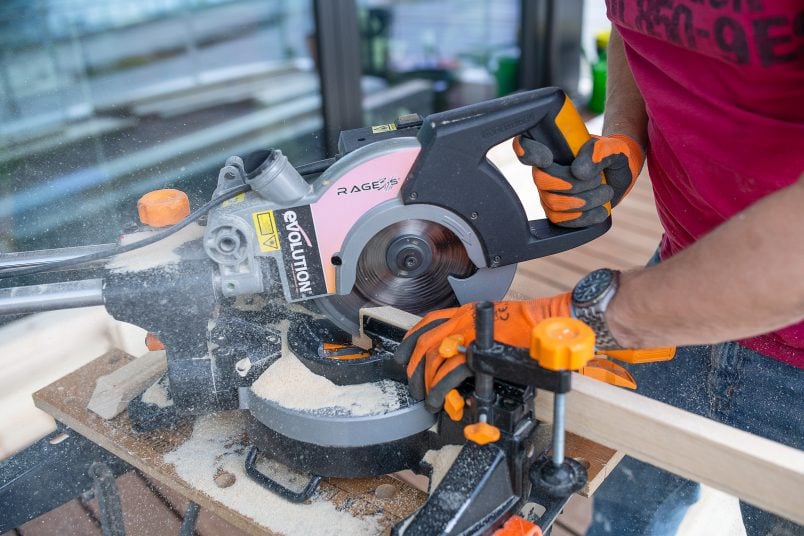
All cuts are straight, except for the pieces of cladding where every end is cut at a 45° angle. Ultimately, this is purely a design choice as it means that no ends of the slats will be visible when the box is assembled and it’ll look like one continuous line of cladding around the whole box.
Having mitred corners gives the whole box a much more modern and high-quality feel.
Once you’ve cut all of the timber, give everything a thorough sand with some 120 grit sandpaper.
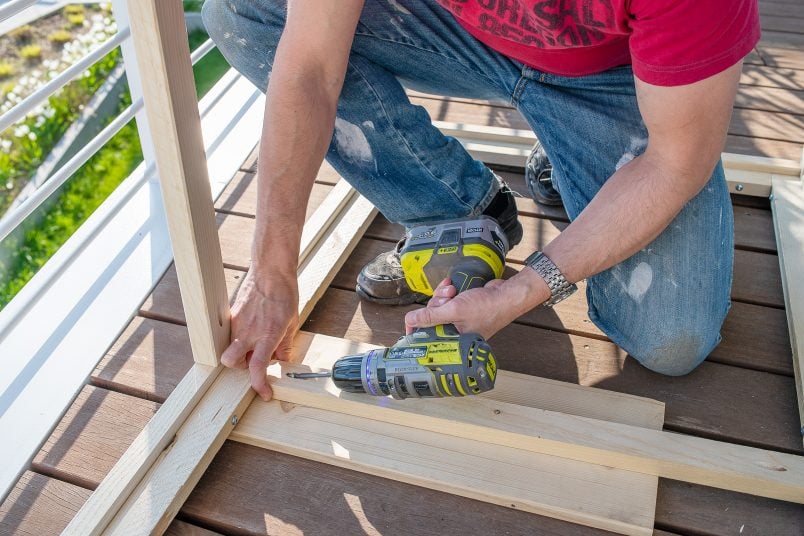
STEP 2
Drill The Pocket Holes
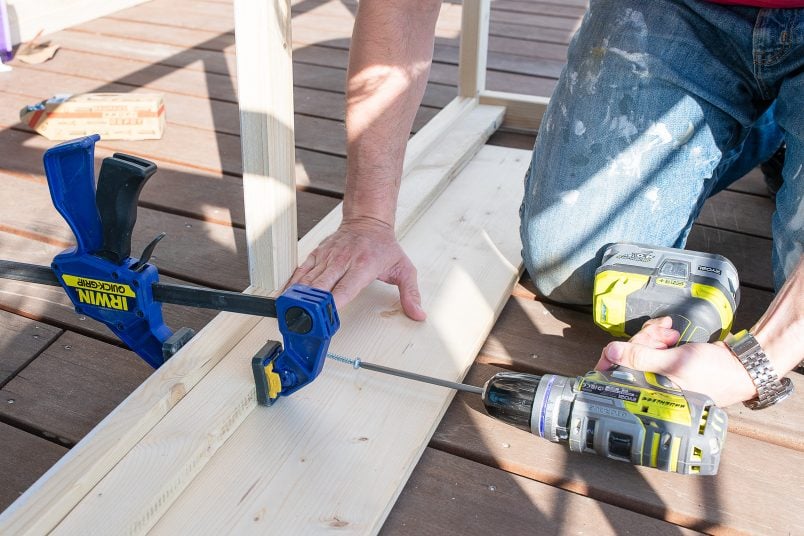
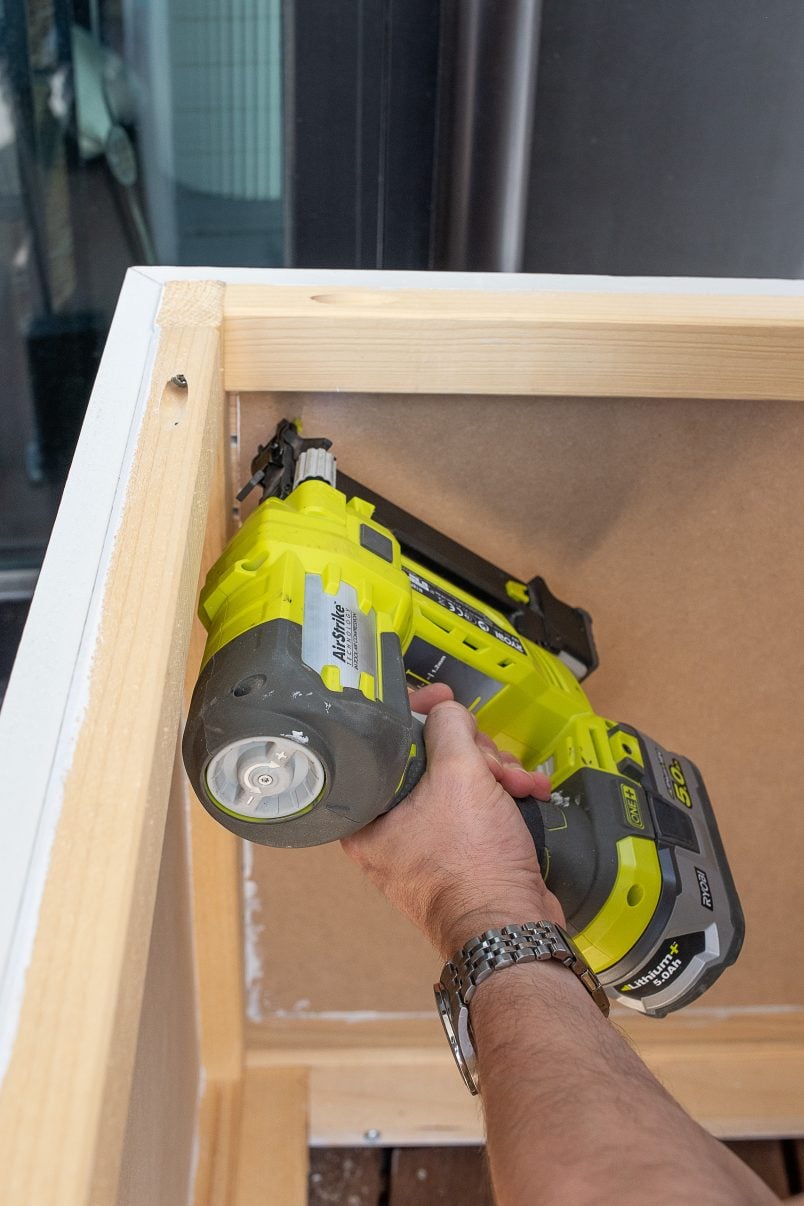
Once you’ve finished cutting all of the timber pieces to the right size, it’s time to add the pocket holes!
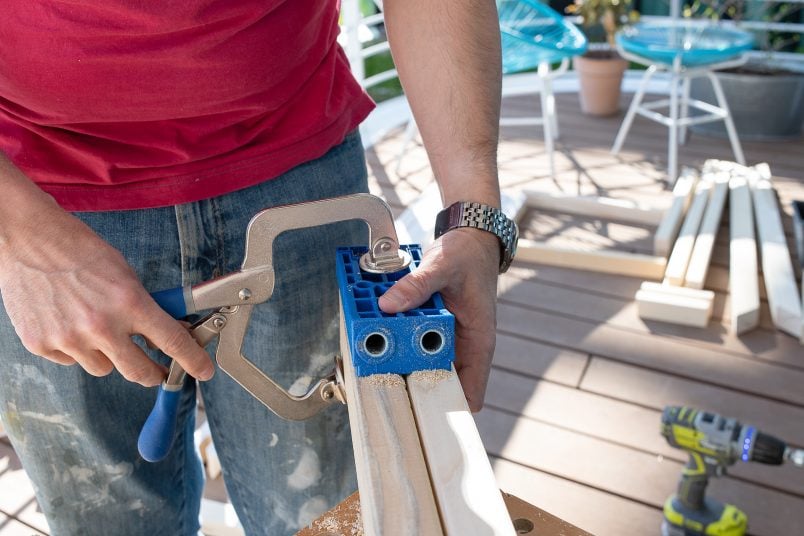
We used our amazing new Kreg Jig HD to make the holes which we bought to build this box and our new garden furniture (more on that soon!). We’d never used a Kreg Jig before so figured we’d have a bit of a learning curve to be able to get things just right but it turned out to be much easier than we expected.
Basically, you attach the jig to the piece of timber, drill through the guide holes, remove the jig and screw the two pieces of timber together. Yep, that really is all that’s to it!
Because we’re using really thick timber for all of our outdoor furniture, we used the Kreg Jig HD which allows you to screw together timber that’s over 38 mm thick.
For each piece of timber that you’re attaching to another, you’ll have to drill at least one (better two) pocket holes and use one/two screws to attach the pieces together.
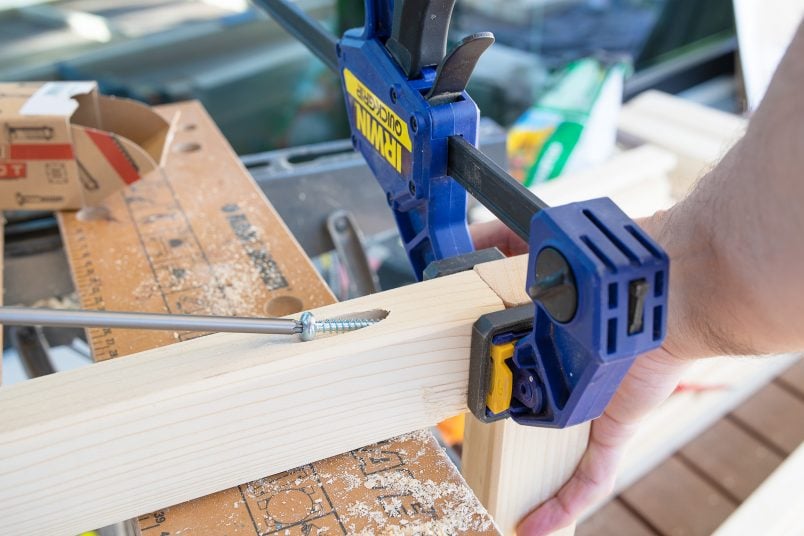
We’ll be sharing a detailed tutorial on how to use a Kreg Jig as soon as we have a bit more practice using it. One thing you always have to remember is where and in what direction to drill the holes. You always have to drill so that you screw in the direction of the longer piece of remaining timber (not towards the top of the joint where the connection would be weaker).
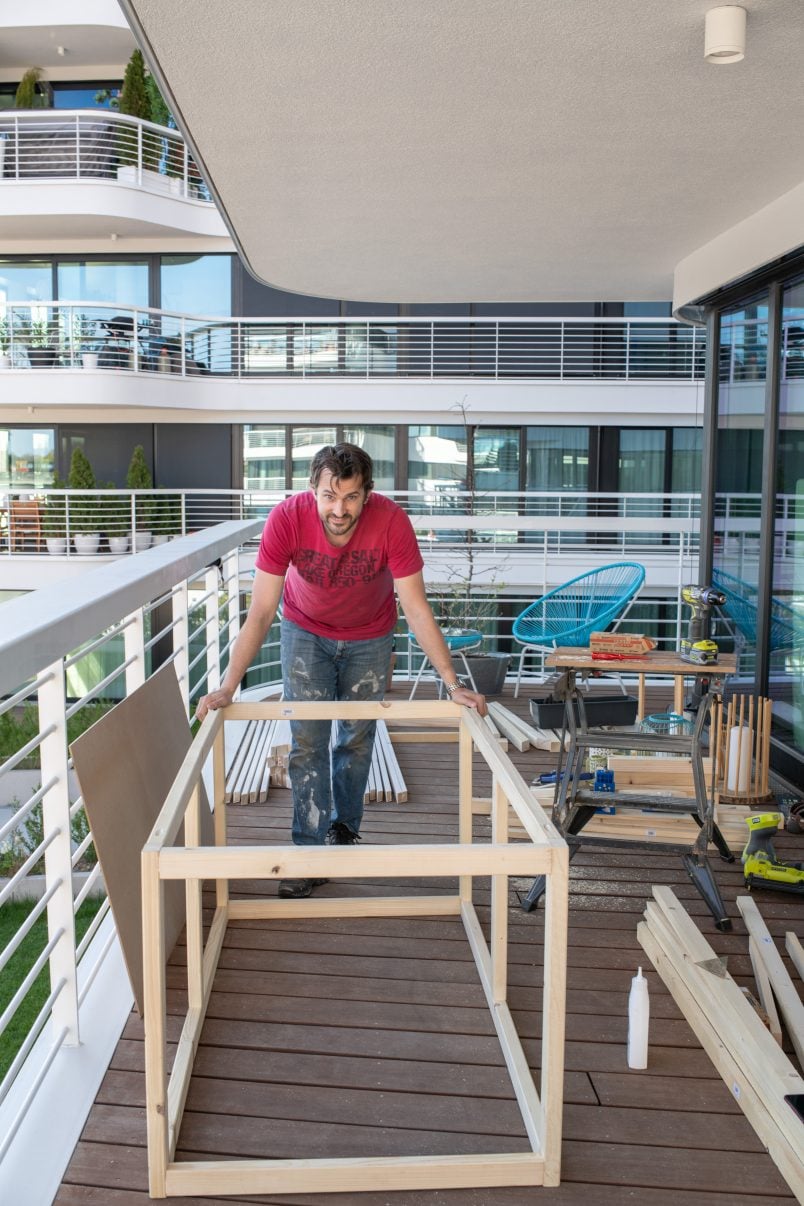
STEP 3
Assemble The Frame
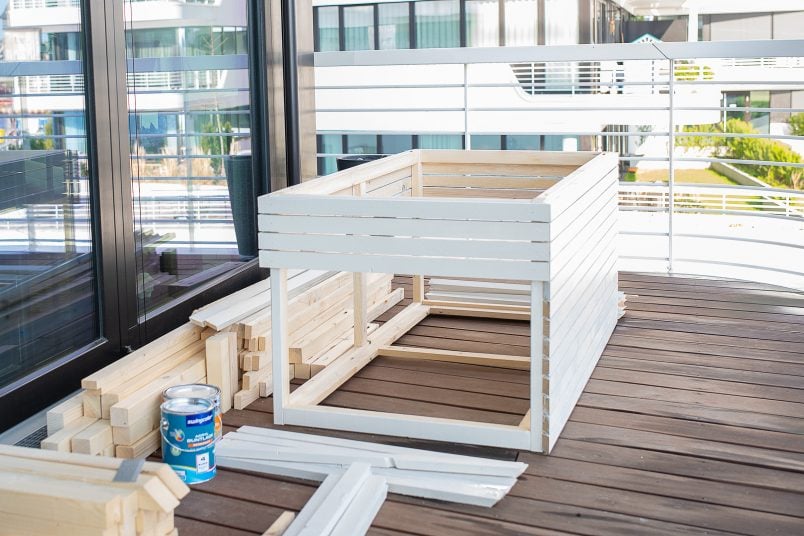
Most of the hard work is already done! All that’s left to do is a bit of assembly and a bit of painting.
Really, it’s just like a big jigsaw puzzle!
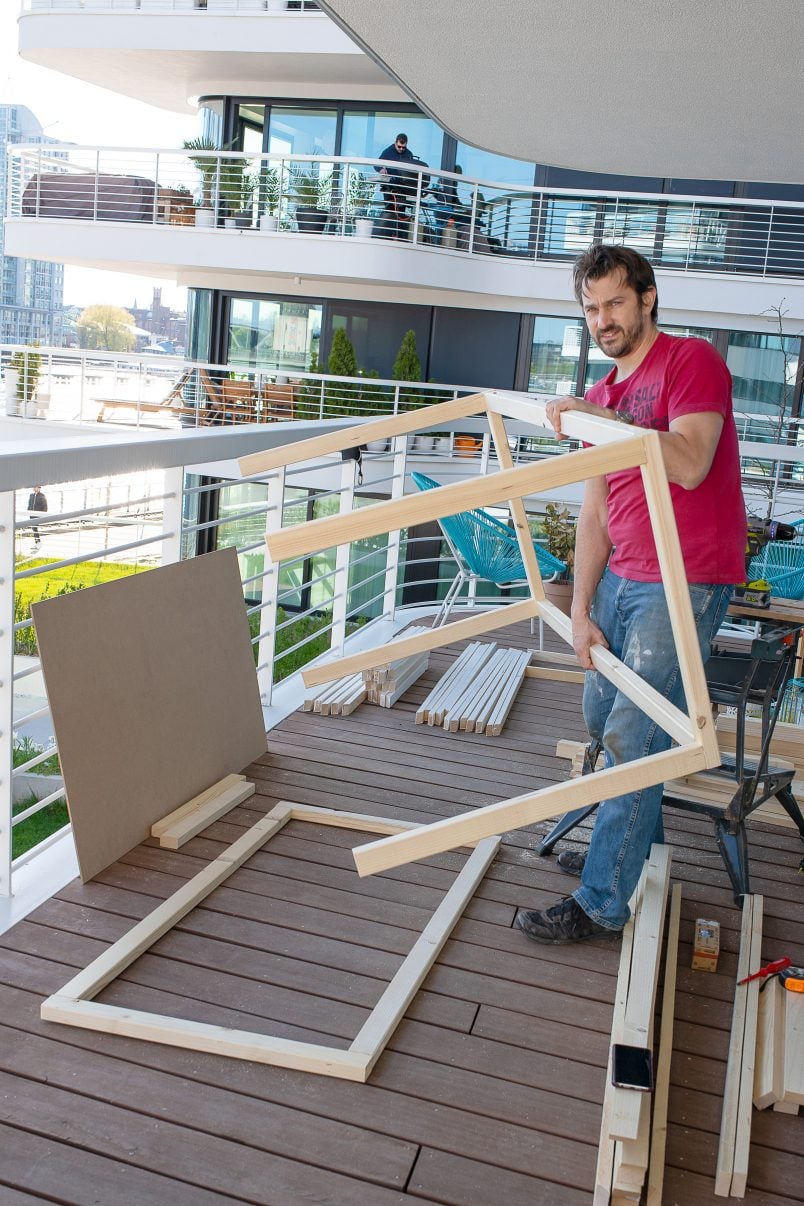
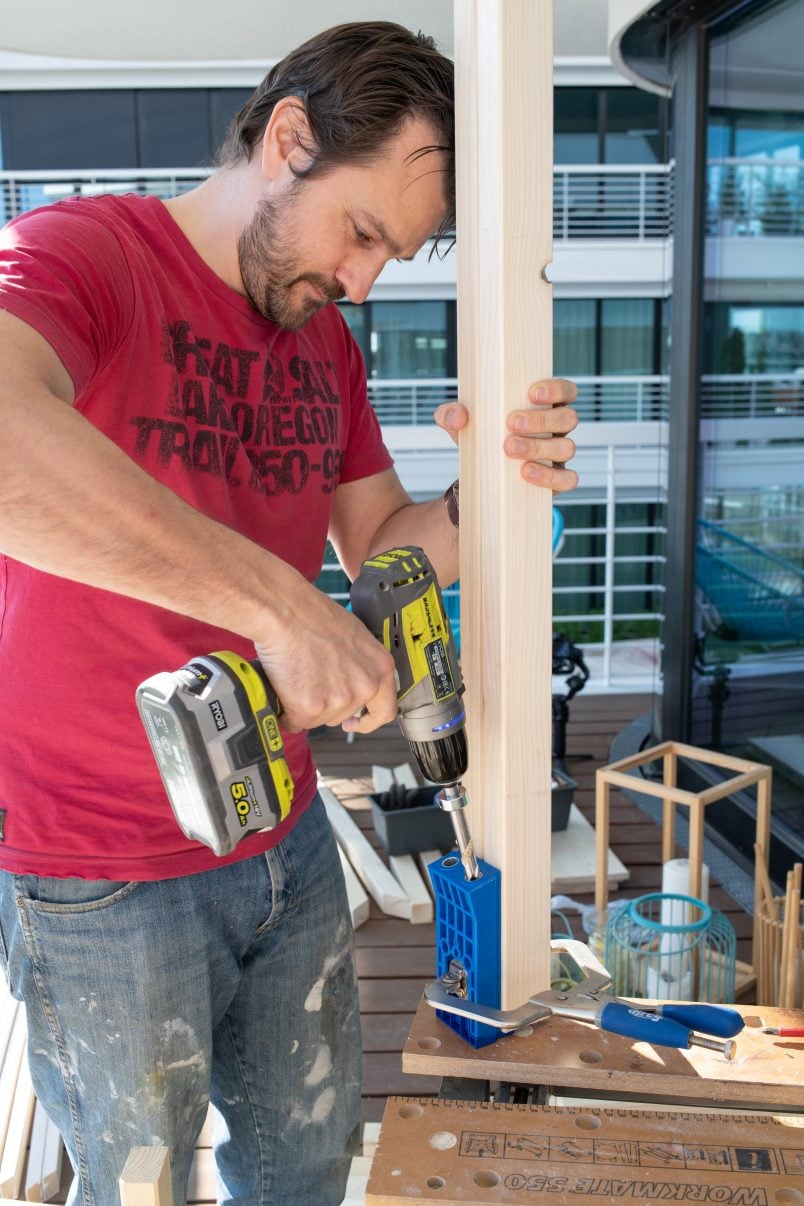
Lay out the pieces of timber you’ll need for the two front sides of the box.
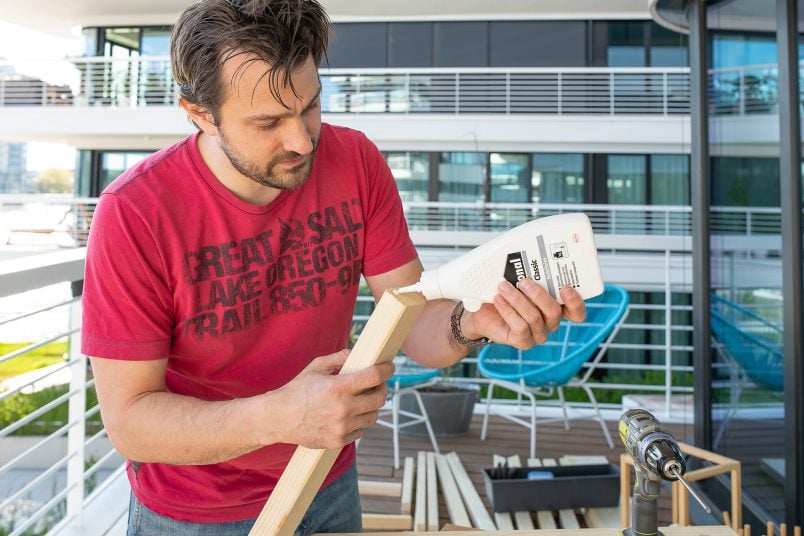
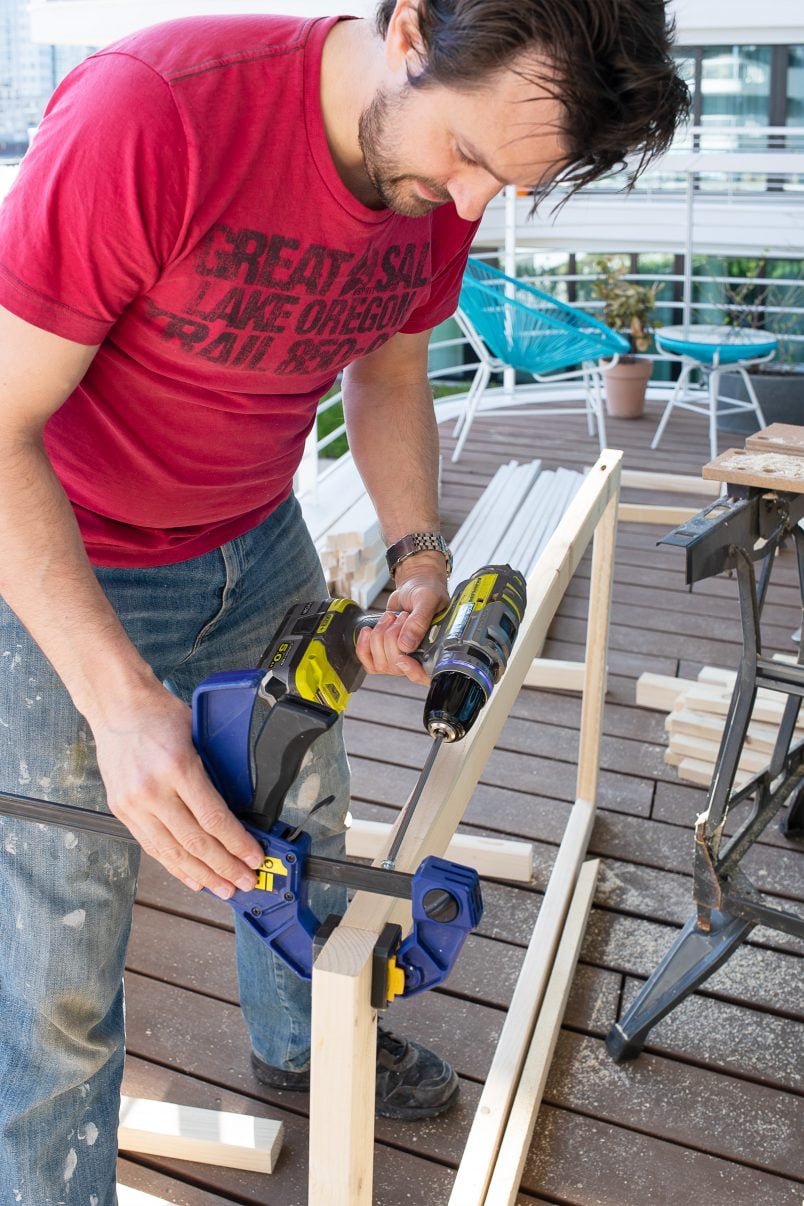
Then, glue and screw them together working your way from one connection to the next. Once you’ve assembled the first frame, do exactly the same for the second.
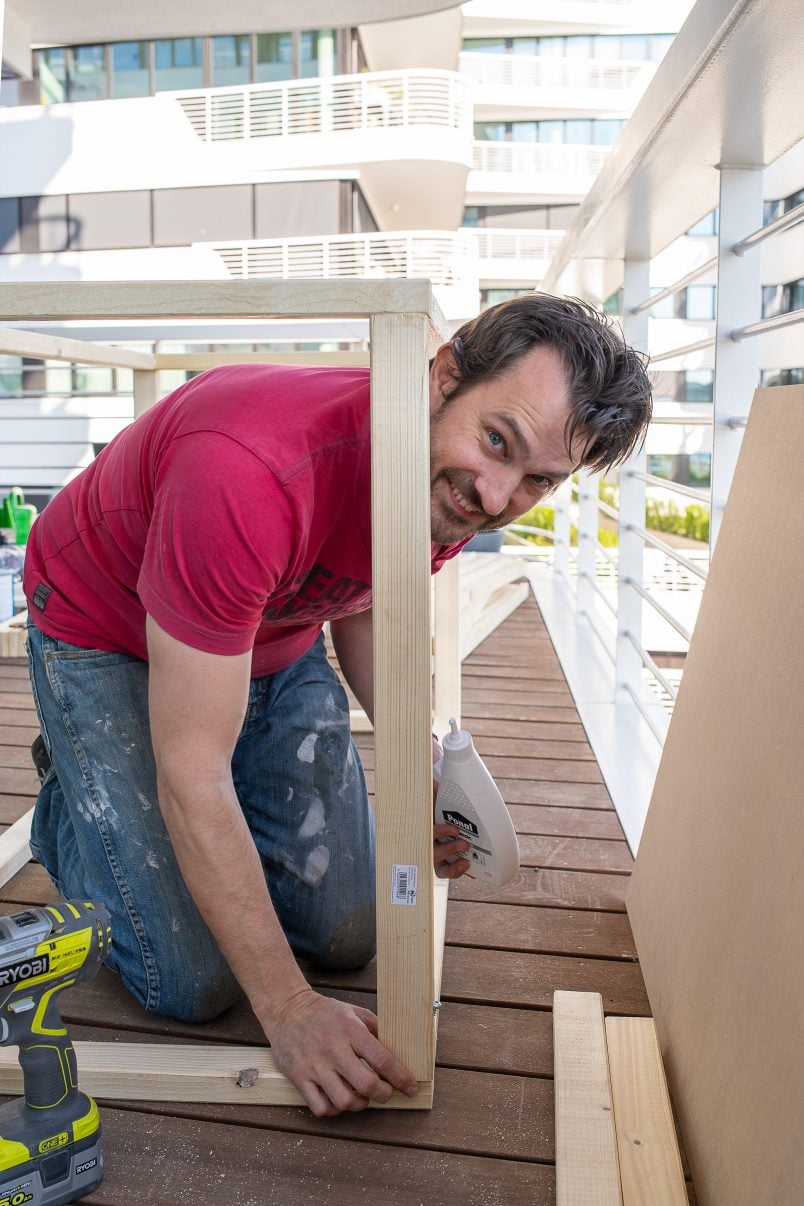
We figured that this would be a perfect first project to try our new Kreg Jig HD on, as all of these connections will be hidden under the cladding, so you don’t have to worry if something isn’t as pretty as you’d like or if you accidentally drill a hole in the wrong position.
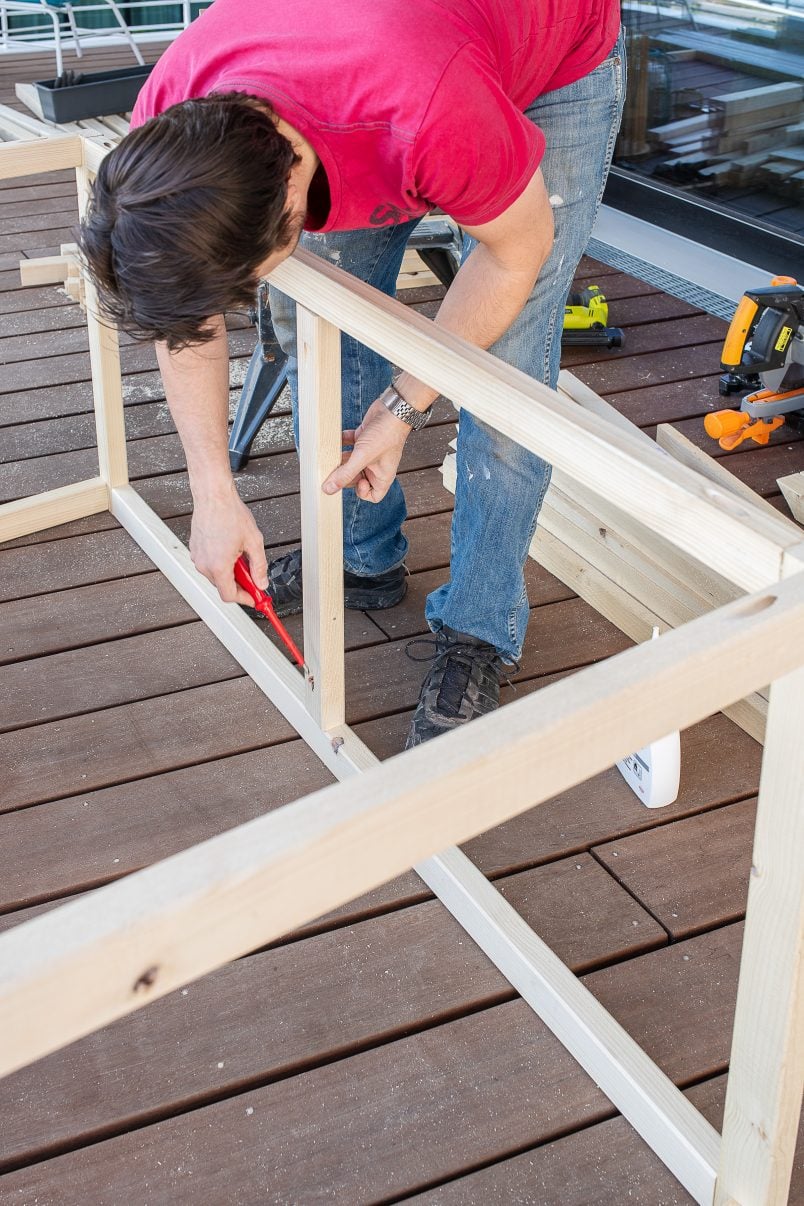
Next, attach the pieces of timber that will be the frame for the base of the box. Screw the two longer pieces to the long side of the box, two of the shorter pieces to the short ends and the third short piece to the middle of the base.
We raised the floor slightly off the ground by placing an off-cut of timber underneath the frame pieces before attaching them to the rest of the frame.
This is optional but raising it up off the floor ever so slightly will reduce any chances of moisture causing problems.
STEP 4
Get Painting
Before you do any more box assembly, it’s a good idea to give everything a coat of primer and a couple of coats of paint.
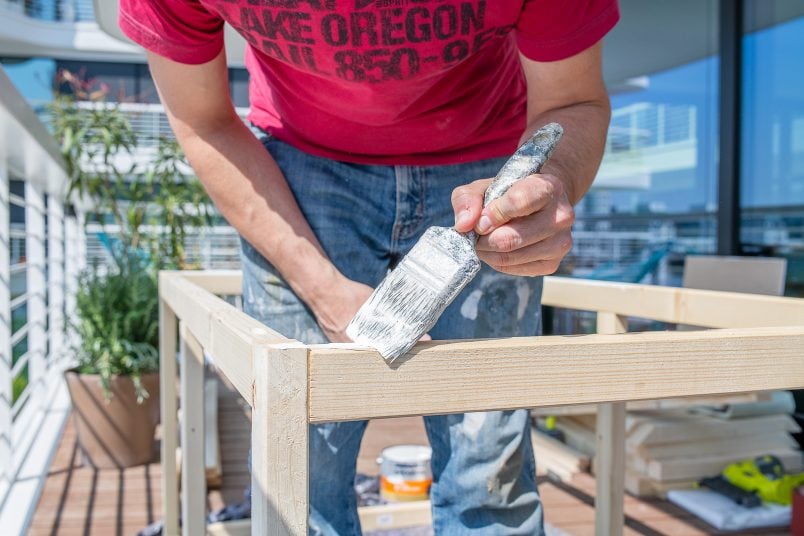
You could do this step later on, but painting everything now will make it much easier to reach every part of the timber. The slats are really close to each other and, although it is possible to wiggle your paintbrush into the gaps, we just find it quicker and easier to paint everything before attaching it.
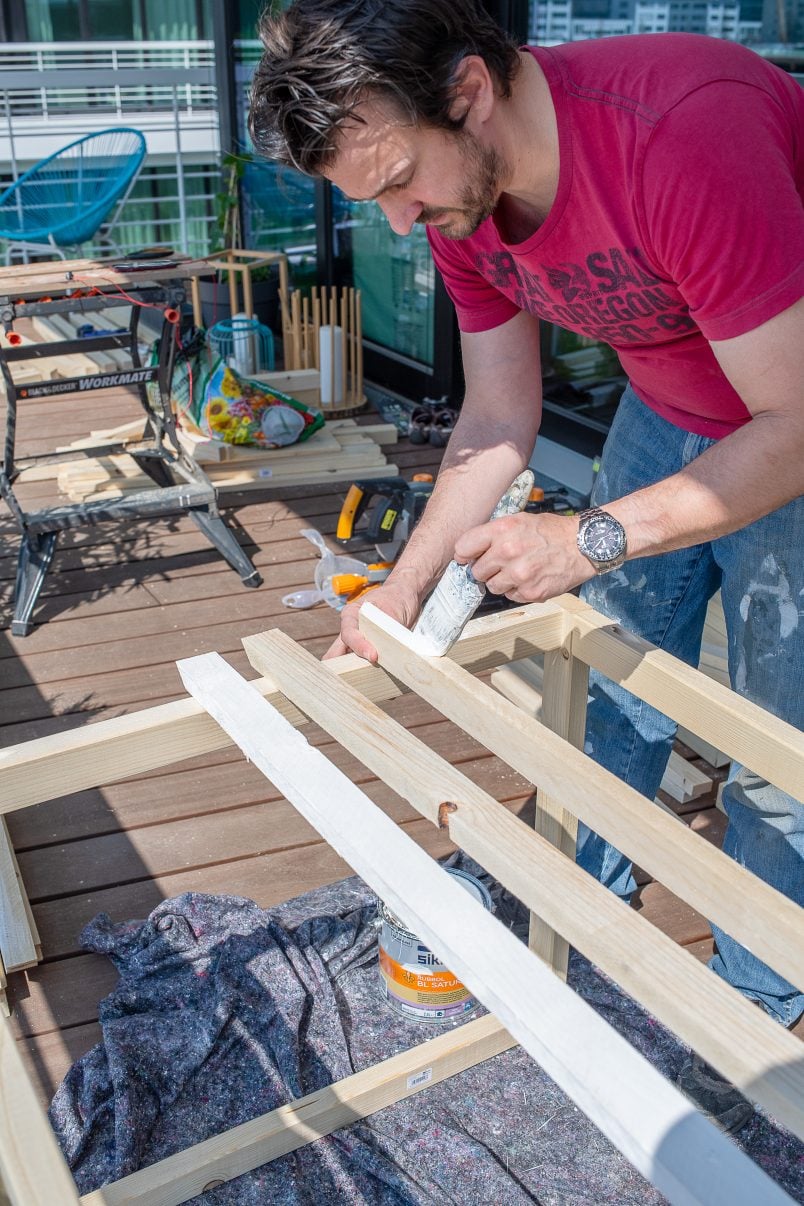
Start by giving everything a coat of primer. Make sure to use one that’s suitable for outdoor use. These kinds of primers usually have a chemical in them that will help protect against algae and fungus.
We used the paint we had leftover from restoring our timber windows as it’s perfect for outdoor use (you’re actually not even allowed to use it indoors).
Really good paints are expensive but they are worth investing in, especially if you’re painting something like windows where the paint has to be extra durable, contain additional chemicals to protect the timber, have a high elasticity (to stop it cracking), be moisture regulating, etc.
Tip: You should always use wood that’s suitable for outdoor use for these kinds of projects, but we couldn’t get hold of everything we wanted and used some indoor woods, too. This is another reason that we painted everything with a super high-quality paint. Our box is also under a roof and, whilst it will get wet, it’s not completely exposed to the elements.
We always follow the same tried and tested process when painting any timber. Make sure everything is smooth and clean before applying a coat of primer. When it’s dry, give it a very light sand with some 220 grit sandpaper, then clean it and prime it again.
When the second coat of primer has dried, give it another light sand and clean before repeating the same steps with your chosen paint finish until you have the coverage you’re happy with.
STEP 5
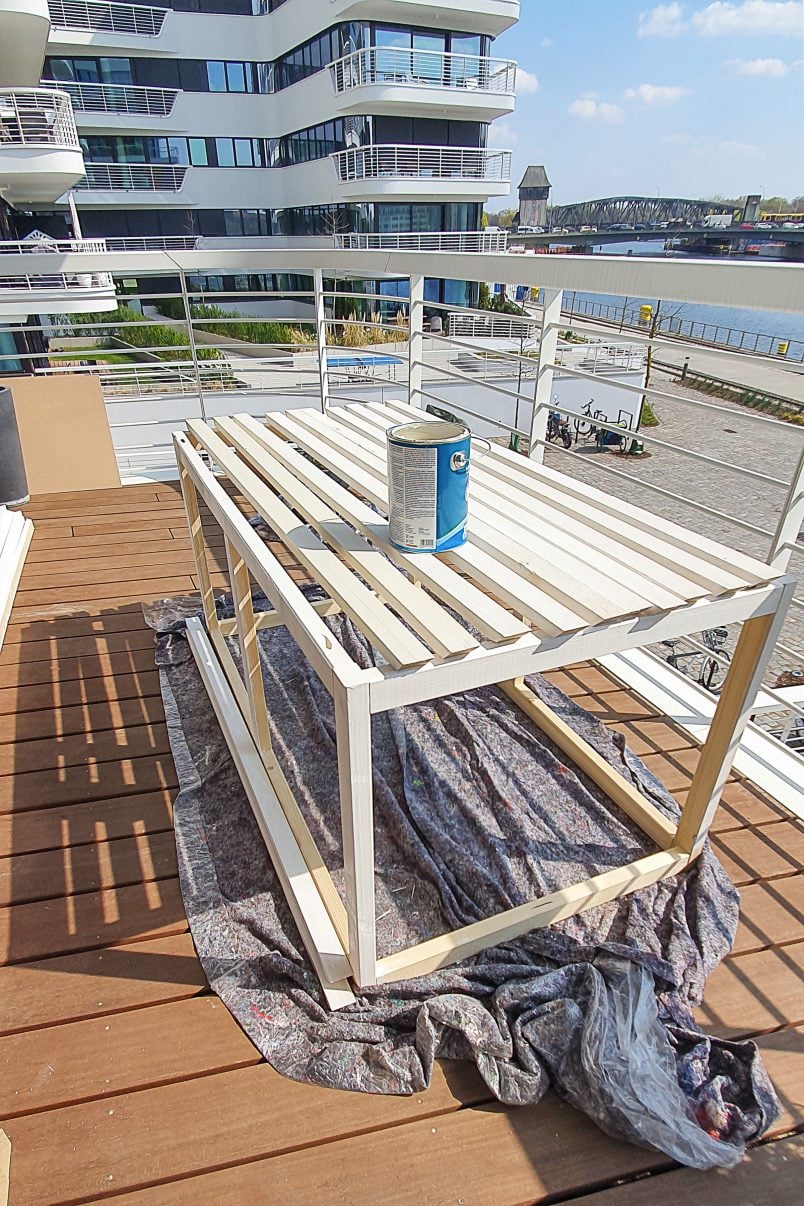
Add The Outer Slats
Now that you’ve built the frame and done all of the painting, it’s time to finish assembling your DIY outdoor storage box!
This step may look like it’ll be a lot of work but it’s actually the quickest step of the whole build!
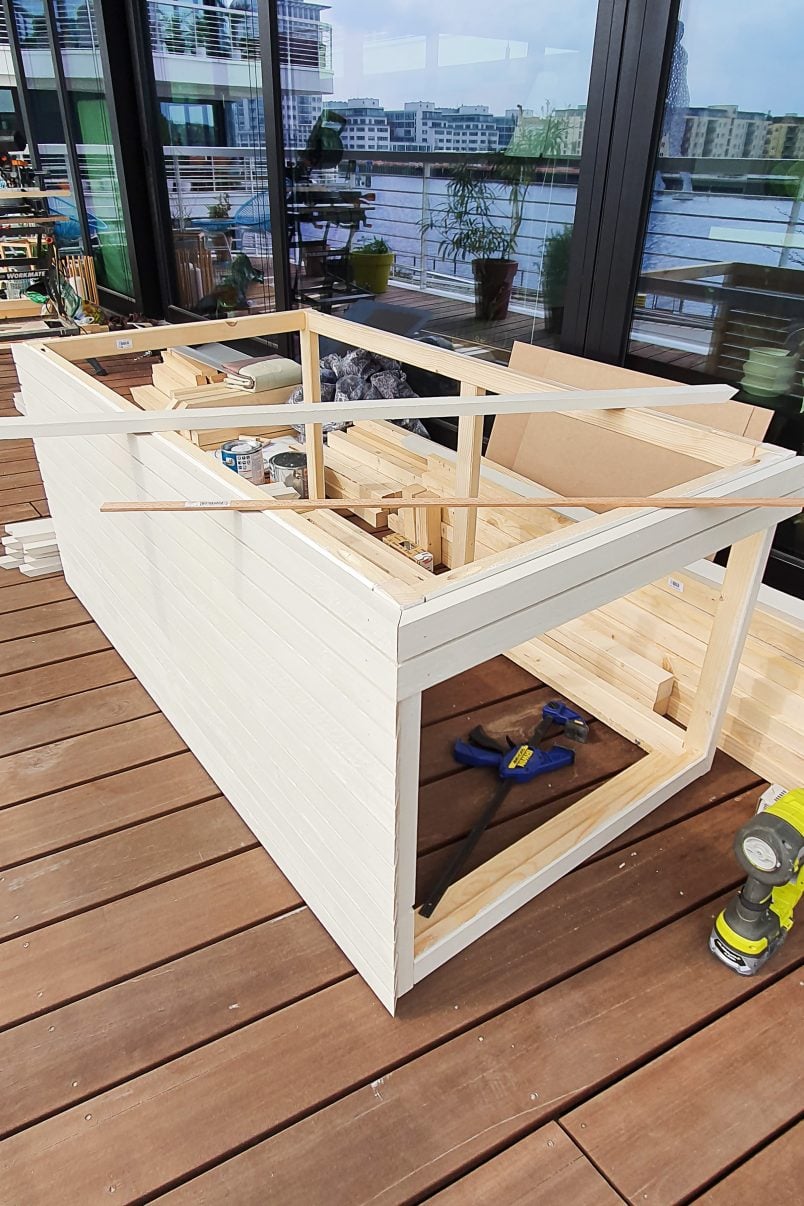
Place the first row of slats around the edge of the base of your assembled frame and nail it in place with the nailer. This is the most important layer, so really make sure that everything is perfectly level and straight so that you don’t have any problems later on.

We absolutely love our nailer and use it for countless projects but it is an expensive tool that, if you’re only planning on using it for this project, you might want to hire instead of buying. Having said that, you’ll probably find that you do use it way more than you expect if you have one!
Alternatively, you could, of course, nail the battens by hand.
After attaching the first layer, place an offcut of timber (or anything else that’s 5mm thick) below the first layer of timber and add the next layer of cladding. Repeat these steps of layering and nailing the timber battens to the frame until you’ve reached the bottom.
STEP 6
Add The Inner Sides & Floor
Now that your DIY outdoor storage box is actually starting to look like a storage box, you can add the finishing touches.
Glue and nail the boards to the inside of the box and do the same with the slightly thicker large board that will make up the floor of your outdoor storage box.
STEP 7
Attach The Lid
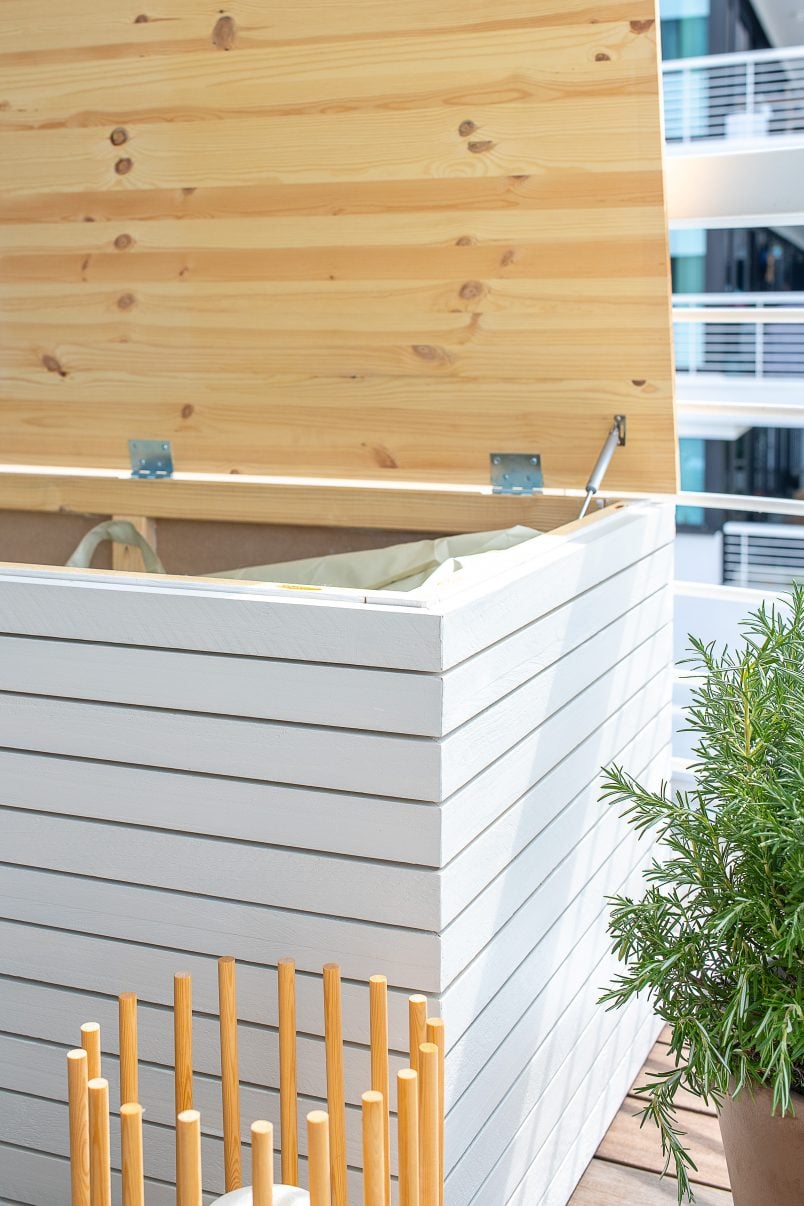
The last step is to attach the lid of the box.
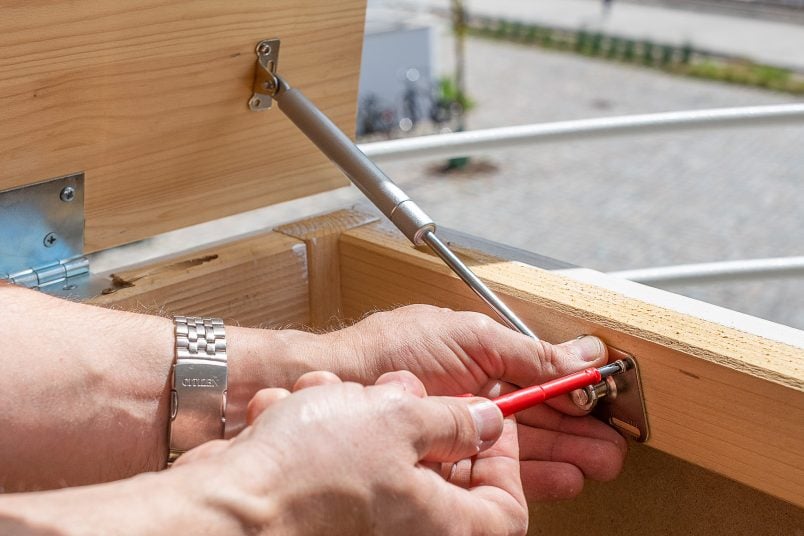
We wanted this box to be as easy to use as possible so, as well as attaching a few hinges along the back, we also added some hydraulic hinges to the sides to keep the lid open.
To make sure that the lid can completely close, you’ll have to remove a tiny bit of the frame to be able to lower the hinge slightly. Just use a chisel and a hammer to remove a bit of the frame.
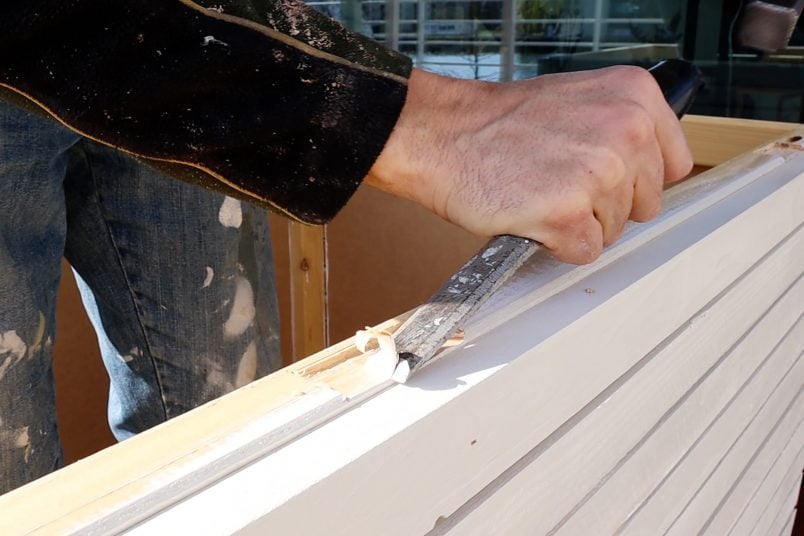
The easiest way to attach the lid is by attaching the hinges to the lid first and then screwing it to the box. It’s definitely a two person job. and is a bit fiddly. It took us two attempts to get the lid to line up and close perfectly. We’d also recommend placing the box on its side while working as this makes it easier to line everything up.
We also added a hydraulic hinge to each side of the box. This is completely optional but it makes it much easier to rummage around in the box when the lid automatically stays open.
STEP 8
Finishing Touches
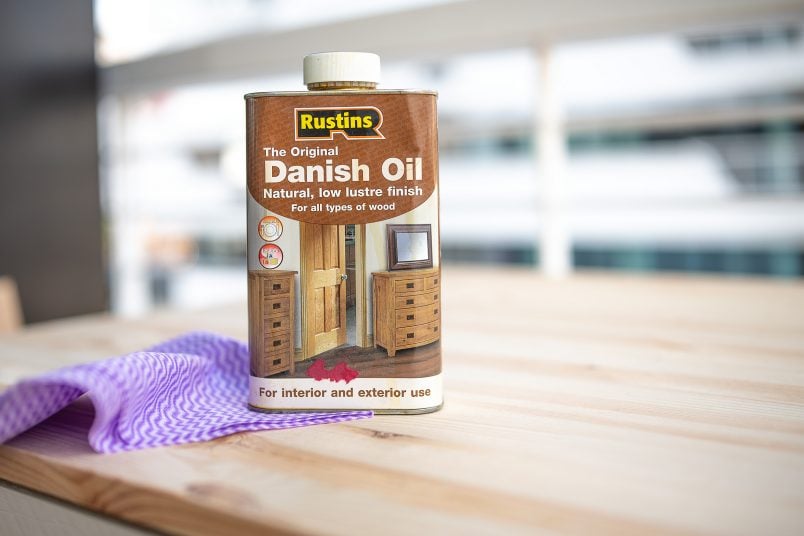
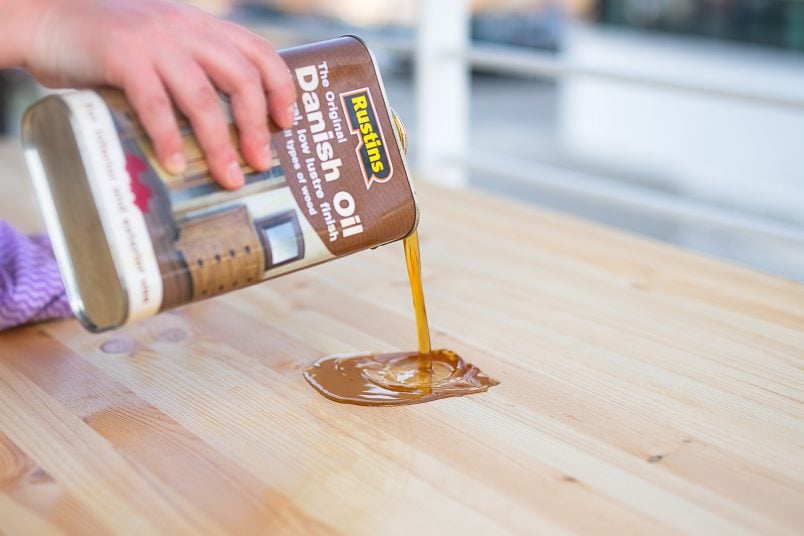
All that’s left to do is fill any imperfections and oil the top of the box. We had originally planned on painting the top of the outdoor storage box, too but the oiled timber adds a lovely contrast.
This box isn’t 100% watertight, so it’s a good idea to invest in a storage bag that is watertight. We bought this storage bag which is the perfect size for this outdoor storage box and all of our cushions fit in it nicely.
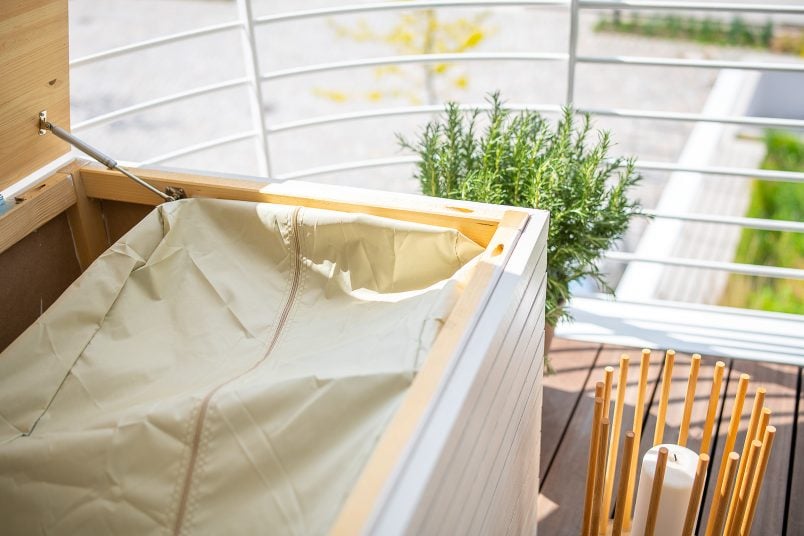
To stop it flopping around in the box, we used some velco to stick it to the sides and keep it in position.
STEP 9
Enjoy!
The best bit of any project is always being able to stand back and say “I built that!”.
Here’s the cost breakdown of how much it cost to build this DIY wooden outdoor storage box:
Timber battens | 64€
Timber sheets | 71€
Hydraulic hinges | 11€
Hinges | 12€
Screws & nails | 7€
Primer & Paint | 12€
Sandpaper & Filler | 7€
Outdoor storage bag | 25€
Total: (about) 209€ / £180
As you can see, this isn’t the cheapest project ever but, if you’ve ever looked at buying an outdoor storage box, you’ll know that they can be really expensive, especially if you want one as large as this one.
Best of all, this DIY wooden outdoor storage box is a really beginner-friendly project for you to practice your DIY skills on and it only takes a couple of hours to built. The bit that takes longest is actually the painting and everyone can do a bit of painting, right?!
As you can see, this isn’t the only thing we’ve built!
Now, all we need is some good sunny weather so we can enjoy our new outdoor furniture!
Pop back soon so that you can see our finished cabana and the other furniture we’re building for our balcony! We can’t wait to share it!
Do you have any fun outdoor plans for this year? Have you ever tried building your own furniture? We’d love to know what you think so leave us a comment below!
If you like this project, you will love these ones, too!


Get Our Favourite DIY Essentials!
Leave a Reply