Ad – This post is in collaboration with Gallerix.
After months of work, our first room makeover is finally starting to come together. Last week, we shared our gorgeous new luxury vinyl plank floor, and we’ve just finished the next project in this room – a DIY slatted radiator cover.
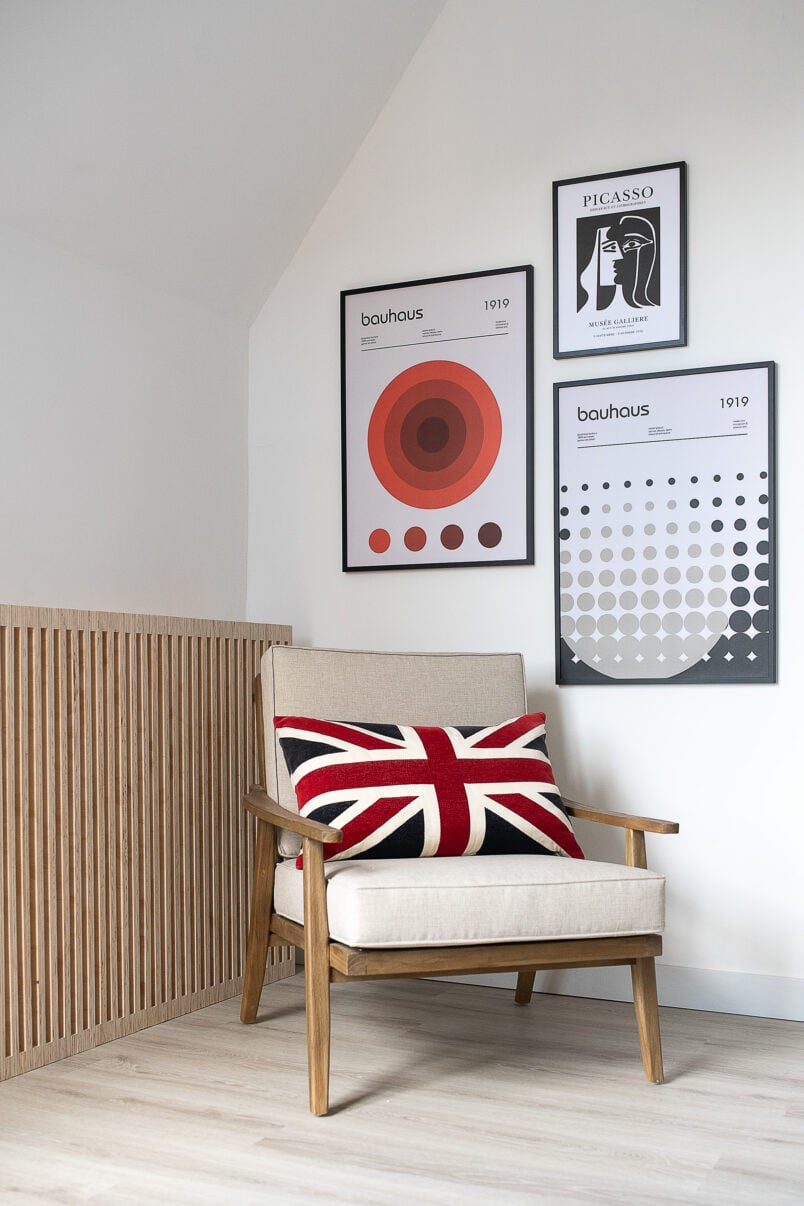
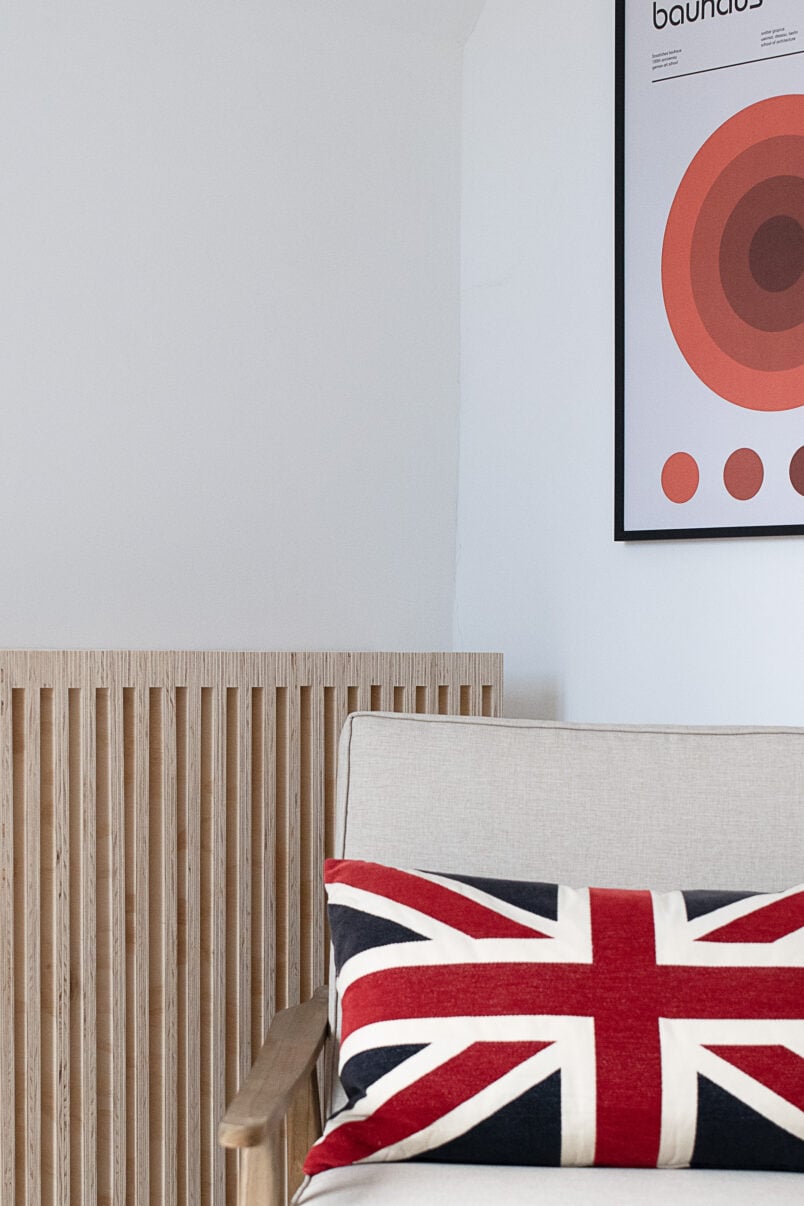
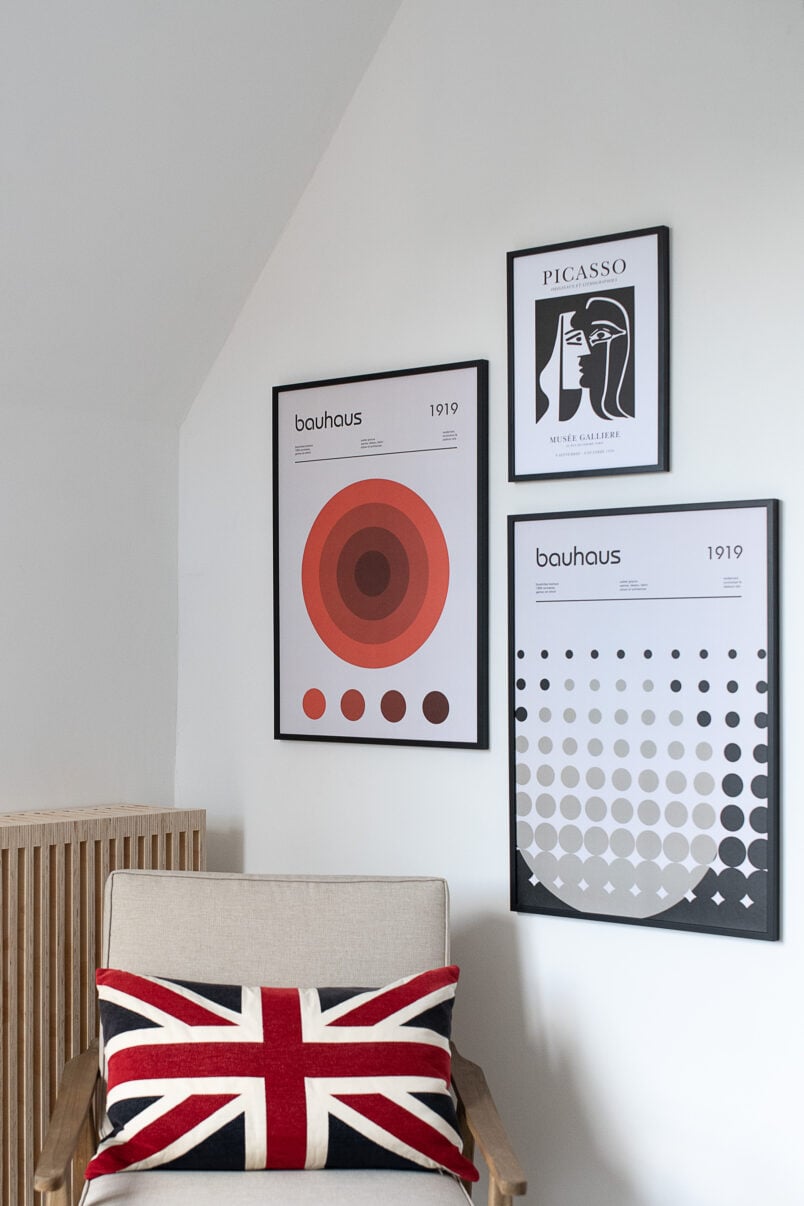
After all the messy building work (removing the wallpaper alone took days as we had 6 layers of wallpaper to remove!), the end is in sight. And we have another great addition to the room, too. Did you spot our fabulous new prints?
We’ll be sharing more of our new art and a great discount code for Gallerix for you to use later in this post, but first, let us show you how to build a slatted radiator cover.
Building a bespoke slatted radiator cover is a stylish and easy way to hide a boring radiator. It’s a really easy, beginner-friendly project.
This is what you will need to build a DIY slatted radiator cover:
This post contains affiliate links. We only recommend products we love and think that you will, too! Read our full disclaimer here.
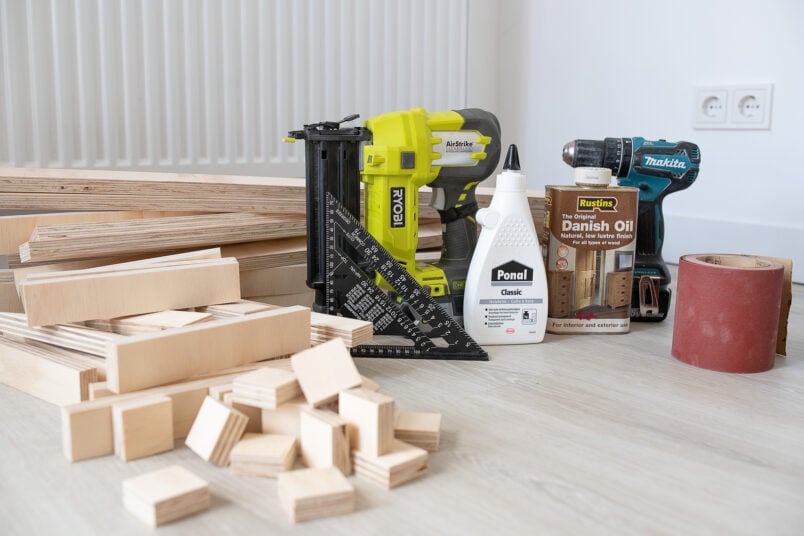
- 18mm sheet of multiplex plywood (alternatively, you could use timber battens)
- Cordless Drill & Drill Bits
- Table Saw or Plunge Saw (alternatively, you could have the pieces cut in-store or use timber slats)
- Mitre Saw (if you don’t have one, you could use a fine saw instead)
- Nailer
- Wood glue
- Screws & Wallplugs
- Spirit Level or Laser Level
- Speed Square
- Sandpaper (120 grit and 240 grit)
- Oil
This is how to build a wood slat radiator cover:
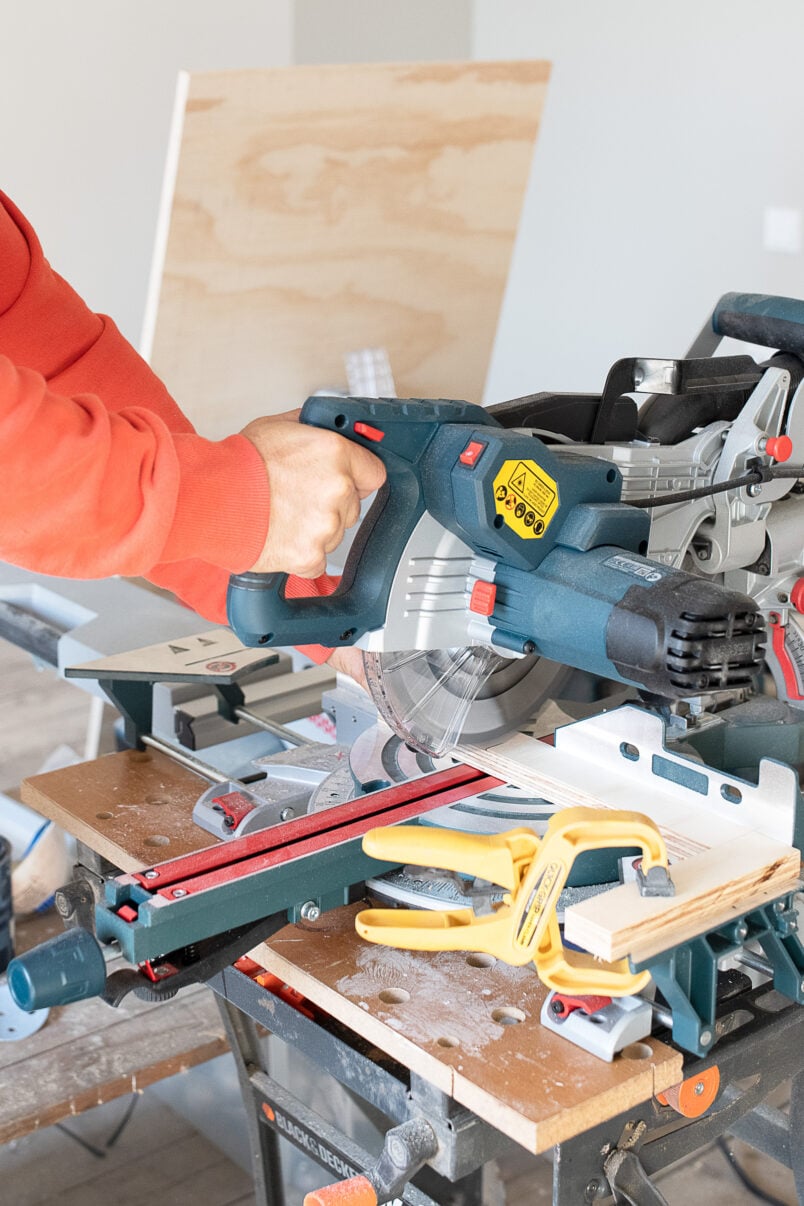
01
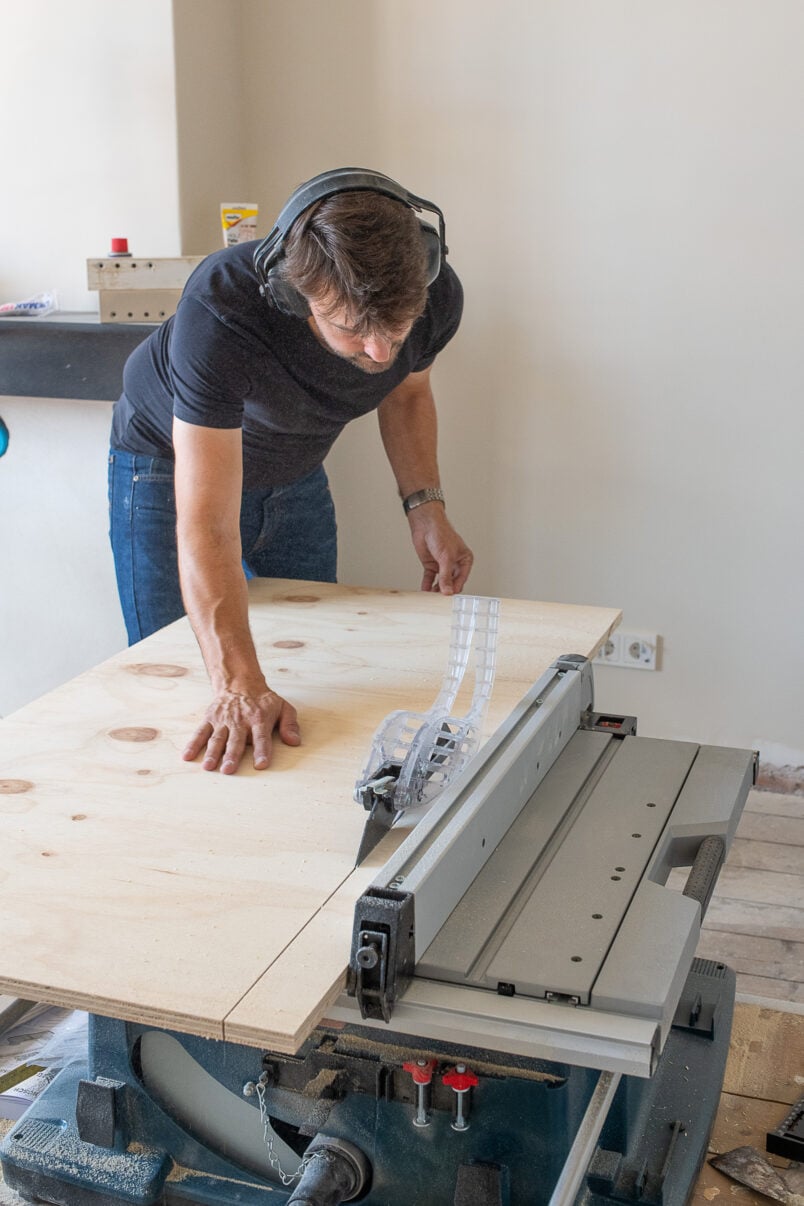
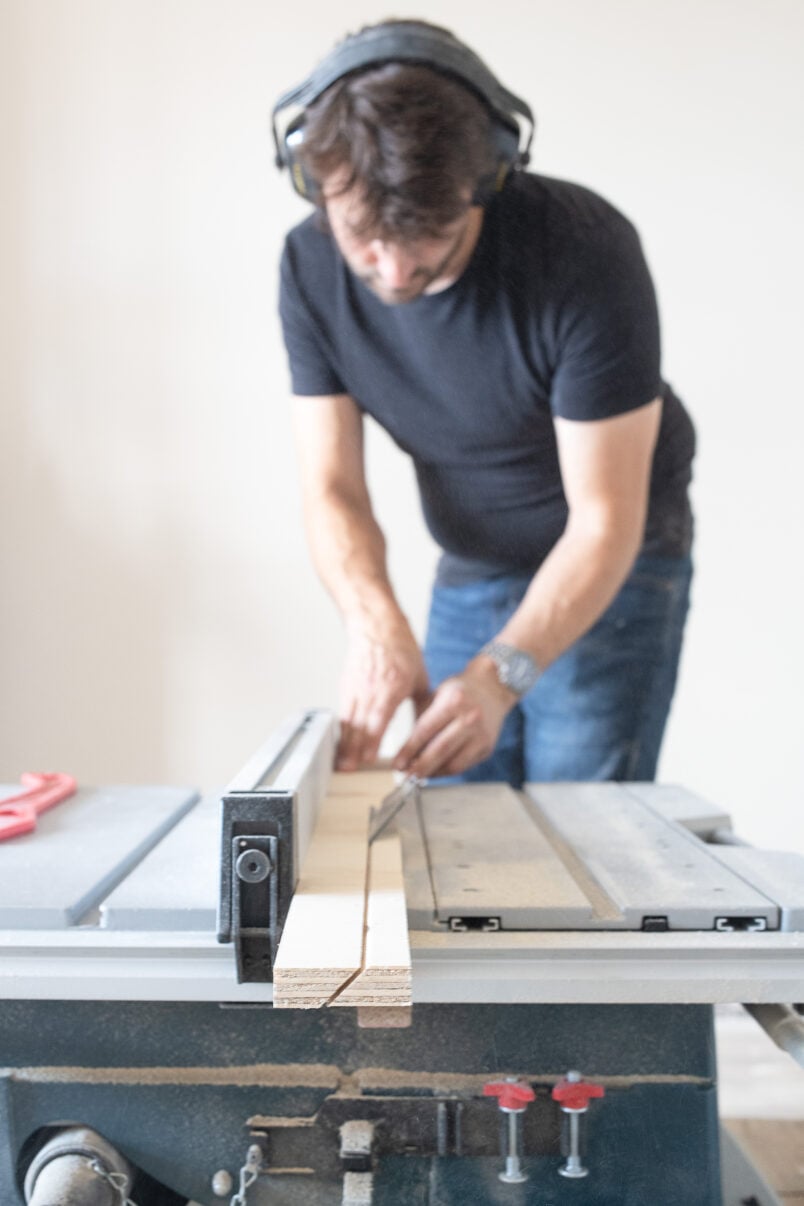
Cut The Slats
Start by cutting all of the slats to build your DIY radiator cover.
Each of our slats is 4cm wide. The length and size of these will vary depending on the size of your radiator. Make sure to leave a minimum gap of 8cm at the top, front and side for the warm air to flow.
In order to not reduce efficiency, it’s important to leave lots of space between the radiator cover and the radiator. We also designed this plywood radiator cover so that there would be a lot of gaps for the warm air to escape through. After all, there’s no point in building a radiator cover if it blocks all of the heat.
DIY TIP
We used our new table saw to cut all of the plywood slats for our slatted radiator cover because we want the stripy edge showing the layers of veneer to be visible.
If you want to save time or don’t feel confident using a table saw, you could easily have them cut in the store where you buy your timber or use readymade timber slats instead.
Once you’ve cut a lot of slats, you’ll have to shorten them to the size you need for your radiator cover with a mitre saw.
For our radiator cover, we used 38 long slats (ours are 85cm long) and 37 shorter slats (ours are 21cm long). At the top and bottom, we also inserted 73 very short slats (4cm long) to fill the gaps. Lastly, you’ll need one extra slat to attach the radiator cover to the wall.
02
Sand The DIY Radiator Cover Components
Sand all of the slats with some 120 grit sandpaper to remove any rough edges. You’ll sand the whole cover again when it’s assembled, so don’t worry if it’s not perfect yet. The pieces just have to be smooth so that you can assemble them.
03
Assemble The Slatted Radiator Cover
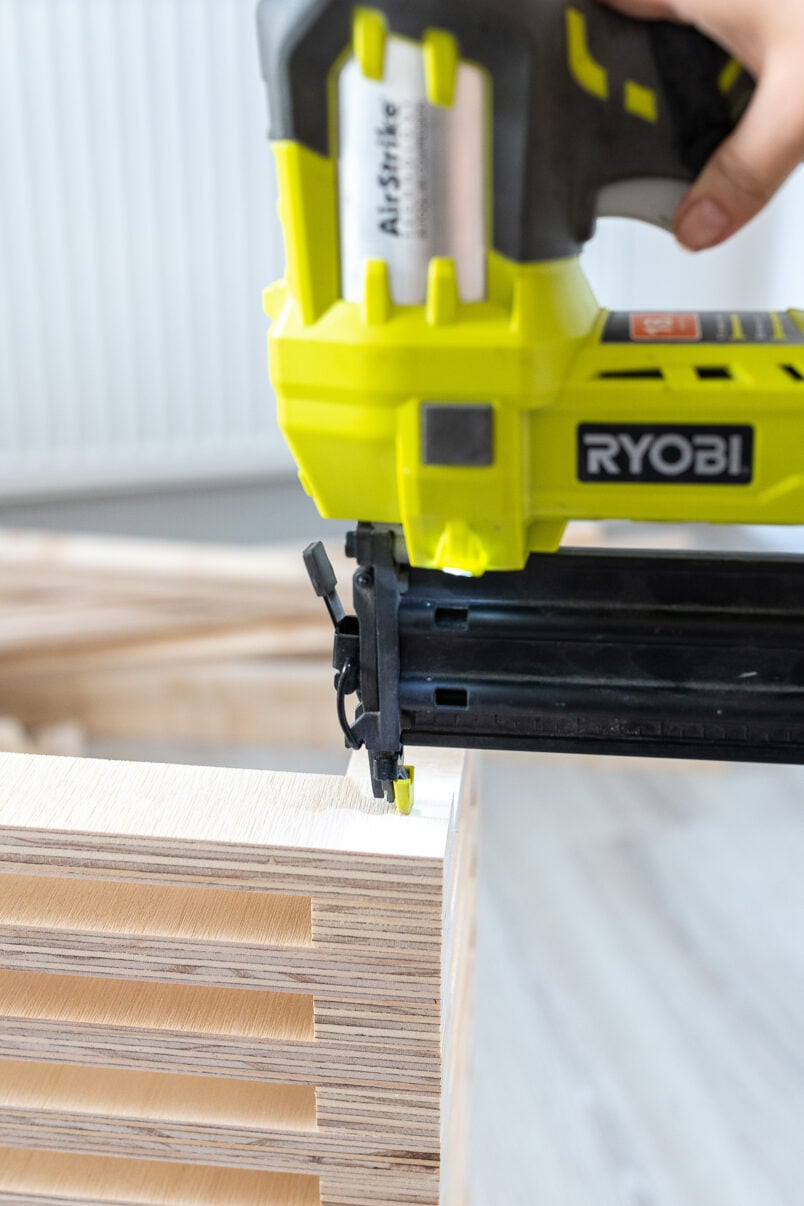
Assembling the slatted radiator feels a bit like playing a giant version of Jenga. Start with one of the long vertical pieces and glue two of the shorter pieces to each end with some high-quality wood glue.
We also secured the join with a couple of nails. It’s probably not necessary, but we want the cover to be super secure, so decide that adding a couple of nails would be a good idea.
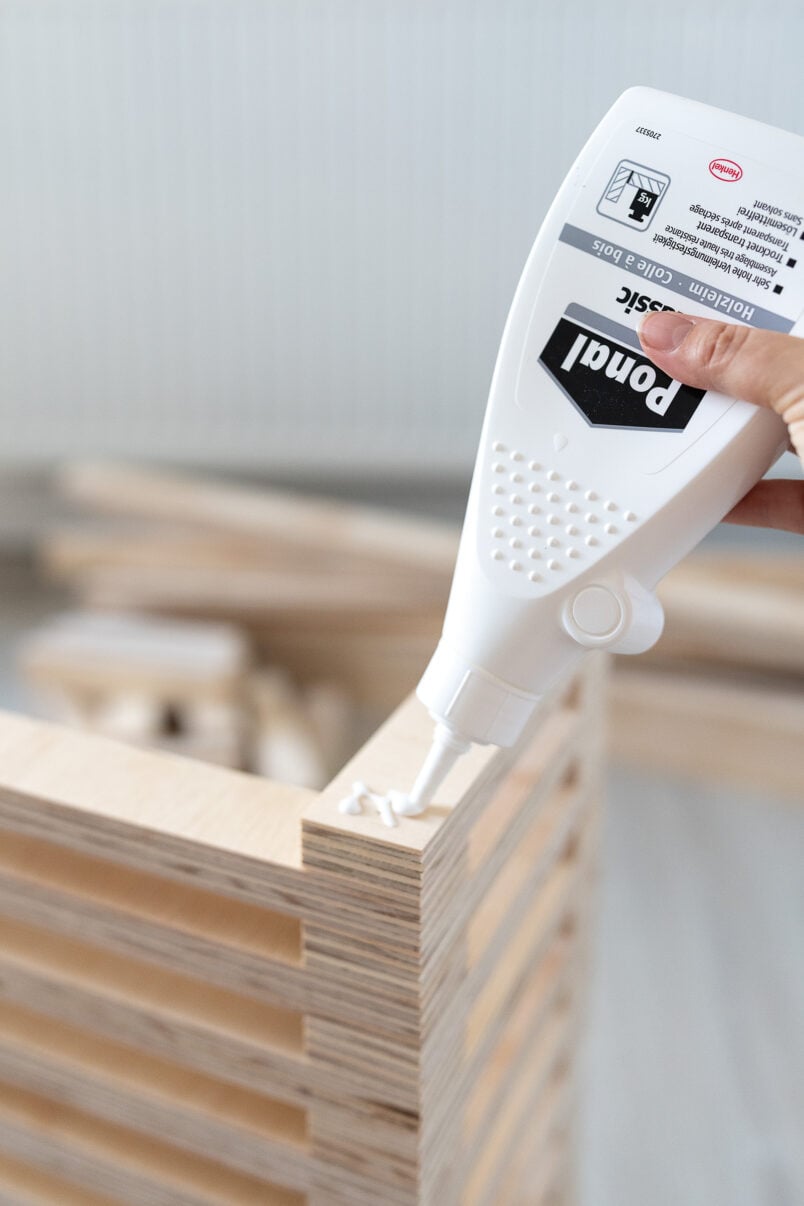
Then, glue another long piece on top of the short ones and nail it into place.
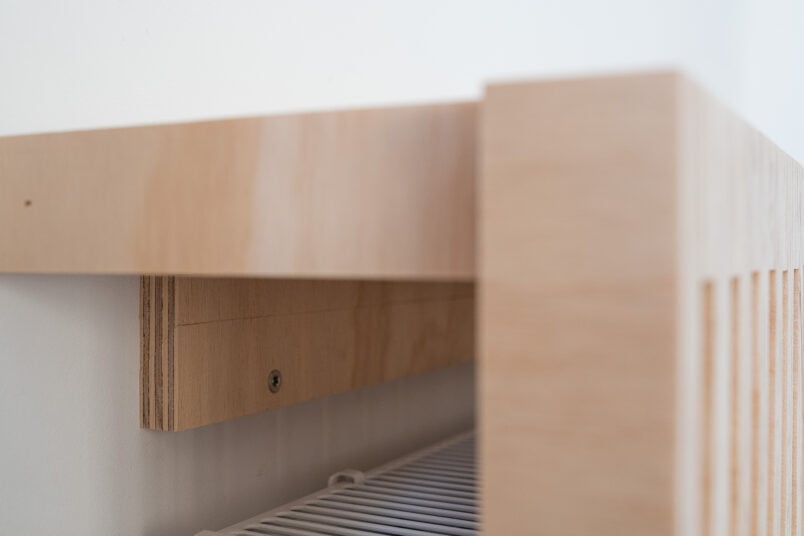
For the bottom and top, where the radiator cover meets the wall, we also inserted little square pieces to fill the gaps. You don’t have to do this, but we like the look of the continuous line without gaps that the additional pieces give you.

The only tricky thing about this project is making sure that the pieces are glued together at a perfect 90° angle. Use a speed square to make sure the slats are perfectly aligned before nailing them together.
04
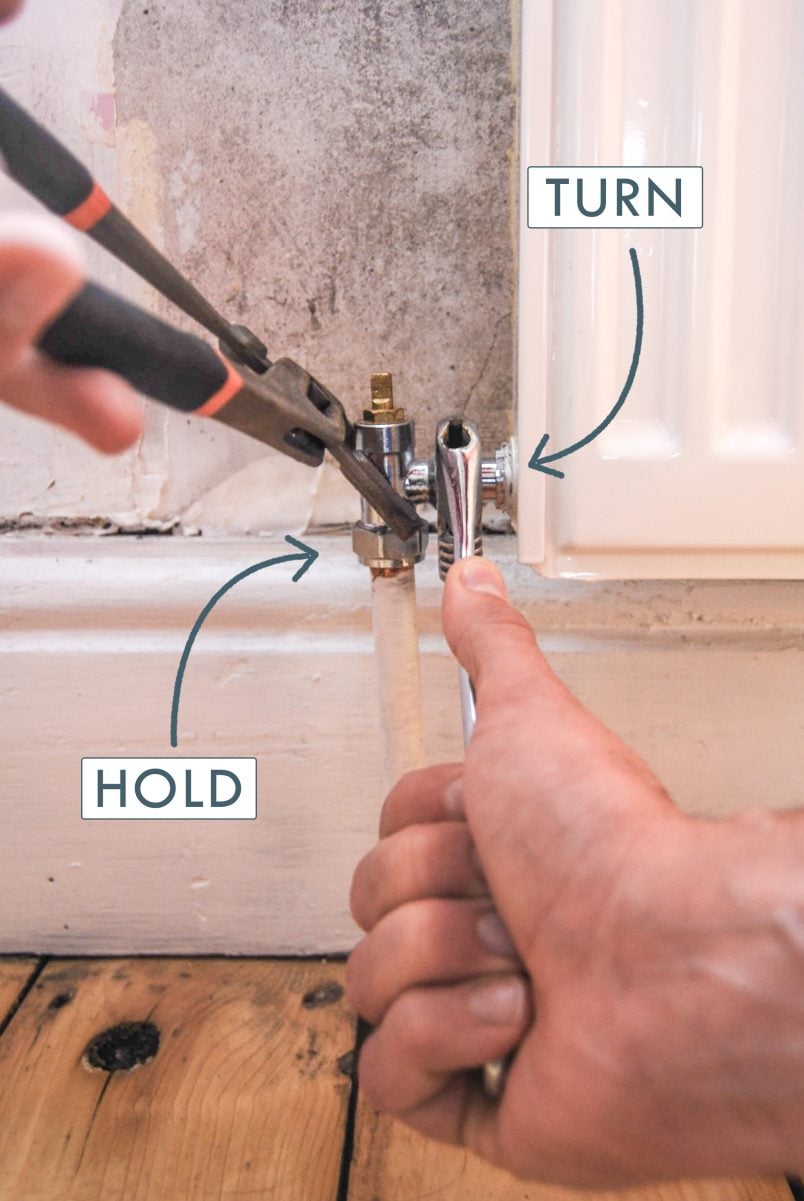
Make The Supporting Wall Batten
Make sure you firmly attach it to the wall. Use a laser level (or a spirit level) to make sure it’s completely level so that the radiator cover won’t wobble.
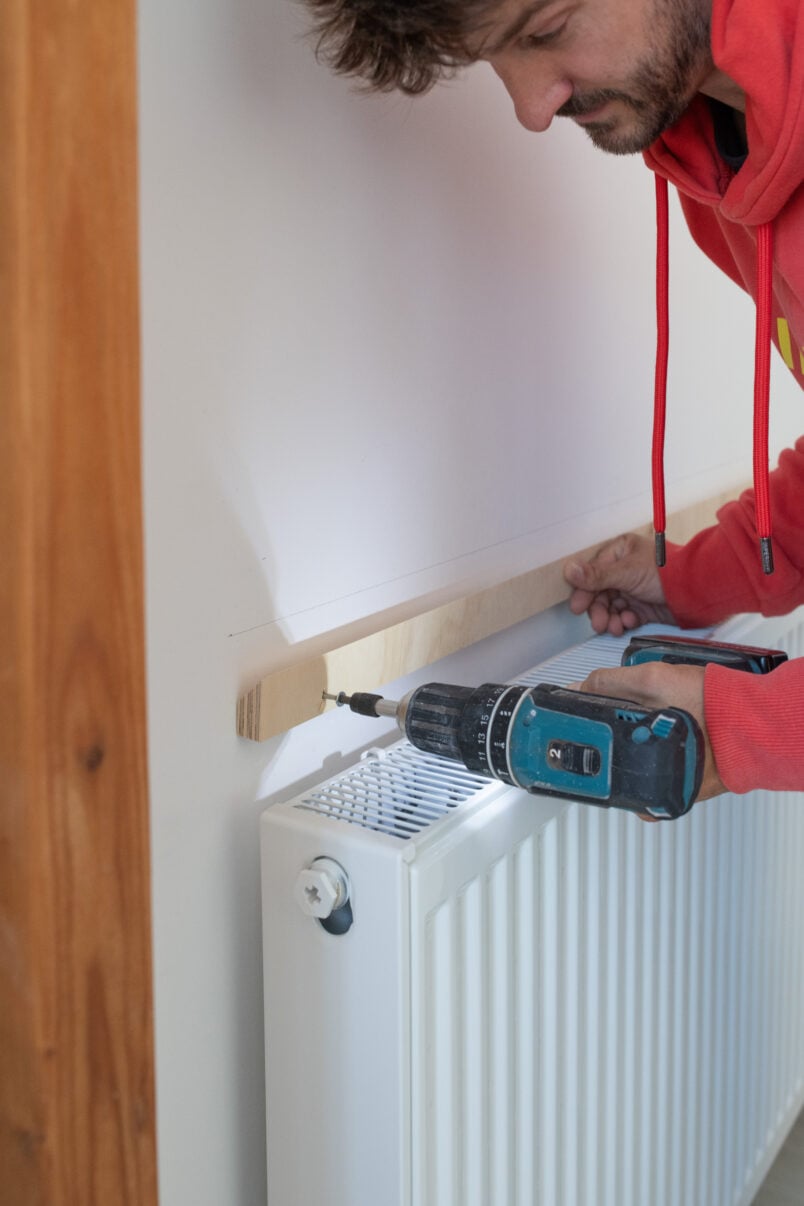
As you can see, we cut the batten so that it has an angle at the top. The corresponding piece is attached to the radiator cover, and when you place the cover against the wall, the angled pieces slot together and firmly hold the radiator against the wall.
It’s a super simple way of holding the slatted radiator cover in place, but it also means that you can easily remove the cover to clean behind it, too.
To make the angled pieces, just cut a timber slat (ours is 6cm wide) through the middle at an angle and attach one piece to the wall and one to the radiator cover.
05
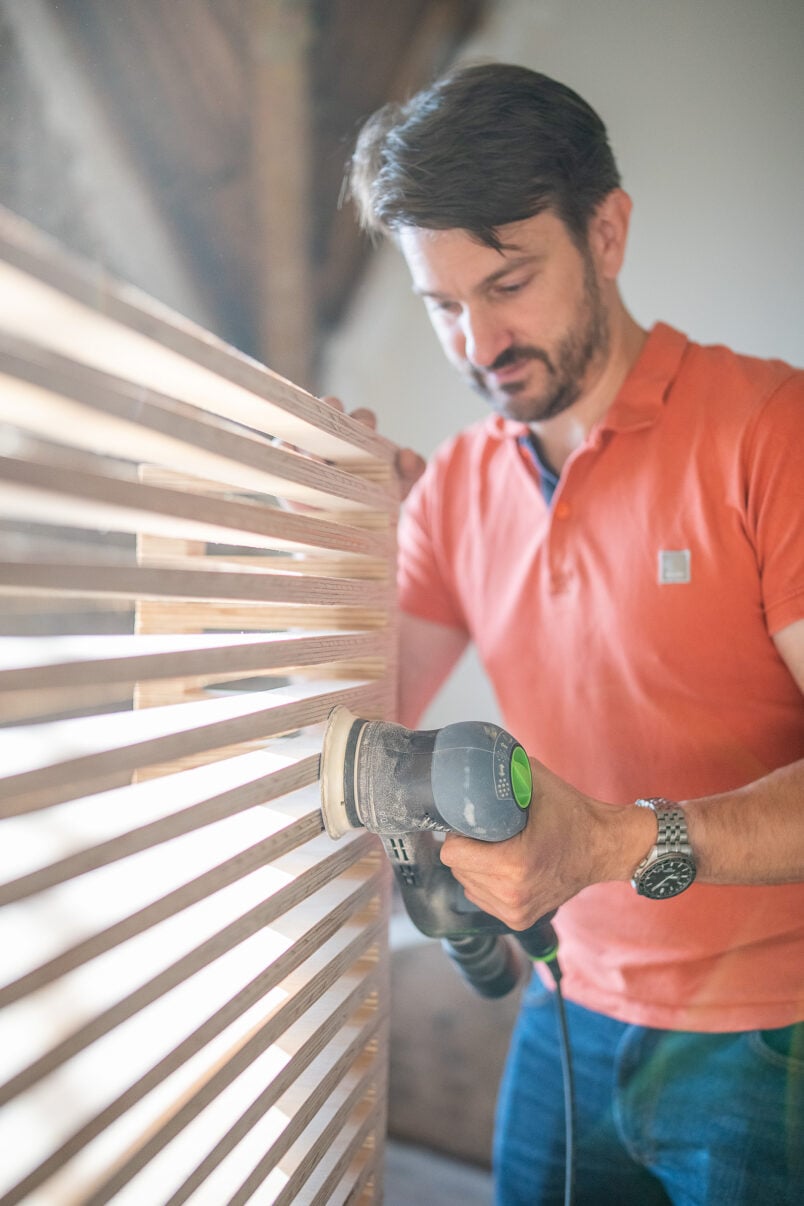
Sand The Radiator Cover
When everything is assembled, give the whole radiator cover a sand to remove any imperfections and rough bits. We sanded everything with 80 grit sandpaper to remove any uneven spots and then sanded again with 120 grit to make it completely smooth.
06
Oil The Wooden Slats
We love the look of the multiplex plywood edge, so we decided to keep it visible and oil the surface. We love using Danish Oil as it’s easy to use and brings out the lovely grain of the wood.
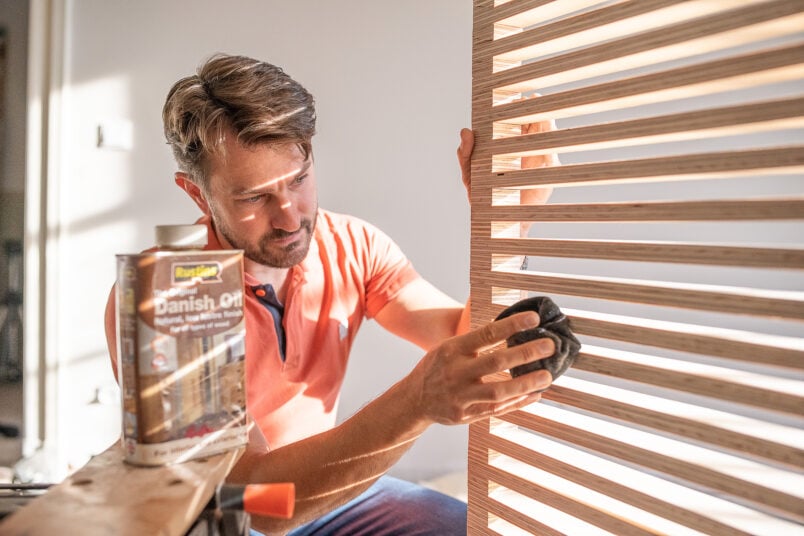
Use an old rag to apply a couple of coats of oil all over the surface of the slatter radiator cover. You can read our full guide on how to apply Danish oil and achieve a perfect finish here.
If you are painting your slatted radiator cover, you can skip the step of sanding it with 240 grit sandpaper and instead apply a coat of primer and a couple of coats of paint. Don’t forget to sand between each coat of paint for a smooth finish, though.
You can read our full guide on how to paint wood here.
This plywood radiator cover was really easy to build and is a very beginner-friendly project.
You don’t have to make any fancy cuts; you can just keep adding more and more slats until it’s the length you need it to be. Having said that, it was rather time-consuming to build. Cutting the slats is quick but glueing everything together and waiting for the glue to dry after attaching each layer took about 3 days on and off.
You obviously don’t have to stand there and watch the glue dry, but because of all of the waiting, it will take a couple of days to assemble.
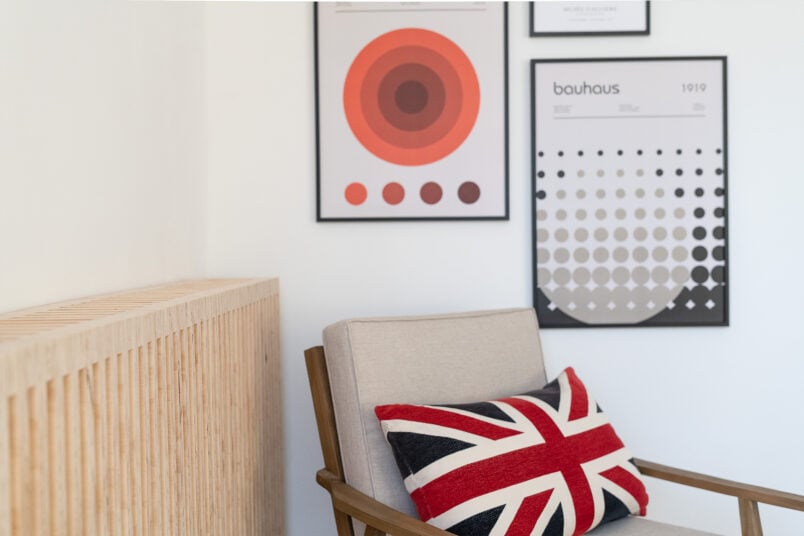
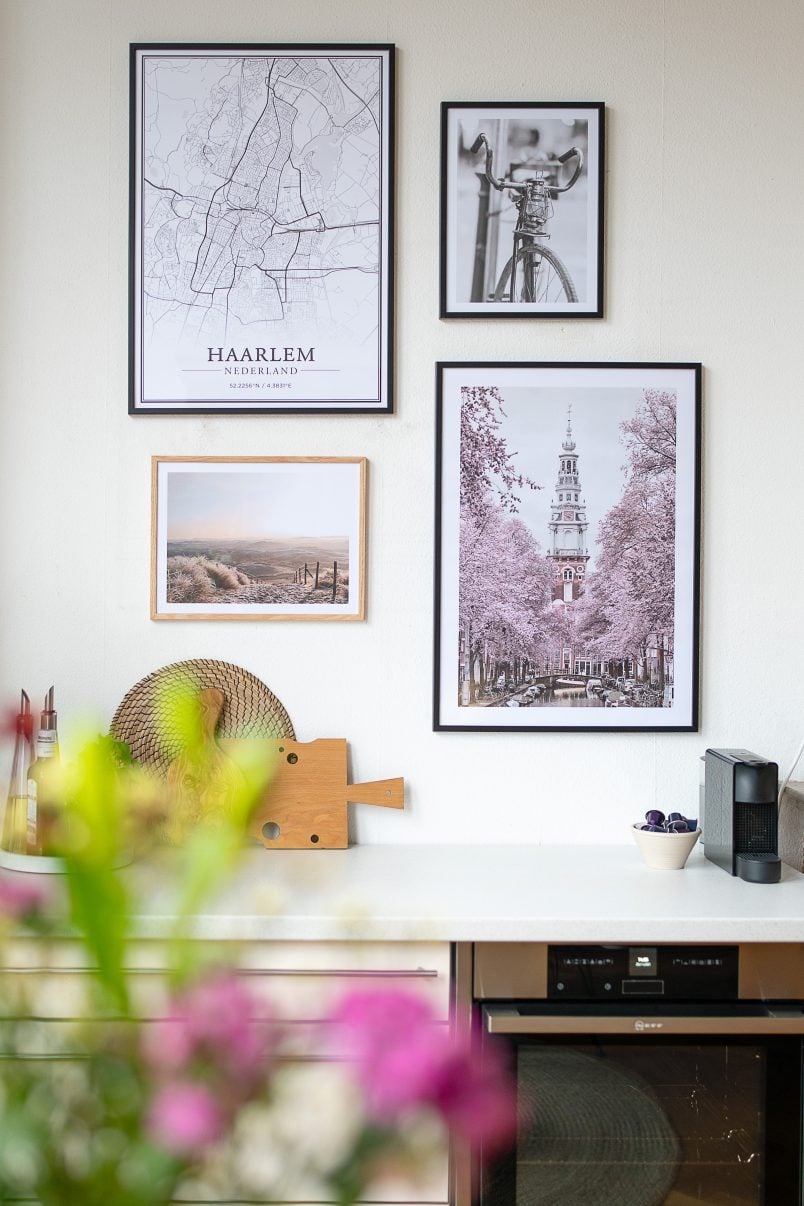
Now for the fun bit – hanging new art in our newly renovated room.
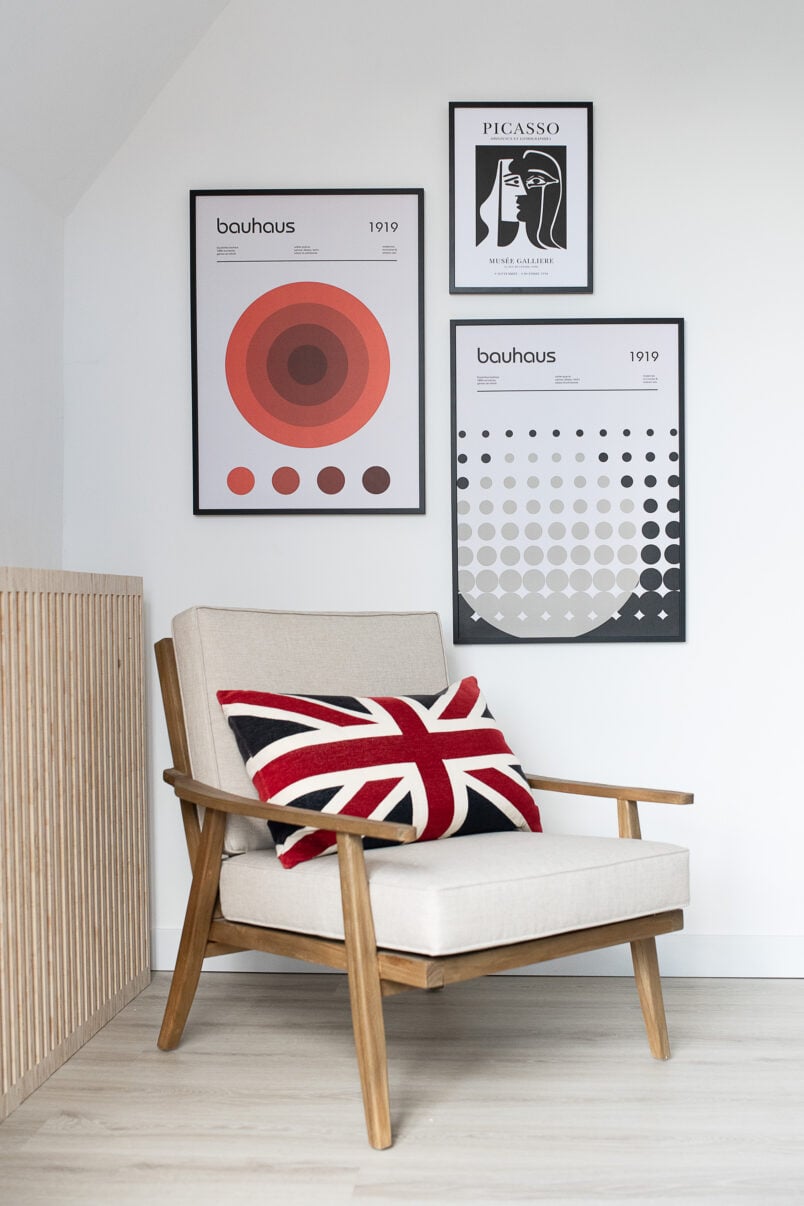
Artwork is always the best way to add personality to any space, and thanks to Gallerix, we now have some fabulous new framed art prints that look perfect in this room.
One of the first things we did when moving into our new home was hanging all of the art we love, including a selection of Gallerix posters in our dining room which is why we knew we’d love our new Gallerix prints, too.
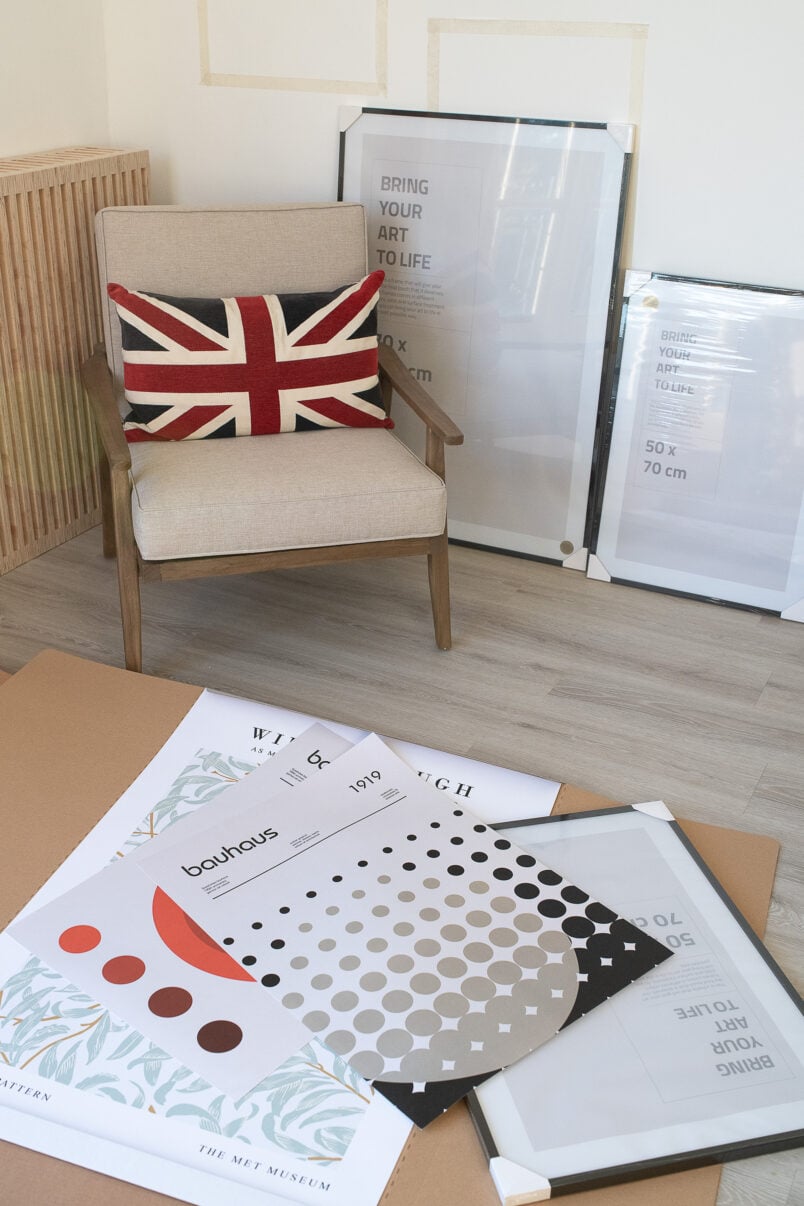
Gallerix has a huge amount of prints to choose from and you’ll definitely find some fabulous prints and frames for your home there, too.
Sometimes, choosing art can feel overwhelming, which is why I love their Gallery Wall feature, which shows you curated collections of artwork that all look great together. The gallery walls are sorted by colours and categories so you can find the perfect gallery to suit your style. This makes it so quick and easy to choose the perfect collection for your home.
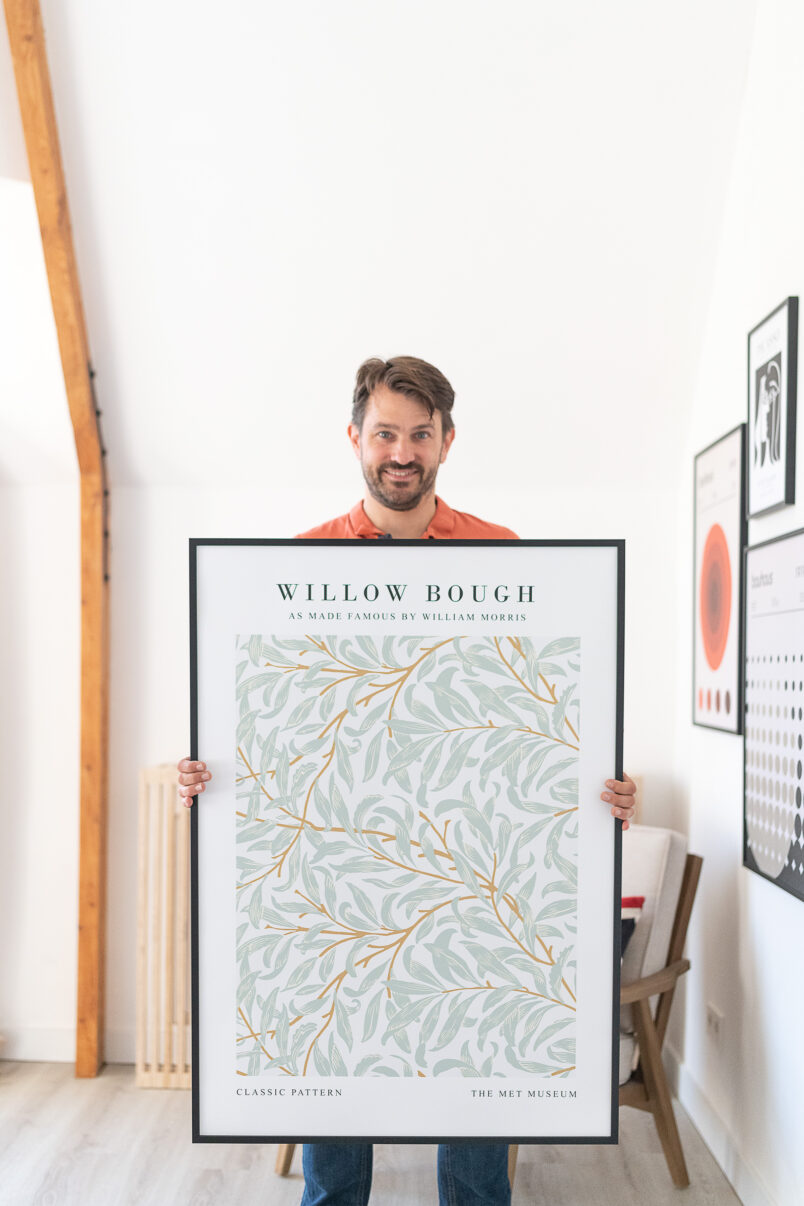
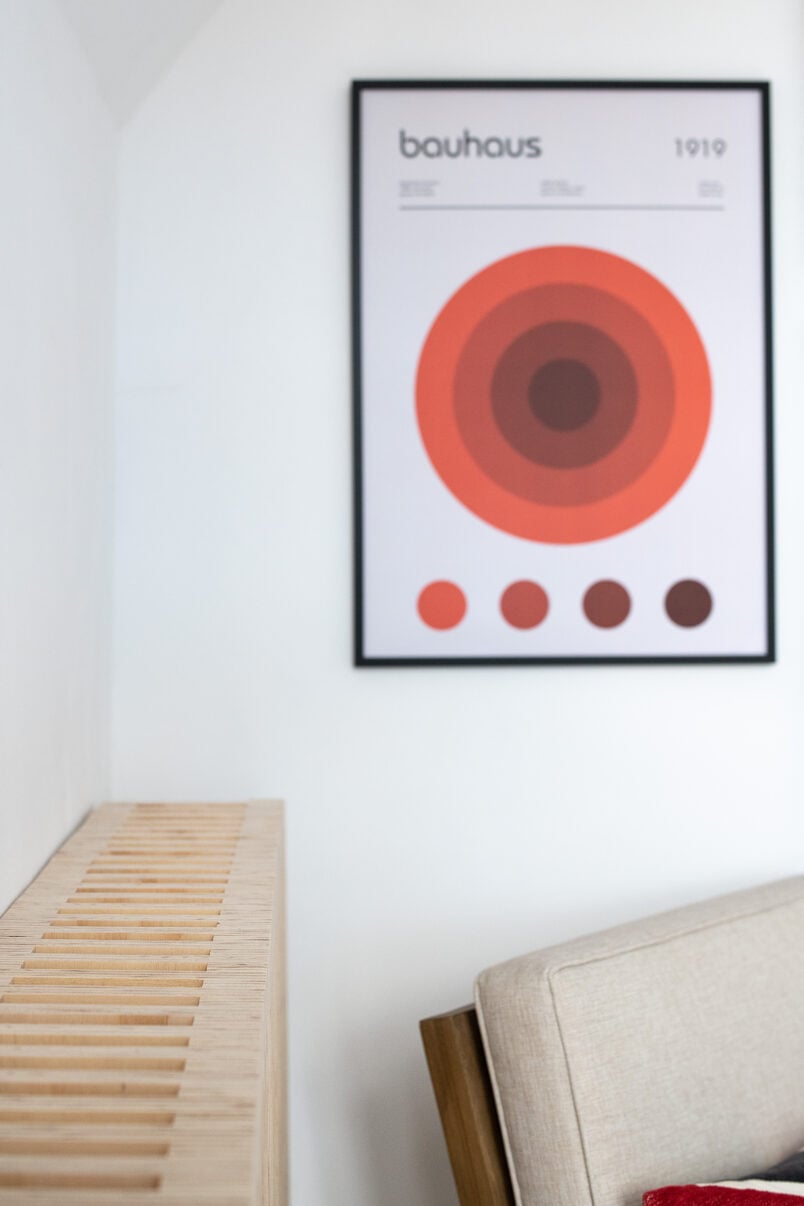
We opted for some Bauhaus-inspired prints along with a William Morris pattern, which I love. We already have a gorgeous Gallerix William Morris print hanging in our dining room and will probably hang these two prints together at some point.
Lastly, we also chose a Picasso print as a bit of a nod to the people who used to live in our house. They were friends with the artist and actually had an original Picasso painting hanging in the living room. Admittedly, an original Picasso won’t be on our shopping list any time soon but the print looks fab, too.
It gets even better, though! The amazing guys over at Gallerix have given me a discount code to share with you! Just enter “LITTLEHOUSE30” at checkout to receive 30% off the entire poster collection at checkout (excludes frames).
DIY Slatted Radiator Cover FAQs
You can reach around the side of the radiator cover to adjust the thermostatic valves, as we left the sides of the cover open. We are also using digital Wifi thermostats that you can control via your phone, so there’s no need to be able to reach the valves.
Anything blocking the radiator’s airflow will reduce its efficiency. Make sure that the design of your radiator cover is as open as possible and doesn’t trap any warm air or affect your thermostatic valve. It’s also important not to block radiators with any furniture as this will reduce their efficiency, too. 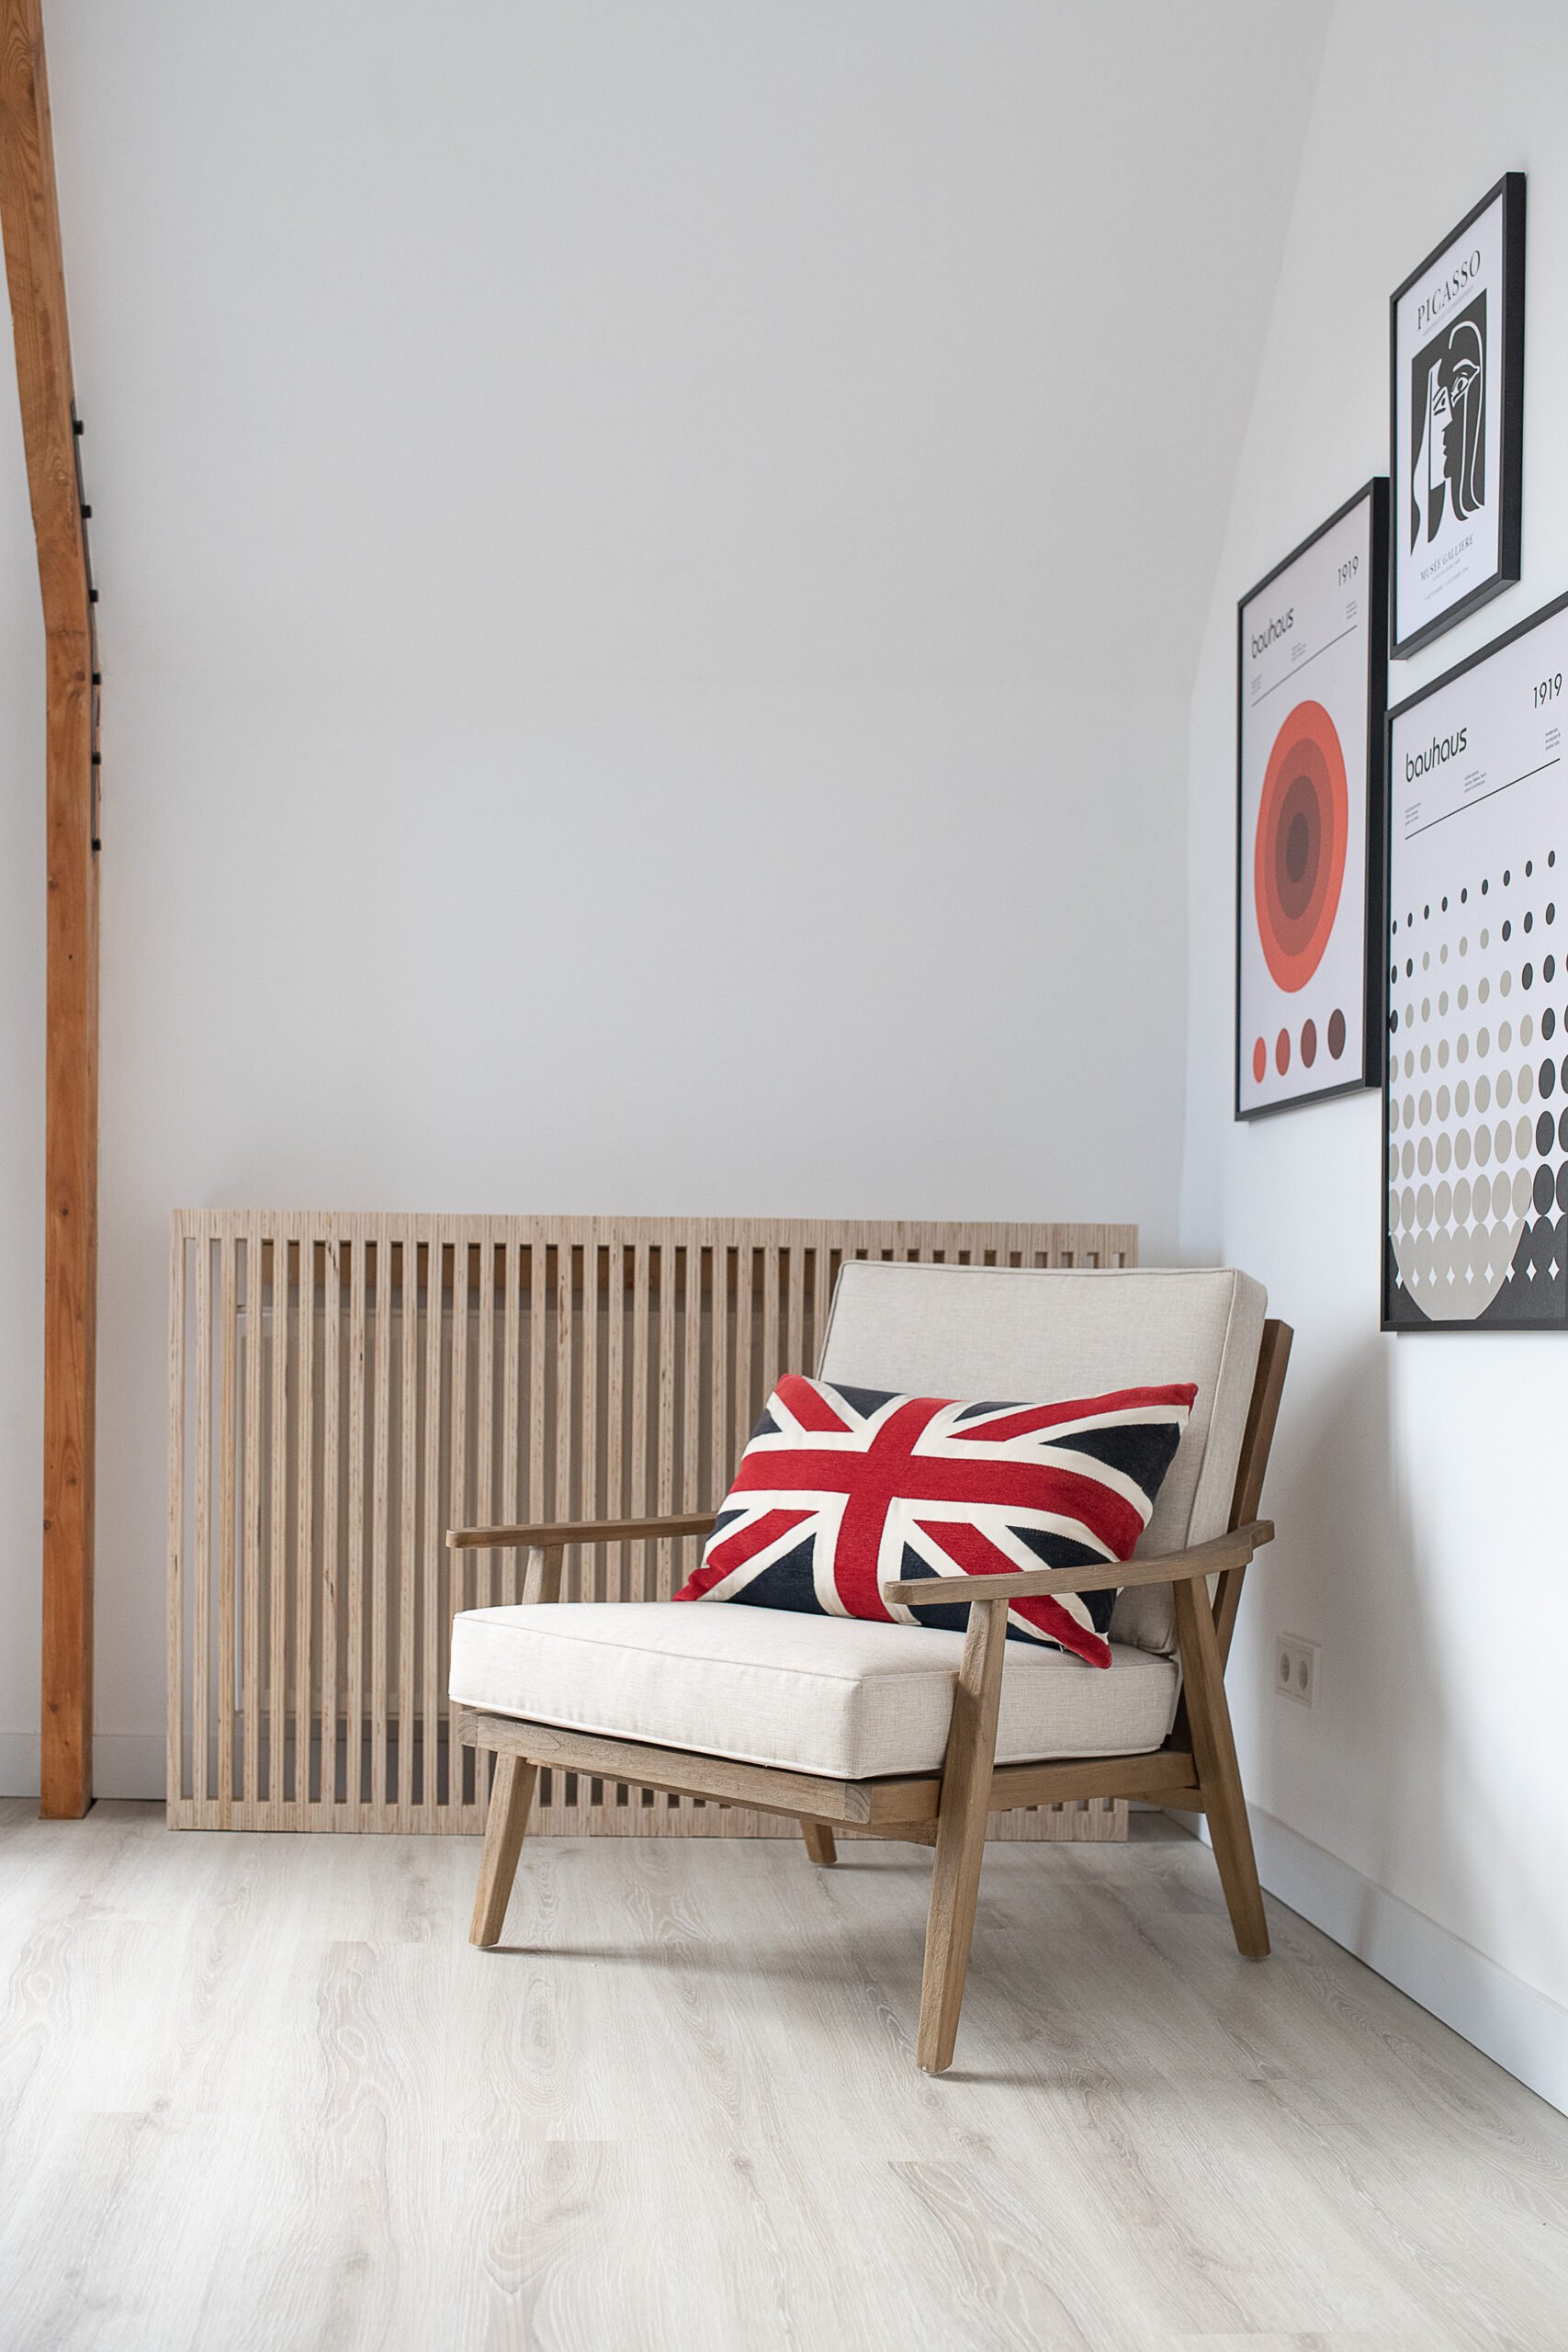
Keep a minimum of 7 cm between your radiator cover and the radiator for the hot air to be able to circulate. No part of the radiator cover should ever touch the radiator.
You can paint almost anything, including radiators. Just be sure to use the correct type of paint, which will have to be suitable for radiators. Click here for a detailed guide on how to paint a radiator.
The cost of a radiator cover will depend on the size and the materials it’s made of. Inexpensive radiator covers from a DIY store for medium-sized radiators will cost around £100. There are great online retailers where you can order completely bespoke radiator covers starting at about £300 for a medium-sized one.
The total cost for our radiator cover was 70€ (about £60). DIY radiator covers are perfect for getting a bespoke look at a fraction of the cost.
We need to replace all radiators throughout our home, and as much as I’d love period-style radiators everywhere, there’s no way our budget will stretch that far. Building your own custom radiator covers is a great way of hiding boring radiators at a fraction of the cost.
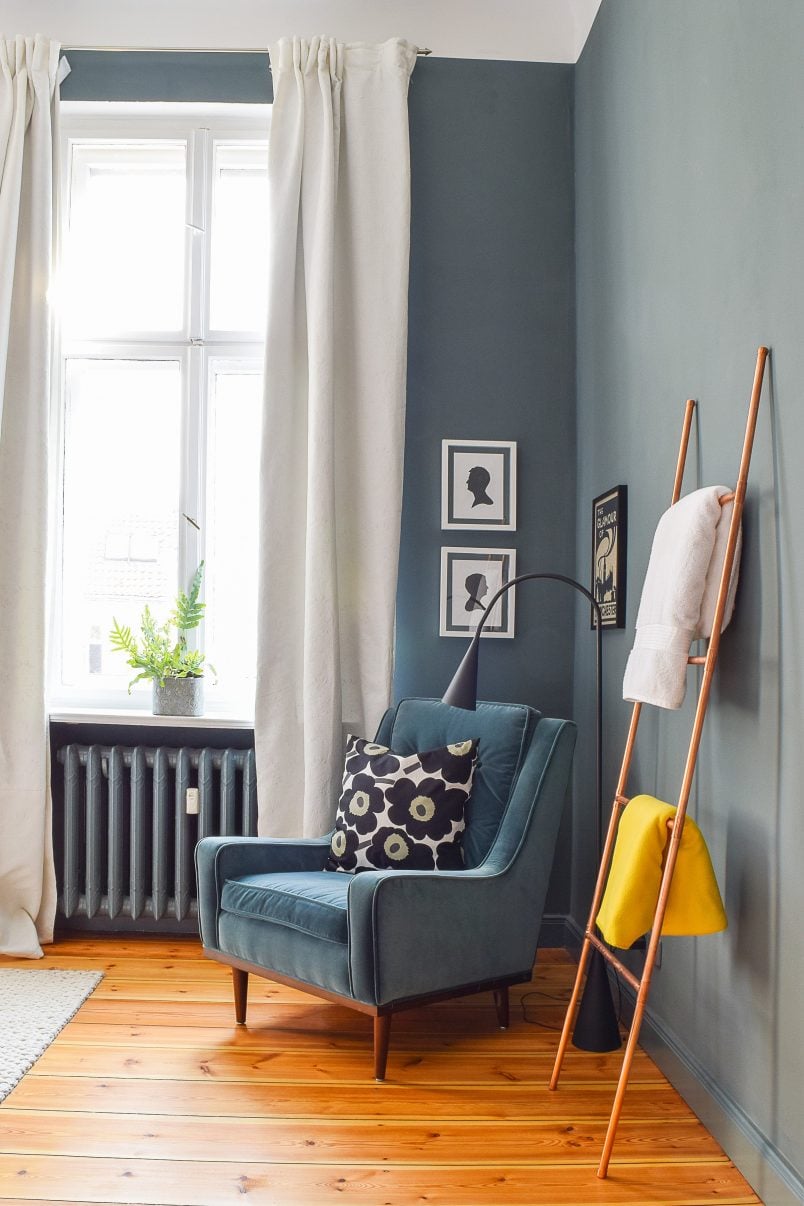
We absolutely love how this DIY slatted radiator cover turned out. It looks sleek and modern, while the visible layers of the multiplex plywood we used give it a warm and tactile feel. The corner of the room is easily the most finished part of our house, and we love how the new artwork really makes it start to feel like a home.
Sue says
Your radiator cover looks amazing and certainly does not look like DIY . Well done to you. I have never oiled any wood in my home as I often wondered what it would be like to clean?
Christine says
Thank you so much, Sue! Oiled wood is really easy to keep clean. The oil dries solid giving you a super smooth surface that’s completely dry (and not oily at all). It protects the surface really well and we just give it an occasional dust or, if it’s dirty, a wipe with a damp cloth.
Cx
john smith says
that’s what I was looking for, tnx
Christine says
Glad you like it, John! We’re really pleased with how it turned out.
Cx