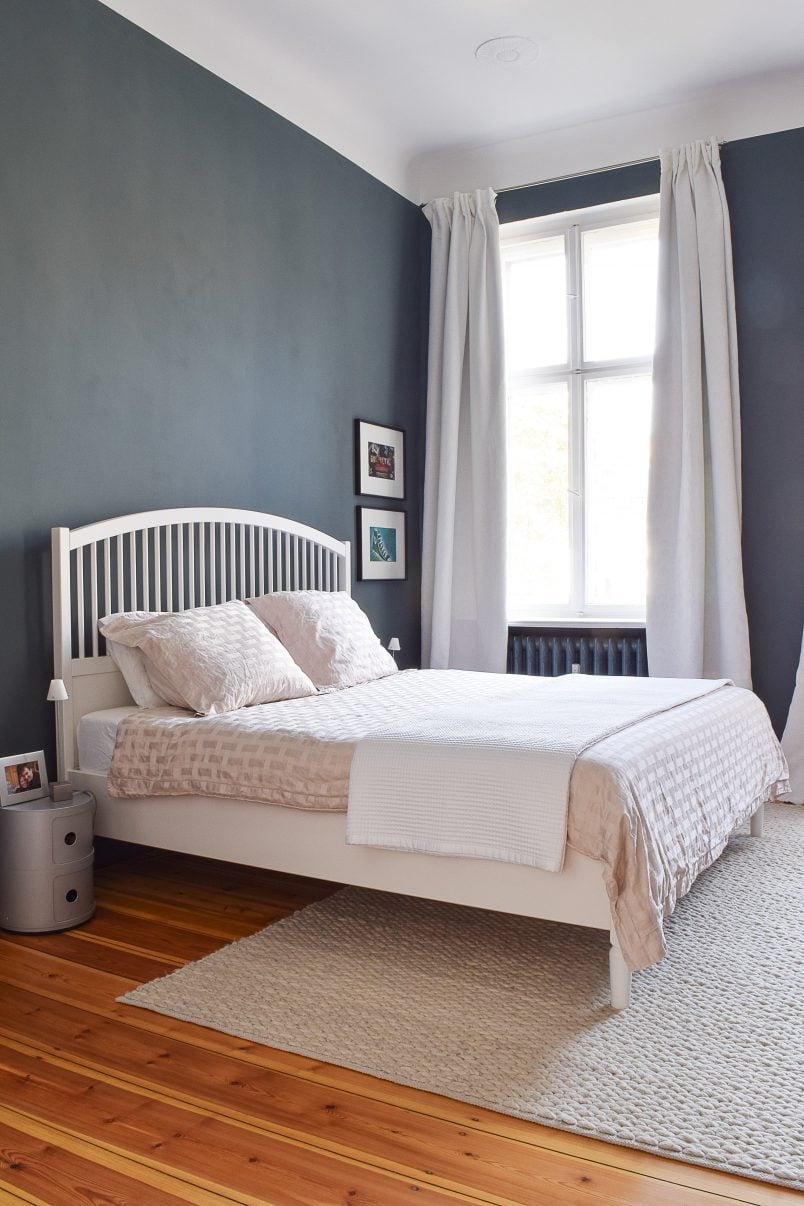
To say that I got carried away while painting our master bedroom would be a bit of an understatement. I love the colour so much that I ended up painting everything.
Doors, walls, skirting boards and even the light switches & sockets weren’t safe from my paintbrush!
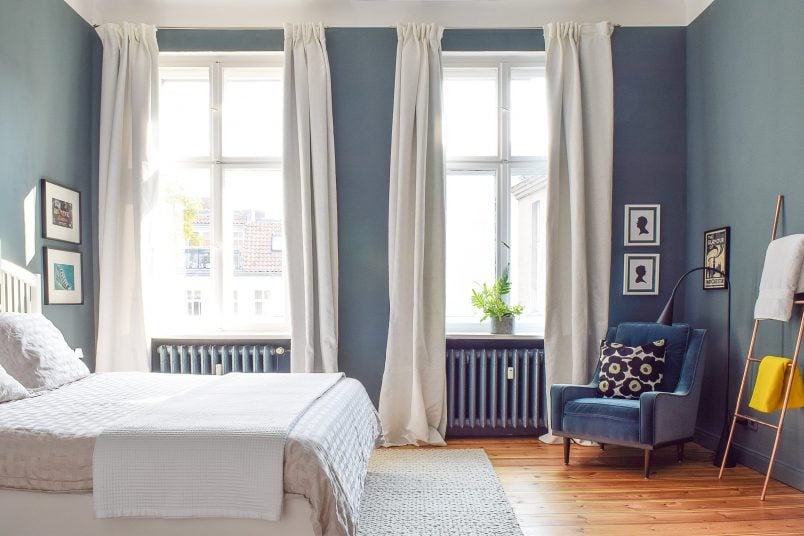
The eagle-eyed amongst you may have noticed that my painting escapades didn’t stop there.
I painted the radiators, too!
I love how everything seamlessly blends together and now that everything is the same colour the room not only feels larger but also much more tranquil which has got to be a good thing in a bedroom.
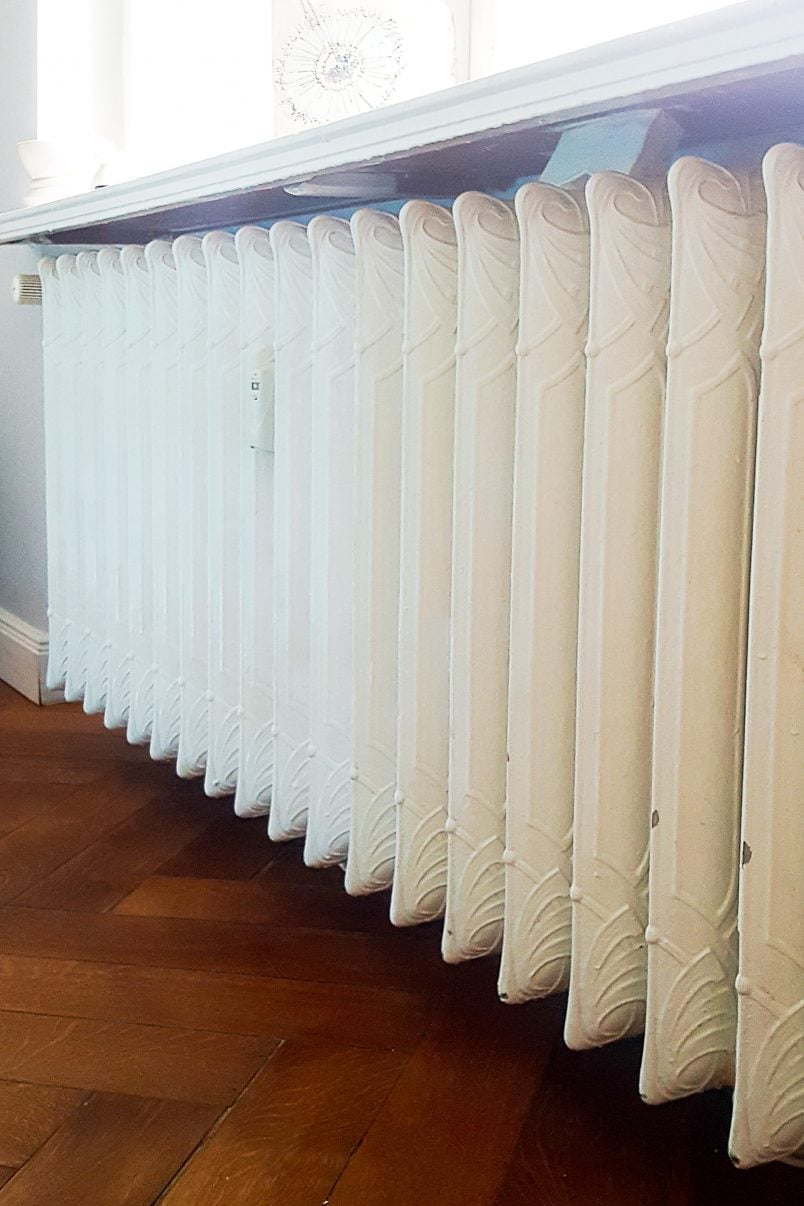
We’re so lucky to still have the gorgeous ornate original radiators in our apartment and I’m now slowly working my way around painting all of the others, too.
This post contains affiliate links. We only recommend products we love and think that you will, too! Read our full disclaimer here.
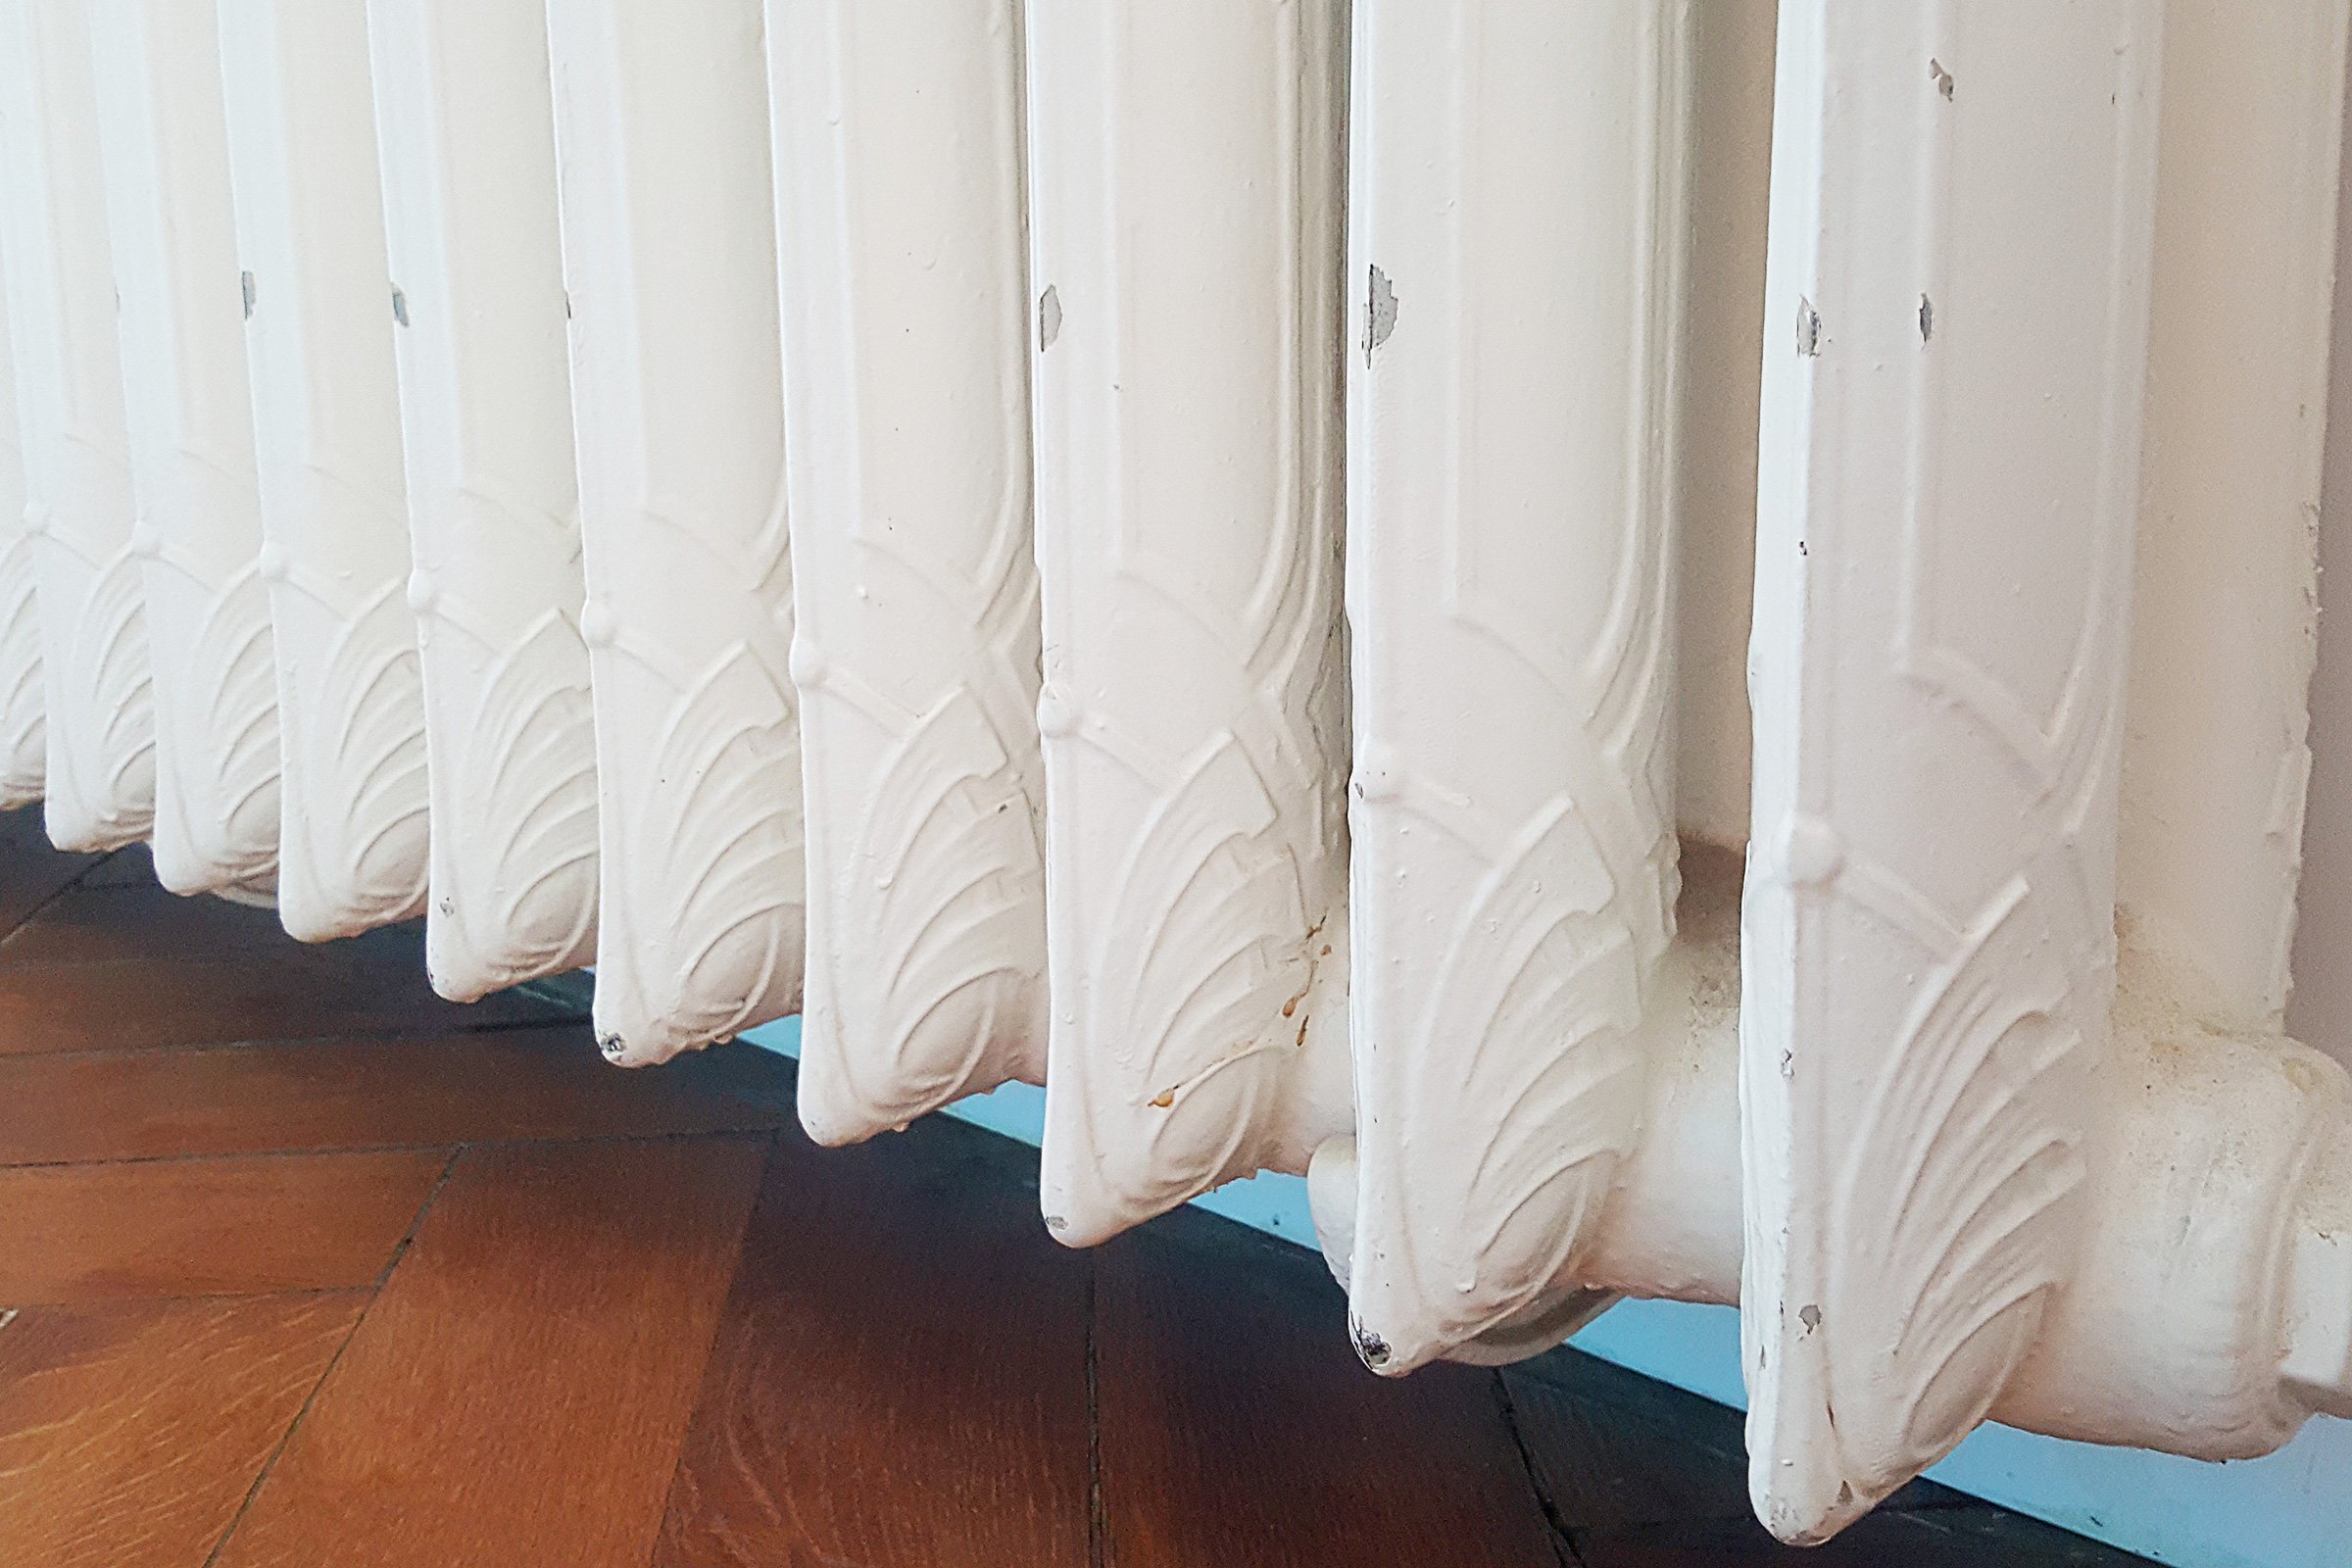
In an ideal world, I’d have the radiators sandblasted and spray painted. It’s definitely what I’d recommend if you can as it’s the only way to get the elusive perfect finish, especially if you have column radiators like ours.
Annoyingly, it’s not something we can do at the moment as we can’t empty the heating system which therefore means we can’t empty the radiators to be able to take them off the wall.
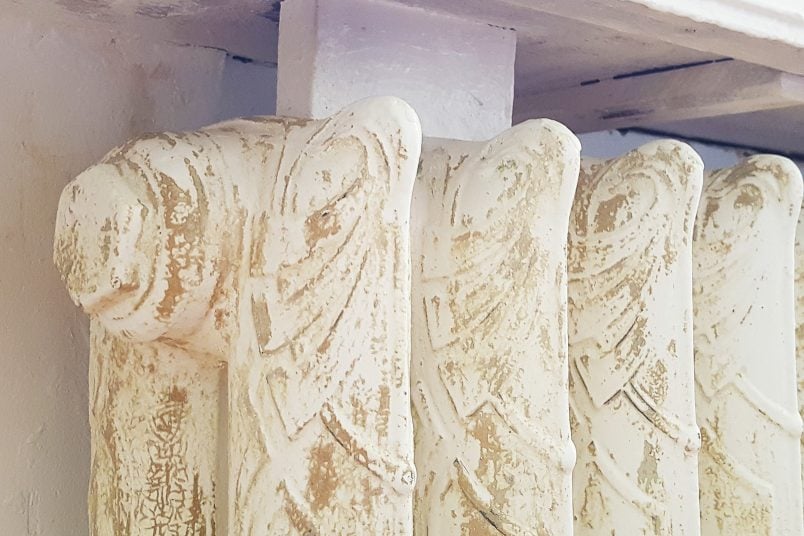
As there’s so much detail lost under layer upon layer of old paint, I’m hoping it’s something we can do in the future although I’m not sure how easy it’s going to be to drag our radiators down 4 flights of stairs, especially as some of them weigh a whopping 200 kg or more!
I did attempt to strip the paint on the old radiator in our guest bedroom but quickly decided that it just wasn’t worth the effort as it basically just made a huge mess and I couldn’t reach most of the areas to strip anyway! It probably wasn’t helped by the fact that the paint stripper I used was useless. (I should listen to my own advice and only ever use Peel Away!)
In the end, I decided that coving the yellowed radiators with a clean coat of paint would be the best option and I have to admit that the difference is quite staggering – although that may have something to do with the fact that I also cleaned the radiators for the first time since moving in (don’t judge), too!
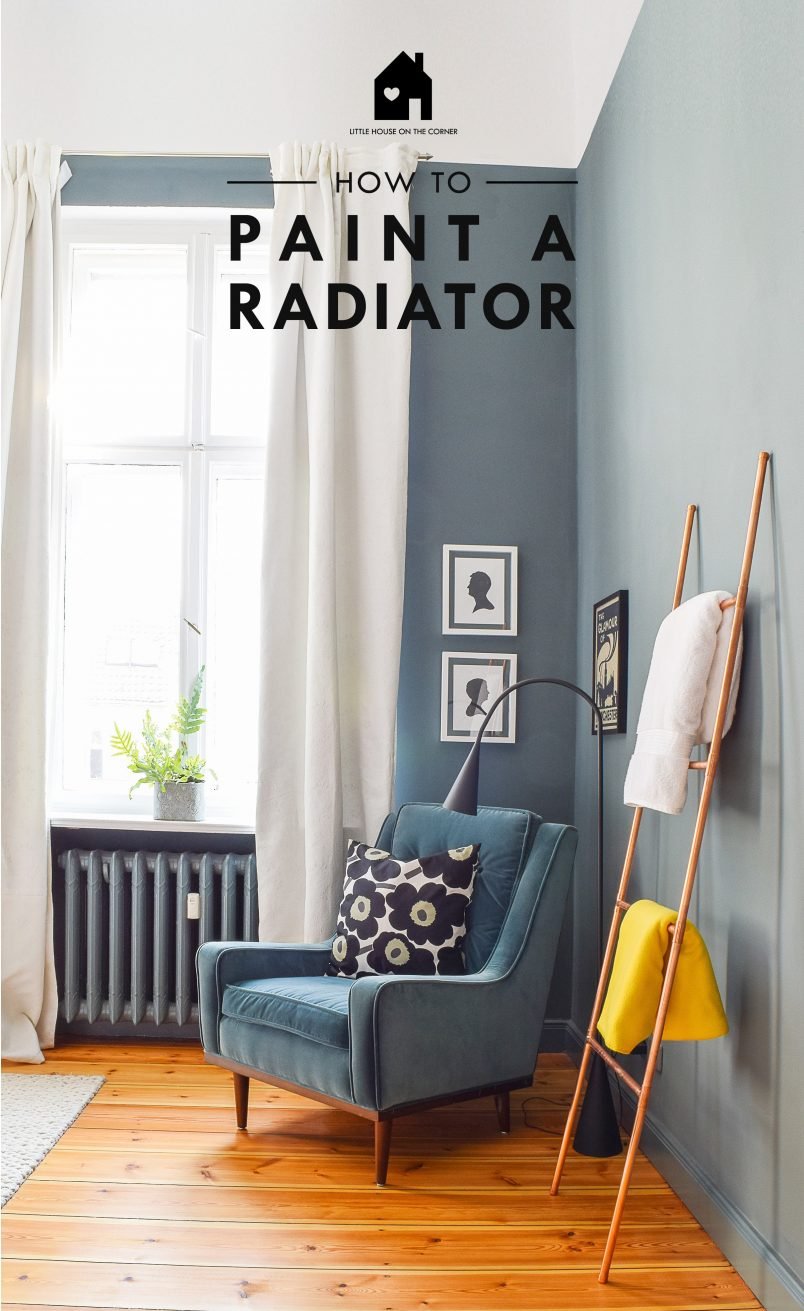
If you’re thinking of giving your radiators a refresh, here’s our quick guide on how to paint a radiator.
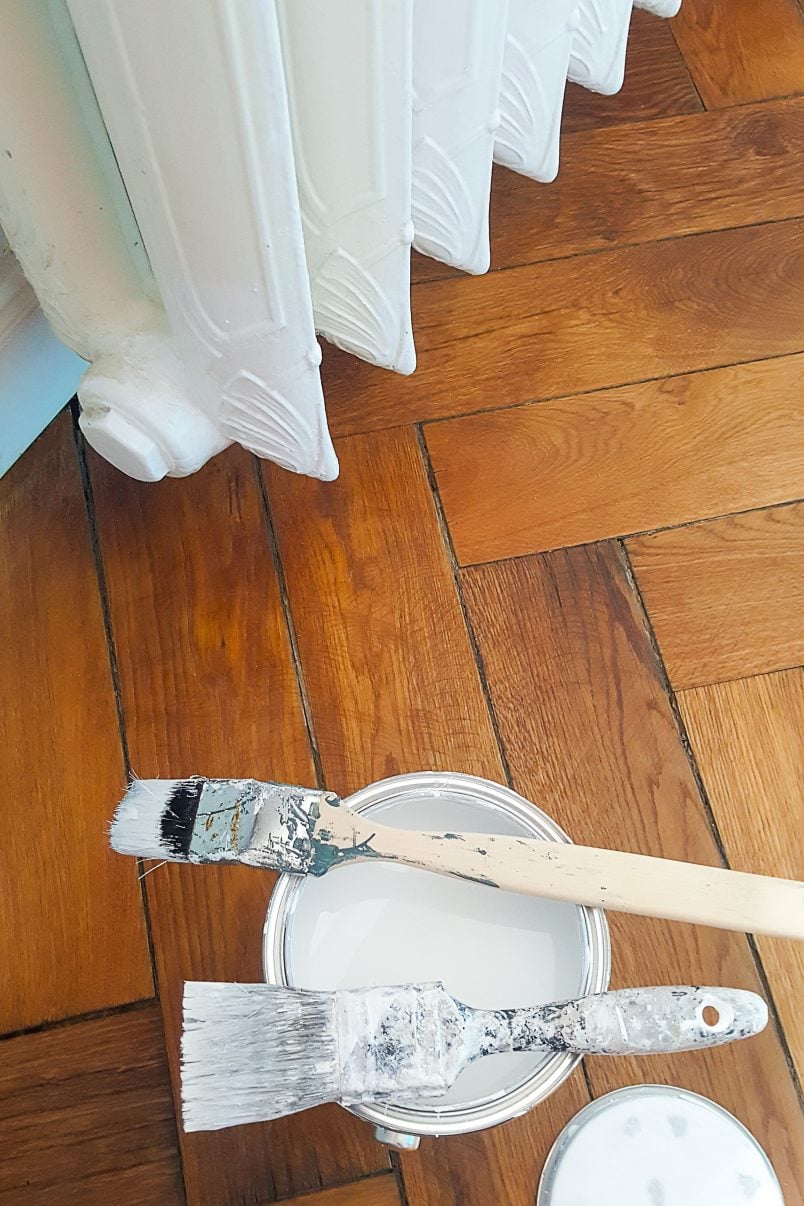
This is what you will need to paint your radiator:
This post contains affiliate links. We only recommend products we love and think that you will, too! Read our full disclaimer here.
- Water, sugar soap & sponge (and gloves)
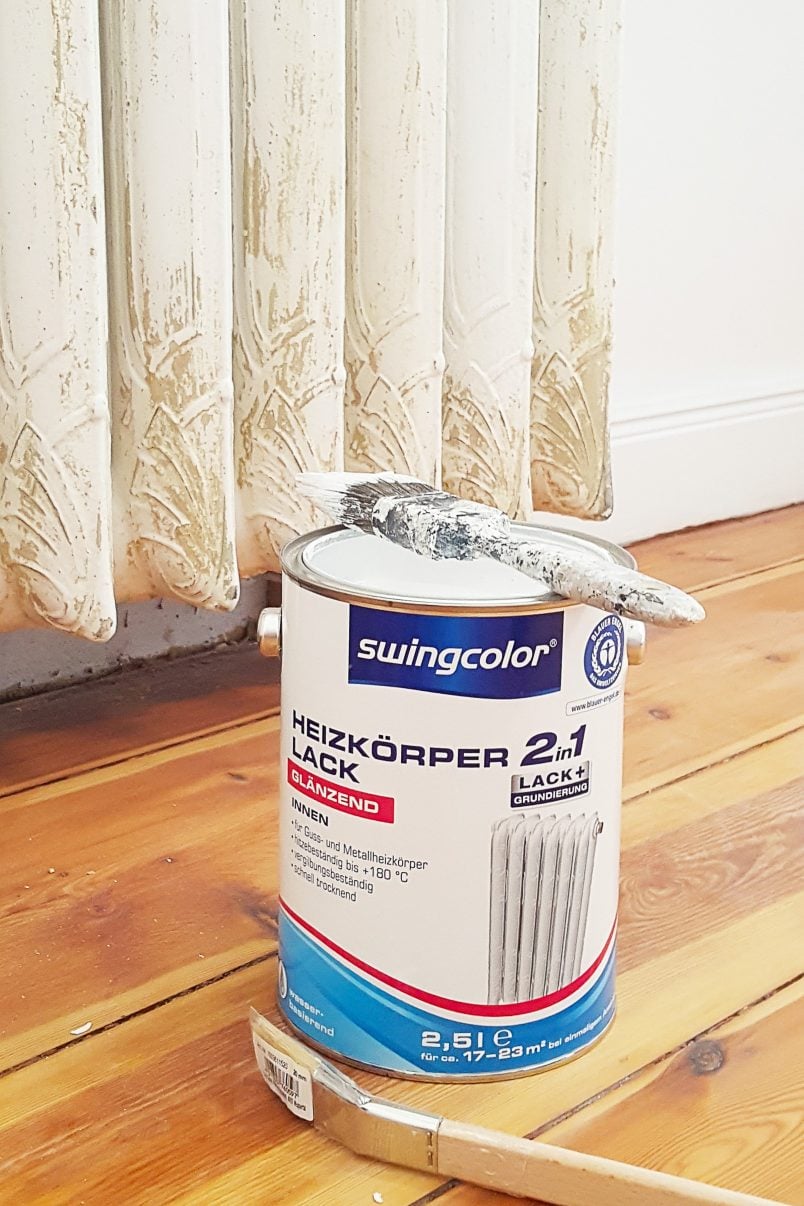
- Paintbrush (we love these brushes and use them for everything)
- If you have a column radiator you’ll need a long-reach paintbrush, too
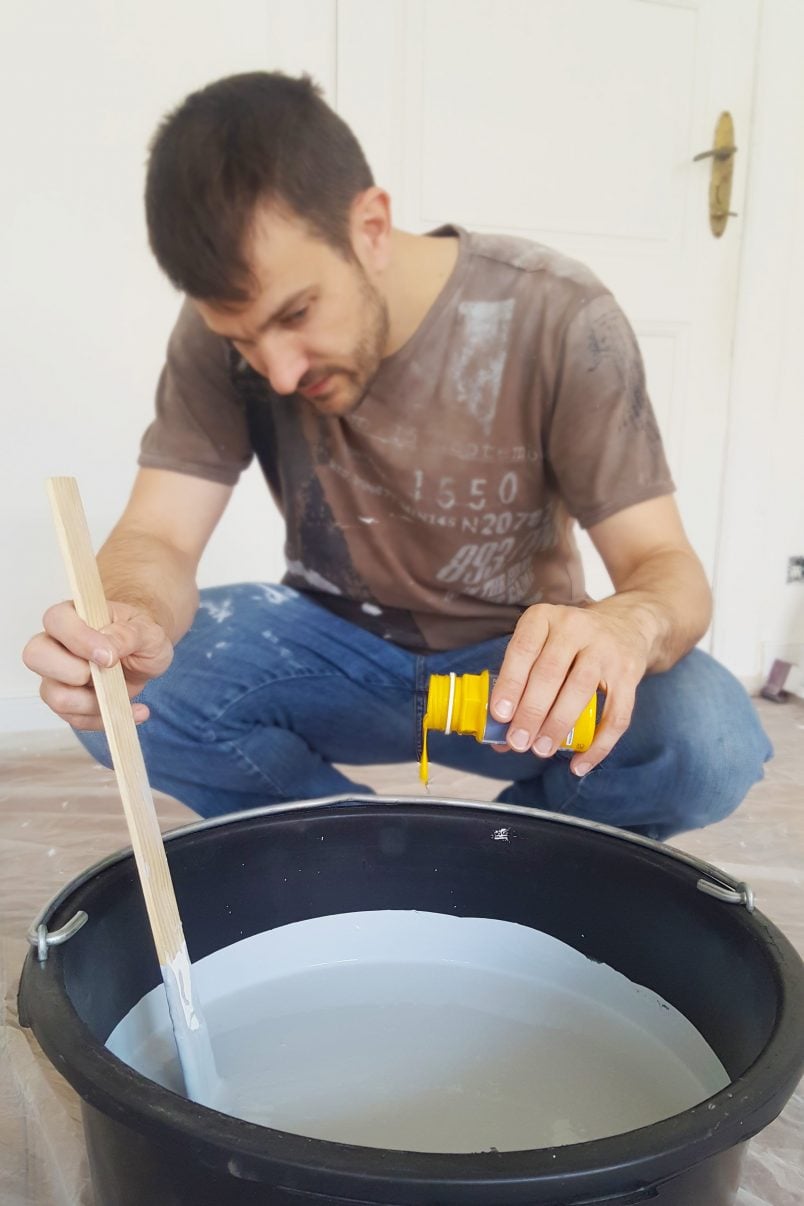
- Radiator paint – make sure to use a paint that’s suitable for radiators, is heat resistant and includes a primer for rust (or prime the radiators before painting)
- Drop cloths (to protect your floors)
This is how to paint a radiator without removing it:
Step 1
Clean The Radiator
When painting anything, the key is in the prep, and it’s no different when painting radiators.
We often find that the prep work actually takes longer than the actual painting but, as annoying as it may be, it’s the only way to achieve a long-lasting result that you’ll be happy with.
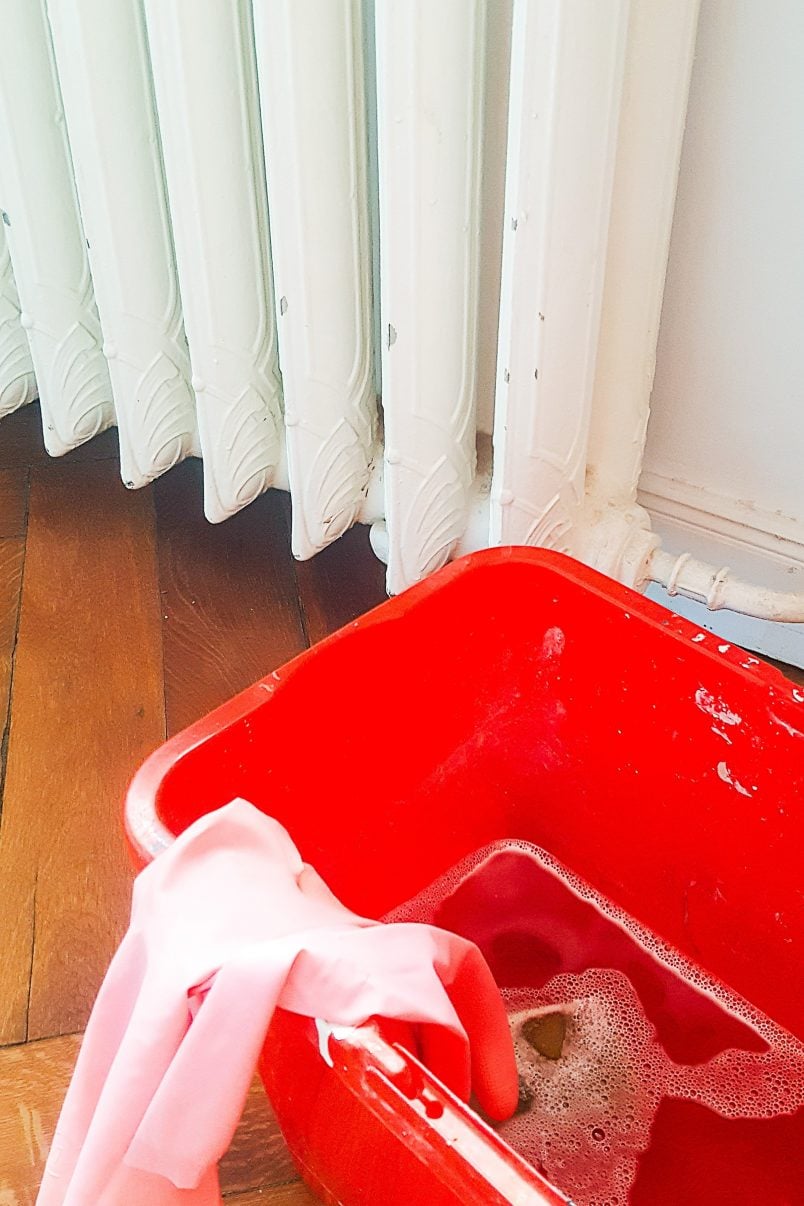
I abandoned my paint stripping efforts but it doesn’t really matter if you’re completely stripping your radiators or if you’re painting over an existing finish – the most important part is to make sure that you have a perfectly clean, dry and grease-free surface to paint.
I love to use sugar soap to clean anything that I’m painting as it’s slightly abrasive. Just give your radiators a thorough scrub with a sponge and sugar soap before moving on to the next step. If your radiators are in a better condition than ours, you could use a mild detergent to clean them instead.
You probably also want to cover your floors with a drop cloth before you start painting. We didn’t bother but we would recommend taking some precautions to catch any drips.
Step 2
Paint The Radiator
When the radiator is clean and dry you can move on to painting it.
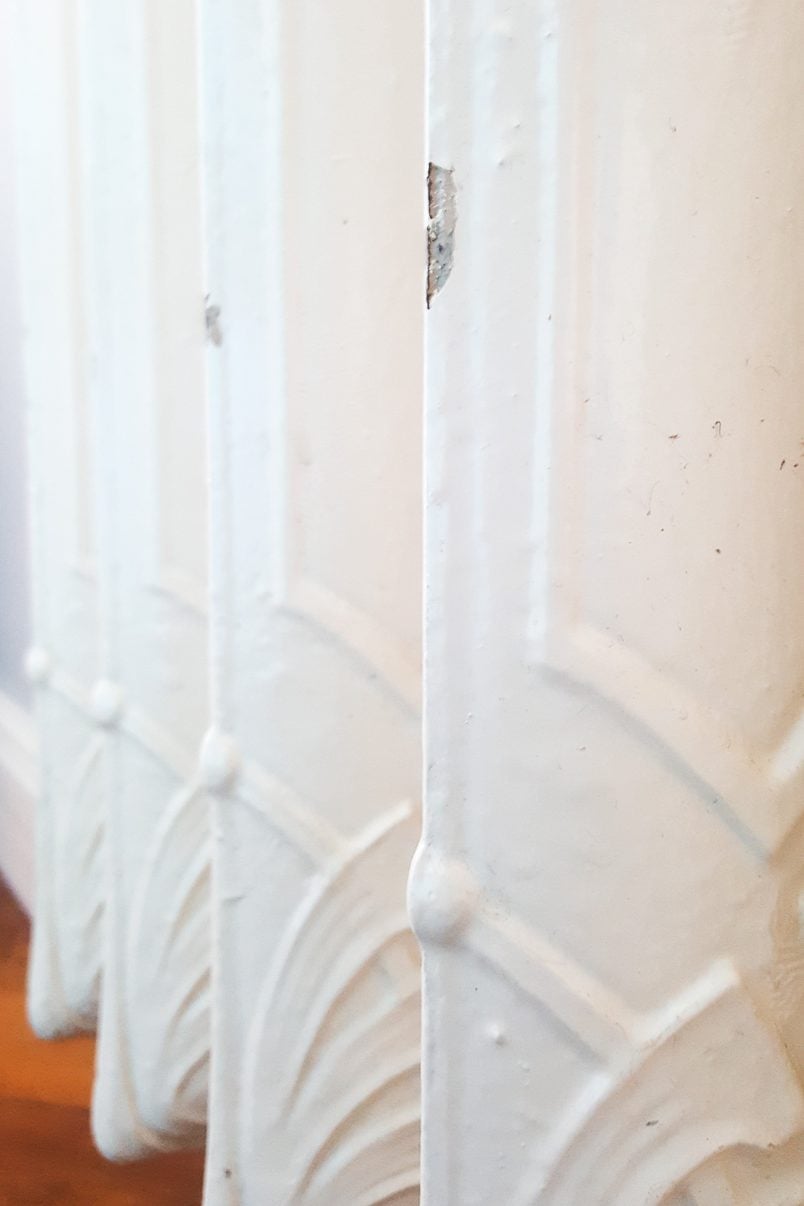
As you can see, our cast iron radiator is damaged from when I sanded the floors and you can see a line across the front of the columns where the paint has chipped from where I kept bumping into them with the large drum sander.
Even if your radiators aren’t as badly damaged as ours, it’s really important to make sure that you use metal primer and paint that’s both suitable for radiators & heat resistant and is rust proofing, too.
It doesn’t matter if you’re painting cast iron radiators or modern ones – the process of painting a radiator is always the same. Using the right paint is important for any project but even more so for radiators. It doesn’t matter if it’s water-based or oil-based paint – just make sure that it’s suitable for painting radiators.
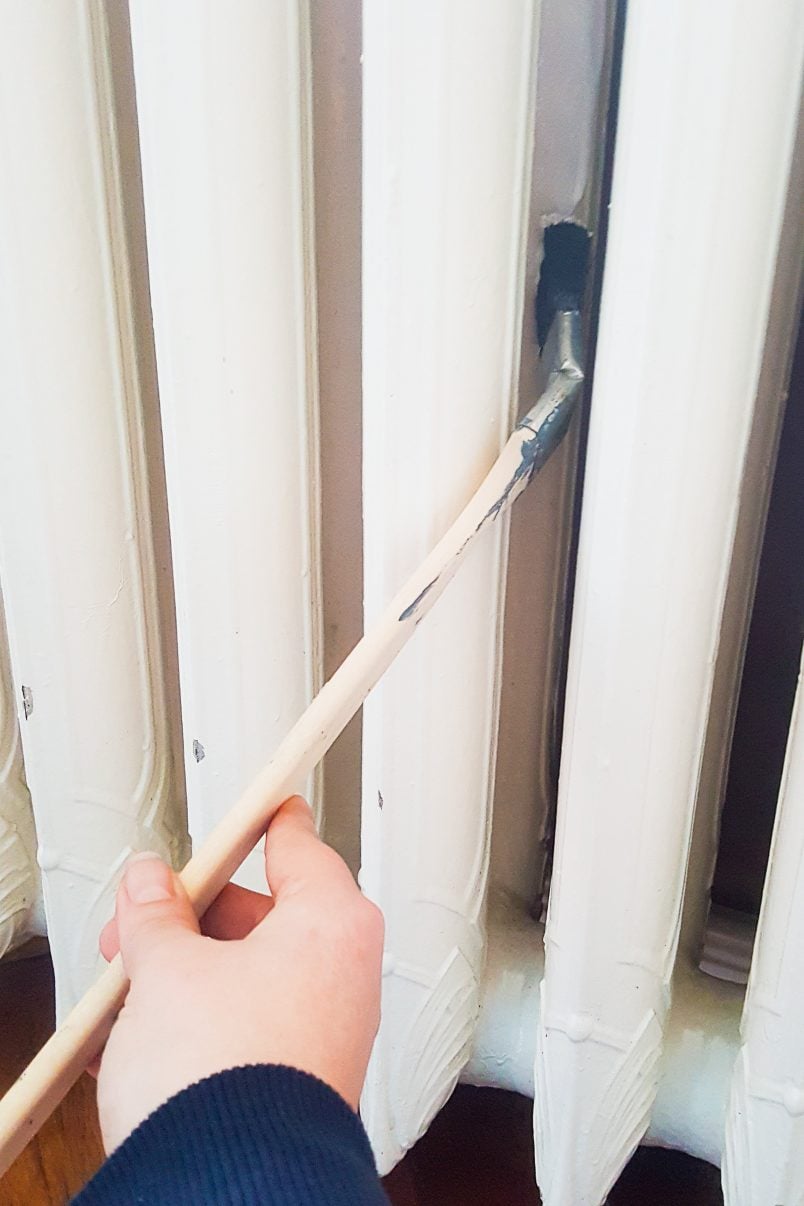
When you’re ready to paint your radiators, start by painting the back, harder-to-reach columns first and then move on to the front section of the radiator. The long, angled brush is ideal for this as it makes it much easier to paint hard-to-reach areas of the radiator and there’s no need to remove it for painting.
Start painting the back columns first, This will help avoid you getting paint all over you and your brush as you try to manoeuvre your paintbrush in the narrow spaces.
SECRET DIY TIP
Turn the radiator to a very low setting when painting it! It helps dry the paint and avoid drips.
It’s likely, that your painted radiators will smell the first few times when you start using them as it’ll take time for the paint to fully cure. By painting when the radiator is on a low setting, you’ll be helping the paint to dry faster and therefore reduce the dreaded paint smell, too!
And that’s all there is to it! It took me a couple of hours painting per radiator but it was well worth it for the difference (and cleanliness)!
Now I just need to paint the rest of the radiators in our apartment. I’ve already ticked the bathroom, master bedroom, guest bedroom and living room radiators off my list – only 5 more to go! Then I can move on to the doors, skirtings, moulding, and windows. The fun of DIY around our home just never stops!

How To Paint A Radiator FAQ
Ideally, you will your special radiator paint that is formulated to withstand high temperatures. Alternatively, you can also use satin or eggshell paint that’s usually suitable to paint metal.
Yes! Painting your radiators is a great way to transform your room. You can paint your radiators the same colour as your walls so that they blend in or make a feature of them by choosing a bold colour.
Whatever you do, do not paint your radiators with emulsion. It will make them impossible to keep clean and you won’t be able to achieve a smooth paint finish either. If your radiators are made of cast iron, painting them with water-based paint could make them rust!
If you’re not lucky enough to have gorgeous old radiators that you can paint, why not build a radiator cover to hide them? We just finished building a gorgeous new DIY slatted radiator cover that was very easy to build and won’t reduce the efficiency of your radiator! And, if you have a radiator that you have to remove because you want to replace it or plaster the wall behind it, you can see exactly how to remove a radiator here.
Have you painted your radiators to match your walls? Do you think it’ll be worth taking our radiators to be stripped and repainted or should we just live with the fact that some of the detail has been lost under old layers of paint?
Emily says
Hey! Thanks for the helpful post. Your floors are gorgeous. What did you finish them with? The room with the herringbone pattern looks similar to the Douglas fir I just laid in my sunroom. Looking for options to protect it without making it too shiny.
Christine says
Thank you so much for the compliments about our floors, Emily. We’ve shared lots of posts about the process of sanding and oiling them – you can see all of our floor-related articles here. We love the oiled finish, too, but found that the oil we used made everything slightly yellow, so we’re hesitant about recommending it. If you do want to check it out, it’s by a company called Leinos. We love the oil, just the colour change was a tiny issue.
Cx
Michelle Sarich says
Hi Christine and Jan,
I’ve enjoyed reading your blog. We are thinking of getting a sander for wood. Do you have a favourite?
Christine says
Thank you so much, Michelle! We’re always happy to help when it comes to recommendations. We share lots of our favourite tools in the “Our favourite Tools” section on the blog but haven’t actually included a sander on the list! Whoops! Generally, it’ll depend on what kind of sander you’re looking for as there are lots of different types like orbital, belt and mouse sanders. To start with, we’d recommend a mouse sander as it’s fairly versatile and super easy to use. We have this mouse sander which does the job and is affordable (affiliate link) although you may want to consider a cordless battery-powered if you prefer not to have a cable.
Hope that helps & happy sanding!
Cx