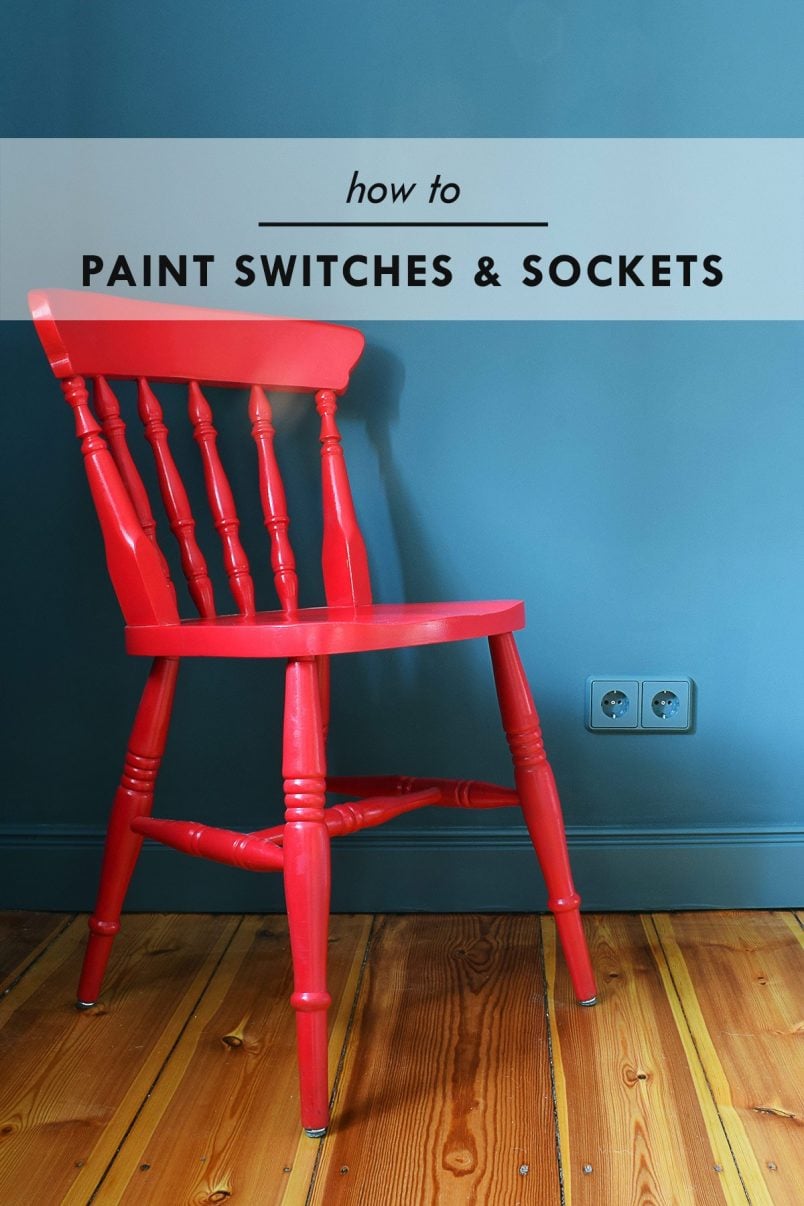
It’s been a mad few weeks around here, but we’re getting close to completing our bedroom makeover.

It’s already gone through a huge change over the last few weeks. Our previously yucky floors have been sanded, and we’ve not only painted the walls but have also painted the doors, radiators and skirting (more on that soon)!
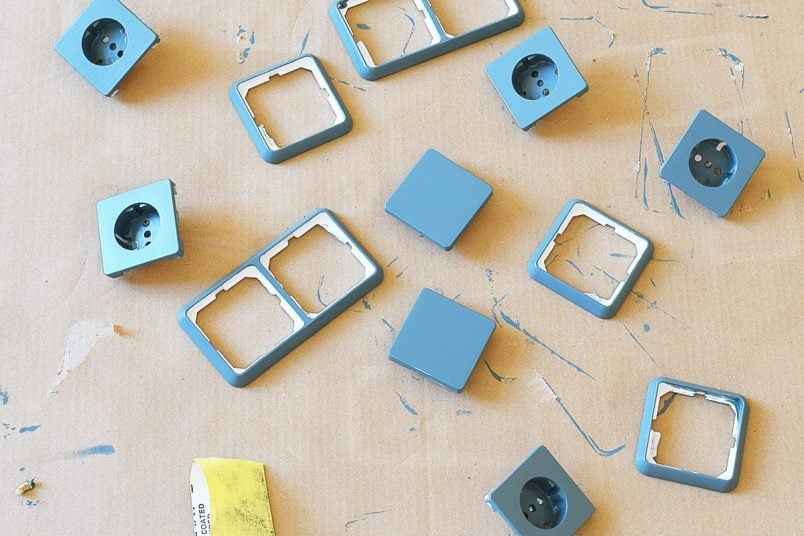
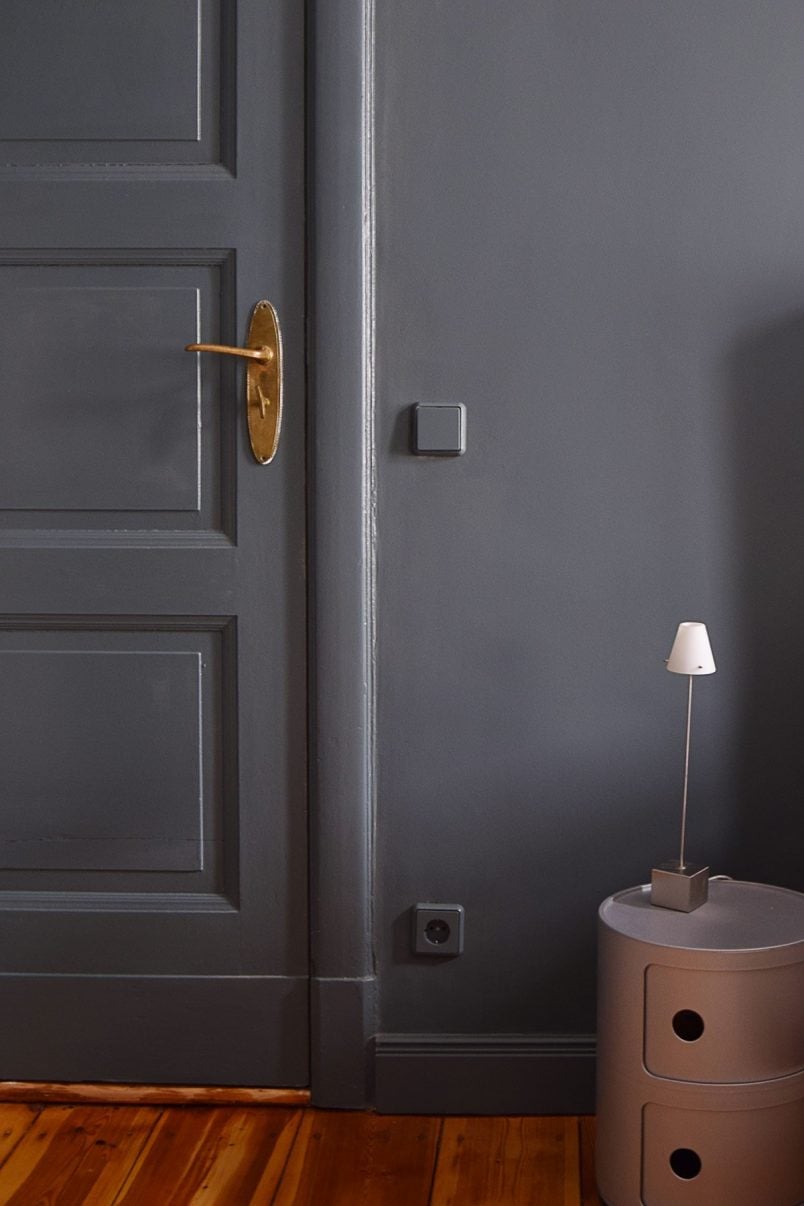
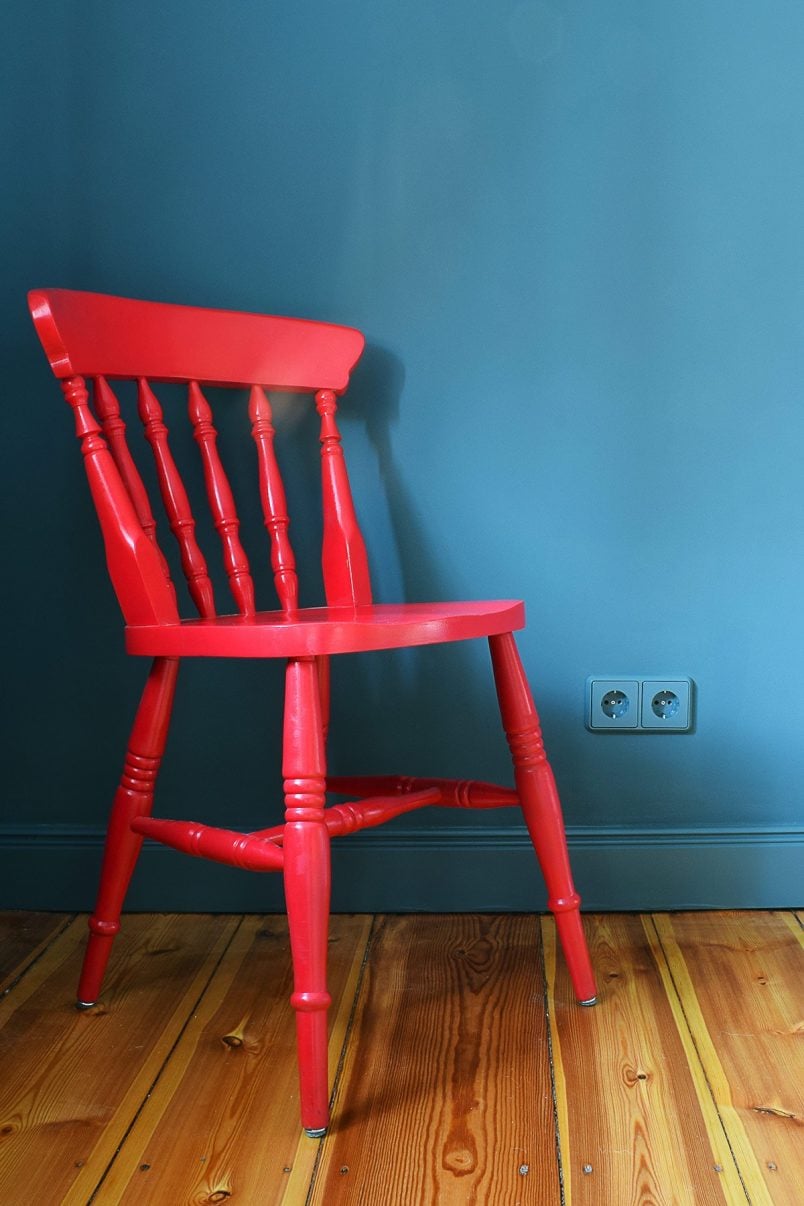
After painting everywhere a dark colour, one thing that really stood out – and not in a good way – were the bright white sockets and light switches, so I decided to paint them, too!
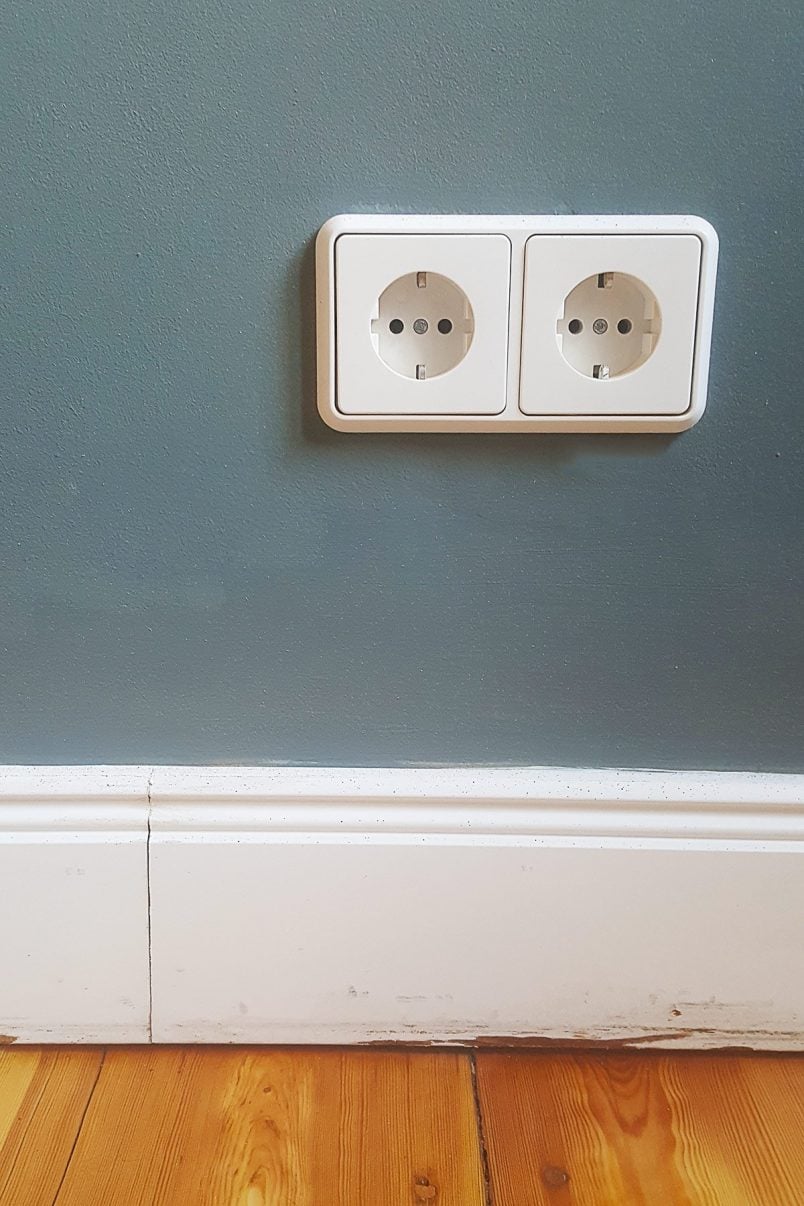
I have to admit that I was a bit unsure about how well painting switches and sockets would work, but it turned out so much better than I’d expected.
I should say that we’re only thinking of this as a temporary solution, and we would eventually like to replace all switches and sockets throughout the whole apartment.
Given that our current covers are just basic cheap ones, we figured that we have nothing to lose. And, let’s face it, they couldn’t look much worse, could they?
If you’re thinking of painting your light switches and sockets, here’s how we did it.
This is what you will need to paint your switches and sockets:

This post contains affiliate links. We only recommend products we love and think that you will, too! Read our full disclaimer here.
- Etch primer for plastic
- Paint in the colour of your choice – we’d recommend a water-based eggshell paint (check that it’s suitable for painting plastic)
- Paintbrush
- Sandpaper – at least 240 grit

This is how to paint switches & sockets:
1. Remove & clean
Start by removing the covers from the wall. Obviously, it’s important to stay safe, so don’t forget to turn off the electricity first!
Then give them a thorough clean to remove any dirt and dust and make sure they’re completely dry before moving on to the next step.
2. Prime
When painting plastic, priming is the most important step as it ensures a good key between the smooth plastic and the paint.
That’s why we used an etch primer to coat the switches and sockets before painting them. After all, we want the finish to be durable!
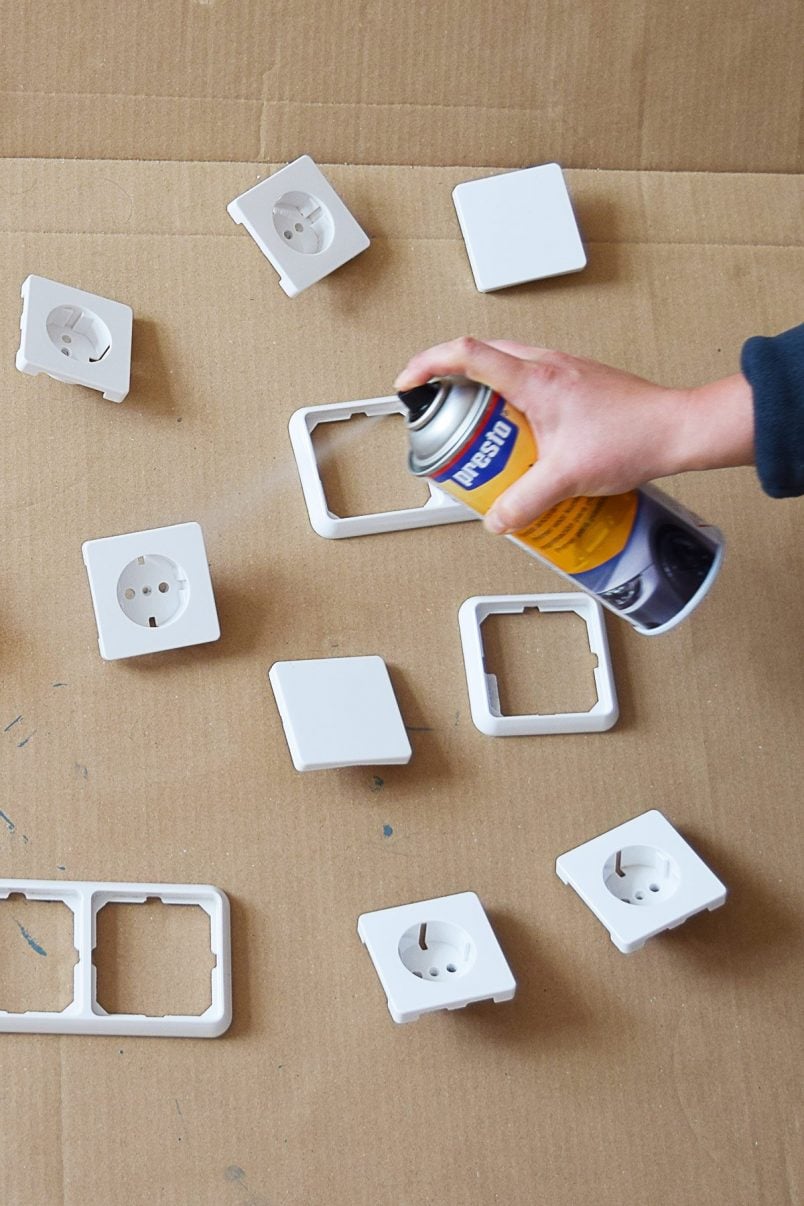
Give the covers a light spray with the primer and wait until it dries completely. Then give them a second coat of primer.
3. Paint
When the paint has dried, you can finally start to paint the covers.
As always when painting, lots of thin coats are much better (and more durable) than one thick one.
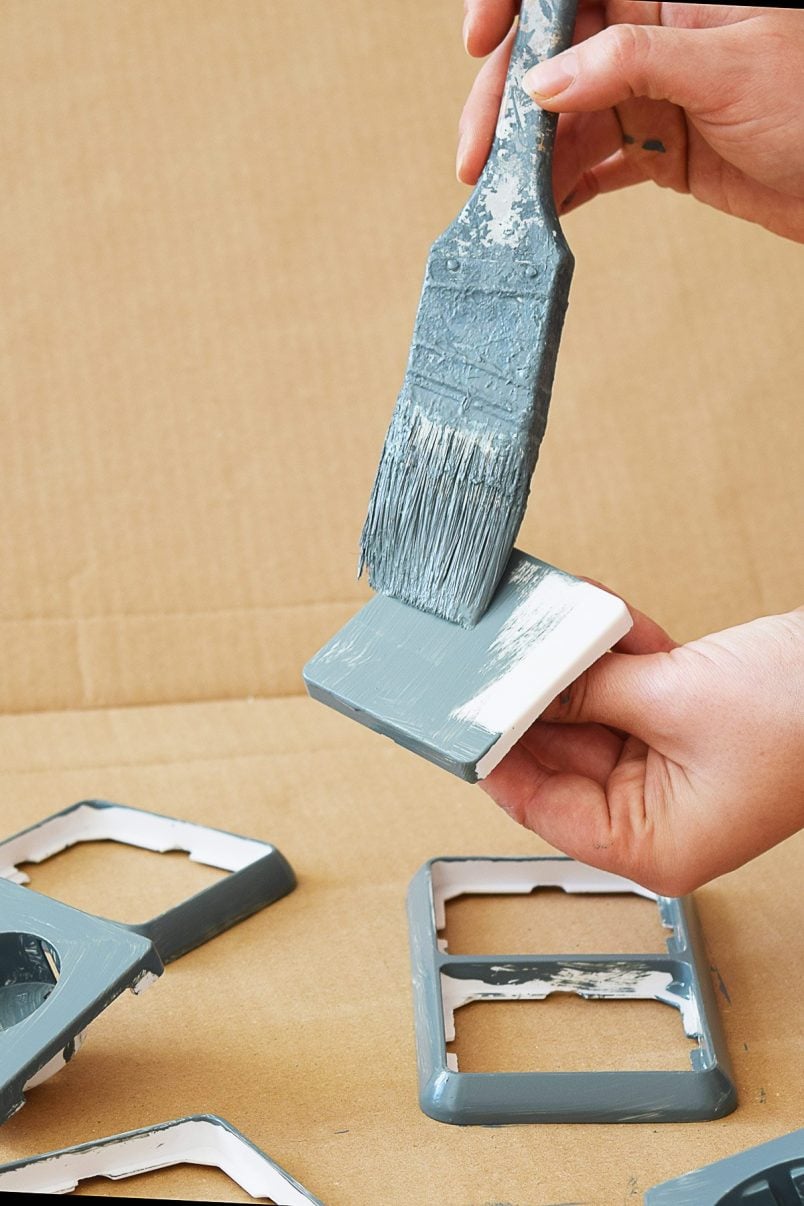
We painted our switches and sockets three times. After letting each coat of paint drying thoroughly we then gave the covers a light sand with some fine sandpaper before applying the next coat of paint.
4. Let it dry
It’s kind of obvious that you have to wait for everything to dry before reattaching it to the wall, but in this case, it’s even more important than usual.
It takes a long time (around 28 days!) for the paint to fully cure, and until it does, the finish will still be a bit delicate.
So far, our painted switches and sockets are holding up really well, and there’s not a single scratch or worn patch.
I’m really so pleased that I tried this project. It may not last forever (we’ll share an update after a few months), but they definitely look so much better than the white switches that were there before.
We still have a few updates and improvements to finish off in the bedroom, and we’ll share the full reveal as soon as we’ve put the room back together!
Have you ever tried painting switches and sockets? Do you think we’re mad to paint everything the same colour?
If you like this project, you will love these, too!


Jennifer Clements says
I painted our radiators & pvc window frames, which worked out fine but I was worried painting the light switch’s & sockets would look rubbish
But yours looks fab! You’ve given me the confidence to just have a go before I go out & pay for all new ones. XXX
Christine says
I’d always recommend trying out one first but the finish on ours held up beautifully and it’s something I’d definitely do again! It’s definitely much cheaper than buying new ones!
Cx
PS. Would love to see a pic when you’ve done!
Ragnar says
Forget Berker 1930! They’re nice but IMO too obviously reproductions. If you want to spend that kind of money, go for THPG’s black bakelite range!
The glass ones are even cooler and more appropriate for your place:
Duroplastschalter – Glasabdeckung
Bakelitschalter – Glasabdeckung
The rotary switches are truly authentic, the toggle ones not quite, the covers are missing one screw. The surface-mounted ones are too clunky to be authentic if you ask me. If your apartment even had electricity when it was built it probably had something like the Fontini range originally though.
I have to admit I’ve never seen those in person though, they might be too clunky too. Dimbler by the same company is seriously cool but probably much more authentic for a UK home.
Christine says
I had a look at the Berker switches in real life and actually think they’re a quite sympathetic reproduction. They are very obviously a modern version but I don’t mind that.
I have seen the THPG switches before and I love the glass ones!
At the moment we’re not sure what we’ll be doing. I’d love rotary switches but spending that kind of money on a light switch seems a bit bonkers, too!
Cx
Lins @ Boo & Maddie says
This looks amazing! Funnily enough I’ve also got my eye on very expensive plug socket updates so I’m going to do them bit by bit but it will be worth it I hope ? X
Christine says
Love that I’m not the only one with expensive taste, Lins!
I’d thought about replacing them room for room but I’m paranoid that I’ll get through half of the apartment and they’ll stop making the switches!
Maybe I should just find ones I like and we can afford! ;)
Cx
Tamara says
I painted mine 10 years ago. I put a couple coats of urethane on top (mine are different, they have toggle switch that sticks out). They’ve lasted really well. They could use a touch up now, but I’d do it again,
Christine says
That’s really good to know, Tamara! I have hope that ours will last for a long while, too. Thanks for sharing your result!
Cx
HouseTreeBeast says
I really like the look of this actually. But I would worry I’d have to redo every one of them if I get tired of the color. You’re not worried about that?
PS: I have a post up on that en suite door I promissed some time around
Christine says
Thanks! I’m not worried about having to repaint them. It’s only meant as a temporary solution as we’d eventually like to replace them all. Painting the switches and sockets also didn’t take long, so they’d be quick to update again if I should change my mind.
Off to check out our en-suite door…
Cx