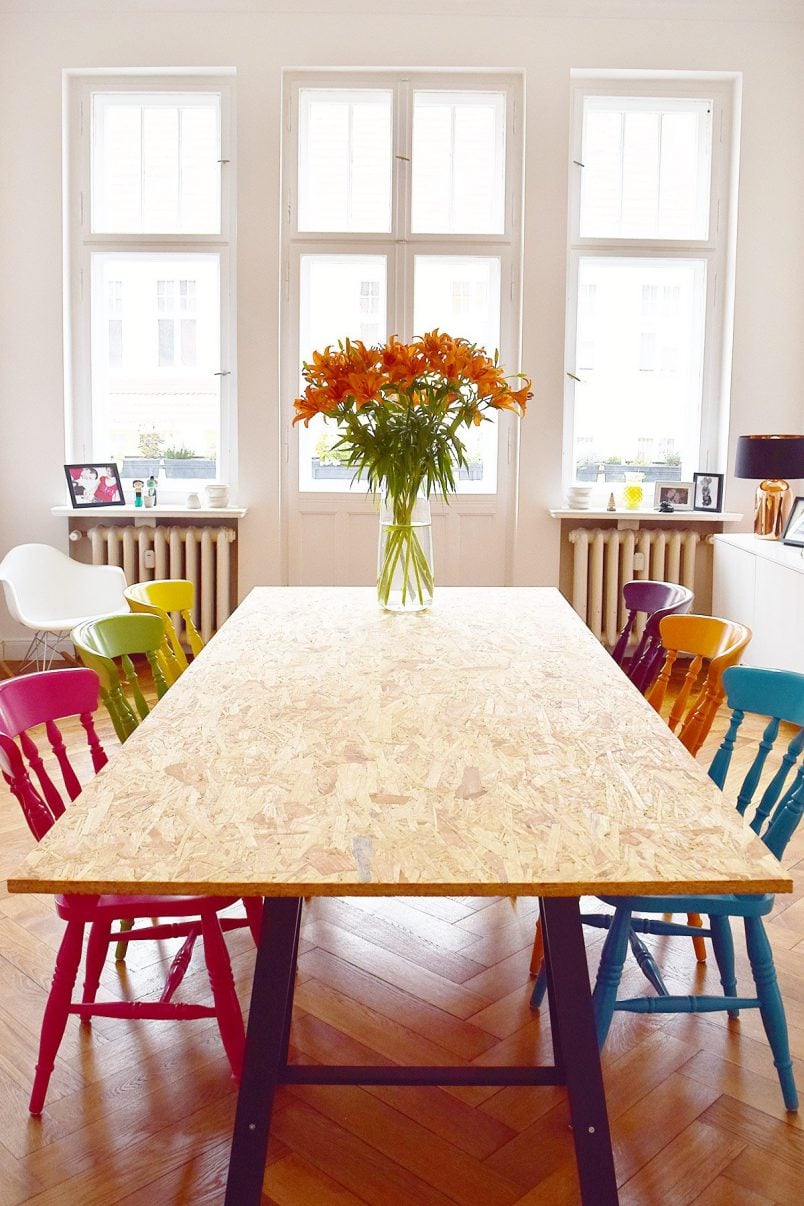
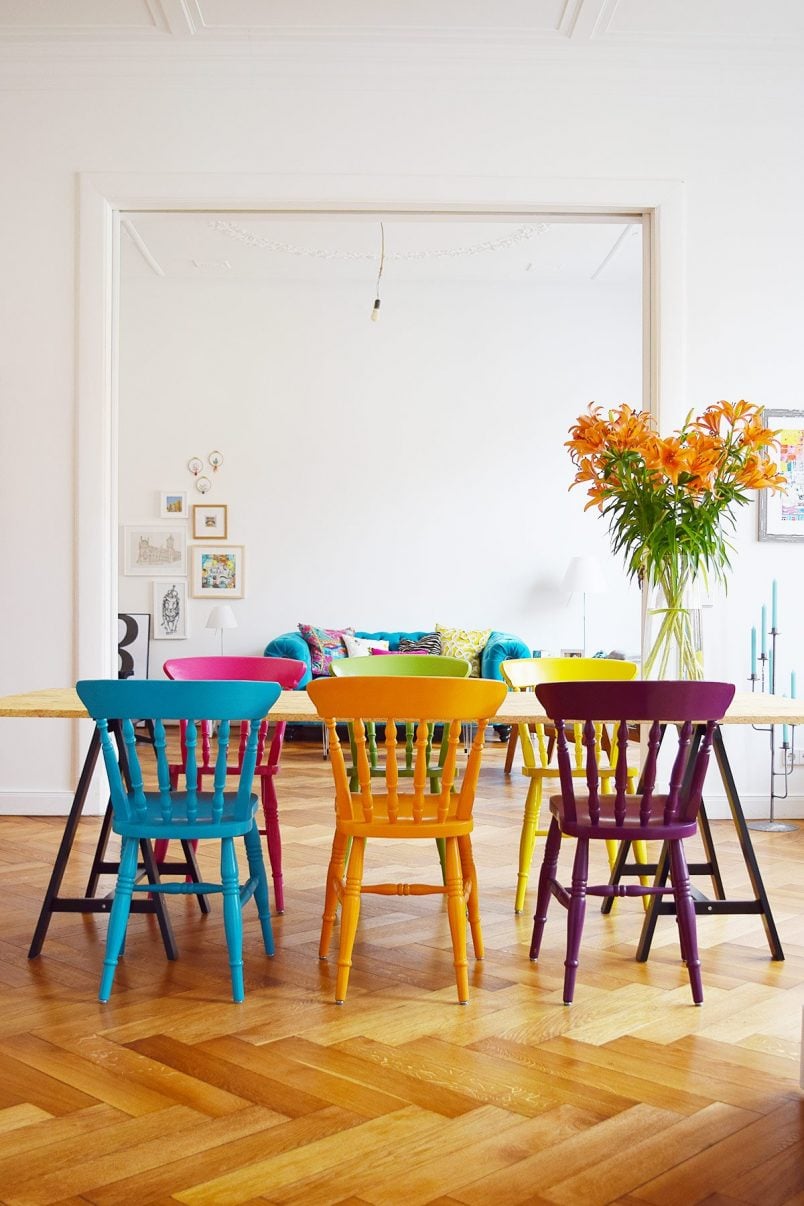
We have a new DIY dining table!
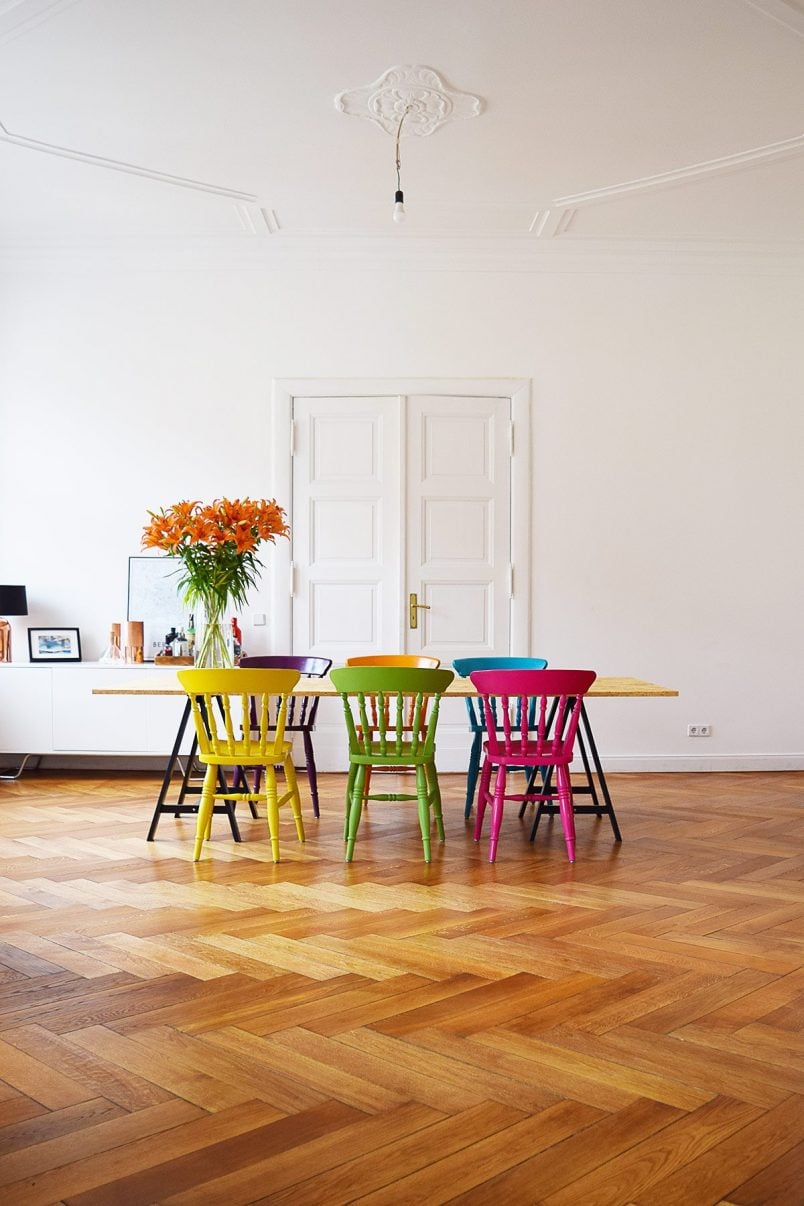
I’m really pleased with how it turned out but I have to admit that I feel a bit of a cheat calling this project a DIY dining table as there’s so little to it, that it can barely be classed as a DIY at all.
Basically, it consists of placing a piece of wood on some trestles. Simple, right?
Well, it would have been if I’d not decided that we didn’t need to hire a car to transport the sheet of timber back to our apartment and instead carried it home on the train!
Yep, you heard right – on the train! And, as you can see, Jan wasn’t too impressed.
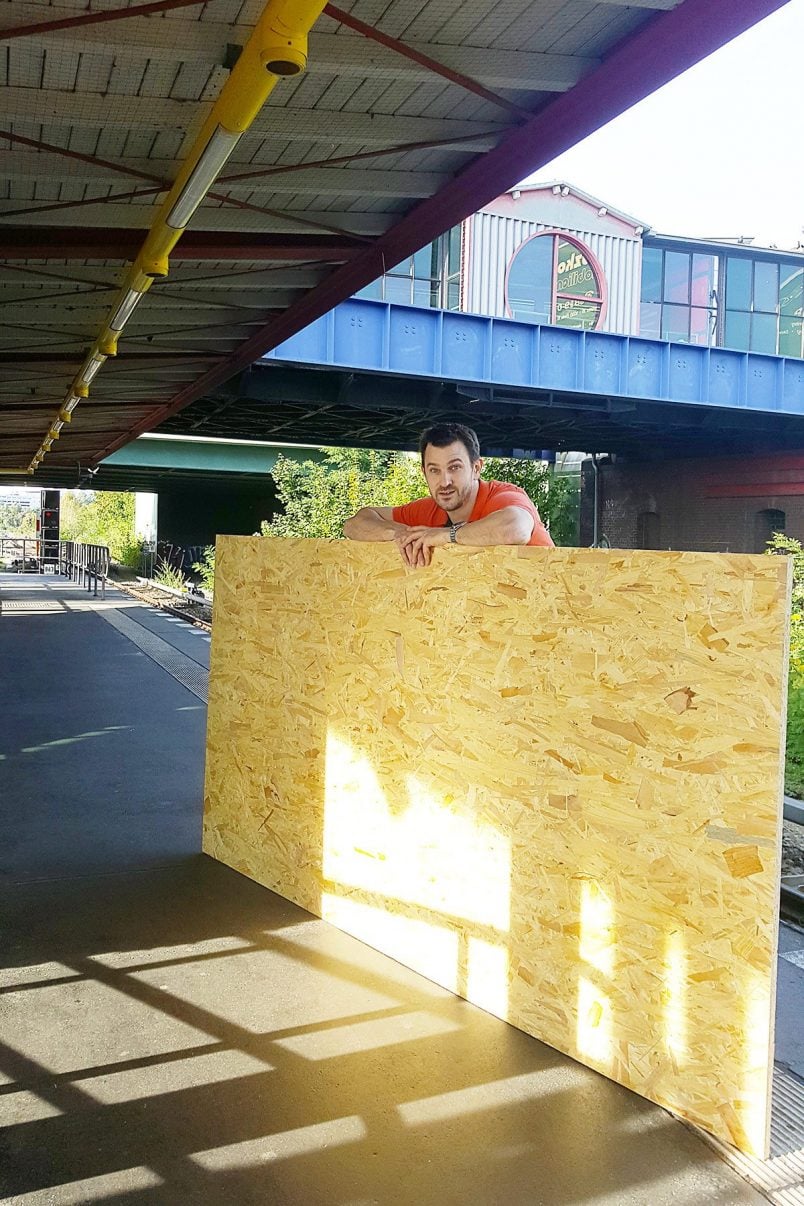
Now, if you think we’d lost our minds (most passengers on the train seemed to think so), you might possibly be right. In my defense, I didn’t realise that the OSB board was quite as heavy as it was and I totally admit that I’d missed the bit on the website where the weight was stated.
It weighed a whopping 40.43kg!
Let’s just say that carrying it home on the train, over the road and then up four flights of stairs wasn’t the most fun Jan and I have ever had.
Once we’d managed to get the supplies into our apartment the rest of the project was a complete breeze and, even if it can’t really be classed as a DIY project, here’s our guide to making your own DIY dining table.
This is what you will need to build a super affordable DIY dining table:
This post contains affiliate links. We only recommend products we love and think that you will, too! Read our full disclaimer here.
- 2x Trestles (we used Oddvald from Ikea)
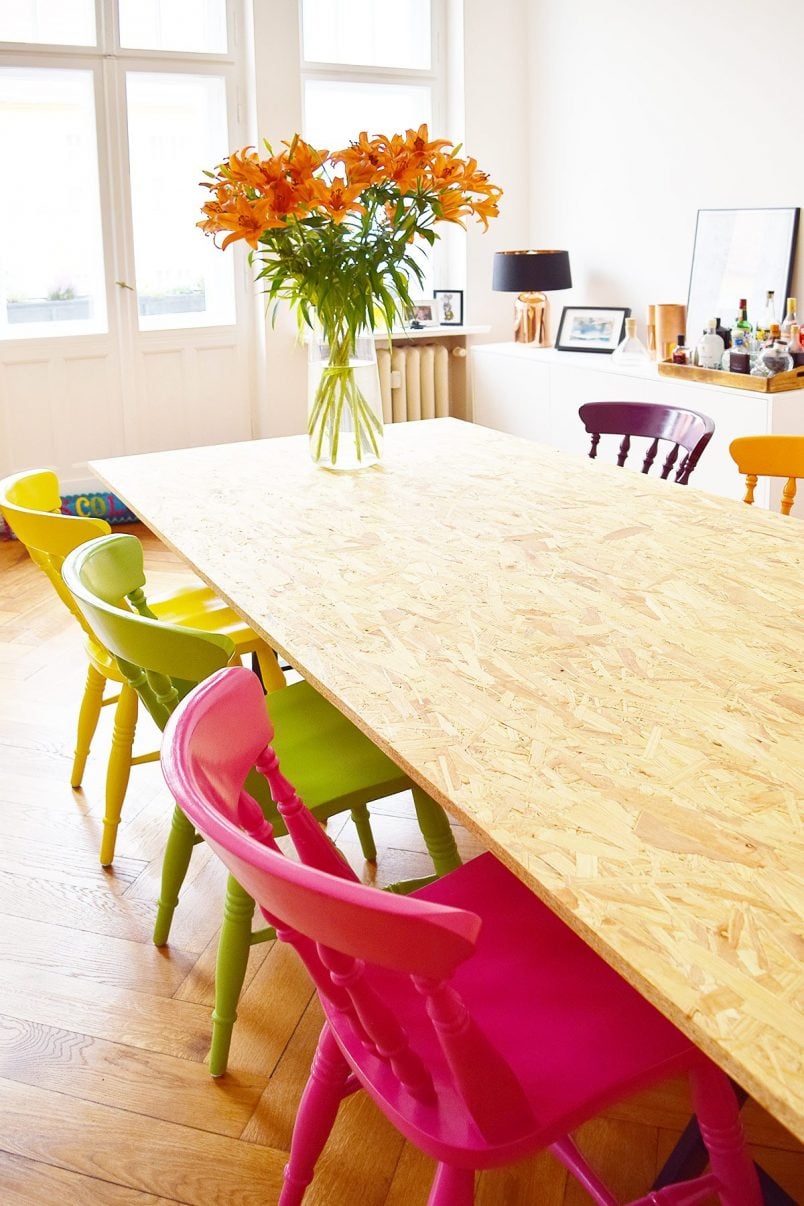
- 1 x OSB board in the size you want your table to be (ours is 250 x 110cm x 22mm)
- Oil or varnish to seal the surface (we used some of the oil we had left over from our newly sanded and oiled floors). We recommend using this oil which we love for oiling all of our wooden furniture.
- Sandpaper (about 40 grit and 120 grit would be ideal)
SHOP OUR DIY ESSENTIALS

This is how to make a DIY dining table:
1. Start by working out the size you want your table to be. This is inevitable the most important step in the process as you’ll have to purchase your supplies accordingly. You could even get your board cut to size at the DIY store!
We’d recommend getting the thickest board possible. The thicker it is, the less it will start to sag in the middle.
2. Position your trestles and place the board on top. Check the board is the size you want it to be.

3. Cut the board to size (if you’ve not had it cut where you purchased it). We used our handy small circular saw to cut a strip off one of the sides.
4. Next, give the OSB board a sand to make sure there are no rough edges or sharp bits on the surface.
Start by sanding with 40 grit paper and then when everything is completely smooth give it another sand with 120 grit paper. This will ensure that you’re left with a lovely smooth surface.
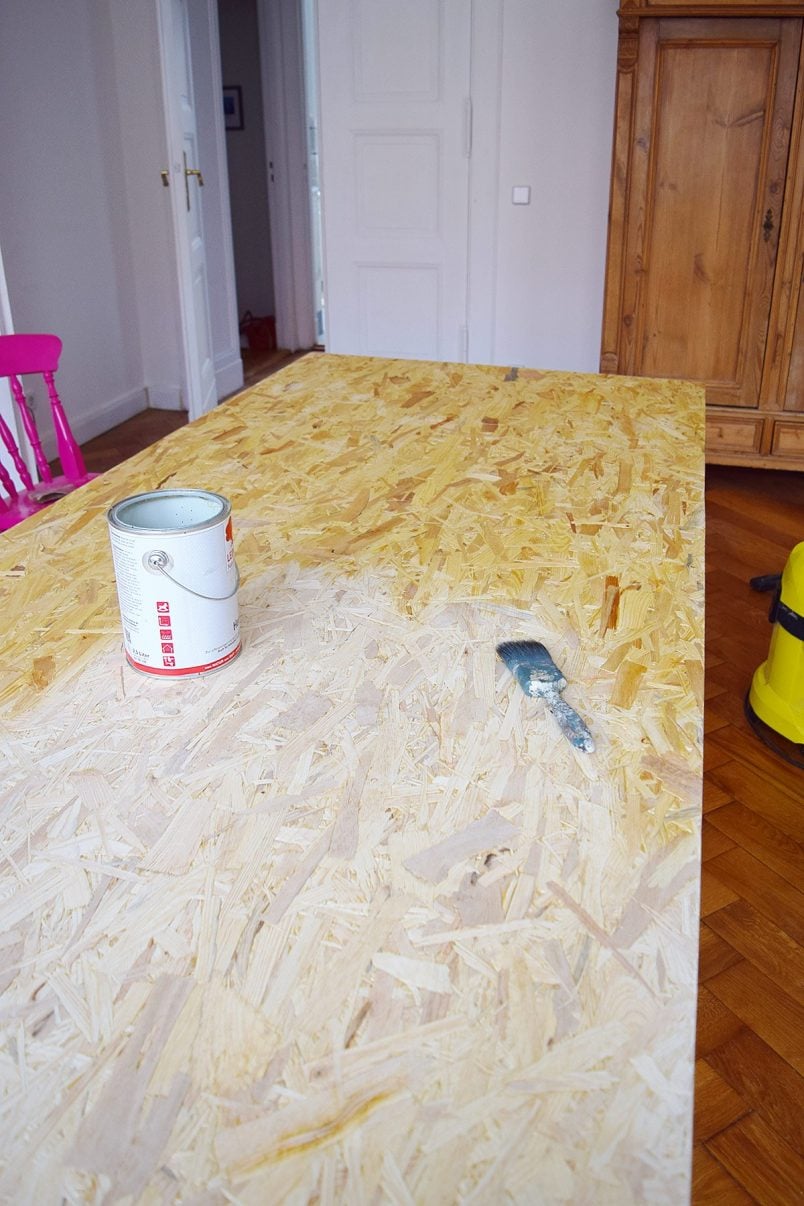
5. The last thing to do is oil or varnish the surface. Because we still had some left over, we applied the same oil we used for our floors. Exactly how you’ll have to apply your finish will depend on what you’re using. In our case, we had to apply 3 coats of oil over the space of a couple of days.
We didn’t love the oil we used on our floors so don’t recommend it. The oil we almost always use to protect our furniture is this danish oil which leaves a lovely smooth and silky finish. You can see how we used it to oil our new sideboard after removing a large watermark here.
And that was it!
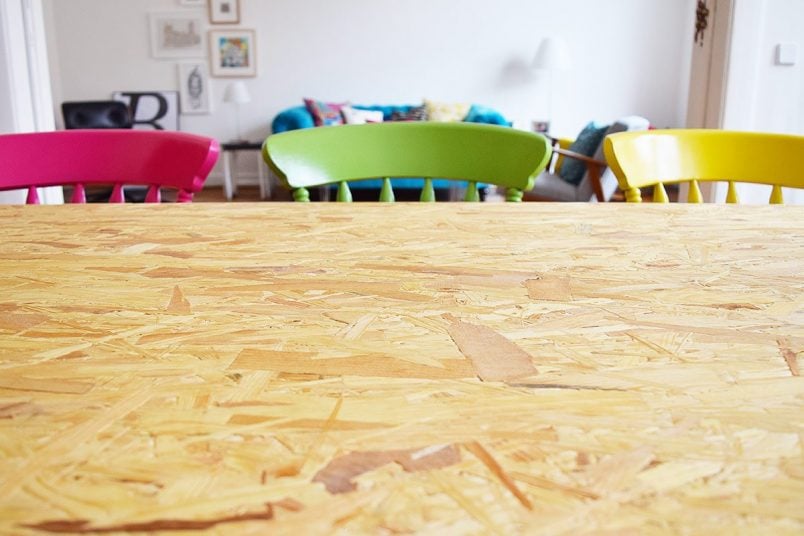
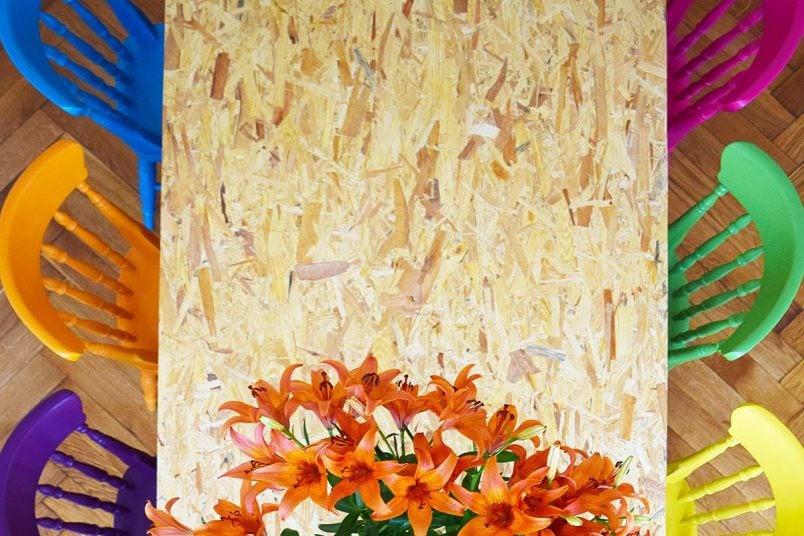
I love the texture of the OSB table top and I’m surprised to say that I even love the more relaxed and thrown together look of the table. It has a kind of loft-style feeling which I think works surprisingly well with rest of our apartment.
Pretty much everything we own feels too small for our fairly large and high rooms and the main reason we decided to change the table was because our previous one looked completely out of proportion with the room.
It may not be the most glamorous of solutions but the size and scale of our new DIY dining table definitely works better in our dining room. It’s also a table I’ll be able to craft and DIY at without feeling guilty if I scratch it.
Ultimately we would like to replace it with a “proper” table but it’s something that’s way down our priority list at the moment.
I hate being wasteful, so when we do finally get round to purchasing a new table I can always use the board to make something else!
Tips:
- Make sure to sand the edges thoroughly as they’re really rough.
- Don’t forget to sand the underside (at least around the edge) where you’ll be sat. It’s a rough material and you don’t want to end up with splinters!
- Don’t skip varnishing, waxing or oiling the surface. OSB is essentially lots of pressed wood slithers so you really want to seal the surface to avoid any splinters!
Have you ever made your own furniture? Do you love OSB as much as I do? Do you have a favourite piece of furniture in your home? Have you ever transported anything unusual on public transport?
Lisa says
…OSB cab absorb water like a sponge…Oil doesn’t seem like a sufficient finish? Even a poly would still be pretty vulnerable if scratched I’d think? The OSB looks nice but the texture isn’t typically smooth so id think it would be harder to wipe clean. A sheet of plywood would be my choice first. It’s more expensive but takes better care of the above concern, is more durable, and comes in the same size. This is a quick table and the chairs with it in the space look great!
Christine says
It was super durable, Lisa and we had no problems at all. You’re right about the texture though which made it a bit more difficult to wipe clean. Because it worked so well, we’ll actually be using an OSB board as a temporary table in our new home, too.
It was only ever meant to be a temporary solution, and we ended up covering it with resin. You can see our faux-terrazzo resin table here.
Cx
edouardo says
Hello! the table is great!!
I would love to do the same! Can you tell me what wax you use to protect it from water? Thanks in advance :)
Christine says
Thank you. It was only ever meant to be a temporary solution and we actually upgraded it (you can see what we did here). This version was great as well, though! We sealed it with some oil that we had left over from our floors. You don’t need anything special to seal it though. Just some varnish, oil or wax that you can buy at any DIY store will be more than enough.
Cx
Dani says
May I ask where you got the chairs from?
Christine says
We bought them at a vintage reclamation shop and painted them ourselves. It’s an easy thing to do and it’s easy to find second-hand chairs online or at local salvage shops.
Cx
Zinzi Minott says
Heya, can you say a bit more about your chairs. The finish is super shiny and I’d like to try something similar.
Thx
Christine says
They were second-hand finds that we painted and then varnished for extra durability. We used some of the floor varnish we had left over from when we sanded our floors (it’s called Granwax Aquathane) but any hard-wearing varnish will do. Hope that helps!
Cx
Maxine Francis says
I was looking up how to make table out of OSB board and came across your page really put mind at ease to think I can do this …
Christine says
It’s really so simple, Maxine – you can definitely do it! It is very heavy though, having said that we did carry it up 89 steps ;). Just make sure to thoroughly sand it so that you don’t get any splinters! You may also want to check out what we ended up doing with the table, as this was always only meant to be temporary. You can see our finished dining table here.
Cx
Laurie says
Can you tell me about the chairs? Did you buy them those colors or did you paint them? If you painted, could you tell me the cookie’s you used?
Christine says
Yes, we painted them, Laurie! They were second-hand find s- we actually only bought 4 and then had to search for another year to find 4 more that were exactly the same. You can read about how we painted them and what colours we used here and our second round of painted chairs here.
Cx
Ps. We’re just working on a table update and have completely changed it! It looks amazing, so stay tuned ;)
Betty says
Hi, great job with the table! I’m wondering did it sag in the middle after all? It’s been a year and I’m courious because I would like to make very similar dining table with osb board :-) thx, B
Christine says
Thanks, Betty! The table has been up for almost exactly a year and it’s not sagged at all (so far). I totally admit, that we’d never planned on it being our forever solution but so far it’s holding up really well.
Cx
LizKMtl says
You’ve mentioned before *how much fun* it is getting large and/or heavy things back home on the train or public transit (I once lugged a IKEA Bekvam kitchen cart home on the train and bus, so I feel ya) but have you ever looked into signing up for a car-sharing service? They must have one in Berlin – they have at least two here in Montreal, and the cars on offer range in size from little Smart cars to hatchbacks that you can carry quite a lot in, and are perfect for IKEA hauls. The price varies depending on what monthly plan you sign up for, too. It’s something I’ve been meaning to sign up for, but I just don’t need it often enough (…yet!)
Christine says
We are actually both signed up for car sharing! I know it sounds mad to carry things home but the DIY store that’s closest to us is just outside of the sharing zone so it’s a bit of a pain to go and find a car and then come back.
Having said that, we’ve done exactly that a few times like when we bought loads of plants for our balcony or for our trips back from Ikea (which is still in the car sharing zone).
The two things we’ve carried back so far are the OSB board and our ladder (which wasn’t a problem) which both wouldn’t have really fitted in the standard car-sharing vehicles. But, there’s a new car-sharing company that’s introducing small vans and transporters which I’m really excited about as that will definitely mean that it’s much easier for us to get things home.
Deciding to carry home the OSB board really wasn’t a good idea though! ;)
Cx
Anni Rumble says
Wow!
This looks fabulous and could be glammed-up with a single sheet dyed in your favourite colour and used as a table cloth for more formal dinners.
I’m going to get some of those trestles as I’d like to do something similar to make a work table for my studio….great idea. (Not so sure about transporting it as you did, mind, I’d probably opt for delivery!!!)
Christine says
Thank you, Anni! I totally agree with you about glamming it up with a tablecloth of some sort. It’s actually what I’m planning on doing for Christmas dinner (and I think we actually already own a super large tablecloth that will fit).
I think I’d opt for having it transported, too – carrying it home on the train really wasn’t one of my brightest ideas!
Cx
Claire says
Love the table, what a great result! Does the board literally just sit on top of the trestles, or is it fixed to them?
Christine says
Thank you, Claire! It’s just resting on top of the trestles. It’s really heaving and hasn’t slipped or moved till now.
Cx
Lucy, Kent ~ England says
Well done you two, great table! Def counts as do it yourself.
I’ve just come home with 5m of 5′ tall lino, ok I hear you say, what’s such a big deal?
I’m disabled and currently using a mobility scooter while my wheelchair is being serviced, so as well as a bag full of my stuff from pottery class on scooter (think the big bags from Wilkinsons) I also had this huge roll of Lino and I had to catch the train home. I didn’t plan on doing this, the public toilets opposite my Adult Ed are being refurbished. In my lunch break I went outside for fresh air and saw this lino on the skip, it looked ok so I asked why it was being thrown away? `Excess love, got more than needed, do you want it?’ Did I want it? I almost bit his hand off. So when I finally get to move I have lino for kitchen, bathroom or hall in pale grey with flecks of black, white, red, blue (looks like granite). Leftovers will be used toward faux fireplace.
Christine says
I would have pounced on the lino, too! Isn’t it mad what we’ll all do to achieve a home we’ll love?!
Always happy to hear that I’m not the only one who does mad things, Lucy!
Cx