[Ad – This post is in collaboration with Ryobi . All opinions and thoughts are of course our own! This post contains affiliate links. Read our full disclaimer here.
With so much messy building work going on around here (we’ve finally boxed in the steel beam between the kitchen & dining room and we’re doing some more work on our driveway – more on both of those projects soon!) it’s nice to occasionally take some time out and just make something fun.
As we were recently sent some new tools by the lovely people over at Ryobi (thanks, guys!) we, of course, had to take them for a proper test run! After all, there’s nothing quite like a new power tool to get us excited. So; after a quick brainstorm, this is what we came up with.
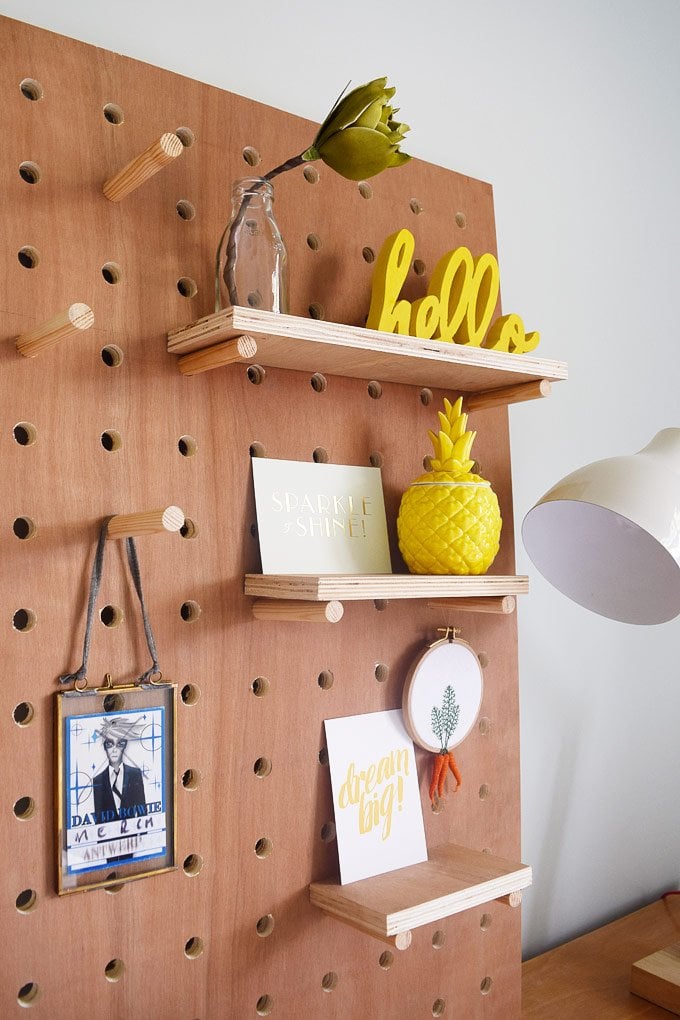
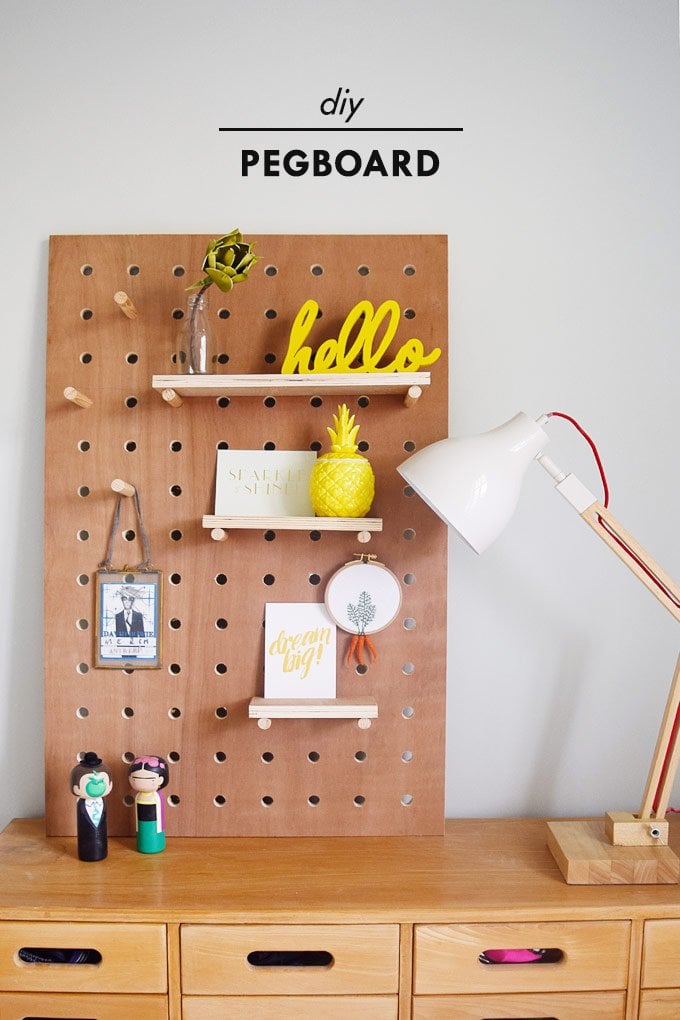
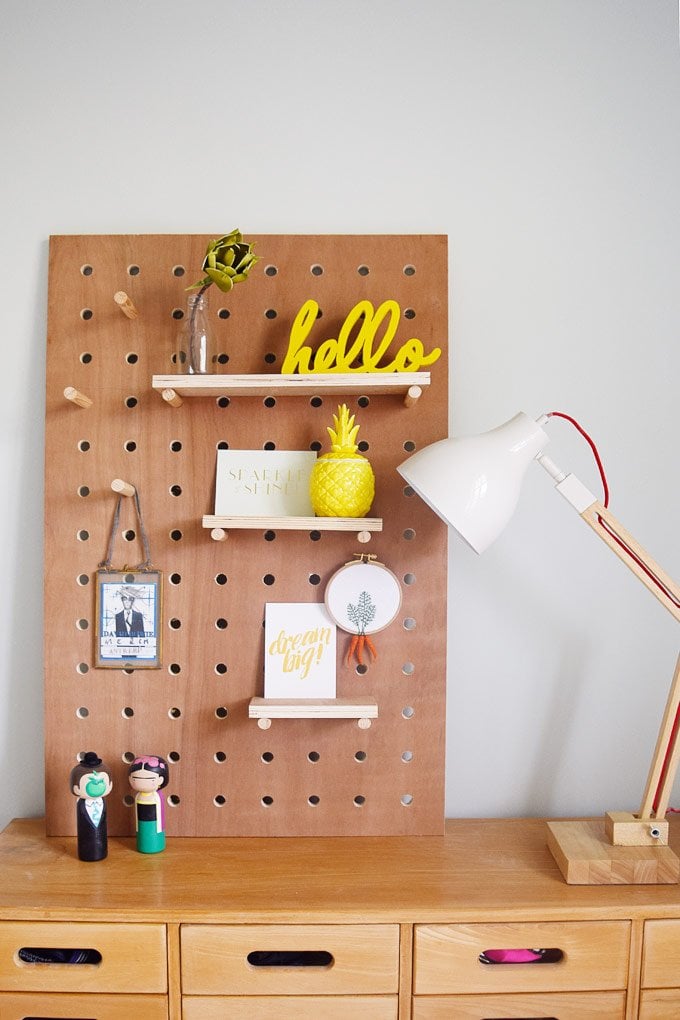
Yep, a DIY pegboard.
I’ve wanted a pegboard for as long as I can remember (and would still like another more traditional style one for all of our tools in the cellar) so it was an easy decision to try and build one ourselves.
Making it was actually surprisingly easy and you don’t need many supplies or tools to make one of your own.
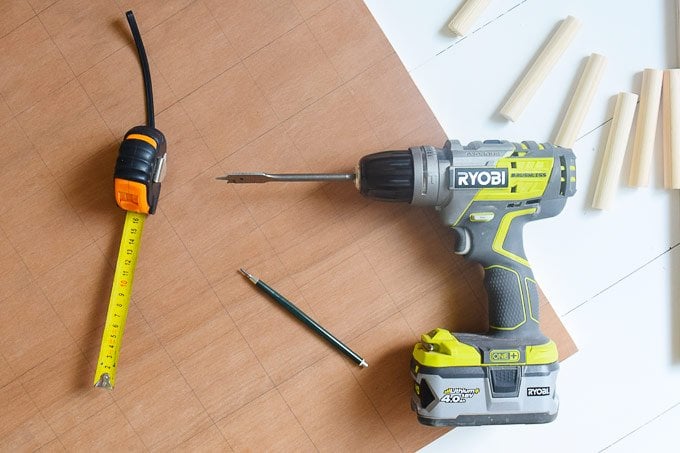
This is what you’ll need to make your own DIY Pegboard:
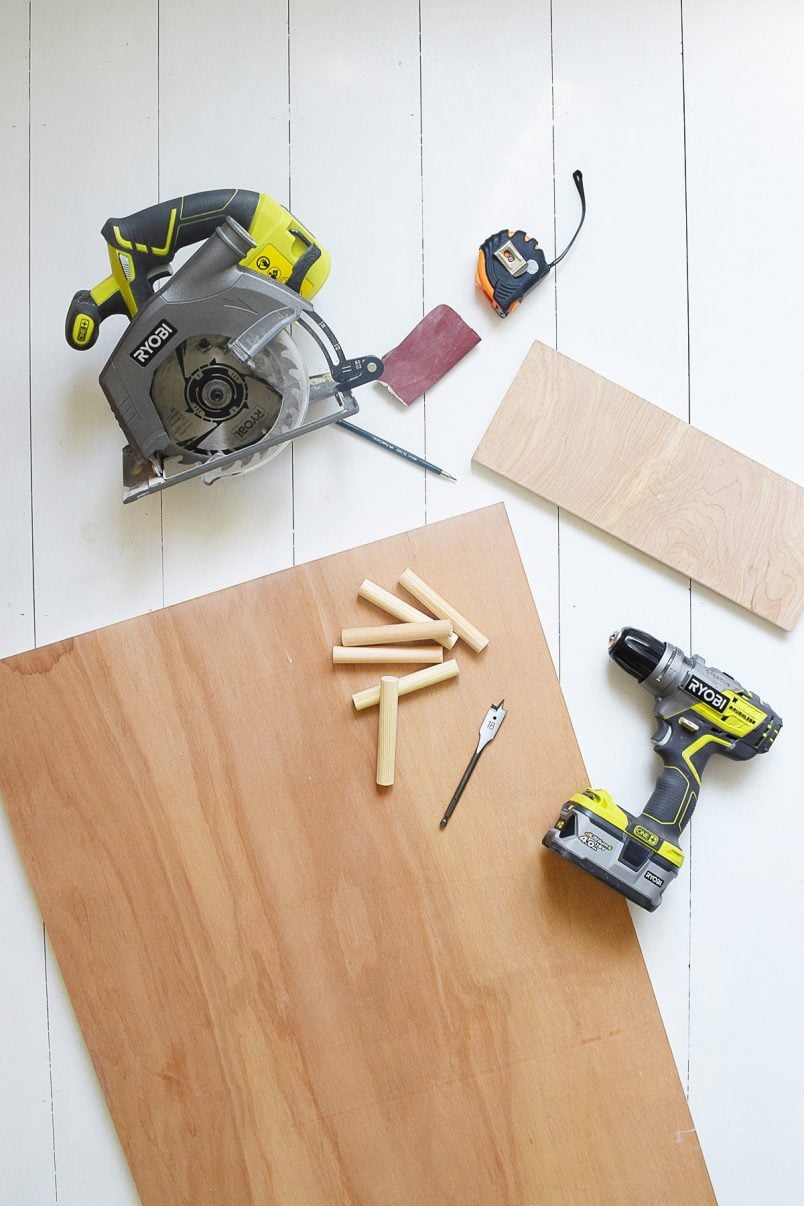
- Plywood sheet (we used 18mm x 606mm x 1220 mm)
- Dowel (18mm) (We bought a 2.4m long one and cut it into shorter pegs – ours are all 11.4cm long)
- Circular saw
- Cordless Drill
- 18mm Flat Wood Bit
- Sandpaper (120 Grit)
- Tape measure & pencil
This is how to make a DIY pegboard:
#1 Start by cutting the main board for your pegs to size with your circular saw (or depending on where you purchase your wood, you could get it cut in store).
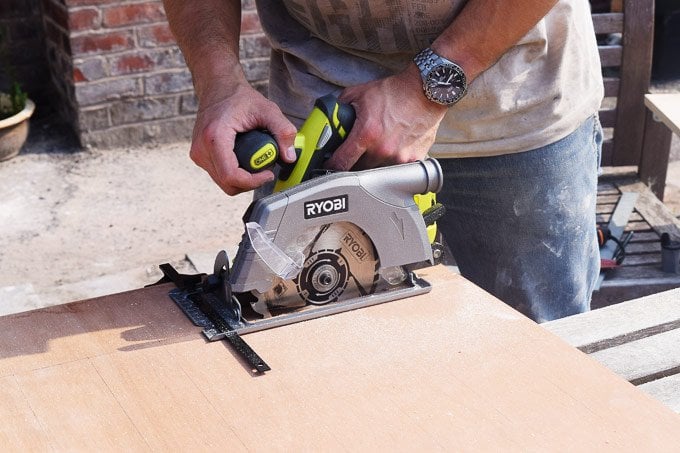
These are the measurements we used (we planned it around the size of the plywood board so we’d have as little waste as possible), but you can, of course, make it any size that you’d like.
We then used the offcuts to make some shelves to attach to the pegboard which we also cut to size with the circular saw.
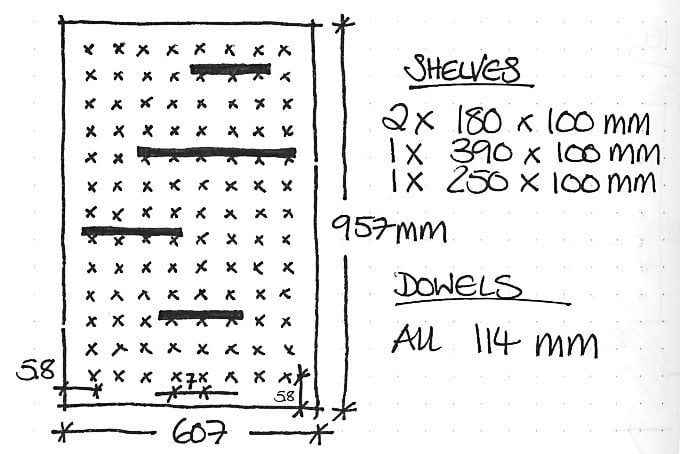
#2 Next measure the positions of the holes for your dowels.
Our dowels are all 7cm apart (we left slightly less space at the edges of the board). We measured and marked a grid across the plywood – each intersection of the lines is where you have to drill a hole for your dowel.
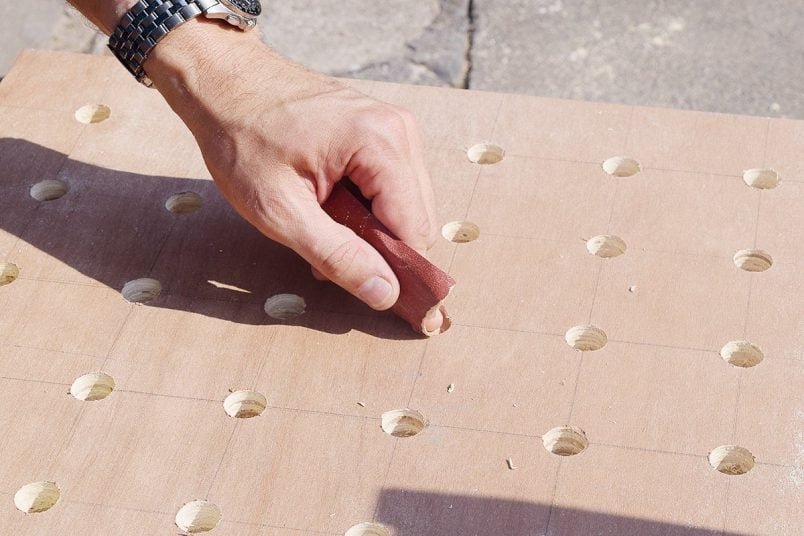
#3 Now it’s time to drill the holes for your dowels. This is the trickiest part of this project as you have to drill the hole as straight as possible.
We did this part of the project together. When Jan drilled a hole I checked that he was drilling as straight and level as possible and when I was drilling, Jan checked that I was drilling as vertical as possible.
This is probably not the best way of drilling perfectly straight holes, but it worked well enough for this project.
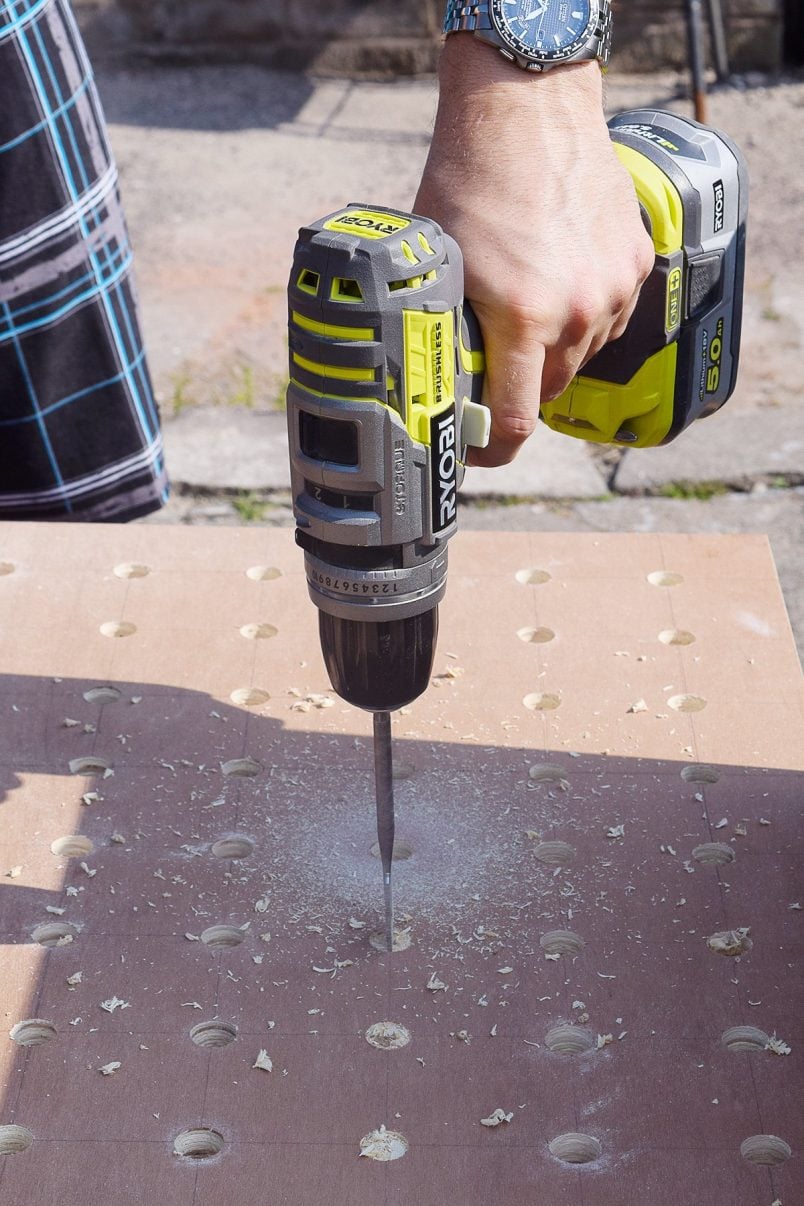
Drilling with a powerful drill and a really sharp flat wood bit helps drill straight and clean holes.
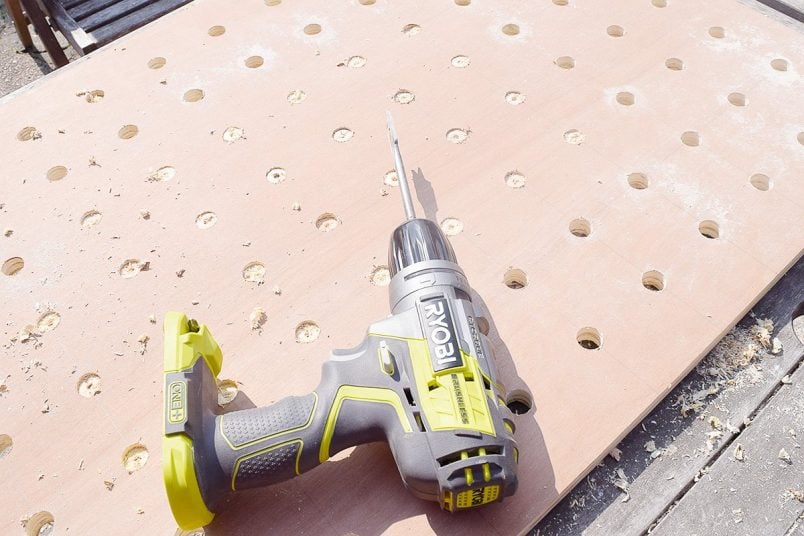
#4 After drilling all of the holes (if you make a board as large as ours it’s 104 holes) give all of the edges a quick sand with some sandpaper to remove any rough edges. Don’t forget to sand the edges of your board and shelves, too.
If you cut the holes to the same diameter as the dowel it will be a tight fit, but it does mean that they stay firmly in place.
#5 Now all that’s left to do is clean away any pencil lines and assemble your DIY pegboard. Just stick the pegs into some of the holes, add a shelf or two and you’re done.
We decided to just lean our pegboard against the wall but you could attach it straight to the wall. Just bear in mind that it’s quite heavy even without you placing things on it.
If you want to hang the pegboard on the wall, we recommend using a french cleat. A french cleat is basically made of two angled pieces of wood. One piece is attached to the wall and the other is attached to the pegboard. You can then just slot the two cleat parts together and the pegboard will be securely attached to the wall.
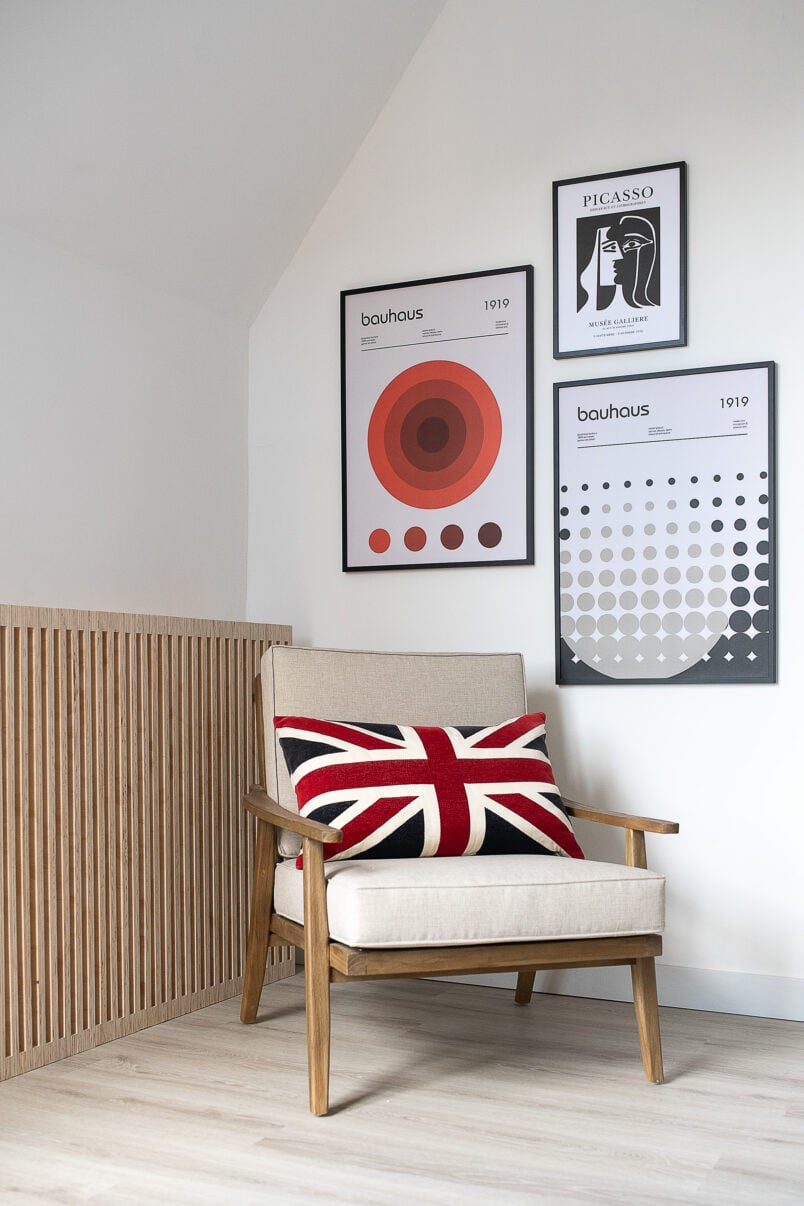
We used this method to attach our DIY slatted radiator cover to the wall and it’s such an easy and effective way to hang anything heavy on a wall. You can see exactly how we made the french cleat here.
I love a project that helps me keep organised, although this one is more for decorative purposes. Now all I need is to find some more pretty items to place and hang on it!
How do you distract yourself from messy building work? Do you love pegboards as much as I do?
If you like this project, you will love these, too!

Eddy HALL says
Hi there,
Do you have any estimate on how much weight a shelf on this kind of pegboard could hold? Books, for example?
Christine says
Our pegboard was really sturdy and I think a couple of books would be fine but I wouldn’t use it as a full-on bookshelf. The dowels we used were also quite thick which also helped.
Cx
Eli says
cant wait to finish this!!!!….how far apart were your holes!!
Christine says
They were 7cm apart (from centre to centre). You can see the exact measurements we used in the little sketch in the post.
Hope that helps and have fun building it!
Cx
Alex says
How did you get your dowels in? I’m hammering mine in and still struggling to get them through
Christine says
We had no problem getting them in and just pushed them through the holes, Alex. Maybe you could try giving the holes a quick sand?
Sorry I can’t be more help!
Cx
Echaimutenan says
Loveeeeed. I will make it soon. Thank you for your idea ??
Christine says
You’re welcome! It was an easy project to make but do let me know if you run into any difficulties and we’ll be happy to help!
Cx
Rob Simpson says
Awesome project!
Liked the set of toys kept on the table.
The Color & combination is beautiful too.
Thanks Christine :)
Lucy Caitlyn says
We’re thinking on similar lines :-)
I got a friend to make me a peg board for my
8 week old Chinchilla. She loves to jump and
was giving Mum a hard time playing leapfrog
with her.
With the peg board play area she has shelves
at different heights and I can hang treats on pegs.
Planning a version for the cats, might even get round
to one for me. Though my jumping days are long over
so a more prosaic use :-)
Christine says
Great minds obviously do think alike, Lucy ! ;)
I love the idea of a pet peg board! It looks pretty and makes your pets happy!
Cx