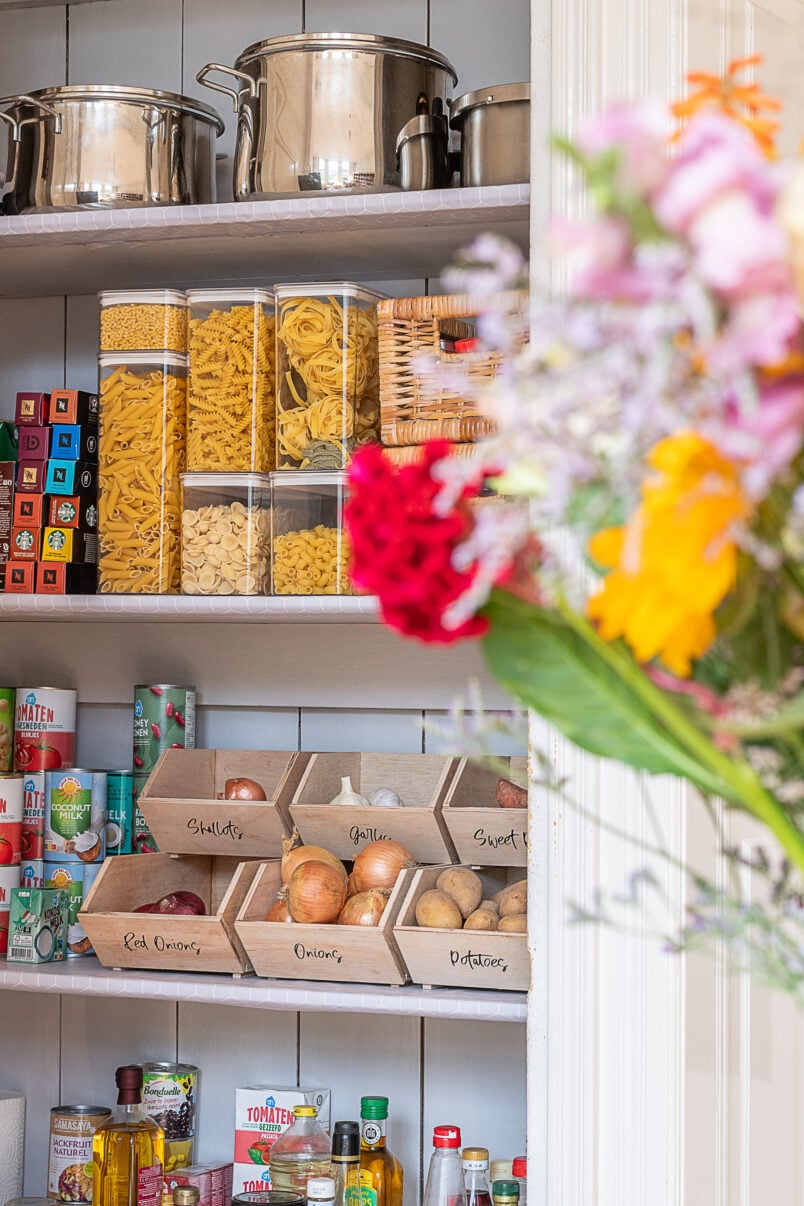
I’m still in organising overdrive and everything I currently seem to be doing is geared towards hosting my family at Christmas. There will be 13 of us in our apartment (yes, that wasn’t a typo – 13!) so a bit of coordination and organisation is going to be invaluable. And, our newest little organisation project is this DIY floating spice rack.
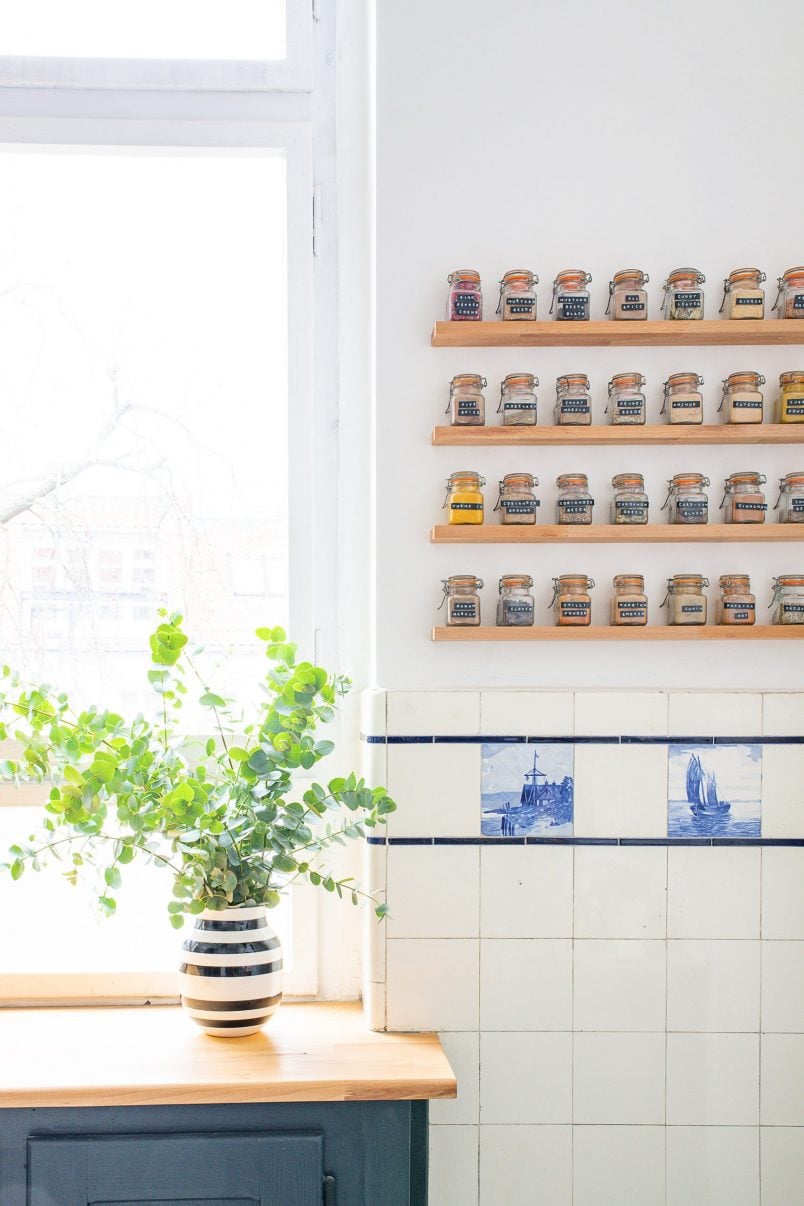
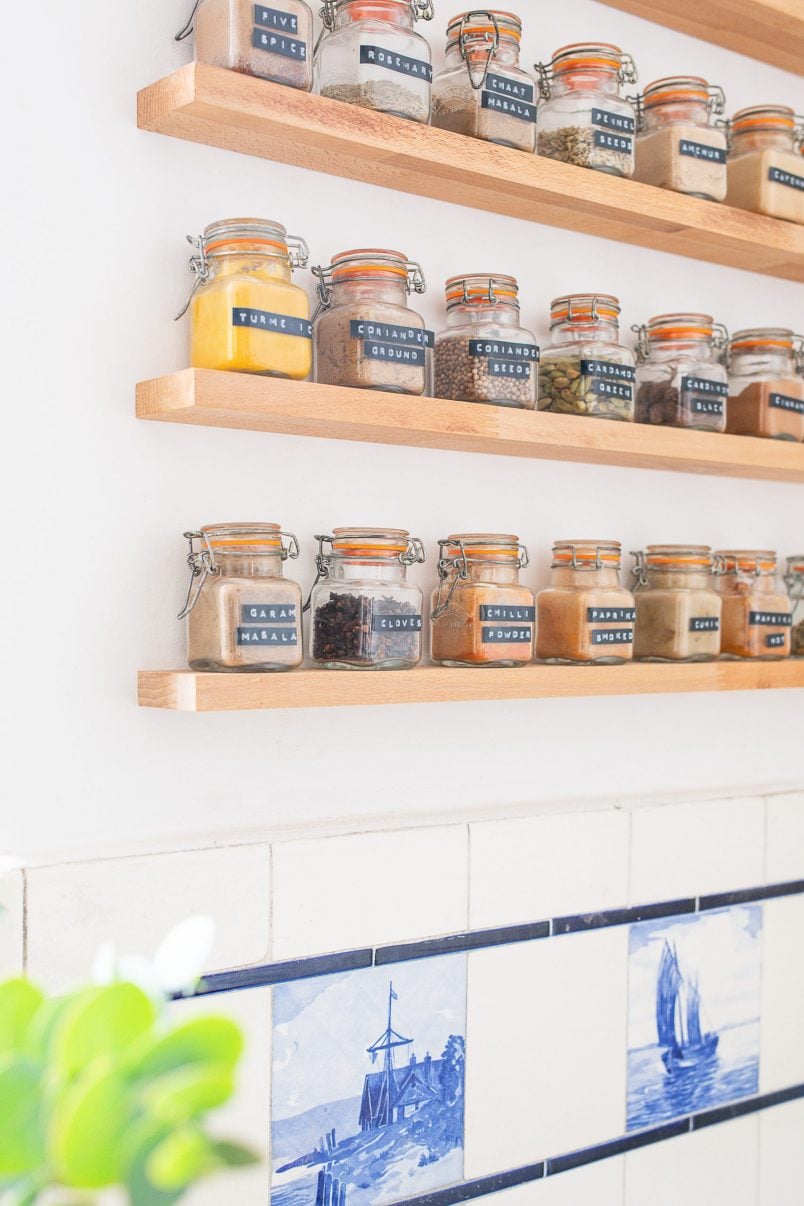
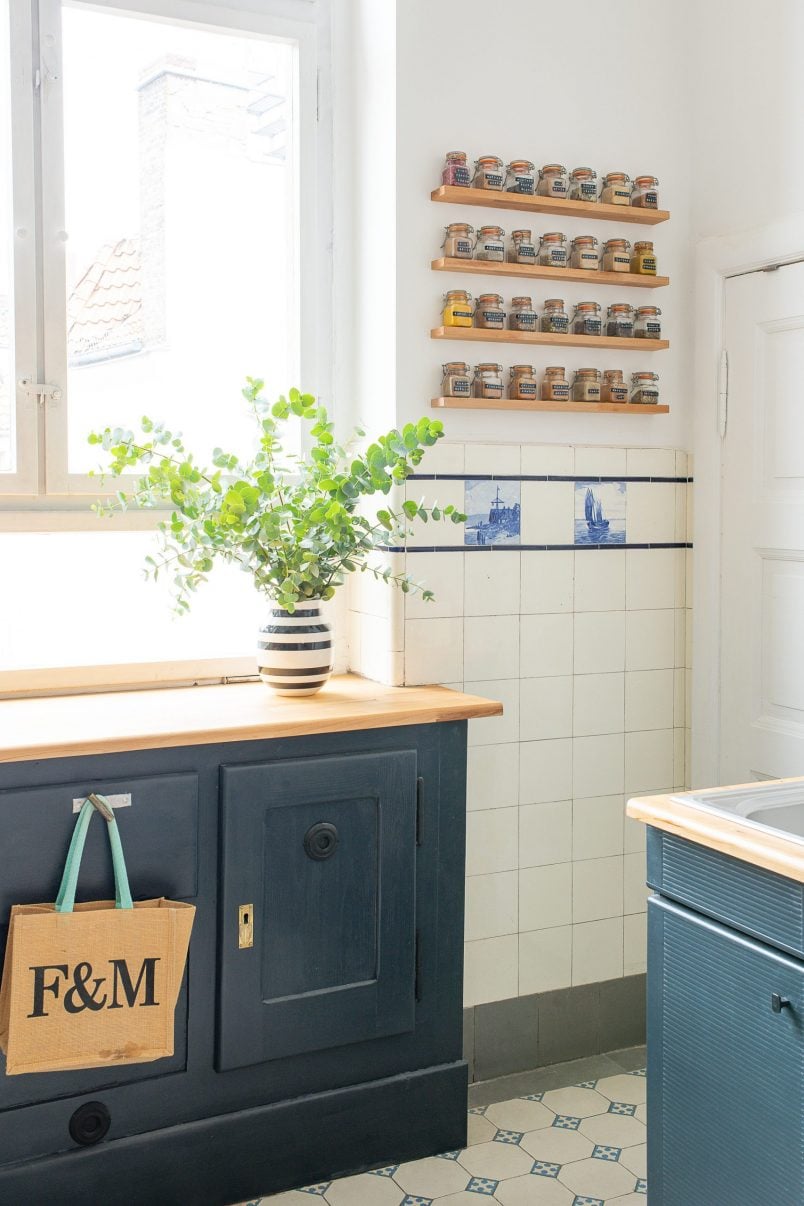
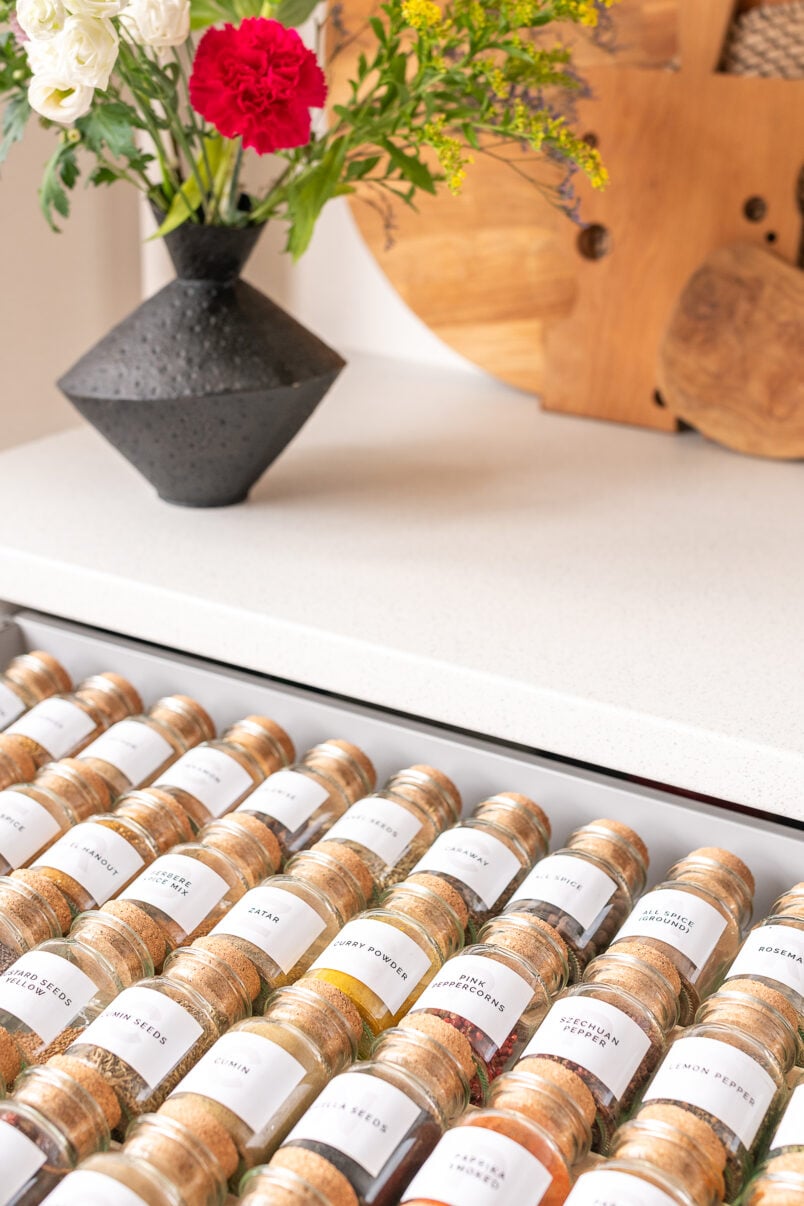
We used to have all of our spices stored in multiple boxes in our pantry and it used to take forever to find what we were looking for but now they’re all neatly lined up on our new spice rack.
This floating spice rack is really easy to build. You’re basically just drilling holes into a timber board, screwing screws into a wall and slotting the shelf onto them.
Yes, this project would probably be easier if you used small shelf brackets to attach the spice shelves but I have this weird obsession with not seeing any screws or fixings which is why we built these floating shelves.
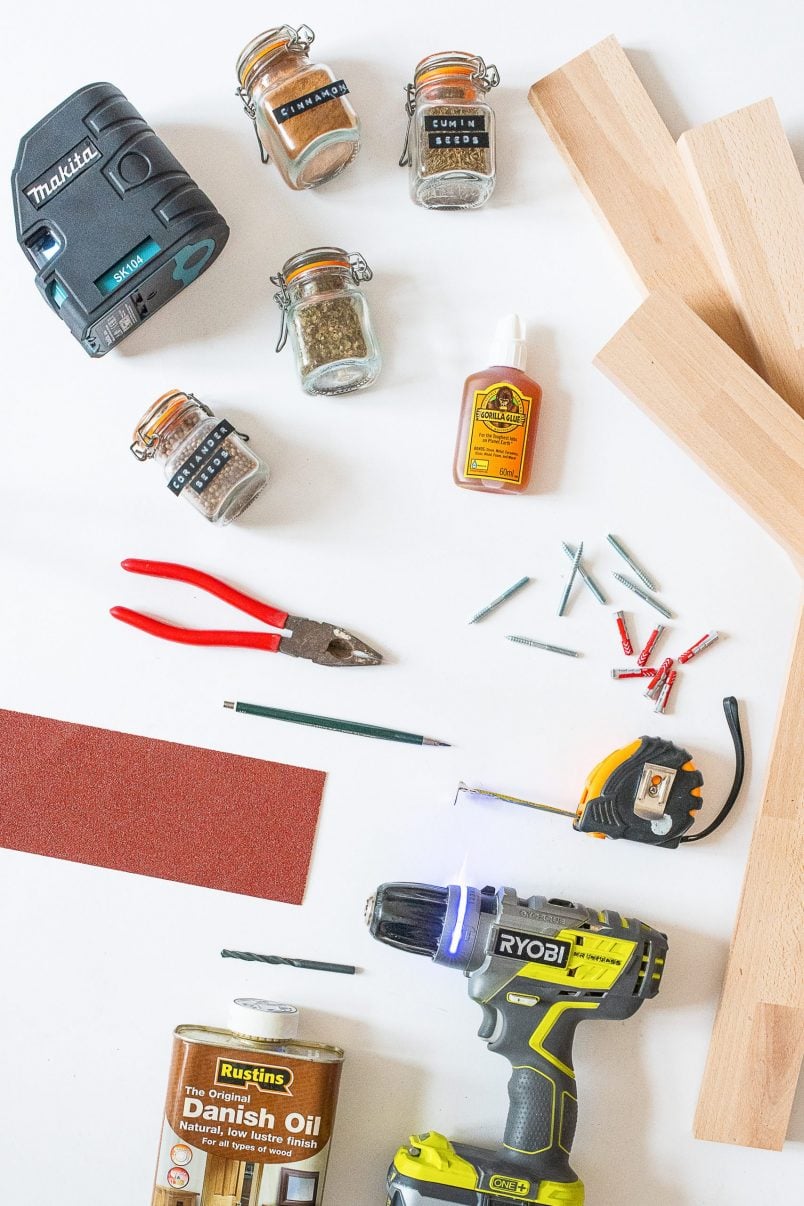
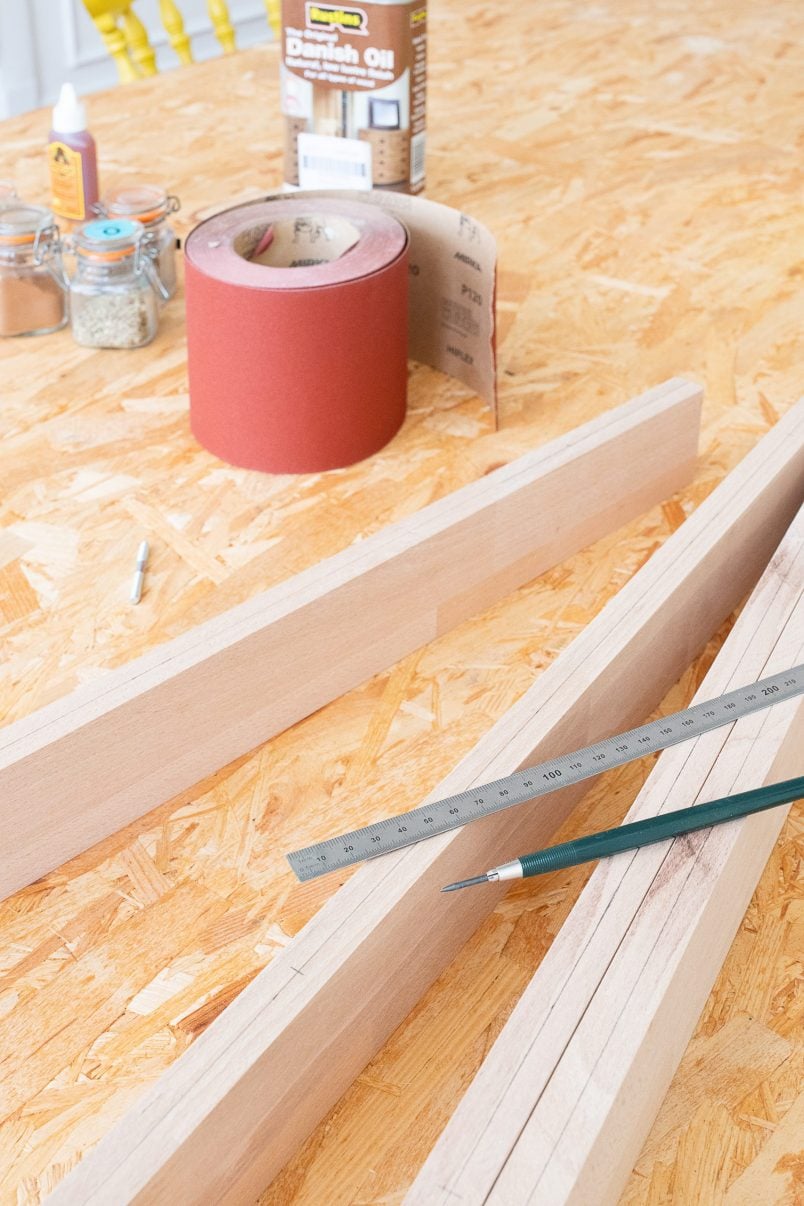
This is what you will need to build your own DIY floating spice rack:
This post contains affiliate links. We only recommend products we love and think that you will, too! Read our full disclaimer here.
- 18mm Timber strips or a timber board cut into strips (our strips are 6cm wide and 60cm long) – we had ours cut in the DIY store where we bought it
- Cordless Drill & drill bit (5 mm bit for timber, 6 mm bit for brickwork)
- Wall Plugs (6 mm)
- Dowel Screws (5 x 50 mm)
- Tape measure & pencil
- Pliers
- Laser level or spirit level (we treated ourselves to this laser level when we panelled our guest bedroom and love it)
- Sandpaper
- Danish Oil
- Lots of spice jars
- Optional: Glue (Gorilla glue is ideal for this project)
- Optional: I labelled ours with our label maker

This is how to build a DIY floating spice rack:
Step 1
Measure
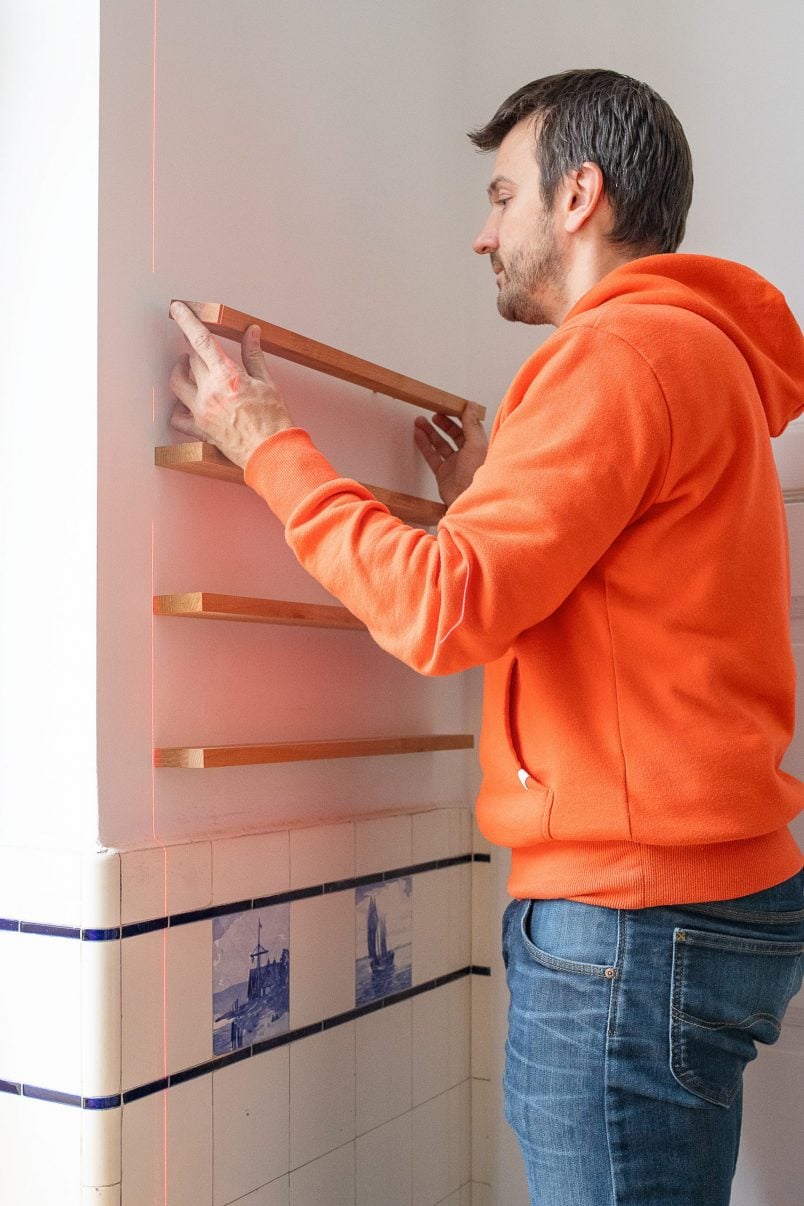
Start by measuring and marking where you want to install your shelves on your wall and draw a horizontal line to mark the exact position of the shelves with your pencil.
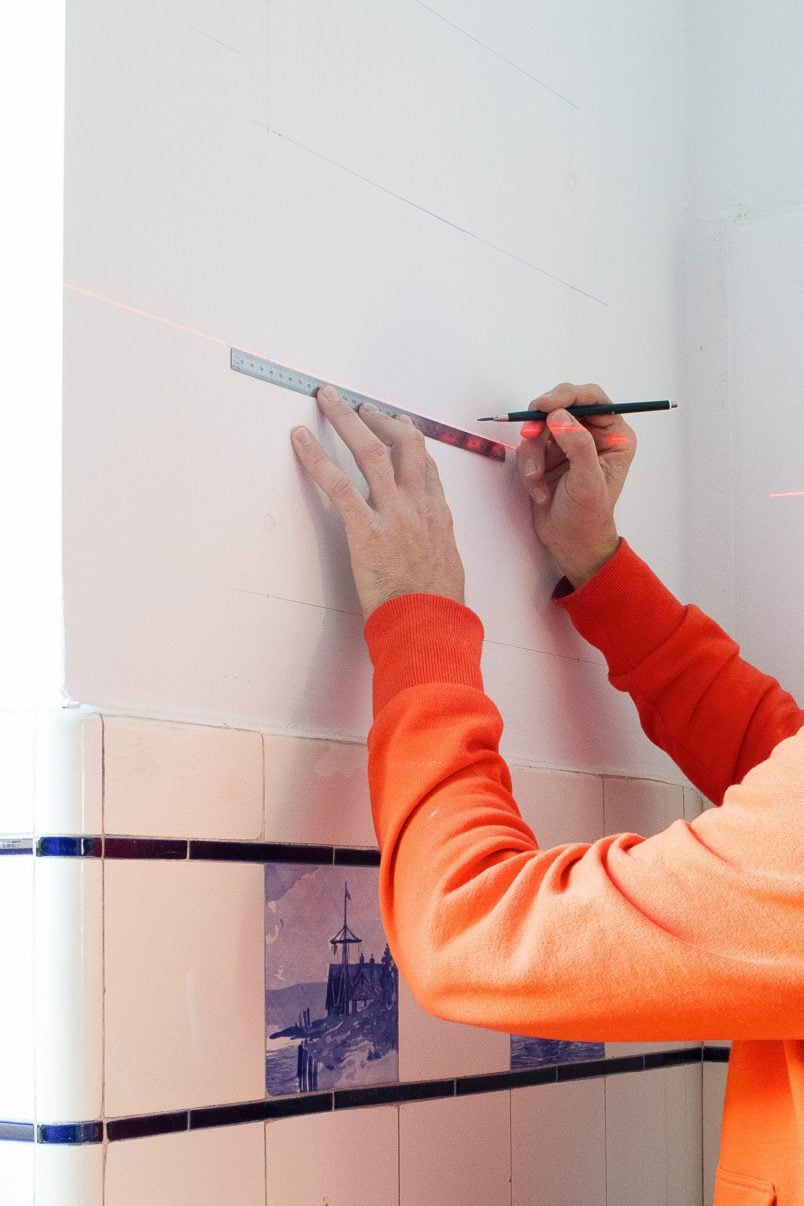
It’s important to be as accurate as possible while building this project as you have very little tolerance when attaching the shelves to the wall which is why it’s essential to use a laser level (or a spirit level) to make sure that it’s perfectly straight.
Next, draw a line along the centre of the long edge of your shelves. These two lines – the one on the wall and the one on the shelf – will line up with each other when you attach the shelves to the wall.
Measure and mark 10cm from the edge of each side of your shelves before lining them up with the line you already drew on your wall and transfer vertical marks to the wall.
Step 2
Drill Holes In The Wall
Double-check that everything lines up perfectly before drilling the holes for your wall plugs into the wall and then drilling the corresponding holes into your shelf.
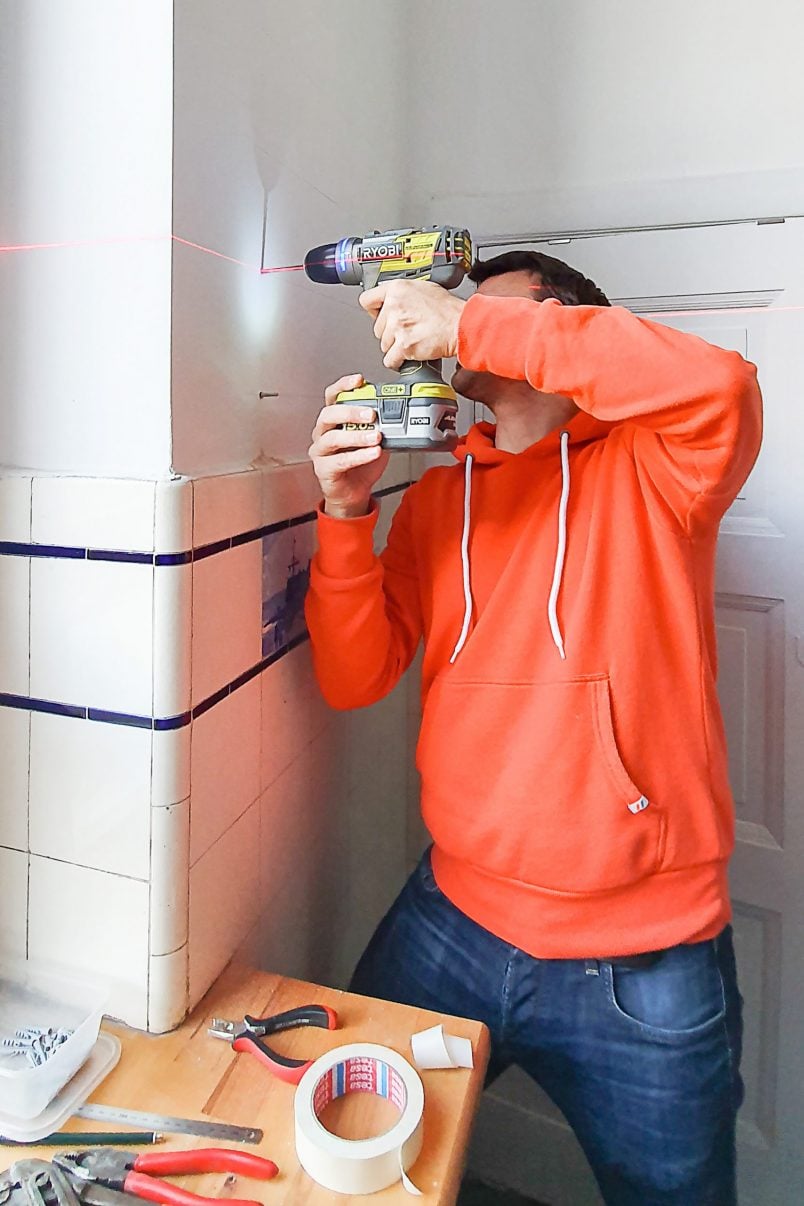
It’s really important to drill as accurately as possible, especially when drilling the holes into the shelf as you need them to be as straight as possible.
Ideally, you would use a bench drill for this but as we don’t have one we drilled the holes with our cordless drill (I helped make sure that everything was straight while Jan drilled the holes).
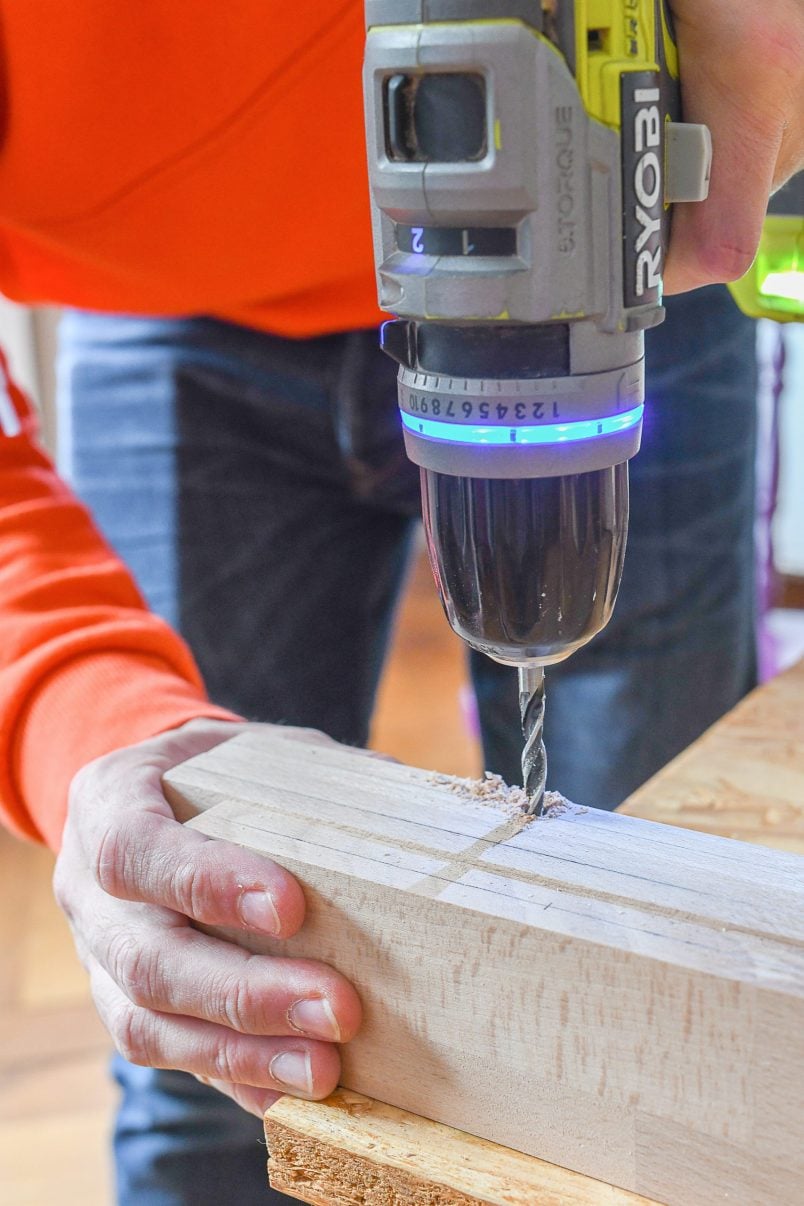
We used a 6 mm drill bit and 6 mm wall plugs for the wall and we drilled a 5 mm hole into the timber shelf for the 5mm dowel screws to slot into.
Step 3
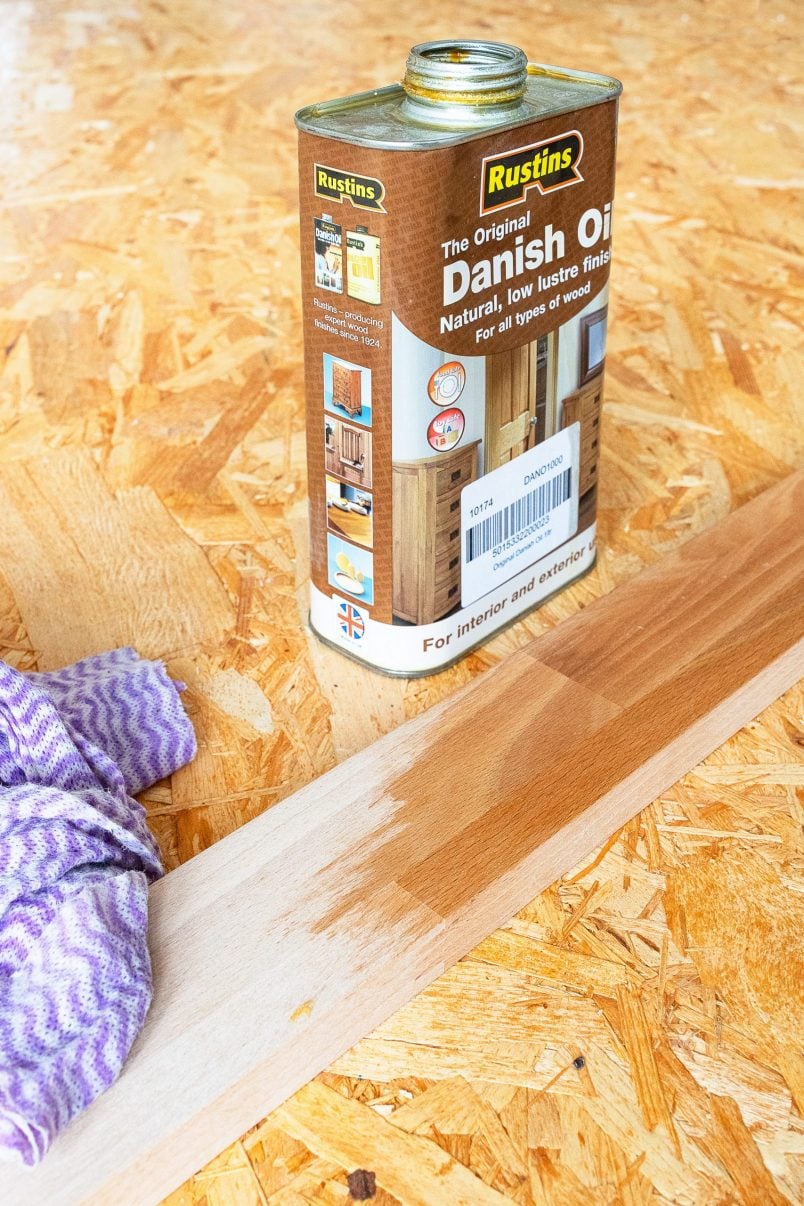
Sand & Oil
Give any rough edges a sand with some sandpaper and make sure that everything is lovely and smooth before giving them a coat of oil for some protection.
We almost always use Danish oil for anything furniture-related as it’s easy to use and makes everything look and feel amazing (although it does stink!). You can read our full guide on how to apply Danish oil to protect your furniture here.
We used it on our gorgeous new dining room bench and we also used it to transform our midcentury sideboard which had a huge watermark that we managed to remove (you can read about our watermark removal adventures here).
Step 4
Assemble The Floating Shelves
Pop your wall plugs into the wall and screw your dowel screws into them. Then slot your shelf on top of the screws to check that everything fits.
It should be a really tight fit and you’ll probably find that you really have to use force to push the shelf onto the dowel screws.
For some of the shelves we built, we even had to use a hammer (with a block of wood in between so as not to damage the shelf) to bash the shelf onto the screws.
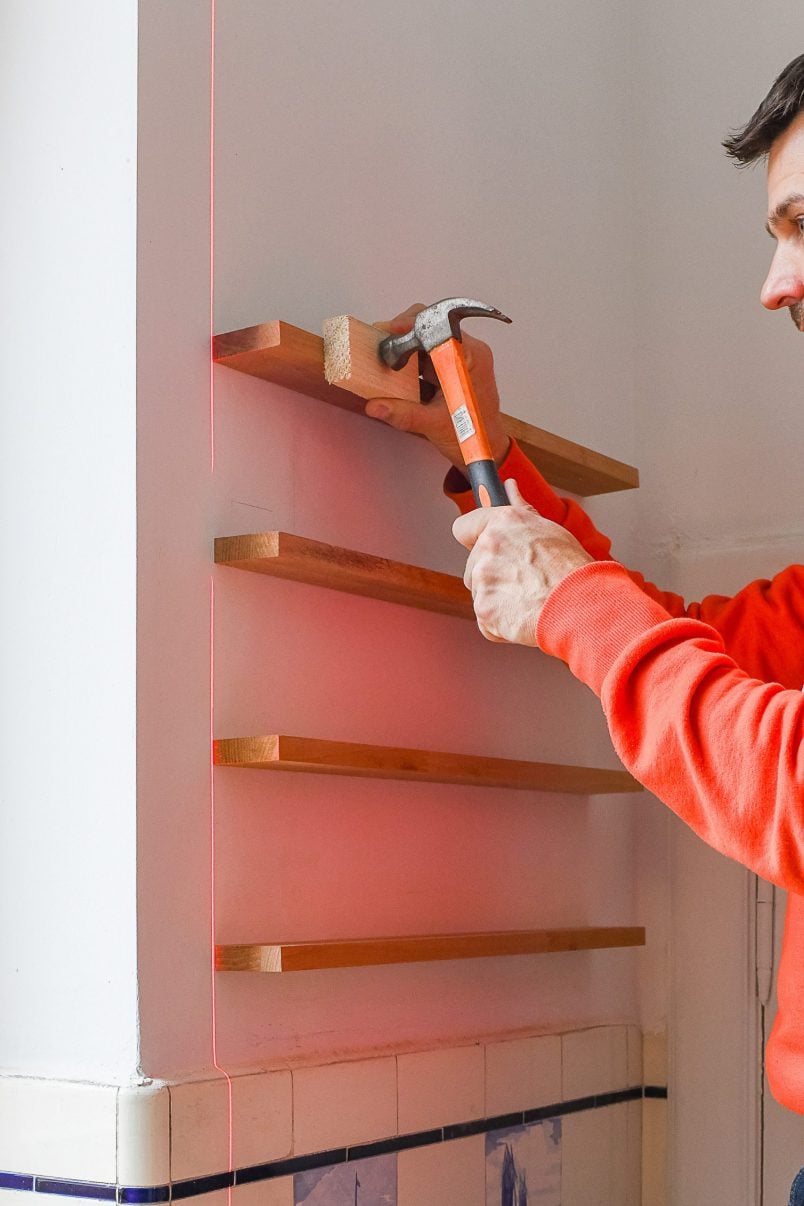
If your shelf is a bit wobbly, don’t worry too much as you can secure it with some glue. Initially, we’d planned on using glue for all of our shelves, too but they fit so well that there was no need.
If you do have to use glue to secure them, Gorilla glue is perfect for this project as it expands and fills any gaps between the screw and timber making the connection strong and the DIY floating spice rack secure.
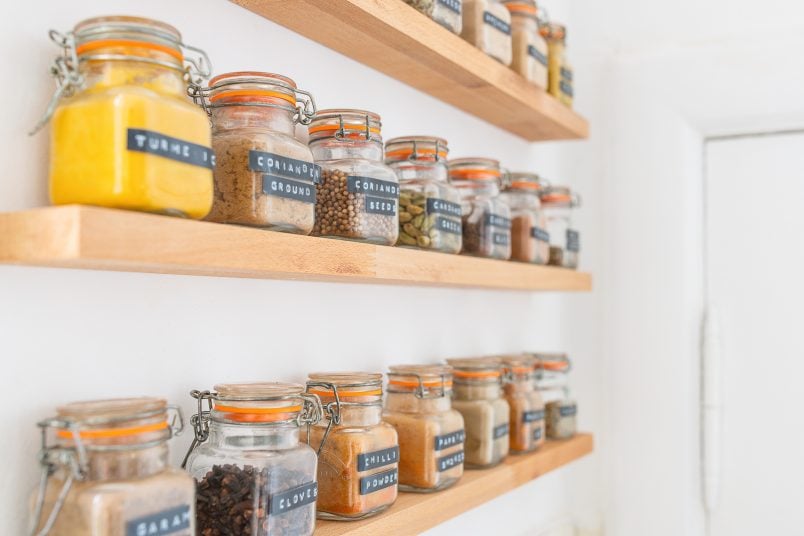
All that’s left to do is add all of your jars full of spices and cook something delicious!
I love how these shelves turned out but I wouldn’t recommend using this method for large floating shelves as the board is ultimately just stuck onto the screw. If you are thinking of building more substantial floating shelves that will carry more weight we’ve got you covered!
You can see our tutorial on how to build super-slim floating shelves here or you can see how we built the floating bookshelves in our alcove here!

If you don’t have any wall space to organise your spices, you might want to check out this post where we share how to build a super-easy DIY spice drawer organiser.
Do you have any fun plans for Christmas? How do you stay organised in the kitchen? Are you as obsessed as I am about not seeing fixings?
Bobbi Bullard says
These are beautiful and practical. Who would ask for anything more from a DIY project. Thank you for your very clear instructions and your wonderful pictures.
Christine says
Thank you so much, Bobbi! So glad to hear you like the project.
Cx