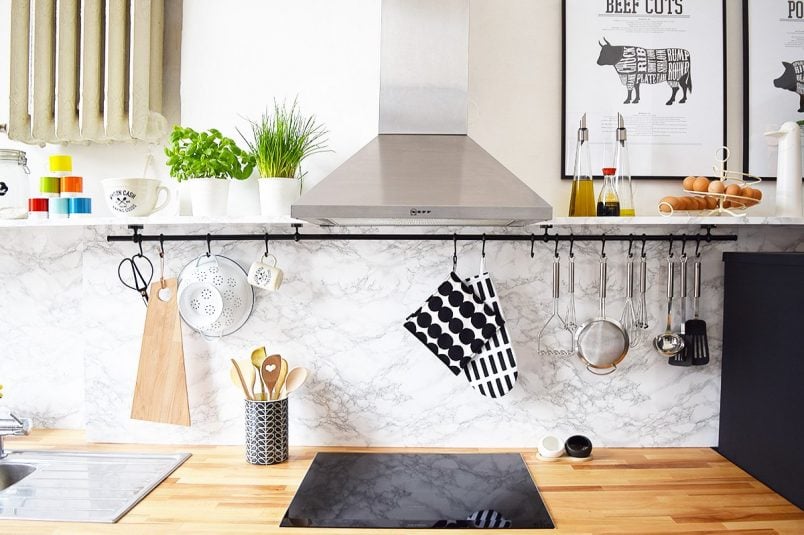
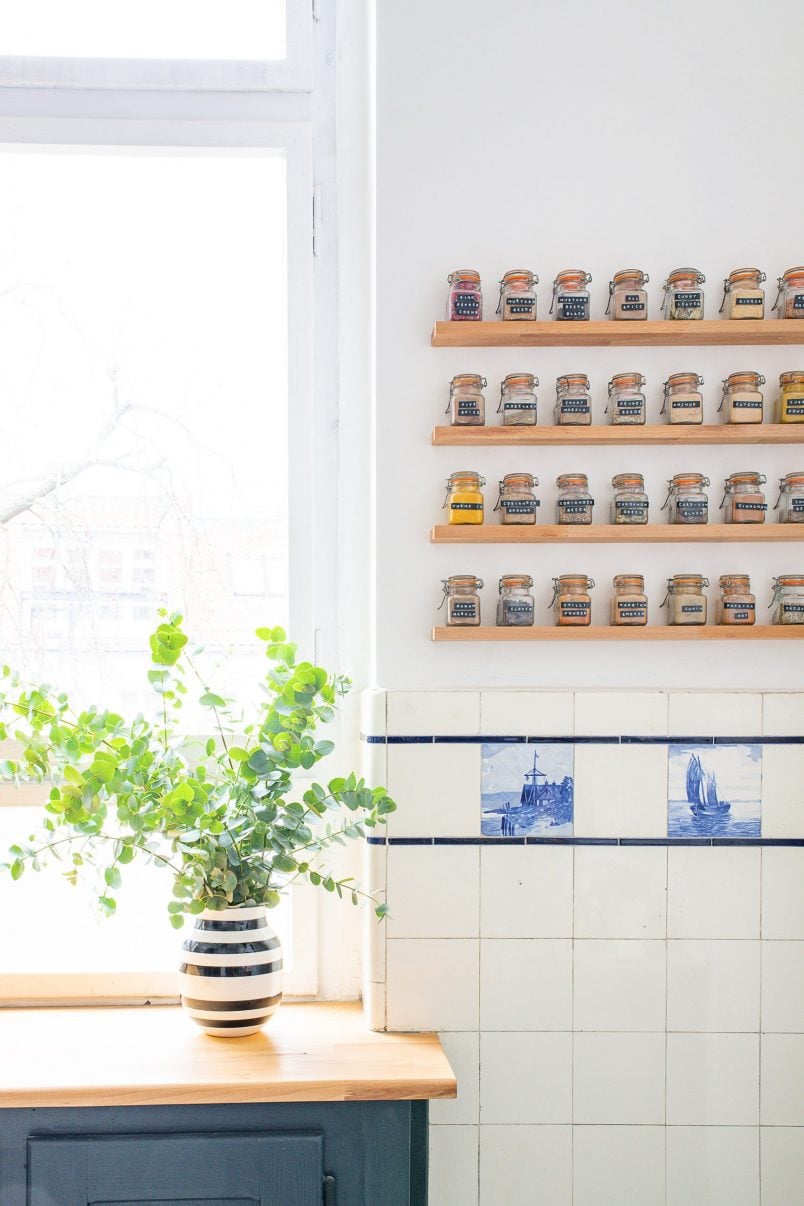
Did you see our super thin floating shelves in our epic kitchen makeover reveal that we shared last week?
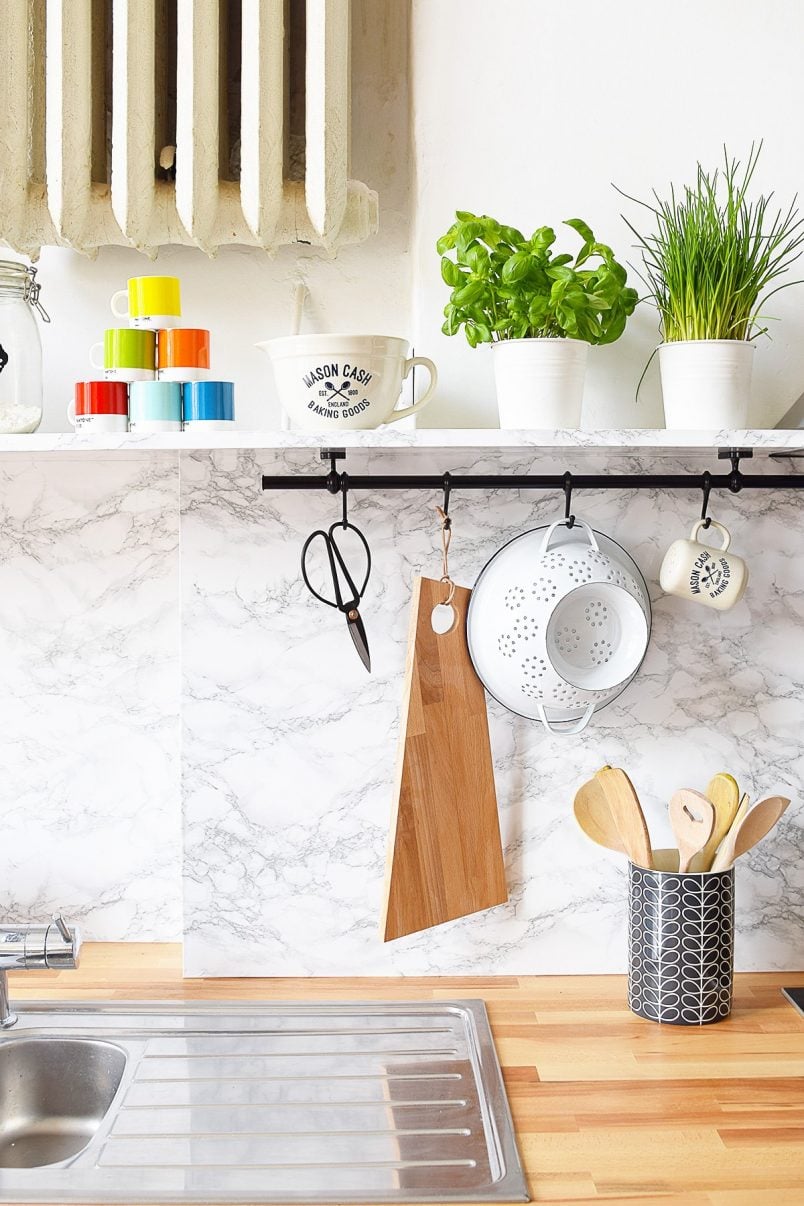
I love how elegant and slim they look! They almost look like they couldn’t possibly hold but they’re actually really sturdy. (Oh, and yes, it’s totally weird that there’s a radiator floating on the wall.)
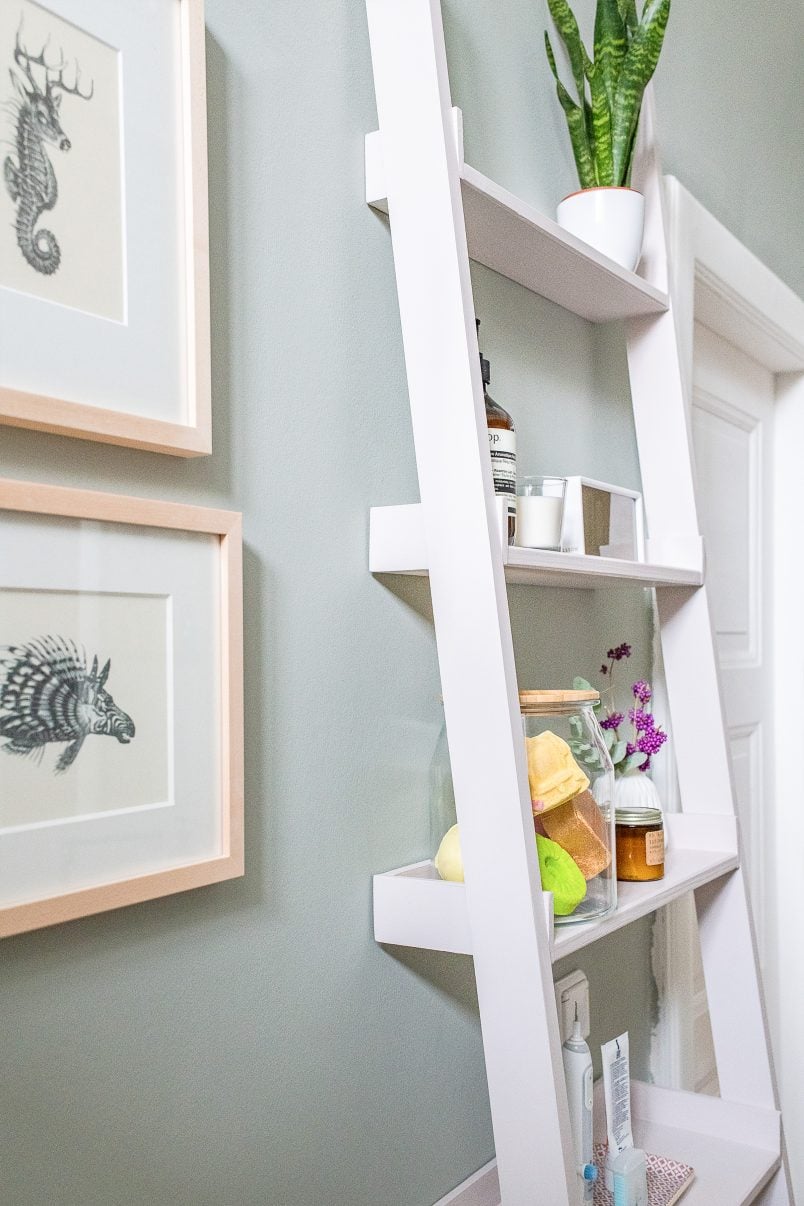
We already built DIY floating shelves in our Edwardian home, which we loved, but we wanted the shelves to have a lighter look in the kitchen, so we decided to build these super-thin floating shelves.
Basically, the shelves consist of steel brackets that are screwed to the wall and then hidden under the timber shelf cladding and our backsplash. It may sound complicated, but the thin floating shelves are really straightforward to build, probably more so if you have straight walls unlike us!
Although the list of supplies you need seems long you probably already have most things lying around.
This is what you will need to build thin floating shelves:
This post contains affiliate links. We only recommend products we love and think that you will, too! Read our full disclaimer here.
For the shelves:
- Steel brackets – We used these 150 x 150 x 25 mm brackets for our shelves which are 20cm deep. The amount you’ll need will depend on the length of the shelf. We spaced ours about 40 cm apart.
- Timber for the top of the shelf – We used 12mm thick MDF
- Timber for the bottom – We used 3mm thick MDF
- A strip of timber to cover the front – In our case we used a 19mm strip of timber which is the thickness of the two layers of MDF (top & bottom) plus the thickness of the bracket plus a millimetre tolerance.
- Wood glue – We always use this wood glue which is our favourite.
- Wall Plugs & Screws
- Sandpaper (about 120 grit)
Tools:
- Tape measure
- Spirit level or laser level (we have this laser level)
- Drill (this is our cordless drill)
- Plunge saw (or you could have the boards cut to size when you purchase them)
- Fine saw
For the finish:
- Marble effect vinyl foil
- Silicone (we used white & clear)
This is how to build thin floating shelves:
1. Attach Brackets
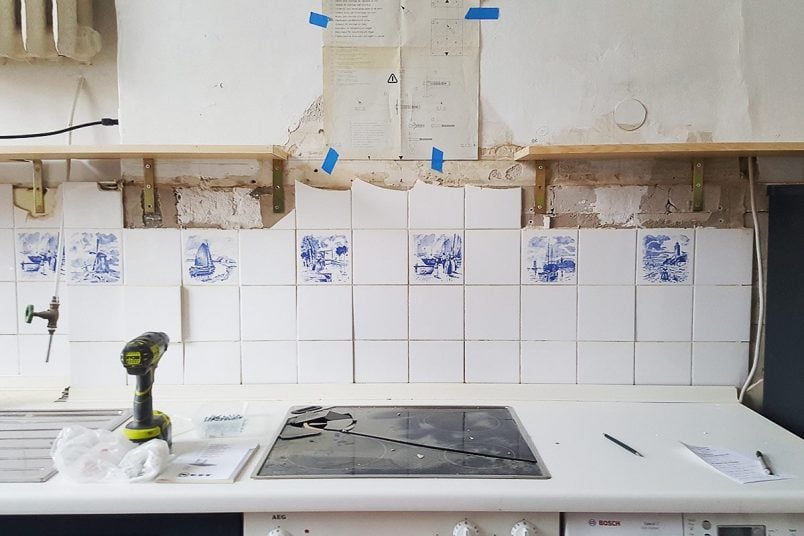
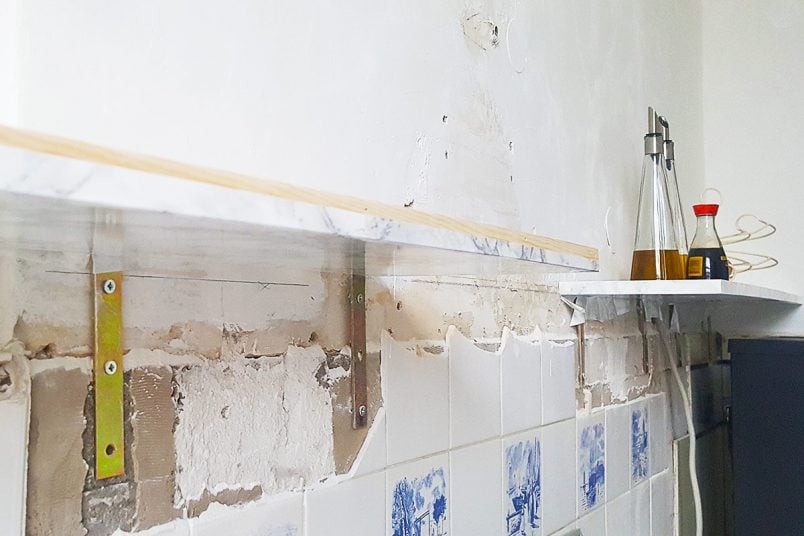
Start by drawing a horizontal line 12mm lower than the top of where you want your finished shelf to be. This line is the guide for your brackets. The top of all brackets should be at exactly that level.
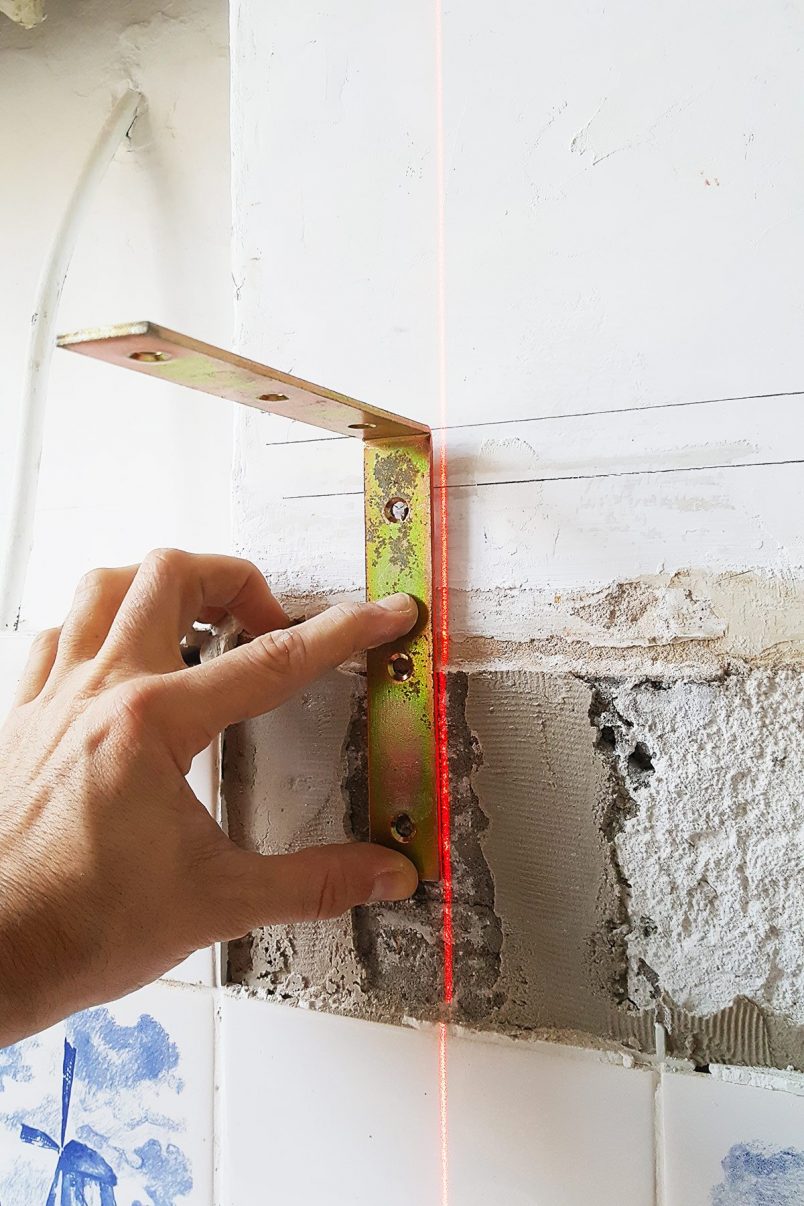
Space out the brackets evenly across the wall making sure to place brackets at the ends of the shelf. Our brackets are spaced out with about 40cm between each of them.

Then attach them to the wall. How you attach them will depend on your wall. Ours is brick, so we used wall plugs & screws. Just make sure that the brackets are firmly attached and really secure.
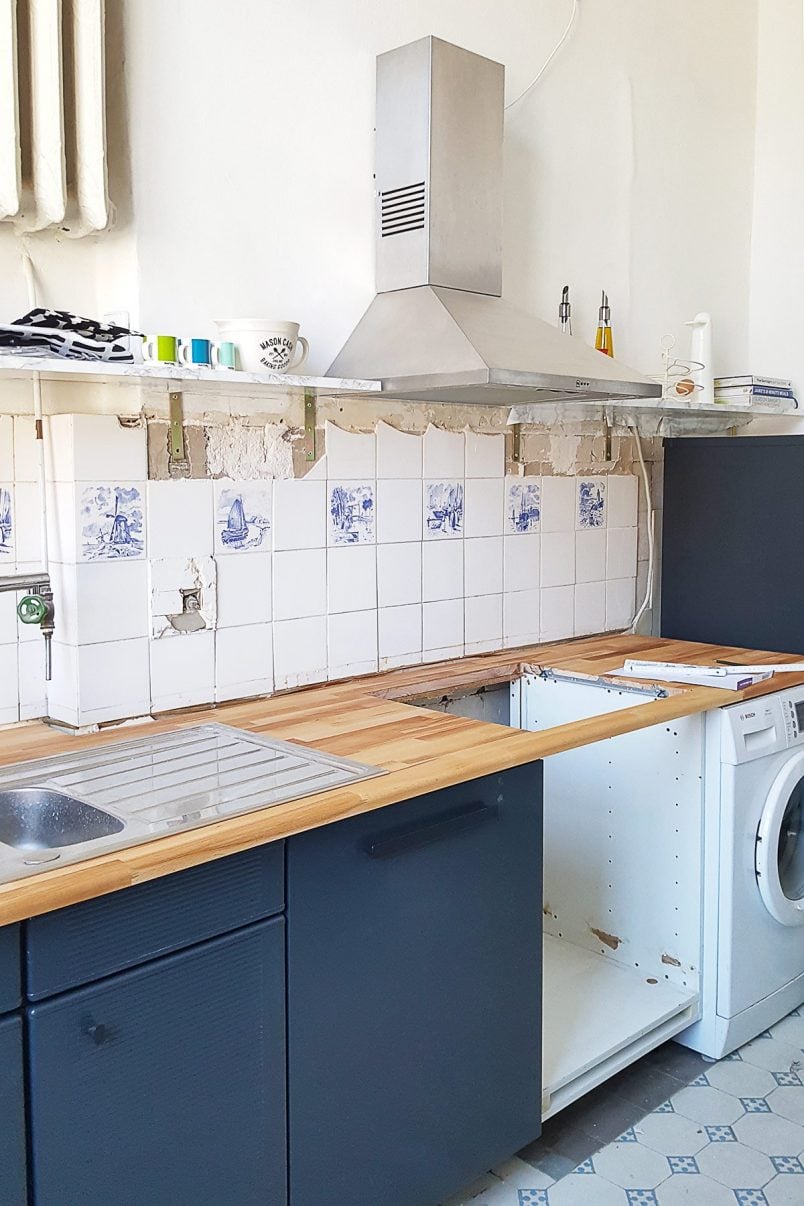
As you can see, we removed some of the tiles before attaching the brackets to give us a better surface to attach them to.
2. Attach Top Board
Cut your timber to the size you’d like your shelf to be with a circular saw (or you could get it cut to size where you purchased it) and give all edges a light sand.
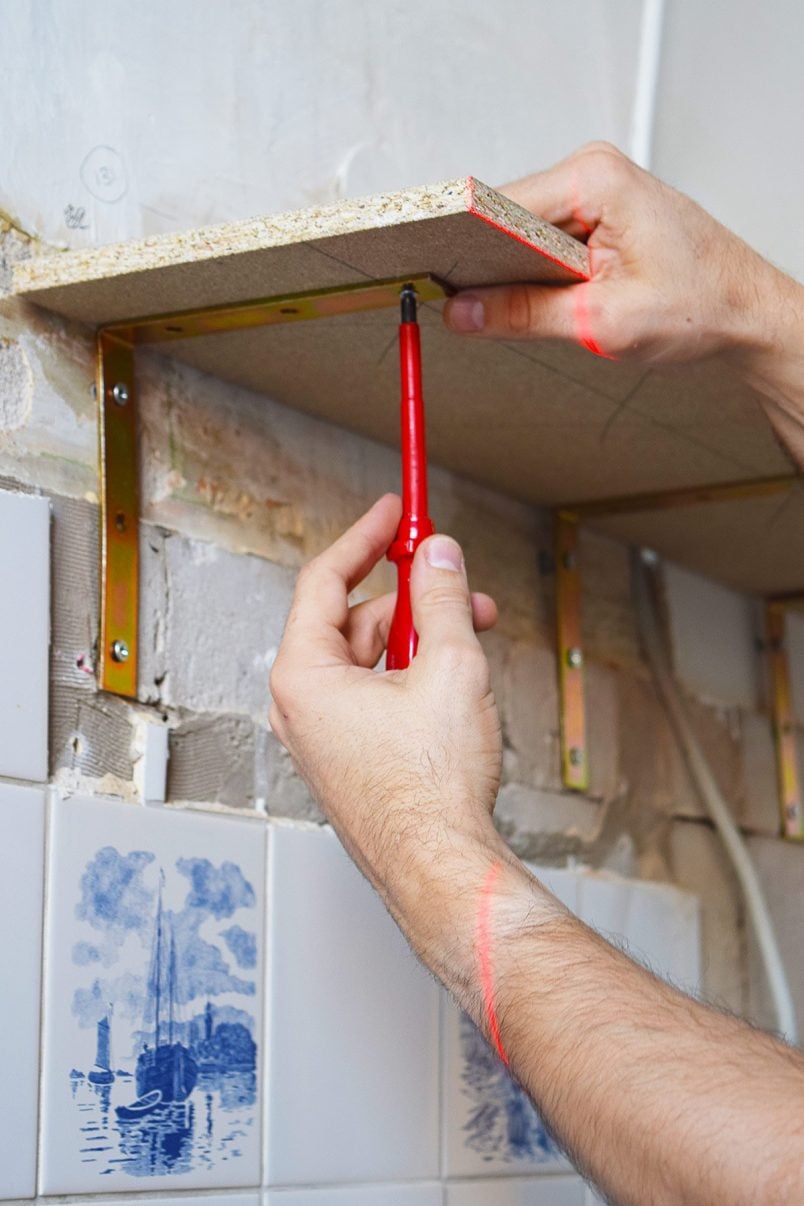
Place it on top of the brackets and screw it to them with some small screws.
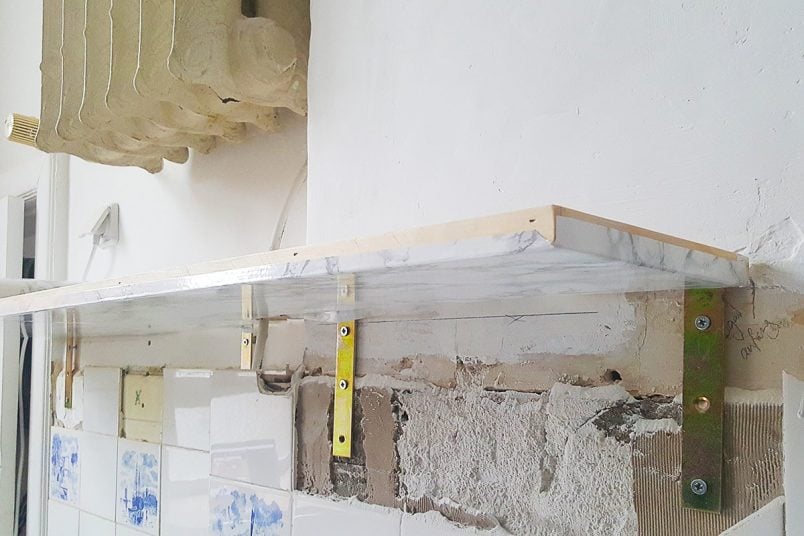
3. Attach Bottom Board
Cut the bottom board to almost the same size as the top board (it has to be a few millimetres thinner because of the bracket) and screw it to the underside of the brackets with some short screws so that they don’t poke out of the top board.
Make sure to slightly sink the screws into the wood so that you can add filler over the screws to hide them.
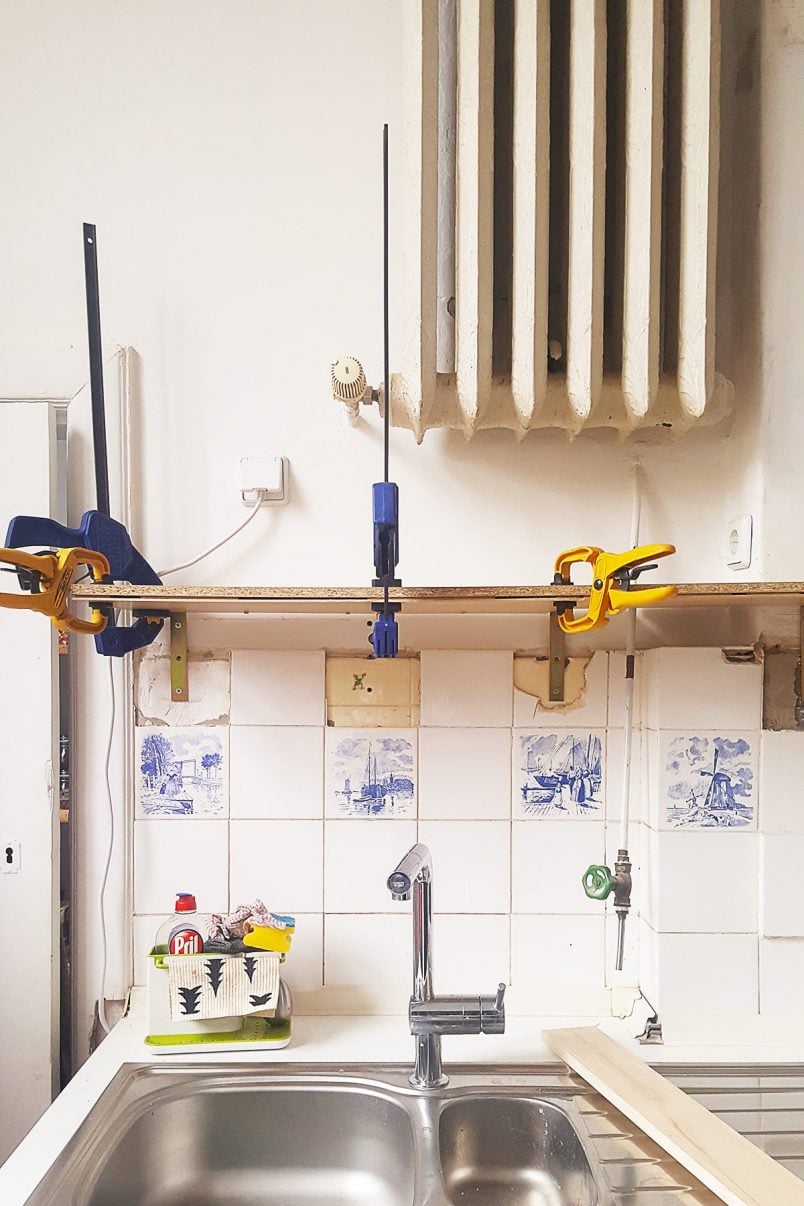
We used some clamps to hold the bottom piece in place while attaching it. If you look closely, you can see that we also have a few additional pieces of wood between the two layers of the shelf. These are just offcuts that are the same thickness as the bracket we used.
This meant that we were able to glue the bottom piece of the shelf to the top shelf. This isn’t a necessary step but it gives the shelf some more strength and makes it easier to screw things together because the shelf pieces are already firmly attached.
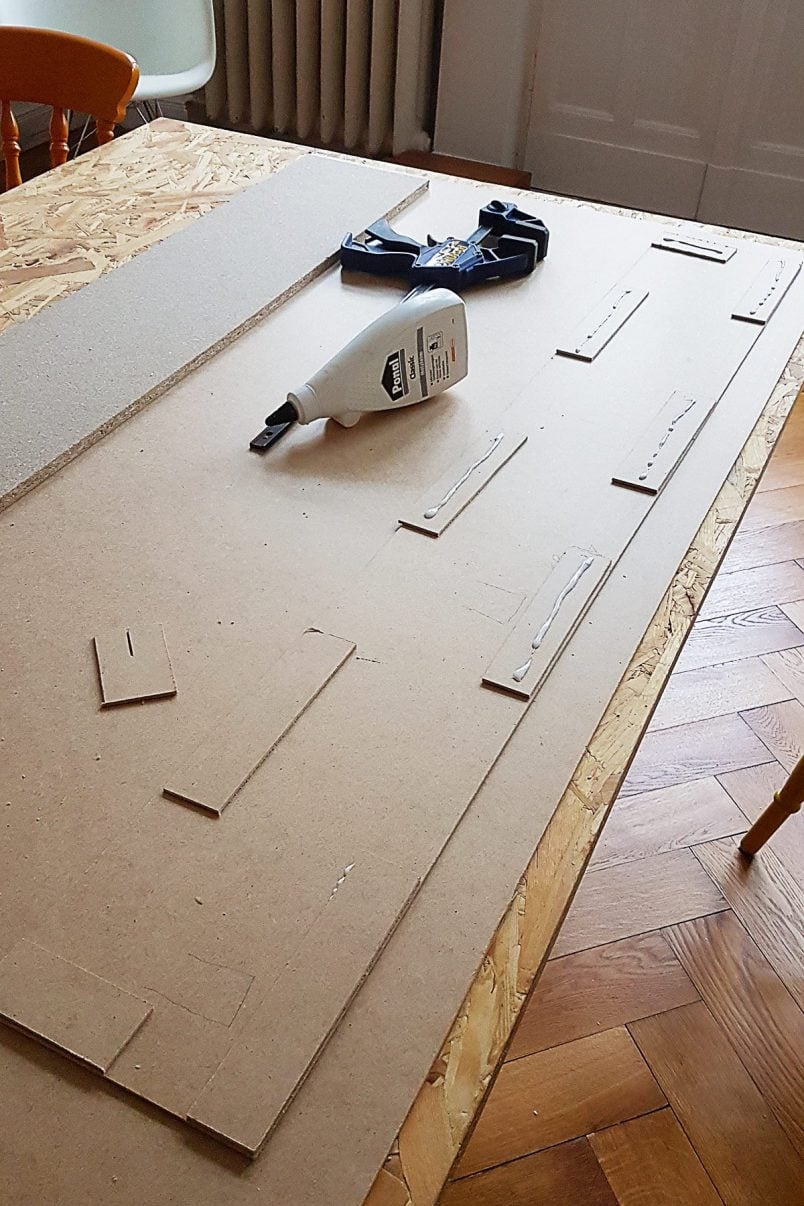
4. Cover Front Of Shelves
To finish the shelves, you’ll need to add a strip of timber to cover the front edge of the shelf.
We used our nailer to attach it. It’s quick and easy and only leaves small holes that are smaller to fill. If you don’t have a nail gun you could nail it by hand or even just glue it to the edge.
5. Paint or Cover
Now for the fun part!
Make sure the surface is clean and dust-free before covering the shelves with the marble effect vinyl. The finish is, of course, totally up to you. The vinyl we used is available in loads of different finishes but you could just as easily paint the shelves.

I’m not going to lie, applying the vinyl was a pain probably because I didn’t make things easier by thinking that I could wrap it around the shelf in one piece. It is possible but it’s really difficult to get it completely smooth.
I covered the second shelf in two pieces (one on the bottom and one on the top) which was a lot easier and the join is barely visible.
Just work your way from one end of the shelf to the other and peel back the backing as you go while making sure to completely smooth out any bubbles.
I found it easiest to smooth out the vinyl with my hand to start before using an old credit card to really smooth the foil and remove any little air bubbles.
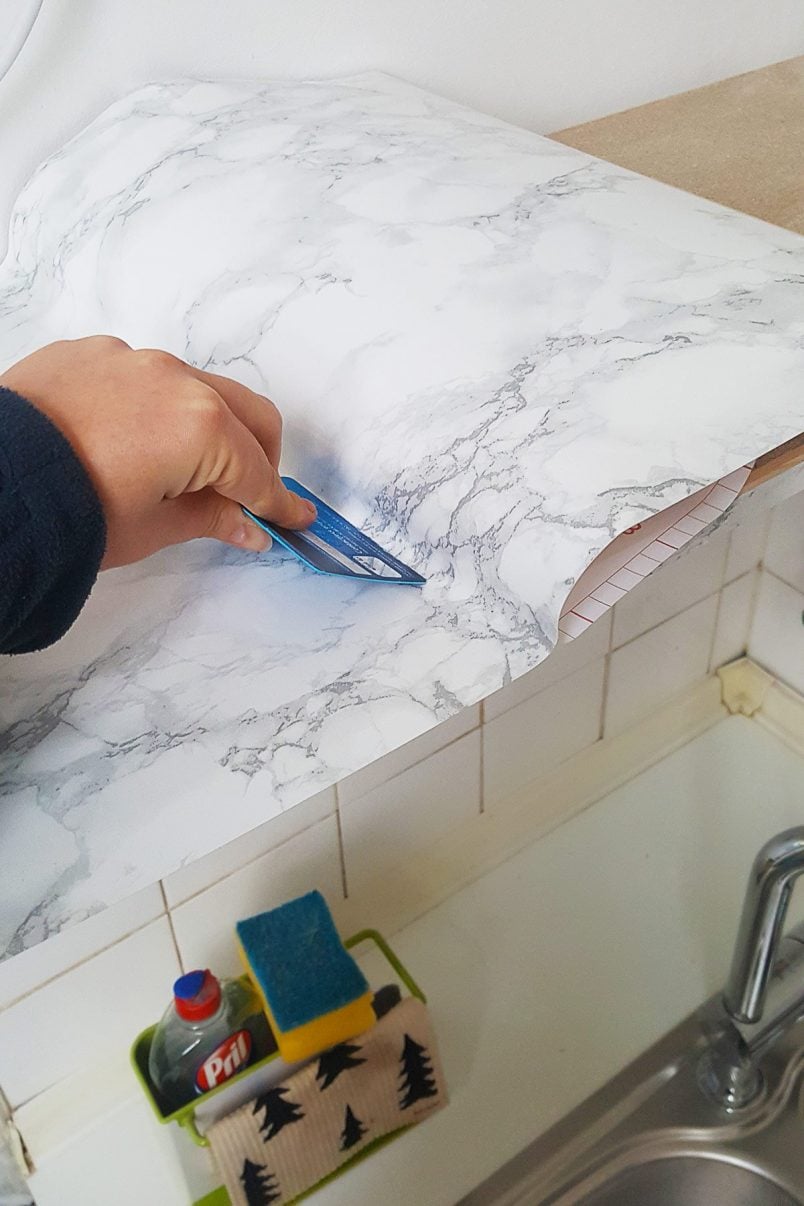
Then just fold over the remaining vinyl around the edge of the shelf and run your fingernail along the edges to achieve really crisp corners.
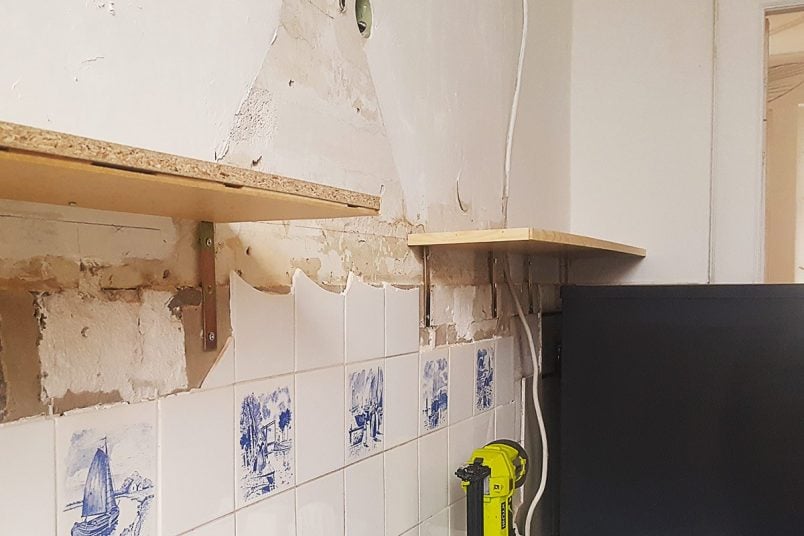
6. Hide The Brackets
How you hide the brackets will depend on how you’re finishing the wall.
Given the condition of our whole wall which was covered in a mismatch of original tiles and badly matched copies, we opted to hide everything under a new faux marble backsplash that matches the shelves.
We’ll share a full post about our backsplash next week but basically, it’s just a large piece of timber that we covered in the same marble effect vinyl and glued to our walls.
Covering the brackets with a board is obviously a really easy way to hide them but there’s another really easy option to hide them, too.
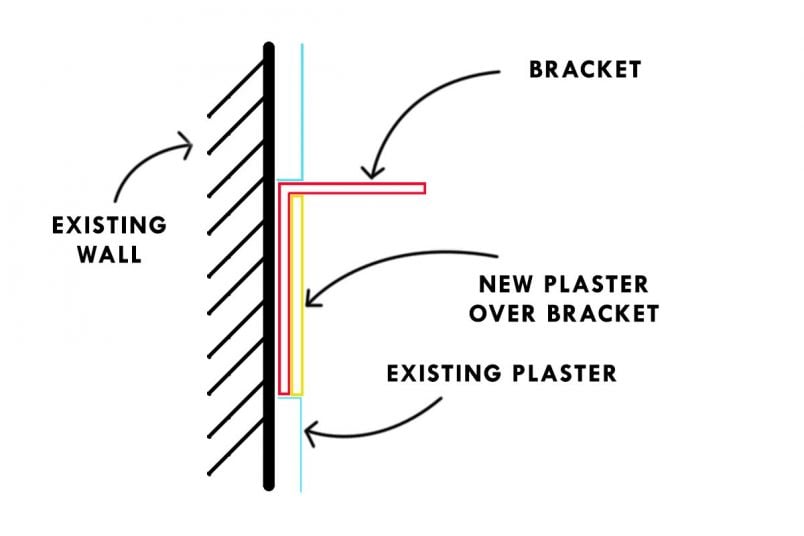
All you have to do is sink the brackets into the wall by removing a bit of the plaster first.
To do this, just score around where the bracket will be with a Stanley knife and then scratch away the plaster. Make sure the indentation you’re creating is deep enough for the bracket to generously fit into. When you’ve finished building the shelves you can then just use some filler or plaster to cover the hole and the brackets.
It’s really just a matter of filling and smoothing everything out to hide the bracket under the plaster. To ensure that there will be no cracks, I’d also recommend adding a layer of jointing tape before plastering.
Because we didn’t do this, I’ve added a sketch to show exactly what I mean.
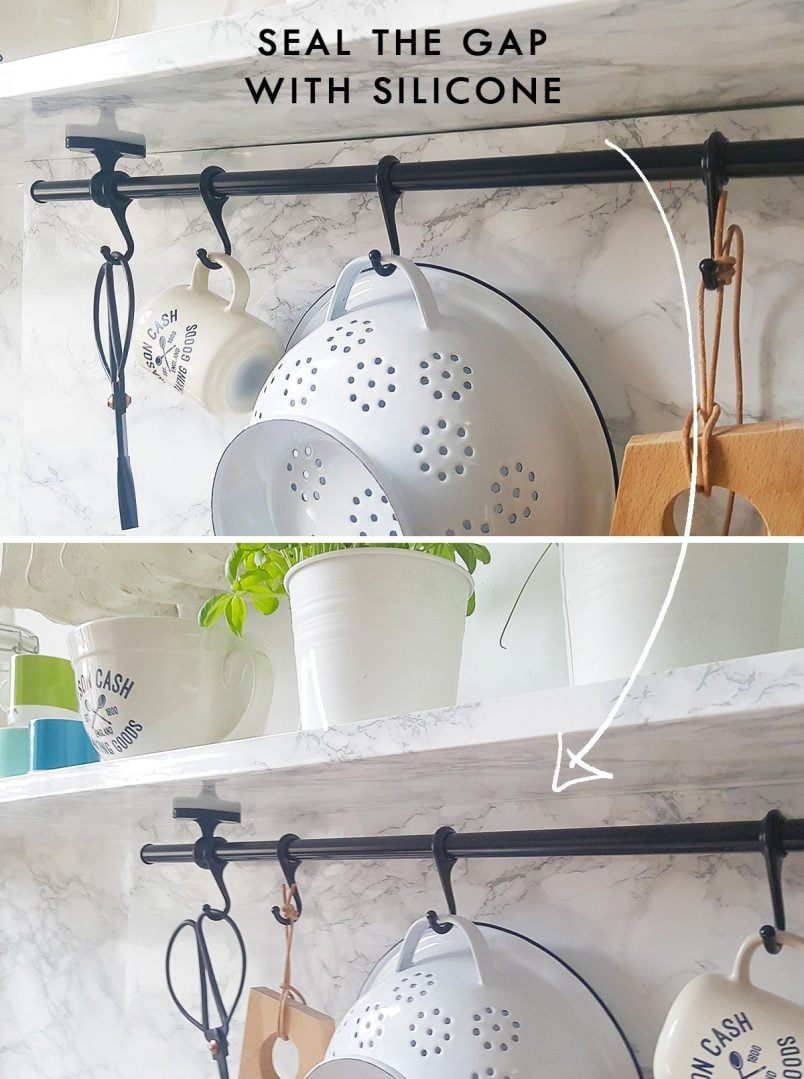
6. Finish The Edges
The last thing to do is seal any edges with some silicone.
And that’s it! It may seem like there are a lot of steps to this project but it’s actually a really easy project to do.

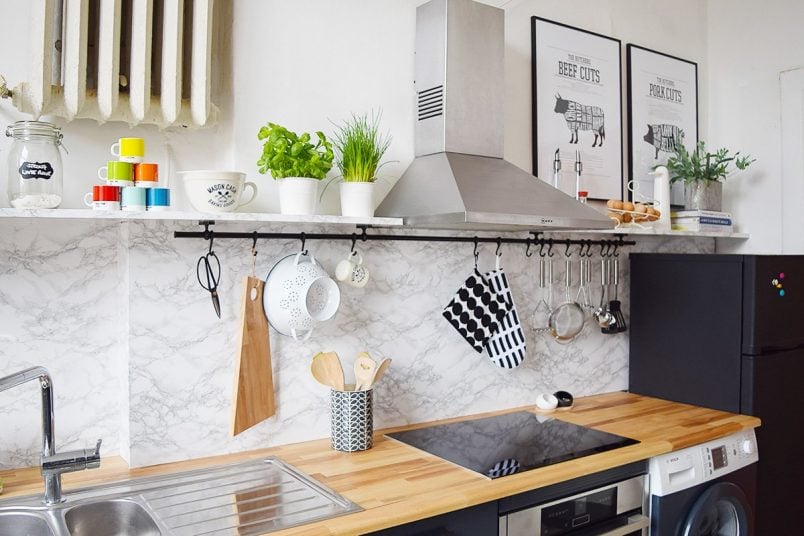
I love how the super thin floating shelves look in our kitchen. They have such a lovely modern and elegant feel.
You can see the full reveal and makeover of our kitchen here.

Stay tuned as we’ll be sharing lots more of our kitchen makeover projects including how we built our faux marble backsplash and our DIY picture shelves.
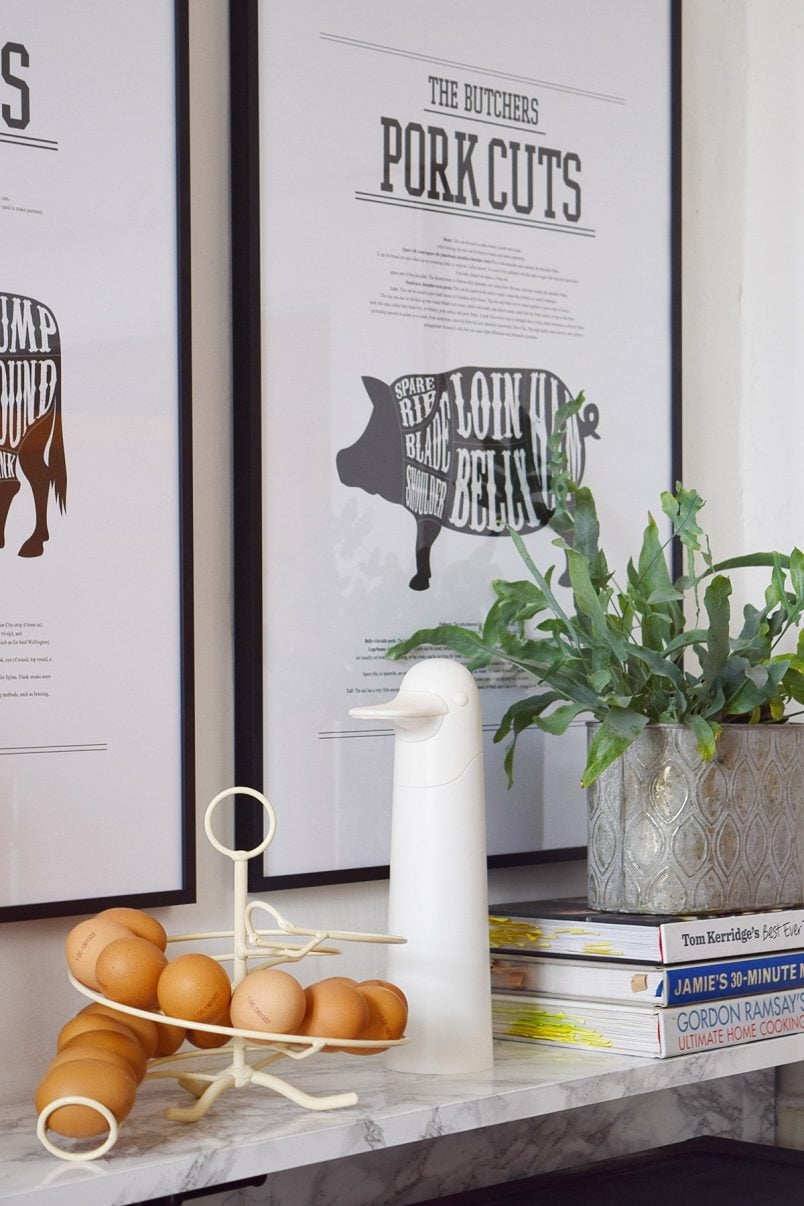
Given that we hate clutter I’m surprised at just how much I love our open shelves.
We’re still able to hide all of our general kitchen clutter in the cupboards but the shelf is a lovely space to display some of the prettier kitchen items and store some of the day-to-day things we need.
Are you pro open shelves in the kitchen? Or do you hate them? What’s your favourite way to stay organised? Do you prefer the look of super thin floating shelves or do you like the chunky ones more?
Rachel Porter says
Only a few people use wooden countertops. The renovation outcome is beautiful and the color combination makes the kitchen very attractive.
Christine says
Thank you, Rachel!
Cx