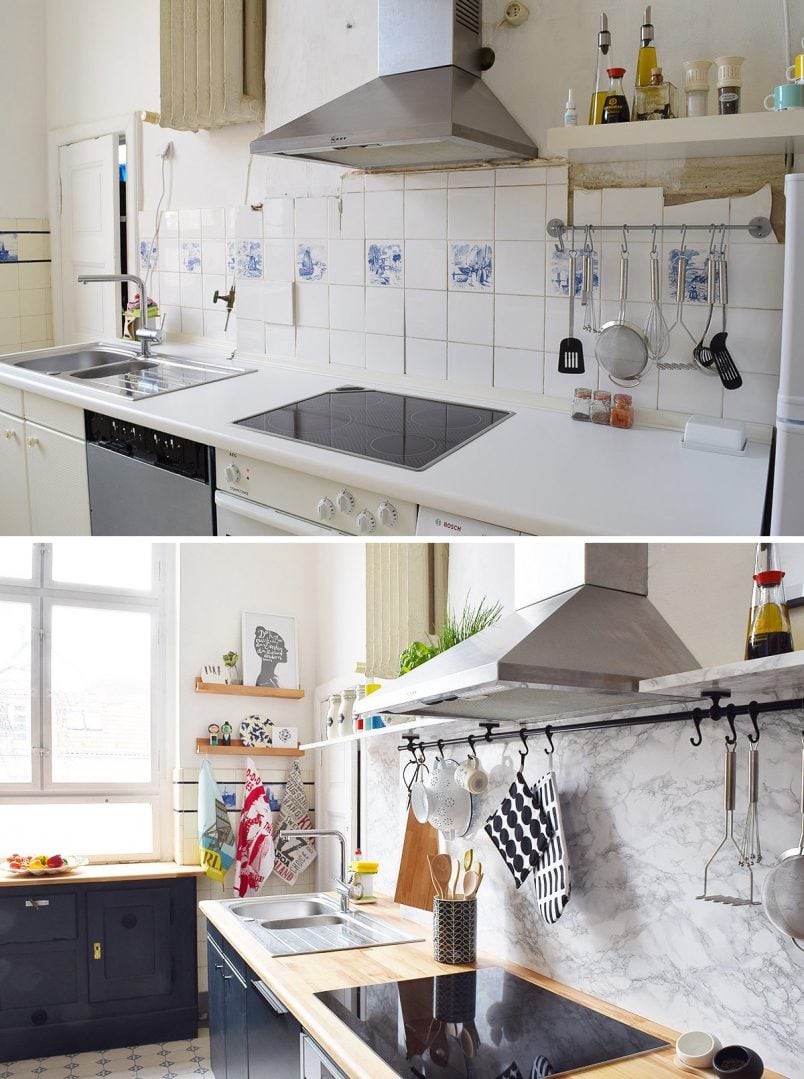
We’re still totally over the moon with the epic transformation of our kitchen that we shared a couple of weeks ago. If you didn’t catch it, you can see the full transformation with loads of before & after pictures here.

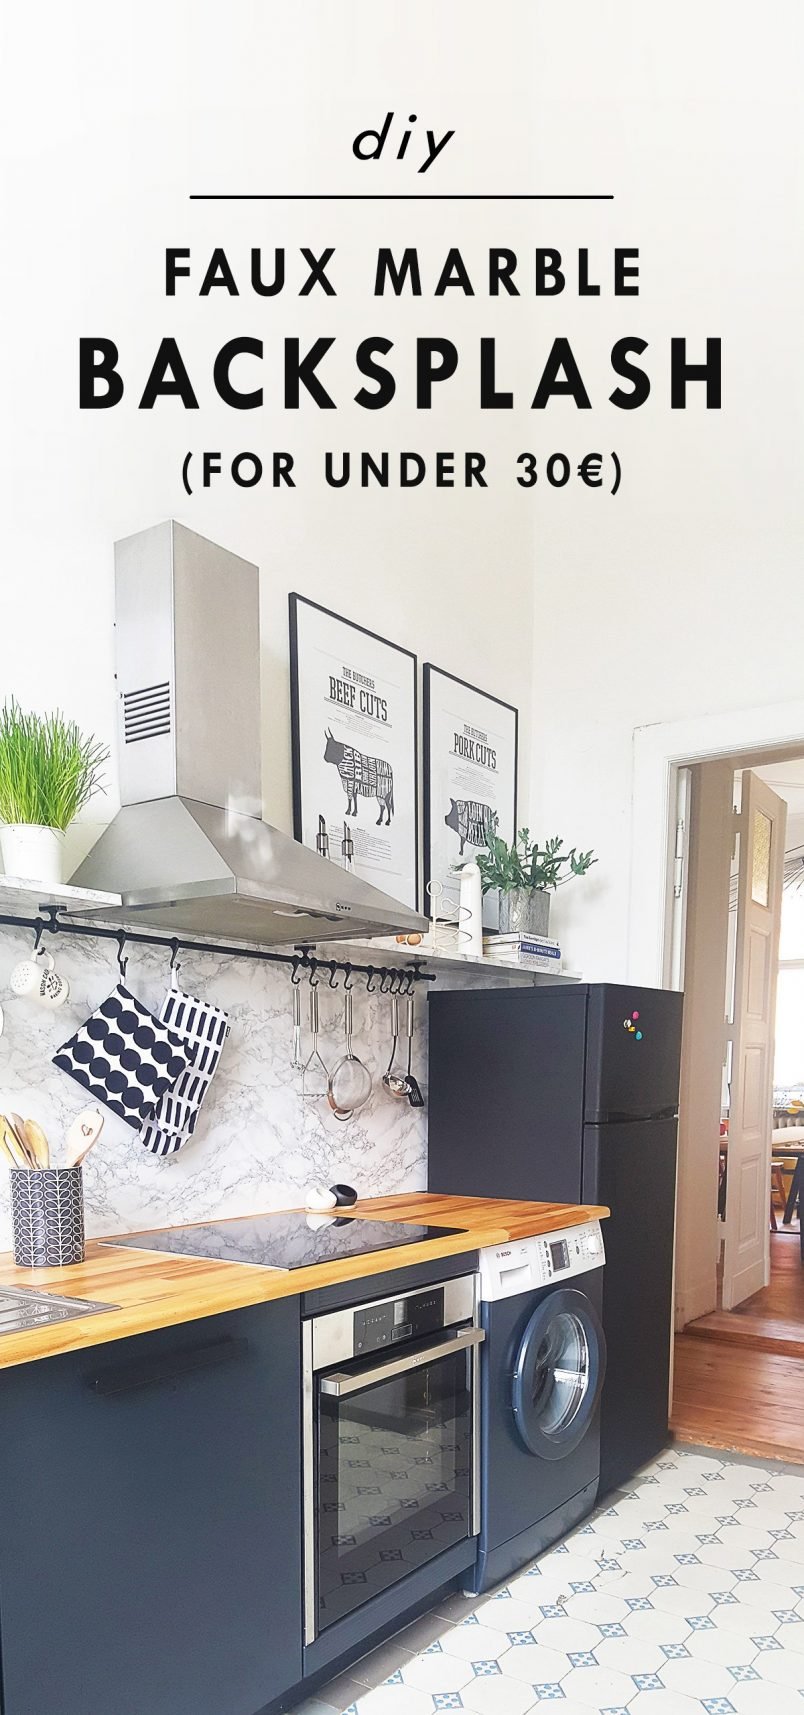
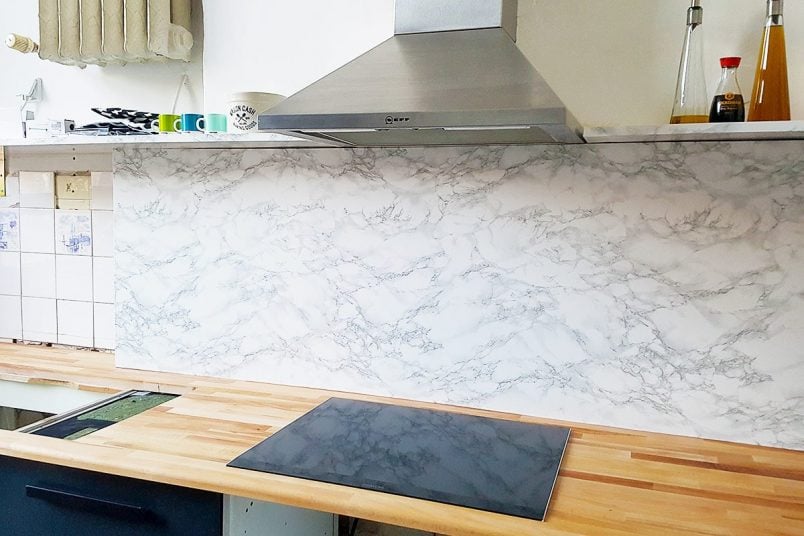
We tackled so many projects during this renovation, and I love every single thing about our new room. It’s hard to pick a favourite part because everything has come together so well, but one of the things I really love is our new faux marble backsplash.
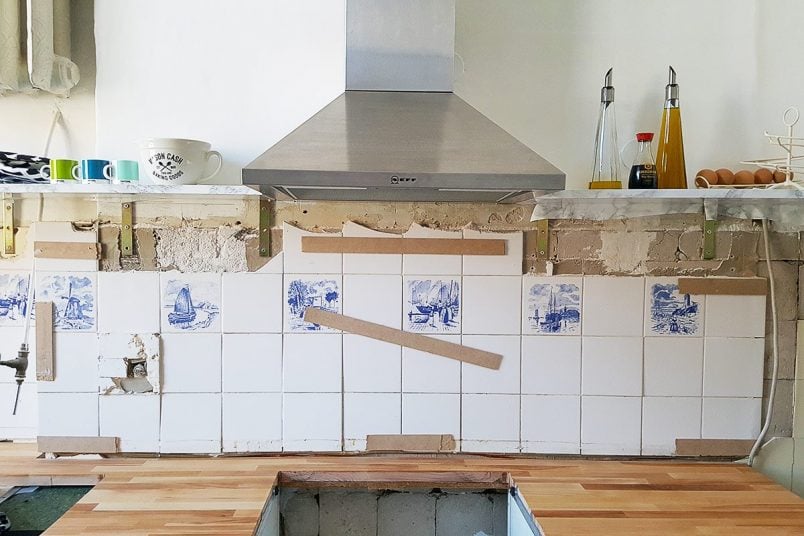
We had considered tiling the walls, but there were a few things that held me back – even if it would have been nice to try a tiling project for a change (yep, we’ve never done one!).
Our whole makeover is meant to be a temporary solution and given that some of our existing backsplash tiles are originals, we didn’t want to do anything that would damage them or prevent us from possibly keeping or reusing them in the future.
We’d originally planned on installing a copper backsplash, but we’re on a super strict budget, and splashing out on a luxury full-on copper backsplash for a temporary kitchen makeover just wasn’t going to happen. Which is why we came up with the faux marble solution instead. Best of all, the whole thing only cost a bargainous 28 €!
This is what you will need to install a faux marble backsplash:
This post contains affiliate links. We only recommend products we love and think that you will, too! Read our full disclaimer here.
- Marble contact paper – this is the marble paper that we used
- MDF board (we used 5mm MDF because it was the cheapest)
- Craft knife
- Old credit card (or similar)
- Optional: Circular saw – most DIY stores will cut the wood to size for you when you buy it
- Sandpaper (around 120 grit)
- No Nails
- Silicone
- Caulk gun
This is how to build and install a faux marble backsplash:
01
Measure and Prepare
As always when starting any project measuring and getting everything prepared is vital to achieving a result you’ll be happy with.
Start by measuring the backsplash area you’ll be covering before cutting the MDF boards that will be the backing of your new backsplash to size with a circular saw.
Check they fit the area you’re covering and give all edges a light sand to make sure they’re completely smooth.
02
Glue The Marble
Now, it’s time to glue the marble paper to the MDF backing board.
Make sure the surface of the board is completely dust and dirt free and lay the paper over the sheet of MDF leaving an overhang of a couple of centimetres at each edge.
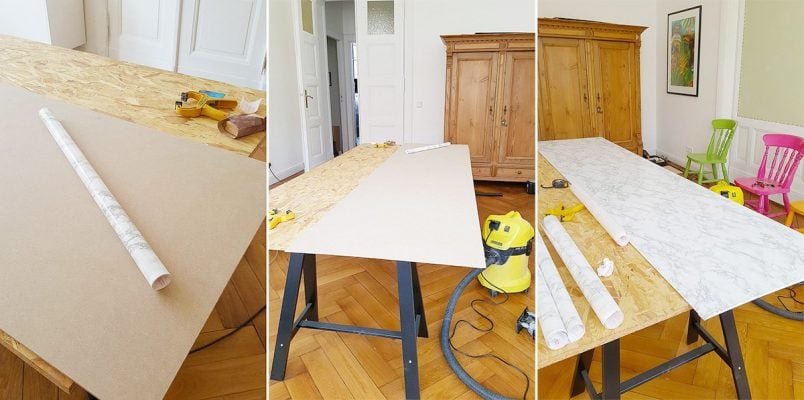
Then, peel back one edge of the backing paper and glue down the marble paper along one edge of the board. Now work your way along the board, peeling back the backing paper bit by bit and glueing and smoothing out the marble paper as you go.
When the front side is finished, turn over the board and wrap the paper around the edges as if you were wrapping a present.
Tip: It’s a good idea to get some help with this. It’s much easier if you have someone to hold the paper while you are attaching it, especially if it’s a larger piece. It’s also good to have someone there to shout and curse at when you’ve got an air bubble because it’s quite fiddly to get it completely smooth. Luckily, you can just pop any bubbles with a pin and smooth them.
03
Install The Backsplash
One of my favourite things about this project is that it’s so fast, as there’s no drying time involved, and it’s ready to install as soon as it’s covered.
Apply a layer of no-nails over the back of the board, making sure to cover it evenly, and then just stick it to the wall!
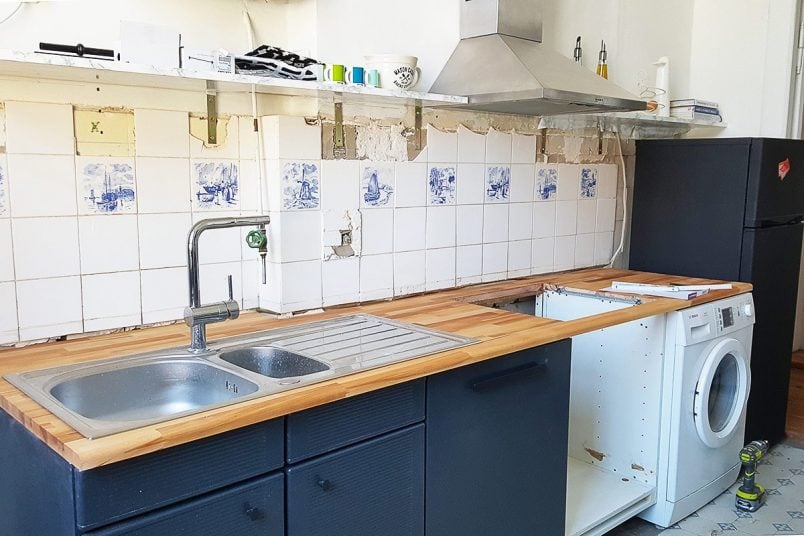
As you can see, our wall was very uneven, which is why we levelled it out a bit by glueing a few leftover pieces of the MDF we used to the wall first. Luckily, most walls aren’t quite as wonky as ours!
No Nails adhesive dries quite quickly, so you’ll just have to press the board against the wall for a few minutes until the glue starts to dry.
04
Apply Silicone Around The Edges
When the glue has completely dried, and the faux marble splashback is firmly secured to the wall, all that’s left to do is silicone around the edges where it meets your worktop (and any other edges).
You have to make sure that all edges are sealed so that no dirt or moisture can get under or behind the panelling.
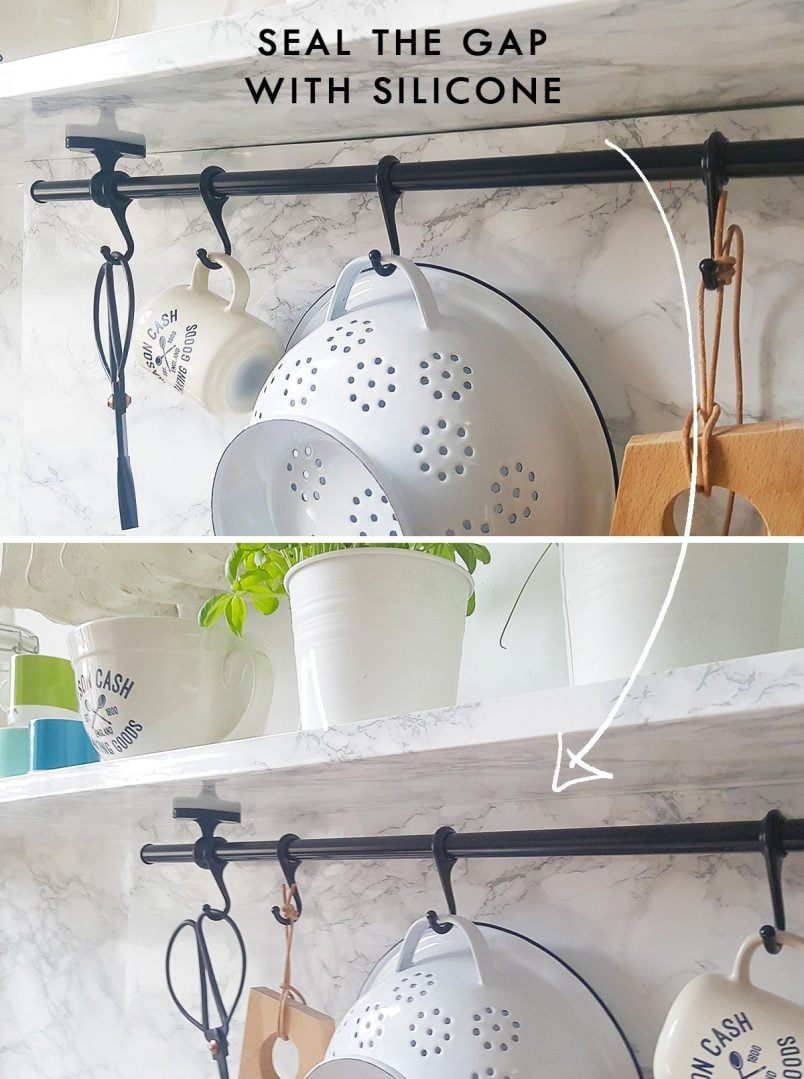
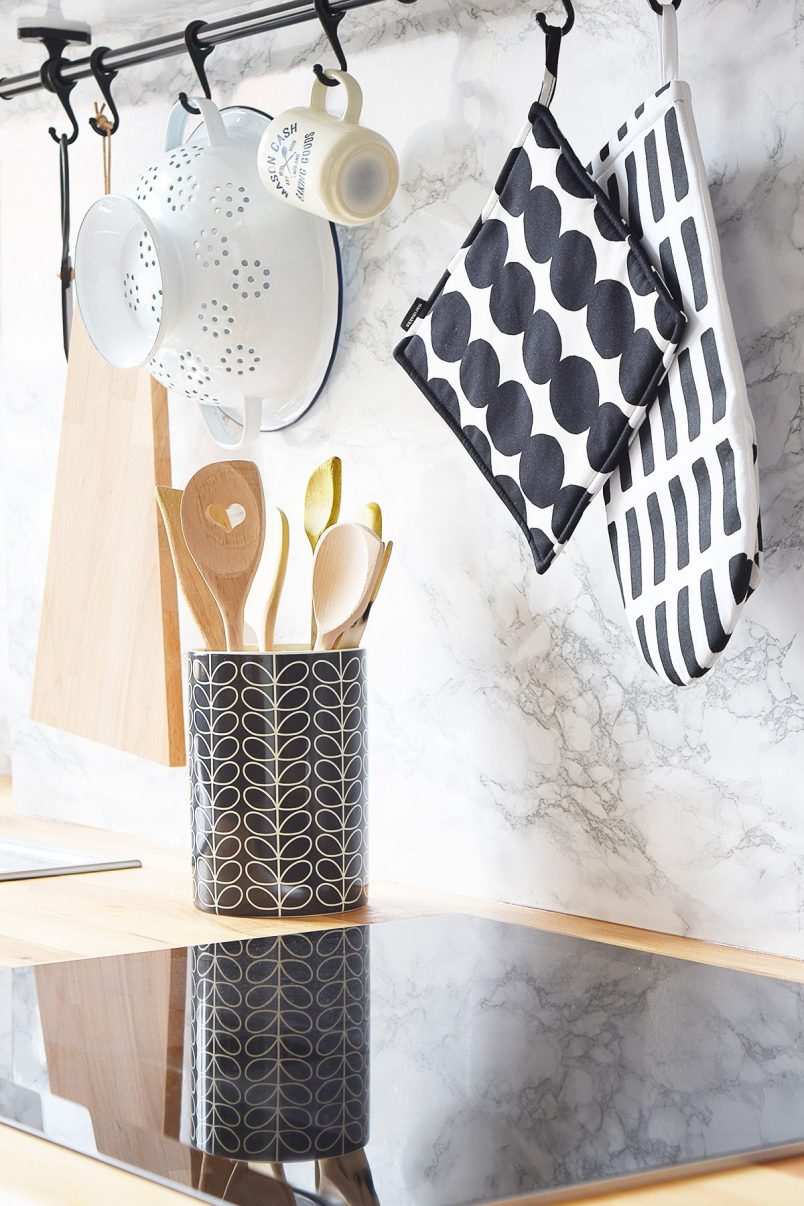
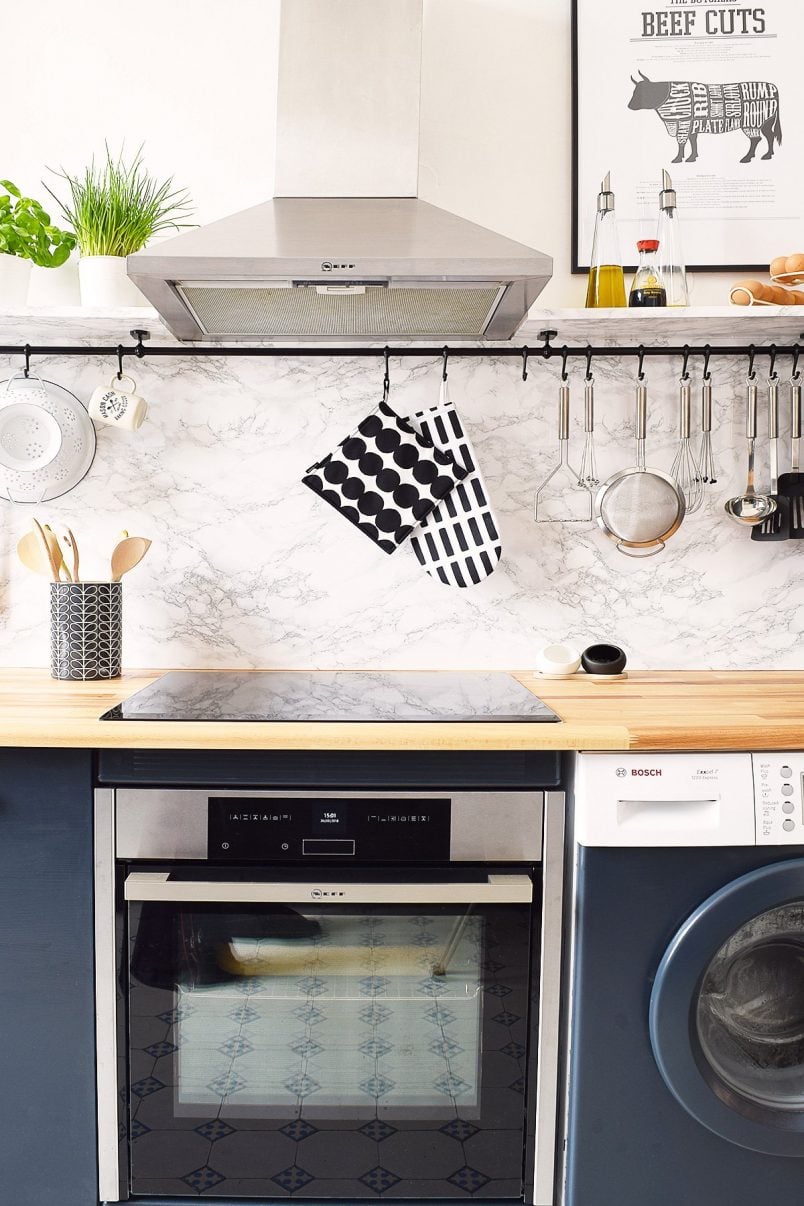
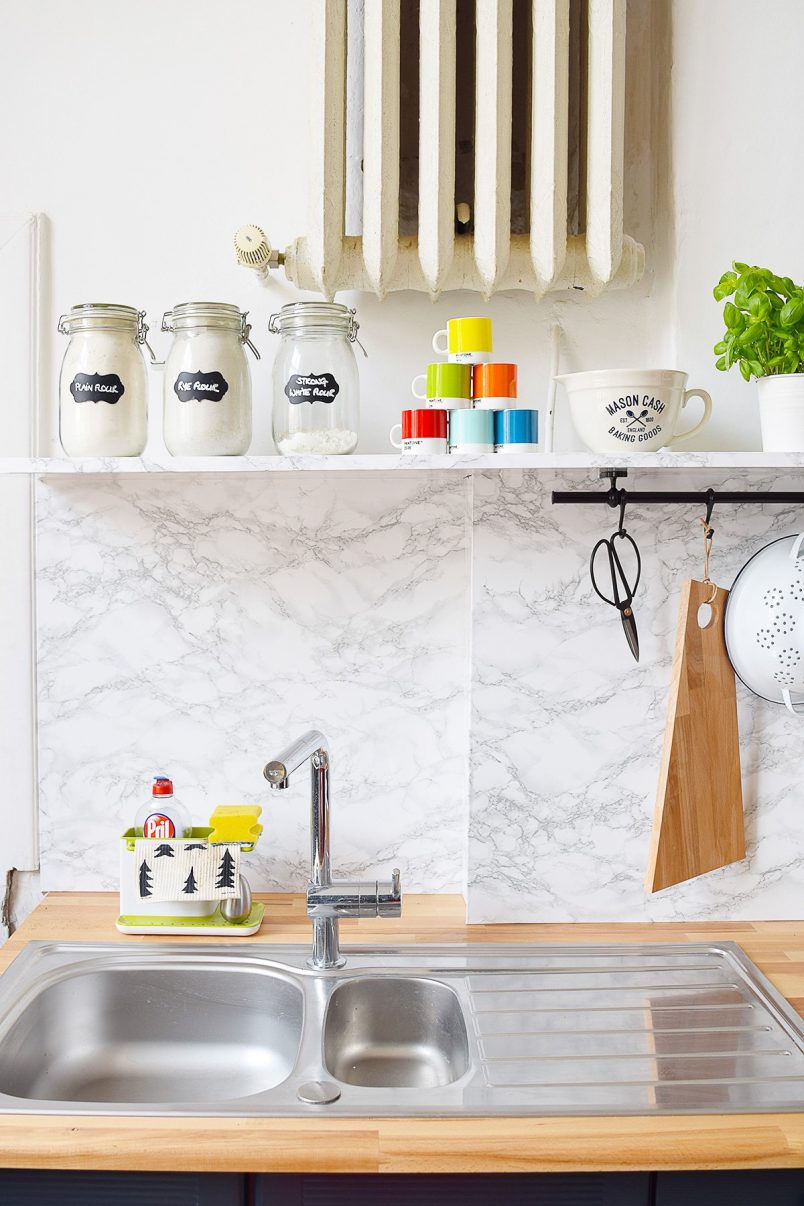
We used clear silicone where the board meets the beech worktop and white silicone where the faux marble backsplash meets the floating shelves.
As well as making sure that no dirt can get into any cracks, silicone is also your friend because it’ll hide any imperfections and small gaps around your board.
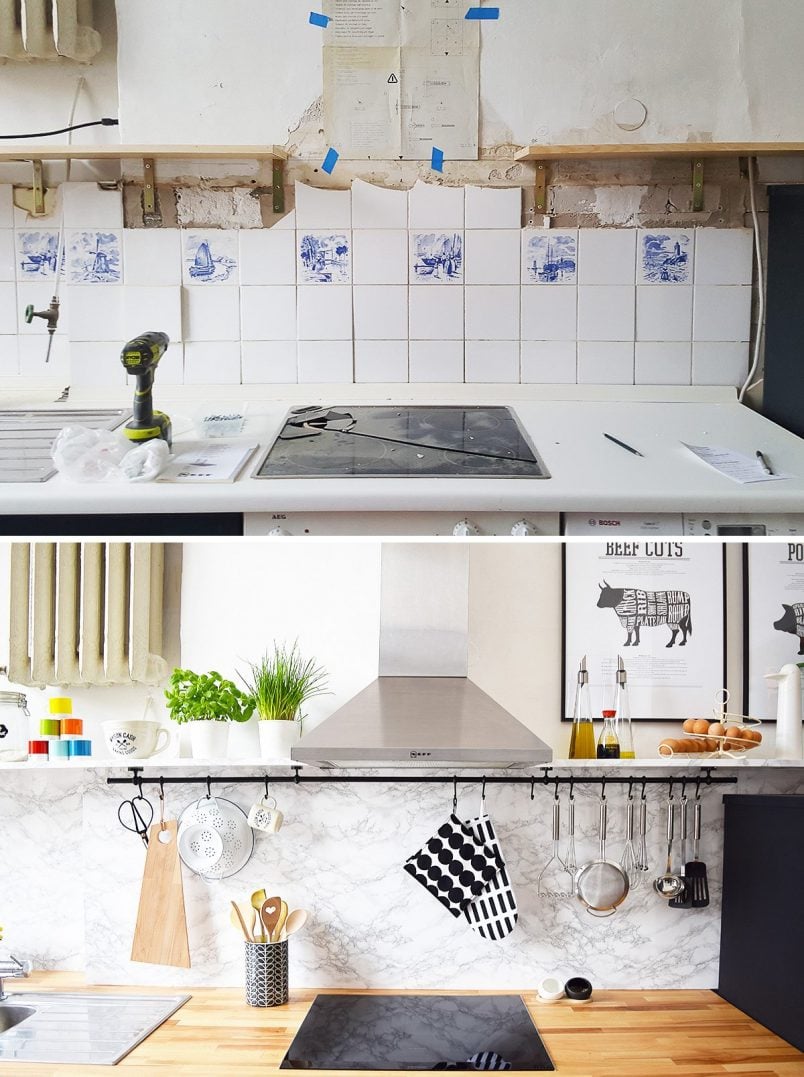
We’re so lucky to have the original tiles on the other side of the kitchen but the ones on this side were a mess and quite badly damaged. By just adding this faux marble backsplash and hiding the mess behind it, the kitchen feels completely different and soooo much cleaner!
Is it a solution that will last forever? Probably not – it is only vinyl paper, after all. Having said that, it’s been up for a couple of months now, and so far, it’s held up perfectly, and it’s really easy to wipe clean.
More importantly though, it was a really cheap project to do.
Cost Breakdown:
- Marble foil – 14€
- MDF Board – 9€
- No Nails – 5€
Total cost of the faux marble backsplash: 28€
You can see a full breakdown of our kitchen makeover costs and a full list of supplies and sources in our kitchen reveal that we shared here.
Given that this kitchen is 33 years old we really couldn’t be happier with how the whole makeover has turned out. This makeover was always only ever meant to be temporary but I love it so much now that I’m really not in a rush to rip it out any time soon.
Have you ever updated your kitchen? What would your dream kitchen look like?

June says
It’s not heatproof. How did it hold up when you turned the stove on? I would think this is a fire hazard.
Christine says
It’s a bit away from the stove and doesn’t get warm at all. It’s easy to keep clean, too. We had it for years without any problems and it held up perfectly.
Hope that helps, June.
Cx