I’ll let you into a little secret. We love DIY, and we’ve learned a lot over the last 8 years of improving our homes, but we often make things up as we go along!
We don’t always know how our projects will turn out, especially on projects like our DIY bar cart, where I had no idea if what I’d planned would actually work.
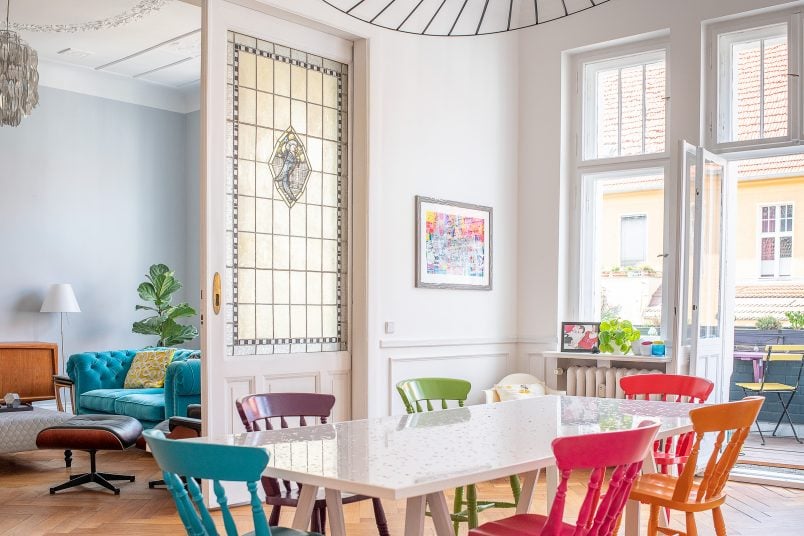
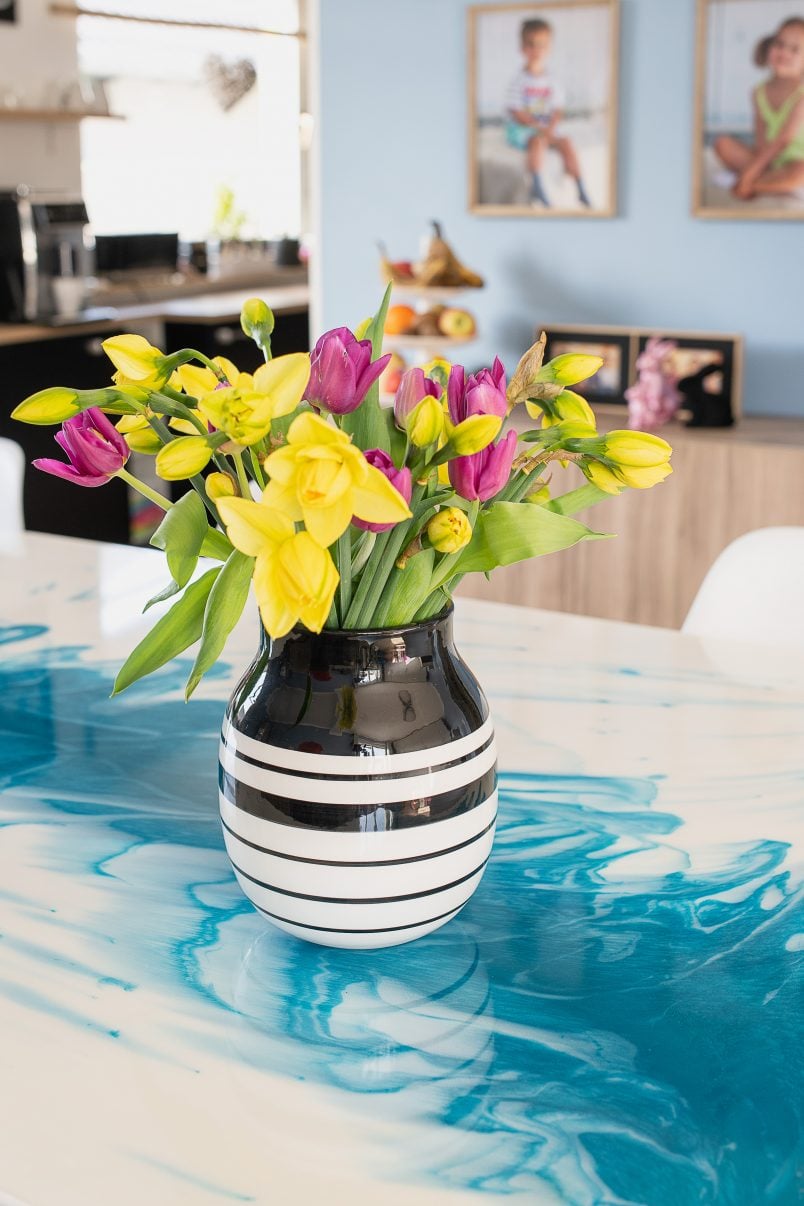
Our latest project is no exception and definitely falls into the experimental category – we’ve built a DIY terrazzo dining table!
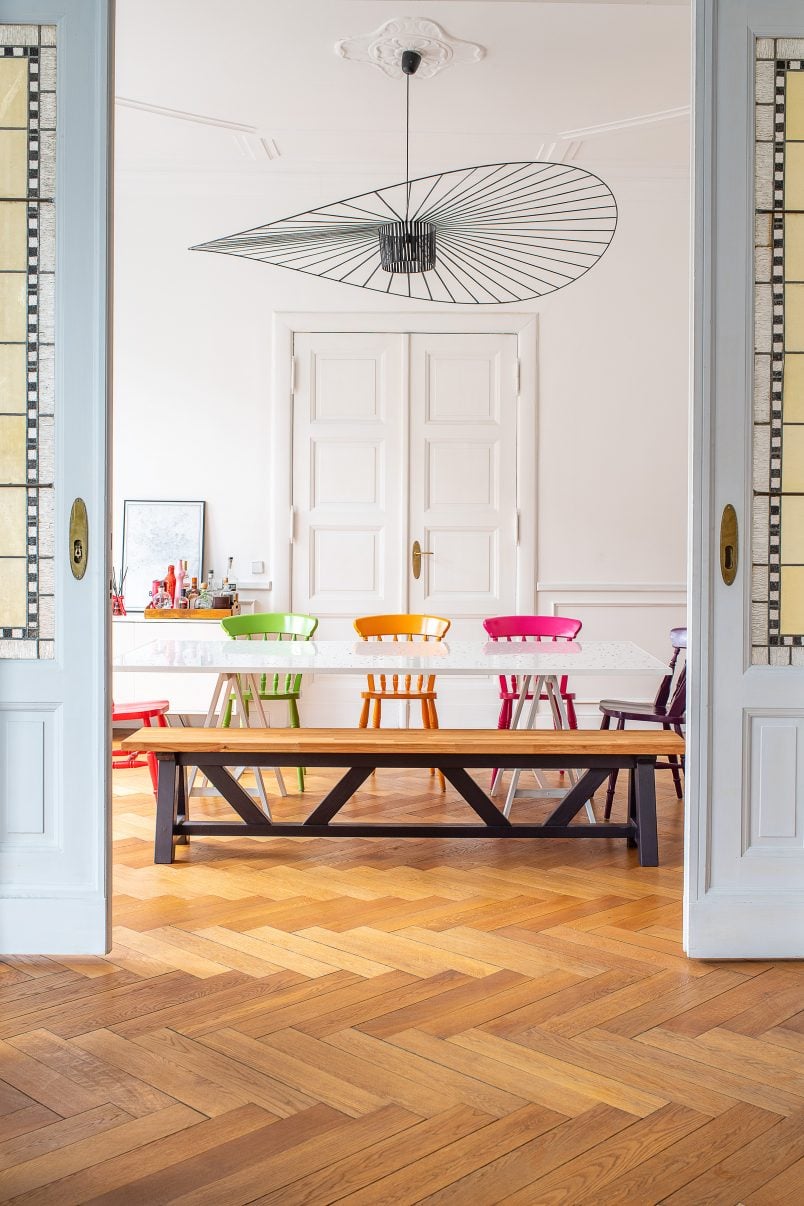
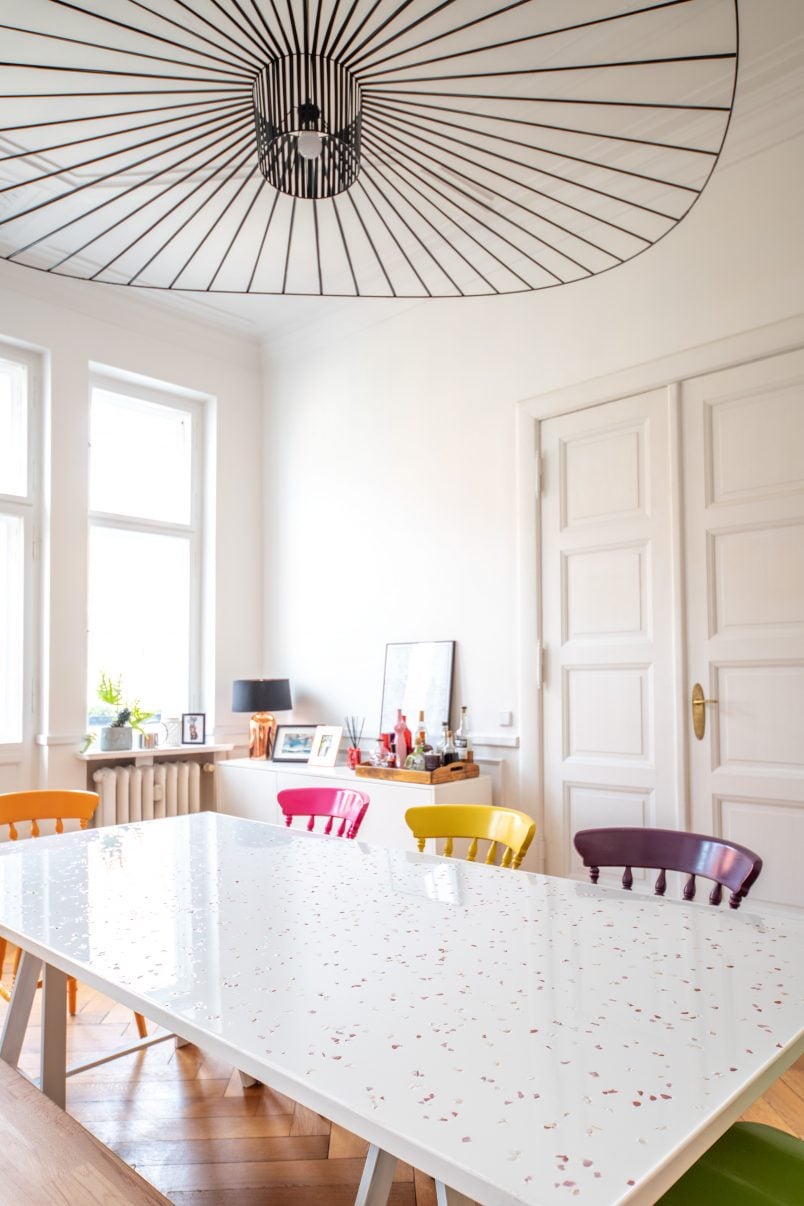
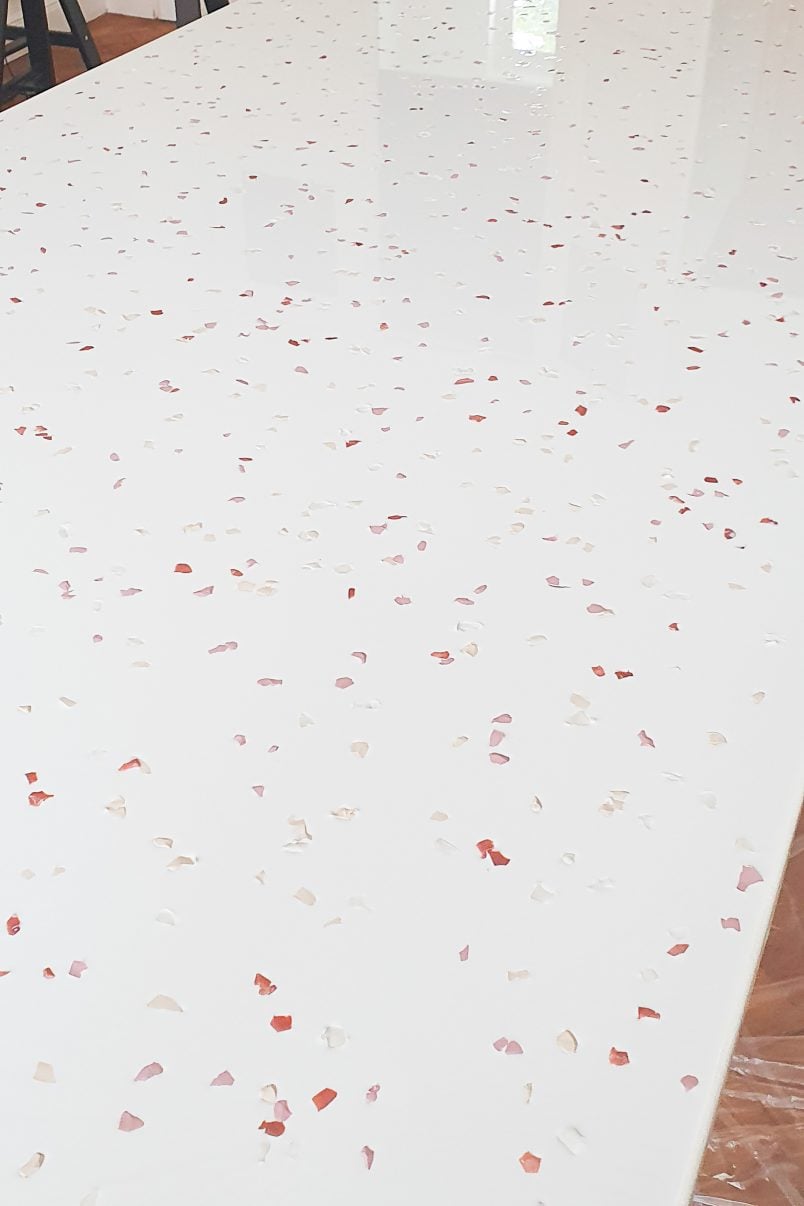
After a lot of research, we opted to build a terrazzo table that isn’t actually terrazzo. It’s a resin top with coloured “terrazzo” flakes which are made out of Fimo polymer clay.
Yep, I really wasn’t kidding when I said this was experimental.
Luckily, our mad idea worked, and it actually turned out so much better than we could have hoped!
I love how the little flecks of colour look in the super glossy surface, and it really feels a lot more like a real table rather than a sheet of timber we’d just placed on two trestles.
And, if you’d like to build your own super durable terrazzo effect dining table – or any other table for that matter – we’re sharing exactly how we did it!
This is what you will need to build a super affordable faux terrazzo dining table:
This post contains affiliate links. We only recommend products we love and think that you will, too! Read our full disclaimer here.
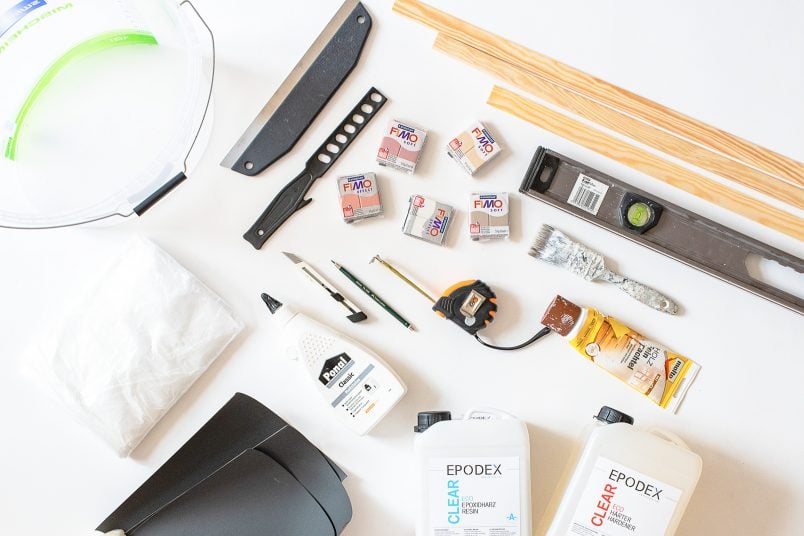
Tools:
- Mitre saw (or a fine saw & mitre box)
- Scales (we used our kitchen scales)
- Spirit level
- Nailer (or a hammer & nails)

Supplies:
- Resin – it’s available in 100s of different colours – we used 6kg of this resin in white (RAL 9003)
- Fimo in whatever colour combination you want (we used mother of pearl, taupe, pearl roségold, antique rose and sahara)
- D-shaped moulding strips to edge the table
- Paintbrush (a small cheap one that you can throw away afterwards)
- Wood glue
- A couple of nails to attach the moulding to the edge of the table (we used our nailer for this but you could nail by hand)
- A couple of washers, a thin strip of timber or something similar – basically, anything solid that’s 2-3mm thick
- Sandpaper 120 grit and 600 grit
- Mixing bucket & paint mixing stick
- Adhesive spreader
- Paint (for the edging trim)
- Wood filler
- Polythene dust sheets
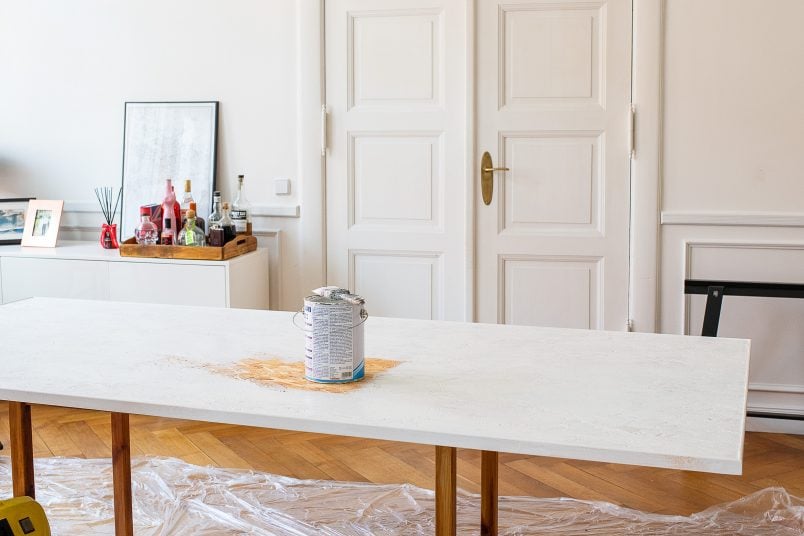
- Tabletop – you can read about our DIY table here. Basically, it’s a 22mm OSB board with two trestles underneath. You could totally add this resin top to any existing table you have, though! If you are building this table from scratch, I’d recommend using plywood instead of OSB.
- Optional: We painted our tabletop with a white wood primer first as we were worried about the dark colour shining through the epoxy finish. It’s a totally optional step and will depend on the epoxy colours you’re using and on the base of your table).
This is how to build an epoxy resin terrazzo style table:
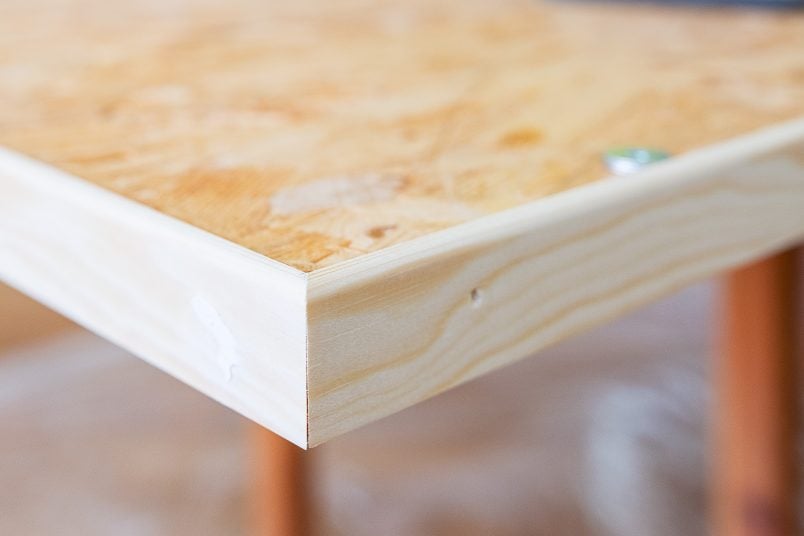
1. Prepare the base of the table and add an edging strip
To be able to pour the resin, you’ll have to give the tabletop an edge so that the resin doesn’t flow over the edge when you pour it.
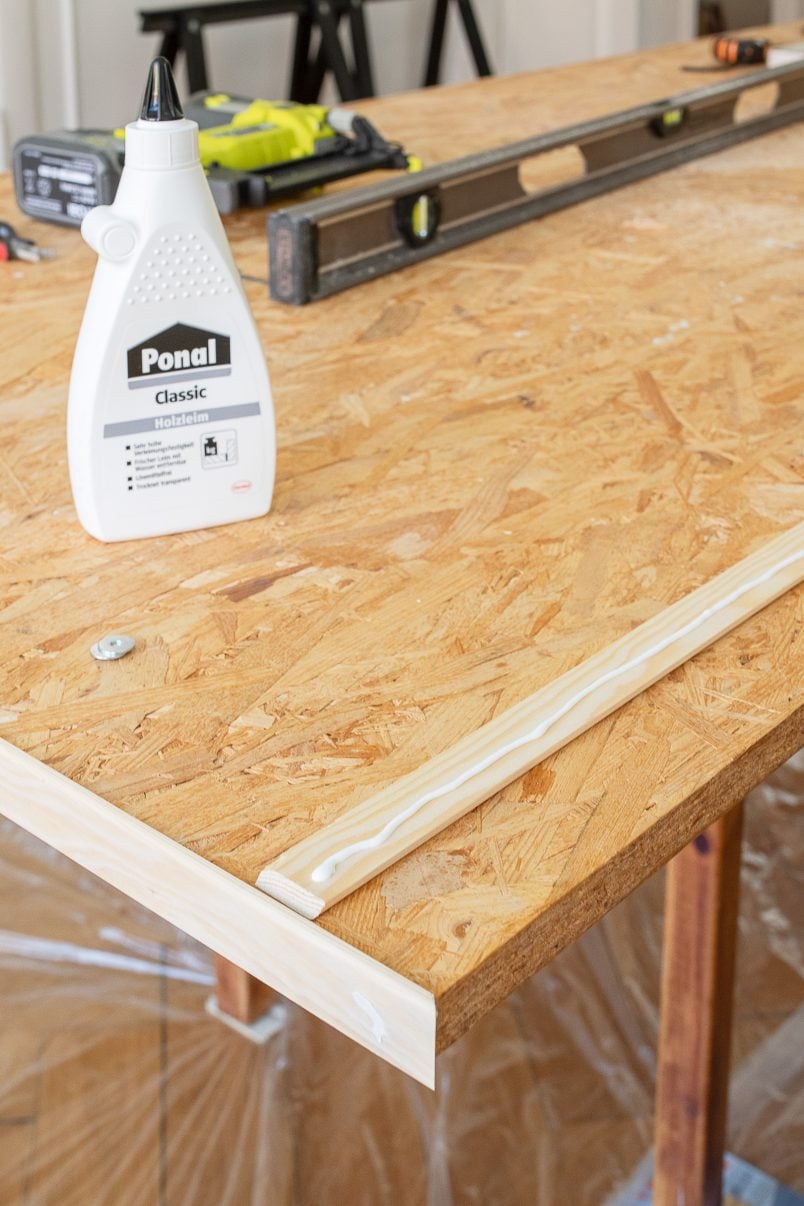
Cut a strip of moulding to the required length (the length of your table plus a bit extra for your mitred corners) with your mitre saw and cut the ends at a 45° angle to give the corners of the table a mitred corner.
Make sure that it all fits, and then apply a layer of wood glue along the length of the strip before sticking it to the table and securing it with a couple of nails.
We used our favourite tool – a nail gun for this, but it is an expensive tool and you could use a couple of small nails and a hammer instead.
The whole point of this edging strip is to give the resin something to flow against, which is why the upper edge of your strip has to be slightly higher than the surface of your table.
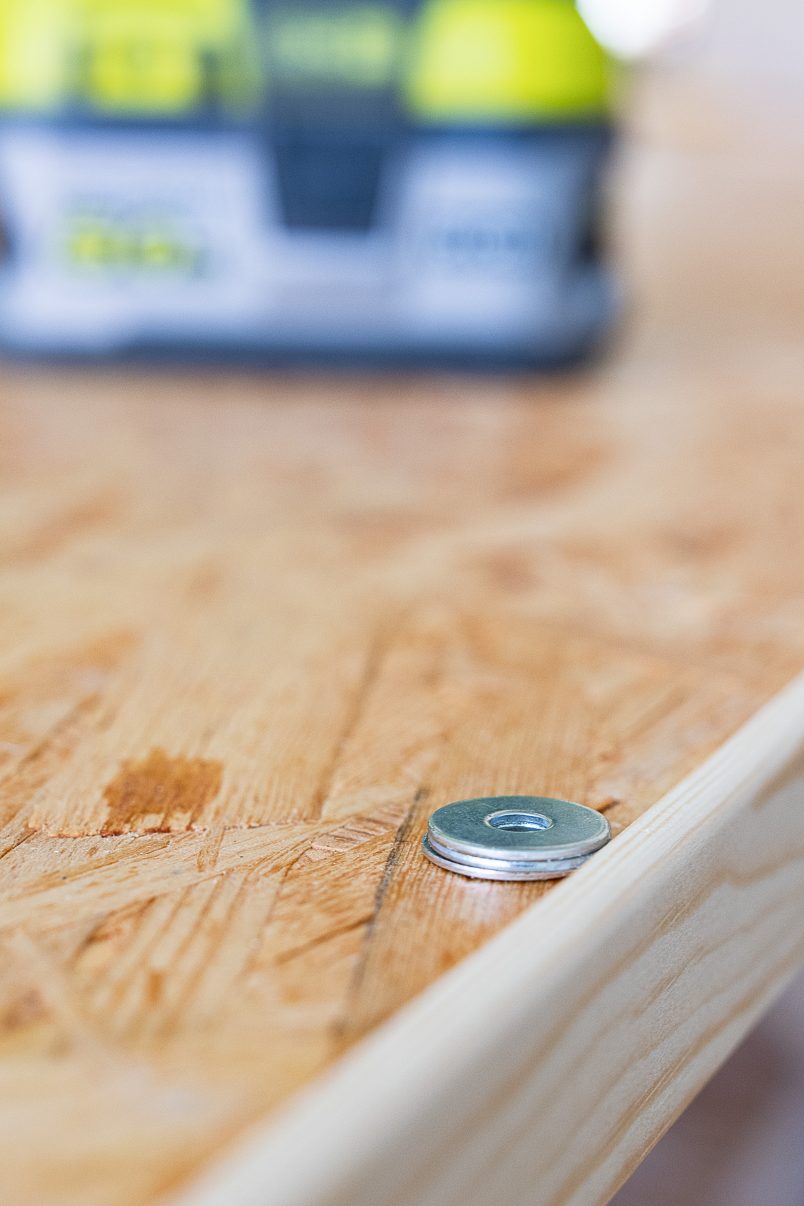
To keep everything perfectly level and straight, we made ourselves a little distance holder out of a couple of stacked washers, which we then used to hold the top edge to the wood strip before nailing it into place.
The advised thickness of the resin is 2mm, so we made sure that our edge was slightly higher (2.5 – 3mm) just to be certain that no resin would overflow and wreck our parquet floor.
Tip: The hardest part of this project was making sure the table base is completely level. Our home is well over a 100 years old and nothing is level which is why we ended up balancing our tabletop on our guest bedroom desk (this is was another fun DIY project that you can read about here), some additional trestles and a couple of magazines. Not the most elegant of solutions, but it worked.
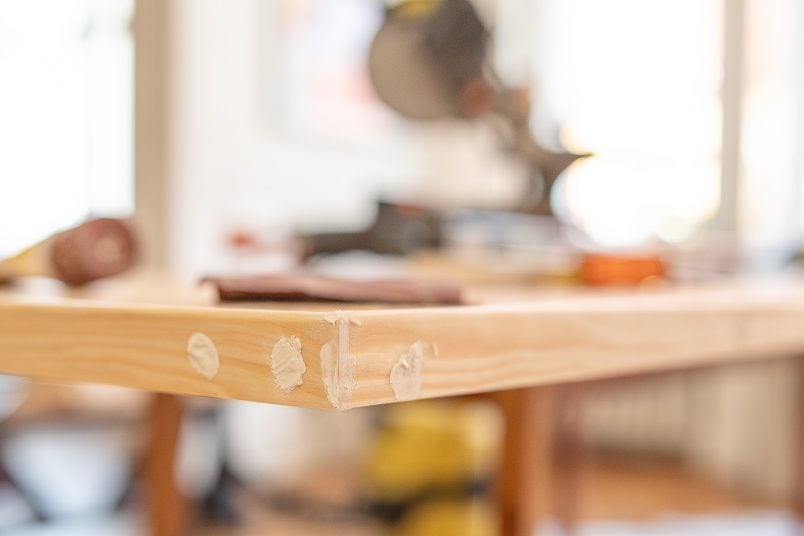
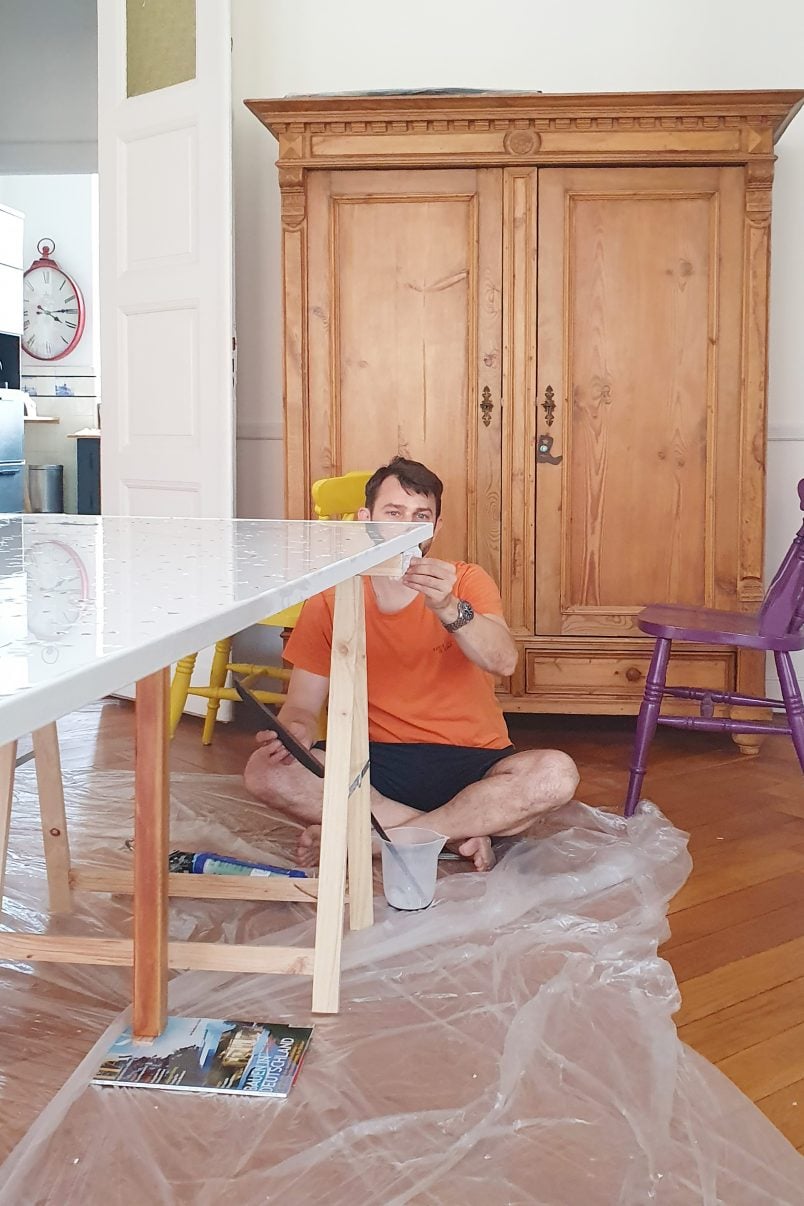
Next, fill any little gaps, imperfections or nail holes with some wood filler and sand everything smooth when the filler has dried before giving the edge a coat of primer and paint.
2. Prime the base
After preparing the edge of the table, it’s time to prepare the base.
We gave our OSB table a coat of white paint before adding the resin because we were worried that the darker board would shine through the finish. Looking back, though, I don’t think this was necessary, as the resin is very opaque.
One step I wouldn’t skip, however, is priming the base with a thin coat of resin. This helps seal the surface and will help you achieve a better finish when you apply the thick layer of resin as it helps reduce air bubbles.
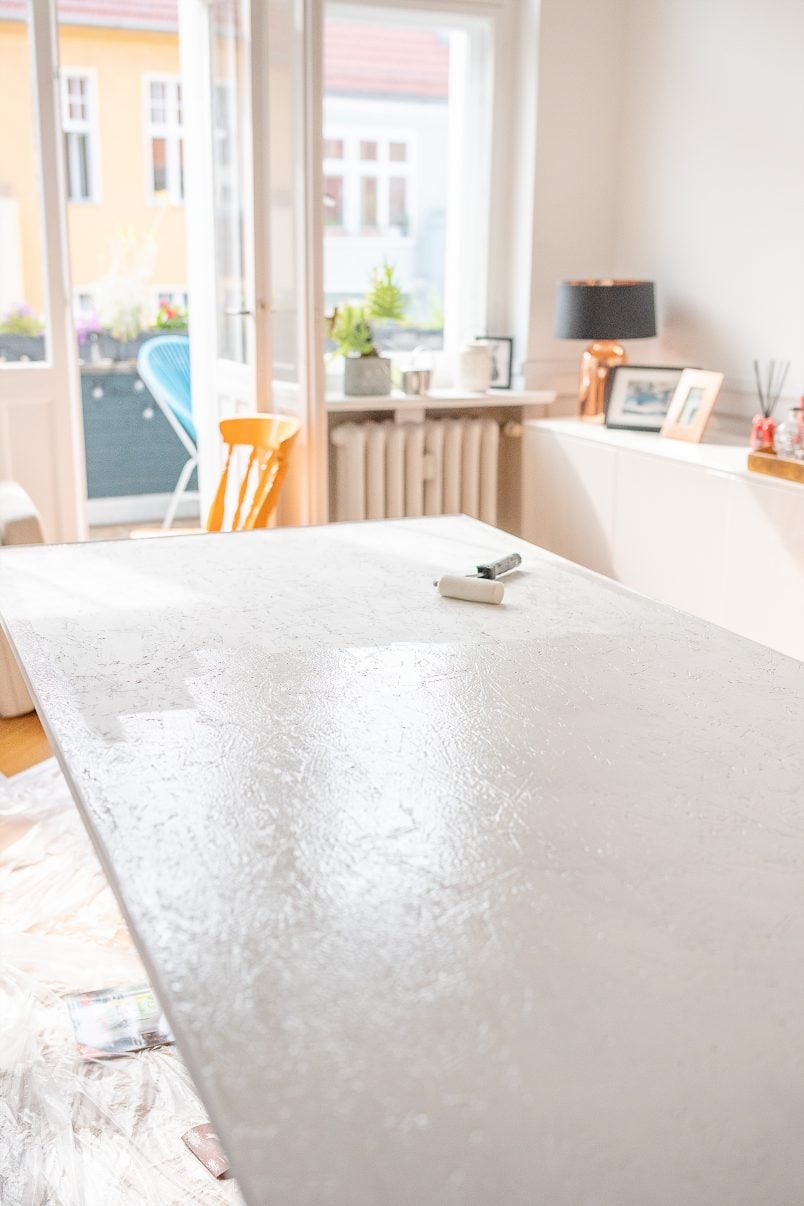
For the main surface area of the table, we rolled the resin on with a small foam roller and painted around the edge of the table with a small paintbrush. Both the roller and the brush were useless after applying the resin, so don’t use your expensive brushes for this!
Tip: Make sure to really seal the edges where the timber edging strip and table meet. We had a small leak in one of the corners, and the resin started to drip through the tiniest hole. We managed to seal it from the underside with some silicone sealant. It definitely caused a few minutes of panic, and any leaks are best avoided if possible!
3. Make the “terrazzo aggregate”
This is definitely the most time-consuming part of this project, but it’s also weirdly fun as this is where you can get really creative.
There are dozens of colours of Fimo to choose from and you can easily personalise this project to make it totally bespoke and match your home and decor.
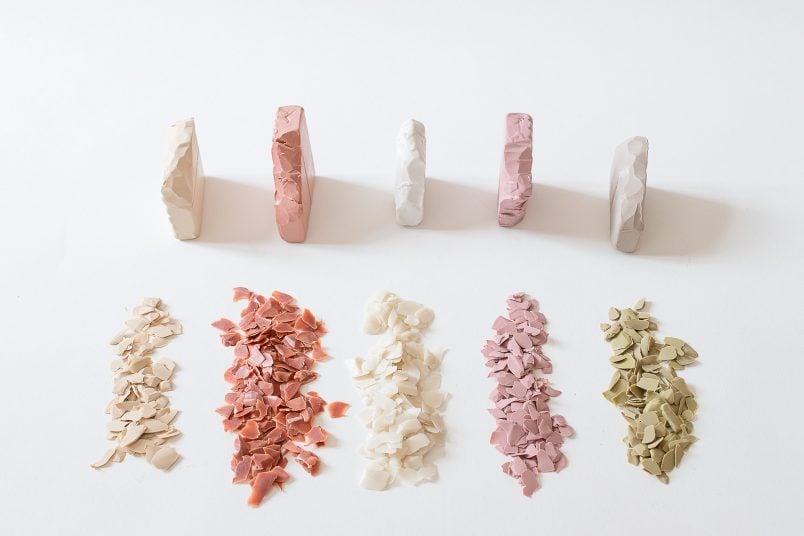
Basically, you just cut little slices off the Fimo blocks with a craft knife, and spread them out on a baking tray and bake them according to the instructions (we actually baked our Fimo for 5 minutes less than recommended as the chips are so small and thin).
It’s rather tedious, but you will find that you get quicker over time. The pieces also don’t have to be perfect, as that’s part of the charm of the terrazzo effect.
How many chips you’ll have to make will totally depend on the size of your table and how much coverage you want. As a rough guide, we used just over slightly more than half of each block of Fimo to make our chips. (we ended up not using the taupe coloured Fimo as it kept discolouring during baking)
4. Pour the resin
After preparing the table and Fimo paint chips it’s finally time to add the resin to your table!
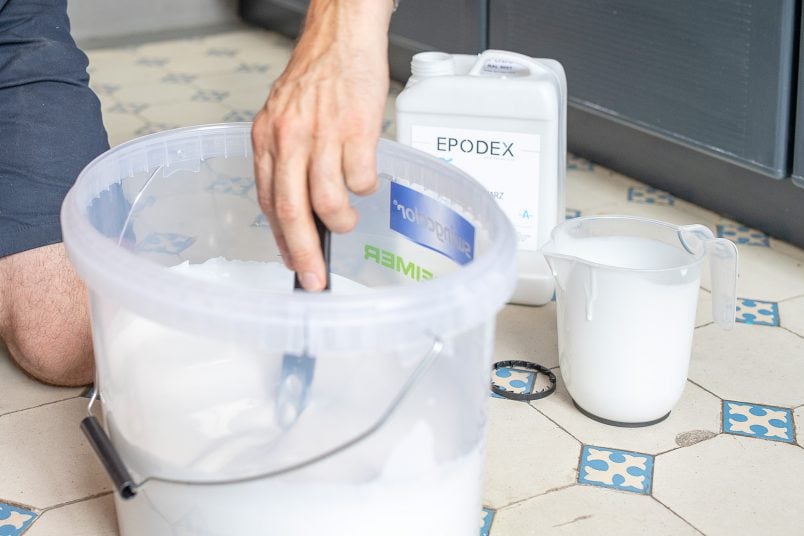
Make sure the surface of your table is super clean and free of any dust and dirt before mixing the resin and hardener together in a super clean bucket (we bought one specifically for this project) according to the manufacturer’s instructions.
Make sure that it’s thoroughly mixed before pouring the milk-like liquid onto the table.
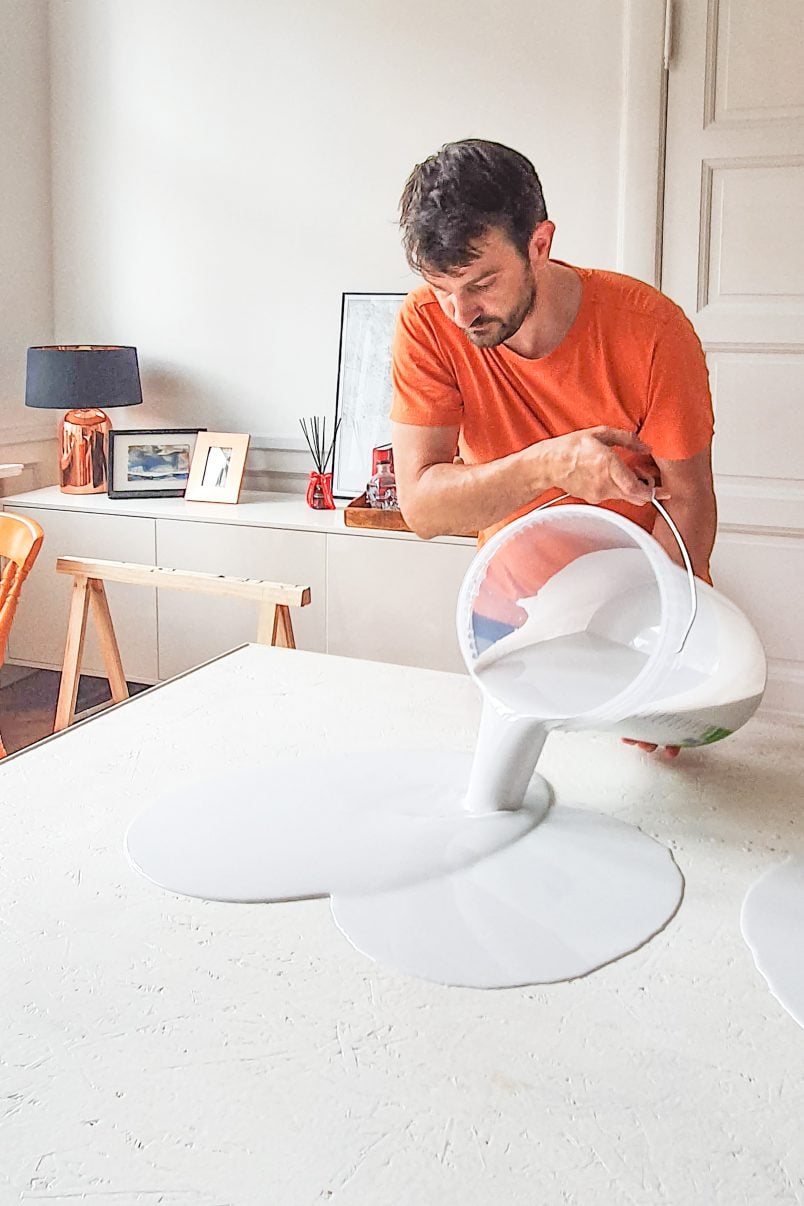
You only have a very limited time to work with the epoxy resin which is why there are no pictures of the next couple of steps. The resin is self-levelling but you do need to give it a helping hand to ”push” it over the table with the help of an adhesive spreader.
Tip: Be very careful with any mixture you have left in the bucket. Ours started steaming because of the chemical reaction, and it got so warm that it started to warp the plastic bucket!
When the surface is completely covered and more or less level you can start to add the colourful Fimo paint chips. We just threw one colour after another over the table making sure to roughly distribute the chips until we had a pattern we were happy with.
The next step is the hardest part of any project – waiting. You have to wait for at least 20 hours before you can touch the resin and it takes a full week until it properly cures. Weirdly, the thinner it is the longer it takes to dry!
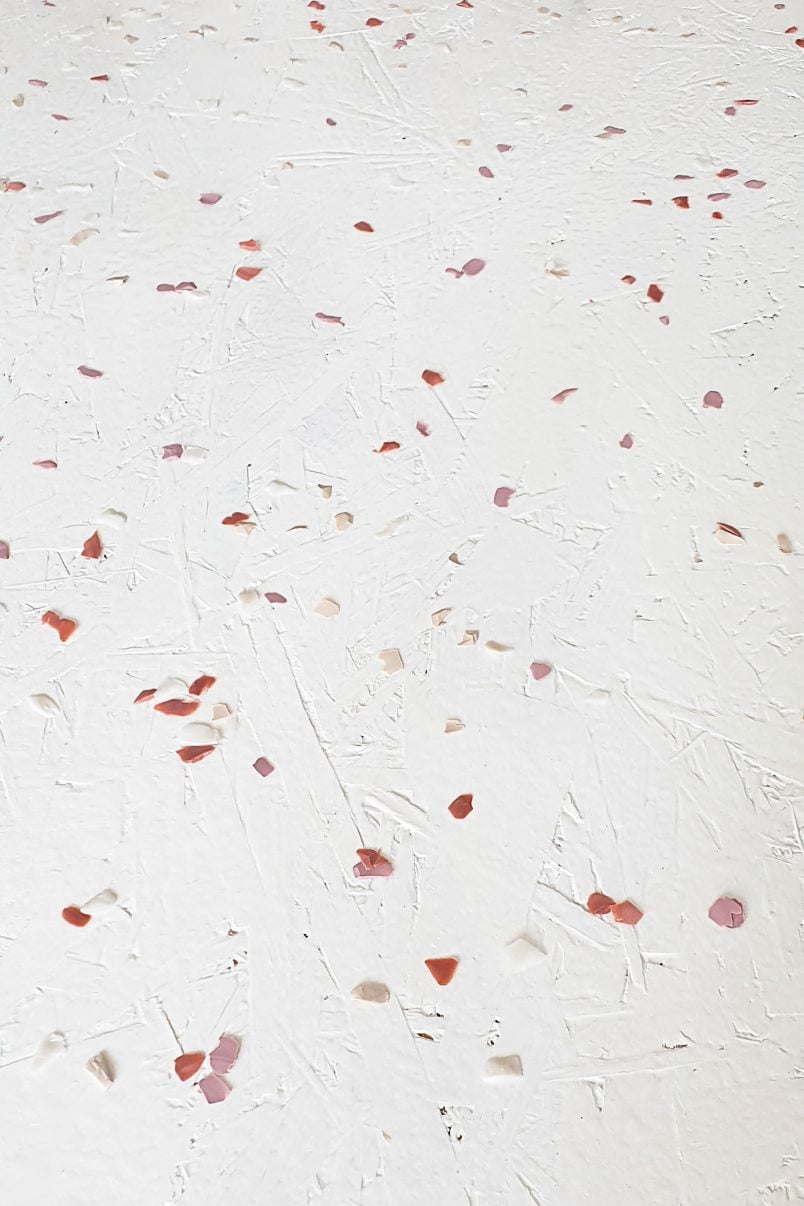
5. Sand & polish
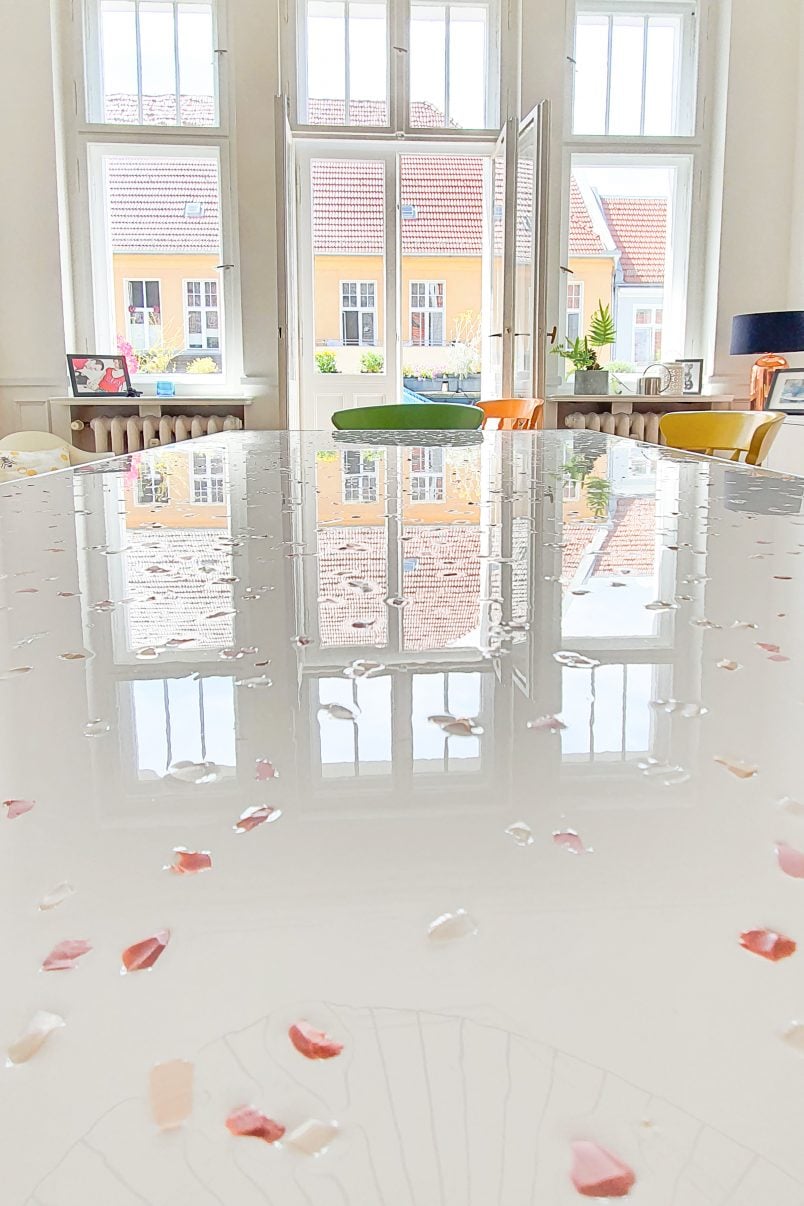
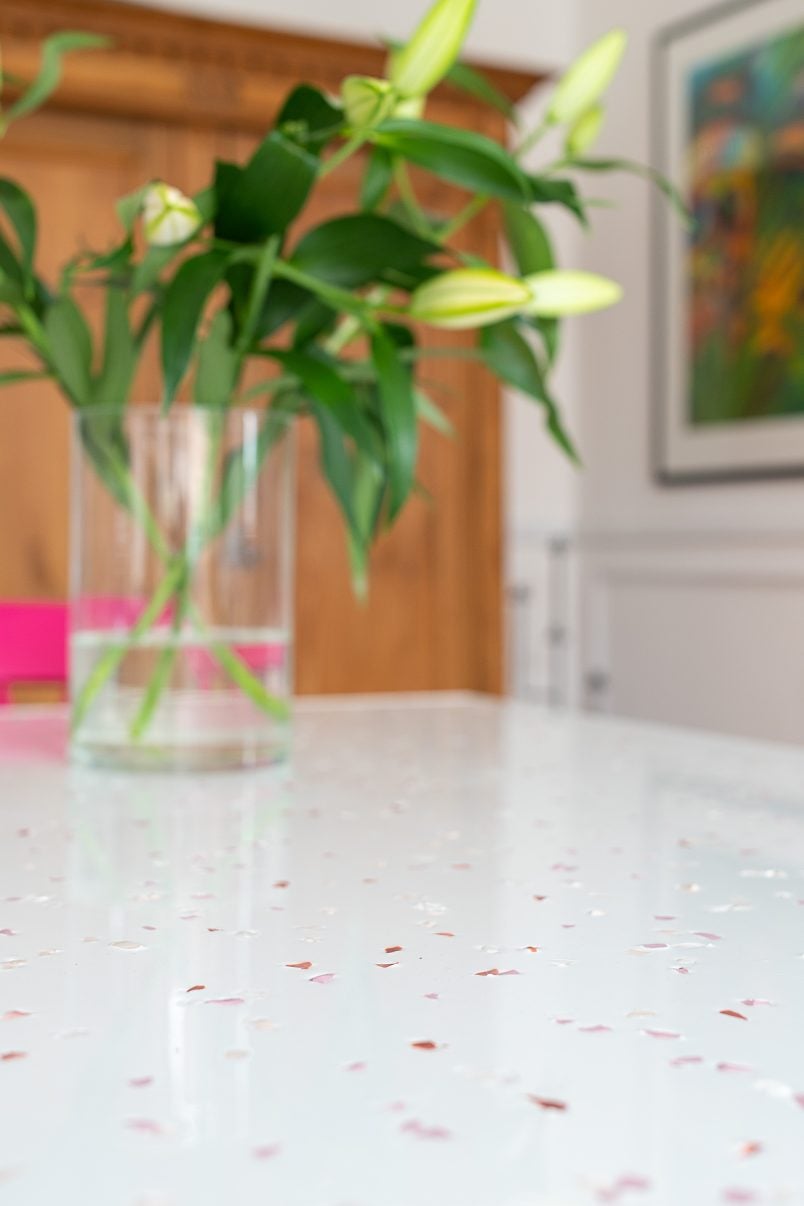
We absolutely love the shiny finish of the white resin and the little specks of colour which break up the large surface. As you can see, the Fimo paint chips are also slightly raised, making the table slightly textured.

Originally, we had planned on sanding the whole surface to make everything silky smooth and remove any unevenness caused by the terrazzo chips.
Ultimately, we didn’t sand it (more on the reasons behind that decision next week!) and, it’s definitely a step you can skip if you’re in a rush, as the table works really well, even if it’s slightly textured.

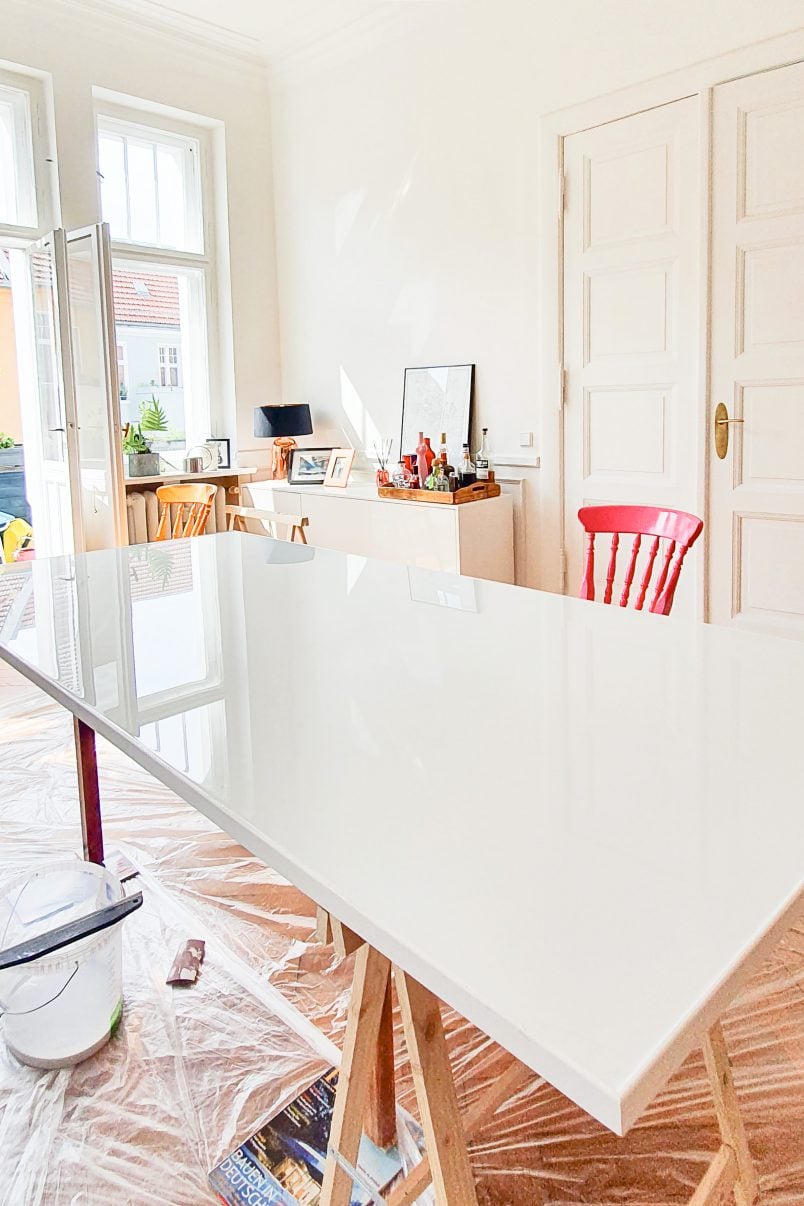
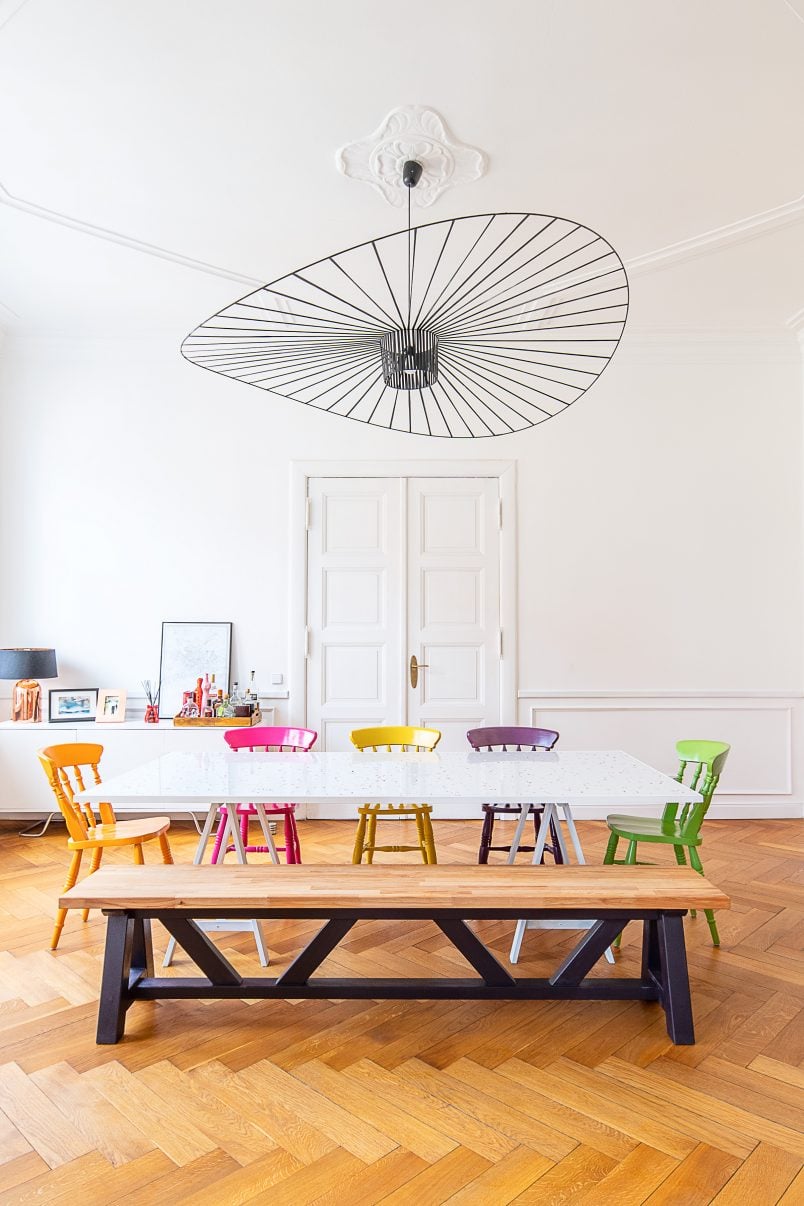
Overall, our DIY dining table turned out so much better than we’d hoped, and it really looks like a proper grown-up table. Epoxy resin is also (meant to be) completely stain-resistant, so it should be ideal for a dining table.
I’m sure you’re wondering if a resin table – especially a white one – Is durable and scratch-resistant?
We already gave it a thorough test when my sister and family came to visit. It definitely got put through its paces with four young children covering it in bolognese, raspberry jam and chicken tikka!
It’s so easy to keep clean, and even the stickiest mess can just be wiped away with a damp cloth.
And, as far as scratches go, I’m happy to say that it’s really durable, too. There’s not a scratch or dent in sight!
Another thing I love about this table is how creative you could get with the different colours of resin to create something totally bespoke. You could create a marble effect or go completely wild and have a Jackson Pollock inspired table by mixing different resin colours.
Now for the most important things. How long does it take to build a resin table, and how much does it cost to make a terrazzo resin table?
Here’s the cost breakdown:
- Resin: 80€ (the exact amount will obviously depend on the thickness of the resin and size of the table)
- Fimo: 11€
- Bucket, paintbrush, wood filler, nails & polythene sheet: 5€
- Timber edging strip: 10€
Total: 106€
We’ve not included the actual table in this calculation, which cost about 50€ to build.
Why did we choose an epoxy terrazzo over a real terrazzo dining table?
I spent hours researching so many different methods including everything from making real terrazzo to using a thick floor paint to self-levelling flooring compound and all sorts of different types of fillers for making this table.
All of the methods I found had drawbacks, and I was always worried about the flexibility of the coating and whether it would end up cracking when the table moved or flexed slightly. The terrazzo resin ticks all the boxes, and it’s holding up beautifully (so far, at least).
And you never know, one of these days, I might learn how to make a real terrazzo table!
Right, you’ll have to excuse me while I’m off looking for other things I can cover with resin!
What do you think of our DIY dining table? Have you ever attempted a project with resin? What colour, Fimo or resin, would you opt for? Or what would you put in your resin? We’d love to hear what you think, so let us know in the comments below!


Abby says
Hello! I love this idea! I am looking at making two beside tables with a similar method. I was thinking of using tiles and breaking them into pieces, do you think this would work just as well? Also do you think it would be possible to use painters tape to make the edges of the table? That way they would come off easily once dry.
Thank you!
Christine says
Thanks, Abby! The resin is very thin, and if you use tiles, you might be better trying a more traditional terrazzo with plaster instead of resin. Maybe a thicker coat of resin would work though? The resin is extremely sticky, which is why I don’t think painters tape would work. I think they would stick together and the tape would be impossible to remove.
Hope that helps & I’d love to see you project when you’ve finished!
Cx
Lucy says
Love it! Desperate to know why you didn’t sand it? I am making one this weekend x
Christine says
Thank you, Lucy. The only reason is because we didn’t have the time. We moved house not long after building the table and the people buying our apartment wanted to keep it. If you do sand it, I’d recommend waiting for a couple of weeks until the resin is completely hard.
Good luck with your table – we’d love to see some pictures when you’ve finished!
Cx
PS. We built another resin table for my sister and used two different colours of resin. We also shared a video of the process which you might find helpful.
Galou says
Nice tutorial and lovely table really !
I am also searching the way to make a DIY terrazzo board table.
Eventually I will opt for a jesmonite table board with chips as this resin is les toxic than epoxy resin.
If you’re interested and curious have a look at those tutorials (in French but Google is your friend)
Vidéo
Christine says
Thank you, Galou! It turned out so much better than expected. We wanted a quick and, more importantly, affordable table. I absolutely love the look of the one in the links you shared and it’s a project we’d love to do someday. Having said that, it’s a lot more expensive than our version. I did the calculations and it would have cost about 1000€ to build the table in the size we have (compared to about 150€ we spent in total). It is beautiful though!
Cx
ziad farhat says
Hello, very interesting work done, a beautiful piece. i would like to build a similar table but i’m afraid of yellowing effect of resin. have you seen any signs of yellowing on yours ?!
Best Regards
Christine says
Thank you so much, we really love how it turned out, too. Our table didn’t turn yellow but we didn’t have it for a huge amount of time because we moved and it was too big for our new home.
We also build a second resin table using the same method for my sister which you can read about here. Her table has been done for almost a year and the white part has changed colour slightly.
Hope that helps!
Cx
Erin says
G’day, absolutely love love love the table! Am looking to do something similar myself but damn the price of resin is looking pricy or am I using the resin calculator on that site wrong? Curious to know how much resin and the cost was for you when you tackled this table, we are looking to do a smaller table (90cm x150cm). Would love to hear of your experience with pricing before I take the plunge. Much thanks! Erin x
Christine says
Thank you so much, Erin! The resin is expensive but you don’t need a lot of it. I can’t remember exactly how much we used (we either bought the 4.5kg or 6kg set). The resin layer is only a couple of millimetres thick. I put your measurements in the calculator and it comes back saying you’ll need about 3kg for a table your size (based on 2mm thickness). You may want to order the larger pack just to make sure you have enough resin though as you will have to prime the table first. The cost should come in at around 50€ to 80€ depending on what resin you use and how thick you want to pour it.
Hope that helps but, of course, let me know if you have any other questions!
Cx
PS. We’d love to see a picture of your finished table!
Erin says
I’m totally convinced this is what we are going to do for our dining table – I love the look of yours so much. Thank you so much for replying so quickly! I will definitely send pics when done x
Christine says
No problem – always happy to help! Good luck with your project.
Cx
Erin says
Am getting ready to do this tomorrow but am curious, would it be worth mixing some of the terrazzo chippings into the resin before pouring so there’s some depth to the aggregate or just stick with scattering it on the surface – or maybe a bit of both? E x
Christine says
I was worried that they’d clump together which is why I scattered them over. You will find that some of them sink slightly and you can push and wiggle them around a tiny bit, too. I totally admit that this was a highly experimental project and we made things up as we had no reference to work from. There’s probably not a right or wrong way to do things, so go with what you feel would be right, Erin!
Good luck with the project!
Cx
PS. I’d love to see a picture of the finished table!
Tyra Joseph - Pasteur says
Where did you get the chairs ?
Christine says
We bought them second hand and painted them – we obviously couldn’t decide on a colour, Tyra! ;) You can see the original post about the chairs here. We built the bench from scratch and you can see the DIY tutorial for it.
Cx
Noelle says
Truly beautiful! Do you have any insight on how this would hold up as an outdoor table?
Christine says
We were just talking about the same thing, Noelle! We absolutely love the table and have just finished building a second one (more on that in a week or two). There are different types of resin available and some of them are suitable for outdoor use. The table we’ve just built is for indoors, too but we’ll definitely be trying an outdoor resin project at some point, too!
Cx
Loes says
Hi! Love this, it turned out beautiful! We are planning on dojng a round table of this and I have a few questions, hope that’s okay ;) What would you use to sand it with and seal it with? More epoxy resin but clear or a different sealer? Is there a specific reason you didn’t use pieces of glass and stone instead of fimo? And lastly, did you just poor right up until the edge of the timber strip so it is not sticking out above the resin surface? I was thinking of actally removing the timber strip again after pouring and then sanding it down and sealing it. Thanks for the lovely tutorial! All the best :)
Christine says
Thank you, Loes – glad to hear that you like it! We’re always happy to answer questions (if we can!). To sand the table we would use an angle grinder with dust attachment like we used to sand our concrete bathroom countertop. The attachment makes it easy to keep the angle grinder flat and definitely helps with any dust. I’d recommend starting on a grit that’s about 120 to 180 grit and then moving on to the finer grits (you may have to wet the surface) finishing with something around 2000 grit. (you can see the diamond sanding pads we used in the post about our concrete vanity top, too). I don’t think that a normal palm sander (or similar) will be powerful enough to sand the resin. We didn’t seal the table and I honestly don’t think it needs it. I’d seen some options where people had oiled the top after sanding so this may be something worth looking in to.
Yes, we poured the resin right up to the edge. If you can, I’d recommend pouring it so it just tips over the edge. We didn’t purely because we had nowhere else to work other than in our dining room and we’re a bit panicky about wrecking our parquet floor! I’m not sure how easy it would be to remove the edge afterwards but if you do decide to, I’d probably recommend using a kind of plastic strip that the resin doesn’t adhere to as well. I would still be a bit worried about the edge chipping though as the resin is only really thin. The thickness of the resin is also the reason we used Fimo to create the chips. All of the pieces of glass and stone I could find were quite thick and I also couldn’t find colours I liked (although I was probably being fussy, too!).
Hope that helps and I’d love to see a picture of your finished table!
Cx
Kimberly Duran says
This is an AMAZING project, I just love it! xxx
Christine says
Thank you so much, Kimberly! Just goes to show that it’s good to try something new every now and then!
Cx