I probably shouldn’t admit this, but my favourite DIY projects are the ones where I can take shortcuts. Yes, I know, as a DIY blogger I should love all things DIY but for me, the best projects are often the ones where you get a quick result without much pfaffing.
Let’s face it, we all have way too much to do without making, even more, work for ourselves!
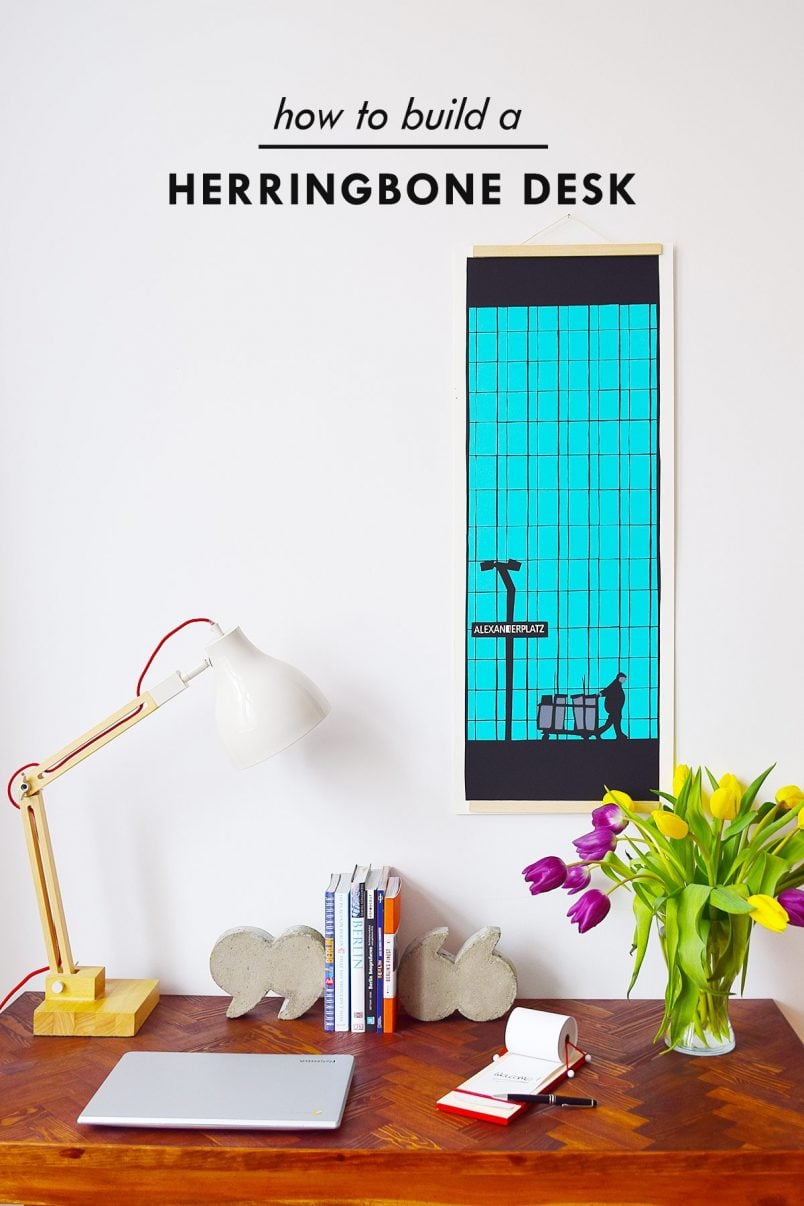
If you caught our recent big news (we’re opening an Airbnb!) you will probably have already guessed that our main priority is getting our guest bedroom finished. There’s still a huge amount we’d like to complete before we can call it guest ready and one of the things that this room has to have is a desk!
And our new DIY herringbone desk definitely falls into the “cheat DIY” category as we didn’t actually build the desk from scratch.
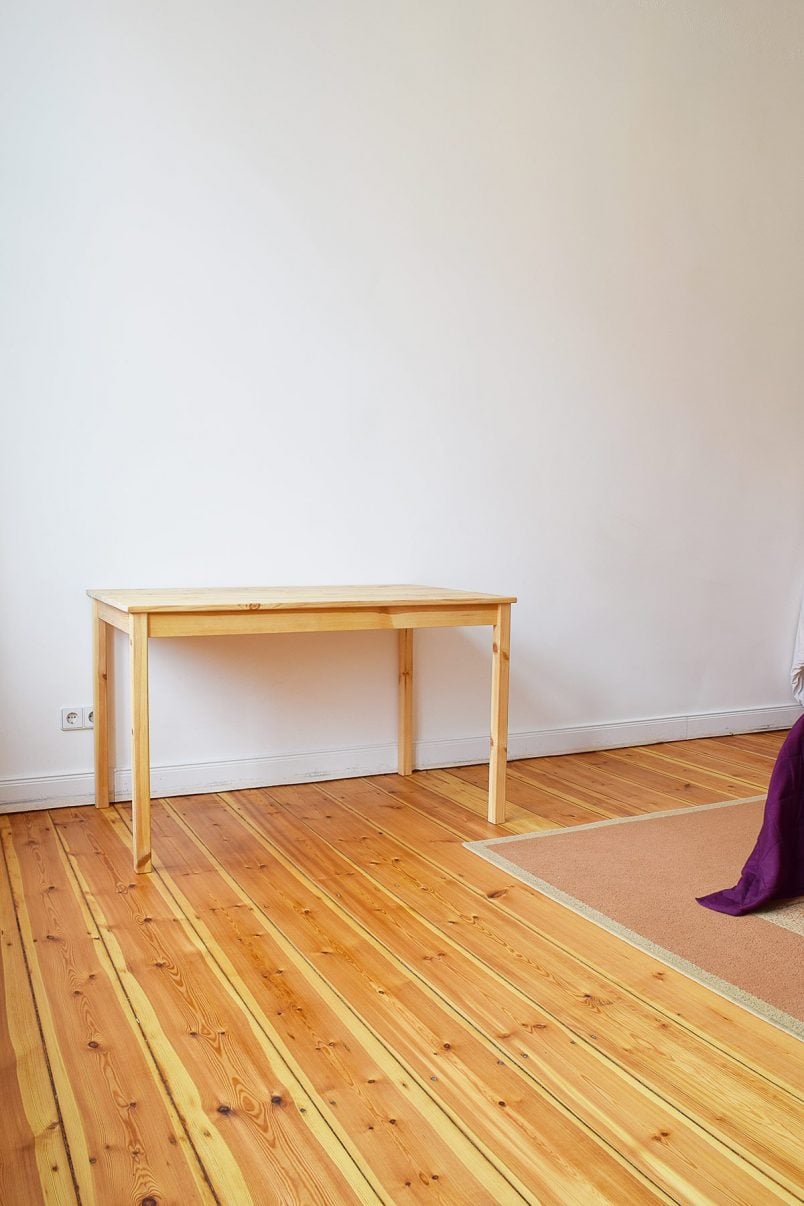
When we moved into our temporary rented apartment we ended up purchasing a small table to fit in our kitchen which, since moving into our current home, has been stuck in our cellar getting very dirty. So we figured we could just use it as a desk in our guest bedroom.
There were a few problems with this plan, though.
Firstly, it’s not the right size and looked like we’ve just plonked a table in the corner of the room – which we did – and it wasn’t the right colour either.
I’d like this room to have a calming and minimal but also luxurious feel and a bashed and dirty pine table really wasn’t going to cut it!
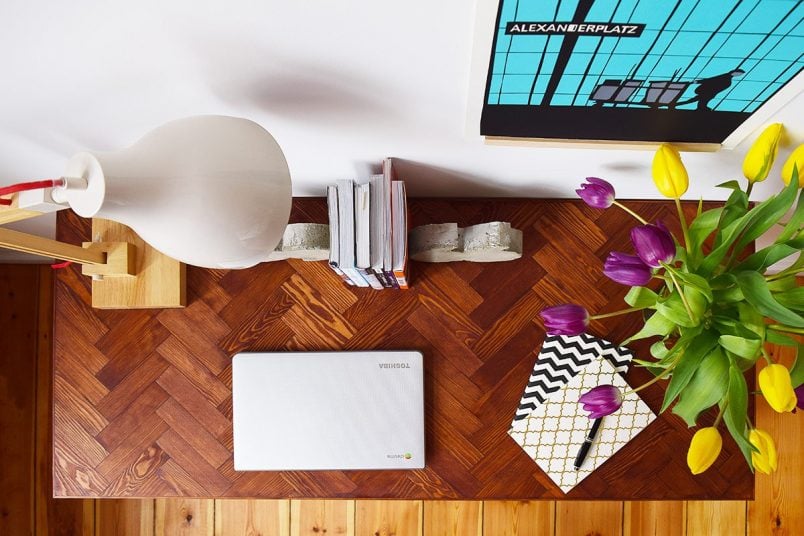
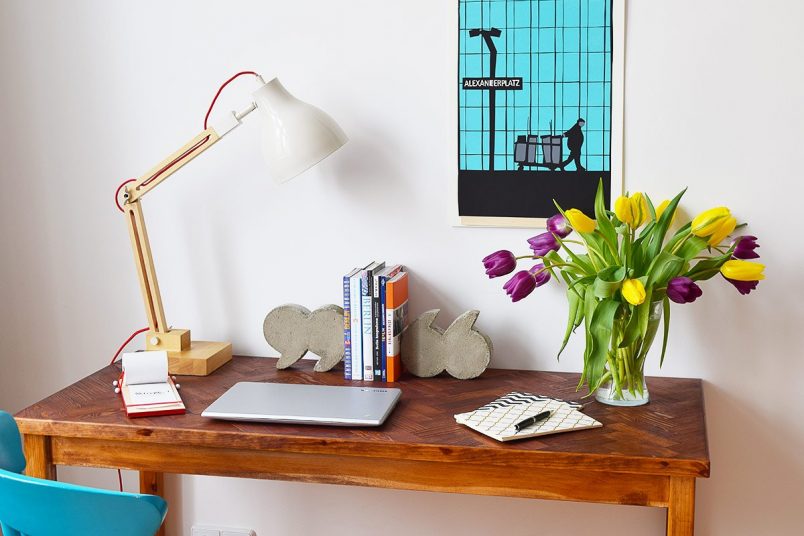
So, after a bit of TLC, our desk now looks like this.

Not too bad for a couple of hours work, right?
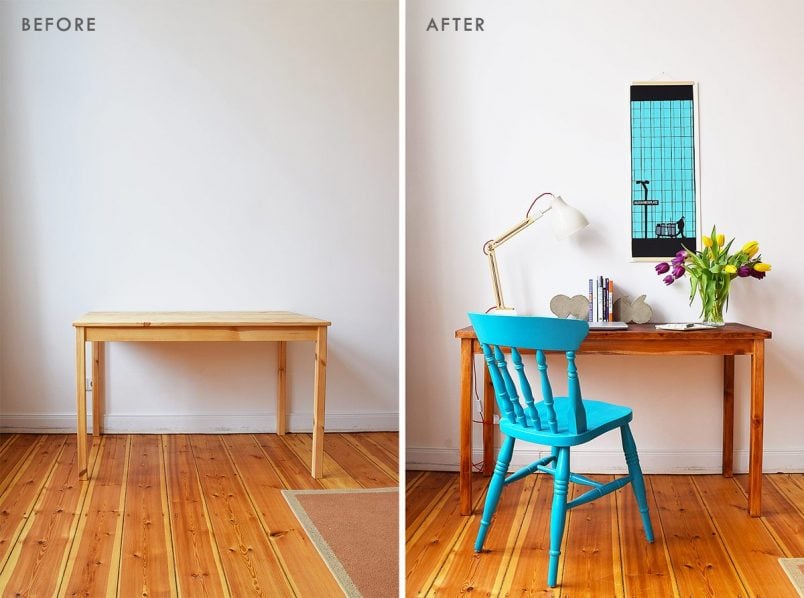
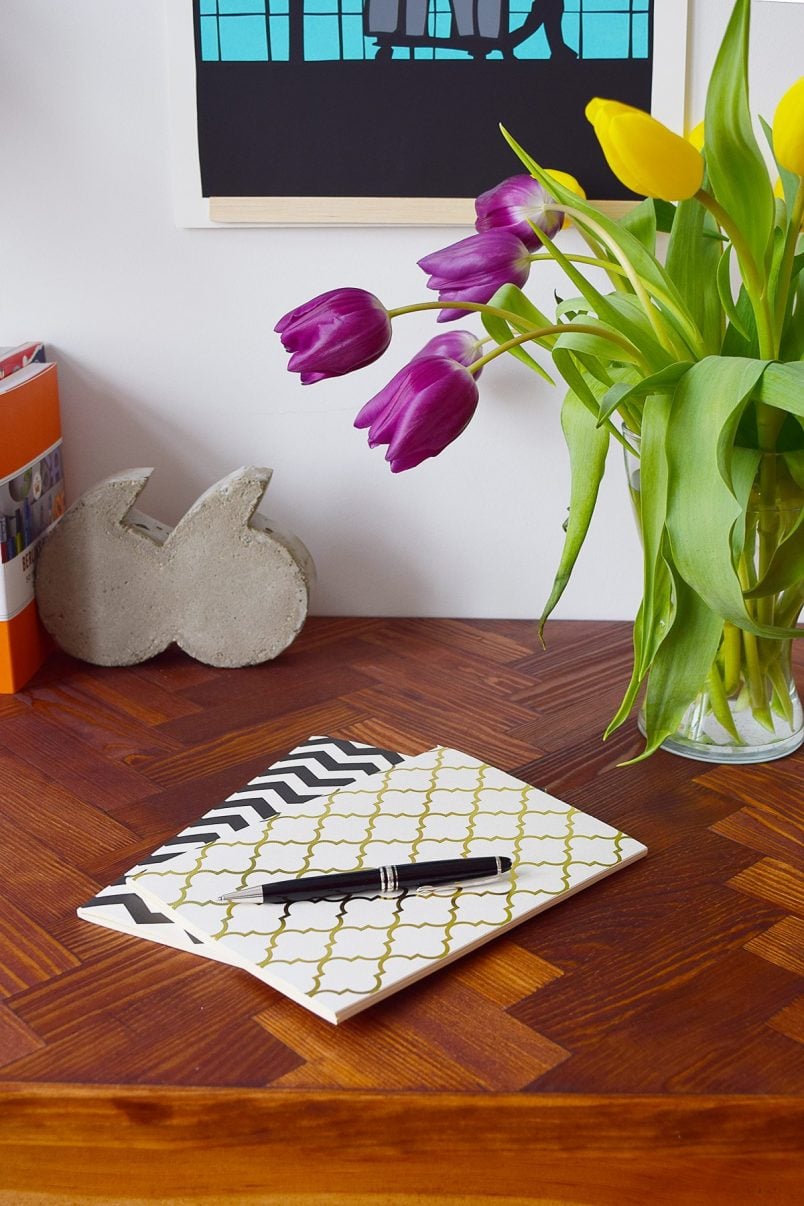
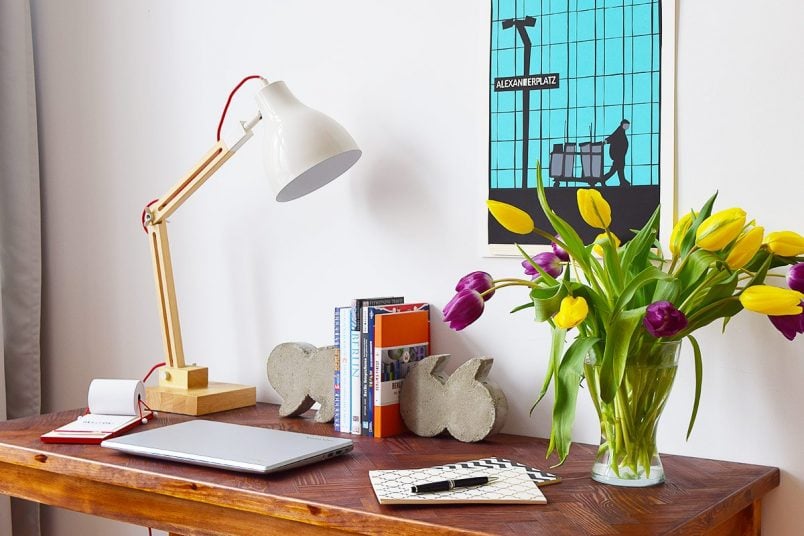
I really love the new colour and the subtle detail the herringbone pattern adds. The best part is that it was super easy to create, too!
This is what you will need if you fancy making your own DIY herringbone desk:
This post contains affiliate links. We only recommend products we love and think that you will, too! Read our full disclaimer here.
Supplies:
- Table (we used Ingo from Ikea)
- 7 strips of timber for the herringbone pattern – we used these strips from our local DIY store (which are 2.4m long, 4 cm wide and 0.5 cm thick)
- Strips of timber for the edge of the table – we used these 2.3 cm x 0.4 cm strips that have a rounded edge on one side
- Wood glue (we always use this glue which we think is the best wood glue available and I use it whenever I can, even for craft projects)
- Stain – we love the non-grain raising stains by Fiddes because they’re so easy to use and you’re pretty much guaranteed to achieve a good result that’s really even (the colour we used is Sapele)
- Wood filler
- Oil, varnish or wax to seal the surface (we used oil left over from sanding our floors)
- Cloth to apply stain
Tools:
- Mitre saw – alternatively you could saw the pieces with a handsaw
- Orbital sander and sanding disks (we used 40 grit and 120 grit disks)
- Circular saw
This is how to make a DIY herringbone desk:
Step 1
Adjust the size (optional)
The biggest change we made to the table was cutting it down to the size we wanted. The overall length was fine but it was a bit too wide and looked out of proportion. (Excuse the grainy pictures – taking a decent photo at this time of year is almost impossible.)
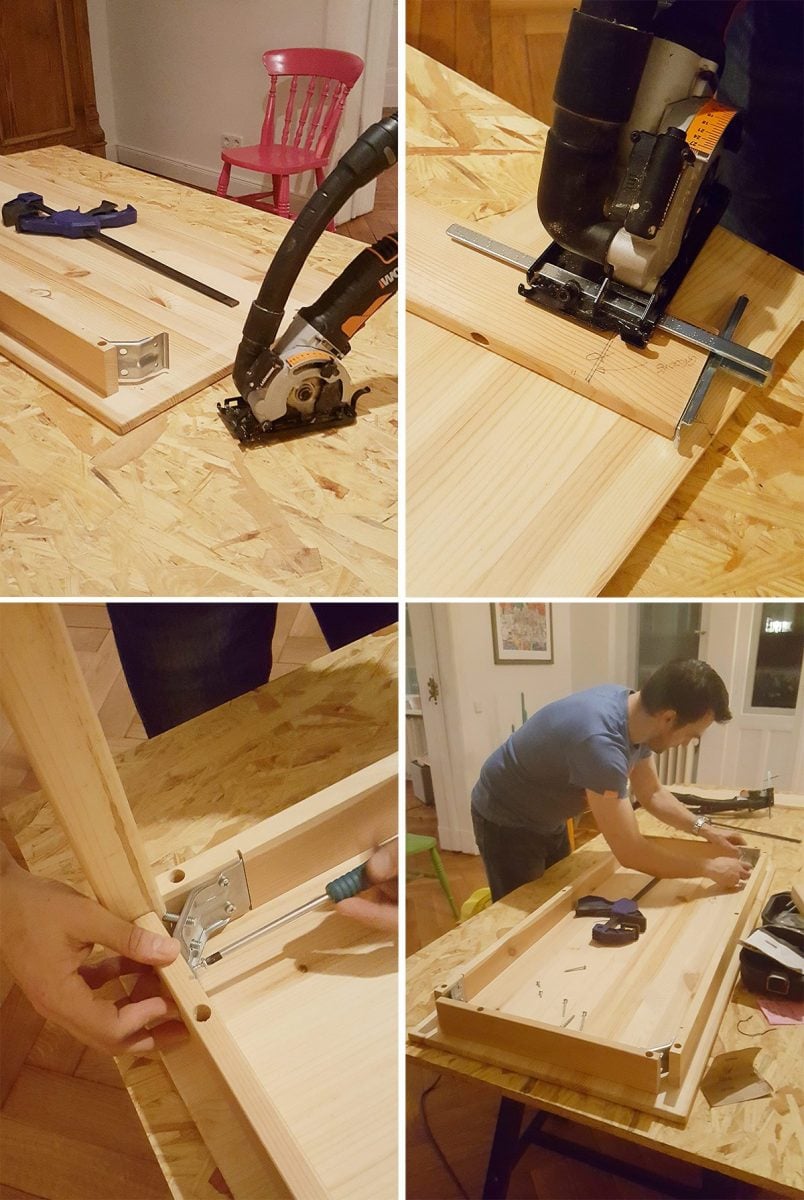
After taking the table to pieces, we used our circular saw to cut a strip off the long edge and then used our mitre saw to shorten the slats that form the main frame of the desk.
Because the legs of the table are held in place with little metal brackets we also had to add two more grooves for the bracket to wedge into (we cut off the existing grooves when shortening them).
Step 2
Add The Herringbone Pattern
Originally, I’d planned on just staining and then oiling the desk but, as usual, I wasn’t quite able to control my DIY urges and decided to upgrade the plain surface of the desk with a lovely herringbone pattern.
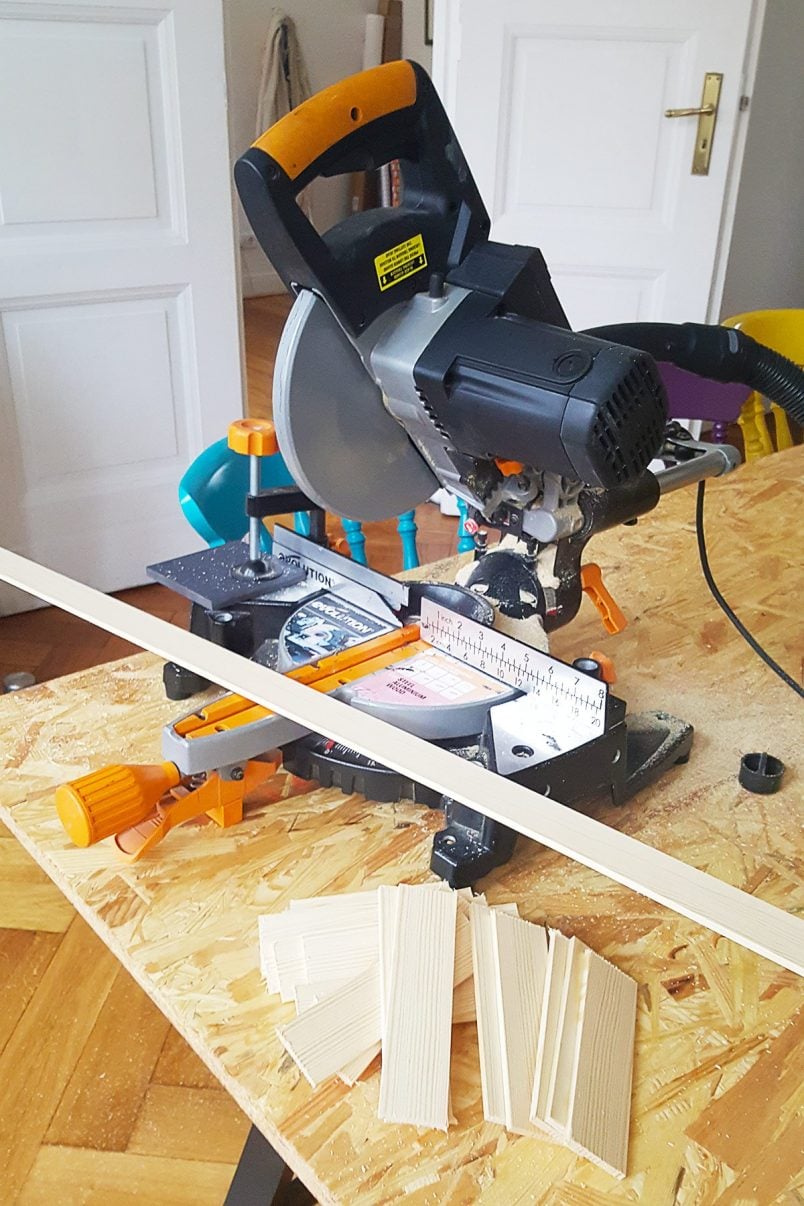
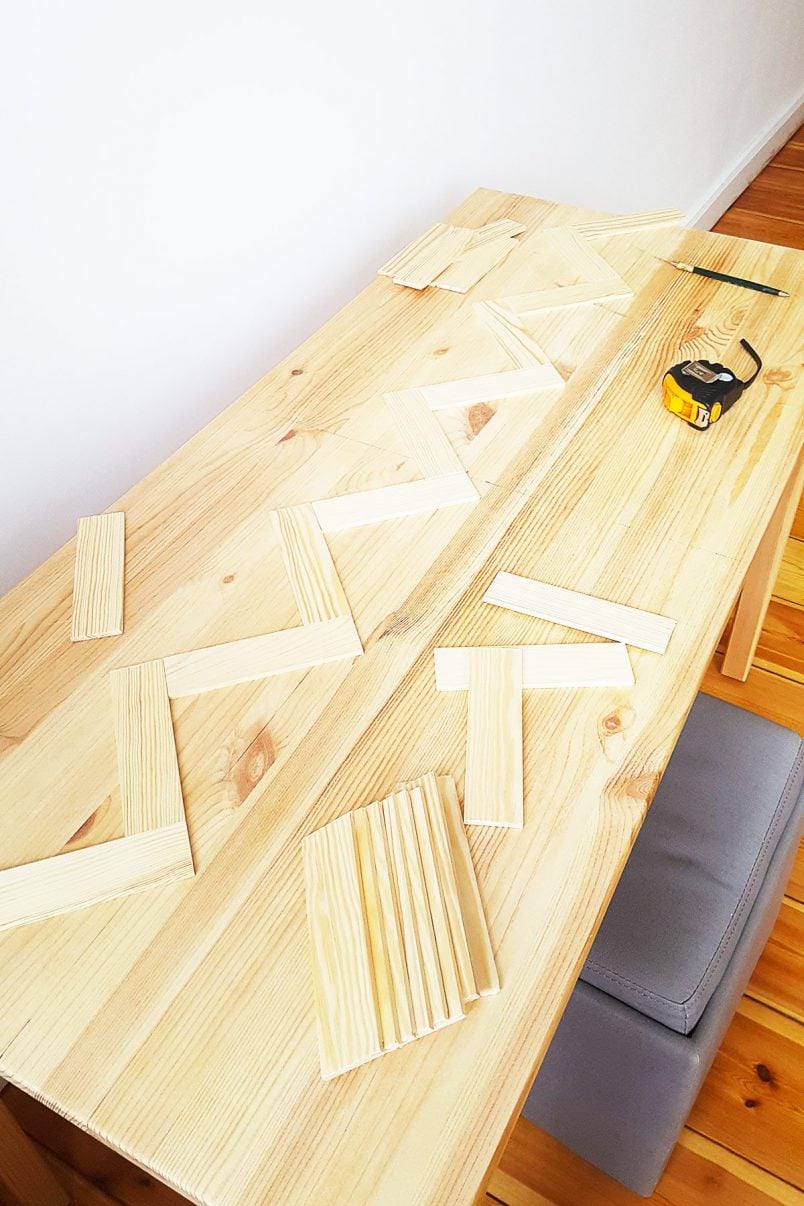
To make the individual pieces for the herringbone pattern I cut the long strips of timber into equal pieces (ours are 15cm long) with our mitre saw. You could, of course, cut them by hand but using the mitre saw is much quicker and it’s also much easier to make sure all pieces are exactly the same size which is important when laying a pattern.
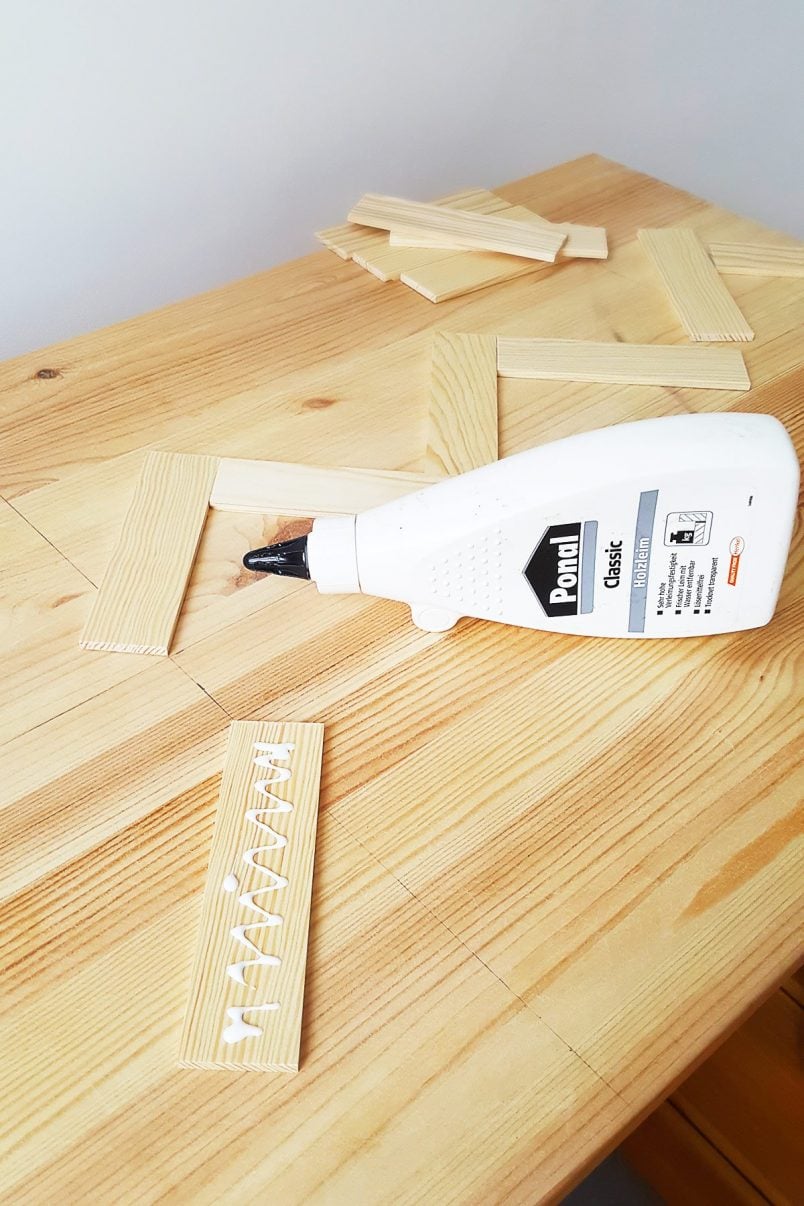
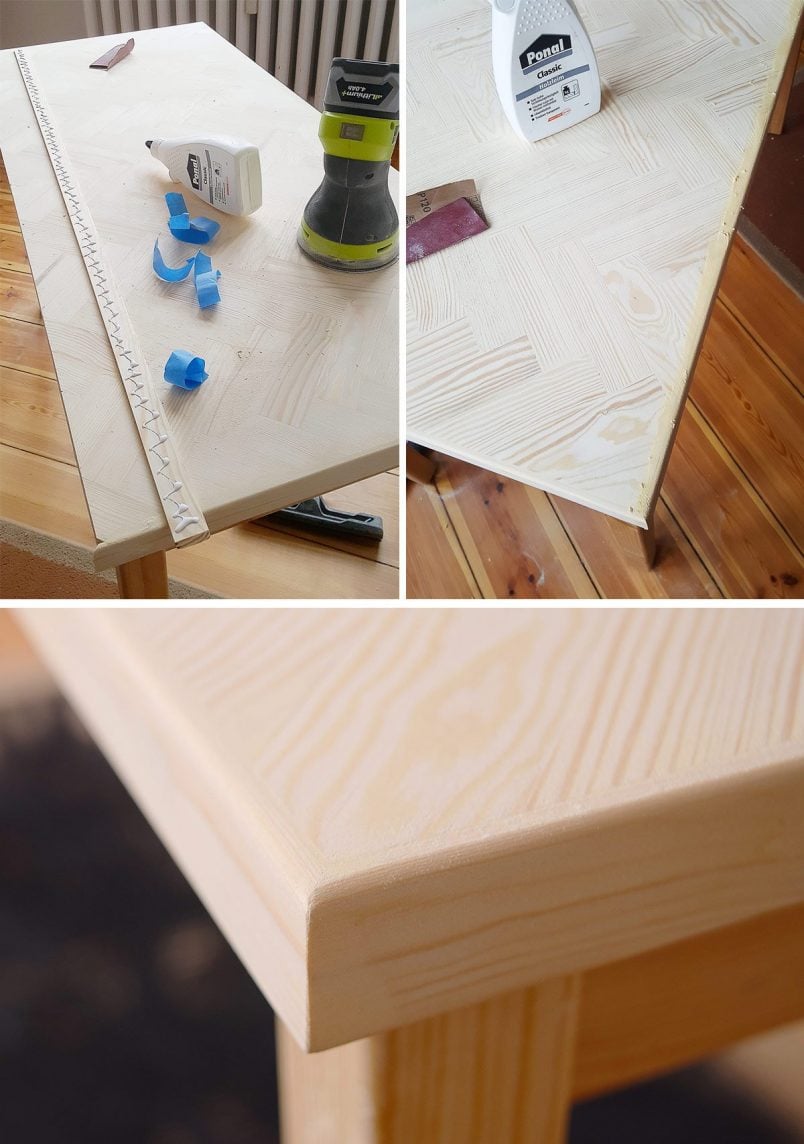
When you’ve cut all the pieces, lay out one full row of them across the desk and make sure that it’s level before glueing it into place. Working from the centre outwards will ensure that the pattern is even.
Then just work your way across the surface of the table glueing down each piece of timber and pressing it down firmly. Don’t worry about the edges just yet, just make sure the whole surface is covered.
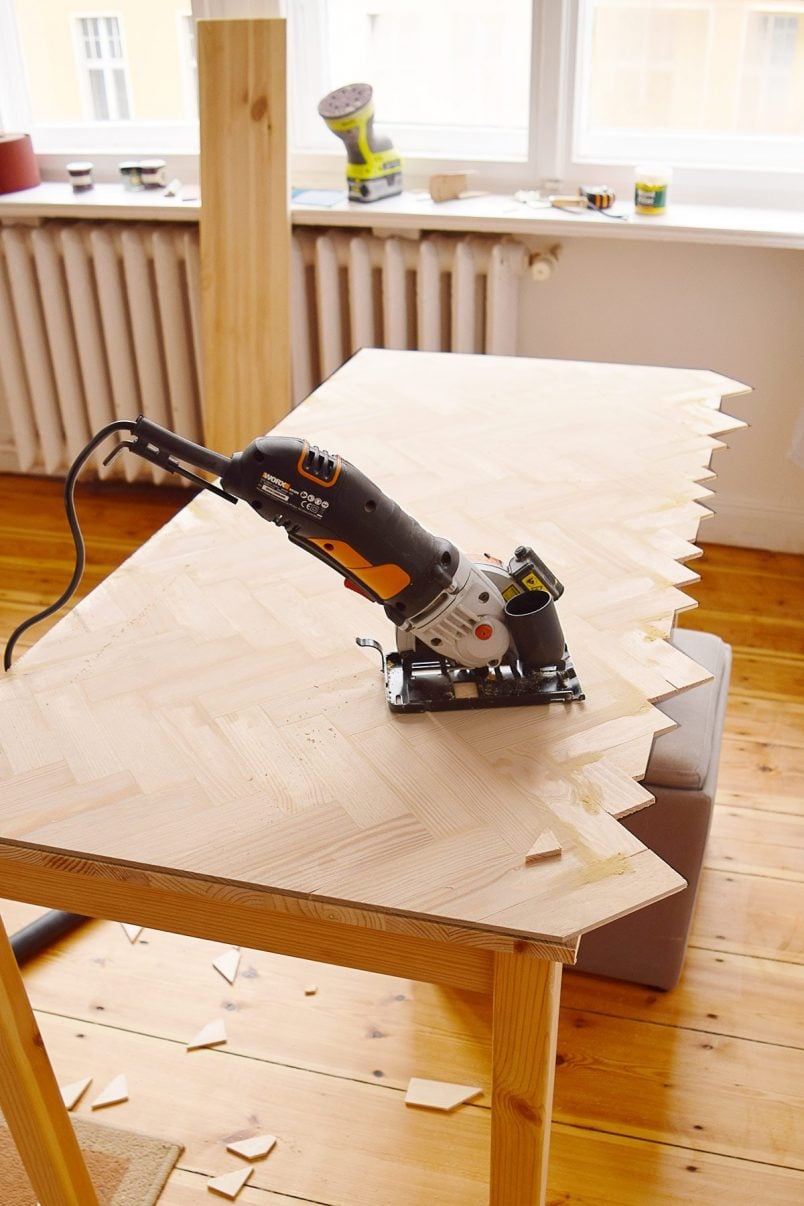
Then, when you’ve finished covering the whole surface and everything has dried it’s time to sort out the edges.
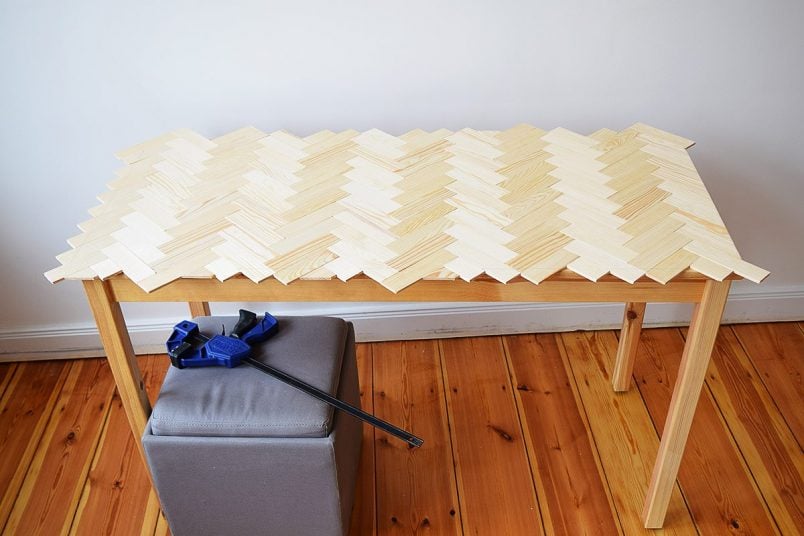
To achieve a perfectly straight edge we used a circular saw to cut off the overlap.
Step 2
Fill & Sand
You’ll probably find that there are a few gaps between the pieces of timber (it’s pretty much impossible to achieve a perfect covering) so just fill them with some wood filler.

It’ll look really messy at this point but don’t worry as sanding is next.
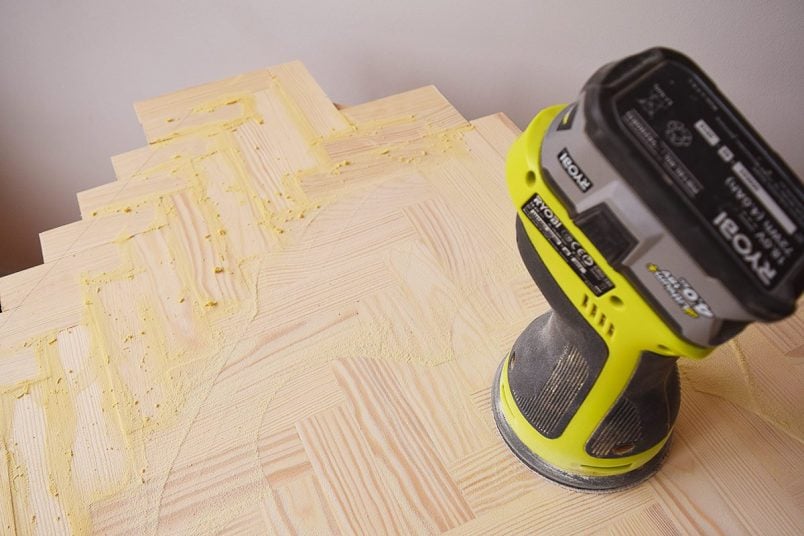
It’s no secret that we’re power tool addicts which is why we sanded everything with our orbital sander. As always when sanding, start with a coarse paper (we used 40 grit to start) and then move on to finer paper (we finished with 120 grit paper).
Step 4
Add An Edge
When you’ve finished glueing, filling and sanding it’s time to add the edge to the desk.
We couldn’t leave it looking like this, could we?
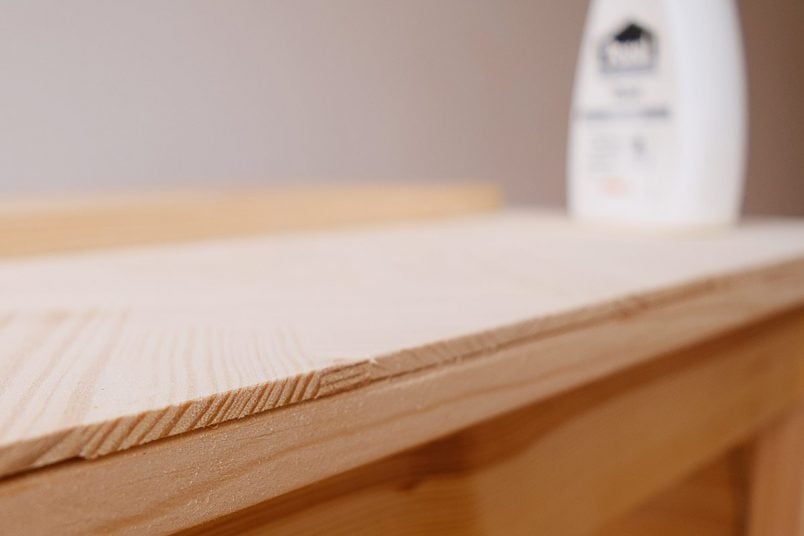
For the edge, we used similar timber strips to the ones we made the herringbone pattern with (the only difference is that they have a curved top edge). Cut the pieces to the required length and then glue them to the edge of the desk. Because we want the desk to be really sturdy, we also added a couple of nails to make sure the edging strip is extra secure (but that’s optional).
To make things look tidier we also cut the ends of each strip at a 45° angle so that there was a cleaner finish at the corners.
Step 5
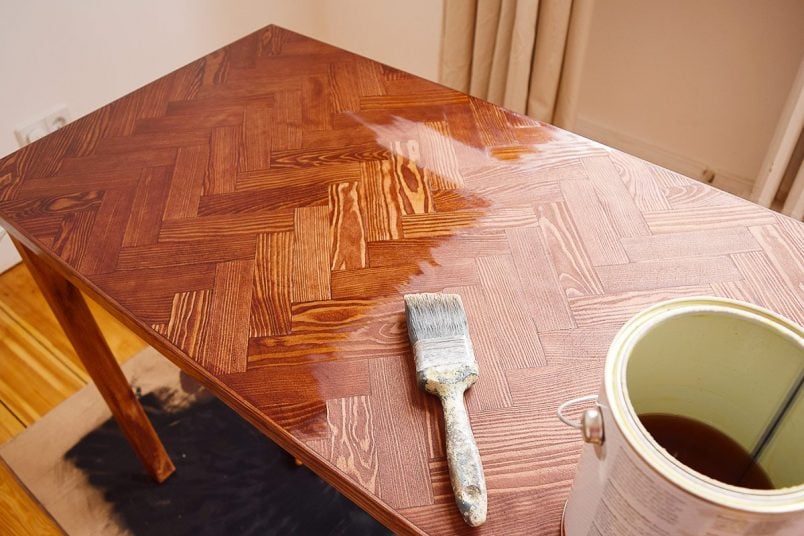
Stain & Seal
My favourite stain is this non-grain raising stain by Fiddes which I used for staining the treads on our stairs and for our DIY hallway bench. I like to wipe the stain on with a cloth (don’t forget to wear gloves!) because I find it easier to get it even but you could use a paintbrush, too.
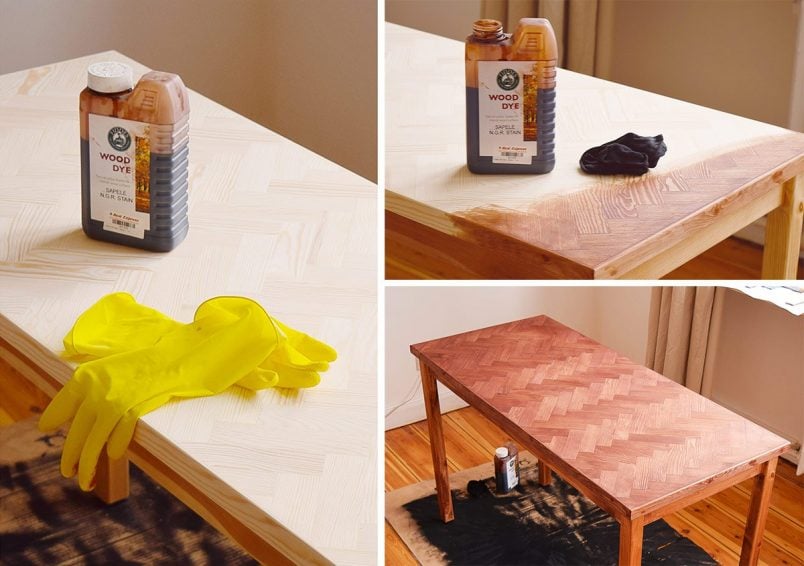
Then, when the stain was dry it was just a matter of giving everything a few coats of oil (we still have some left from when we sanded and oiled our floors so that’s what I’m currently using whenever I can).
And that’s all there is to it!
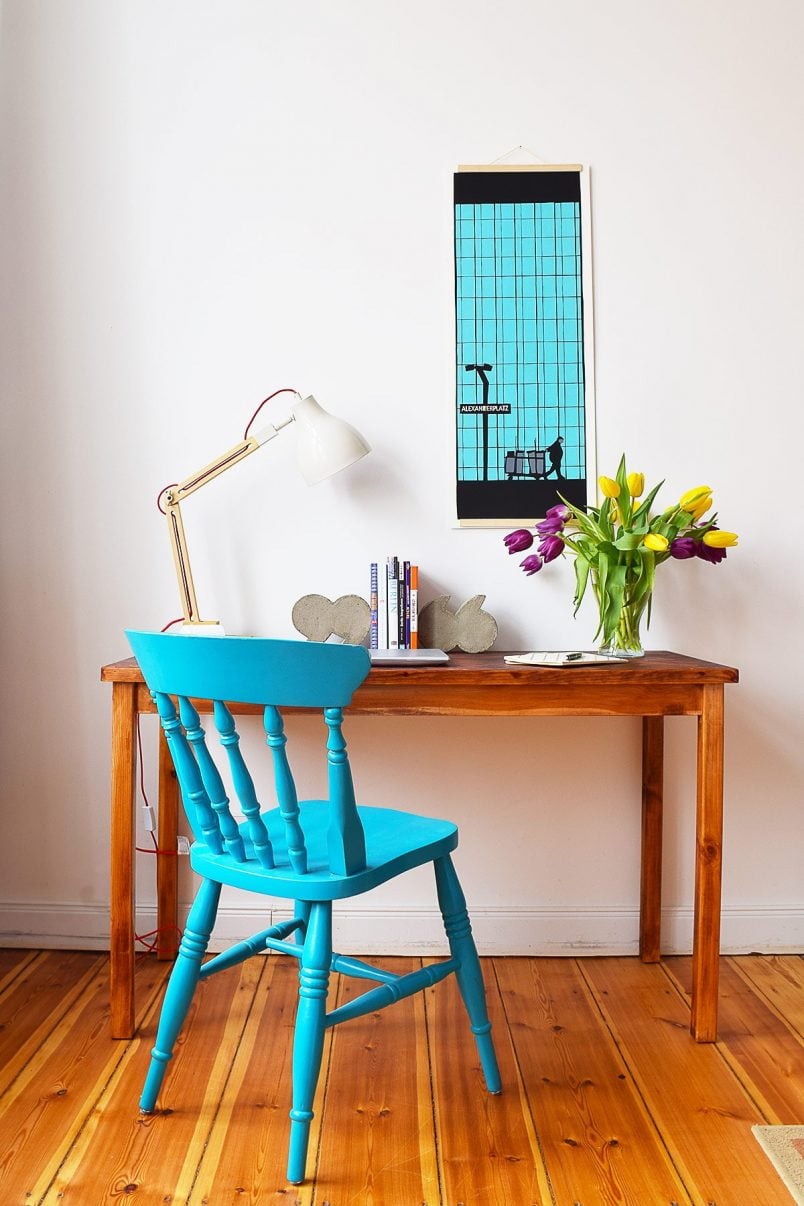
It’s admittedly not the most spacious desk ever but it’s great to have a small work-friendly space where people can spend an hour or two catching up on emails or just have a place to put down all their random travel stuff.
There are still loads of changes and additions we’d like to make in order to get our Airbnb up and running. Next on our list is an armchair and footstool (if you caught our Instagram stories you’ll already know that we’ve ordered a chair! More soon).
What are your favourite DIY projects? Are you as impatient as I am?
If you like this project, you will love these ones, too!

stephanie says
Where do we buy the small circular saw?
Christine says
I’ve just update the post, Stephanie. There’s now a link in the tools section to the saw we have. Hope that helps!
Cx
Sarah Belcher says
That looks so awesome!
Christine says
Thank you so much, Sarah!
C
Flo says
I love that DIY-idea, turned out so amazing together with the blue chair!
Christine says
Thank you so much, Flo! It was so easy and we’re really happy with it, too.
Cx
HouseTreeBeast says
What a great idea! I have a table similar to this one which has had more repurposes (whitewash, grey, industrial and now weng’e colored). This seems like the perfect ‘next’ update. Classic and easy to do.
Christine says
Thank you! I love that you keep changing your table to suit your style and needs. I think that a lot of people would just go out and buy a new table! ;)
Cx