Yesterday we told you about the first part of our staircase restoration project – stripping and sanding (you can catch up on the first phase here). The first stage of the restoration was definitely the most involved.
After weeks of sanding, I can’t tell you how much we’ve been looking forward to painting everything. This is what the staircase looked like when we’d almost completed the stripping and sanding.
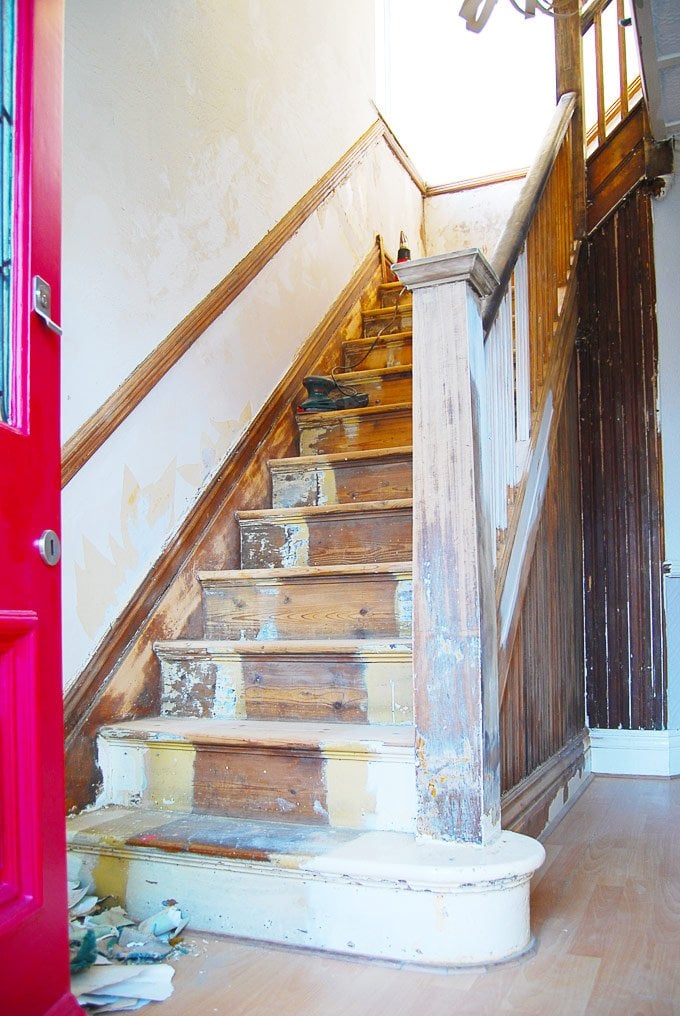
If you’re thinking we’re completely mad spending so many hours stripping and sanding everything only to cover it in paint again, you’re probably right. Having said that, everything was covered in so many layers of chipped and flaking paint, that we felt, we didn’t have much choice but to start from scratch.
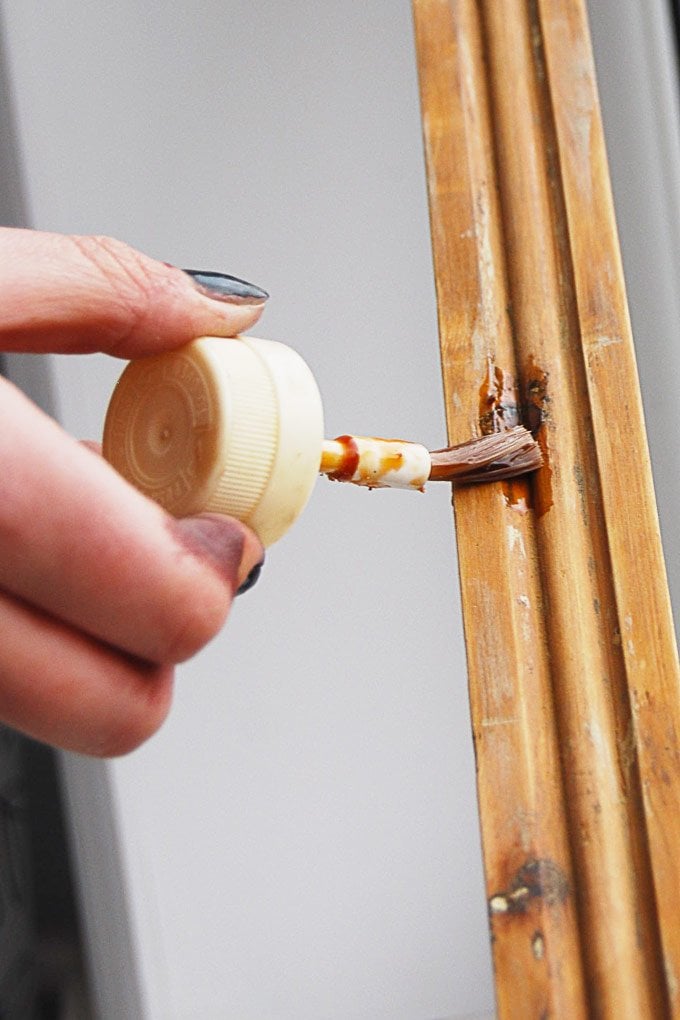
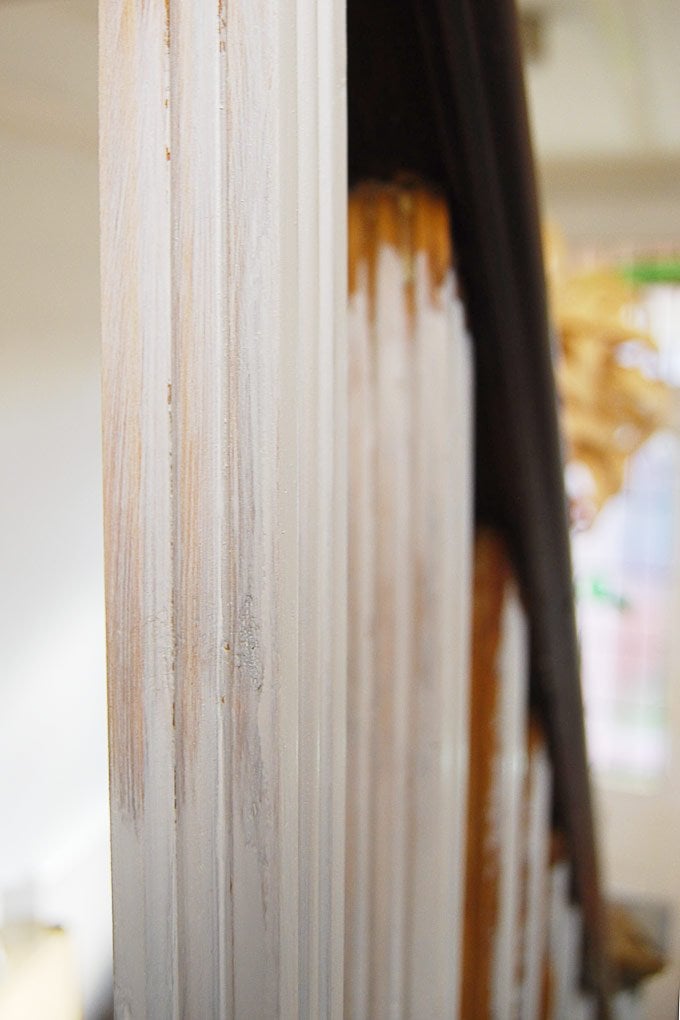
We started the painting process by treating the knots in the wood with a knotting solution to stop them from bleeding through the white paint in the future.
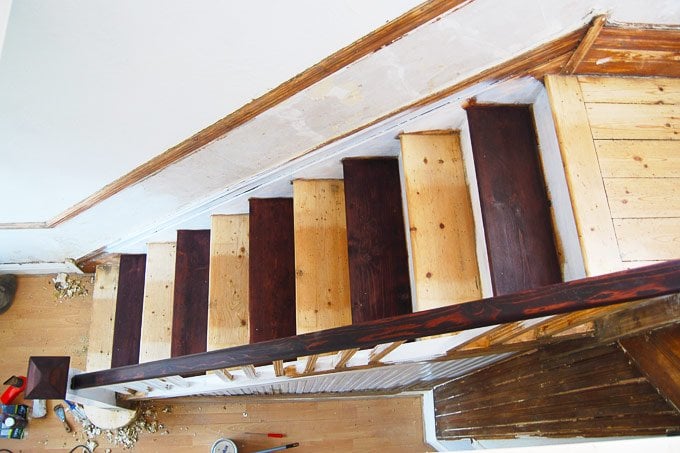
After contemplating what to do with the treads for ages, we finally decided to stain them. There’s no going back now! The stain we used for the treads and handrail dries really quickly, but we still decided to stain alternating steps so that we could still use the staircase. After all, the only bathroom in the house is on the first floor!
We already told you about staining our handrail when we completed part of the staircase restoration on the upstairs landing (you can read about it here).
We used exactly the same method to stain the rest of the handrail, the tops of the newel posts and the treads. After applying lots and lots of masking tape to protect the treads, we were finally able to start painting.
This is our woodwork after applying the first coat of paint.
We are using the same pure brilliant white paint with an Eggshell finish for all the woodwork in the house that we are painting. The next step is the most important one when painting any woodwork – sanding – yes, again!
The moisture in the paint will cause the grain to rise slightly – this is what you have to sand away with very fine sandpaper when the paint has dried. We always use at least 240 grit sandpaper for this kind of sanding. We can’t emphasise enough how important this step is to achieve a professional and flawless finish.

Then after removing any dust you can apply the next coat of paint. We only needed two coats of paint to completely cover the woodwork, but depending on the surface you are painting, you may need to apply more.
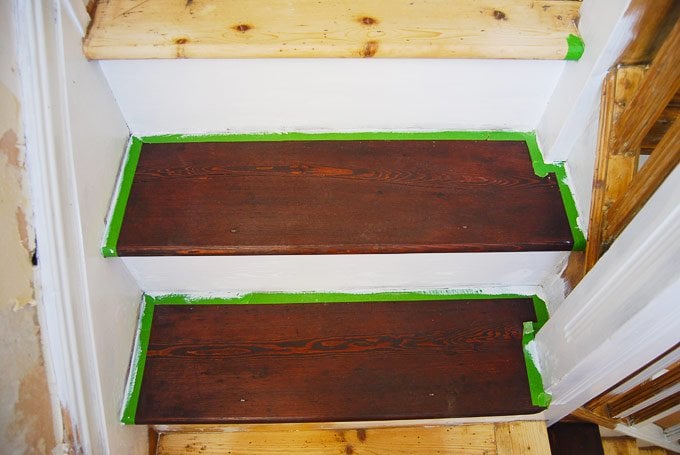
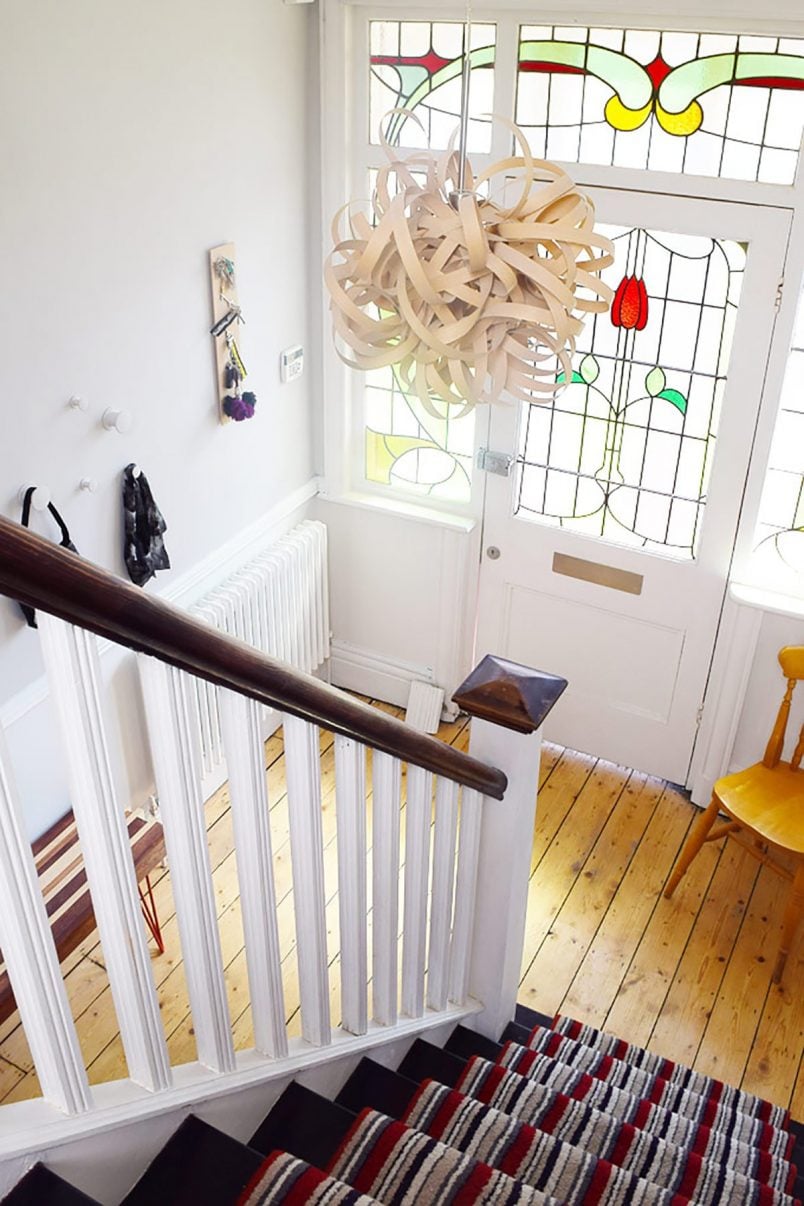
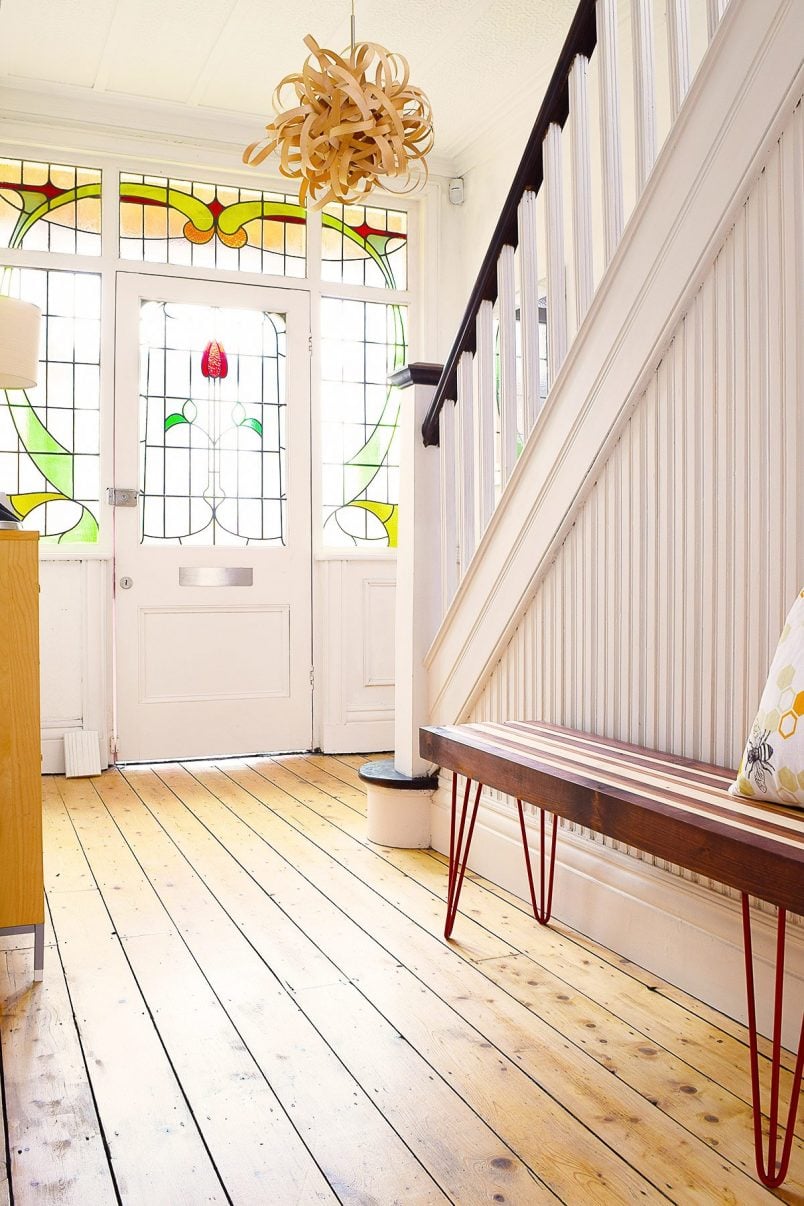
This is what steps look like after painting the risers.
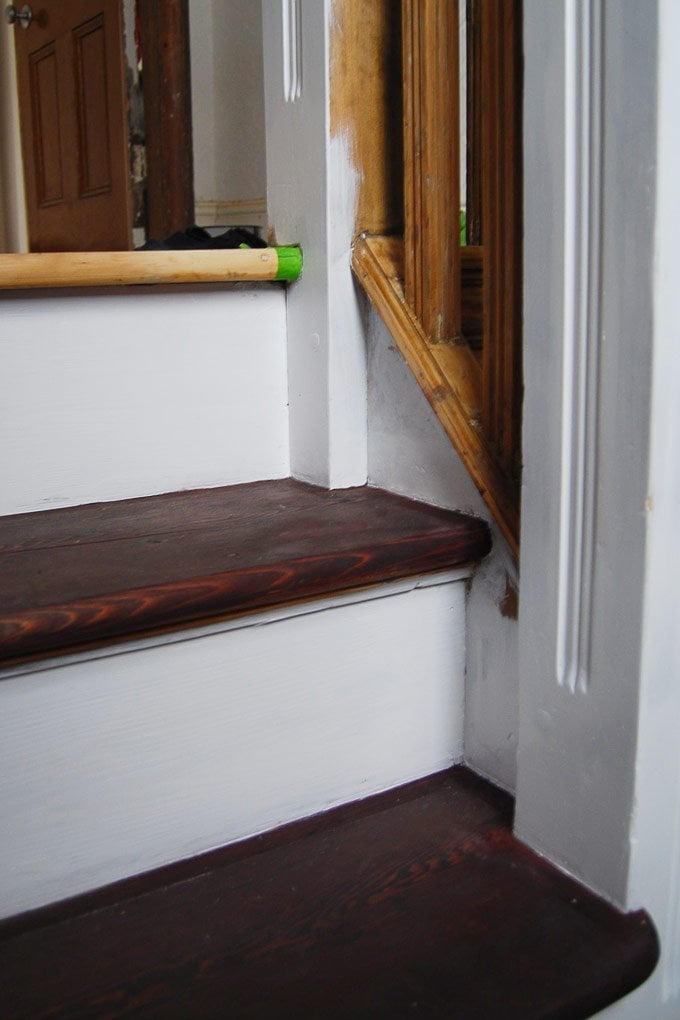
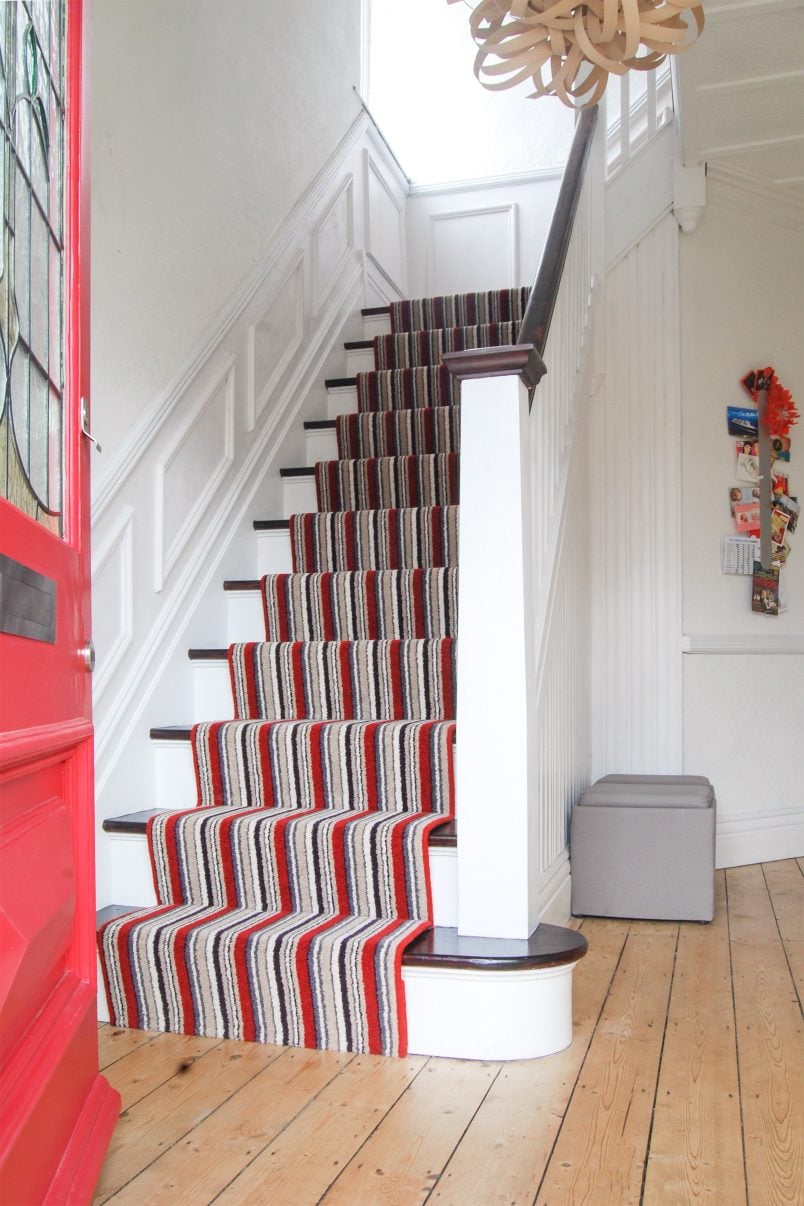
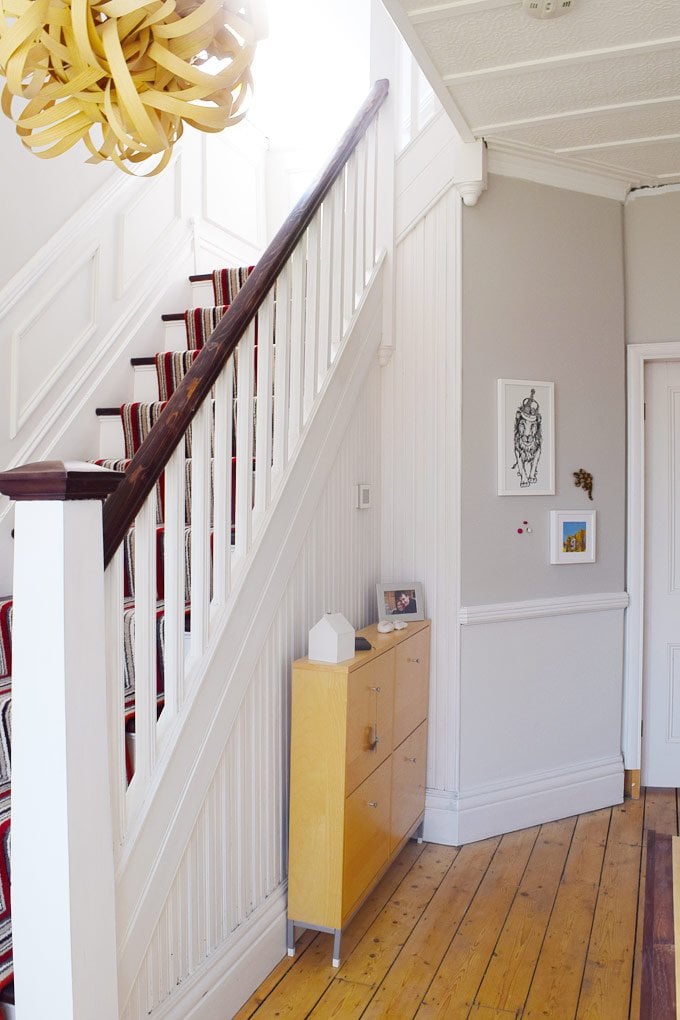
We love the contrast between the dark steps and the white risers. Do you think we were right to stain the treads? Or should we have just left them the natural colour of the wood? Tomorrow we’ll continue with Part 3 of our Staircase Restoration Project – the wood panelling.
If you like this project, you will love these ones, too!
Alice Whitby says
Hello, I’ve found your posts really helpful, thank you!
Quick qu-did you have any paint remaining on the treads before you stained them? I’ve sanded like crazy but there is still some paint visible in the corners. Would a dark stain cover this or look obvious?
Thanks
Christine says
It’s probably not the answer you want to hear, but yes, we sanded away all of the paint. I know it’s a complete pain and everyone hates sanding (or at least I do). What I would suggest for the corners is getting yourself a paint scraper like this one (aff link). We didn’t know it existed when we sanded the stairs but use it all of the time now. It’ll help you remove every last bit in the corner. On the plus side, if you just have a tiny shadow of previous stain left, you should be able to stain over it with a dark stain. Definitely test on a step first.
Hope that helps!
Cx
Catherine says
Hi there, I notice that on the previous about your staircase renovation, the stairs were sanded but showed different colours of stain. Then on this page, they have been sanded to the point that they are all one colour! We are in the phase of our staircase showing different stripes of old stain. How on earth did you get from stripes of stain to completely sanded??!! This isn’t mentioned in your blog, but I do think this is actually the most difficult bit that people struggle with. We are wondering whether to buy 24 grit sandpaper as 40 grit is still not touching it, even with the orbital sander. Please help if you can remember how you managed to achieve this step!!
Christine says
There’s no secret trick to removing the stain, Cathrine. It’ll just eventually disappear when you sand the treads (a lot). If you’re planning on staining the treads, I wouldn’t worry too much about a light colour difference as it won’t be visible after staining.
I’d definitely recommend starting with a coarser grit paper if you’re having trouble removing any paint or stain. It is really coarse and you’ll have to do a lot of sanding to smooth everything out but it’ll save you time in the long-run.
Hope that helps!
Cx
Mrs Catherine R Flynn says
Thank you so much for taking the time to reply. Your blog posts on your stairs renovation have been so incredibly useful. It was the top link that came up when I was researching, and all the info you’ve been given has been totally spot on. I’m now thinking of doing exactly the same as what you have done. I think the staiing of the treads is an especially good idea for a long term effect that doesn’t need constant touching up. I don’t think there is a wood paint out there that is durable enough to withstand heavy traffic on the treads over a long period of time!
Suzanne says
what brand of paint and stain did you use for the stairs please?
Christine says
We used Fiddes Non-Grain raising stain for the treads in the colour Mahogani. It’s an amazing stain which worked really well! For the risers and balustrades, we used Dulux Pure Brilliant White in eggshell. We weren’t overly happy with how it looked over time as it became quite yellow and we ended up repainting a lot. Apparently, they have since changed the paint formula though. We now generally use Farrow & Ball All White Modern Eggshell Wood Paint for all woodwork.
Hope that helps!
Cx
michael says
hi, what color stain did you use? looks like something i will be needing. thanks in advance.
Christine says
We used a non-grain raising stain in Mahogany by a company called Fiddes. It was really easy to work with and it the only kind of stain we now recommend as it was amazing. We applied a couple of coats to make it fairly dark.
Hope that helps, Michael!
Cx
Angie says
Hi… I’m in the middle of restring my staircase, I’ve got all the gloss he wood, and there is now this brown looks like paint but I don’t think it is, when I use the heat gun on it it goes all gooey, and it’s really hard to get off, do I use paint stripper to remove this gooey stuff? Or stuck with the heat gun? I’ve tried sanding it, but I’m gonna be there for weeks trying to sand it off….. also in relation to the dust! Is it beneficial to try and seal the doors off? If so do you have any ideas with what I can use? Wish the dust didn’t get everywhere and just went in the extractor bag on the sander ….
Thanks
Christine says
I totally feel for you, Angie! There’s a reason it took us years to finish ;).
We also had the sticky brown varnish that we had to remove. We persevered with the heat gun but you can, of course, use a stripper (we also recommend Peel Away).
In regards to the dust, it’s important to regularly empty the bag on the sander which I find keeps the dust down. There’s no getting around that it’s a horrible job though!
I assume that you’ve checked for lead paint as it’s obviously important to be safe. If you do have lead paint you should take extra safety precautions and only use a chemical stripper to remove the paint.
Good luck with the rest of your staircase and try to remember that your hard work will be worth it in the end!
Cx
Zahra Ansari says
Hi. I love the retsauration. And this is exactly what we want to do with our stairs.
Ours need bit of fixing before since they creak too much. My question is how did you fill the holes left from the staples?
Thanks
Christine says
Thank you, Zahra! We didn’t fill the holes as they were too small to really see – especially after staining the treads darker. We did, however, fill any larger holes with some standard wood filler. If you’re planning on staining your steps, just make sure to use a filler that can be stained, too.
Cx
CAROL says
Our house is only 18 years old, but love the look with a modern take, in the process of pulling out nails but the stairs are not real wood more like MDF, we’re still going ahead with a good primer on the risers, question is..would you prime the treads before staining I have medium oak floor varnish. Your stairway is amazing!
Christine says
Thank you, Carol! If you are going to varnish or stain the treads you shouldn’t prime them. In the case of stairs, we’d always recommend using a stain in the colour of your choice and then a clear varnish on top. Stairs are obviously going to get a lot of wear and tear and if the coloured varnish chips any marks will be immediately visible. If you stain the wood and then varnish it only the clear top layer will chip and any scuffs won’t be quite as visible. Hope that makes sense!
Cx
Joanna says
It’s fascinating what you have done to restore the staircase. We have bought a Victorian house that needed top to bottom renovation. We started to renovate the staircase and followed similar steps to what you have done. One question I wanted to ask you – did you have any gaps between the risers and treqds that you had to fill? We noticed some and wondering how to do it and what to use. Any advice? Thanks!
Christine says
Thank you, Joanna! We were lucky and didn’t have any gaps anywhere on our staircase. I think that the solution will depend on how big the gaps are. If they’re only small I’d be tempted to leave them. If you’re planning a similar look to our stairs (dark treads and white risers) you will probably hardly notice any gaps. If the gaps are too large and you decide to fill them, I’d probably use some timber strips which you glue into the gaps. I’d wouldn’t recommend a filler as it will probably end up breaking out of the gap with the inevitable movement of the staircase.
At the end of the day, it’s an old staircase and the gaps are just part of the charm (unless they’re too big and annoy you too much!).
Hope that makes sense but do let us know if there’s anything else we can help you with!
Good luck with your staircase – I’m sure that all of your hard work will be worth it!
Cx
PS. You can see the completely finished staircase in our house tour here.
Cinnamongirl says
I laughed at the gooey paint issue when stripping . I’m going through the same process with my stairs but I also done 4 doors and door frames too. -.-
I have to say stripping paint has so far been my favourite part of the restoration but the gooey paint is a nightmare. I got past this with using a chemical after the heat gun stage. Very long process on all doorframes and every stair but worth the end result. I used screwfix no nonsense paint stripper incase you face the challenge again in the future :) looks like ova glue has a pleasant smell just slap on then scrub off. Really messy this was the worst bit but brings the wood up like new. Amazing results. I’m at the sanding stage of the stairs & after pulling away the false ceiling I feel I can finally see the light at the end of he tunnel. Everyone things I’m mad but the end result will be amazing. I can’t wait to finally see my finished stairs. So I can move onto the living room of course :D
You’ve done an amazing job. How satisfying!!!
Christine says
Oh, I feel for you but I also totally agree that it’ll be worth it in the end! We used paint stripper (we love Peel Away) for our fireplaces and for the wood around our stained glass in the front door. Yep, it’s messy but it’s just one of those things you have to go through if you want a perfect finish!
Good luck with the rest of your stairs! I’m sure that all of your hard work will pay off!
Cx
kiran shahid says
Hey guys,
your stairs look great.
I am on stage 1 of my stairs restoration, i wonder if you can help me?
I have removed the old carpet and underlay and it appears some years ago there was carpet laid in the middle of the stairs and paint on the edges, these two colours in the wood are now different and still noticeable different after we have stripped the paint.
a) We cant tell which colour wood is the same, whether where the carpet was the wood has darkened or where the paint was the wood has lightened.
b) have tried to sand this down but colours are not matching still, wonder whether light has penetrated too light in the wood or carpet has dulled the colour so deep?
Help?
x
Christine says
Old staircases almost always had some sort of runner up the middle – ours were the same, too. On the pictures, you can see that we had the same issue with the centre of the staircase being a slightly different shade than the outer edges of the treads. Both parts of the wood would have changed colour and the “real” colour probably lies somewhere between them both. Having said that it’s going to be almost impossible to sand the treads so that the colours are even again as the wood would have changed colour too much for you to sand away. Part of the reason that we stained the treads is because of that same problem and we’d recommend staining your treads, too, Kiran.
Good luck with the rest of your staircase!
Cx
Allison Cooper says
Hi. Currently renovating the staircase in our Edwardian house and have the same issue where the wood is darker where the carpet runner was. I would like painted risers and stained wood treads like you did. Have you any advice on how you used the stain to even out the wood colour. Intend to use Fiddes products. Thanks Allison
Christine says
We didn’t anything to even out the darker colour. As you can see on the pictures, we sanded the treads a lot so that the darker patch was much lighter. When we applied the dark stain, it all just automatically blended together and the darker part wasn’t visible anymore.
I would say that you really need to give the treads a very good sand to even them out as much as possible first. Hope that helps & good luck with your stairs, Allison!
Cx
Allison Cooper says
Thanks for the advice Christine. I have used a heat gun to get rid of many years of old paint and now sanding. Will follow your advice and make sure I do that really well. I hope my stairs look as good as yours when they are finished. X
Christine says
Aww, thanks! I’m sure your stairs will turn out amazing! Just remember to be safe and wear a dust mask! (I assume you’ve already checked for lead paint, too).
Would love to see a picture of your finished staircase when you’re done!
Cx
richard says
Hi. It’s interesting to read about all the work on your staircase. I’m fitting new softwood balustrading,handrails & baserail to my stairs & want a light oak matt finish. I tend to use screwfix products. Can you suggest which ones to use. Regards Richard
Christine says
We also use a lot of Screwfix products, but our by far favourite stains are by a company called Fiddes. We always use their Non Grain raising spirit dyes. They’re really easy to work with and give a very even finish.
Would love to know what you think of the stain if you decide to use it!
Good luck!
Cx
Cattrysse Watt says
Hi I’m in the middle of my staircase been on weeks, and do I wipe the staircase after sanding with anything to stop foot prints showing up in the varnish pleasekind regards
Cattrysse watt
P.s you did a wonderful job
Christine says
Thanks for the compliments, Cattrysse! Before you varnish the stairs, I’d remove as much dust as possible through vaccuming and then I’d wipe them down with some white spirit to get rid of every last bit of dust before varnishing.
Hope that’s some help!
Cx
Angiy Michael says
Hi , We are currently in the prolonged process of staring at our bare stairs somewhat demoralised about how to progress ! The majority of our sanding is now done but we have hit an empasse ! :-D Could you advise me what stain you used for your treads and what you painted with ? Any advice appreciated
Christine says
I can’t tell you how many time we stopped and restarted sanding our staircase. We got so sick of it, but the results are definitely worth it!
The products we used (and were really happy with) are Fiddes Non-Grain Raising Stain in Mahogany to stain both the treads and handrail (I think we applied two coats) and the treads are varnished with Granwax Aquathane Floor Varnish in Satin. The white paint is the same that we’ve used throughout the house. It’s just a standard eggshell for wood. Good luck with the rest of your staircase!
Cx
Julia says
I’m in the middle of my stairs, can you tell me is brilliant white with egg shell what’s the difference from any other.
Christine says
Hi Julia! The only difference between the different kinds of paints is the level of sheen. Usually there are 3-4 different types of paint finishes – gloss, satin, eggshell and matt. (although you probably won’t find matt for wood).
Eggshell only has a very, very slight sheen. Usually the less shiny a paint is, the less imperfections (of whatever you are painting) will be seen. I’ve heard that gloss finishes can be more durable though.
At the end of the day, it’s probably just down to personal preference though!
Cx
Julia says
Thanks for your reply, I couldn’t go to bed till early hours just looking at your home beautiful, The only thing with my stairs is the steps are no?t rel wood but I would really like to do what you have done. Do you think it would work
Christine says
Aww, thanks Julia – that’s sooo kind! We stained and varnished our steps to give a more durable finish. You could paint the steps, but if the paint chips it’s going to be a lot more visible compared to stain & varnish. Alternatively you could maybe cover the treads with something that is real wood (I just had a quick google and there are loads of great examples out there). If you installed treads on top of your existing treads, you may also be able to pre-finish the wood, which would make it a lot easier to achieve a perfect paint finish.
Good luck!
Cx
Julia says
thanks very much for your advice, will really take your advice on boardxx
Christine says
You’re welcome, Julia!
Cx