All of this week, we will be sharing the details of our staircase restoration project with you.
It’s taken months and months of work to finally finish restoring our staircase and we couldn’t be happier with the result.
But let’s start at the beginning…
Last week we already shared some of our staircase restoration progress with you. This is what the staircase looked like when we moved in.

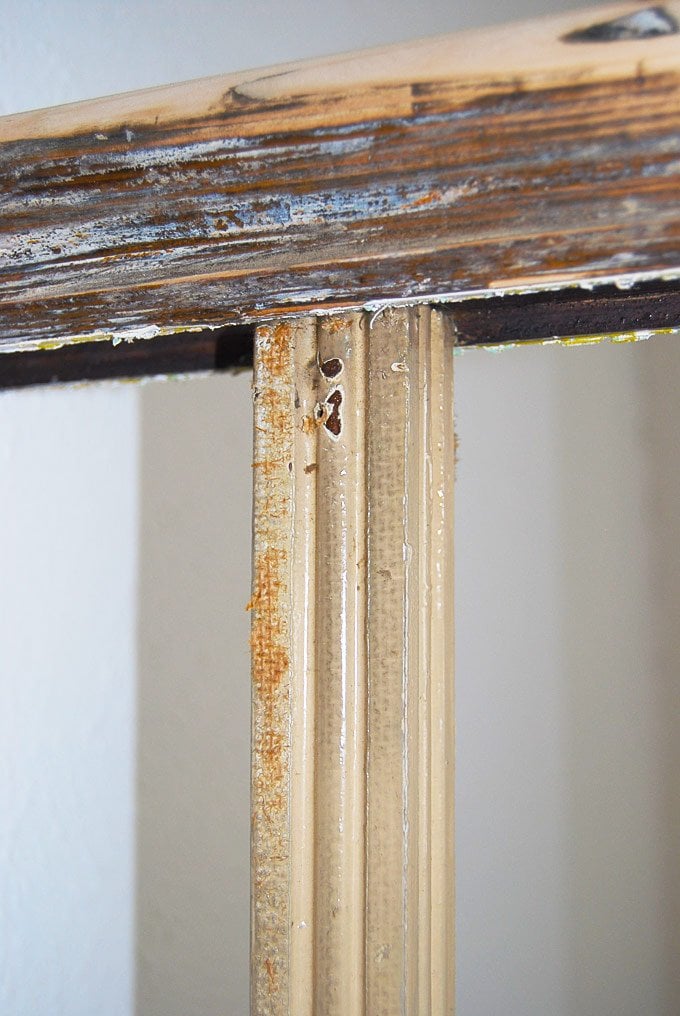
From a distance, it all didn’t look too bad, but close up the woodwork was extremely worn and the paint was chipped all over.
Everything had been painted so many times, that all the detail in the wood moulding was completely lost.
We were really lucky and discovered that the original balusters were still in place and had just been boarded up, but these were also covered in layers of paint.
We started by stripping and sanding the balusters as we previously did on the upstairs landing.
Originally, we’d just planned on restoring the handrail and balusters down the side of the staircase, however, it turned out to be almost impossible to strip away the paint down to the base of the balusters and skirting with the carpet still in place; so we decided to take up the carpet, too.
This meant that we had to restore the treads and risers, too. Yep, we just can’t help making more work for ourselves.
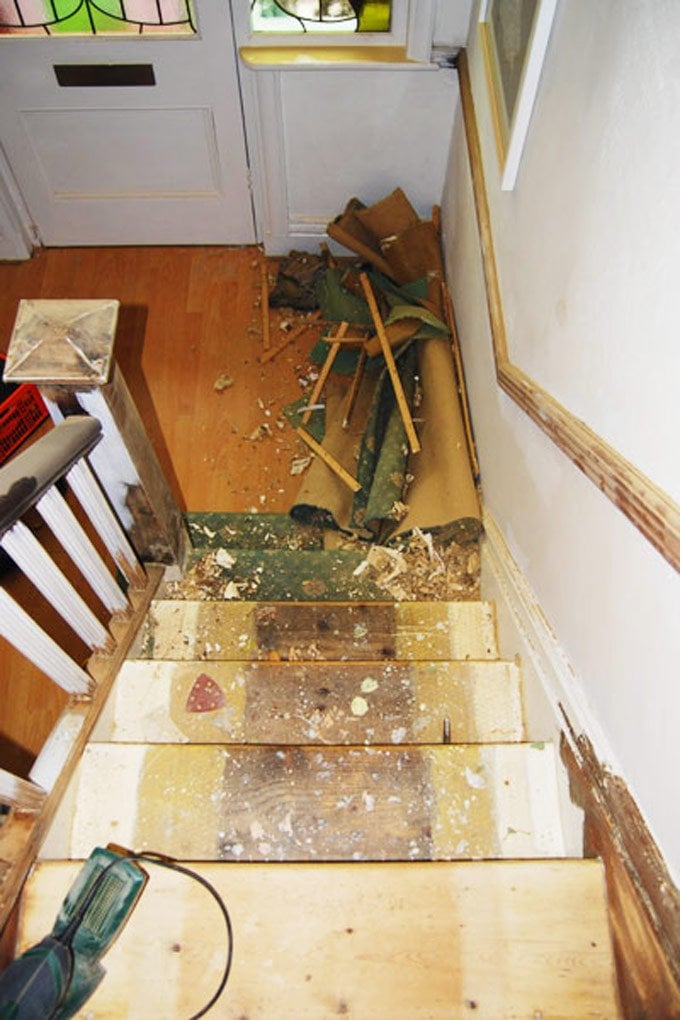
After removing the carpet, this is what the staircase looked like.
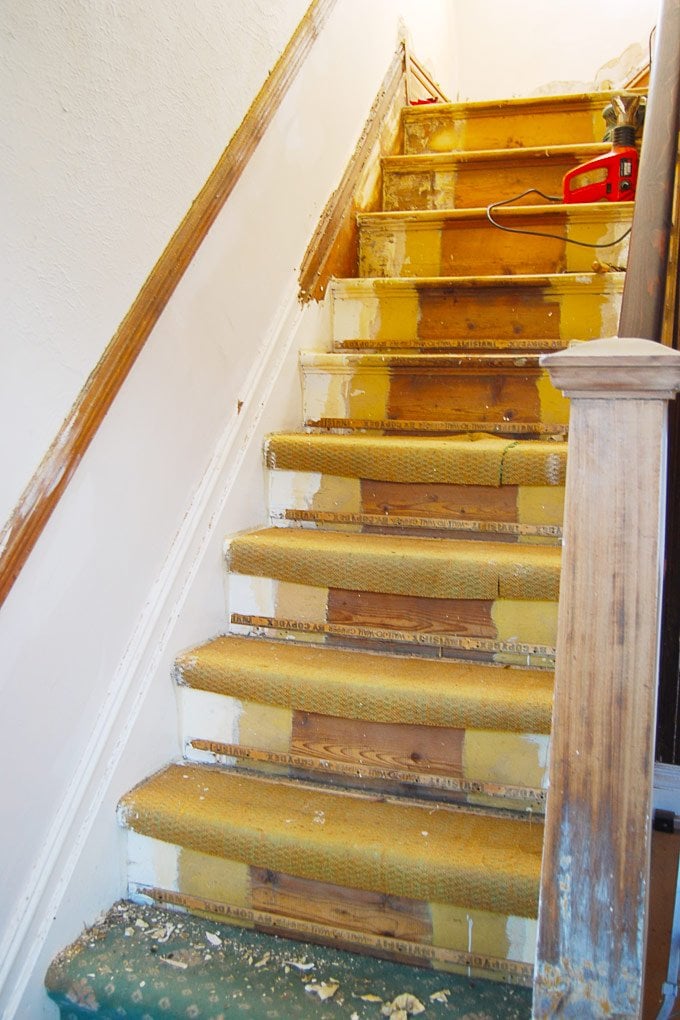
There were hundreds of nails holding down the carpet grippers and even more staples attaching the underlay to the steps. We started by removing the carpet grippers with the help of a crowbar.
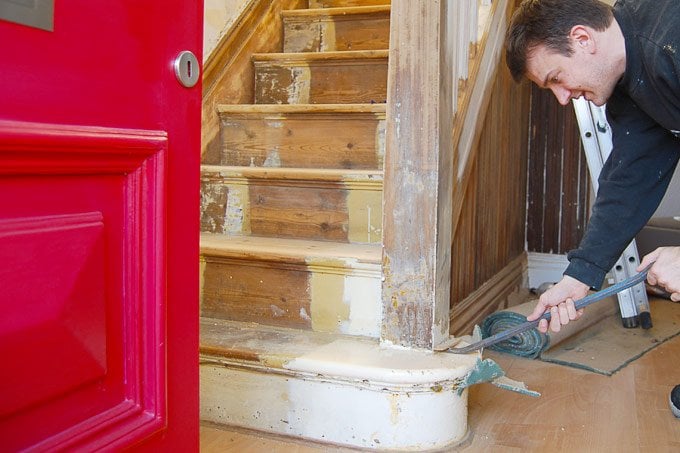
Then, after removing the remaining nails and staples we started stripping away the layers of paint with a heat gun.
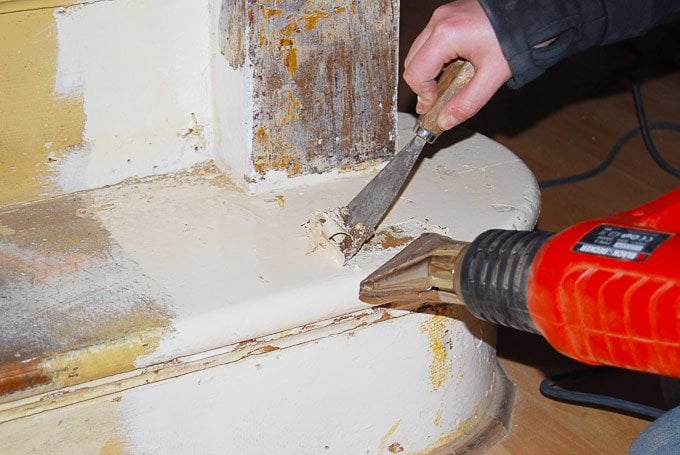
When stripping old paint, it’s always especially important to be safe and check for lead paint before you start any stripping work. You can see our full guide on how to deal with lead paint and safely remove it here.
This took hours and hours. I daren’t think what our next electricity bill will look like! The paint kept going really gooey and got stuck in the detailed grooves and ridges of the woodwork.
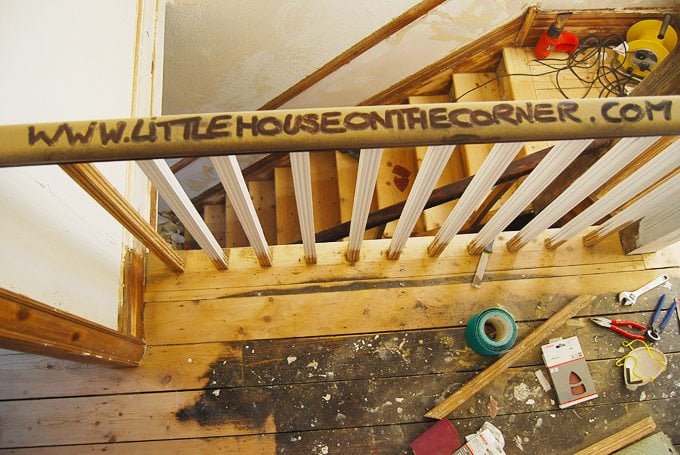
This is what our hallway has looked like for the past weeks.
Not a pretty sight is it? After removing the layers of paint, we then turned to sanding.
As bad as you think the hallway looks, you should see what the rest of the house looked like after a few hours of sanding! I’m not sure I have ever seen so much dust!
Yep, that is the dust on our dark mahogany brown handrail.
We were able to sand the steps with our little electric detail sander, but because of the detail in the balusters and stringers, almost everything else had to be sanded by hand.
For the initial sanding, we used coarse 80 grit sandpaper.

This removed any last bits of paint and dirt but left the wood quite rough, so we sanded the whole area again with 120 grit sandpaper in order to achieve a smooth and paintable finish.
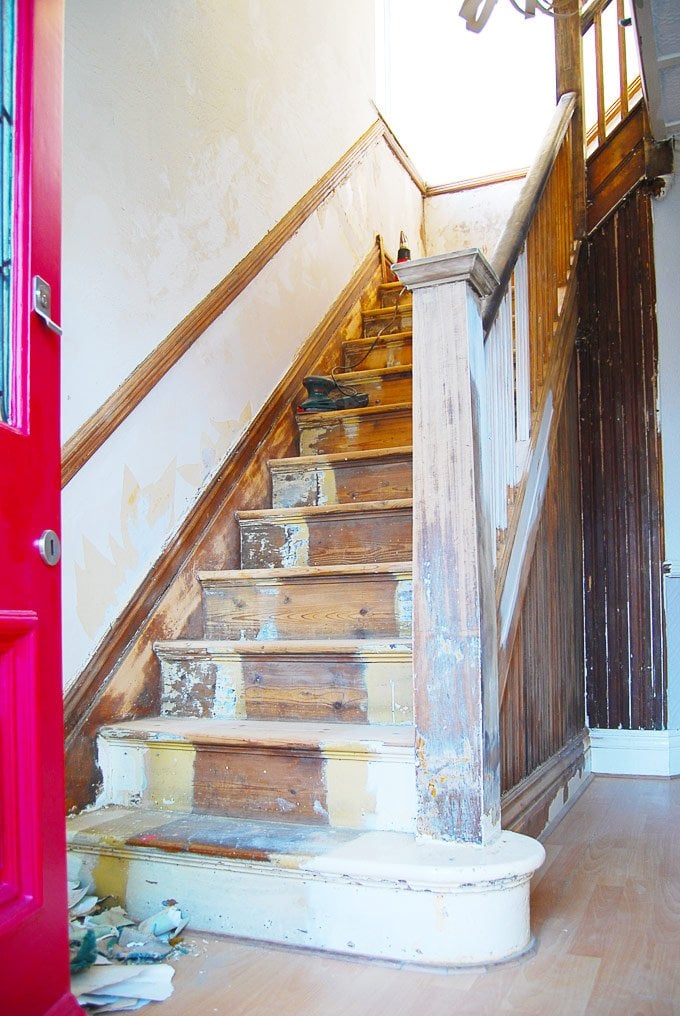
So, after hours and hours of stripping and sanding (except for the first step), this is what the hallway and staircase look like.
Tomorrow we’ll reveal Part 2 of our Staircase Restoration Project – Staining, Painting and Varnishing. Come back to see how we got on!
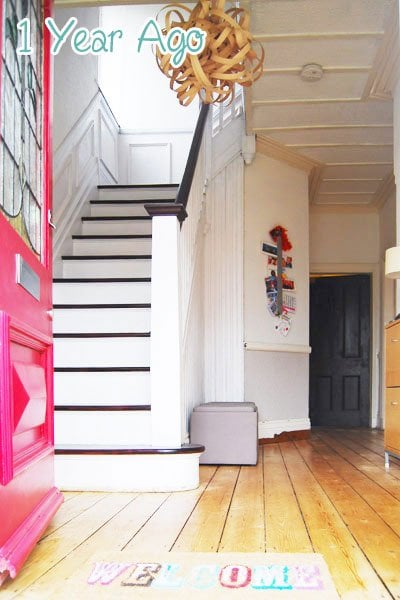
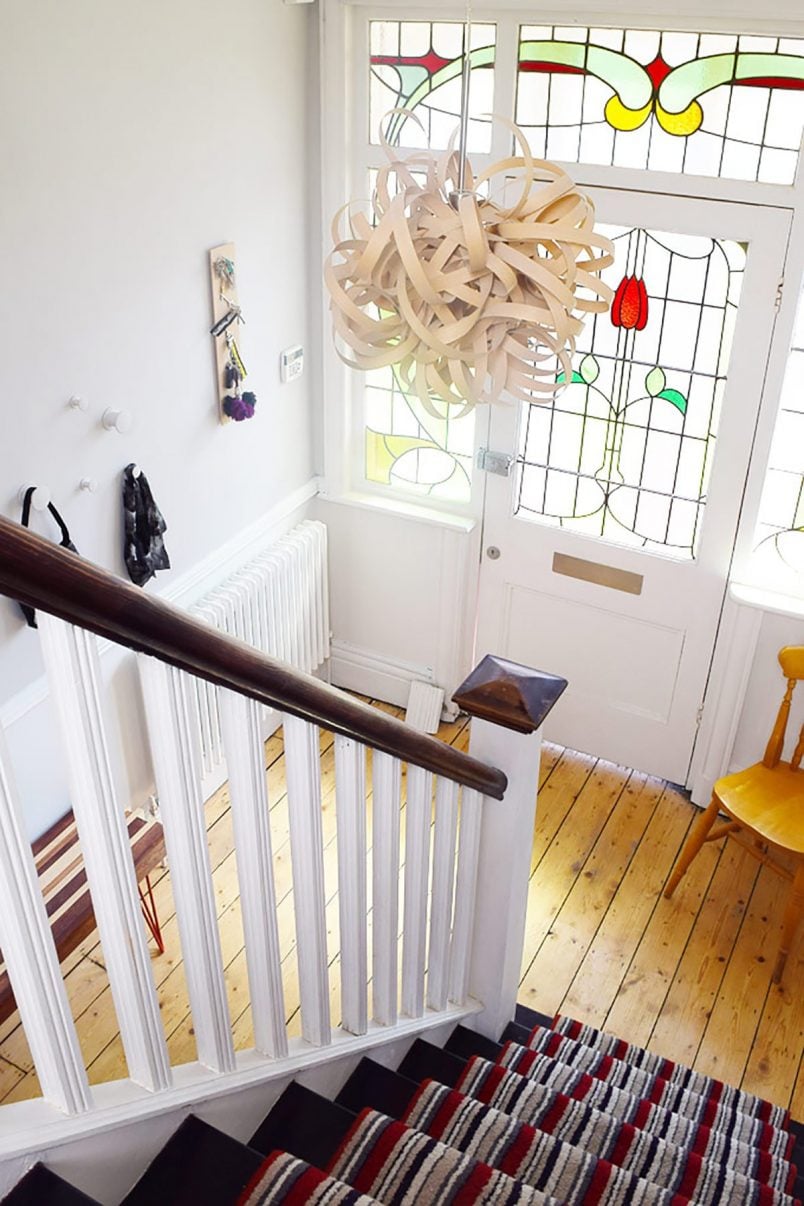
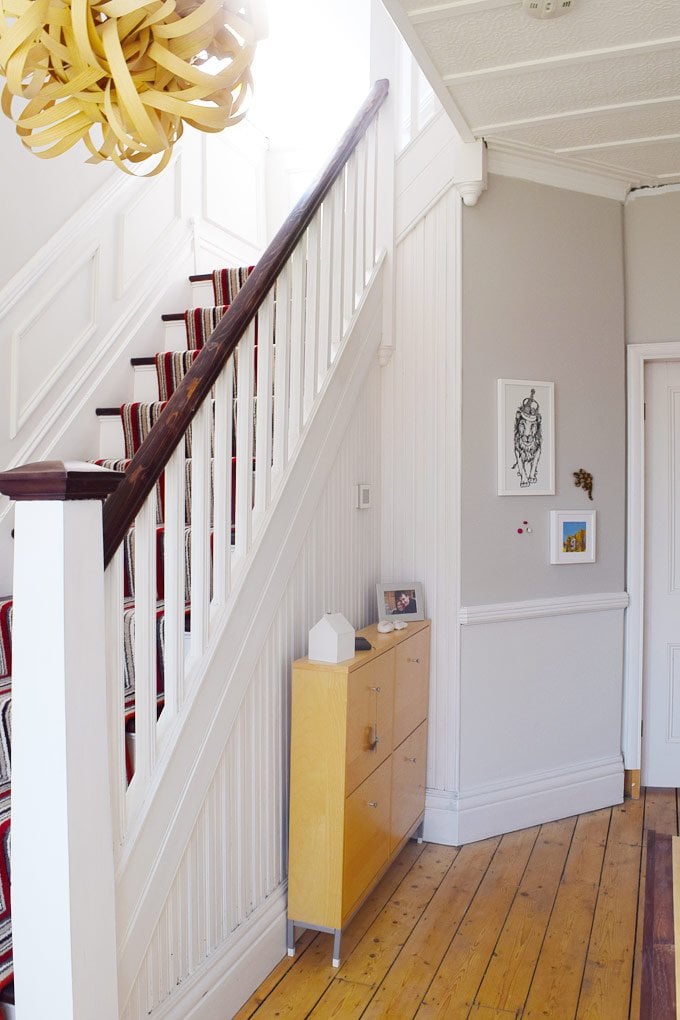
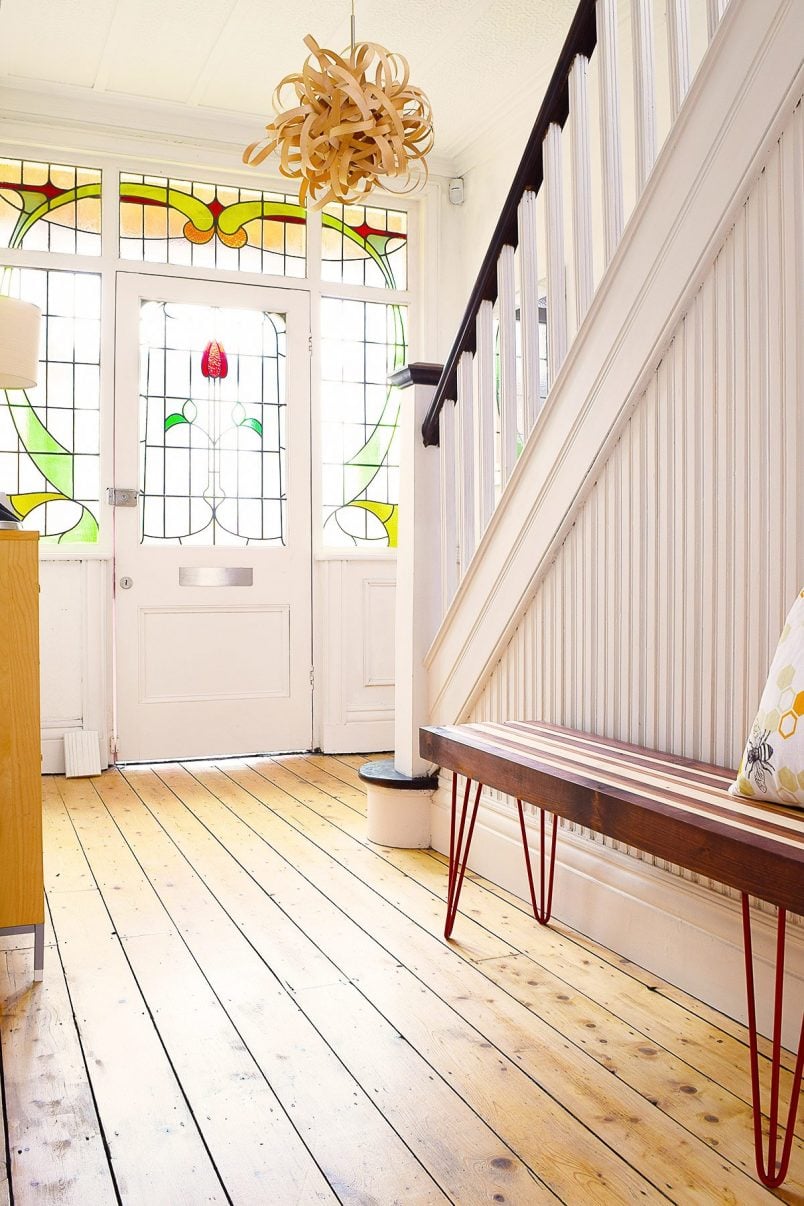
PS. If you’re impatient and want to see what our finished staircase and hallway looked like, head over to our house tour!
johnjohn755@hotmail.com says
lovely except for the carpet runner
Peter says
Hello hello ..I am just coming to the end of my very long project of the staircase ……..Removing 7 layers of Very Old and new Paint from the staircase spindles steps and the top landing the paint was not hard to remove But into the corners and tight place to get to was a total Different thing it was very very hard I used Nitrous at the beginning and this just took only one layer of paint on after put three layer’s of nitrous on the paint . I could only remove the paint with a heat gun. Under the paint was a layer of black substance this was a total nightmare nitrous did nothing to remove this substance used a sander it took for one spindle as seen in my picture 2 hours on average to sand one spindle I used a new Aldi sander I use a hard sand paper ..In all I went through five or the velcro attachment with I had to claim from the 3 year warranty the velcro was sent from Austria I claimed times and after the fifth time they sent me a new sand .. because we had to wait for this new sander to come I went to be and Bought Bosch hp 100. It was very good I was very impressed with this sander Nono of the Sanders were obtical Sanders… .. Then after tow days the Aldi sander arrived so I put the Bosch away and used the new Aldi sander . . after using this new sander for 4 hours this day the sandpaper stopped sticking to the velcro yet again soon sent the a message to say this has happened again In strategy of you sending me A new velcro all the way from Austria or sending me a new sander Please can you just send me 4 or 5 New Velcro attachments .. they wrote to me say under the warranty we can only send one velcro attachment a time so I went back to my good Bosch sander But yes after several days the same thing happened with this sander it would no longer stick my sand per to the Velcro so i took this back to BQ which the swapped the sand paper I have used is so many I lose my count the black substance under all the paint a locked the sand paper and this substance stuck to the sand you could not remove this from the sand paper it was so tough youWould rip the sandpaper trying to get this substance off the sand paper.. for the tight spaces I used a Dremol this was waste of time the black substance just stuck to the attachments .. in the end I used a Stanley knife . At the moment I am thinking what is best to treat the wood ..maybe oil .. any advise will be Greatful after several month if hard work on this Project I want the best to show the woods grain and to keep it looking it best .. Maybe Danish oil … your thank full. PETER
Christine says
It sounds like you’ve had a really tough time, Peter! I totally feel for you as I know just how much hard work it is.
I’m not sure what finish to suggest as it will ultimately depend on what look you’re aiming for.
We’ve just used oil to finish our newly sanded floors (we used varnish in our last home) and I have to say that I love it even more than I thought I would. It gives a lovely natural finish while enhancing the natural grain of the wood.
Good luck with the rest of your staircase – I’m sure that all of your hard work will be worth it!
Cx
Rosie says
Hiya
We are embarking on a 6-week summer of DIY and I would love to do the stairs in our house as you have done. At the moment they are covered in carpet on top of a layer of old foamy carpet liner-ey stuff on top of a whole load of carpet adhesive. Did you have adhesive on your stairs? Is that what you used the heat gun for?
Thanks so much for any advice!!
Rosie
Christine says
We had no adhesive on the steps, but they were covered it lots of paint and gunk. It took a long, long time to strip and sand everything but the work was definitely worth it for the end result.
We used the heat gun to strip the old paint off the treads and spindles. If you’re in an old house, remember that the paint could contain lead, so you’ll have to take safety precautions and possible use a paint stripper rather than a heat gun. Here’s a link to the finished staircase . All of the other posts about the steps we took are linked in it, too.
Good luck with your staircase!
Cx
Rachel says
We’ve got an awful lot of stripping and sanding to do in our 1960s house. Can I ask what palm sander you used and if you recommend it? The thought of sanding everything using just sandpaper and elbow grease is too depressing!
Christine says
I really don’t envy you, Rachel! Our palm Sander was ok, but not great. I’ve heard that orbital sanders are meant to be more powerful, but we’ve not had experience with one of them yet. Either way, our main tip would be to start sanding with coarse paper (maybe around 40 grit) and only moving onto finer paper when most of the paint is gone. As always keep safe and make sure you don’t have any lead paint or similar to remove.
Good luck!!
Cx
Rachel says
Thanks for your help. I’ll have a look at orbital sanders and let you know if they’re any good :)
Christine says
No problem! Let us know how you get on!
Cx