[Ad – This post is in collaboration with MatsGrids and contains affiliate links. We only recommend products we love and think that you will, too! Read our full disclaimer here. ]
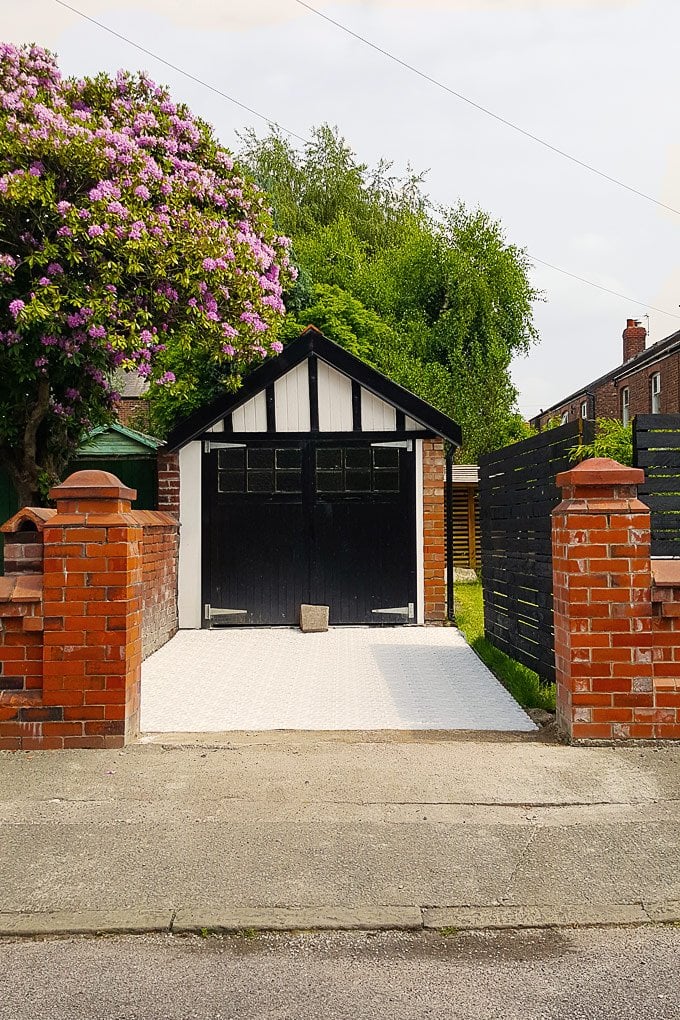
After working on it on and off for months we have finally finished installing our gravel driveway!
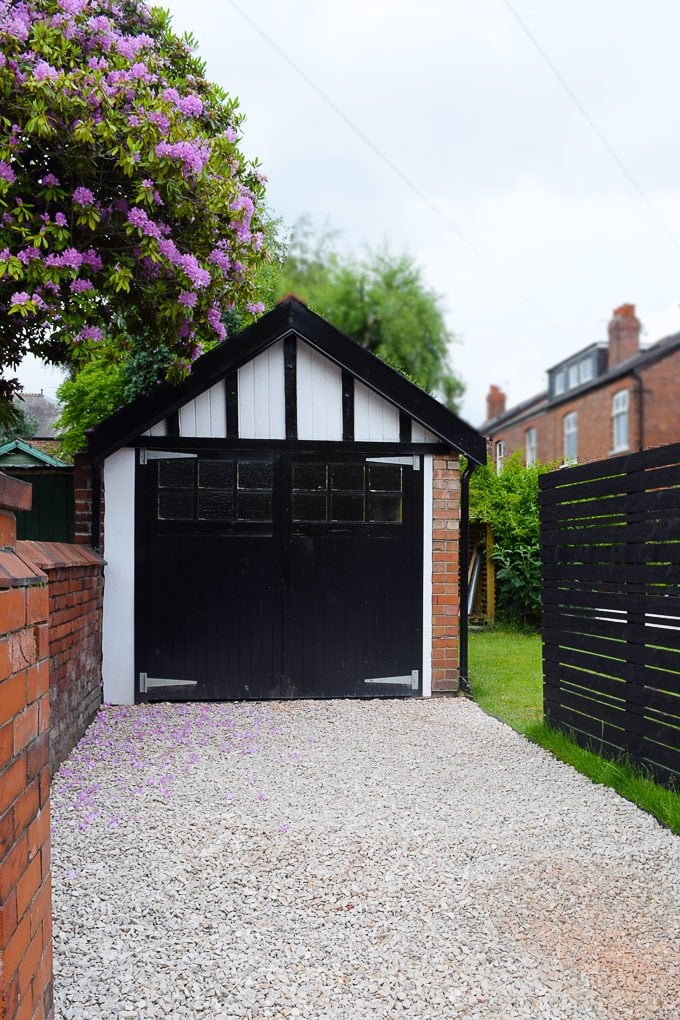
We love how it turned out and, although it’s taken us almost a year to complete, it isn’t difficult to lay a gravel driveway or even that much work to do!
Most projects that we take on tend to take longer than we think, be more involved than we imagined and cost more than we expect, but amazingly laying a gravel driveway turned out to be much easier than we’d anticipated (although it was hard work at times).
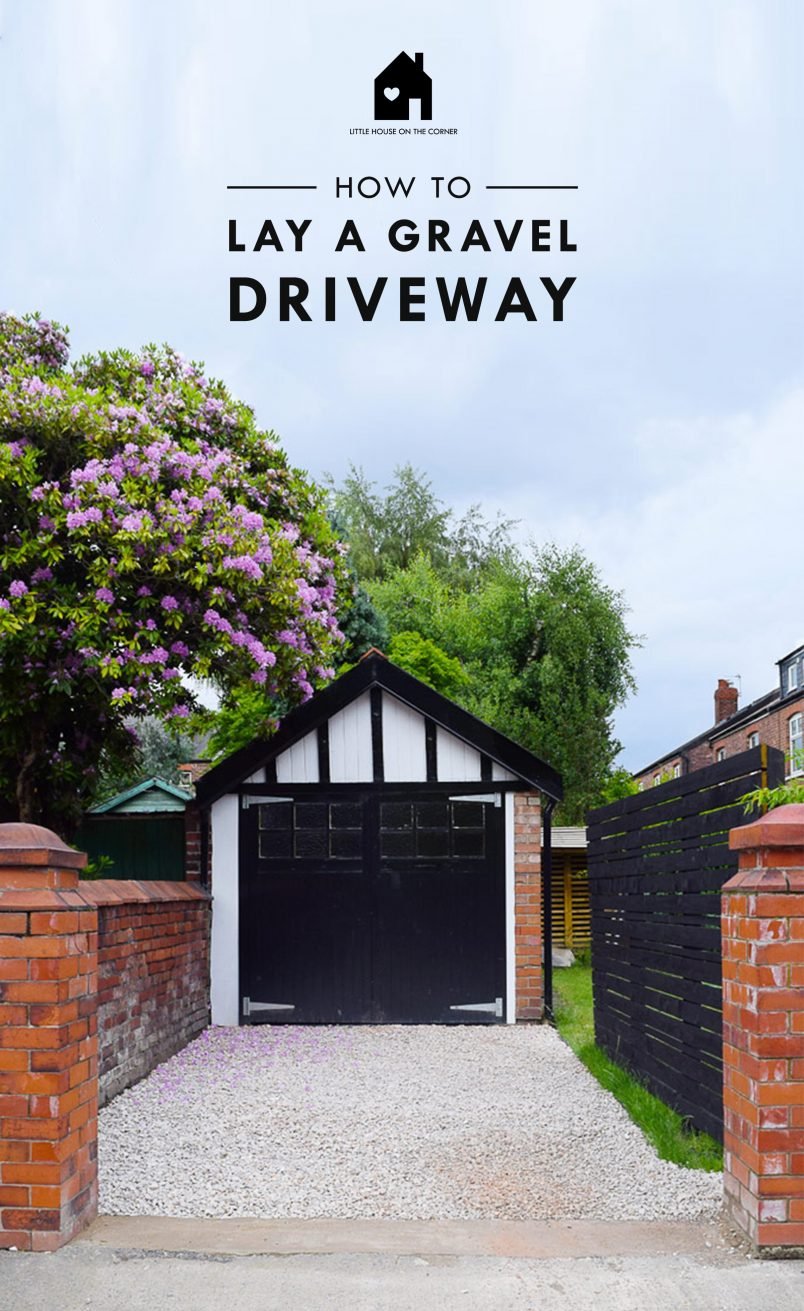
Here’s our guide on how to lay a gravel driveway:
Step 1
Prepare The Driveway (Aka. The hard work and dirty bit)
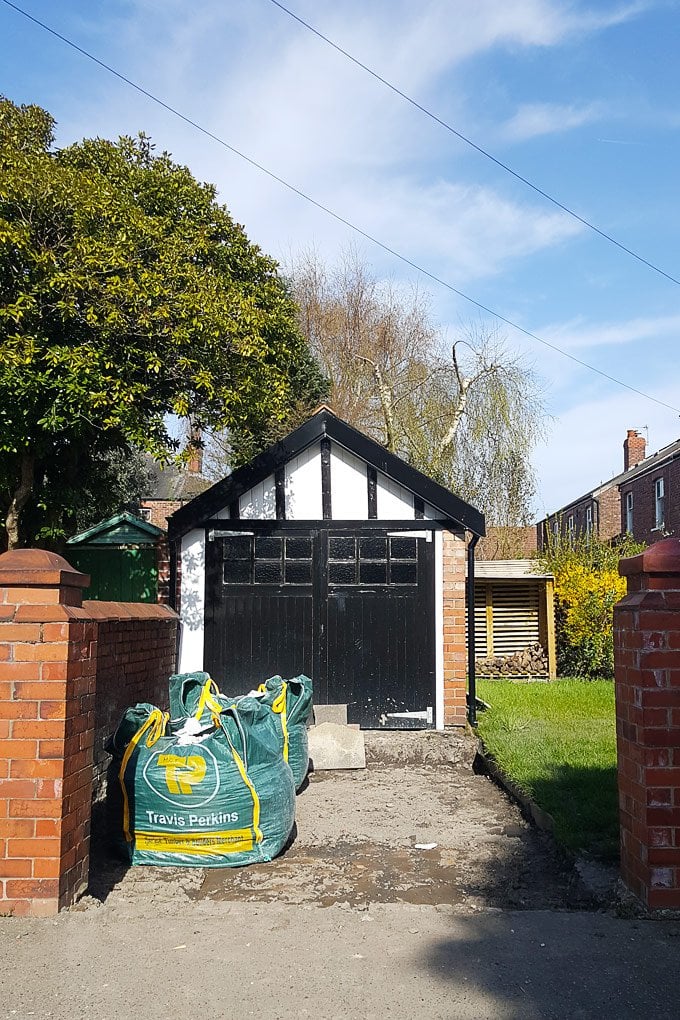
Like most of our garden, the driveway used to be covered in tarmac that had seen better days so before we could even begin to think about laying a gravel driveway we inevitably had to get out our shovels and get digging.
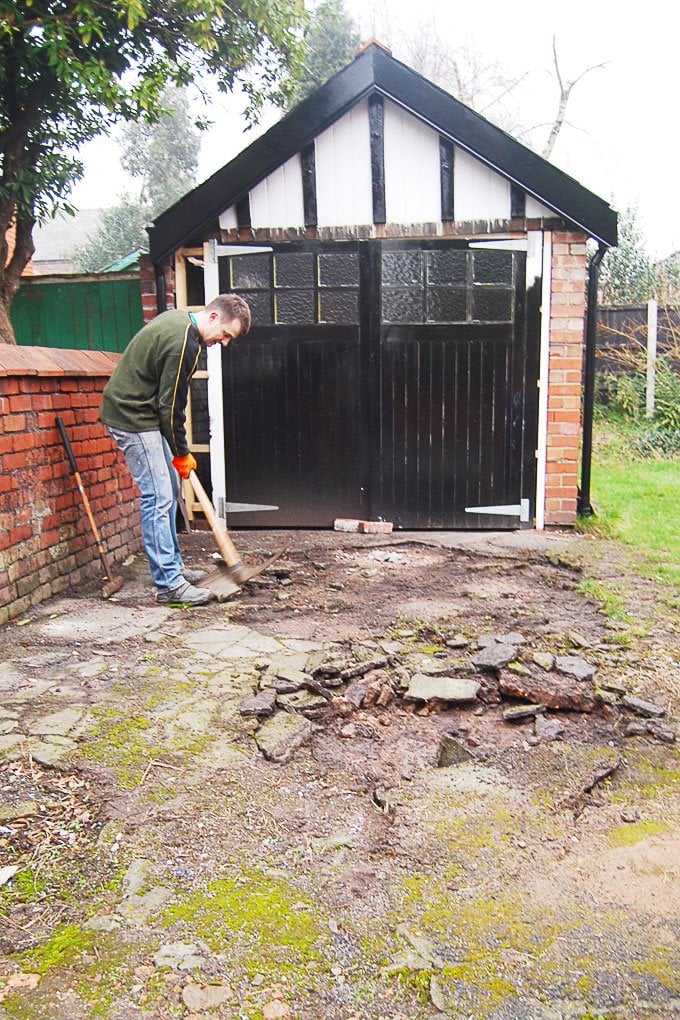
Removing the first layer of already broken tarmac turned out to be easy and fairly quick but removing the rest of the surface was miserable.
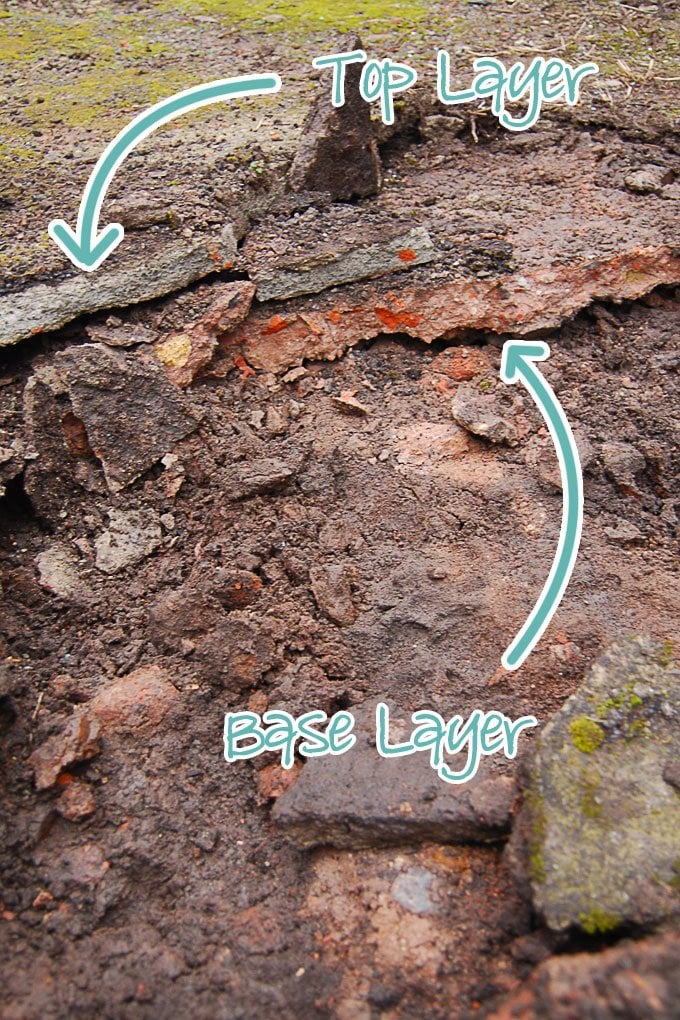
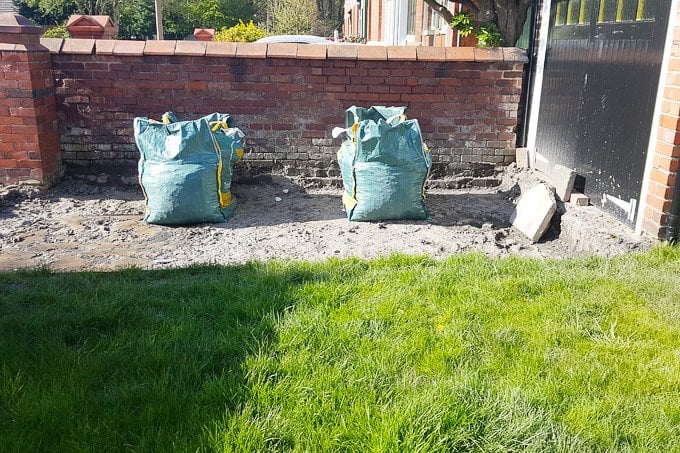
There should have really been a firm foundation layer under the tarmac but it turned out to be more of a mixture of clay, soil and rubble. Not exactly ideal if you consider that it’s meant to be there to support the weight of cars.
A lot of digging and two full skips later the driveway was finally tarmac and dirt free (this is the part of the project that took by far the longest to complete) and we could finally order some more rubble to replace the rubble we’d just removed.
Step 2
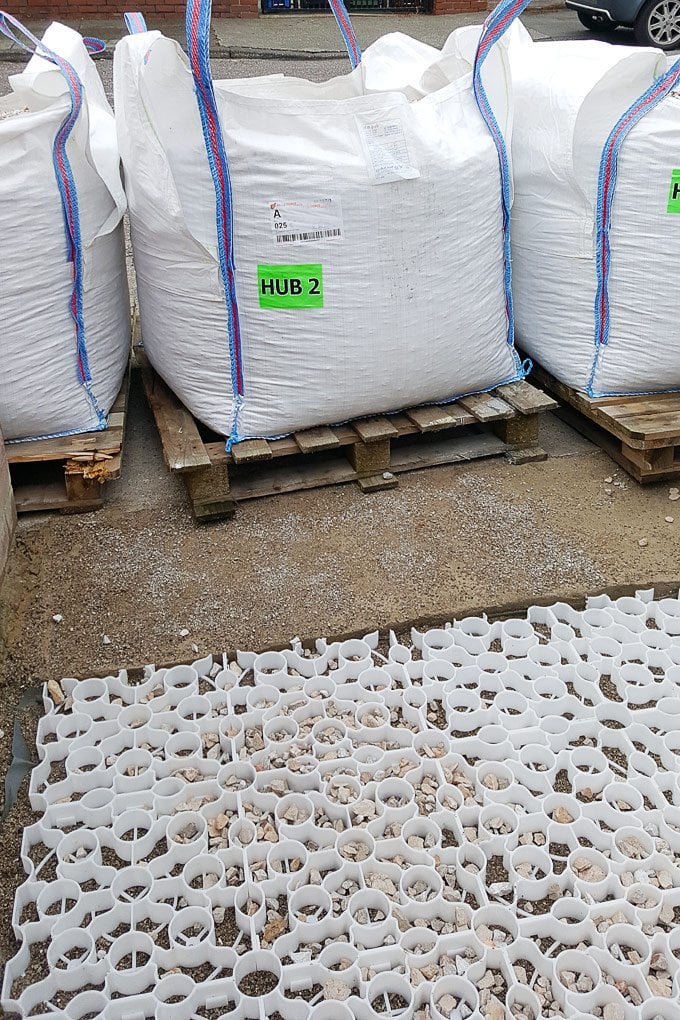
Add The Driveway Base Layer
It felt so mad to pay for skip loads of rubble to be removed only to end up paying for new rubble to be delivered, but the base of the driveway is really important and the quality of the aggregate you use has to be right.
For driveway subbases, you should be using MOT Type 1 which consists of different sized pieces of aggregate that compact together to form a solid base that’s suitable for heavier loads.
At first, we calculated that two bulk bags of MOT would be enough to cover our driveway, but it wasn’t even close so we had to order another two bags, which still turned out to not be quite enough and we ended up having to order another fifth bag to reach the height we needed.
Needless to say not one of our best DIY planning moments, but we got there in the end and after a few hours of shovelling and levelling out the base layer (it has to slope away from the garage) it was finally time to get out the wacker!
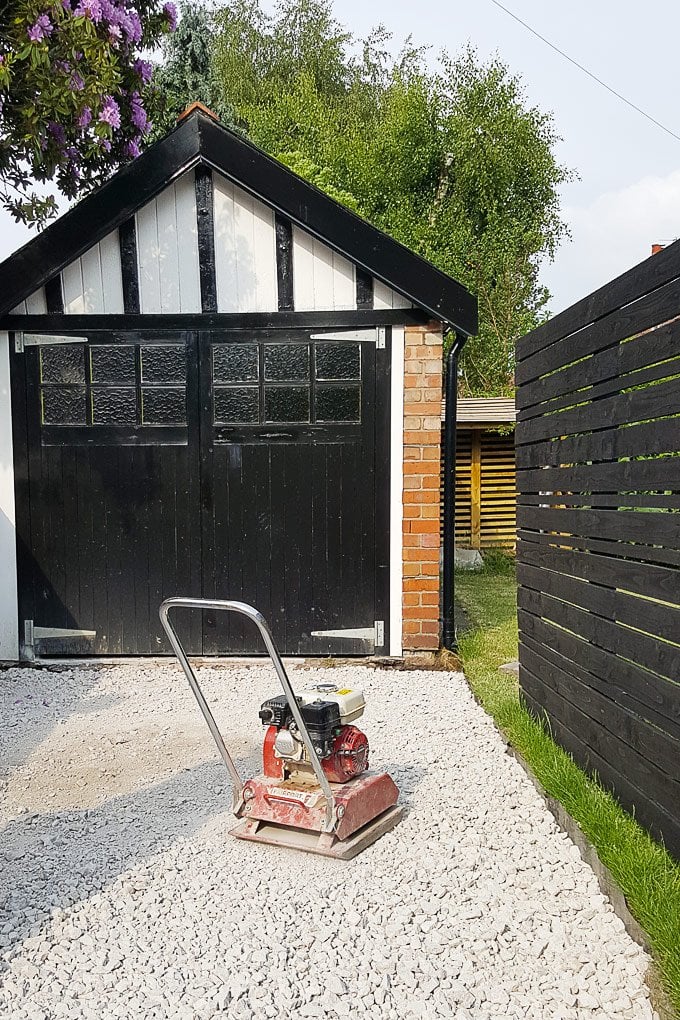
Yes, the wacker! We may own more than a few power tools, but unsurprisingly a wacker isn’t one of them.
Luckily we were able to borrow one from one of our lovely neighbours who happens to be a builder and was kind enough to give me a hand getting things started.
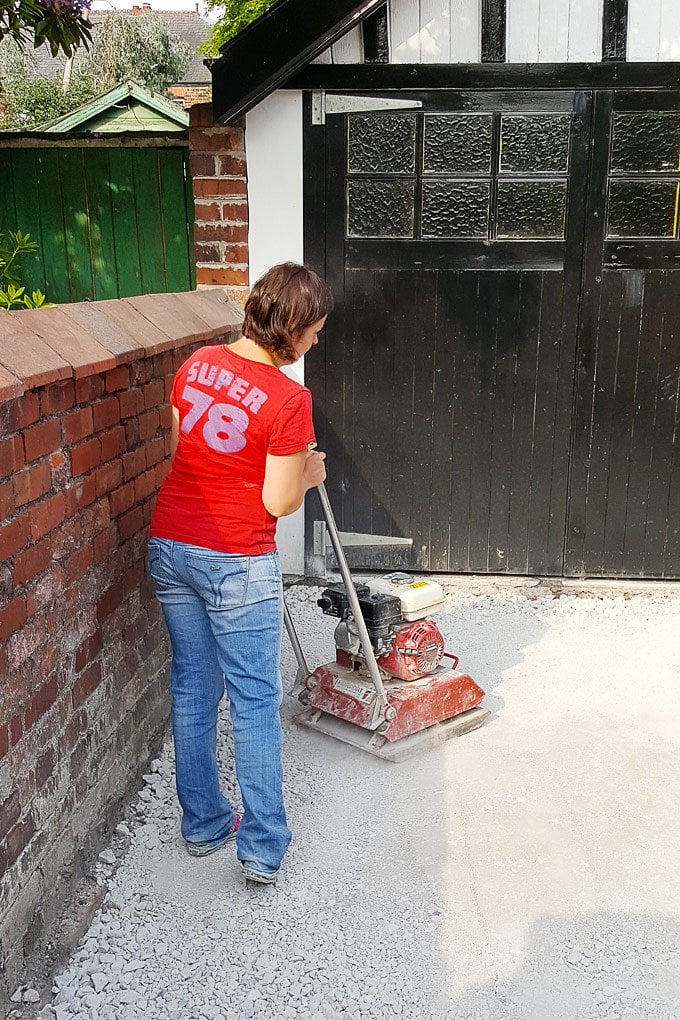
I’ll totally admit that I was more than just a bit apprehensive about using the wacker, but actually, I shouldn’t have worried too much.
Yes, it was really dusty, it was really heavy and it was really, really noisy, but it was easy to use and it only took about 15 minutes to compact the whole driveway.
As so often the prep work turned out to be the most time-consuming part of this project and the next steps were really quick. We forgot to add the layer of weed control membrane under the MOT, so decided to install it on top of it instead. When I say install, I actually mean spend 5 minutes rolling it out.
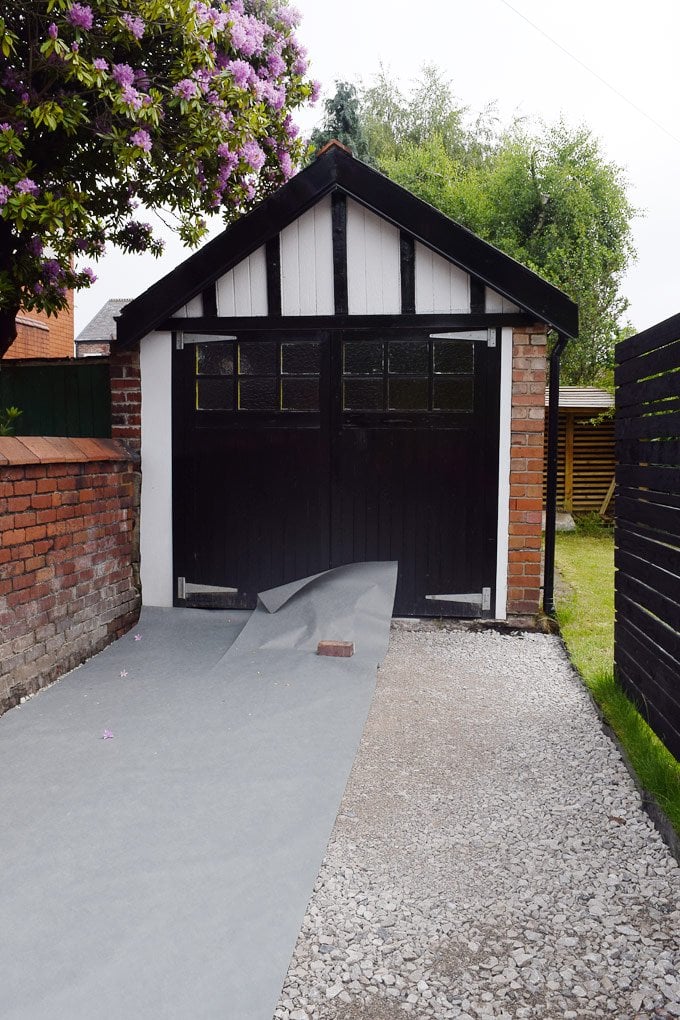
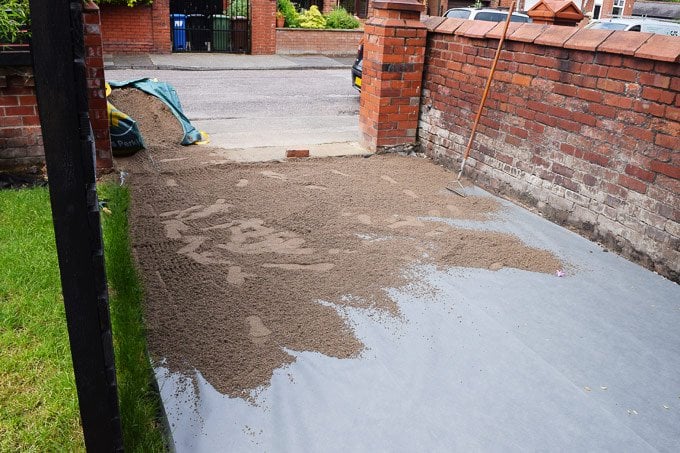
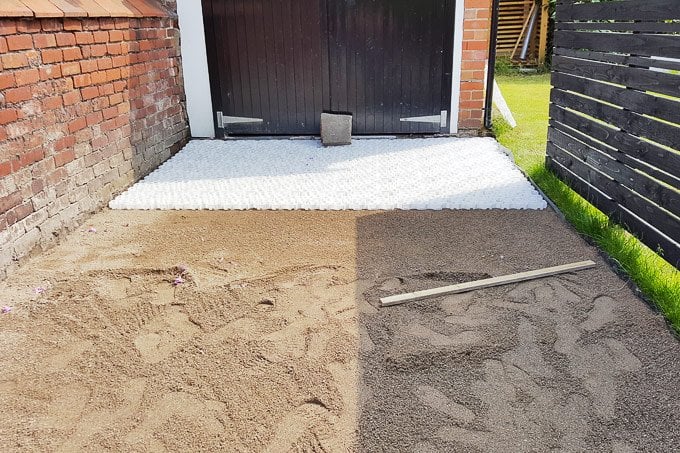
Then it was time to get shovelling. Again. Yep, we really know how to have fun around here! This time, we had to lay a level of sand over the MOT and weed membrane.
Jan was working away the week that the sand was delivered, so I had to shovel almost a tonne of sand myself in preparation for the gravel that was due to get delivered later that same week.
Not exactly great timing or the most fun afternoon ever, but it was weirdly exciting to see more progress and the finishing line was definitely in sight!
Step 3
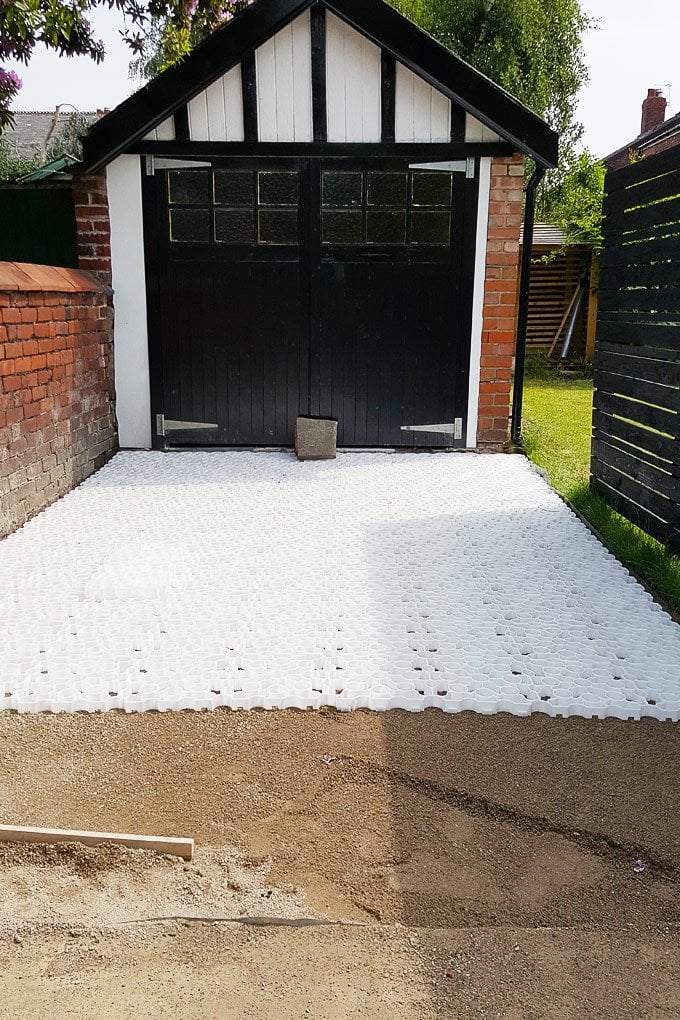
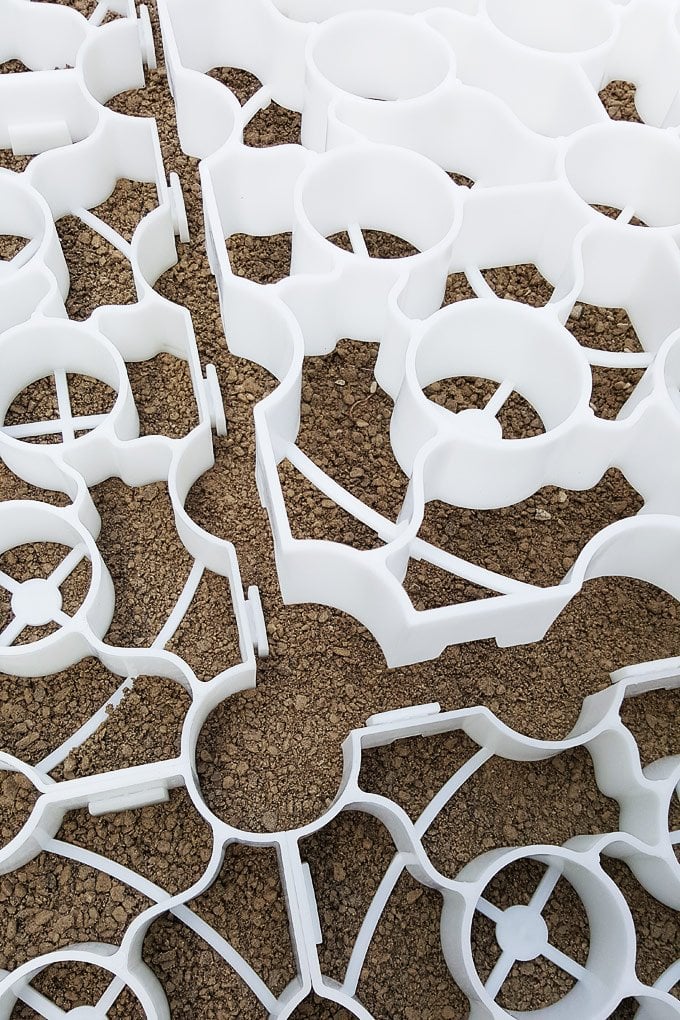
Add The Gravel Grids
Although we knew we wanted to lay a gravel driveway, we really didn’t want to end up with gravel everywhere or end up with an uneven surface every time we drove or walked across it which is why we opted to install gravel grids.
Basically, they are mats with little pockets that get filled with gravel and therefore keep your gravel in position and the driveway looking great. We used these gravel grids by MatsGrids.
Adding the gravel grids to the driveway was easily my favourite part of this project. It was so quick to do (I laid them on my own) and is probably one of the easiest DIY jobs we’ve ever done.
It is important that the sand is level (I used an offcut of timber to level and smooth it as I worked my way from one end of the driveway to the other) because it could otherwise be difficult to get the mats to lock together, but I had absolutely no problems at all and everything just slotted into place – literally.
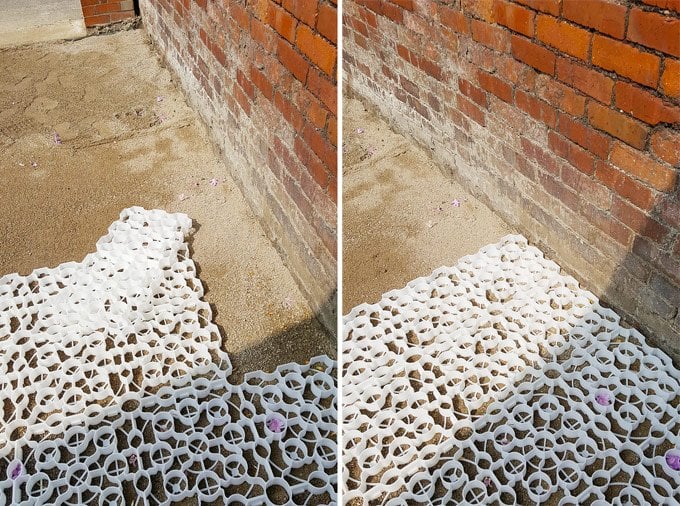
There are little hooks on the edges of the mats and they just all lock into each other.
Even cutting them turned out to be surprisingly easy. I had thought I might need an angle grinder or something else heavy-duty to cut them, but all I used was a standard fine saw.
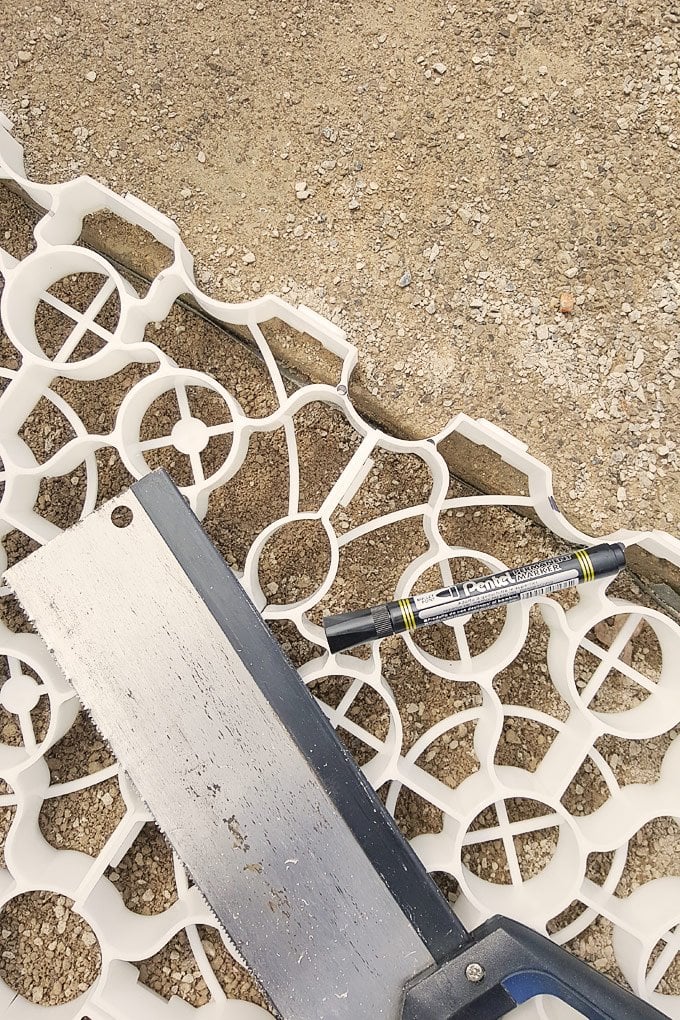
It only took me 1.5 hours to cover the whole driveway, which is probably why I enjoyed this step so much (yep, you could call me impatient).
Step 4
Add The Gravel
Laying a gravel driveway really wouldn’t be complete without actually laying gravel, would it?
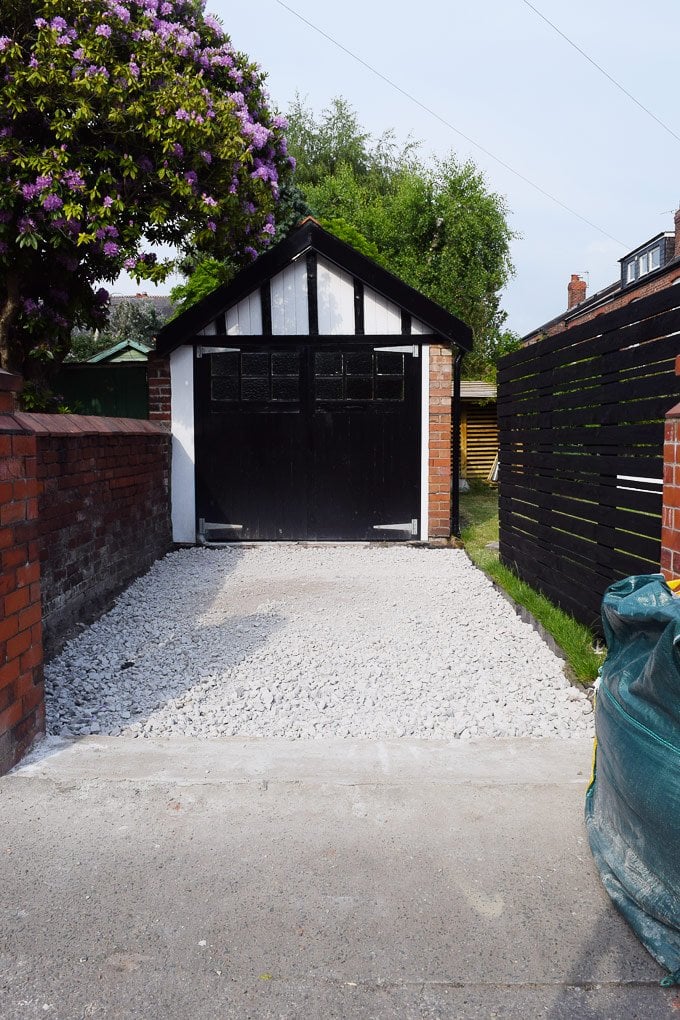
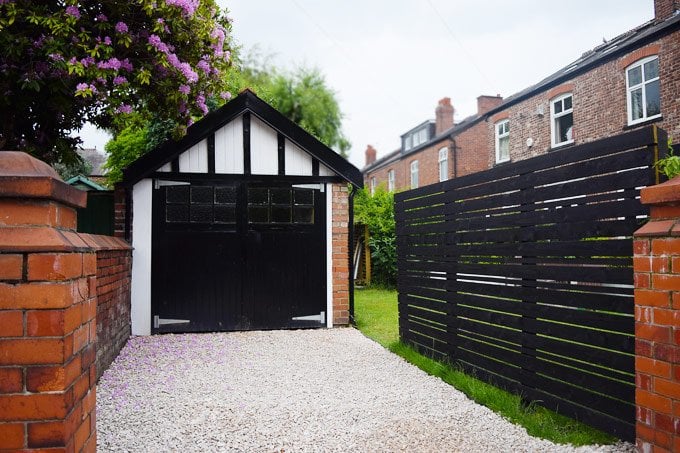
We followed the advice of MatGrids for the gravel (they recommend angular gravel up to 20mm for their grids) and decided to choose Dove Grey Limestone gravel.
It’s a soft light grey colour and it seemed perfect as we wanted something light and modern looking that would contrast nicely with the dark fence.
Like the MOT and sharp sand, it came in big bulk bags (we used 3 bags – about 1.5 for the actual driveway and the rest for the area along the wall).
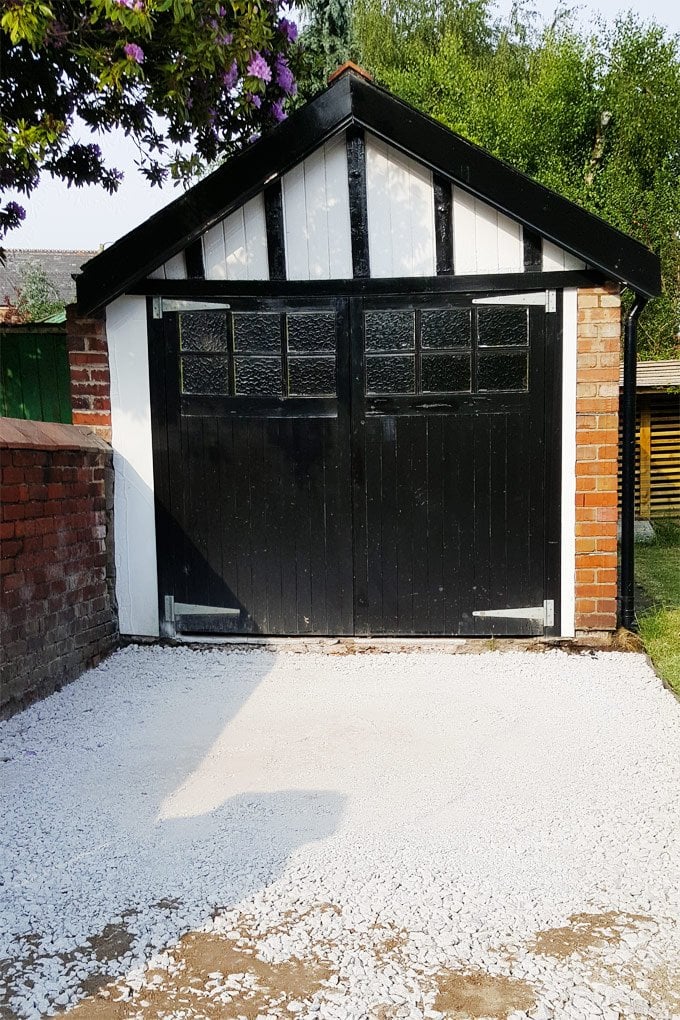
If you’d not already guessed, I was well and truly sick of shovelling by this point, but with the project so near to completion and Jan back home to help it only took a few more hours (with a few breaks because of torrential rain) and finally finished laying our gravel driveway!
Materials & cost breakdown (to lay a gravel driveway that’s about 15m²):
- MOT Type 1 £200
- Sharp Sand £40
- Weed Control Membrane £20
- Gravel Mats £225 (ours were kindly supplied by MatsGrids)
- Gravel £160
- Total gravel driveway cost: £665

We love how the driveway has turned out and as you can probably tell, there was nothing difficult about this project at all. Jan did most of the shovelling and I did most of putting things back together again.
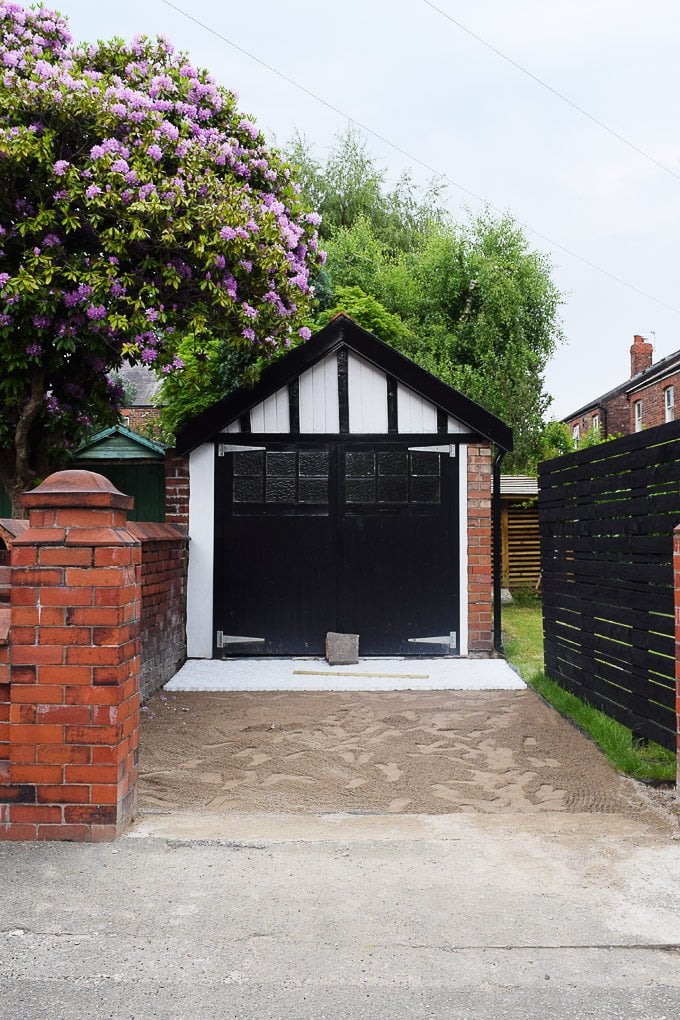
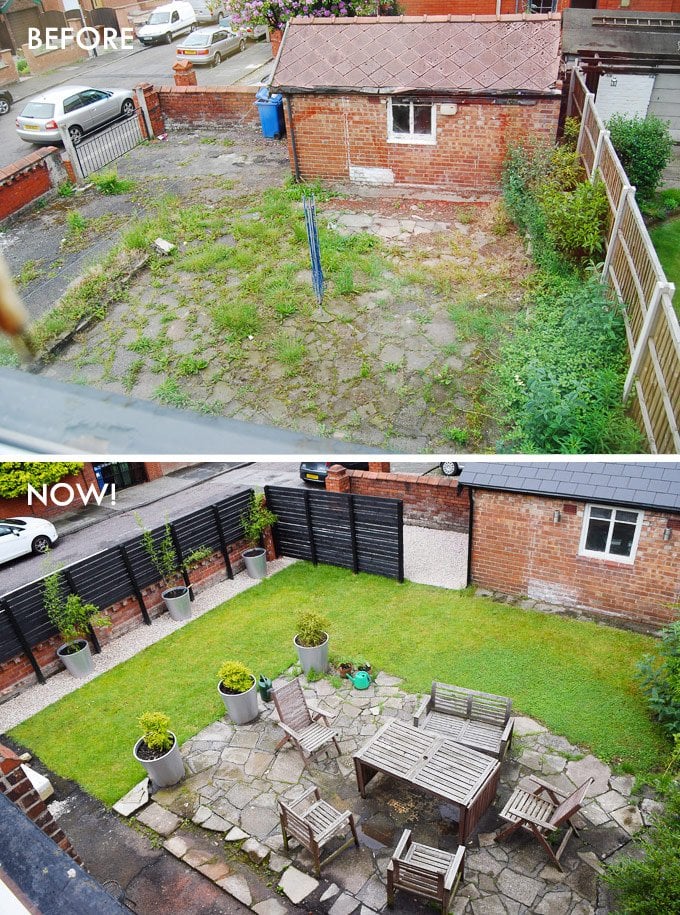
Because this project has happened over such a long time, it’s difficult to remember just how far we’ve come so here are the obligatory before and after pictures.
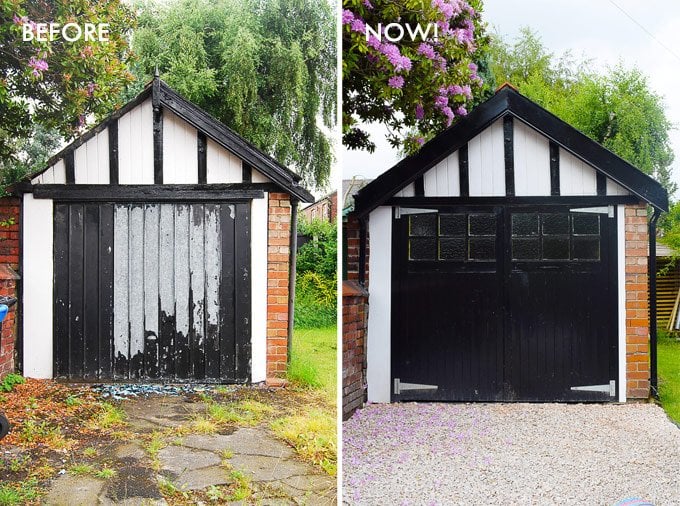
My biggest concern about laying a gravel driveway was that it would end up looking untidy, but so far the gravel hasn’t moved and it’s still really tidy and level.
Do you also find that projects seem to take longer and cost more than to anticipated? Have you ever had a project that turned out to be easier than expected?
SHOP OUR DIY ESSENTIALS


OhioGal says
Great work! We have an old asphalt driveway and want to double the width for a 2 car driveway and turn it into gravel. Did you use any kind of border on the grass side? I worry the grass my creep over time. Thanks!
Christine says
Thanks! Yes, we used a plastic edging strip everywhere where gravel and grass meet. You just push it into the ground and lay the gravel and grass up to it. Worked really well and kept everything looking tidy. Hope that helps!
Cx
Ray says
Excellent job done there. I have been searching for various ideas to fix a 60m section of driveway, by doing just two strips for the vehicle wheels, and have been looking at Gravel Mats as a permeable option.
Christine says
Wow, 60m is a long driveway! Sounds like you have your work cut out but I think gravel mats would work really well and will definitely help keep the gravel where it should be.
Cx
Ermoni Osborne says
Thank you so much for sharing this wonderful idea. I really want to do this to our property. Unfortunately there never was a driveway. My question is do I need to do any other prep If I am starting with grass and dirt other than pulling up the grass and leveling the dirt?
Thanks!
Christine says
Yes, of courses you can lay a driveway if there wasn’t one there before, Ermoni. It’s just always important to make sure that you have a solid base under the gravel. You’ll definitely need to add layers of MOT that you thoroughly compact, too. Ultimately, we removed everything down to the clay soil in our driveway, too – the steps whether you had a driveway there before or not are exactly the same.
Cx
Jonathan says
Really helpful and interesting article, and fantastic transformation! We’re thinking of doing our driveway and so this is great.
One question out of interest, what is the reason for the layer of sand, could the gravel grids not just be set on the sub layer?
Christine says
Thanks for the compliment, Jonathan! The sand is there to level out any lumps and bumps in the sublayer. It’s almost impossible to get it completely flat and you can really easily wiggle the sand around to create a perfect base for the grids to sit on.
Cx
Niki says
Wow, it looks great! I’m going to use this to create a gravel area. Thanks for including the pics. I’m a visual person and they helped. Looks like your backyard is much improved from where it started.
Christine says
Thanks, Niki! We’re super pleased with how it turned out, too!
Cx
Yowe says
Hi Christine & Jan
First of all great work.
I can see you did this project few years back.
What is experience now after some years ? Any regret or thing that should have been done different ?
I m also thinking to do same. After filling gravel in grids, did you press it with weaker or apply some chemical to hold/ join gravel ?
Much thanks
Christine says
Thanks, Yowe! We have since moved but have since walked past a couple of times and the drive looks exactly as it did when we finished. We never had any problems with weeds and the gravel stayed in place really well.
Overall, it was a really easy project to do and we were really happy with the result. We didn’t press the gravel down – the grids fill really easily and there’s just a centimetre or so of gravel on top. The grids do all of the work and hold everything in place really well.
Hope that helps & we’d love to know how you get on!
Cx
John Watton says
In your costing you don’t mention the two skips to take away the tarmac and rubble. That’s going to almost double the cost.
The project involves laying over 250mm depth of new materials, so most people will need to excavate almost 4 cubic metres of the site first and this needs to be included in the project costing.
Christine says
We didn’t include the skip costs because they will vary so much depending on where you live and on how much rubble you’re removing. All situations will vary and the costs listed here are for the actual driveway, not for any prep work. We filled one large skip which cost under £200 (we also removed further tarmac in the rest of the garden which is why we mentioned two in the article).
Hope that helps.
Cx
KELLY says
Hi! Can you tell me if this application was “smooth” enough to push a travel trailer (caravan?) on? I am wanting to park our travel trailer on it and will need to move it around by hand sometimes. I can do that on the street, but not on grass or wood chips. I am thinking this gravel grid surface might work. Thank you!
Christine says
Hi, I think it would work as the grids hold the gravel in place really well and it was easy to push wheelbarrows and bins across.
I’d recommend getting in touch with MatsGrids though just to be sure. They’re really helpful and I’m sure they’ll be able to help you, too!
Cx
Peter Waters says
You gave a total price but did not state the area covered, cost per meter laid even for materials would be useful
Christine says
I shared more details (including the size) in the comments. It’s about 3 x 5 metres.
CX
Keith liewis says
Hi guys, nice work on the driveway. I’m thinking of doing the same as you’ve done but twice the size looking at yours. You’ve given me the inspiration and so I’m going ahead in the summer. Thanks ?
Keith
Christine says
How exciting, Keith! It’s a really easy project to do – even if all of the shovelling is a complete pain! ;)
We’d love to see a picture when you’ve finished.
Good luck!
Cx
niria griego says
have you had any weed sprouts in your driveway?
Christine says
We’ve moved since finishing the driveway so it’s difficult to judge. We walked past the house and driveway a couple of weeks ago and there were no weeds in sight. The weed membrane should keep the weeds away.
Cx
Lee Miles says
Wow looks great guys, i love what you have done to the garden, I still have so much work to focus on in the house before I can even think about what to fo to mine.
I also need to sort out my drive and the shared drive between the house but quotes were between 6.5k and 11k :( i would love to try it myself, but the only worry i have is regarding what to do to the drains on the shared drive.
I was thinking of going with permeable paving as I am not a big fan of Gravel, as it’s what we had at our last place and I was forever hearing a tapping sound while driving, as the stones would wedge in the groves of the tires.
So whats the next project?
Christine says
The garden always seemed to be the last thing on our to do list, too! It’s mad how much landscaping can cost!
Cx
Zozza1 says
Hi Christine, project looks amazing! Are you able to tell me where you got the gravel from? It’s a lovely colour. Thanks
Christine says
Thanks! We ordered the gravel at Decorative Aggregates (http://decorativeaggregates.com/) It’s Dove Grey Limestone Gravel in 14-20mm.
Cx
Charles Van tongeren says
Hi how big is this space please?
Christine says
It’s about 3 x 5 metres.
Cx
Kashif Ayub says
Dear Christine
Nice driveway and nice gravel colour.
Can you please let me know how deep you dig and what was the length and width of this driveway please.
How did you get rid of removal soil?
Sorry for lot of questions just getting excited?
Regards
Kashif
Christine says
Thanks, Kashif. The build up of the driveway is weed membrane, about 150mm of MOT subbase, 30-50mm of grit sand, 40mm gravel grid with gravel + about 10-20mm gravel over the grid.
We dug the existing soil out by hand with a shovel and had it removed in skips.
Hope that helps!
Cx
Kashif says
Thanks for the quick reply Christine
Just wandered how much skip cost you.
By looking at the space and depth £665 is a good amount and I think you saved a lot.
Enjoy
Joseph S says
Have the same sort of project in mind but will use rubble from old brick wall as base together with scalpings. I reckon the scalpings should pack round the rubble and keep it in place. Will then leave for a few weeks and with use i reckon it will pack down (too expensive to hire whacker. Final layer will be limestone gravel to match the rest of the drive. No sand, membrane or plastic grid.
Emma Kings (Renovatem) says
Morning! So pleased I’ve been pointed in the direction of this post- we have a large (ugly) concrete frontage and want to opt for gravel/gravel grids, mainly due to it probably. Ring the cheapest option compared to block paving/tarmac etc. And secondly I think it looks really effective! It’s great to see someone who’s used them and hear how they’ve used them and how they’ve got on.. we’re hoping to overlay straight onto the concrete but keep getting mixed advice on whether this is possible.. Great read and great result :) xx
Christine says
I can totally recommend a gravel driveway, Emma. The grids made the whole project really easy and definitely help keep everything looking good. I’d probably recommend removing the concrete first. I know it’s a load of extra work but the whole benefit of installing gravel is that the water can drain away which obviously wouldn’t be possible if you kept the concrete.
Happy to help if you have any other questions!
Cx
FZN says
Beautiful! A gravel path splitting up halfway up the walk, with one side going towards your front door and the other going towards a wooden shed for gardening tools / home office would have looked amazing as well. Good job on the DIY work!
Christine says
Thank you for the compliments!
Cx
Christine says
Thank you for the compliments! We’re really happy with how it turned out, too.
Cx
Lins @ Boo & Maddie says
As always your dedication to the cause is so incredible, I love your detailed step by step posts because if it was me I would just scatter that gravel over the existing tarmac and hope for the best :) It’s looking really amazing and that before and after of your garden – wow!! Xx
Christine says
Thank you so much, Lins! The garden still needs work, but it’s definitely a huge improvement and we’re really pleased with the progress so far.
Cx
Jessica@CapeofDreams says
Wow! The transformation of your backyard is impressive. It now looks like such a relaxing place to hang out. Gravel driveways are so much better than asphalt as they allow for rainwater absorption and prevent runoff. However, I had never heard of those grids to keep the gravel in place. That is wonderful. I wish that we could do this, but our driveway is so long that I think that it would be cost prohibitive.
Christine says
Thank you, Jessica! Part of the reason that we chose gravel was so that the water could drain away and because of the overall cost. Basically, a gravel driveway worked out cheaper than all other options and we think it looks pretty good, too! :)
Cost on home improvement projects is always such huge issue. It’s amazing how quickly the costs add up and it always seems to cost more than we expect!
Cx
Gemma says
This looks fantastic! We’re actually doing the same thing on our driveway soon! We’re just waiting for our drop curb to be installed (extended) by the council and then we’re going to do the same process. Our driveway will fit 2 cars on plus space for guests and we’re having a slabbed path down the side too. It’s a big job! But I’m hoping once we really get started with it then it can be done in 2 weekends. I’m sick of looking at our drive at the moment which is half dug up, whilst the other half is still being used to put the car on.
Thank you for sharing your process, it’s got me excited about doing ours again and your driveway really does look wonderful, what a big difference! Your garden is looking beautiful too! :)
Gemma x
The British Feather – A UK Home Decor & Lifestyle Blog
Christine says
Thank you, Gemma! It sounds like you’ll really have your work cut out. I’m really glad that we opted for gravel. We had considered paving because we were worried that the gravel would end up everywhere, but the mats really do help everything stay in place and keep it looking clean and tidy. As always the preparation was the bit that took longest to do – actually laying the MOT, grids and gravel was really quick which I loved because of the immediate before and after feeling. Visible progress is always the best way to keep motivated.
Good look with your driveway!
Cx
Arati Devasher says
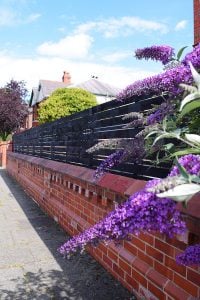
It looks so beautiful, especially with the purple flower petals on it!
Christine says
Thank you, Arati! We’re so pleased with how it turned out. Definitely one of those projects where we ask ourselves why it took us so long to get round to doing it!
Cx