Over the last week or so we’ve been sharing our flooring updates with you. As you’ve probably already guessed, we did a lot more than we initially let on.
Basically, we sanded almost all the floors in our house in one weekend! It was so much work, with a little bit of disaster along the way…
Friday 17/05/2013
14:30 I’m off to pick up the floor sanders that I reserved earlier this week. The sanders aren’t ready and I’m told to come back in about 30 minutes.
15:15 I return to hire shop. The sanders were accidentally hired out to someone else, the next sanders will be ready in about an hour. The hire shop guys are really friendly and helpful, but this isn’t a great start.
16:15 Back again. Sanders are ready at last. The lovely hire shop guys carry the big floor sander to the car for me. Off home – again.
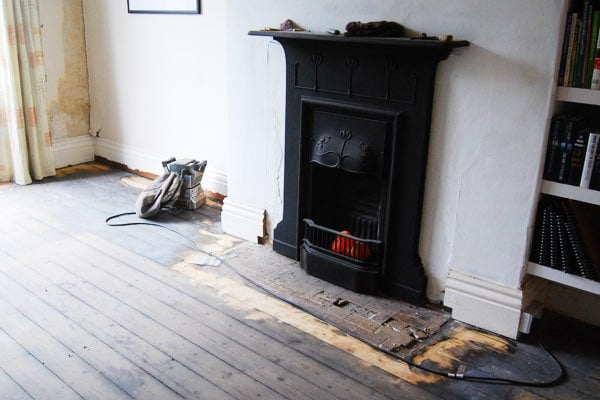
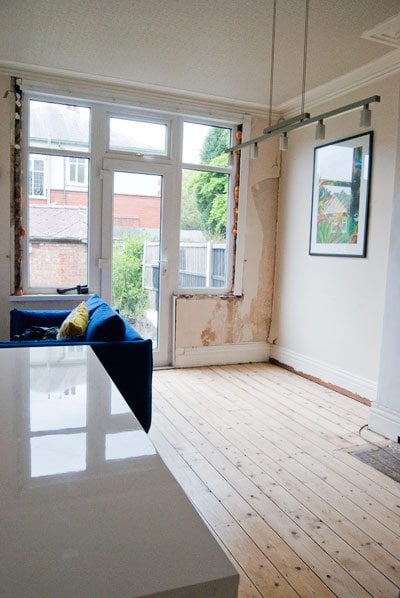
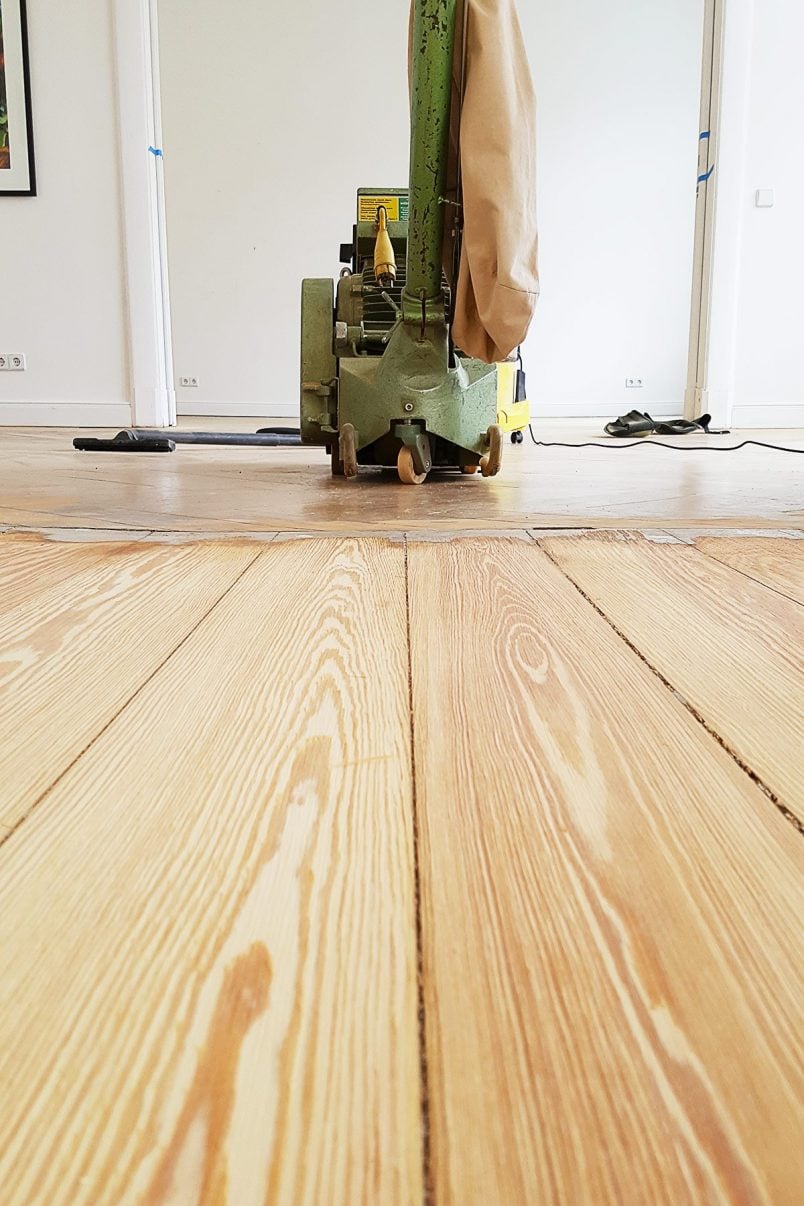
16:30 Can finally start with the sanding. Yay! Decided to start work in the dining room. Am so excited and decide to start sanding the edges with 40 grit paper. Initial results are amazing and it’s so satisfying to see the clean and stain-free floorboard to appear.
16:45 Sanding is much harder work than it looks. So much harder! Starting to get tired already and have only managed to sand about a metre of the room. This is going to be a very long weekend. I plough on.
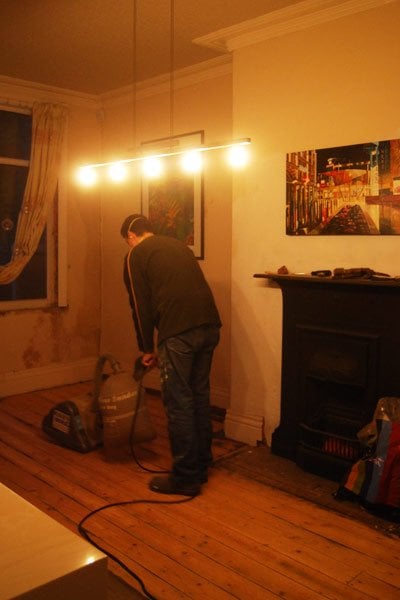
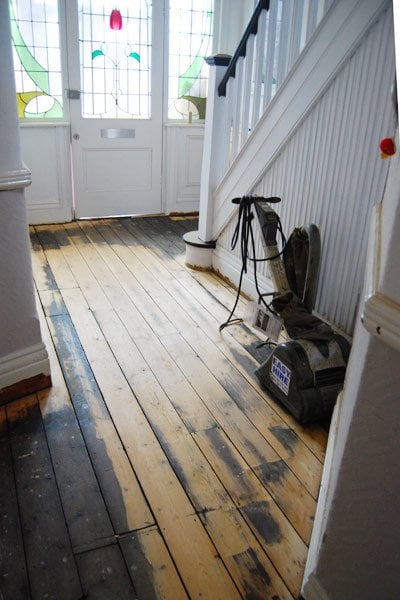
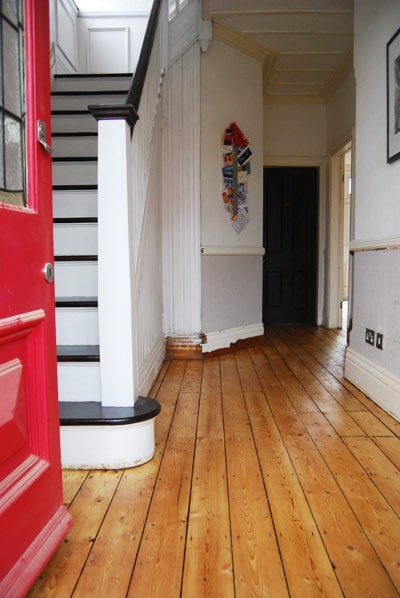
18:30 Jan’s home from work. I’ve been struggling on sanding the dining room with the edging sander and am already aching all over. While I’m sanding the edges in the dining room and hallway, Jan makes a start with the large floor sander in the dining room.
22:00 It’s been a long few hours. My back is aching from bending over and my arms are aching from holding the machine. We’ve managed sand about half of the dining room and the edges of the hallway floor.
22:30 Absolutely knackered. After a bit of tidying, we fall into a deep sleep.
Saturday 18/05/2013
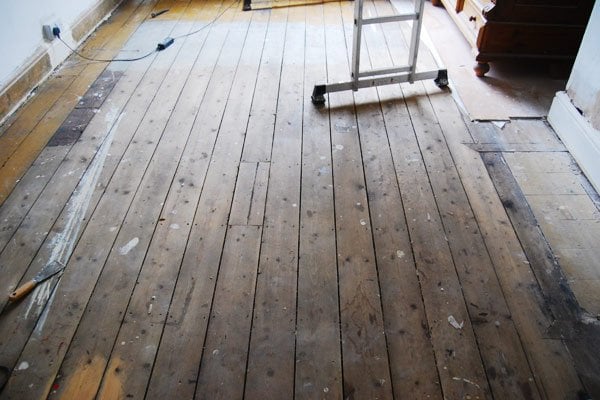
9:00 Back to sanding. We’ve realized that although the floorboards are in a good condition, they need more sanding than we anticipated.
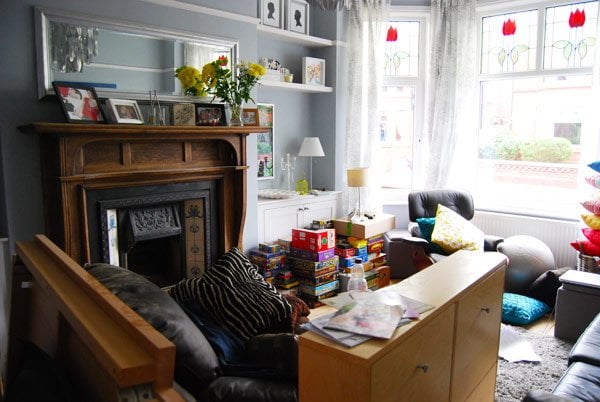
13:00 We decide Fish & Chips would be a perfect lunch, having been working so hard. Pop-out, but the chip shop is on holiday. Ugh. Back home for some sandwiches in our very full living room.
14:15 Back to work. So sick of sanding. My left knee is really sore, as I find myself pressing my left elbow against it to be able to hold and steady the really powerful sander so that I’m not thrown across the room. I obviously have to do more weights at the gym. Jan is still sanding the dining room floor.
15:30 Although the initial sanding results were amazing and strangely satisfying, we quickly learn that sanding away all of the dirt and stain takes a much longer time as the boards are slightly uneven and bowed. Loads of sanding is required to even out the boards and get to every last bit of varnish and stain.
16:30 Almost finished the initial dining room floor sanding. Now all of the dirt and varnish is gone, we can switch to a finer grit sandpaper and sand everything again. The novelty has well and truly worn off.
18:00 We start sanding the dining room again with an even finer grade sandpaper and also finally make a start on sanding the hallway floor. By now we’ve learned to frequently switch the sandpaper. It makes a huge difference and progress is much quicker.
21:00 Finished the downstairs sanding. Off upstairs to make a start on the landing. Really can’t be bothered anymore.
22: 00 Fed up, aching and tired. Go to bed and fall asleep straight away. What a great Saturday night. We really know how to live the high life, don’t we?
Sunday 19/05/2013
8:30 Up early. Treat ourselves to a break at the gym.
12:00 Back to sanding. Aching even more than before, maybe going to the gym wasn’t a good idea. Still, a lot left to do in a day.
15:00 We realise that our neighbours are back from their weekend away. We’d better get a move on as there is still a lot to do and the machines are really noisy. At least we’ve made a start on the guest bedroom.
16:30 The job seems never-ending. We’ve definitely taken on much too much for just a weekend. The second bedroom and hallway have now been sanded for the first time with 24 grit paper and we can finally make a start on sanding everything with the 40 and 60 grit papers.
Our neighbours are amazing and patient, but it is Sunday evening and we’d better get a move on.
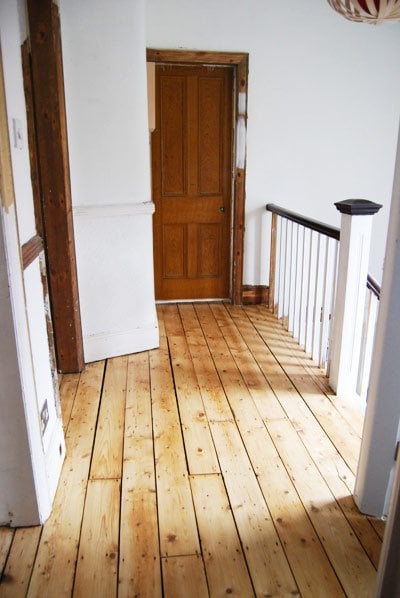
17:00 Almost finished now! All first-floor sanding, including the 120 grit last sand is complete. Yay. I start cleaning up the guest bedroom and hallway while Jan carries the really heavy sander down the stairs.
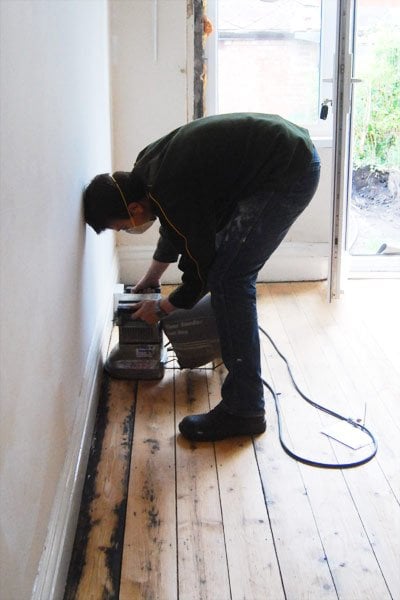
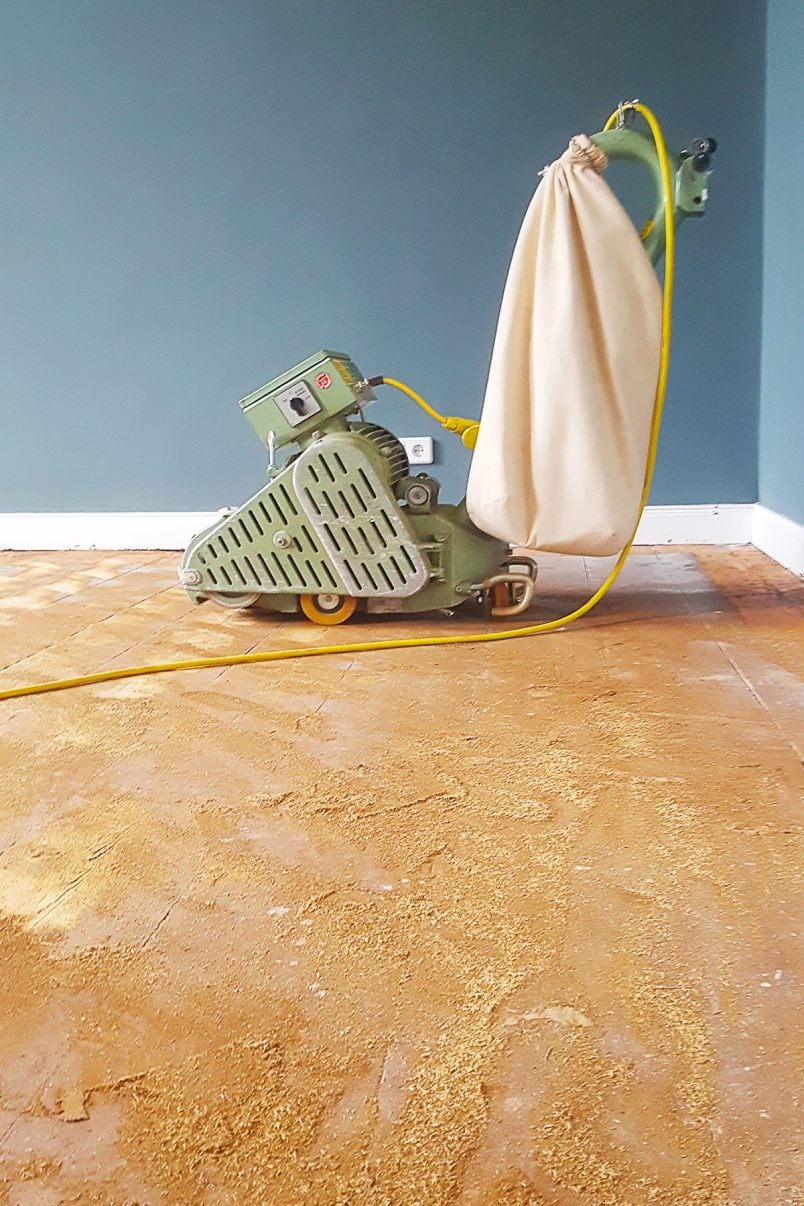
18:00 The very last sand on the ground floor begins. Jan is now using the edging sander and I’m using the big floor sander that Jan just carried down the stairs. It weighs about 40 kg, so three cheers for Jan!
18:10 I plug in the sander to start the final 20 minutes of finishing sanding on the ground floor. The sander doesn’t startup. Slight confusion. I check the socket – all is good. More confusion. I check the cables, but still can’t get the machine to start. Slight panic starts to kick in.
Jan to the rescue – but even he can’t get the machine to work. We have no idea what went wrong but just can’t get the machine to start. It’s so annoying. We’re so close to completion and patting ourselves in the back, but we just can’t finish the job.
19:00 Jan finishes sanding the edges with the edging sander and attempt a final tidy for the evening.
Monday 20/05/2013
7:00 I’m off to the hire shop to return the sanders and confess our little issue. Had been worrying all night that we’d get a huge bill, but the hire shop guys were fantastic and really helpful.
As we hadn’t damaged the machine and it was just a machine fault, we weren’t liable. Relief – this could have ended up being a really expensive job. The guys in the hire shop promise to call as soon as another sander is in.
9:30 I receive the call and pick up another large floor sander to finish the job.
10:00 I’m on my own as Jan is at work. Panic. The sander has to be back by 12, but it’s just way too heavy for me to lift out of the car. Only one of our neighbours seems to be home, so I try my luck to see if he can help. The door opens, he’s still in his pyjama…
10:30 After our lovely neighbour gives me a hand, I can finally start giving the floor a final sand. All is good, not much more to do now.
11:30 Finally finish the job and can return the sander (with a little more help from my neighbour).
12:00 Can, at last, admire our work. Now, all we need is to varnish all floors. This has to be the longest DIY weekend ever…
What we learned (& what no one will tell you):
- Every tutorial you read states that you have to sink each and every nail into the floorboards before beginning to sand. Don’t bother. Of course, you have to make sure there are no nails protruding out of the surface, but we found it fine to just sand over everything. You have to be really careful though. If you have sparks they can cause the sawdust to catch fire and you could also damage the sandpaper or, even worse, the machine! Definitely something to try at your own risk, but it worked for us!
- We had the floors sanded in the living room and our bedroom. It took our sander guy about 2 hours to do the whole room. We figured that it would maybe take us twice as long – and there are two of us and just one of him. We couldn’t have been more wrong. It took so much longer!
- Start by sanding with a really coarse paper, even if you think that your boards are in a good condition and change your paper frequently. We started sanding with 24 grit, when all of the dirt and varnish was gone, we smoothed over everything with 40 grit and then with 60 grit paper and finally with 120 grit paper.
- Make sure you have plenty of space in your bin. We completely filled ours and emptied our vacuum cleaner 13 times!
- Even if you think your floor doesn’t need it, don’t skip the step with the fine sandpaper. It really does make a difference!
- Don’t underestimate the prep work.
- Sanding is so noisy. Don’t even think about attempting it if you have neighbours that are home. We both wore earplugs the whole time and still ended up with a slight buzzing in our ears.
Budget Breakdown
- Weekend hire floor sander and edge sander (Friday 14:00 – Monday 12:00) – £52.50 (special half price offer)
- Large sanding sheets – £69.60
- Small sanding disks for edging sander – £46.80
- Varnish (we still had some left over from our staircase restoration, so only needed one extra can) – £40.00
- Dust Masks – £4.18
Total: £213.08
When we had the floor in the living room sanded (about 2 years ago) we paid £250.00 for the one room, so doing two rooms and two hallways for about the same price definitely makes it a job worth doing yourself.
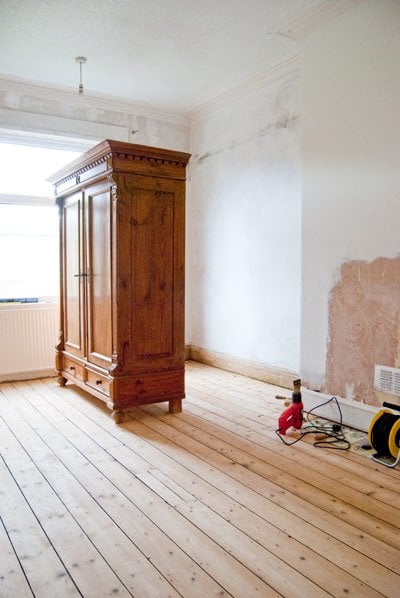
The laminate flooring gave everything a cheap feel and our newly sanded floors are so much more in keeping with the style of the house. We still need to finish off the varnishing and sort the skirting boards, but we’re really happy with the result so far.
That’s what happened on our busiest DIY weekend. What were you up to? Have you ever taken on too much work for a weekend? Have you ever sanded your own floors?
*Having been asked a lot of questions about how to sand wooden floors, we’ve put together a long list answering the most frequently asked questions. You can check it out here: Floorsanding FAQ.*


Jo says
Hello ? this is a very interesting and informative journal of your floor sanding experience. You mentioned that you had your lounge professionally sanded for £250, did his include varnishing/finishing it or just the sanding? And what size is your lounge approximately?
Thank you ?
Christine says
Yes, we paid to have our lounge floor sanded. This included finishing (in our case varnish) and the room was approximately 15m². We’ve shared lots of floor sanding advice over the years and if you search for floor sanding on our blog you’ll find lots of articles. I’d definitely recommend reading this post we wrote about the most common floor sanding questions we get asked, as it will probably cover most of the questions you have but feel free to ask away if you have any more.
Cx
SM says
Hi, thanks for this really helpful guide! We just bought a house where the previous owners appear to have whitewashed the wood floors throughout the house. Upstairs there are original 1930 floors, downstairs there are relatively new wide plank wood floors. Everything is white. We would like to restore all of the floors to their natural color, do you think that sanding will really remove all the paint? I am skeptical because of the seams and cracks, but we have no experience with restoring floors. I have been wondering if we need to use a paint stripper first and then sand? Your thoughts and experience would be very much appreciated!
Christine says
It really depends on what your floorboards are made of. If you have the original floorboards, it shouldn’t be a problem to give them a sand and remove the paint. There’s definitely no need to remove the paint with paint stripper first – the sanding will remove everything! The floors in our current home were covered in a really thick layer of paint and sanding them removed everything! (You can see the floors in our current home here) I’d generally treat the wide plank floors the same but it’s important to know what they are made of! If they are engineered floorboards you may not be able to sand them as the top layer of timber may be too thin to sand.
Basically, I’d research what your floors are made of first and then sand them if you know that they are floorboards that can be sanded.
Hope that makes sense!
Cx
SM says
Thanks for the quick response, very helpful & reassuring to see your new place! I would be very happy if ours turn out that well! Also, very relieved that we don’t have to strip two levels of our house in addition to sanding… I’m just curious though, doesn’t paint get into the spaces and joints between boards? How does this come out from sanding? I assumed that sanding work on the boards, but that any gaps in the wood would end up staying white. Thanks so much for your great site.
Christine says
I know exactly what you mean and it’s difficult to answer without knowing exactly what your floors look like. Having said that, sanding removes a lot the surface area of the timber (a couple of millimetres at least) and usually any bits of paint that have worked their way into any joins will not be too deep and will disappear when sanding. It really depends on exactly what your floors are like though and how big the gaps are between the floorboards.
Hope that makes sense & sorry I can’t be more help!
Cx
mario says
Wow your floors look amazing. Well done to you both. One question? Where did you hire your floor sander from? I would like to sand my floors in my victorian house but a couple of people have told me not do it myself and it’s better to hire some one to do it.
But I can’t really afford to hire someone so i need to do it myself. I spoke to a builder and he said if you hire a machine from a will known hire company, they damage the floors. So any tips what sander you used that would be great… Thanks mario
Christine says
Thank you, Mario! I honestly think that floor sanding is something you can easily do yourself. It’s very hard work but not difficult and our floors looked exactly the same as the floors we paid to have sanded.
We hired our machine at a local company (because they had an offer on) and we’re really happy with it. When we sanded the floors in our current come we used another local company to hire the sanders. Most machines are very similar and I’d be surprised if they damaged the floors no matter where you hire them.
Cx
paul says
Great job. I’ve heard that varnishes turn darken with an orange tinge over time
Is that your experience?
Christine says
We sanded and varnished our floor about 3 years ago and so far it hasn’t turned orange at all although it has darkened a bit. The varnish we used held up really well and we’re still really happy with how it turned out. Having said that, I think I’d be tempted to oil the floor if we every undertook a similar project again.
Cx
Holly says
Hello! We read your blog and sanded three rooms in our new house this weekend! It was everything you said it would be! Knackering, dusty (especially when the dust bag exploded!), but satisfying when finished. We are just about to varnish the floors now and I was wondering if you have any tips for this? Did you do yours with a roller or a brush and do we need anything special for this? When the varnish says to sand before applying the top layer, how did you go about this?
Thank you for any advice you can give and also for such brilliant tips about the sanding process!
Holly
Christine says
Glad we could help, Holly! An exploding dust bag sounds like a nightmare – at least most of the hard work is done now!
For varnishing the floor we just used a large paint brush. You could, of course, use a roller of you want but I personally always prefer the finish you get with a brush. In general, when painting or varnishing wood you should always sand (only lightly with fine sandpaper) between coats of paint/varnish. It removes any air bubbles and imperfections and will result in a much smoother and more professional finish. Having said that, we didn’t bother to sand between coats of varnish on the floor. We figured that it wouldn’t matter if it wasn’t super smooth as it’s “only” the floor and we wouldn’t be feeling it too much ;). Other than that we didn’t use anything special, just make sure that your floor is super clean and completely dust free. You could also wipe the floor with white spirit first to make sure that there’s absolutely no dust left, but we didn’t bother with that either.
Hope that helps & good luck with your floor!
Cx
Holly says
Thank you for your reply and your advice :) Yes, we were feeling so smug and saying ‘this isn’t as dusty as we thought it would be, we can handle this’ and then boom, dust literally everywhere! Okay great, we’ll give it a go with the brush and see how we get on.
All the best with your upcoming move,
Holly
Christine says
Haha, it’s always the way!
Thank you, Holly!
Cx
Holly Lloy says
Hi! So sorry to bother you again.. We are now agonising over which varnish to buy! The aquathane you used has now been discontinued and there are so many other varnishes out there it’s tough to choose one! Do you still rate the no nonsense quick dry varnish you used on your kitchen? Our floorboards are pine so we’re just wanting something non yellowing and clear in colour to enhance the wood.
Thank you so much,
Holly
Christine says
No problem, Holly! I’ve had a look at the Granwax website and the product names seem to have changed. I’ve compared the front of the products on the internet with the one that we have and going by the description it looks like this is the one that we used.
The NoNonsense varnish is still also holding up really well, too. It’s not yellowed and we’re still happy with the finish.
Cx
Holly Lloy says
Thank you for your help Christine. We have bought the no nonsense varnish, seems to have good reviews all round :) All the best,
Holly
Nicola says
Hi there! Thanks for all of the great tips! I’m just about to sand my hallway and dining room but the varnish guidelines I’ve seen say that though it dries pretty quick you can’t walk on it for 24 hours. This just isn’t possible in the hallway so thought about doing it before bed each night. How did you get around this? Thanks ☺
Christine says
That’s exactly what we did – varnished our way through the hallway to the stairs and left it overnight. The varnish we used dried fairly quickly, but it’s always a good idea to let it dry as long as possible before walking on it.
Good luck with your floors!
Cx
Nicola says
Thanks :-)
Deckrevive says
Nice post!! Thanks for sharing these valuable flooring updates. You really did a great job. It’s a superb transformation in the floor. the floor looks amazing after applying proper sanding and looks so fresh. Your work is really appreciable. Well done!!
Christine says
Thanks for the compliments!
Cx
Kris says
Hi, that article and your experience helped me very well. First I wanted to call some floor company for sanding. It was good fella from floorsandingdublin who told me something about sending but I am thankful for your blog. It was the right point to do myself. Thanks. Kris
Christine says
Thank Kris! Glad we could help!
Cx
Jolie Wang says
Thanks for sharing these wonderful tips in how to sand floorboards. It’s really useful for me to apply for my floor.
Jolie Wang says
thanks for great post. I wish I read it before I did resand my floor last week.
Aleks says
Hi guys – love the webpage. We were inspired by your project and have taken on ours! We agree that sanding is not for the faint hearted – it’s exhausting and takes much longer than you think. Our main problem until our wood burning stove is installed is a very cold lounge with draughts through the floor boards :-( Have you tried anything like stop gap? http://stopgaps.com/
Keep up the good work!
Christine says
Aww, thanks Aleks! We completely insulated under our floors for the same reason (you can read about it here). We also blocked the gaps between our skirting and floor (you can read about that here). Basically we’ve done everything that we possibly could to make our home a bit warmer, as we had the same draught issues as you.
Hope you enjoy your home and manage to get your home a bit warmer!
Cx
pablo brown says
Sanding the floorboards is a bugger of a job,but what cheeses me off the most is the dirt on the outside of the boards. The big sander never seems to remove them. I use the tip of the edging sander,but it’s backbreaking (be careful ,as you may sand a grove into the floorboards). A small powerful belt sander can come in handy, for the alcoves and the hard to reach areas. I also used a tool like this http://www.diy.com/departments/diall-stainless-carbon-steel-floor-scraper-w105mm-l340mm-t30mm/287850_BQ.prd for the corners,but the tool I used is more like a plane that you drag back rather than pushed. I’m about to do my house again for third time,there’s only so many rugs a house can have. Has anyone used Oslo wood wax? It’s bleeding expensive,but altho not perfect (it will eventually wear away) it’s better than any varnish I’ve used. If anyone has a better treatment I’m all ears,that ronseal diamond varnish is absolute garbage.
Christine says
Hi Pablo. Thanks for sharing your experiences here on our blog. We also found that the edges of the boards stay dirty for longer, but for us it was just a case of sanding everything completely flat with the belt sander. We’ve not used wax, but are still really happy with the varnish that we used. The living room has been done for four years now and still looks exactly as it did on the day it was first done.
Cx
Nikki davis jones says
Love the floors. Nice work! I am doing mine at the mo. I have done 2 rooms and a hallway on my own and feeling it now! So the edges… I am going to paint my boards white so do I have to go all out with the hand sander round the edges when they will be painted anyway? N
Christine says
Thanks! How much you sand really depends on the finish that’s there at the moment. Really, the more you sand, the better the finish will be, but as long the floor is smooth I think you’ll be okay if it’ not perfectly sanded. You could always have a try in a test area and see how it looks if you’re unsure…
Good luck with the rest of your sanding!
Cx
Kit says
Hi Christine,
When replacing the rotten floorboards, did you use ‘reclaimed’ boards or just new wood?
Really stuck on whether it is worth finding old floorboards or not.
Thanks!
Kit
Christine says
We actually used some floorboards that we took up in another room of the house. I personally would go to the effort to find some reclaimed floorboards, but it’s really up to you!
Cx
Kit says
Thanks for the speedy reply!
That’s a really good idea.
Thanks again,
Kit
Carly Hiller from sandinglondon.co.uk says
This is the most comprehensive floor sanding guide I have seen so far. I really like how you have described every single task from the sanding process and the time it took. Great job, Christine! It took you a lot of time and efforts to restore the look of your floorboards, but the result is astonishing!
Rebecca says
I have to say they look fantastic. I did my floors a couple of weeks ago with my boyfriend and my tip is the man should do the edging (because they have more upper body strength) and the woman do the main sanding. This is the only way my body could handle it.
Also final tip for removing staples being on your hands and knees that whole time – Get a mdf/ply board, buy four castors and attach them and kneel on the board and move yourself along that way, it saves getting up and down all the time. When not sanding the board is under my bed with shoes on it.
Christine says
Great tips! Thanks for sharing them, Rebecca!
I started out doing the edging – the machine just seemed a little less frightening – what a mistake that was, I totally agree that the main belt sander was much easier to handle.
Cx
Becky says
They look great! Did you use a clear varnish or a stain before? I love the colour.
Christine says
Thanks, Becky! We just used clear varnish, the colour is the natural colour of the pine floorboards.
Cx
Fiona says
This post was brilliant and I’m ashamed to admit that I giggled the whole way through! We are also in the process of restoring our floorboards and today is day 5 of a non-stop sanding spree. I sympathise so much – it’s a killer of a job. I can barely move my hands after using the heavy edger for so long. The novelty wore off with us pretty damn quick too – good to know we aren’t the only ones suffering!
Christine says
Glad we’re not the only ones that found it really hard going. Just remember that it’ll be worth it in the end!
Cx
Sara says
Hi Christine!
I am really enjoying reading your website! We live in a 1930’s house and we are going to spent this Easter restoring our floors. We have removed carpets from one of the lounges, entrance hall and all of the upstairs. We have hired a drum sander and the edge sander. We are giving ourselves a week to sand and varnish basically 5 large rooms. Do you think it is achievable? luckily, our neighours aren’t too close to us (so we can work the night shift if needed) but we have 3 children from 4 to 8 years old, so it is going to be fun. I am thinking of using the same varnish you have recomended. Could you please let me know where did you buy it? We are in the Wirral.
If we survive this project (we are not DIY experts, in fact this will be our first), I would love to do our stairs like yours, they are so beautiful!
Best wishes,
Sara
Christine says
Thanks, Sara! It’s a lot of work for a week, but it should be possible. Just remember to frequently change your paper – the whole process is much quicker then. Varnishing is really quick and the varnish we used dried really quickly, too. We managed to purchase our varnish from the guy who sanded our floors in the living room, but we also contacted Granwax directly and they were able to give us some other suppliers. I’d recommend doing the same, they’ll be able to tell you who’s closest to you. If you’d like some more info you can check out our DIY guide to floorsanding here or of course drop us a line… always happy to help if we can!
Good luck!
Cx
Anthony says
Hi, just wondering whether you filled the gaps in your floorboards at all. If not, do you wish you had? Seems like a lot of hassle so I’m keen to avoid this on top of all the sanding…
Thanks
Christine says
We didn’t bother filling the gaps. There are special products available, but we decided that it just wasn’t worth it. We’re glad we didn’t bother with the extra work and still think that it was right not to fill the gaps – we did insulate under our floors though.
Hope that’s some help.
Cx
Anthony says
Thanks for this – very helpful. Could you describe a bit more about insulating under floors? Did you not have to take all the boards up for this?
Christine says
You’re welcome, Anthony! We didn’t have to take the floorboards up, as we have a cellar under half of the house and a crawl space under the other half. If you’d like to read more about how we insulated our floors, you can read about our finished cellar ceiling here (the post has links to other progress posts, too) or how we insulated under our living room floor here.
Hope that’s some help – just let us know if you have any more questions!
Cx
Lisa says
What a great blog!
Have just moved into our 3bed council apartment and everything needs doing!
My partner said not to get laminate for the hallways and part living room, but to sand the floorboards and varnish them. This would be cheaper he said!!
I am 5 months pregnant so after reading this am thinking it may be just a tad too much work….however your end results look amazing. A lot to consider now. Thanks for the write up!
Christine says
Thanks, Lisa! Whilst I’m not a huge fan of laminate, it is a really practical solution. I definitely wouldn’t recommend sanding the floor when you are pregnant – it’s really hard work and soo dusty! We paid to have some of our floors done and it wasn’t actually that expensive, maybe it’s worth getting a few quotes and comparing the cost to the laminate flooring option.
Good luck with your renovation!
Cx
kirsty brierley says
Hi Christine
Many thanks for the reply! I think I am going to start with the flooring! Would you recommend that I do the flooring first then do the gloss work(on the panelling) afterwards?
Your website has definately inspired me to get started!!
Thanks a million!!
Kirst x
Christine says
You’re welcome, Kirsty! I’d recommend doing the floor first as when you go around the edges of the room with the edging sander it will inevitable scratch and dent the skirting boards. Other than that, I’d do any other dirty work first. Good luck with your floor – we’d love to know how you get on!
Cx
Kirsty Brierley says
Hiya.
I really love what you have done with the stairs! Do you have any information on that please?
I am seriously considering it and doing the floors after!!
Kirst x
Christine says
Thanks Kirsty! We did write a few posts on our staircase restoration progress. If you check out our projects page you should find a link there. Other than that, what would you like to know? Always happy to help!
Cx
AM Flooring says
Great read i really enjoyed your honest comments on floor sanding. AM Flooring sand floors everyday and it is true what you say about not punching down all of the nails. The only reason that tutorials say to punch down all of the nails is a) to protect the drum and b) it will giv a better look to the floor, especially if you are filling the gaps/joints in the boards as you will be able to fill the nail head holes. C) if you sand lots of wood off the floor then where the nails are there will be lots of bumps as the metal nail is harder than the wood.
Also make sure that you use a buffer after the belt floor sander as this will leave your wooden floor even smoother
Christine says
Thanks for your tips. We’ll definitely give the buffer a try next time!
Cx
vanessa says
Hi Christine, please could you help me out! We have taken back the carpet in our old Victorian house to reveal some lovely floorboards. They are nice and wide and are in good condition. We don’t want to stain them dark we just want to paint them white. People talk a lot about removing the old black varnish that was used at the time but only when you are going to sand the floors with an industrial sander so that the floorboards come back to the pine light surface and so that you don’t clog up the machine. But what about for those people who don’t want to do this and just want to remove the black varnish. What do you do here? I’ve read that you just scrub with the grain with steel wool and white spirit and then once is dry lightly sand over it by hand. Then its ready to paint with a primer and then x2 coats of the floor paint? Please can you help?
Many thanks
Vanessa
p.s. thanks for much for your help with the fireplaces they came out lovely x
Christine says
As we haven’t painted our floors, I’m not 100% sure what the best solution would be. I guess it all comes down to the condition of your floorboards.
We didn’t bother removing any of the old paint and varnish off our floorboards before sanding – we just started sanding with really coarse sandpaper. I think you’ll probably get the best result by completely sanding your floorboards first, but if they are smooth and the varnish is smooth, too, I think you’ll be fine by just painting over everything. I’d definitely give everything a really good clean and then a quick light sand (so that the paint adheres better) first. Even the best paint job wont cover up any unevenness or damaged boards, so it’s really important to have a good surface to start with.
Hope that’s some help!
Cx
PS. So glad that your fireplaces turned our great! Well done, Vanessa!
vanessa says
Thanks Christine! I will give that a go,,,thank you as always xxx
Christine says
You’re so welcome, Vanessa!
Cx
emma watson says
Hi there, can I ask what kind of varnish you used on the floor boards, I’m researching different finishes at the moment.
Also are you in Salford like myself, your house/street seems familiar. We also have a big Victorian semi which we are restoring.
King regards Emma x
It’s looking great BTW
Christine says
Thanks Emma! We used Granwax Aquathane in Satin (I think it’s also available in Gloss) for most of the floors. When we first moved in, we paid for a professional to do the living room and that’s the stuff that he used. It was done around 3 years ago and still looks great. It only has a very, very slight sheen and doesn’t have the “plastic-y” look that you sometimes see. It was really easy to apply, too. We’d definitely recommend it (although it was quite expensive). In the kitchen we used a different varnish (the Aquathane varnish is only available in 5l canisters) because we only needed a bit. For the kitchen we used No Nonsense Quick-Dry Floor Varnish Satin (which we got at Screwfix). We’d been worried about a noticeable difference between the two varnishes, but it actually looks exactly the same (same smell and texture were the same, too). Jan and I kept joking that it was the same product (which we don’t know and probably isn’t)! Both varnishes worked great, dried quickly and still look good now.
Hope that’s some help!
Cx
Ps. We don’t live in Salford, but we are in Manchester, too.
Karah @ thespacebetweenblog says
Your floors came out so beautifully!! It’s so great to hear the reality of it. I was amazed that it took the one guy about a week to do two rooms and I was also amazed at the noise. We’re looking forward to trying to do our bedrooms on our own. Thanks for the vote of confidence!
caitlin says
Woosh, that’s a lot of work. So worth it. Looks excellent.
Christine says
Thanks so much Caitlin! So glad it’s finished!
Cx
Kelly G. says
Oh my word. That looks miserable on your bodies. But Excellent job on finishing and doing it yourselves! We had to hire our house out, since it had to be complete in 4 days… :/
Christine says
Thanks Kelly! Once we’d hired the sander and set ourselves the task of doing the four rooms, there was no going back. If we had had previous experience sanding floors, I have to admit that I would have been very tempted to hire it out, too. We’d really not expected it to be such hard work! So relieved that it all worked out in the end!
Cx
Magali@TheLittleWhiteHouse says
And I thought I had had a busy weekend… It was nothing compared to you. I removed all the screws that used to hold the drywall on the kitchen and dining-room ceilings… Today I can’t feel my legs (from going up and down the ladder), my arms (from holding the very heavy electric screwdriver) and my neck…
Christine says
It was such a long weekend but the work was definitely worth it! Can’t tell you how happy we are that it’s done now.
Bet you’re so happy to be seeing an improvement in your kitchen and I’m sure all of your work will be worth it in the end!
Cx
Kerryn Hewson says
EPIC! I can’t wait to walk all over those lovely floors! xx
Christine says
I know – it’s such an improvement!
Cx