[Ad – This post is in collaboration with Ryobi and may contain affiliate links]
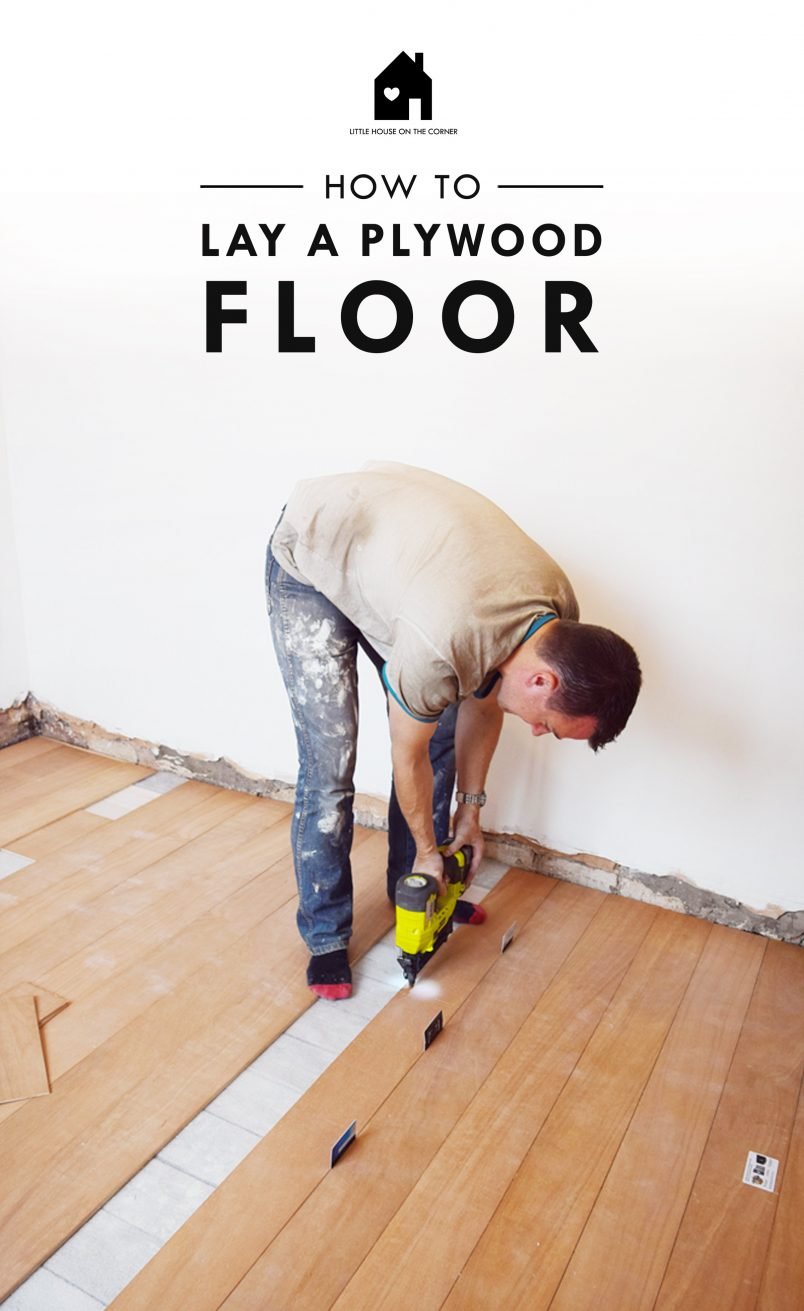
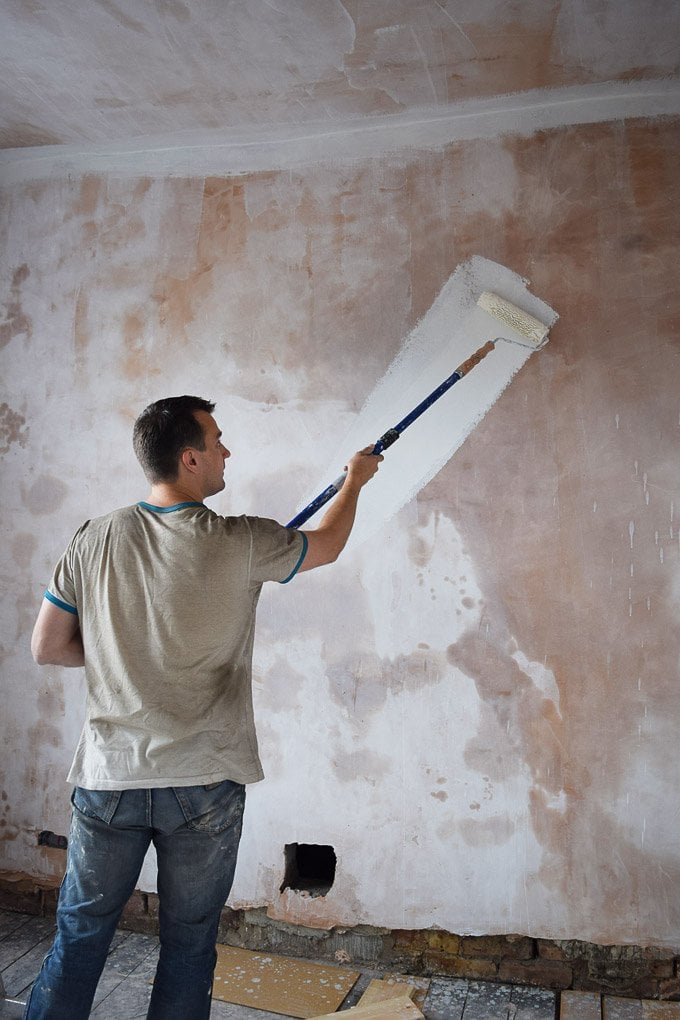
With our guests arriving tomorrow, our small guest bedroom is finally starting to take shape. We already have a new window, our boiler has been moved into the cellar, the walls are plastered and we’ve also just finished laying our new DIY plywood floor!
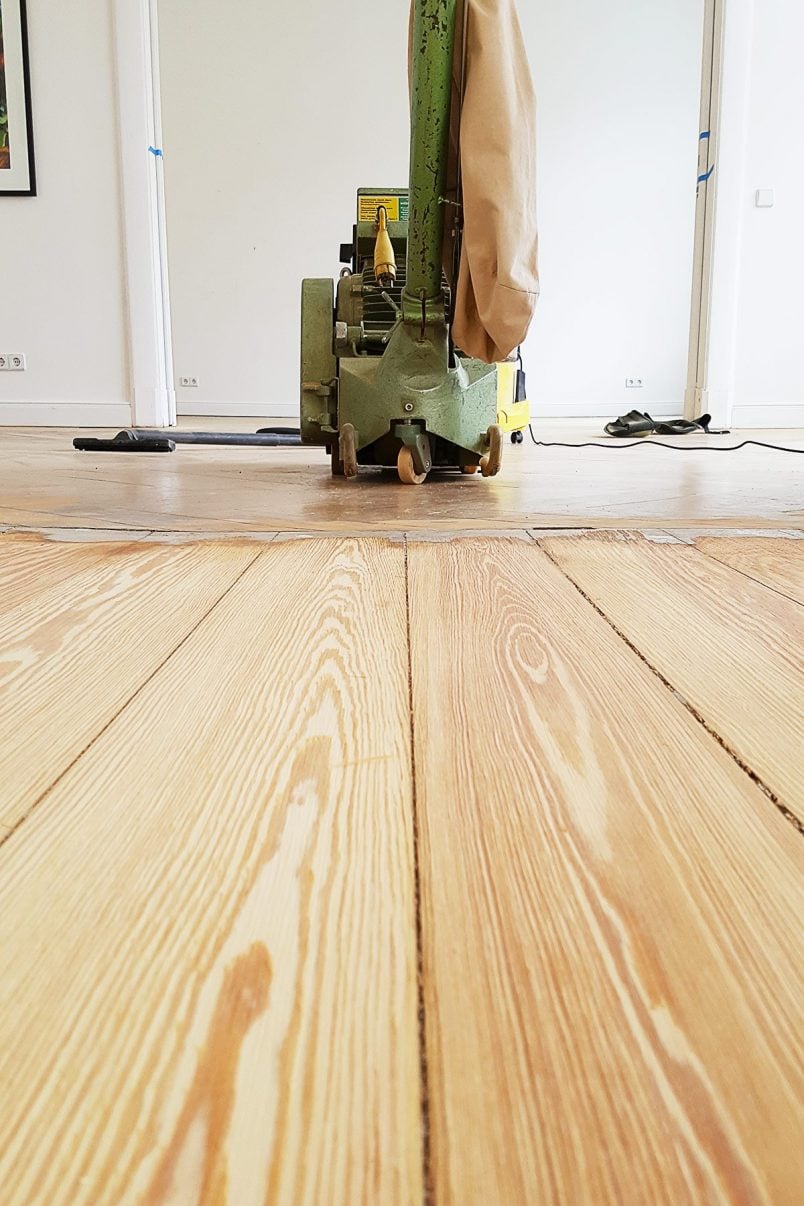
Although we love our sanded and varnished original floorboards which we have almost everywhere in the rest of the house, we already knew that we wouldn’t be able to have them here.
Whilst the condition of the floorboards wasn’t too bad, there were large gaps between them. We also used this room as a kind of resource when replacing other broken floorboards in our home and removed floorboards whenever we needed to replace one somewhere else in the house.
This means that any bits of floor that we repaired or replaced in other rooms matched the rest of the floor perfectly, but it also means that we had to add a new covering in here.
This is what you will need to lay a plywood floor:
This post contains affiliate links. We only recommend products we love and think that you will, too! Read our full disclaimer here.
Tools:
- Mitre saw
- Nailer
- Tape measure
- Spacers (we used old credit cards)
Supplies:

Here’s how to lay a plywood floor:
#1 Calculate
Start by measuring your room and calculating the amount of wood you’ll need. Instead of spending hours cutting huge boards of plywood into strips, we opted to have ours cut to size for us.
Not only does this, of course, save loads of time, it also means that the boards are much more even and straight than we could ever have achieved ourselves.
As our room is so small, we were able to just use full lengths pieces of plywood without having to join them. If you do have to add additional boards, make sure to stagger the joints.
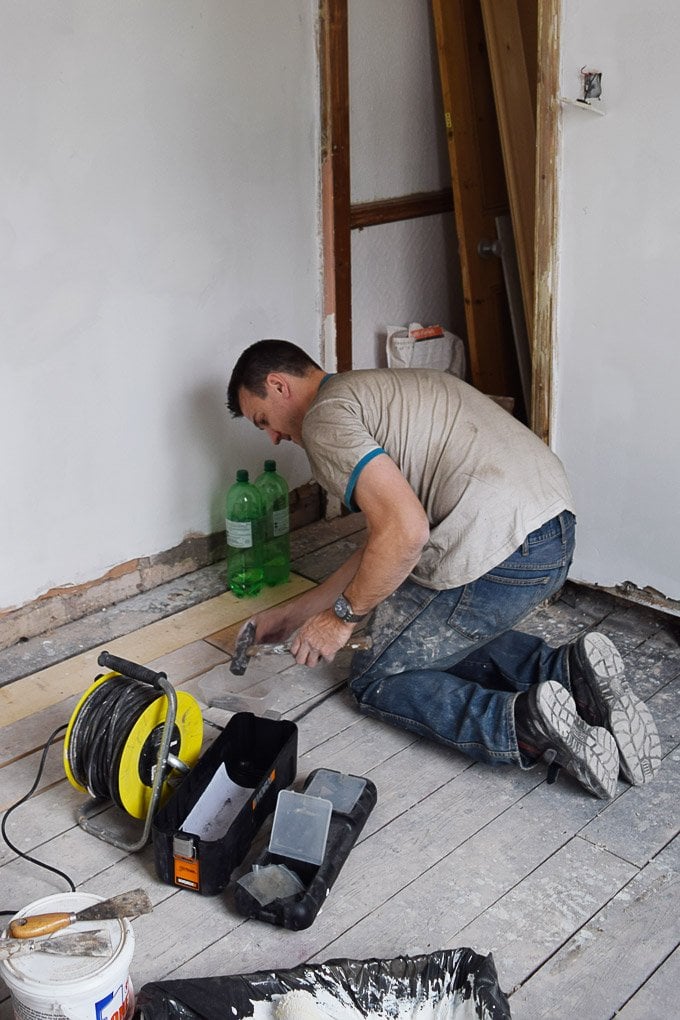
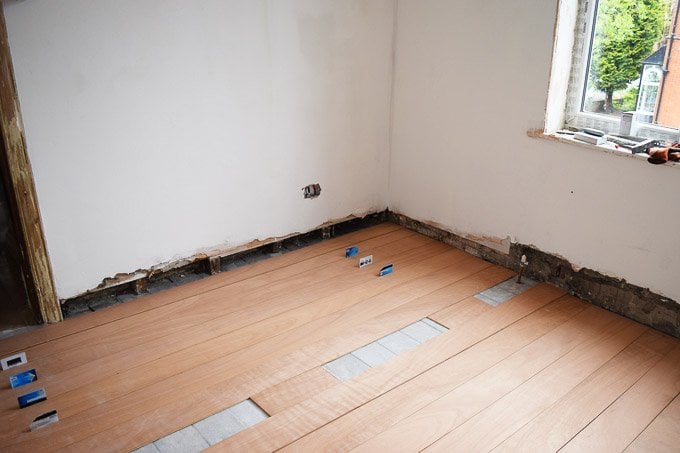
#2 Prepare the room
Remove the existing skirting boards and level out the floor. In addition to making sure that the floor was completely flat and even, we decided that it would be best to put down a thin layer of underlay, too.
It’ll make up for any minor floor imperfections and also help with sound insulation.

#3 Cutting and laying
Cut your boards to the required length, making sure that you leave a small edge around the room for the wood to expand into. Don’t worry about the gap, it’ll be covered by your skirting board later.
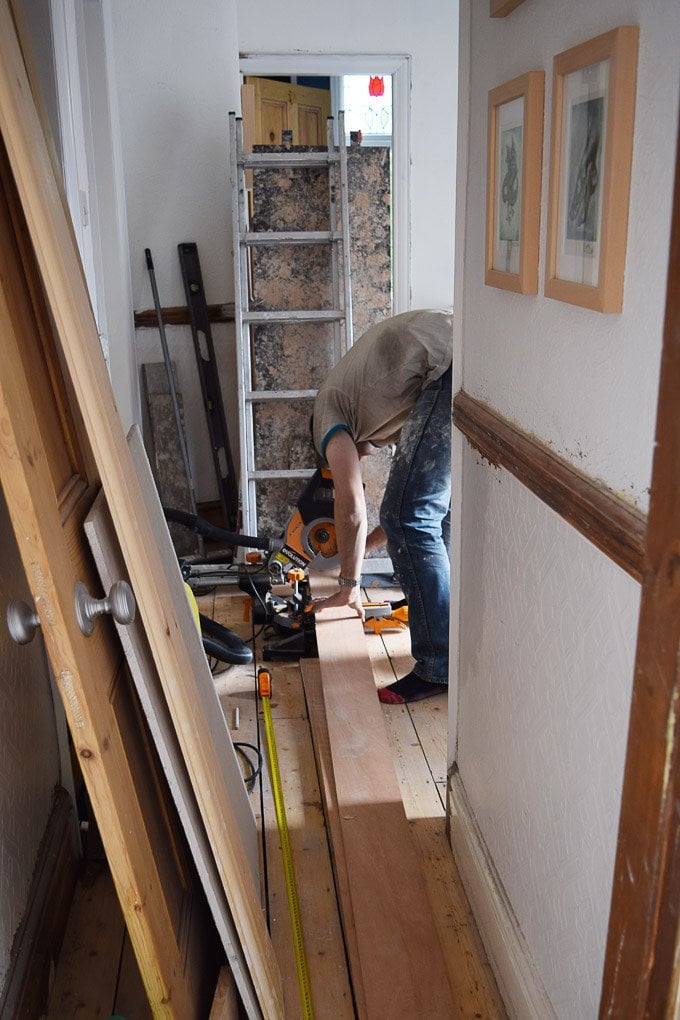
We cut all of our boards with our mitre saw, which made things really quick and easy.
I’d definitely recommend using one (although probably not using one in the mess we were working in), especially if you have to join boards lengthwise, as I’ll give a more exact and tidier cut than you could do by hand. If the edges are rough, give them a quick sand before continuing.
We cut all boards and laid them before actually nailing them to the floor. This way we were able to make sure that were evenly set out and that we wouldn’t be left with a weird thin strip at one end of the room (which you shouldn’t be if you’ve done your calculations correctly!).
#4 Attach the plywood
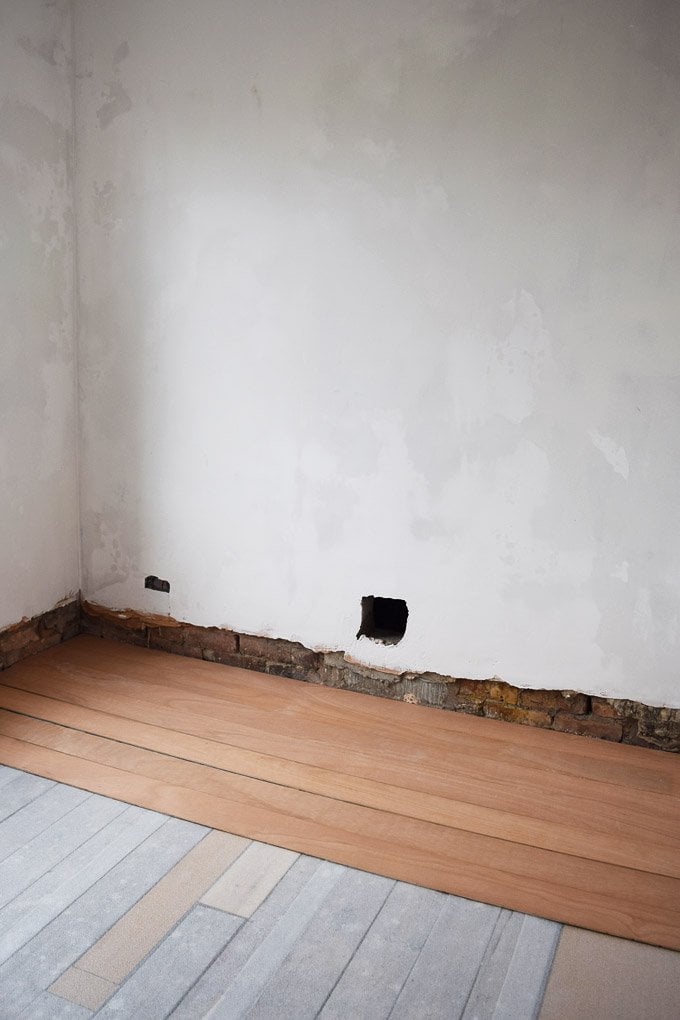
To keep an equal distance between the boards (we still wanted to be able to see that they are planks of wood and not one solid piece of floor) we used some old credit cards as spacers.
You can use whatever you have handy, but we found that they are just the right thickness to have a visible gap that’s not too wide.
Because our full-length planks collided with our heating pipes, we used offcut pieces the same width as the plank as placeholders to keep the same distance.
When we were happy with how the floor was set out, it was time to get out our favourite new power tool – a nailer!
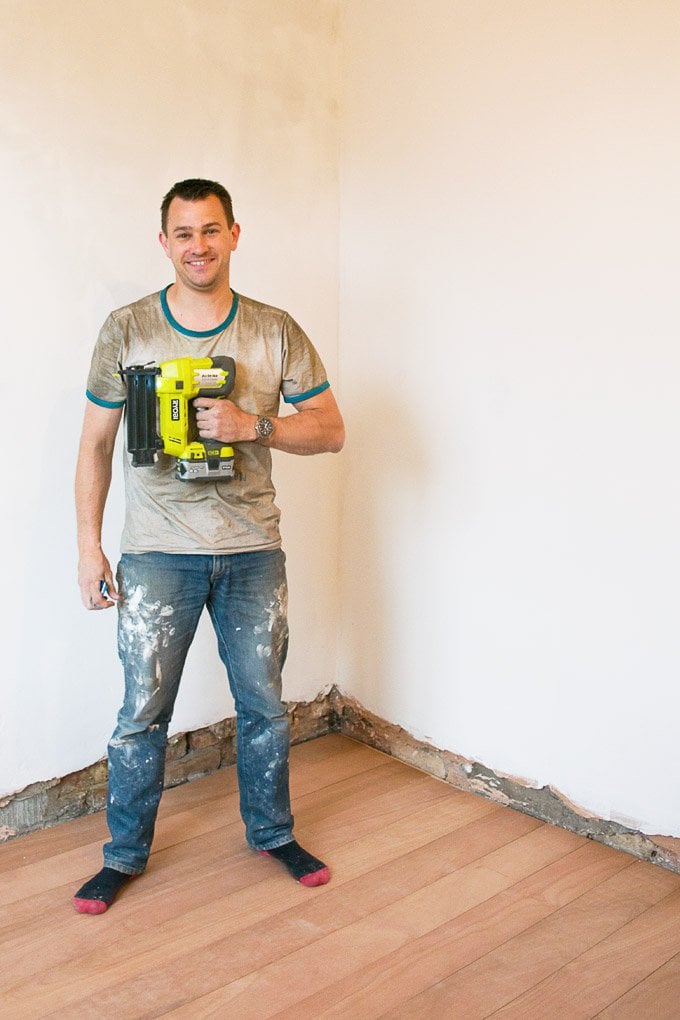
Having a nailer definitely made things so easy and quick. Just watch out for any cables or plumbing underneath!
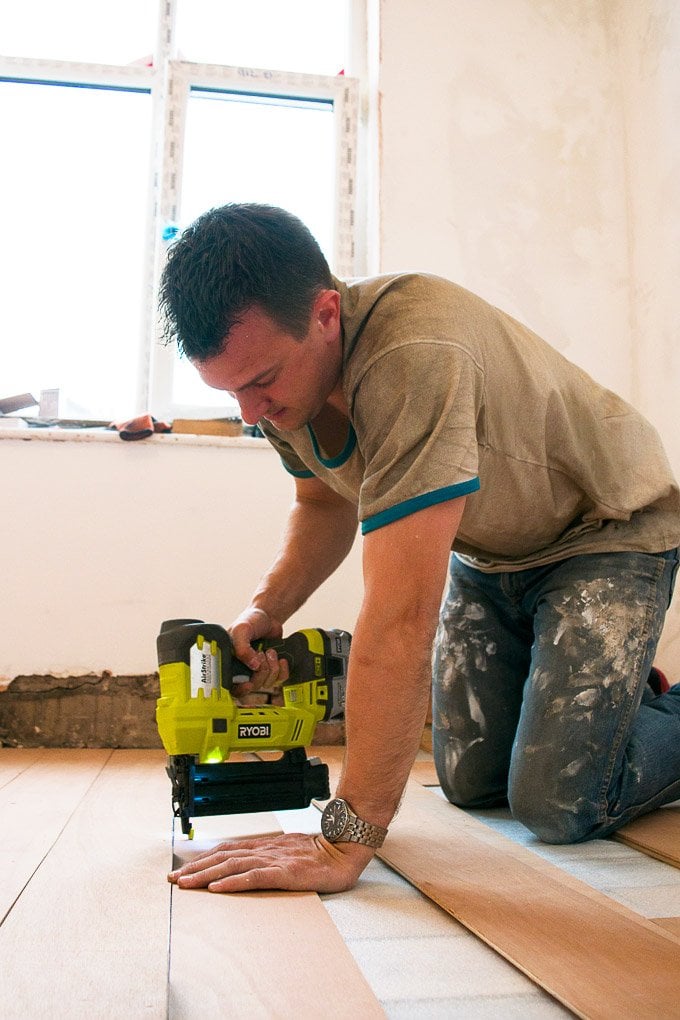
Because we’d already laid out the floor, it was just a matter of holding the plank of plywood in place while Jan worked his way along the length nailing roughly every 50cm.
Double-check the layout of your boards every now and then to make sure that everything is still set out correctly.

Using a nailer also allows you to use tiny nails which become almost invisible when you’ve nailed them into the plywood.
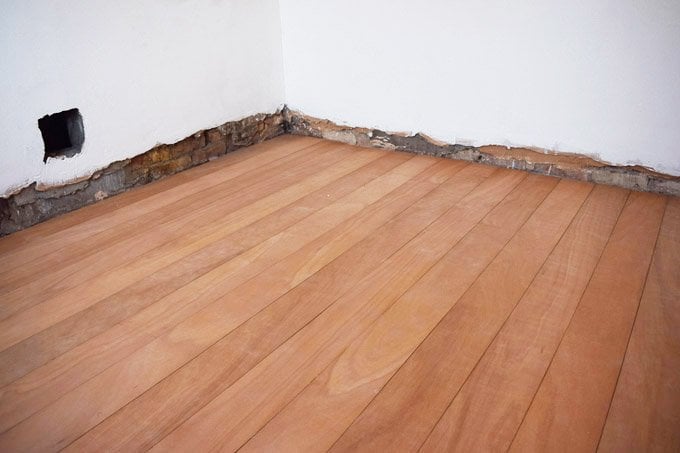
#5 Sanding
The last step depends on the condition of your plywood, you may need to give the floor a quick sand to remove any sharp edges or rough areas. Our floor was smooth so we were lucky and didn’t have to do any sanding.
Altogether the floor took about 4 hours to cut and lay. We obviously still need to attach the skirting, but other than that we’re already pretty happy with the result.
Here are our top 3 tips if you’re thinking of installing a plywood floor.
- If you’re installing a plywood floor on floorboards, make sure to install your new planks of wood at a 90° angle to the existing floorboards.
- Because we’re laying the plywood onto the existing floorboards, we didn’t want anything that was too thick so that we’d create a step. The plywood board we used is only 5mm thick, which means that the difference in height between the hallway floor and bedroom floor is minimal.
- Depending on your room layout and size, we’d recommend starting at the door and working your way through to the back wall. You don’t want to end up with a thin strip of wood where you’ll see it most. In an ideal world, you should probably even start laying the floor from the centre of the room outwards. This way, you’ll end up with equal-sized strips of wood at either end of the room.
- Don’t attempt this without a nail gun. It would take forever to nail it by hand. The nails in the nail gun are also tiny and disappear into the floor which means that you get a much better finish, too.
We’re so close to getting the room completed and I can’t wait to get my paintbrush out. We will, of course, share a cost breakdown of the plywood floor when it’s completely finished.
What kind of flooring do you like most? Do you prefer to have carpet in the bedroom? Do you have any colour suggestions for the floor and room in general?
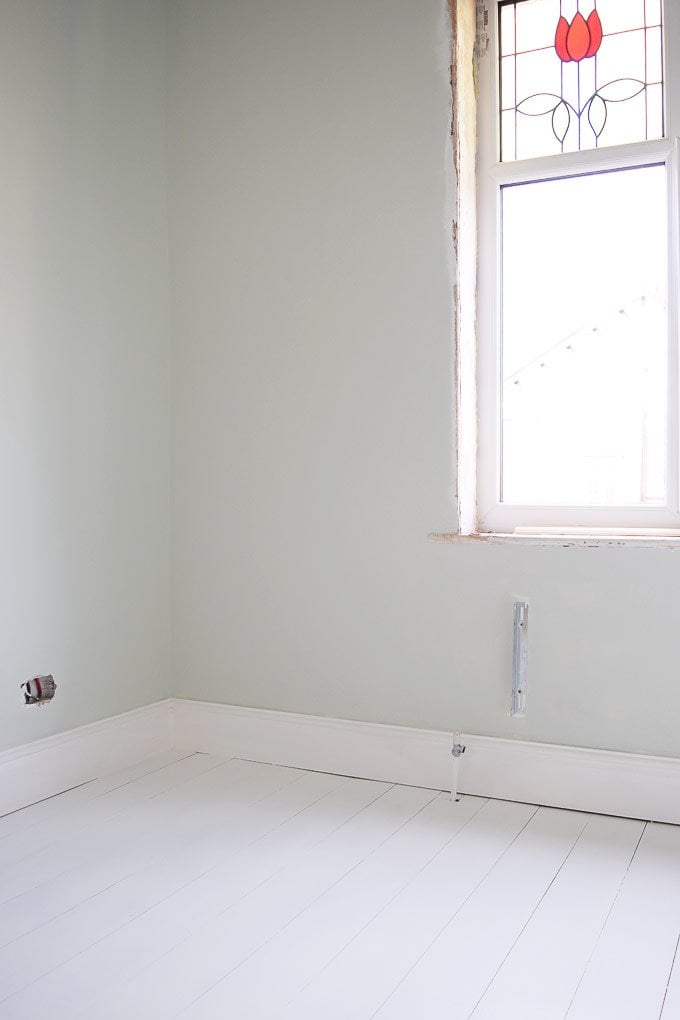
PS. We eventually finished the room! We painted the wood floor and we completely finished painting and decorating the room, too!
SHOP OUR DIY ESSENTIALS
If you like this post, you will love these ones, too!

Eda says
Could you tell me the nail gun gauge and the length of the nails. Thank you
Christine says
We have an 18 gauge nailer. There’s a link in the post to the exact nailer we have in the post (we love it and highly recommend it). The length of the nails will depend on the thickness of the plywood you use. Ours was only a couple of millimetres thick so the nails we used were 30mm long.
Hope that helps but let us know if you have any other questions.
Cx
Alissa says
I am in love with the way you did your flooring! I do have a couple of questions. What plywood did you use? Also, how wide did you have your boards cut? I love the overall look and would like to hopefully replicate it.
Thanks so much!
Christine says
So glad you like the floor, Alissa. We really love how it turned out, too. To avoid ending up with a big step into the room, we used 5mm thick plywood which we attached to the top of the existing floorboards. It was just “normal” plywood and no specific grade or anything treated. Each plank was roughly 16cm wide but the measurements will depend on the size of your room. We didn’t want to end up with a piece of plywood that wouldn’t fit so calculated the exact size so they’d fit perfectly into the room. Just divide the width of the room by the width of the board you want to use and add a couple of millimetres for the gap you’ll need between each board. (Sample: 3.46m / 16cm= 21.625). If you end up with an uneven number just round it down and divide the room width by that number to give you the width of the plank (Sample: 3.46m / 21= 16.6cm). Don’t forget to make it a couple of millimetres thinner for the gap and don’t forget that you’ll also need to leave an edge around the room (that will be covered by the skirting) for the floor to expand into.
Hope that helps!
Cx
Pollyanna Thibodeau says
hi i was wondering if the plywood has to go oppist direction as the floor boards? what would happen if i chose to have them in the same direction? the rest of my house has hardwood floors going in the same direction as the floorboards so if i do this room it would be the only one going oppist.
Christine says
It’s definitely better if the plywood planks go in the opposite direction. Having said that, it shouldn’t be a problem if the run parallel to your floorboards either. Just make sure to stagger the joins so that they don’t coincide with those of the floorboards and to allow for some movement of the floorboards and plywood shrinking and expanding.
Good luck with your floors!
Cx
Shauna Dancer says
Did you acclimate the plywood to the room before you installed it?
Christine says
Not really, Shauna. It may have stood around in our house for a day or so just while we were doing the prep work. We also left small gaps between each board when laying it to allow for any expansion.
Cx
Stela says
Great post, as ever. Sorry if I’ve missed it but how did you re fit skirting boards? We are doing the floors (sanding original floorboards in Victorian house) and removed some skirting boards. We have that bare wall behind and very little to attach boards to.
Many thanks
Christine says
Thank you, Stela! Yes, we fitted skirting boards and we shared how we did it here.
We just nailed it to the wall with our nailer. It’s an expensive tool so I’d only ever recommend buying one if you know you’ll use it. We always hire tools when possible.
Cx
Diana Deiley says
You two do fabulous work. The floor looks awesome. Thank you for the wonderful post with ALL the great tips. Can’t wait to see what you do next.
Christine says
Thank you so much, Diana! We’re really happy with how the floor turned out, too!
Cx
Brian says
Was thinking of doing master bedroom in a plywood floor .
Was thinking of using Baltic birch as is available ,at a decent price .
Have you distressed,or should I say textured
Was wondering
Thanks
Brian
Christine says
I’m not exactly certain what you mean, Brian but I think you’re asking if your plywood was textured. Our plywood was completely smooth. It was a fairly high-quality plywood which is why we didn’t bother to sand it either.
Cx
Kasia says
Hi! I know that you do not live in the house with plywood floor anymore, so you can’t tell how it works after years but while you were there – was it ‘quiet’ floor? I mean was the underlay enough for soundproofing? We have two small kids and planning to lay plywood planks in rooms and corridor upstairs. We have wooden floors under the carpet but in very poor condition and large gaps in-between (probably not enough to have Lego duplo stuck, but with Lego it may be a problem :P). Do you think thicker underlay would be also enough to level out the floor? or should we use ply boards? Or maybe remove existing floor, put floorboards, underlay and then planks?
What do you think? Thank you in advance!
PS. Your new art deco house looks amazing!
Christine says
I wouldn’t say that the plywood floor was particularly quiet – I’d honestly never thought about it too much as it was just the two of us in the house. We put down the thin layer of underlay because that’s what you’d do if you put down a laminate. For us, it was just there to even out the tiniest of bumps in the floor.
It really depends on how uneven your floor is. Whilst the plywood is fairly bendy I’m not sure how well it would hold up if the subfloor isn’t particularly good.
Obviously removing the existing floor would be an option but I assume it would be a lot of work! Having said that, you could just put in nice floorboards and wouldn’t have to plank above it.
I’m not sure how much help I can be but our floor along with loads of others was recently featured on Remodelaholic. There’s pretty much everything you could want to know about plywood floors shared there.
Good luck with your floors!
Cx
Lorene @Remodelaholic says
Hi Christine! I just emailed you about being featured for your plywood floors on Remodelaholic. My emails sometimes get caught in spam filters, so I wanted to leave you a comment as well, as insurance :) Please drop me a line at hello@remodelaholic.com!
kitui4u says
I might have missed the thickness of your plywood, did you use 1/2 or 1/4″, thanks! I will do this project soon. Your work looks SOOOOO cool that I have to do it!!!
Christine says
Glad you like it! The plywood we used was only about 5mm thick as we wanted to keep the threshold between the rooms as small as possible.
We’d love to see your floor when you’ve finished!
Happy DIYing!
Cx
Gerry says
Wait, why does that door leaning against the wall have knobs but no latch? How’s that gonna work?!
Christine says
We can only do one thing at a time, Gerry! We took care of the door at a later date.
Cx
Maria says
What color did u use on the floor. We pick up our cut plywood tomorrow so excited we love your floor. We are putting in our kitchen, dining are and living room. You floors looked natural and I love it
Christine says
We actually shared a post on how we painted the floor (you can read it here). The paint has held up well although I would really recommend waiting as long as possible for the paint to fully cure before you replace any items. We were in a rush and have a few scuffs where the feed of the bed have scratched the floor.
In terms of paint, I don’t think it matters too much which you choose (as long as it’s a good quality floor paint). Don’t skip the primer though – it’ll make a big difference to the durability!
Good luck with your project, Maria!
Cx
Gerry says
I’ve never heard of this underlay before. Thanks for the tip!
Christine says
It’s really good for evening out any small uneven areas. I’d definitely recommend it for under laminate flooring, too.
Cx
carrie says
Terrific blog. Interesting to hear Diane from Blackpool. We are just across the bay at Heysham. We are about to do plywood on concrete. Really useful reading your blog. Thank you. Just wanted to say sorry you don’t feel welcome here. I know I want a diverse country that welcomes people so sorry you don’t feel that. Best of luck to you guys.
Quick question regarding maintenance of your floor. Do you mop it? Or use a steamer. How does that work? And did you ever seal it with floor varnish. If so how did that hold up without showing scratch marks?
Christine says
Thank you, Carrie! The floor held up really well. The paint we used was floor paint so we didn’t varnish or seal again. We mainly mopped the floor which worked fine but it never really got too dirty. Overall the finish has held up really well with almost no scratches or scuffs. The only areas where there are a few marks is where there were heavy pieces of furniure like the bed and sideboard. I think they were also partionally down to the fact that we put the furniture back in the room too soon before giving the paint a chance to fully cure.
Cx
Diane says
Hi again, just an update as we have finished our plywood floor. It was quite a lot of work in the end as it was a large space with hearths, bay window, lots of doors etc, but it was so worth it. It looks absolutely beautiful – I wish I could post a picture. We had intended to go for a white stain but the ply we got was quite light and looked so gorgeous that we ended up using Osmo Polyx Hardwax Oil Raw instead, so it looks completely natural but is protected. Time will tell how it lasts. Thanks so much for your help and advice. Oooooh and we got a £30 nail gun from Screwfix which did a perfect job!
Carrie, yes we are just across the bay. We just spent a week in Milnthorpe while the Oil on the floor cured actually. I was reading about the new road to Heysham – that will be great! Heysham is a beautiful little place. The church there is the one place where myself and my partner both said we’d love to get married. What a location! Best of luck with your project.
PS. Diane was kind enough to share some pictures of her new plywood floor with us! You can see the spectacular result here!
Christine says
I’m so glad to hear that you’re happy with how it turned out, Diane! We’d love to see the result so it would be great if you could send us over a picture (general at littlehouseonthecorner dot com). We’ll try and upload it into your comment so everyone can see your gorgeous new floor, too!
Cx
Diane says
Hi again. Just looking at nail guns for our plywood plank project. Is that the nail gun that you used? It’s nearly £200!!
Christine says
Yes, nail guns are really expensive, Diane. We’ve used it for loads of projects since and it’s one of our favourite tools. If you’re only planning on doing the one project I’d definitely recommend hiring one instead of buying one, though!
Cx
Patrick Sullivan says
I don’t think this floor will last. The material is way too thin and will expand and contract and most likely warp. There is not enough wood in that material for a nail to effectively hold down. If anything the nail will stay there but the wood will work its way out. I’m sorry but because of the thin material you should have used glue and staples.
Christine says
The floor has been down for over a year and a half now and it looks exactly the same as it did on the first day. We left small gaps between the individual planks so that it could expand and there’s been absolutely no warping and none of the nails have worked their way out either. For us, the floor has worked out really well and we’re happy with the result and how well it’s holding up, too.
Cx
Dree says
It doesn’t matter – they’re selling (sold) the house!!
Christine says
You’re right, Dree! Having said that, we wouldn’t want to share anything that didn’t work and we honestly had no problems at all with the floor. I’m actually thinking about doing a similar project again in our new home!
cx
Finn says
Plywood shrinkage is pretty minimal, under most conditions and plywood doesn’t warp. If it’s glued and/or nailed to a subfloor properly, it won’t cup, either, unless it gets very wet. I’m not sure why 5 mm ply planks would lift, either.
Diane says
Hi there, love what you’ve done with the plywood flooring and reading your posts and seeing your photos is taking me back 13 years to when we did up our Edwardian house in Blackpool, which was a complete wreck. We’d have been having such a chin wag down the pub if we’d met! You’ve done a gorgeous job, well done. We’ve decided we’d like to try the plywood flooring in our own lounge and dining room. It all looks pretty straightforward but I’ve got a couple of questions if you don’t mind.
Because we intend to lay the plywood planks on the ground floor (which is drafty in Blackpool!!) we’ll be using underlay. We were looking at engineered wood floor originally but the cost is prohibitive. With that, the insulation would have gone on top of the ply we’ll be using to level the floor (old, uneven, sadly not good enough to sand floorboards) and under the engineered floor, which would “float” on top. I can’t imagine the ply boards sitting well on top of insulation, so we’re thinking, insulation, ply sheets to level, then the ply boards. Do you think that would work? Or ply to level, insulation, ply boards? We’ll be getting the thickest insulation that we can.
Also I notice that you didn’t use glue, whereas other projects online did. I’d rather not use glue. I guess you don’t really need to? I’m slightly worried about the ply boards wanting to shift/crack without glue?
I know this post is from a long time ago, but if you get chance to reply, I’d be really grateful.
Christine says
Thank you, Diane! It’s always nice to know that other people have gone through the same house renovation process and have managed to come out the other side! ;)
We’re still really happy with our plywood floor and it’s holding up really well. Our floor was luckily fairly even, so we just laid a thin layer of underlay underneath. I think you could use some additional plywood to level out the floor first but I’d recommend calculating the build up first as you may end up with a bit of a step into the room.
In regards to the insulation, it should really sit underneath the floorboards (on the cold side of the room and not on the warm side as it could cause damp issues). If you don’t have a crawl space underneath your floor I’d honestly consider taking up the floorboards and insulating from underneath. I know that it sounds like a huge amount of work (and it probably is) but I think it would be the better solution.
We didn’t use glue and there is no cracking and the boards haven’t moved at all. We made sure to leave a very small gap between the boards as the wood will inevitably expand and shrink with the temperatures.
Hope that helps & good luck with your floor!
Cx
Diane says
Thanks so much for taking the time to reply. Yes, insulating under the floorboards is what we would rather do, but this would mean taking up 40 sq metres of floorboards with a 3 year old, so not an option! Oh for a cellar!! We intend to use the insulated underlay that you use when laying a wood or engineered wood floor over floorboards/ply, which is both slim and includes anti damp measures, so I think we’ll be OK. As to which to lay first, I guess we’ll wait until the underlay arrives and see what we think…
I see that you’re off to pastures new. I wanted to wish you both all the very best on your new adventure. Having spent most of my adult life working abroad (19 countries in total!), I am very, very excited for you. Berlin is supposed to be an amazing and very vibrant city and I’m sure you’ll have a blast. We never thought we’d be living back in our Edwardian house, but life can take a strange turn of events, so if you can, I’d recommend keeping your gorgeous house and rent it out (this turned out to be no hassle at all for us), as you never know, one day you may end up back there.
Happy and safe travels and I look forward to reading all about it. I believe that many flats in Berlin have very beautiful parquet flooring, so need for ply there! Take care
Christine says
I totally understand why you wouldn’t want to take up the floorboards – it would be a huge amount of work (even without a toddler in the house!). In regards to the possible damp I mentioned, I wasn’t referring to anything from the ground but rather to a constructional/building physics type damp. Where warm and cold air meet condensation can build so you ideally want any moisture to form on the outside of the construction and not between layers (it could form between the insulation and the floorboards in your case) on the inside if that makes sense.
Thank you so much for your wishes. We’re excited about starting a new adventure, too! We’re already in the process of selling our house and definitely will never be returning back to the UK (other than on holiday to visit friends of course). We’re only leaving because of the Brexit situation (we both don’t have English passports) and whilst we have loved living here no longer feel like it’s a country where we feel welcome. It’s a bit sad that our time here has come to an abrupt end, but we’re now looking ahead to the future.
Cx
Diane says
Oh no, how very sad. I don’t blame you. I’m British but the Brexit result has made me want to leave too. Very best wishes for your future x
Christine says
Thank you, Diane!
Cx
Clivey says
The floor looks absolutely amazing. I was just wondering what type of plywood you used? The coloring looks beautiful.
Thanks.
Christine says
Thank you, Clivey. We loved the colour, too (and were tempted to leave it natural). We went to a local joinery and had the strips cut for us, so I’m not sure exactly what kind of plywood they used.
Sorry we can’t be more help.
Cx
Victoria says
What length brad nail did you use?
Christine says
We used 20 mm nails, Victoria.
Cx
Kelley says
Thank you! We are going to be laying ours on concrete! Does this mean our plywood will have to be thicker than 5mm?
Sorry if I missed it, but how did you lay down the 5mm plywood? With nails? Or did you literally just leave it there without anything to attach it to existing floorboard?
What exact barrier thickness did you get?
What grit did you use to sand?
Sorry if you already answered these in your posts!
Christine says
I don’t see why the plywood would have to be thicker if you are laying it onto concrete. We opted for the thinnest we could find because we didn’t want to end up with a step into the room, but you can choose the thickness to suit your needs. We laid our plywood floor onto our existing wooden floorboards and nailed them down, they have to be fixed to the floor because they would move otherwise. Because we installed our floor onto an existing timber floor we didn’t install a vapour barrier.
I’m not exactly sure how you would attach plywood to the concrete (I don’t think that glueing it would work) and it will be really important to consider the moisture content of your subfloor which will probably need sealing first.
Sorry, we can’t be more help, Kelley. Good luck with your floors.
Cx
Jan Block says
I saw another article written on putting plywood planks as a floor onto cement. They said they used some kind of Bruce flooring glue made to glue wood right to cement. So apparently it can be glued.
Wayne says
To nail on concrete you’ll need to glue down 3/4″ nailing strips (about 2 or 3 inches wide using construction adhesive. Space them about 6 to 8 inches apart. Then simply nail you flooring to the stips.
Christine says
Thanks for sharing, Wayne!
Cx
Finn says
Wayne, I don’t think nailing strips every 6-8″ would provide enough support for 5 mm plywood planks.
Stu says
Hello if you are laying any type of flooring over concrete you need to let the concrete breathe.
Use a dimple type plastic role, then plywood sub-floor like an OSB product, then the flooring. It would also be a good idea to put an insulating layer between the dimpled plastic barrier and the OSB plywood sub-floor, like a high density polystyrene
Here’s a link to the dimple role :
kelley says
Hi, we are thinking about laying plywood as flooring in our bedrooms. My husband is concerned about the small gaps between each piece of wood. Is this of concern? Does debris get in those small gaps?
Christine says
We love our plywood floor and it’s held up really well. We purposely left small gaps because of the wood expanding and shrinking in different temperatures and we didn’t want to end up with a floor that squeaked when boards rubbed agains each other. The gaps we left are really small (only the thickness of a credit card) so we’ve not had any problems with dirt getting in them (that’s not to say that there isn’t possibly some dust and dirt there, it’s just not noticeable).
Hope that helps. Good luck with your floor!
Cx
Halle says
How is the floor standing up? Any warping? Gaps increasing? Problems at all?
Christine says
The floor still looks great and looks exactly the same as it did when we first laid it. We’ve not had any problems at all.
Cx
caitlin says
This looks great! I know that some people like to have nice soft fluffy carpet underfoot in the bedroom but I’ve had way too many sick kids, dog accidents and spilt tea up in the bedrooms to have that be anything but a regrettable choice. The painted floor looks lovely here.
You mention that the floors you put down are the same thickness (or close enough) to match your existing floors. I’m wondering if you still opted to put in any kind of threshold or did you lay right up against the existing floor at the doorway and is that running in the other direction? I’d love to see a photo of that detail. As always, well done :)
p.s. the idea of stealing floorboards from one room for another had me chuckling.
Christine says
Thanks Caitlin! I do love a fluffy carpet, but I totally admit that I’m just too lazy to keep it dust free (especially in our house). The original floorboards that were damaged or missing are the ones that we replaced with ones that were the same thickness. The plywood floor is only 5mm thick and is placed at a 90° angle to the actual floorboards. Because the plywood is so thin, there’s almost no threshold.
I’ll share some more details about how we did it when I finally get round to sharing the painting process!
Cx
Lins @Boo & Maddie says
It looks fantastic, honestly the two of you could easily turn your skills into his ‘n’ her handy team!
We had a laminate/wood mix laid in our office room last year and I really love the finish of it, I hate laminate as a general rule but it seems to have come a long way from the early stuff which sounded like plastic as soon as you walked on it. We’ve got two bedrooms on the first floor, one of which will be a guest room at some point and the other as a kind of multi-purpose room and I think I’ll probably end up putting the same flooring in it’s that nice. Still undecided for our bedroom though! x
Christine says
Aww, thanks Lins! I’ve not looked at laminate for a while as I never really liked it – maybe it’s worth revisiting…
Cx
Stuard says
Thank you for this post. The detailed step-by-step guide is very useful. I agree that if the quality of the wood is high and the floor is smooth the sanding could be skipped but I thought it is necessary to polish the floor. I am right or you can leave it as it is once the floor is fitted? Thanks in advance.