This post contains affiliate links. We only recommend products we love and think that you will, too! Read our full disclaimer here.
Is it just me, or is it getting colder? After this ridiculously wet summer, it already seems to be autumn. About time we start to sort out some of the remaining insulation and heating issues our house still has.
We have already insulated under our most of our ground floor (you can read about that here),
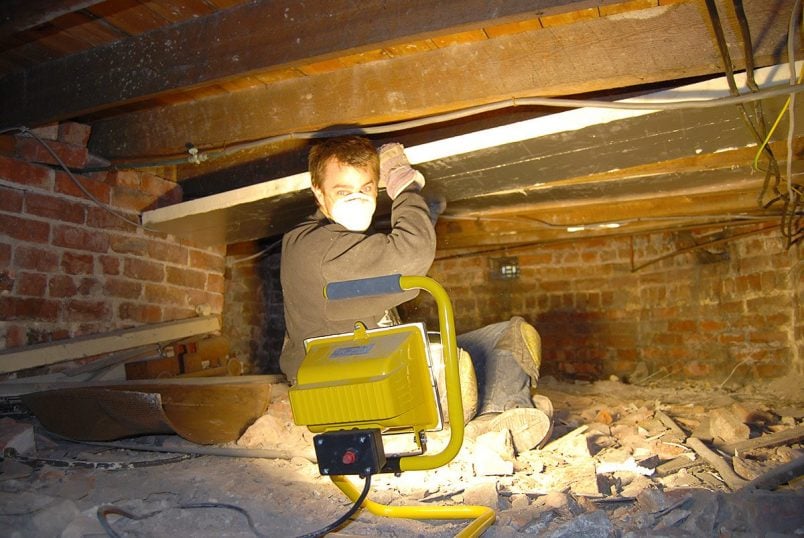
we’ve added extra insulation in the loft, replaced some windows and sealed the gaps around the remaining existing windows.

We have also replaced the living room fireplace.

You can read about our new fireplace here.
One of the main areas still in need of an upgrade is the gap between the skirting and floorboards. Although this isn’t the most exciting work ever, it actually pays for itself within about a year.
As you already know, we removed most of our carpets even before moving in.

You can read more about how disgusting they were here. Although this really didn’t do much for our heating bills – if you add up all the gaps between the skirting and floor, the area adds up to about the area of a small window – it was really necessary.
Initially, we tried caulking the gaps between the skirting and floorboards, but it turned out to be rather messy, as the gaps were all different sizes, sometimes they were too large and the caulk would fall through to the cellar beneath. Caulk also doesn’t tolerate much movement, so that over time it would rip and get dirty.
After having our floors sanded and varnished, we didn’t want to risk messing them up again with caulk, so we decided to use some window sealing tape to fill the gaps.
The tape we used is called weatherstrip and seals gaps from 2-8 mm. Make sure the tape is at least as thick as the gap you are looking to fill, as it will automatically expand to the thickness of the joint once it is in place.

Get the tape that we used!

We opted for black tape so that it wouldn’t be visible once in the gap.
It takes just minutes to complete a room, as all you have to do it push it into place with a stripping knife. The tape then automatically expands to the thickness of the space and, because the tape has expanded, it stays firmly in place.

We should probably point out, that there are specialist tapes available for this job, but we found that this cheaper option works really well.
According to the Energy Saving Trust, filling the gap between skirting and floorboards will save around £20 a year in heating costs.
And here is the filled gap.

You can just about make out the tape. It’s pretty much invisible unless you lie on the floor and stare at the skirting board that is!
SHOP OUR DIY ESSENTIALS
If you like this project, you will love these ones, too!


Hollie says
Hi
We are about to sand our victorian floorboards and this is a super helpful find! Quick question, did you use this method to fill any gaps between your floorboards too?
Thanks
Hollie
Christine says
We didn’t bother to seal the gaps between the floorboards and I’m not sure I’d recommend this method. We insulated under the floorboards and the gaps weren’t big enough to justify filling them. There are special strips you can get to fill the gap between floorboards if that’s something you want to do though. We’ve personally not tried them, though.
Hope that helps and good luck with your floorboards!
Cx
Alice says
Such a simple idea to fill those gaps! I just don’t like the look of the gaps – had not thought about the impact on insulation! I see the strip you used also comes in white. Was there a reason you thought the black would be less visible than the white? Our skirting boards are white too so I thought this would blend in better rather than maintaining the visible gap…?
Christine says
You will almost always have a tiny gap between the skirting board and floor, even in a new building. The shadow will always make it appear dark so the dark tape blends in and becomes invisible. If you use white tape, it’ll be more visible (and I could imagine that it becomes dirty over time, too.
Hope that makes sense!
Cx
J says
helpful suggestions. Although the question was asked some years ago, the person with mice coming in could use wire wool, it’s very cheap and very effective.
Christine says
Thanks for the tip! Hopefully, it’ll help someone reading this.
Cx
Ems says
That is such a good idea. Thank you. Would it be cheeky to ask if an;y one knows of a reliable company that could sand and refinish my wooden floor? I did it myself years ago but now feel I’m past the age when I want to do it again. I live in the West Midlands area.
Christine says
I’m afraid that I don’t know anyone that I could recommend in the Midlands. Hopefully, someone else reading this may be able to though!
Cx
Ems says
Thank you Christine. I hope so too.
Christine says
Hi! Just came in via Pinterest.
I like this idea for smaller gaps. Thank you.
I’ve actually used the plastic foam tubes for pipe insulation around my windows, etc. I should say I haven’t installed trim or molding yet, so I can really cram the bigger pieces into these larger holes. Some tubes I cut in half, but as you said early on, anything is better than caulk!
Great thinking. :)
Christine says
There are similar strips available for skirting boards they were just a lot more expensive and this worked really well for us!
Just to let you know, there are also strips available for windows which are super high expanding and fill every last gap and is the best way to fill gaps around your windows that’s available and it’s treated against mould and fungi. (it’s like this. Oh, and it’s probably worth checking regulations where you live in regards to how you have to insulate, too.
I love caulk for so many things but it’s just really not suitable for anything that moves a lot and it definitely has no insulating properties either.
Good luck with your windows!
Cx
Stela says
Hi,
We have big-ish gap between skirting and the wall (Victorian house) after we removed skirting to sand them and do the floorboards. What do you suggest we use. Gap is about 1in but it varies.
Many thanks
Christine says
Rather than trying to fill the gap, I’d recommend fitting the skirting lower (as if it was new skirting on a new floor). This will probably mean that you end up with a gap on your plaster over the skirting but I think it would be easier to fill.
Alternatively, you could try to fit strips of wood in the gap or cover the gap with beading but given that you’ve gone to so much effort to sand your floor and skirting it would be a bit of a shame.
Cx
Jeannie says
Hi, amazing Idea! Do you know if it can then be painted to match the skirting (so you don’t even know it’s there)?
Christine says
By not painting it you won’t know that it’s there. Basically, it’ll disappear because it’s darker and will just look like a shadow. I definitely wouldn’t recommend painting it. Hope that makes sense!
Cx
RGD says
Thanks for this – very helpful! Will it keep bugs out too?? Thanks!
Christine says
It’ll probably help but I don’t think that it would work long term for keeping bugs away.
Cx
Chris says
Hi, great idea! I’m in the same situation.
I wondered about using a product like this instead?
Will not insulate massively but could offer a more sealed finish. Perhaps a combo of insulation tape first then this second. Not sure how flexible it is either but imagine it must be somewhat flexible to be usable on wood.
Possibly a mix of sawdust & pva would also work well. This mix of pva/sawdust is used for filling gaps between floorboards when sanding original wooden floors.
Christine says
I honestly don’t think that any kind of filler would work, Chris. There will just be too much movement in the floor and skirting even for a flexible filler and I think it’ll end up falling out of the join. I assume that your floor probably also isn’t completely level (if you have floorboards it’s pretty much impossible for it to be level) so filling the gap would also mean that you end up with an uneven edge where the floorboards are at slightly different levels.
Really, you want a small gap between the floor and skirting. The gap will not only tolerate the movement, it’ll also make everything look level and clean.
Hope that makes sense!
Cx
William says
Hi do you have the sticky side facing you when you push it in?
Thanks
William
Christine says
The sticky side should be facing to the back or down so that you don’t see it. You don’t actually have to stick it in place – it should automatically expand to the size of the gap.
Cx
Harj says
Hello, a lot of this language is new to me, and I’m sure someone has already answered the question I have, but will ask anyway and hopefully someone can help. I moved into my beautiful ground floor condo that has hardwood floors through out. Some areas, the baseboard does not sit flush with the floor and there are gaps, AND, I’m noticing ants, not small ones, but big ones… After doing some “google research” I see gaps are a common occurrence, even expected with hardwood floors and baseboards. I would like to fill them in and seems the tape you used is the best route (would like to avoid caulking), or even shoe moulding is a good route? Thank you
Christine says
I would definitely try to avoid caulking as it will end up looking messy after just a short time. The tape we used was to block air and avoid draughts, but I don’t think it would stop ants coming through. That’s probably a separate problem that you’ll have to solve first.
Cx
Raj PAtel says
Hi,
I am getting ted todd engineered wood floor done in my new build house. To get clean look, fitters have taken off skirtings through out and have reinstalled it (they reckon it can be reused but needs redecoration). After skirtings have been fitted, there are uneven gaps of about 2-3 mm at some places and it isnt looking very clean.
I am asking fitters to take the skirtings out and fit brand new finished skirtings. Fitters are telling me to get the uneven gaps caulked and then painted.
I am in bit of dilemma now as should I press fitters to install new skirtings or not?
Christine says
I totally understand your problem Raj. I think you may have less of a problem with new skirting boards, but it all depends on how even the floor is and you will probably still be left with a small gap between the floor and skirting. I personally wouldn’t fill the gap with caulk as it’s impossible to keep clean and over time will rip (due to movement) which could make it look messy. I’d be tempted to live with a small gap if you can get it as even as possible.
Cx
Raj PAtel says
Thanks Christine.
I have been told by my decorator that dont caulk it, use mastic sealant to fill it up and once painted and glossed, you wouldnt even notice any gaps.
I was quite concerned as wood is dark Walnut and quite expensive. With dark color wood, because of contrasting white skirtings, gap becomes visible very quickly.
regards
Raj
Angie says
We have some enormous spiders coming in,,,,,,, it’s my big big hate, I’m really hysterical about them, and I’m usually level headed, I know they are more frightened of me,, I know they can’t hurt me, I know it’s ridiculous, etc etc,
Having new carpets soon so we going to try this when the old ones come up, it’s a brilliant idea, fingers and toes crossed
, Angie X
Christine says
Everyone has something they’re scared of! Hope it works for you.
Cx
Anthonia says
Hello Christine and Jan,
First of all, thanks for your blog post re sanding floorboards; we finally sanded the floorboards this past weekend, after reading your blog post re that topic. We then used hardwax oil instead of varnish (can’t remember why that option now) and we now have a beautiful albeit not quite finished floors downstairs.
Regarding filling the gap between the skirtings and the floors, can we use a sealant to give it a neat look after using the strip?
Cheers,
Anthonia
Christine says
Congrats on your new floor – sound’s like it’s turned out great!
I’d definitely recommend not using a sealant. Over time it’ll get dirty and rip because of the inevitable movement in the floor. If you fill the gap with the strip, the strip shouldn’t be visible at all. The gap that’s left will just look like a shadow and will probaly look neater than any sealant you could apply.
Hope that’s some help!
Cx
Matthew says
Just wanted to thank you for the advice. Moved into a 1960s house last year which had a large gap under the skirting in the kitchen (5-7mm all along the wall). Too big for me to mastic so I’ve been trying to work out what to do about it. Got the Weatherstrip from Screwfix, plugged the gap and what a difference. Virtually invisible and no more cold draughts in the kitchen – the adjoining rooms feel warmer too. I did find it a bit sticky when installing but managed to get it into place with a filling knife as you suggested.
Christine says
Thank you so much for your feedback Matthew! So glad to hear it worked for you, too.
Cx
Jamie says
Hi there, I’ve just torn up my laminate flooring and am getting carpet fitted. I have a gap of about half an inch between the flooring and the skirting board and am thinking of using expanding foam then cut and paint it. Is this something you think would work?
Christine says
That’s such a big gap, Jamie! I think filling the gap with foam filler could work, but could also end up quite messy. I also don’t think that you’d be able to paint it. I wonder if it would be possible to install a small strip of wood in the gap?
Cx
Kriss says
Plating the facings with thin ply or mdf looks really good if done well, but it’s time consuming. It makes the skirting a look chunkier which is cool too. I’d say this is the only way to deal with big gaps.
Christine says
That’s a great idea, thanks for sharing, Kriss! It does sound like a lot of worth though.
Cx
Dee says
Hi Christine,
I’m in Australia and I just purchased an Edwardian house that I have renovated. I have noticed the gaps in the floor boards. So I have tried your ‘please mind the gaps’ tip and it’s worked a treat.My problem is it’s costly as I can’t seem to purchase the roll of Strip in a bulk lot. Can you suggest anywhere online I can find it?
Cheers
Dee
Christine says
We never tried to find large amount of the tape, as we only used it to fill the gap between the skirting and the floor. If you are filling the gaps between the floorboards (we insulated under ours, so didn’t bother) there are specialist products available like something called StopGap. We’ve not actually used it, but maybe that’s the way forward?
Cx
Cathy says
Dee, whhicj Weatherstrip product did you buy and where? The only Weatherstrip I can find at Bunnings isn’t expandable though it was very similar to the pictures in this blog. The description said for windows and doors
Lara says
Would this be rodent proof? Just noticed some mice in our rental house as weather cools down. House is an old queenslander…it has many big gaps between floor and skirting. Thinking of doing this method.
Christine says
Ewww… I don’t think it would be, Lara. Rodents eat through pretty much anything, don’t they?
Cx
elaine says
Hi. Love your website! We are thinking about having an engineered wood floor laying in our lounge BUT hate, hate, hate the beading that is attached for expansion . We have very deep old skirting boards and do not really want to take them off first and then place them back when the floor is fitted. Have you any ideas for a different type of beading to attach to the skirting boards that make it look like part of the original skirting board. I’ve looked at loads of websites but nothing is just right. Am I too fussy? XXXX
Christine says
Thanks, Elaine! I completely agree with you about the beading! I was sooo happy when we ripped up the laminate flooring in our house and could remove the beading that we had! As annoying as it is, I can’t really think of an option other than removing and then reattaching the skirting. When laying an engineered floor, you are always going to have a gap that needs covering somehow. If it’s not possible to remove the skirting, maybe you could choose some beading that’s then painted the same colour as your skirting so that it blends in and looks like it’s just skirting?
Sorry we couldn’t be more help!
Cx
elaine says
Thanks for your reply….Yes, I agree. I’ve racked my brains and am going to look for some nice looking beading/ moulding. Elaine. x
Christine says
You’re welcome, Elaine! Sorry we couldn’t be more help!
Cx
Chris Smith says
You can now buy skirting that overlaps your original skirting if you don’t want to take your old skirting off.
So, lay your new floor 10mm from your old skirting all the way round the room, then fit the new skirting directly on top of the new floor which will also fit over your original skirting.
I know this is an older post buy may help people in similar situation I have just been in.
Yes, this is more expensive than taking off and refitting skirting but this isn’t always doable
Chris
Christine says
Thanks for sharing Christ! We’ve finally finished all of our skirting, but it’s a great tip for people who have problems with large gaps!
Cx
Michael says
Great article as I have similar draught issue – I just wondered please which shop did you purchase your weatherstrip tape in? – many thanks, Michael
Christine says
Thanks, Michael! I think we picked up the weather strip at B&Q, but you should be able to pick it up at any DIY store – it’s really not hard to get hold of.
Good luck with your draught proofing!
Cx
Jared says
Christine,
this looks like a good idea! we have gaps under our skirting boards, 0 to 20mm!!! and SLUGS are getting into our house faster than Nazi’s into poland! I’ve not come accross this tape before, after your remove the seal, how did you slide the tape into the tight gaps with out it sticking to the floor before you got it under the skirting?
Cheers,
Jared.
Christine says
Thanks, Jared! When squashing the tape into the gaps, we removed the seal as we went – basically pushing in the tape and pulling away the seal as we worked our way along the skirting board. The tape also isn’t overly sticky, so if it does stick somewhere that it shouldn’t it’s not a problem to remove. When the tape expands in the joint, it stays there on it’s own – the stickyness is just a little extra help.
Good luck keeping the slugs out – I can’t imagine anything worse!!
Cx
Dex says
Many thanks (how obvious – with hindsight).
Christine says
You’re welcome, Dex!
Cx
Kirsty says
Very useful advice, thank you. Can you recommend anything for large gaps between floor and skirting board (apprx 1.5 inches)? It is a very old house and the floors and floor boards are no longer particular even.
All the best
Kirsty
Christine says
You’re welcome, Kirsty! 1.5 inches is a lot! We like using the weatherstrip because our floors aren’t even either and it expands to the different levels. I don’t think it would work on such large gaps though. The previous commenter, Rick, filled the gaps with strip wood. Maybe that would be an option.
Good luck!
Cx
Toby says
Buy insulation for plumbing pipes , grey,black . Cut with a Stanley blade in to strips at the thickness you desire.
Makes huge difference to room temperature, and black lines around the carpet edge, will make no further progress
Christine says
Great idea, Toby! Thanks for sharing.
Cx
Rick says
I have filled my gaps between skirt and floor with strip wood, glued in place and painted. Slow but doesn’t leave a visible gap. Also been filling the gaps between floorboards with slithers. All dry time consuming but has a superior finish aesthetically.
Christine says
Sounds like a good idea, but sooo much work! It seems like most things are better than caulk, though!
Cx
Anncockerton says
This is so useful thanks! I am in the same situation in my house. Quick question did you remove the self seal for the strip when placing it? I wondered whether the strip just gets inserted or remove the self seal. Many thanks
Ann
Christine says
Glad we could help, Ann! Yes, we removed the seal – we found that it helped the strip stay in place better where the gaps were slightly larger.
Cx
Annie says
Hi Christine,
Great suggestion!
Do you know how this tape handles being mopped each week by normal weekly floorboard cleaning?
Does it absorb the moisture from the mop and begin to smell?
How do you mop your floors using this tape?
Many thanks
Annie
Christine says
There are no issues with it when mopping your floor, Annie. You should always use as little water as possible when mopping wooden floors and the tape is hidden under the skirting so very little moisture even gets to it. We made no change to our mopping routine and the tape is exactly as it was when we first installed it.
Hope that helps!
Cx
Lesley Forrest says
Very pleased I found this article. We have the same problem.
We just removed carpet that was ruined by black dirt all round the edges. We’re fixing white scotia between the skirting and floorboards and I was going to purchase a specialist product Draughtex to fill the gaps first. The Weatherstrip has worked great for a lot less money.
Christine says
So glad to hear it worked well for you, too! Thanks for sharing, Lesley!
Cx
Lesley Forrest says
Thanks to you!!