Remember our rather miserable looking guest bathroom?
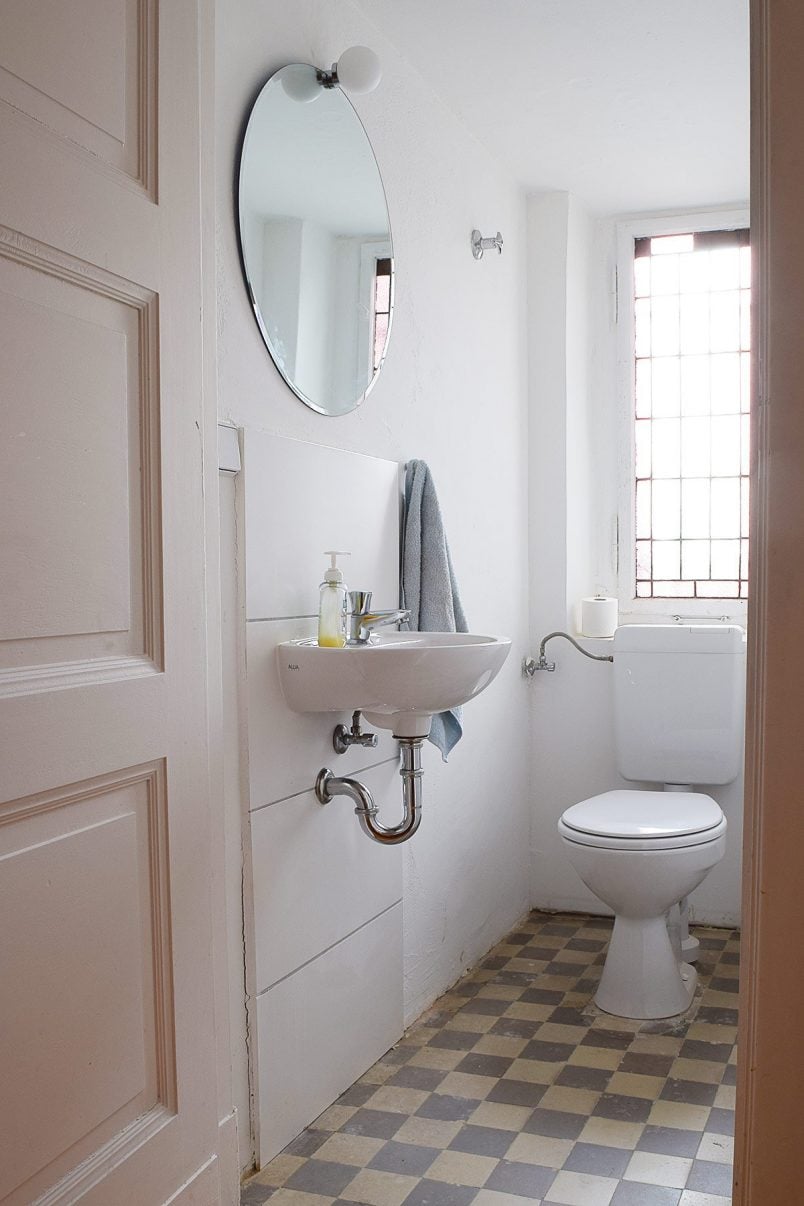
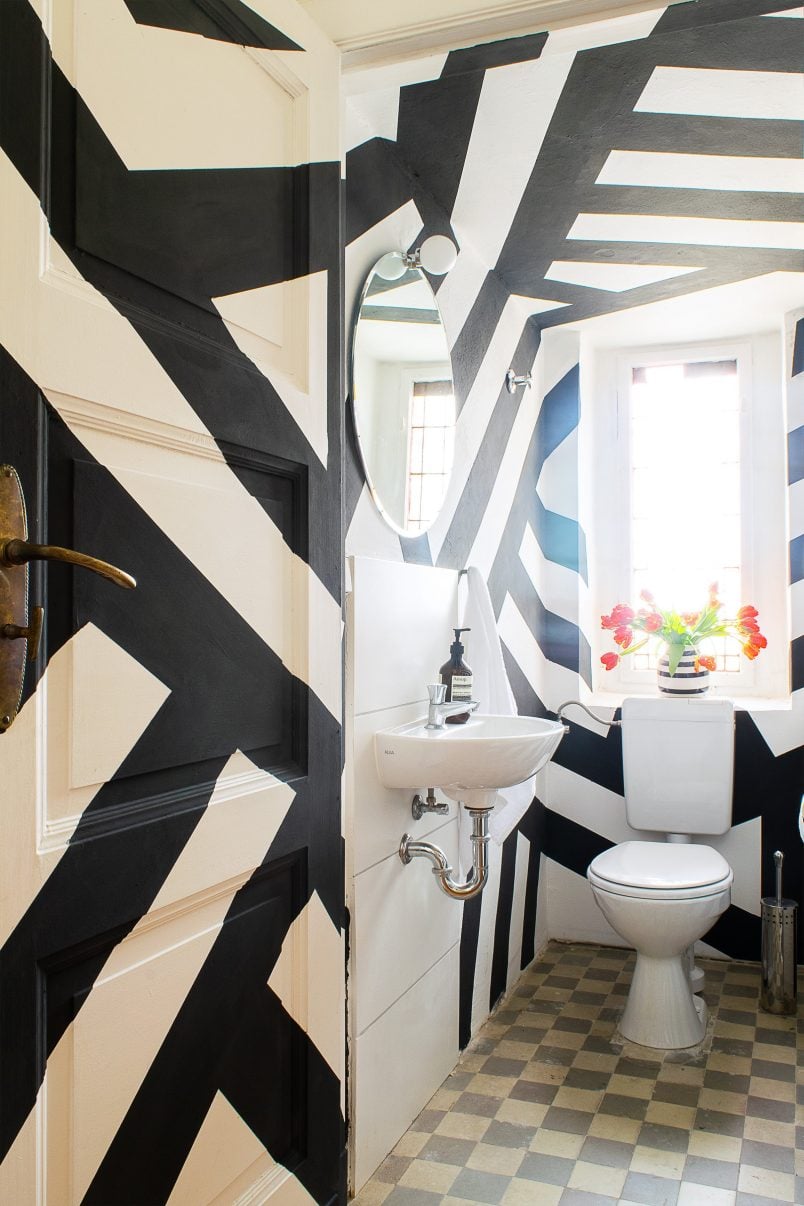
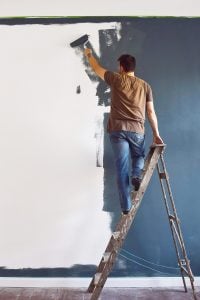
Well, it’s not quite as bland anymore as we gave it a coat of paint. And, when I say I painted it, I really mean it as it now looks like this!
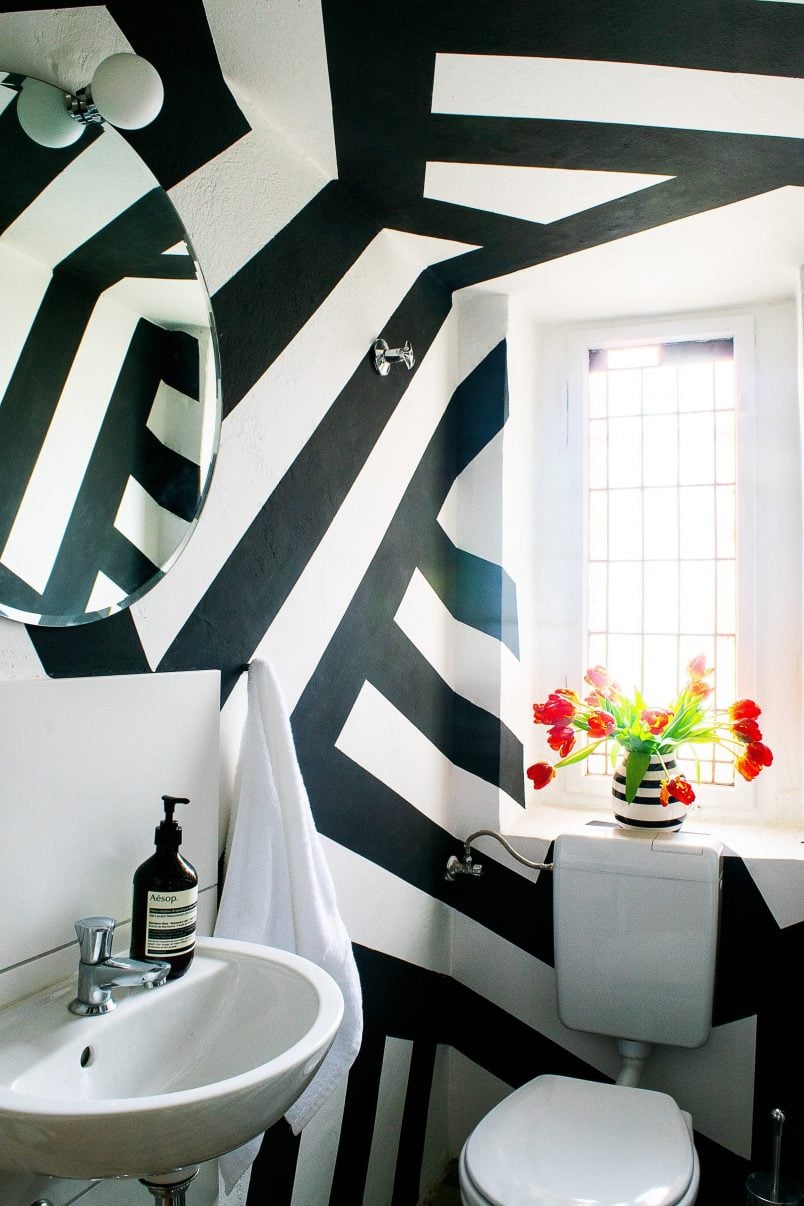
Yep, we’ve finally lost our minds dared to go bold! And, we love it!
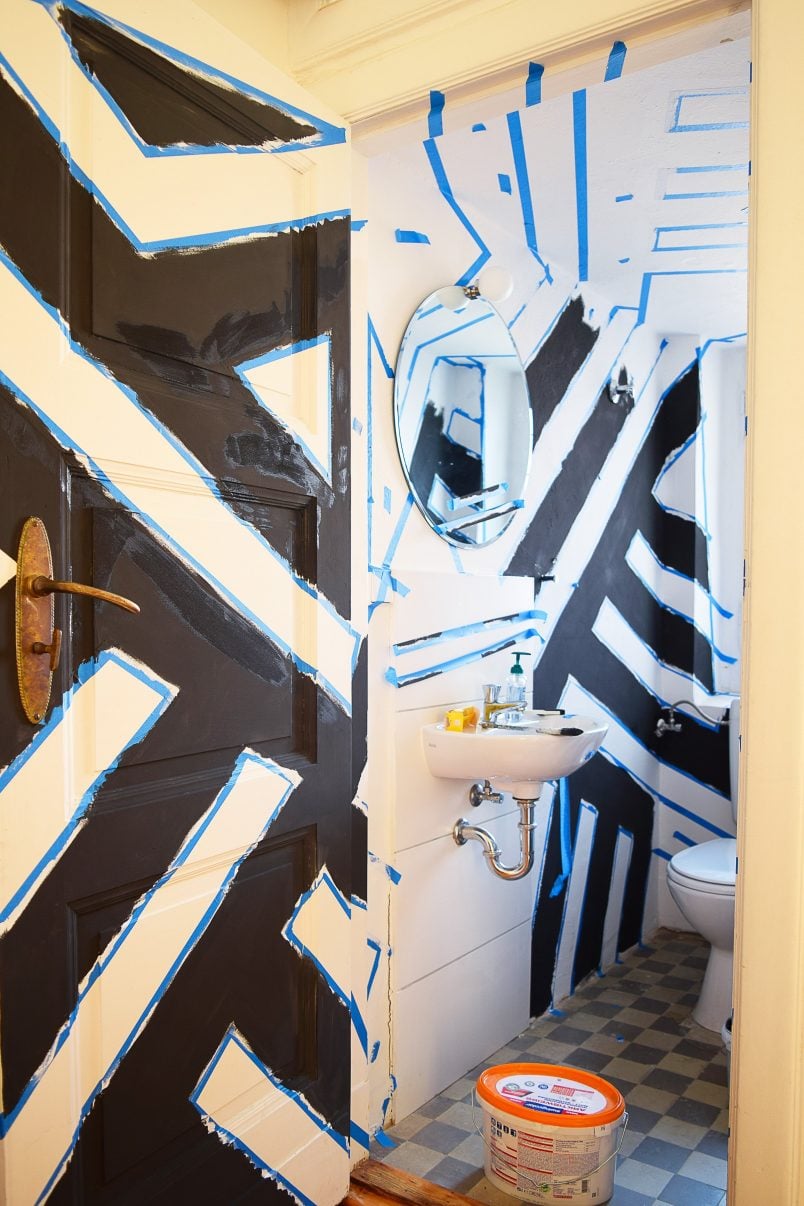
I’m not going to lie though. This was one faffy project that involved a lot of cursing, a lot of balancing on the loo and a lot of masking tape! Apparently taping lots of straight and parallel lines is harder than it looks – who knew?
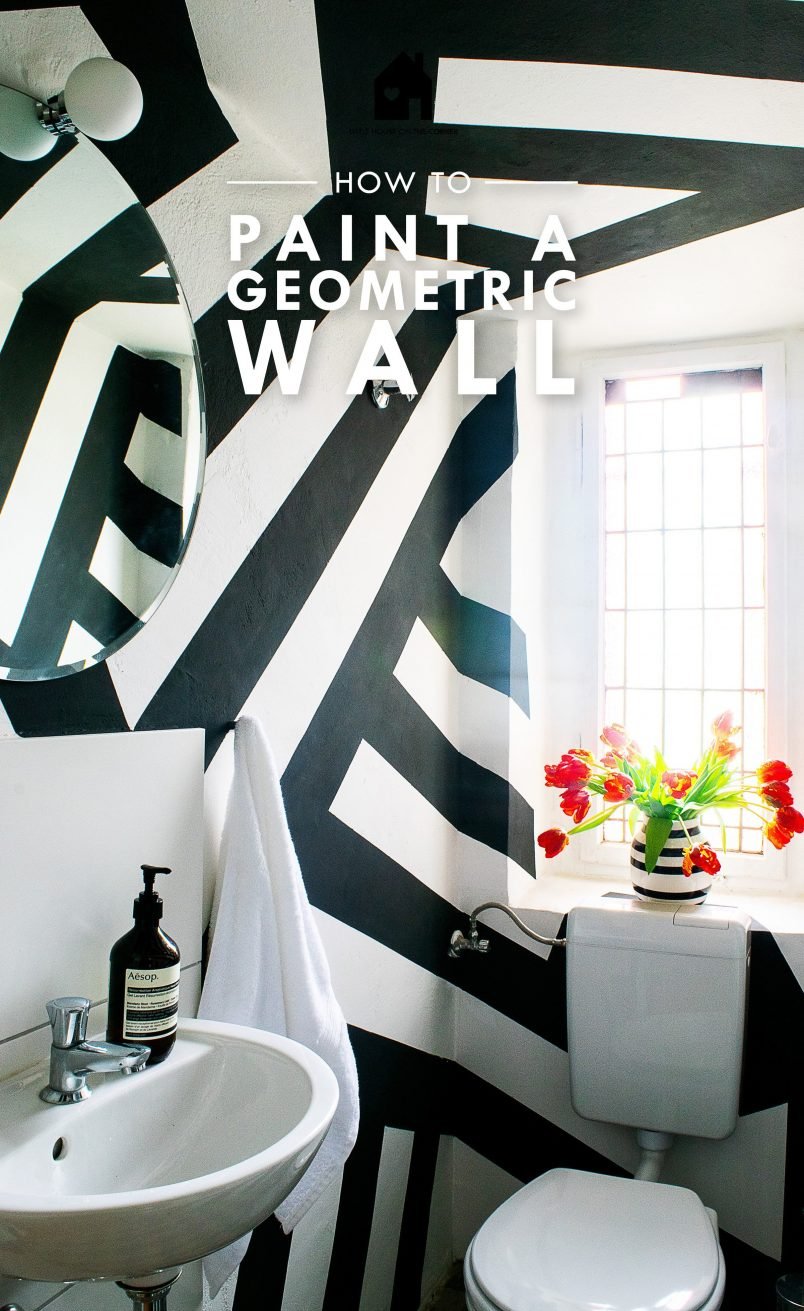
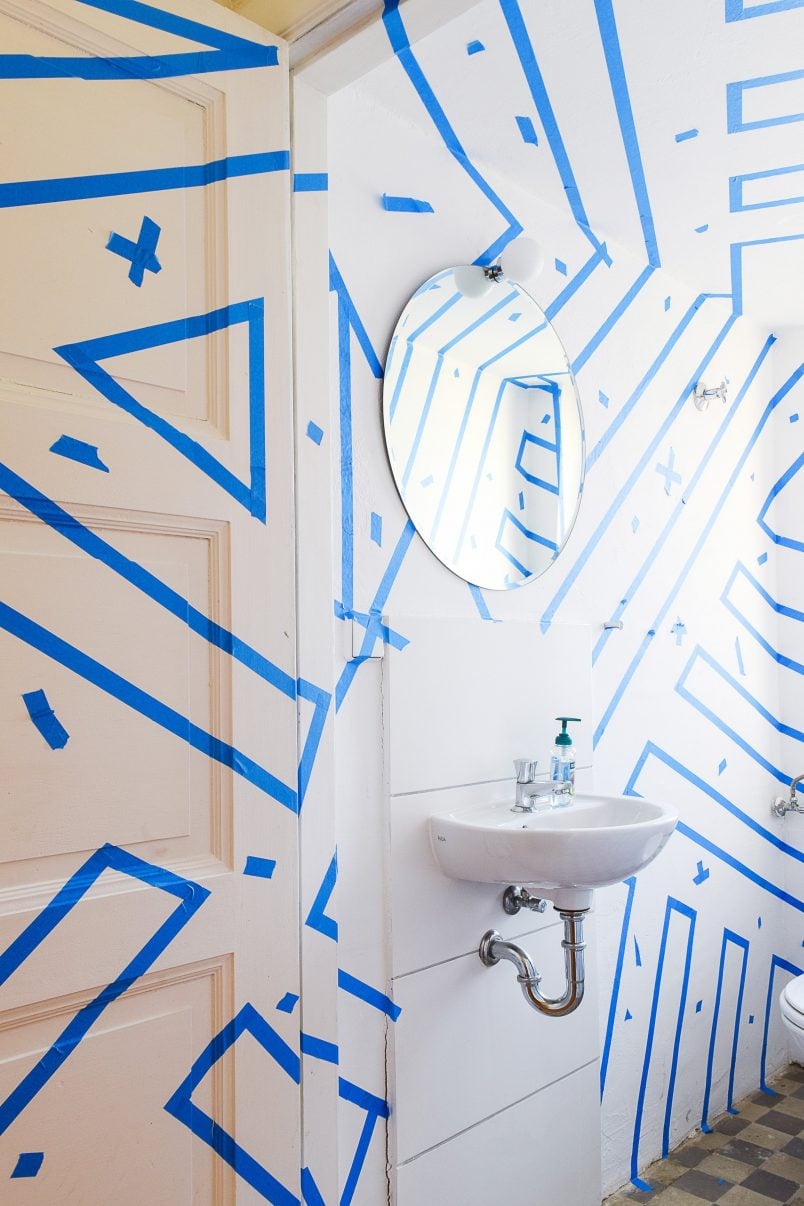
One of the things I love most about the geometric painted walls is the boldness which detracts from the less than perfect sanitary ware and damaged floor.
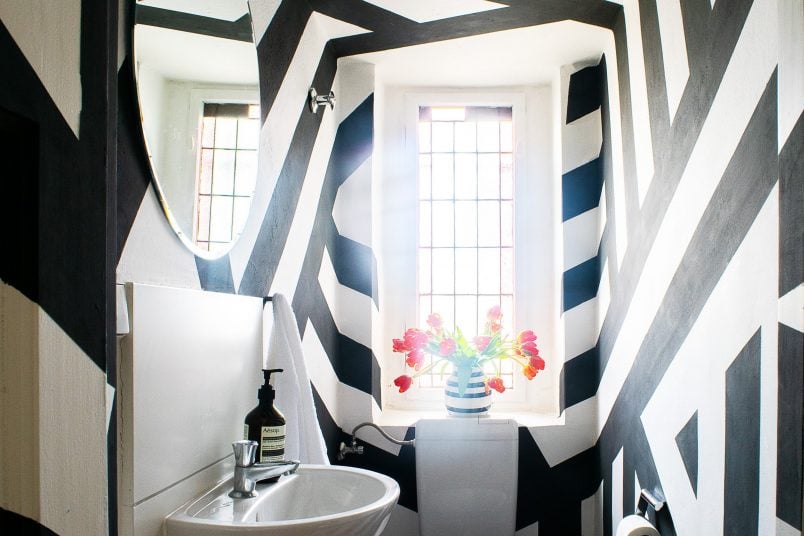
Obviously, our walls and ceiling are completely over the top but the process is the same even if you’re planning a less bold design.
So, if you fancy having a go at creating your own DIY geometric wall, this is what you will need:
This post contains affiliate links. We only recommend products we love and think that you will, too! Read our full disclaimer here.
- Masking Tape – lots of it!
- Paint (base colour & accent colour)
- Paintbrush
- Tape measure
Here’s how to paint geometric walls:
1. Plan Your Design.
As much as I love to plan every last detail of well, let’s face it, everything, I chose to go completely freestyle on our geometric wall design.
I’d already decided to stick with a fairly simple black and white stripe design so, for us, it was just a matter of agreeing on the width of the stripes and then taping it to the wall. Simple, right?
As much as our design just developed on the wall, I did stick to a few small self-imposed design rules because I didn’t want the room to end up being too chaotic.
I decided to stick to a uniform thickness for all stripes (ours are 15cm wide) and I kept most of the lines in each section parallel to each other.
We stuck to a simple two colour design which meant that we kept the walls white and just painted on the black stripes.
If you’re using a different base colour than your walls already are, you’ll have to prime them in that colour first. For example, if you’re planning on painting blue and yellow stripes, you should paint the room yellow first, then tape your design and paint on blue stripes.
2. Tape It.
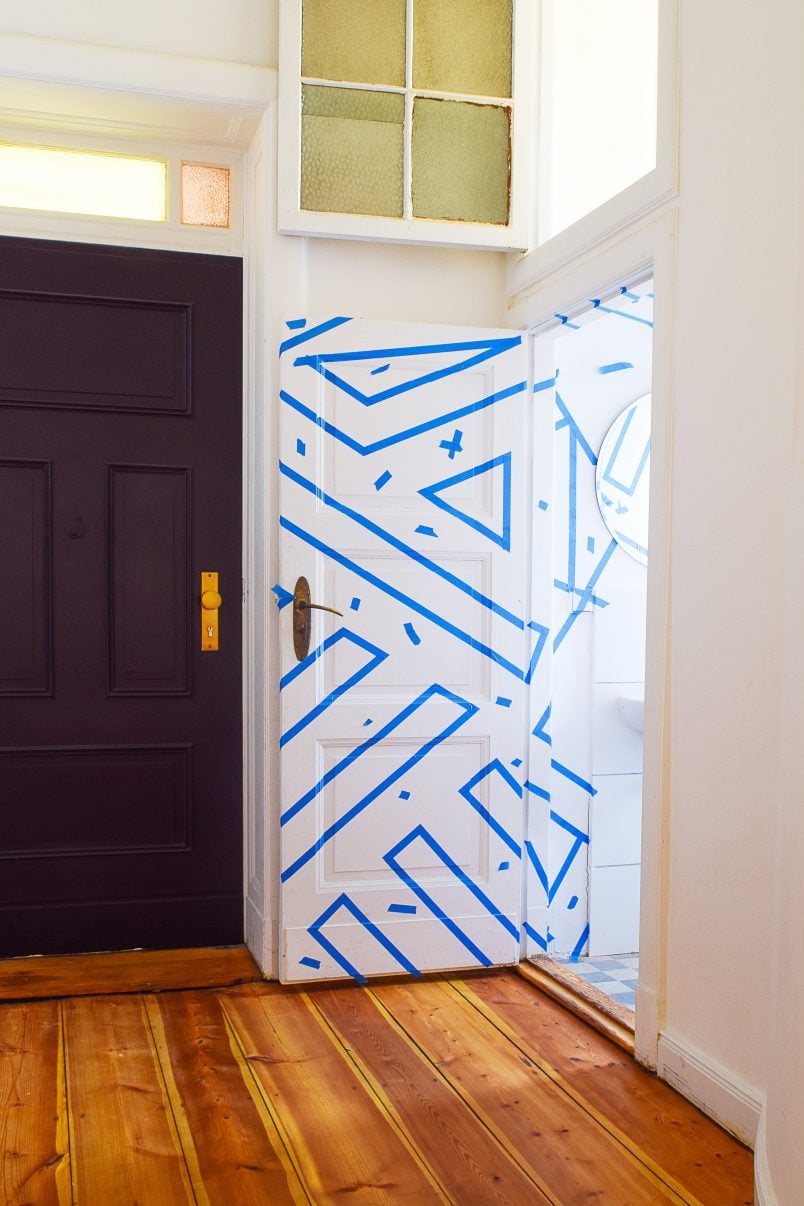
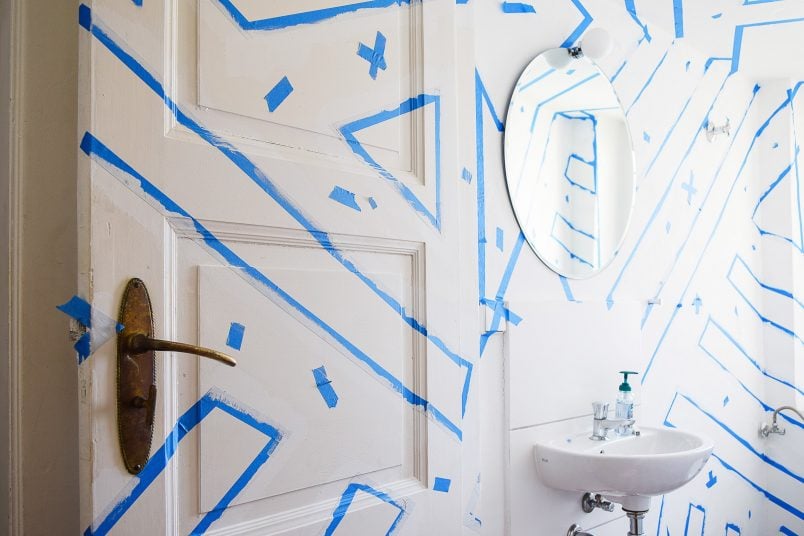
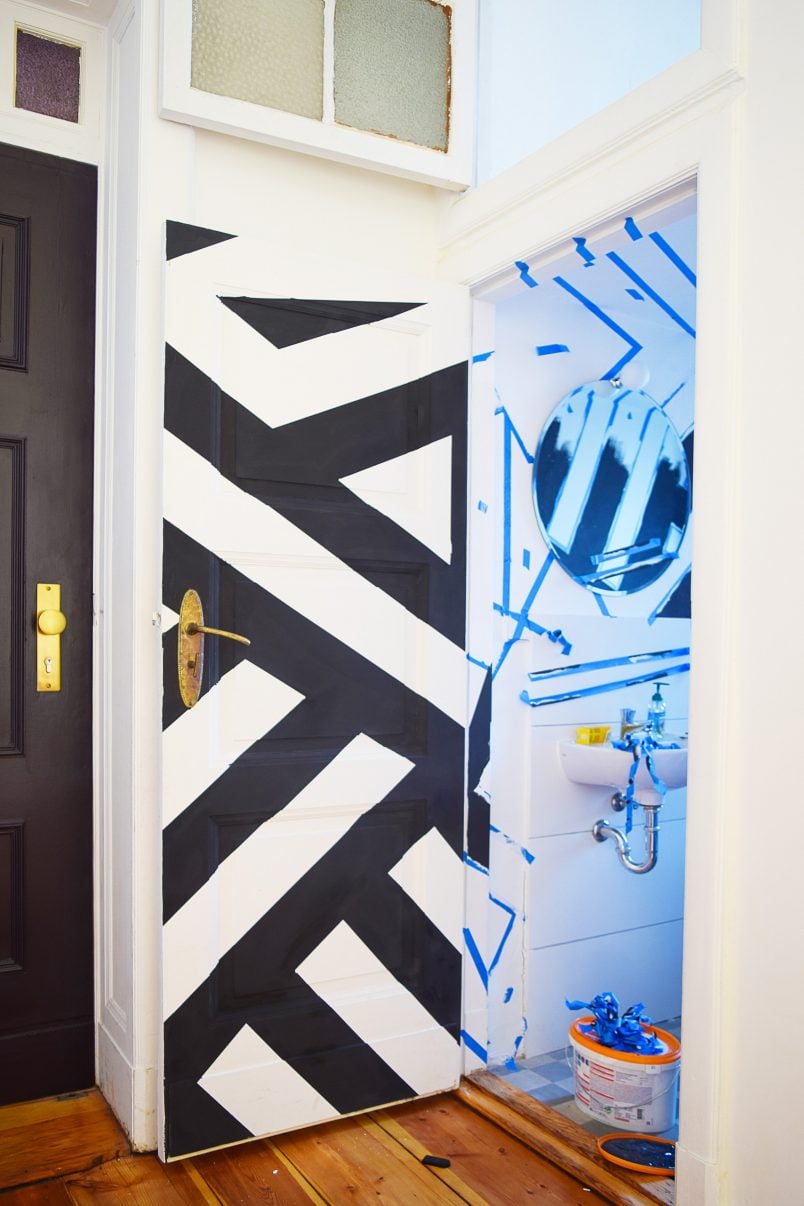
When you’ve decided on a design it’s time to tape it onto the walls and, in our case, ceiling & door, too! This is easily the most annoying part of this project and, I’m not going to lie, it does take time.
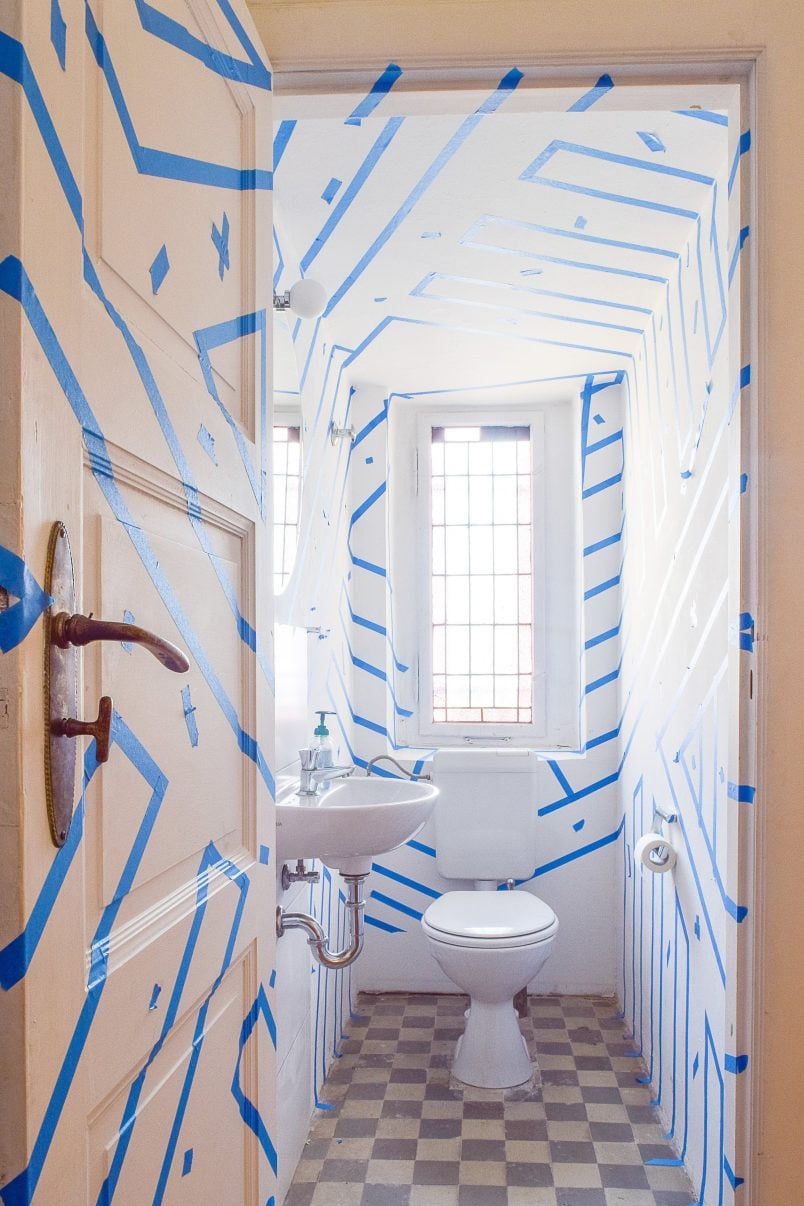
Not having a particular design definitely made it easier but let’s just say that working in the tight space and balancing on the toilet while taping the ceiling wasn’t exactly a pretty sight!
Making sure the lines were parallel was a bit fiddly and did make me want to pull out my hair at times (I have enough grey ones to sacrifice so it’s not all bad!).
In terms of actually taping the design onto the wall, I started with one long line which I projected onto the wall with our laser level (you could just freestyle it though) which I then taped to the wall.
I used this line as a guide for all subsequent lines which I measured and marked with a ruler and pencil before taping to the wall.
3. Prime It.
This project only works if you have super crisp and clean lines.
As well as pushing down the tape and making sure there are no air bubbles, it’s also a good idea to paint over the edge of every piece of tape with the base colour of your design – in our case, white. (If you have a different base colour, you’ll obviously have to use that colour.)

There’s nothing worse than paint bleeding under the tape and leaving frazzled edges – especially when the colours are high-contrast like the black and white in our design.
By painting over the edges with the base colour, you should end up with perfect lines. The base colour paint seals the edges and, if any paint seeps under the tape, it’ll be the colour of your background so it won’t be visible!
This painting trick isn’t exactly a secret but it works every time!
4. Paint It.
This is where the fun starts and where the project quickly comes together.
It’s just a matter of painting the sections with your chosen colour (in our case we painted them black). As our guest bathroom is tiny and our stripes are fairly narrow, I painted them with a paintbrush but you can use a roller if you prefer.
Wait until the first coat of paint has dried before going over your painted stripes a second time.
5. Tidy.
When you’ve painted everything, all that’s left to do is remove the tape – ideally while the paint is still wet – and touch up any areas as needed. Needless to say, this is the most satisfying part of this project!
Try to pull the tape off slowly and at an angle rather than ripping it straight off the wall. This will reduce the chances of you accidentally tearing off any of the paint underneath.
Even though our guest bathroom is tiny, this project did take a surprising amount of time to complete.
It took about 8 or 9 hours to do but you can’t get much more impact from a project that pretty much just involved a roll of tape and a tin of paint, can you?

We still have a couple of areas that need touching up but overall we’re so pleased with the result and the room is definitely a more fun place to be in!
If you’re thinking we’ve completely lost our minds – don’t panic. We’re not actually planning on keeping this room like this forever. Ultimately, we’ll be ripping out everything (ideally late this year) but, as we’re so slow when it comes to the bigger projects, we figured we’d have a bit of fun until then!
What would your dream bathroom look like? Will you be trying geometric painted walls in your home? Have we finally lost our minds (don’t answer that one!)?
Katty Balle says
The patterns sure make a huge difference. From drab to vibrant and lively. Love what you did. Thanks for sharing!
Christine says
Thank you, Katty! Ultimately, the room will need a complete overhaul but the painted walls are definitely a distraction!
Cx
Kezzabeth says
I LOVE it!!! It’s absolutely bonkers in a totally awesome way! And I actually never knew about that painting trick with the tape – it’s so simple yet so genius! Definitely remembering this one for later use ;)
I also kinda hope you keep this room like this forever, ha! It’s brilliant! Although I’m sure your future plans are even more awesome. Can’t wait to seee! :) Kezz X
Christine says
Thank you so much! I thought everyone knew about the tape painting trick – I guess it’s a good thing I shared it!
I’ve already planned most of the guest bathroom, including a fun mosaic floor, and can’t wait to rip out everything! Having said that, there are about a million other projects to finish first. It’s always the way, isn’t it! ;)
Cx
Dace says
Love it! It looks a bit crazy ( most likely my husband wouldn’t allow me loose my mind) , but the bathroom looks so much better! Keep up with ideas! xx
Christine says
Thanks, Dace! I have to admit that Jan didn’t know what I was up to! Was totally inspired by Lins (Boo & Maddie) and gave the room a makeover while he was working away! It is only meant to be temporary though… Full makeover hopefully later this year.
Cx
DeirdreDublin says
Amazing Job. So impressed. Please dont leave this Berlin apt until you’ve it completely finished – I’m looking forward to seeing the completed / finished result.
Christine says
Thank you so much, Deirdre! It would be nice to completely finish a home renovation before moving again, wouldn’t it?! I have so many plans and I really would like so see as many of them as possible realised. Having said that, I’m really not looking forward to restoring dozens of windows! ;)
Cx