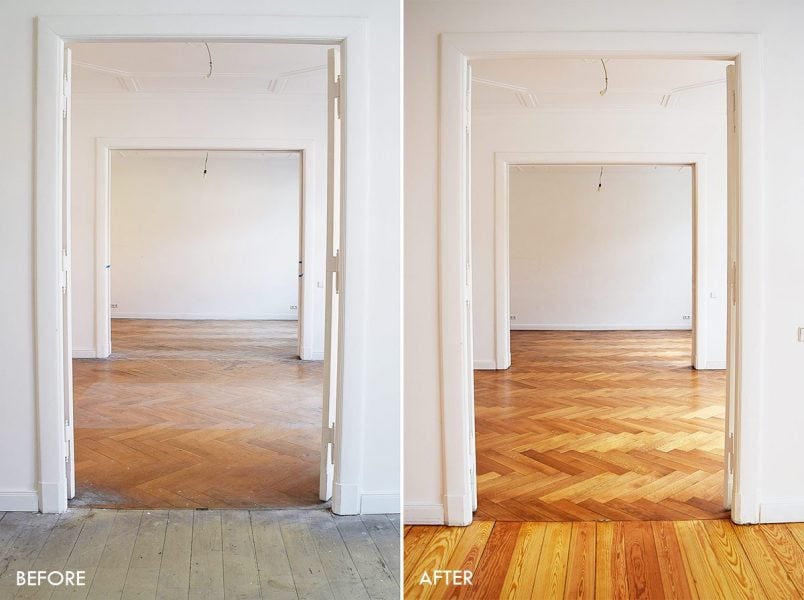
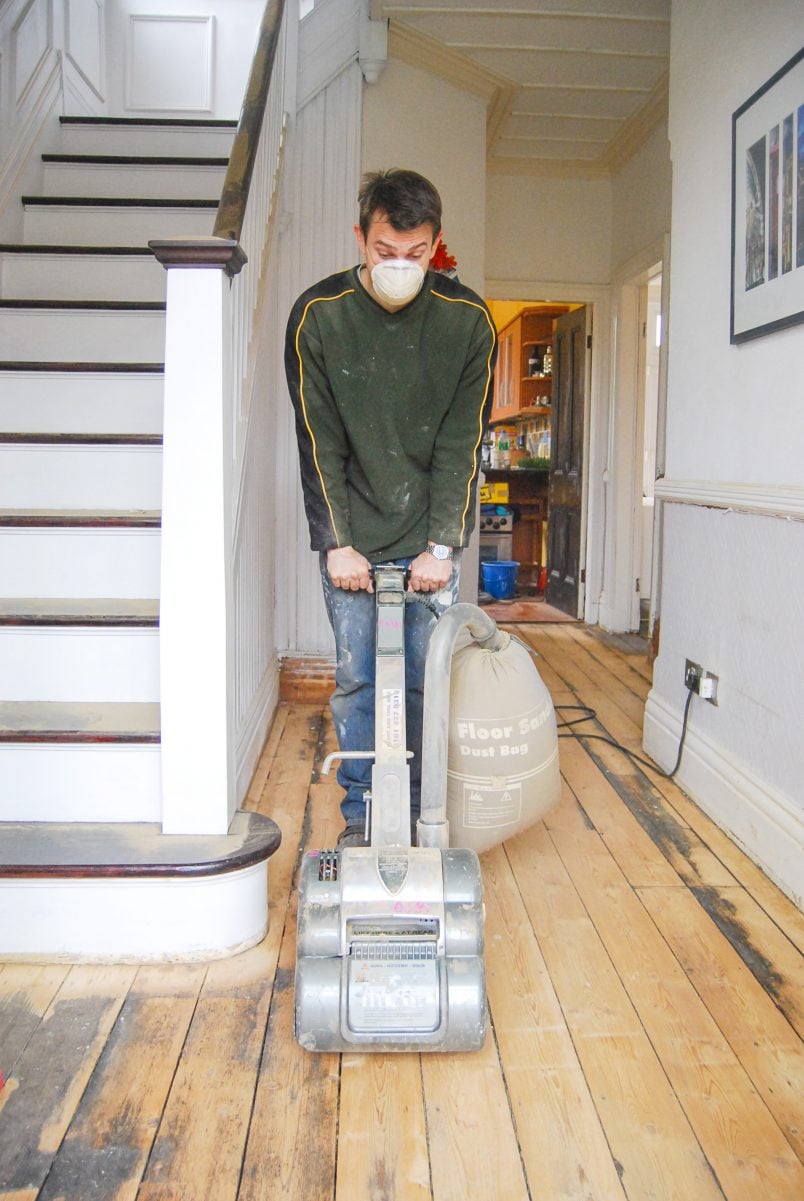
In the last few years, we’ve sanded more floors than I care to remember.
We turned yucky laminate covered floors into gorgeous sanded floorboards and transformed our dull and grey parquet into a luscious and rich oak floor.
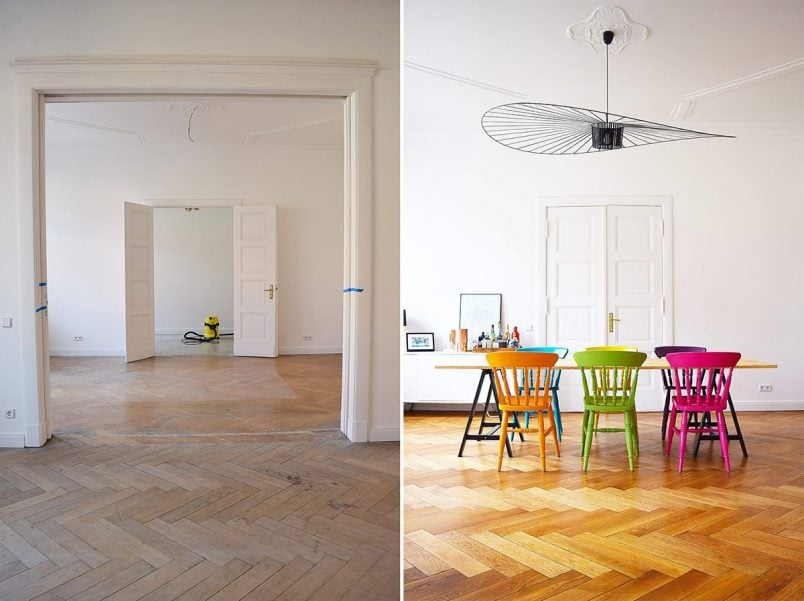
We really couldn’t be happier with how our floors turned out but we did make some floor sanding mistakes along the way.
We learned the hard way that there are things you should and shouldn’t do and, more importantly, there are things you can do to make your floor sanding experience much easier.
As we see some floor sanding mistakes over and over again, we’re sharing our tips and tricks to not only make your life easier but also help you avoid the floor sanding mistakes we made.
We made the mistakes so that you don’t have to!
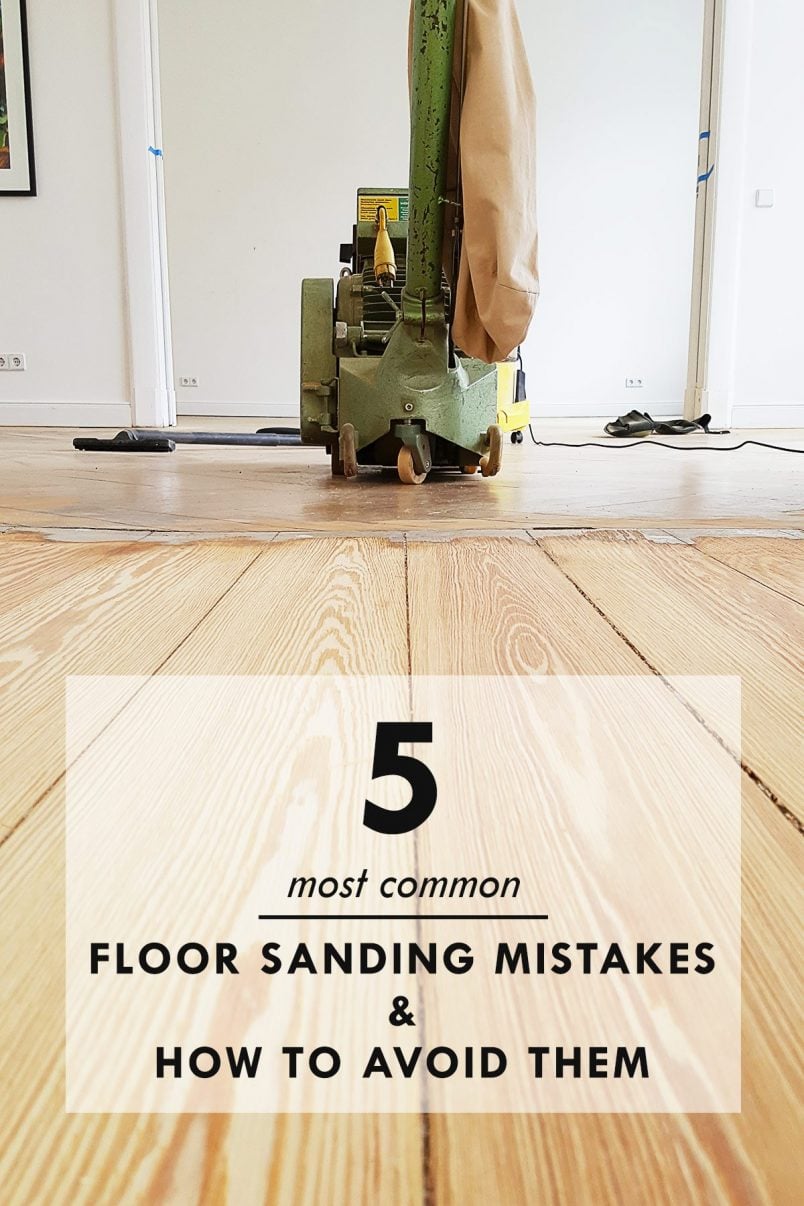
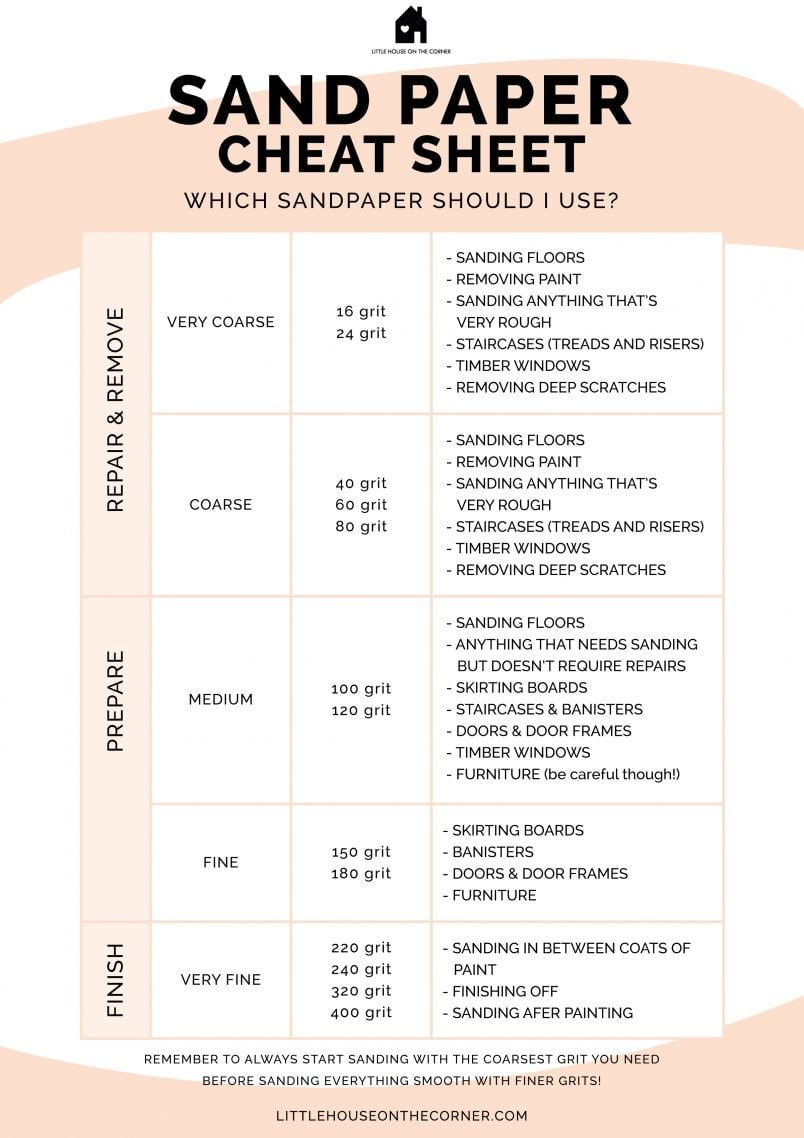
1. Using The Wrong Grit Sandpaper
The by far biggest floor sanding mistake I see is not using the right grit paper.
I honestly can’t stress enough how important it is and you really won’t do yourselves a favour if you start to sand with paper that’s too fine.
What grit you start with will depend on what your floorboards are like. If they’ve been sanded before and just need a refresh you’ll be able to start sanding with finer paper but in most cases, you’ll have to start with a much more coarse paper than you expect.

If your floors haven’t been sanded before, the maximum grit paper you should start sanding with is 24 grit. I know that sounds super coarse and radical but anything finer will not sand away enough of the dirt and old varnish.
More importantly, though, it’ll cause you much more work not to mention cost as you’ll end up using way more paper than if you were using the right grit.
Our floors were slightly wavy and had a really thick layer of varnish on them so we started sanding with 16 grit paper!
Using the wrong grit (too fine) will also mean that your sandpaper clogs up really quickly. Clogged up paper is useless so it’s something you’ll want to avoid.
Not only because it’ll end up costing you more because you’ll constantly be replacing the paper but also because of the additional time it’ll take you to keep changing it.
2. Not Sanding Enough
There’s really no getting around it – sanding your floors is hard work and physically tiring.
When you first start sanding you’ll almost instantly see a huge difference in your floor but once you’ve removed most of the varnish and dirt progress will seem so much slower.

Mostly, this is down to the floorboards not being completely flat which means that the drum of the floor sanding machine won’t be able to reach all areas of the floorboards in one go.
This means that you’ll often be left with shadows either at the edges of the floorboards (if the floorboards are concave) or in the middle of the floorboards (if the floorboards are convex).
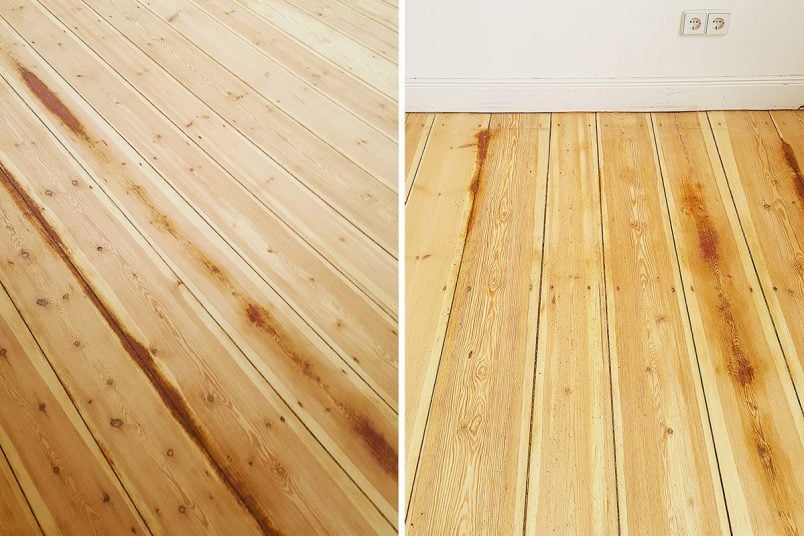
Although you’re probably thinking that your floors look good enough to call them finished, try to resist the temptation to stop now – it’ll make all the difference, promise!
Sanding these last bits away is definitely the most frustrating part of the whole floor sanding process as progress will seem almost non-existent.
You really want to keep sanding until all marks and any shadows are completely removed.
You need to sand your floorboards until they look brand new, even if you’re staining the boards (unless they’re going to be black or painted). It’s what will make the difference between your finished floor looking amazing and professional or average and amateurish.
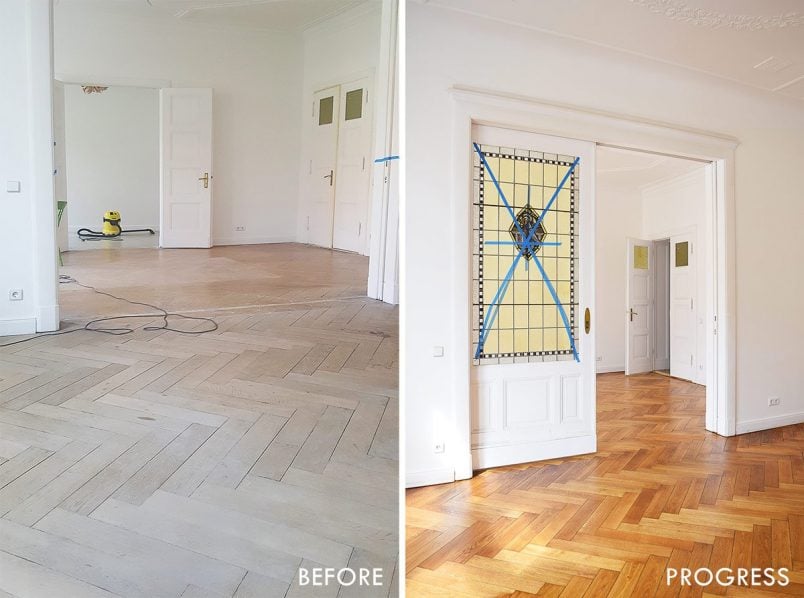
3. Not Sanding Diagonally
We didn’t sand diagonally the first few times we sanded our floors but we did in our new home and it’s something we’d definitely recommend doing.
It makes sanding your floors quicker as it’ll even out your floorboards and you won’t be left with areas of the floorboards that are difficult to reach (which is the shadow problem I mentioned above).
We never thought of the sanded floors in our Edwardian house as uneven – and they weren’t really – but the difference to our newly sanded floors in our current home really surprised me.
It’s difficult to describe and impossible to show in pictures but they somehow feel much flatter and more even.
4. Sanding The Edges
Sanding the edges of your room is a complete pain. It’s backbreaking work as you’ll find yourself hovering over the edging sander for hours on end.
The good news is that you can sand the edges slightly less than the main surface – in fact, it’s a good idea to do so!
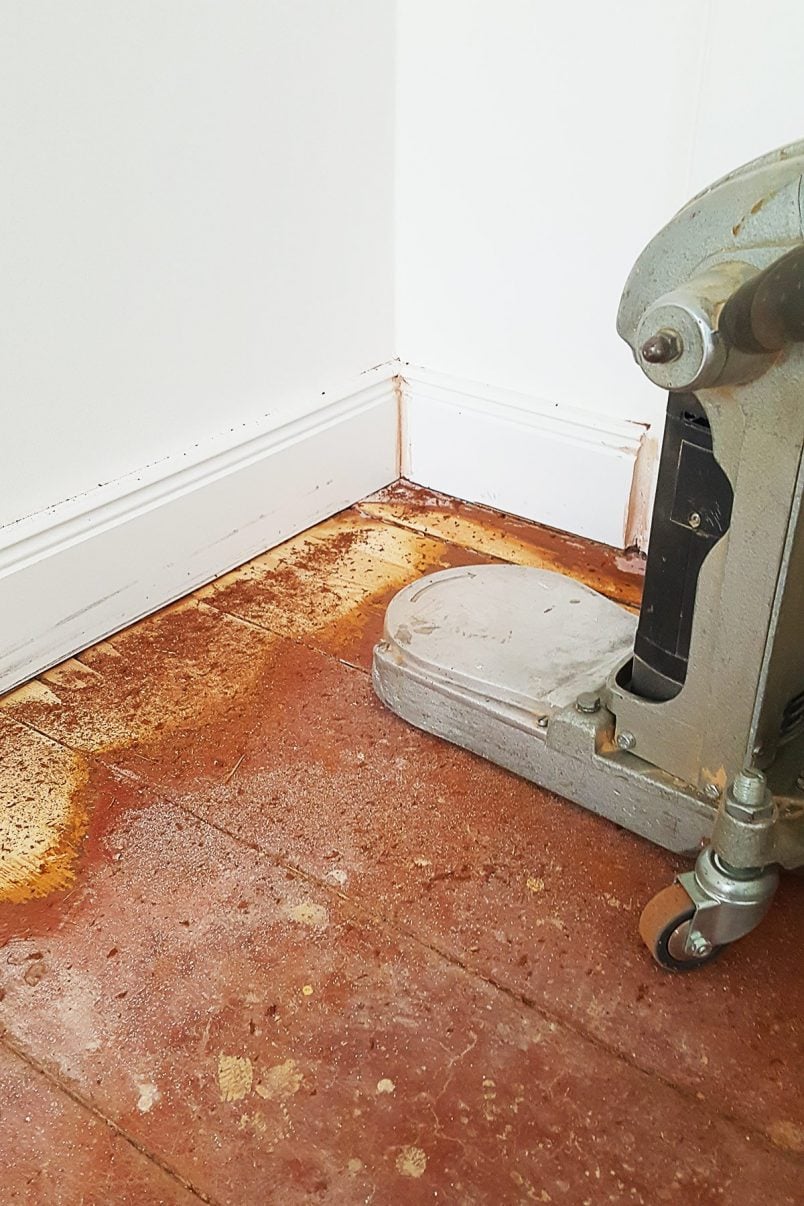
You should finish sanding the main area with 120 grit paper, but we’d recommend you stop at 80 grit for the edges. It’ll still be more than smooth enough and will save you time.
It is totally possible to sand with a fine grit but the problem (especially as a DIYer) is that you can quickly end up with scorch marks on your floor which can develop because of the high heat and friction generated between the sandpaper and your floor.
5. Not Changing The Sandpaper Often Enough
One of the biggest floor sanding mistakes we made when we sanded our floors the first time around was not changing the sandpaper often enough.
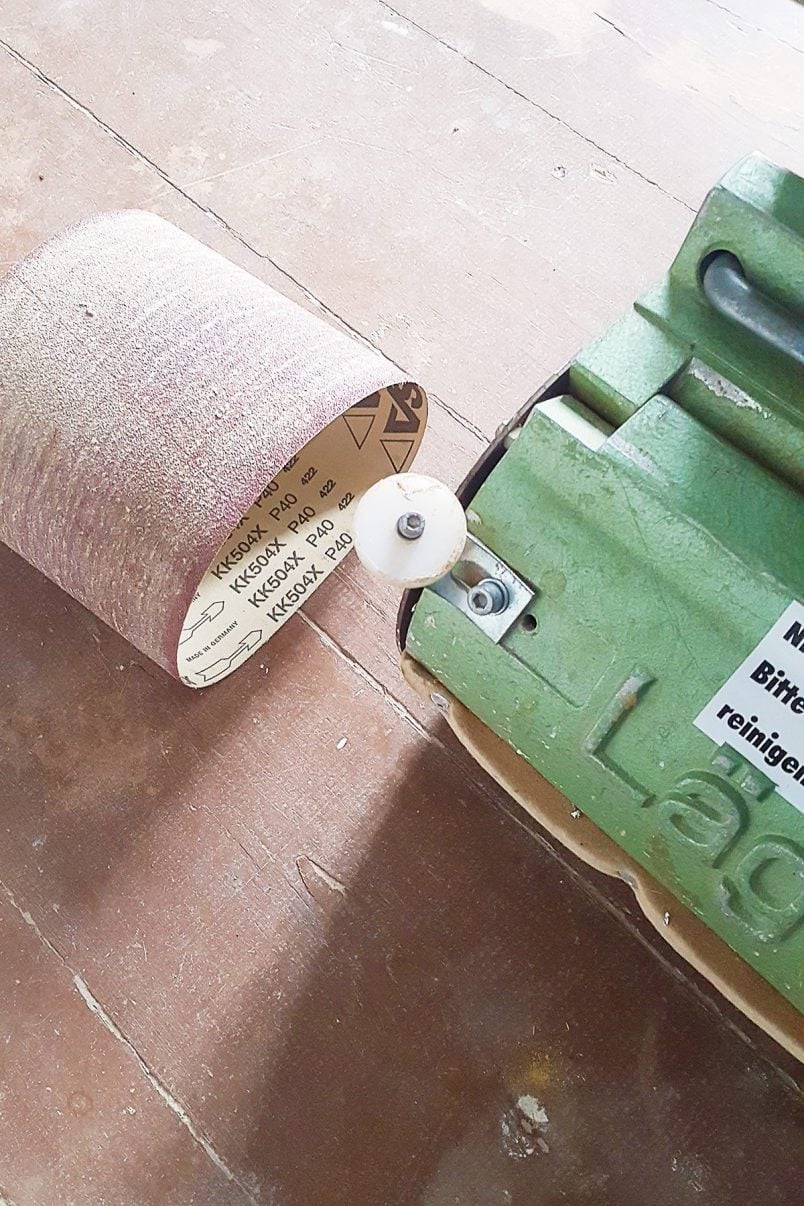
After a day or so, our floor sanding mistake dawned on us and as soon as we started to change the paper more frequently we were able to sand the floors much more quickly.
Yes, now you’re thinking I’d rather save some money as the sheets and disks are really expensive but trust me, once you’re sanding you’ll really want to spend as little as possible time doing it!
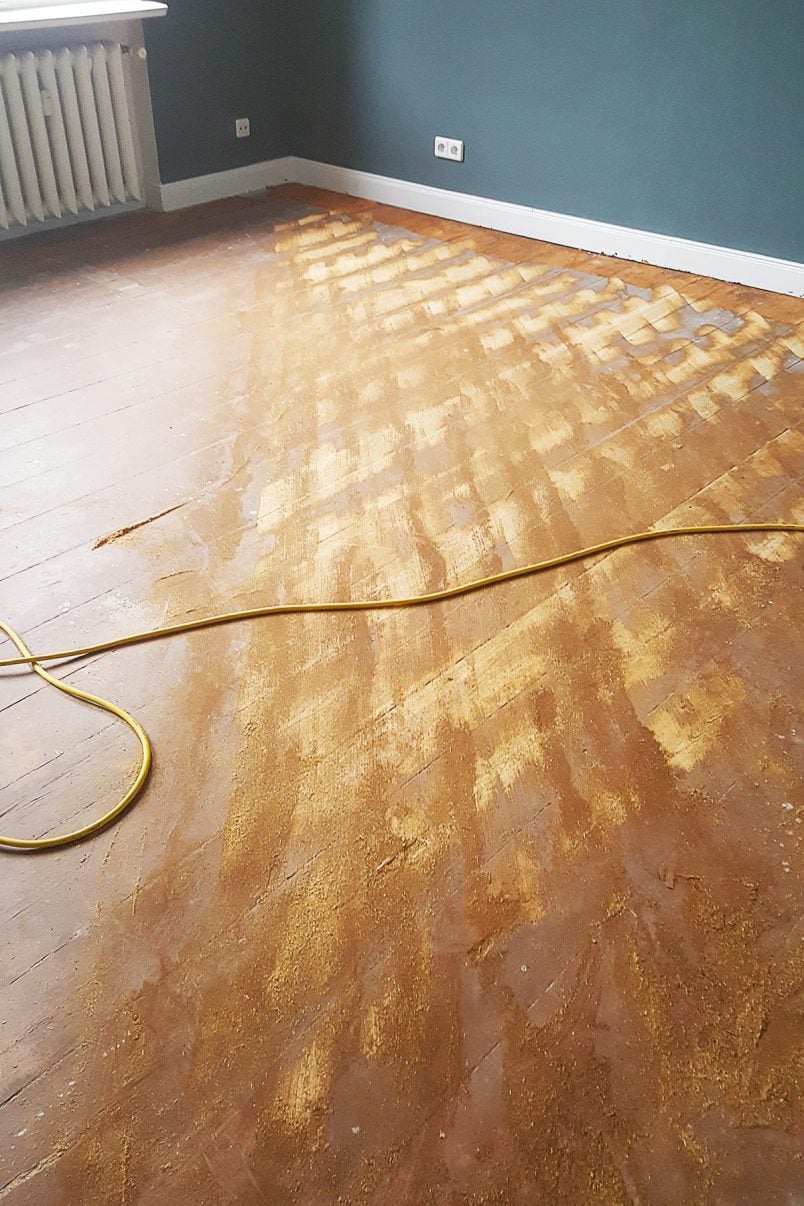
6. Sanding Against The Grain or Across The Floorboards
Never sand at a right angle to the grain of the wood no matter how uneven your floorboards are and how tempting this may be.
Sanding against the grain will damage the wood and cause very deep scratches that are difficult to remove and will be very visible when you oil, varnish or stain the floor.
If the floorboards are wavy and uneven, sand diagonally first. This will even them out and be much less harsh to the wood than sanding at a right angle to the grain. When the floorboards are even, continue sanding along the length of the floorboards and follow the grain of the wood.
Sanding with the grain of the wood means that you’ll be sanding with the natural direction of the fibres of the wood making any scratches invisible.
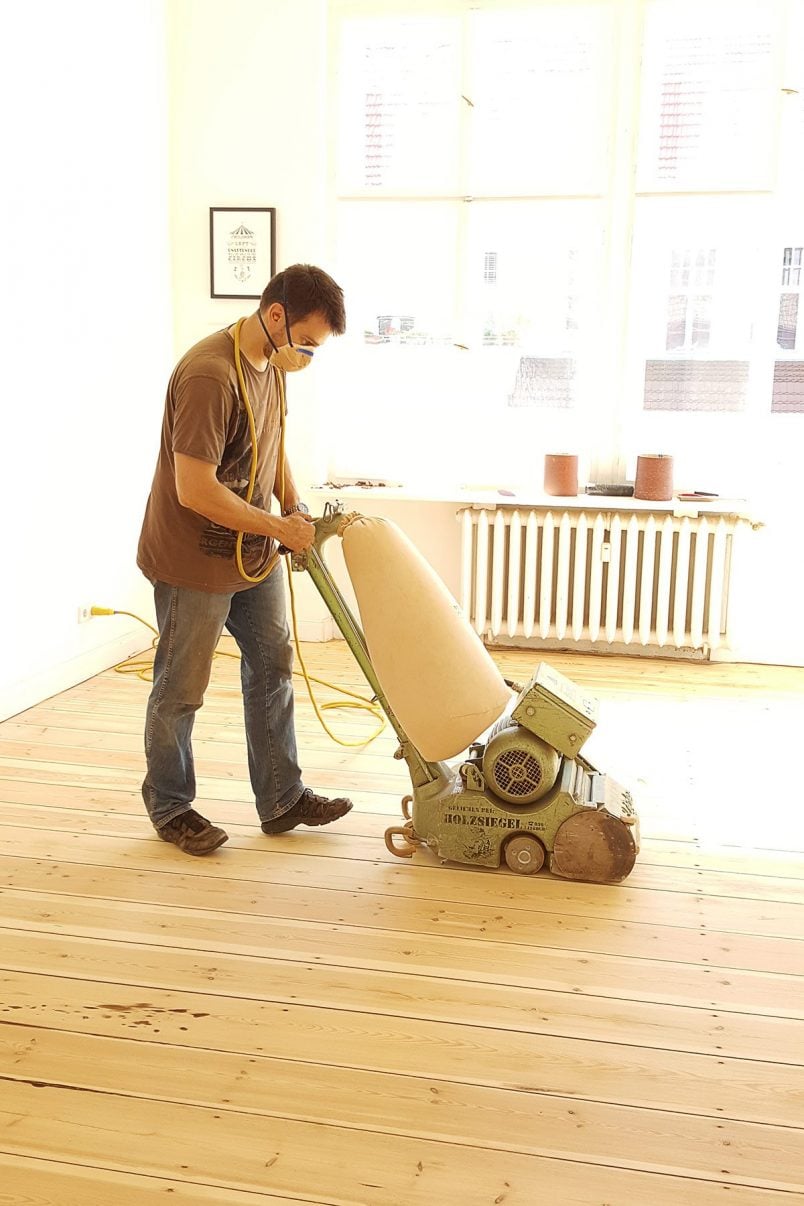
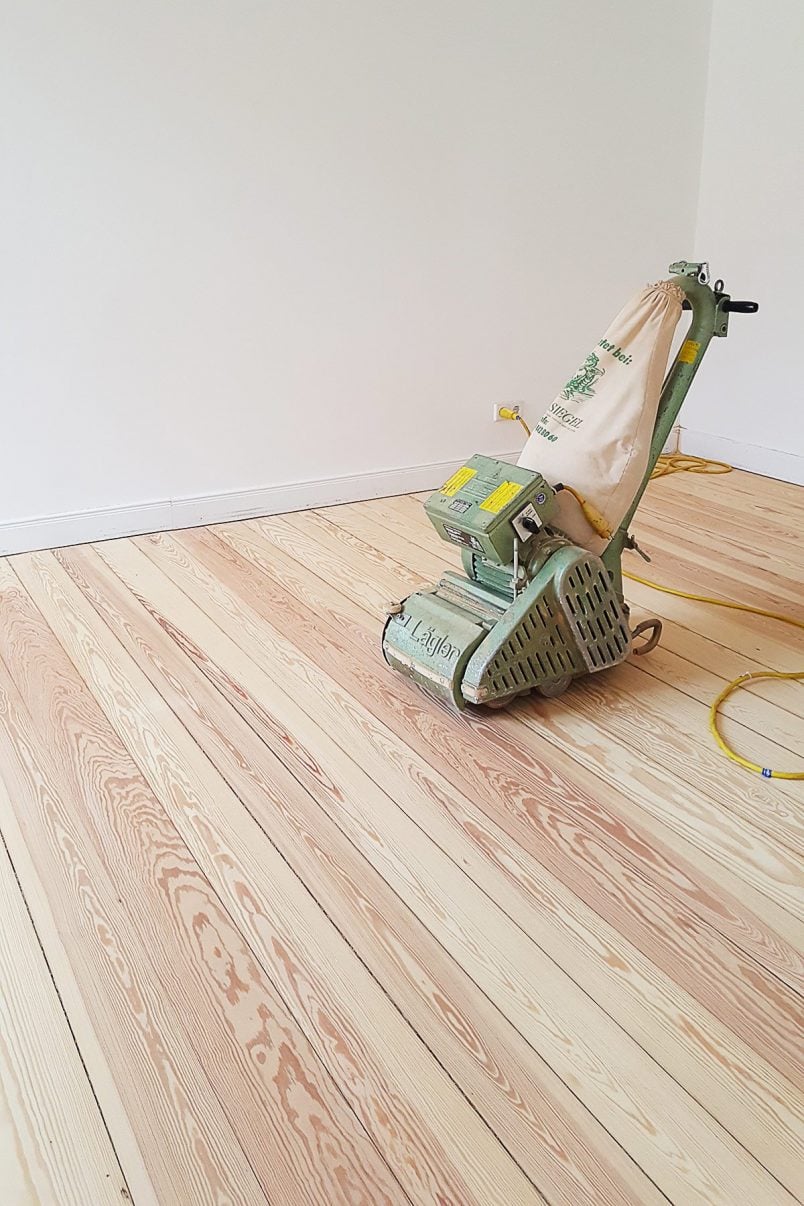
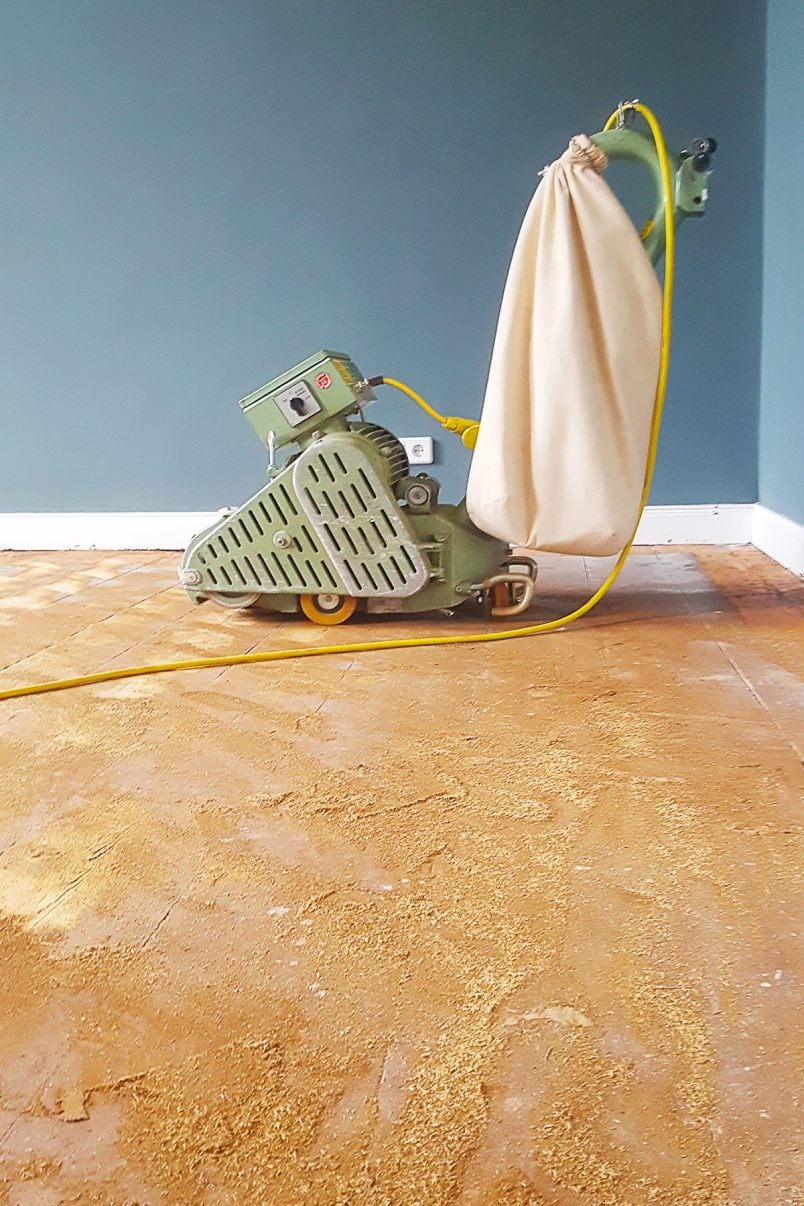
7. Not Using The Drum Sander
To achieve the best results, it’s important to use the right grit sandpaper but also the right tools. You should always use the drum sander whenever possible.
The large drum in the drum sander sands along the grain of the wood. The edging sander rotates in a circular motion and leaves scratches both with and against the grain of the wood. Any scratches against the grain will be more visible so it’s always important to avoid them as much as possible.
If your room is narrow, it may seem easier to use the edging sander to finish the whole floor but the result won’t be as good and you’ll almost certainly see scratches and imperfections. As the name suggests, only use the edging sander to sand the edges of your room.
The room pictured above is the narrowest room we sanded. It’s just under 1.8m wide and using a drum sander was (just about) possible. If your room is wider than 2 meters you should definitely use a drum sander to sand the majority of the floor.
There’s nothing quite like standing back and admiring your finished floors and although we definitely moan about how much hard work it is, it’s also a project that’s easy to do and very rewarding!

If you’re thinking about sanding your floors, you can see our full guide on how to sand your floors and floorboards here.
Have you ever sanded your floors or are you thinking about doing it in your home? Have you ever made any big DIY mistakes or any of the floor sanding mistakes we made?
Christina says
Thank you!
Christine says
You’re welcome, Christina.
Cx
Thom says
This is such great advice, thank you!
I’ve refinished a couple of floors and had good success. On my latest project refinishing new heart pine, I used a drum sander with 36/6/0/100 grits and should have started with more course sandpaper as the resin from the pine was intense! Spent hundreds of dollars on paper but I think it’s looking good.
On the 60 grit I started getting some ridges left in the floor from where the rubber drum pads pushed too hard into the floor that you can see mainly when light is just right coming through the window. They didn’t go away with 100 grit. I was told I should rent a buffer or orbital sander and use 120 grit to lightly and quickly even out those ridges. Do you have advice on this? My plan is to then seal with 2 coats Bona Nordicseal, and 2 coats of Bona Naturale for the top coat. Just want to make sure I don’t mess things up with a buffer. Thanks
Thom
Christine says
Sounds like you’ve already done a great job, Thom! I’d also recommend hiring a large orbital floor sander, although (depending on how bad the ridges are) I’d probably start sanding with 100 grit paper and then 120grit. That will definitely even out any ridges and give you a great finish.
Cx
Kathleen Bostinto says
My Oakwood floors were put in 1997. My 2 dogs put some scratches in the floors that were not deep but there were quite a few. We had a guy come in and said he was a professional. We gave him $2000 deposit and would pay him the other $2000 when he finished. He sanded our floors for 4 days, 4 hours each day. He destroyed our floors throughout the Kitchen, 1/2 bath, 2 hallways, Dining room and Livingroom. With over 100 different size holes in the floor measuring from a dime size up to a 50-cent piece and put all different wood filler colors in them all. Our wooden floors had huge space between them, the walls scorched from his sander. He put a sealer on the floor and left several of his footprints in the sealer. His sanding machine destroyed our stove, all kitchen cupboards with digs, scratches, and wood missing, there was so much yellowing of our Oakwood flooring. A complete disastrous nightmare of a mess. He emptied his dust bag outside into our new white rock garden that stretches around the house. He complained the whole time how much he hated this job and wanted to do something else. Aftter leaving a hurricane of a disastrous mess on our hands, He clicked his finger as if he was in a restaurant requesting the waitress to bring him the check. He said “CHECK PLEASE! REALLY LOUD! I want to get paid now he said! I told him after it is dried, we will inspect it and then pay him. We were so upset and text him and left him a message that we were sick over the destruction he did to our home. We wanted our $2000 deposit back and want the money to repair all the damage he had done. He immediately filed a lawsuit for $24,000 to take us to court and at the same time he put a mechanics lean on us for another $2000. We had a professional company come in with several crews to fix the mess he had done. They had to sand down our floors quite a few more times due to the unprofessional work he had done. They floors were beautiful when they finally got done. It has been 6 months and we now have over 200 slits in all the boards, in all the rooms he had done. We reached out to the 2nd company that did a great job but filled in all the multitude of holes that were in the floors throughout all the other rooms and hallways. Filled all the large space that the first guy did from over sanding and then they also had to sand due to trying to fix his mess. Now months later another disaster comes our way. We reached out to the 2nd company. They do not want to get involved because they think we will sue them, when it was not their fault. We reached out to another company, and they claim that over sanding can cause much damage to the flooring because Oakwood can only be sanded a certain amount of times before it becomes weak and unstable. Now we are left with a disaster in our home and left with a huge bill to install new flooring throughout. The heat or cold weather has nothing to do with the large, long holes that run up all our floors. These floors were down since 1997 and never had a problem. The flooring in the bathroom and hallways are cupping as well.
We spoke to our lawyer who was supposed to go to go to small claims court with us but told us he thinks it best to hold off and get a written letter stating what happened. We took over 500 pics from the beginning to now. The lawyers looked over the pictures and all the evidence and say we must take this up to the circuit court. In their own words they called this “VANDILISM! TOTAL DESTRUCTION OF NOT ONLY YOUR FLOOORS, BUT YOUR HOME. They also checked into his background; he has no contractor’s license in the town or state. He was never registered to work in the county or state. They suggest I get a written statement from a professional stating that over sanding the floors will make them weak and unstable and due to this? I will need all new flooring installed though out. I have to get a quote to install new flooring in all areas listed in this letter. More of a nightmare. We would appreciate it if you could please give us your professional opinion and comment?
Please let us know how long you have been in the flooring business as well. Thank you!
Christine says
Oh wow, that sounds like a nightmare! Hope you manage to get it sorted, Kathleen.
Cx
Camzio says
Gosh, I’ve been reading your post it is now 2023. I would love to know how your claim turned out with the person that ruined your floorboards, I really don’t know how these people get away with demanding money upfront! I hope you managed to resolve.
Debra says
Thank you your sanding tips. We are about to embark on sanding our floors.
Christine says
You’re welcome – hope it all runs smoothly but feel free to get in touch if you have any specific questions!
Cx
Jane West says
Hi
I have had floor boards sanded and can see circles left, is this correct.
Thank you
Christine says
It’s hard to say without knowing your floor but I would say no. When you sand floors, you start with a coarse grit to remove any old varnish and dirt and then go over the floor with finer grits to smooth out the grooves left by the coarse paper. It sounds like your floor hasn’t been sanded enough and that grooves from the coarse paper haven’t been smoothed out enough.
As I said, it’s difficult to know without seeing your floor but I hope that helps!
Cx
Karen Wolfe says
Thank you so much for sharing your experiences and expertise. I just purchased a 101 year old house and discovered hardwood floors under the icky carpets and under three layers of linoleum. Hurray me. I was just getting ready to go rent a sander when I saw this. Thank you again.
Karen
Christine says
What an amazing discovery, Karen! That’s so lucky and I’m sure they’ll look amazing when you’ve sanded them. If you want to read more about sanding your floors, you can see an overview of our most helpful floor sanding articles here.
Good luck with your floors!
Cx
Jeannie Chapman says
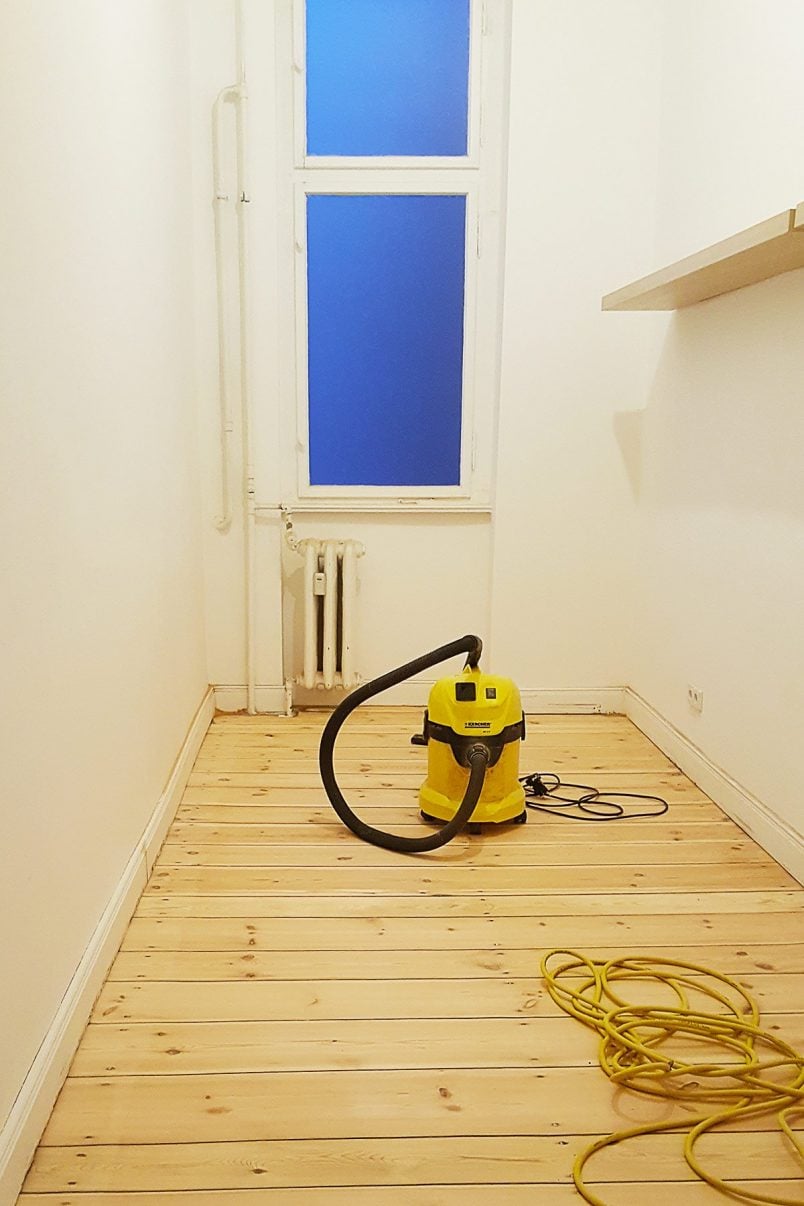
I see your machine has a large bag. Do you still need to empty your whole house or seal each room. ?
Christine says
Sadly, yes. I’d clear as much as possible out of the room you are sanding before starting to work on it as there will still be a lot of dust. I know that it’s not always possible and we’ve sanded around a sofa and moved it from one side of the room to the other before but if you can, I’d recommend clearing as much as possible. It’ll make cleaning up and working in the space much easier, Jeannie.
Cx
Lauren says
What order do you recommend doing for the grits of sandpaper? Thank you.
Christine says
Always start with the lowest number grit and move on to the finer grits (higher numbers), Lauren. Depending on your floors I’d start with 24 grit (possibly even 16 grit if they are very uneven) and then move up to 40 grit, 60 grit, 80 grit, 100 grit and finally 120 grit to make sure the surface is really smooth. You may find this post where we’ve shared links to all of the posts we’ve shared about how to sand floors helpful.
Cx
Wendy Kastner says
Your article has been so helpful to this first-time DIY floor refinisher! I’ve managed to tackle one room already in my 200-year-old fixer upper, and I’m at the ‘shadow’ stage. Did you continue with the coarse grit until all shadows are gone? Thank you again for all your helpful advice!
Christine says
It sounds like you’ve already done most of the hard work! It really depends on how much of a shadow is left. If there’s not much I’d probably move on to 40 grit sandpaper but if it’s still quite dark I’d stick with 24 grit paper for a bit longer.
So glad to hear that you found our advice helpful, Wendy!
Cx
Matt says
What varnish did you guys use??
Christine says
We used varnish in our first home and oil in our second home. Both have advantages and disadvantages. We absolutely loved the oil we used though and highly recommend it as it held up really well and dried fast, too. This is the varnish we used.
Hope that helps, Matt!
Cx
Alex Sutton says
Your floors turned out so good! I ended up having a local company come out to refinish and sand our hardwood floor in our music room since it was pretty bad, but I would love to try doing it myself in the rooms that don’t have as much damage. Did you end up using a stain after you sanded the floors? If you did, what color was it? Thanks for sharing this!
Christine says
Thank you, Alex! It was hard work but soooo worth it! We didn’t use a stain on any of the sanded floors in our homes. They are all just the natural colour of the wood.
Cx
Joanne says
Thank you for this insightful and beneficial article! We are sanding our floors and have two black marks we can’t seem to remove! One is a marker from old furniture, and another is a black x marked on the floor from some type of paint. How do you remove those hard marks without causing the floor to be un-leveled?
Christine says
You’re welcome, Joanne! Are you sanding your floors or are you just trying to remove the mark? If you’re sanding, I’d suggest sanding over the whole surface of the floor a few more times until the marks disappear. You’ll find that they won’t budge for a while and then all of a sudden will vanish. You can go over the odd spot more than others (I wouldn’t do this too often though) if you find you have a really stubborn mark but generally it’s best to sand the whole surface evenly. If you’re worried that the stain is really deep, I’d recommend trying to remove a bit of it by hand with a hand sander – just to see if it’s even possible or if it’s penetrated the floor too much. Ultimately, it’s an old floor, so if you can remove most of it, it may just add to the character of the room.
Cx
Gina says
Just bought my first house and the quote for refinishing the floors was $3000- for a very small house! So my brother thought we could tackle it. I rented an orbital sander and yesterday we spent all day sanding. Our biggest problem has been the finish collecting and for in a gunk that sticks to the floor which we then have to go around and scrape off. We didn’t think to use a pre-cleaner before starting. He also started changing the pads more frequently which helped but it still happens. He used a belt sander in the past and didn’t have this issue, not sure if it’s the type of sander we are using that may make this more of an issue.
Christine says
It sounds like you are using the wrong grit sandpaper, Gina. When you’re sanding away old paint or varnish the sanding disks clog up fairly quickly and using coarser grit sandpaper to start will help avoid the problem (although they will still clog up just not as quickly or as much).
Hope that helps!
Cx
Ellen Millar says
Lots of useful tips – thanks! Just one question – by insulating underneath the floorboards, does that not prevent air circulation under the house? We’ve got airflow bricks around the outside of the house, and someone suggested that by insulating underneath the floorboards it might prevent airflow and consquently cause rot? I’d arthe have the natural look of not using slivers, but equally I don’t want to have drafts, or have the underfloor structure rot. Any advice much appreciated!
Christine says
Yes, and yes. It’s really important to not block your airbricks and allow the air to flow to ensure that everything stays dry and won’t rot. Many people stick the insulation under the joists rather than between them. This means that there’s a big air gap where condensation can occur. Exactly how’s best to insulate your floors will depend on the exact construction of your house. I’d recommend getting some professional advice that’s specific to your home. As a very basic rule though, condensation will occur where hot and cold air meet, so you want to make sure that the inevitable moisture occurs somewhere were the moisture can’t damage your woodwork, etc and can drain away/dry thanks to the air brick ventilation.
Hope that makes sense!
Cx
Katie Street says
I just tried sanding and staining my floors for the first time. When we sanded small pieces of black something would cake on the sanding pads in less than 2 minutes and make the pads ineffective. We were able to scrape off the “gunk” but it left marks in the floor. I tried staining and it turned out very uneven. Any advice for dealing with the “gunk”? Should we strip the floors before sanding??
Christine says
That’s so annoying, Katie – I totally feel for you! It sounds like your floors may have been painted before and when you sand them the paint melts and clogs up the disks. We have a similar situation in our guest bedroom where the floor had been coated in a thick dark red paint. What grade of sandpaper are you using? the coarser the better for these kinds of situations. You could alternatively use a heat gun to strip the paint (if that’s what it is) but it would be a lot of work (always test for things like lead paint, too!). I personally would be tempted to very roughly strip the paint (just to remove the majority of the gunk) and then start sanding with some coarse paper before moving on to the finer grade.
Cx
Rachel Jenkins says
Hi, thanks for this, very helpful!!
I was just wandering where you hired the different machines from, and if you would have any recommendations on which machines are good? ive been looking around and there seems to be quite a big range?
Thanks!
Christine says
That’s a really good question as the quality of the machine can make a huge difference! You will generally find that the hire tools are a bit less powerful than the ones the professionals use but they still work amazingly well. For our first house, we hired the machines at a small local hire shop. In our current home, we also opted for a small independent hire shop as we tend to find that they give better advice and more tips and tricks for handling the machines they hire out. The machine we used the second time around was by a company called Lägler and, if you can get your hands on one, it’s what we’d recommend as it was super powerful and easy to use. Having said that, I wouldn’t worry too much about it as you’ll probably find that most machines will do the job. Just remember to change the paper regularly!
Cx
garyround0@gmail.com says
I’m definitely going to sand the floor boards and stain and varnish them. While your guide is very helpful the question of filling the gaps between the boards is not fully answered. I have gaps of between 4 and 7 millimetres and I’m unsure if these are big or small gaps? If these are gaps that are of a size that need filling, then what should I fill the gaps with? All advice is welcome. Thanks garyround0@gmail.com
Christine says
It’s down to personal preference what you do with any gaps.
We insulated under our ground floor (which is something I’d recommend if you’re exposing your floorboards) and the gaps were fairly small so that there were no problems.
I personally wouldn’t advise on gaps over 5mm. You can fill the gaps with strips of wood that are glued into place before sanding or with a gap filler like this one.
I personally don’t like the look of large gaps which is why we took up all floorboards in our bedroom and moved them closer together so that there was one large gap that we filled with another floorboard.
Basically, there are a few options and the decision is up to you!
Cx
RiRi says
Everytime I think if a question you’ve already answered it across this and your other articles on sanding! So detailed and easy to understand. Thank you! We’re currently buying a victorian semi with wooden floors so am reading up and keep ending up back on your blog!
Christine says
Haha, happy to hear that you keep finding your way back to us! I’m officially obsessed with sanding – it’s such a rewarding job (even if it’s tough at time).
We’ve definitely written more than a few posts about sanding floors and ever time we sand something we learn something new.
We’re actually putting together a full floor sanding guide so that all information is in one place. There are a few things we learned this time around that we’ve not even managed to share yet!
Cx
Lizzie says
This is great! We have yucky red and blue carpet all over our house and with a dog I’d much rather have sweepable, wipeable wooden floors. Just need to get on with it. I’ll certainly bear all these tips in mind!
Christine says
I totally admit that I don’t envy you but I promise that the hard work is worth it!
We shared a full guide on how to sand floors, maybe it’ll be helpful for when you do get round to your floors.
Good luck with your floors!
Cx