Our kitchen renovation is progressing nicely. Most of the cupboards are painted, we installed a new worktop and have almost finished building some super thin floating shelves.
But, if you follow us on Instagram, you’ll already know that we had a fairly major setback at the beginning of last week (our extractor fan fell off the wall in the middle of the night and smashed our hob into a million pieces) which has basically meant that our schedule with strict deadlines has now turned into a “we’ll see when it’s done” kind of situation.
It’s not all bad though. It means that we’ll be able to justify purchasing a fancy new induction hob and, more importantly, our kitchen makeover is looking amazing (although there’s still a long way to go!).
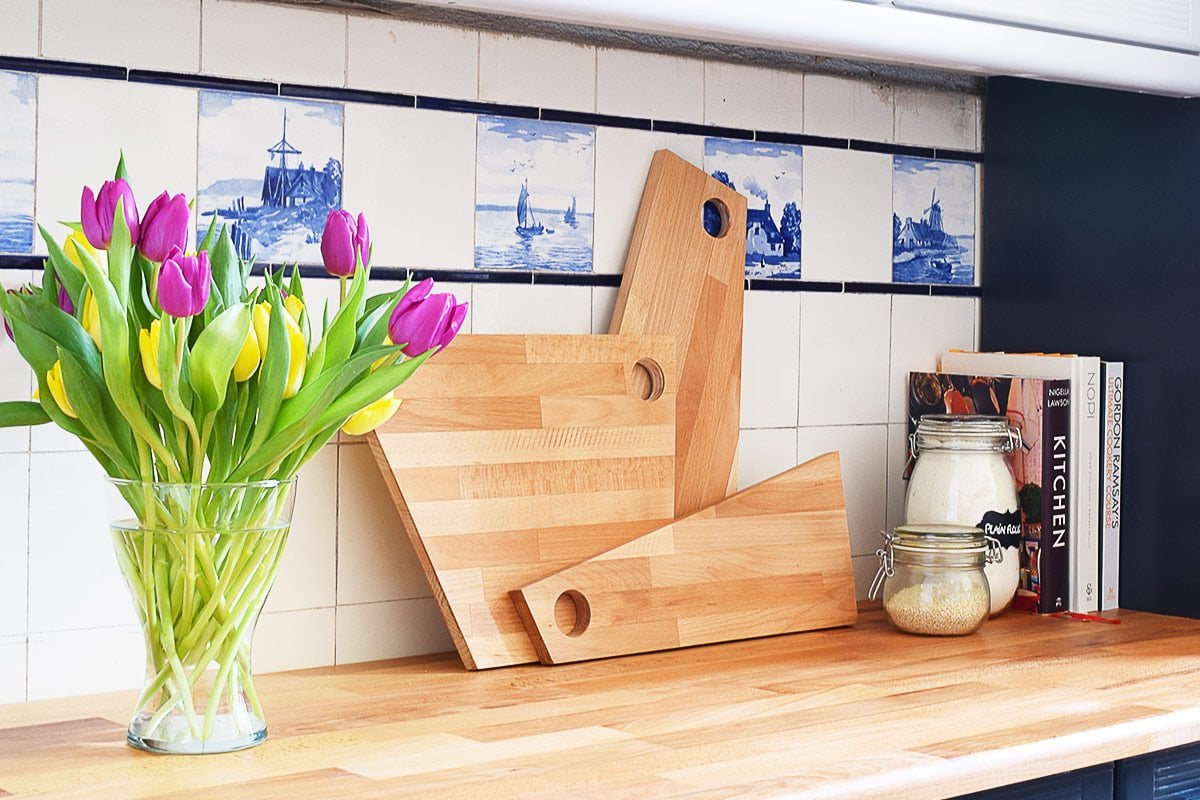
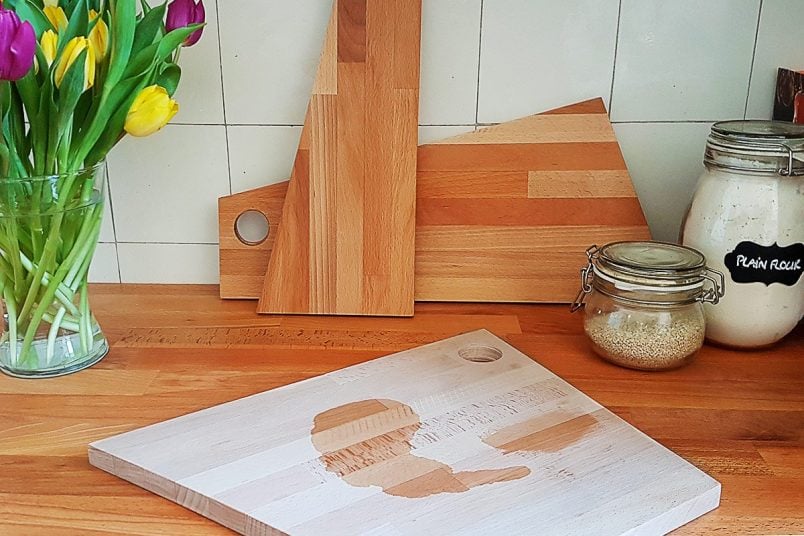
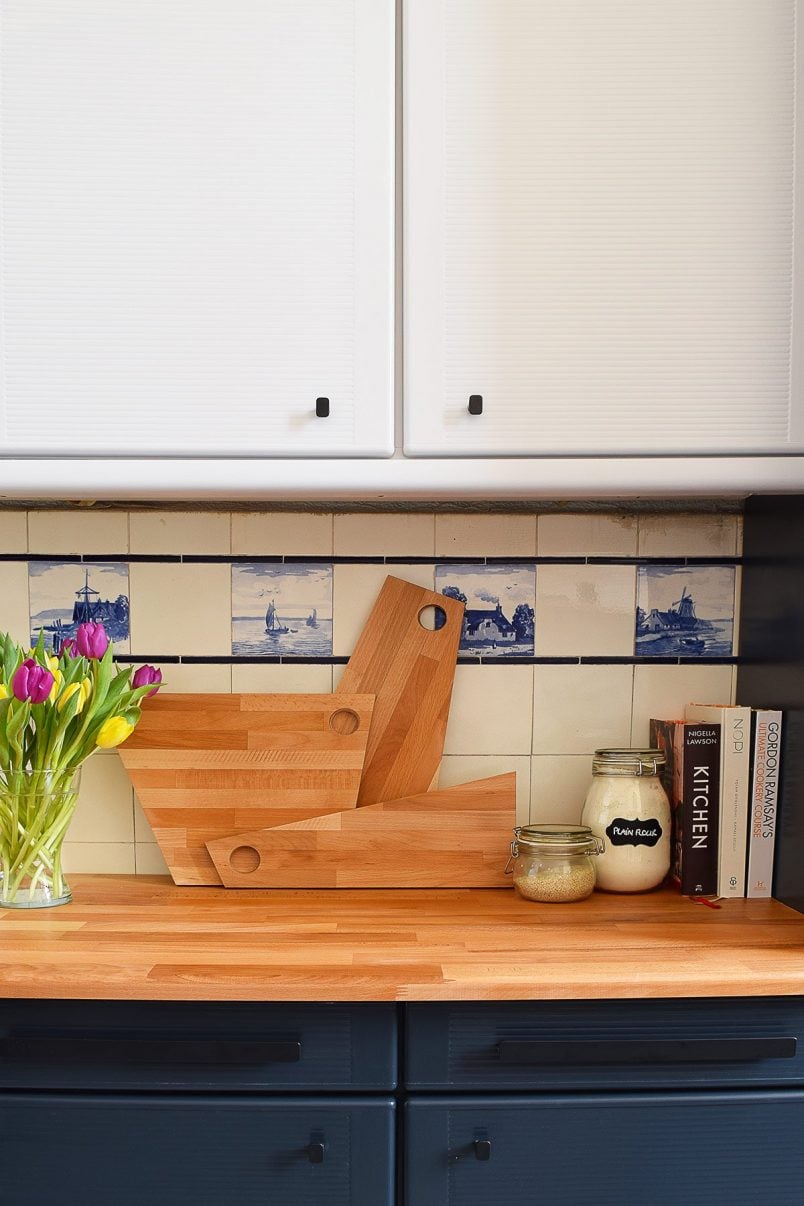
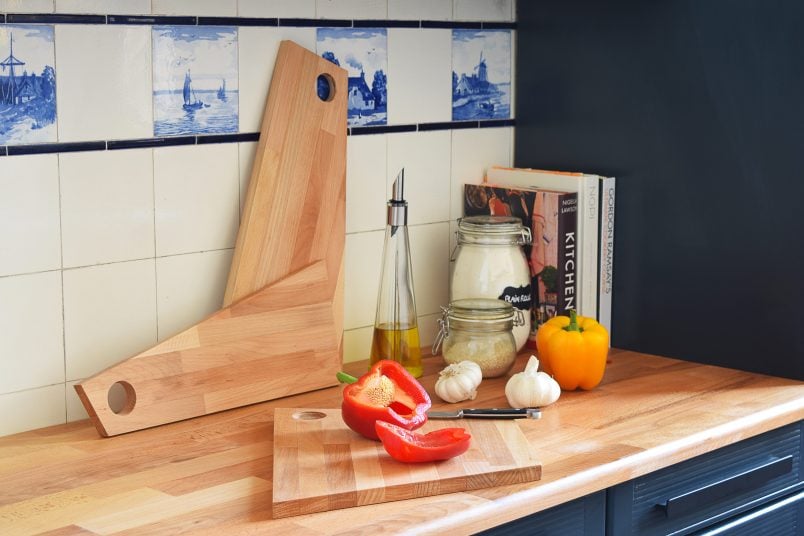
To go with our newly renovated kitchen (whenever it may be done) we’ve been getting creative and have been making a few new accessories for the transformed room. And, our newest addition are these DIY geometric chopping boards.
Aren’t they fun? They are so quick and easy to make that it feels like a cheat even calling it a DIY project but as it involves a circular saw I’m sticking with it!
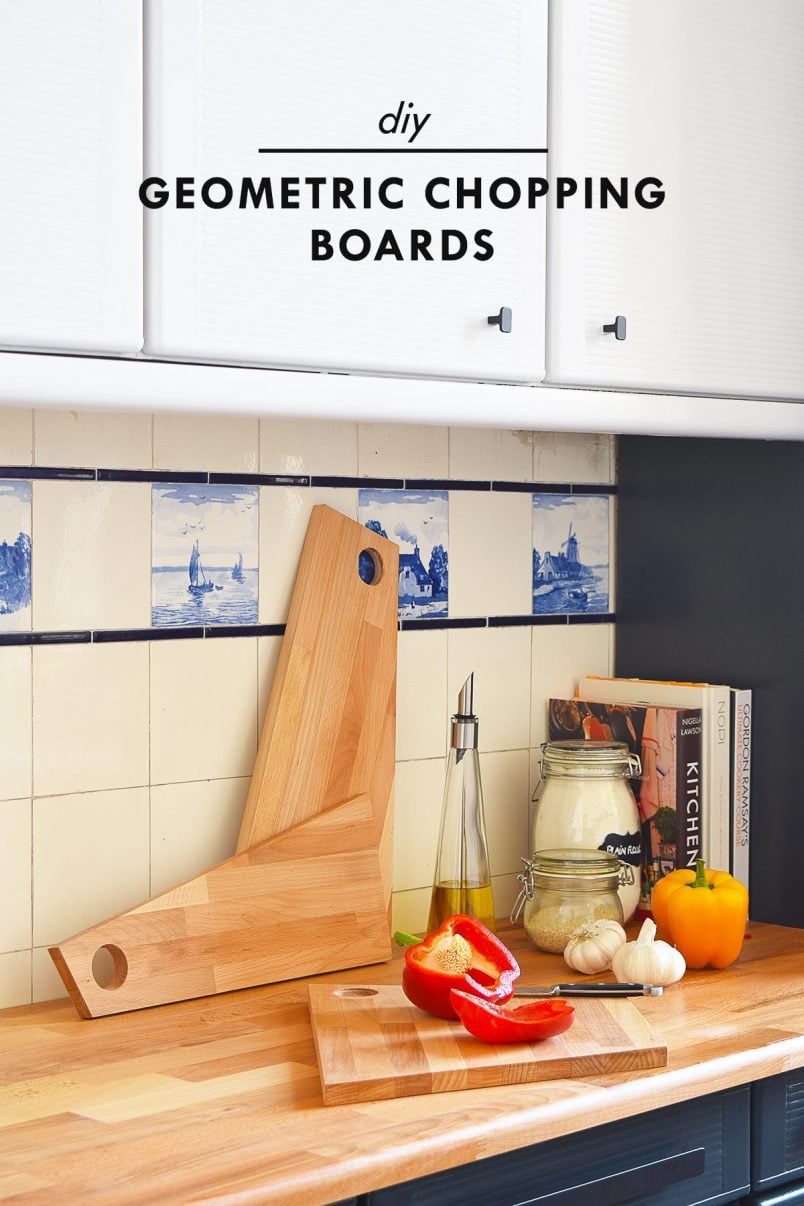
They’re inspired by the asymmetric chopping boards I recently saw. But, after our extractor fan disaster which inevitably means that we’ll end up spending a lot of money on a new hob and oven, we decided to have a go at making our own DIY geometric chopping boards!
This is what you will need to make a DIY geometric chopping board:

This post contains affiliate links. We only recommend products we love and think that you will, too! Read our full disclaimer here.
- A piece of timber – it doesn’t really matter how big it is, you could use a scrap piece of wood. The size of it will determine the size of your chopping board. We used this piece of 800 x 300 mm solid beech from our local DIY store but something like this solid oak hobby board would work really well, too.
- Chopping board oil
- Circular saw
- Masking Tape
- Sandpaper (120 grit & 240 grit)
- Drill & flat bit or a hole saw
- Optional: Clamps
This is how to make your own DIY geometric chopping board:
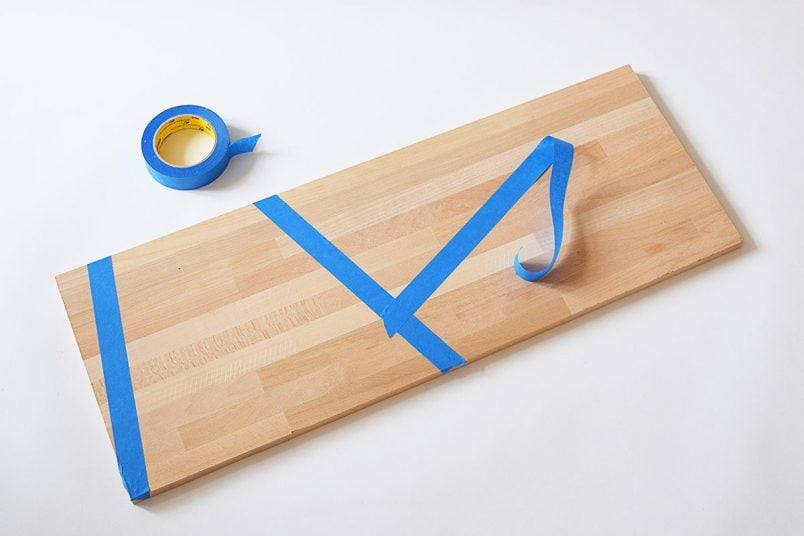
1. Work out your design.
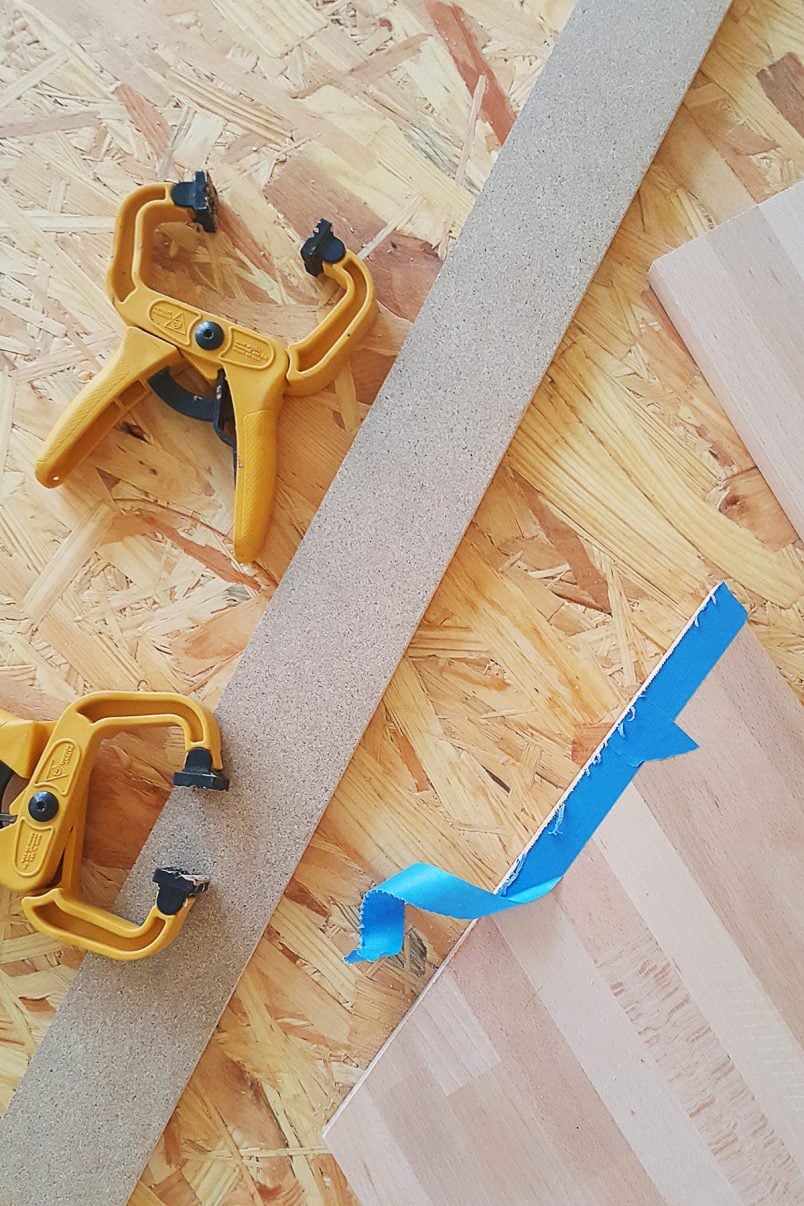
Depending on how small or large you’d like your geometric chopping board to be, tape the lines where you’ll be cutting with some masking tape.
There’s no need to measure anything (unless you want your boards to be a specific size), just use the tape to mark the sizes you want and adjust it until you have a design you are happy with. Just make sure not to cut too close to a join in the wood as it’ll be a weak spot.
2. Cut the boards.
To achieve a perfectly straight edge, we always clamp an offcut of timber to the piece we’re cutting to use as a guide for our circular saw.
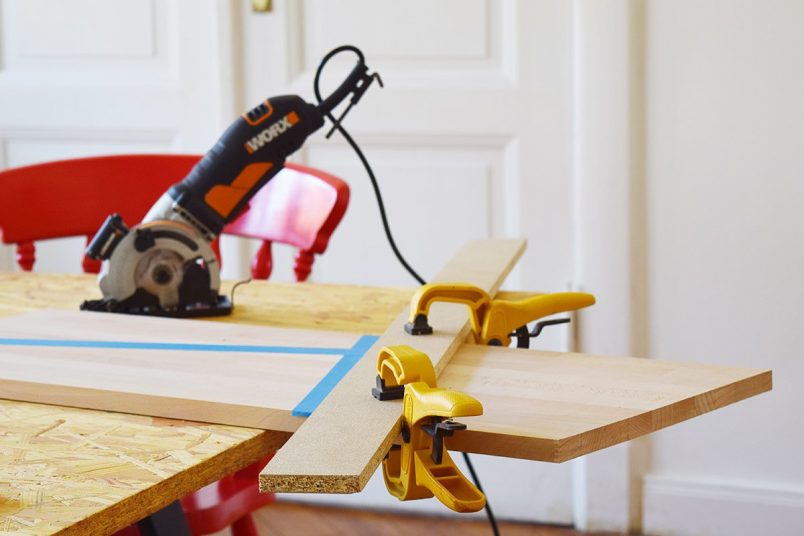
It’s something you don’t have to do and you could just saw a straight line by hand but we find that this method achieves the best results.
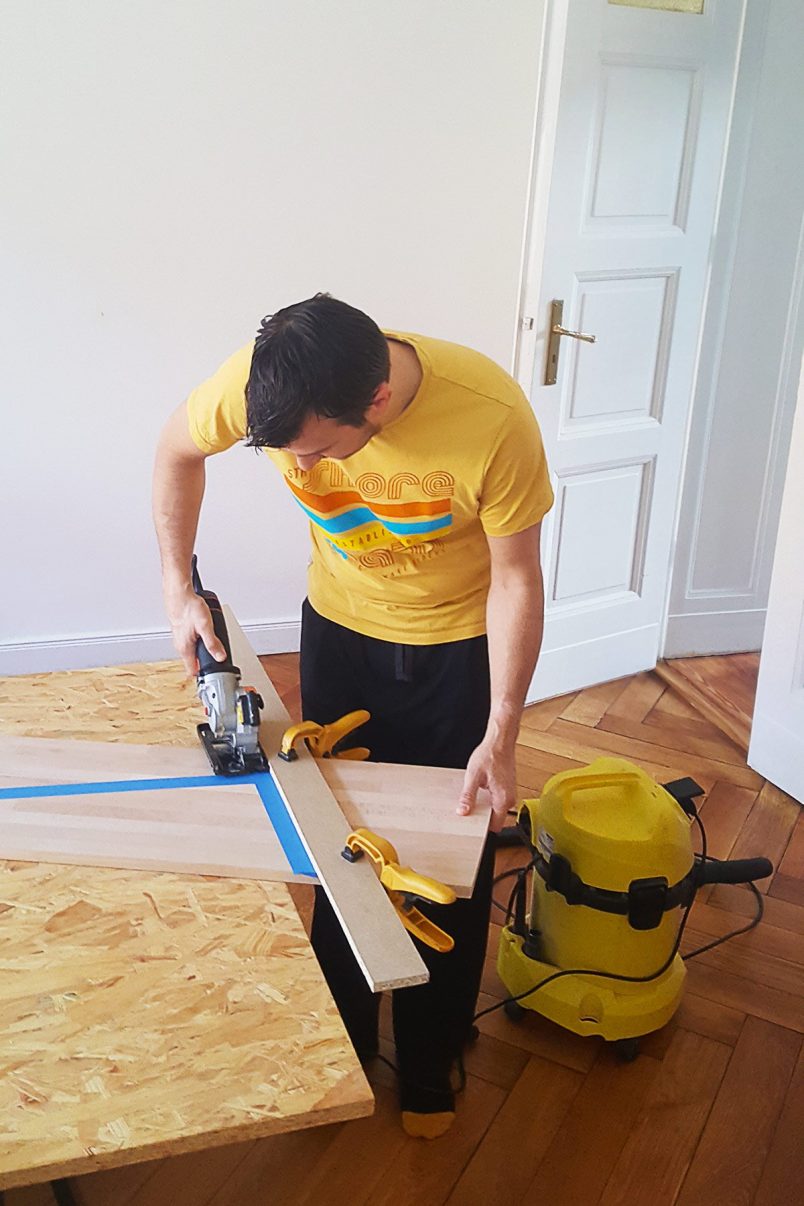
Using tape also has the advantage that it’ll help reduce the risk of the wood tearing along the cut line and should help achieve a perfectly crisp edge.
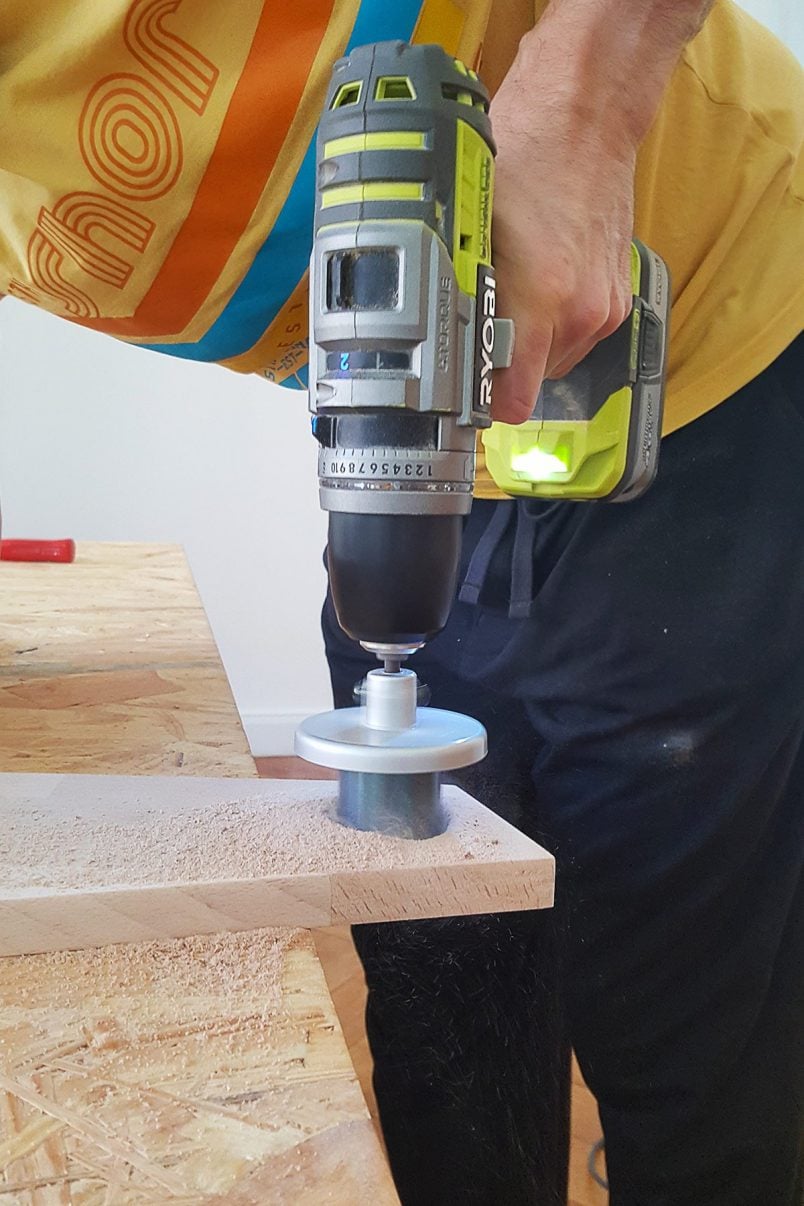
3. Drill the hanger holes.
Now that you’ve cut your geometric chopping boards to the size you want it’s time to add a hole to be able to hang them up. The size is totally up to you – we opted for a 38mm hole which we drilled into the wood with our drill and a hole saw.
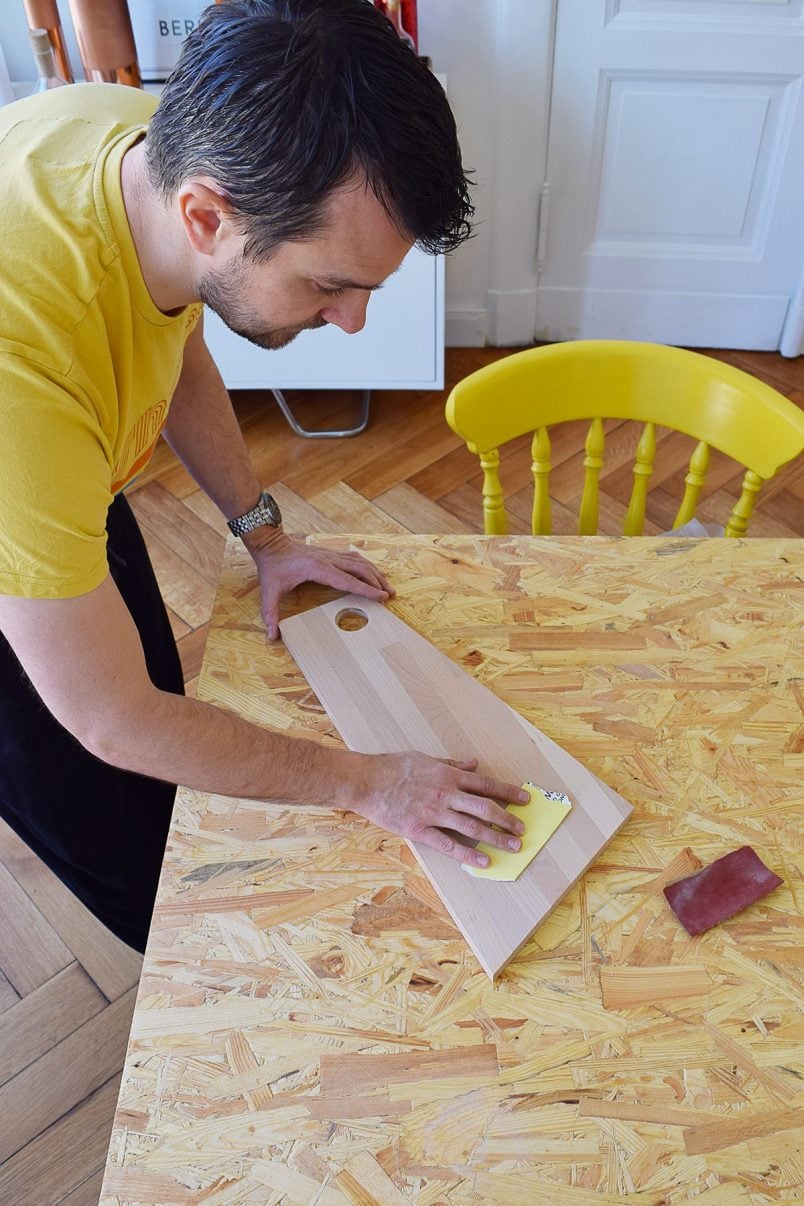
4. Sand & finish.
When you’re happy with the shape and size of your geometric chopping boards give them a thorough sand with some 120 grit sandpaper. Make sure that all edges are completely smooth – you don’t want to end up with a splinter when you’re chopping the limes for your margarita (yep, I class that as cooking).
When everything feels completely smooth change to 240 grit sandpaper and repeat the process. You’ll notice a big difference and everything will feel so much smoother than before.
Wipe the chopping boards clean and make sure there’s no dirt or dust on them before you apply your first coat of chopping board oil with a soft cloth. Let it dry overnight before moving on to the next step.
I go on and on about sanding so much but it’s one of the easiest and most important parts of so many projects, yet it’s something that so often gets overlooked. So, with that in mind, the sanding continues…
You’ll probably notice that the chopping board doesn’t feel as smooth as it did before you applied the oil. That’s because the grain in the wood reacts with moisture and raises up. To achieve a perfectly smooth finish you will have to sand the board again to remove any grain that’s now raised.
Give the chopping board a quick wipe with a damp cloth – the moisture will make any of the remaining grain raise up – and then let it dry again before sanding again with 240 grit paper.
Then, finally, give it another coat of oil. It should now stay completely smooth but if there are still a few rough patches you can just repeat the process until you are happy.
I’d recommend waiting a few days and letting everything thoroughly dry before applying a 3rd coat of the oil for even more protection.
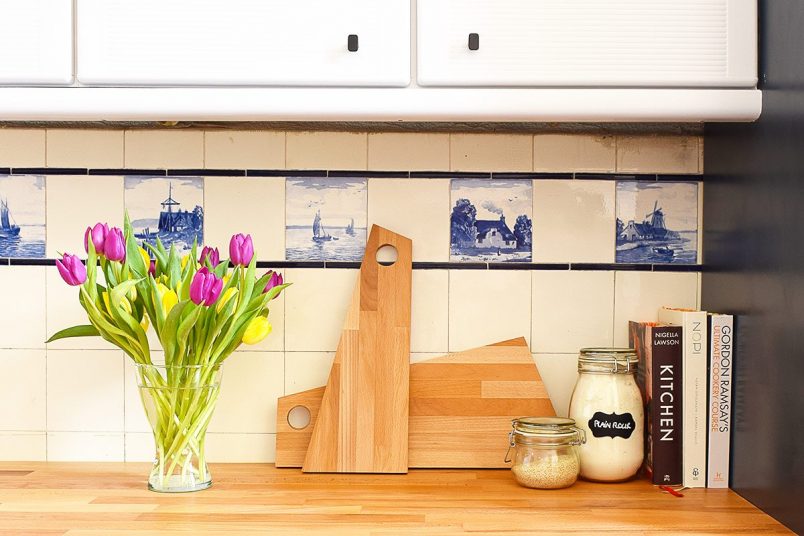
To go with the angular design of the chopping board we decided to keep all of the edges at right angles, too. If you’d like your chopping board to have rounded edges, you can use a router with a rounding bit to create them.
I’m so pleased with how these turned out and all together each geometric chopping board cost less than 2€ each to make! If that’s not a total bargain, I don’t know what is!
For some reason, I can’t get enough of chopping boards at the moment. It’s especially weird if you consider that I don’t particularly enjoy cooking!
Making your own chopping board is so easy to do and I’ll definitely be keeping my eye out for some reclaimed timber as it would be lovely to make a chopping board with a more organic shape and worn look.
Wouldn’t these make fab gifts? Have you ever considered making your own chopping board? Do you have a favourite kitchen accessory?
hester says
Love those Delft Blue tiles! Are they old ones or reproductions?
x Hester
Christine says
We love them, too, Hester! I’m not sure that they’re Delft tiles but they are the original tiles which were installed in the kitchen about 110 years old!
Cx
Eina says
Perfect ‘Berliner Zimmer’ Boards!
Lovely tiles and paint color to complement. Thank you for all the tips on your blog.
Christine says
Thanks, Eina! We can’t wait to finish the kitchen – we finally had a breakthrough yesterday which means that we’ll now hopefully be able to finish it next week!
Cx
Jessica@CapeofDreams says
Very cute! These would make nice housewarming or wedding gifts.
Christine says
Thanks, Jessica! They’re definitely gifts I’d love to receive!
Cx