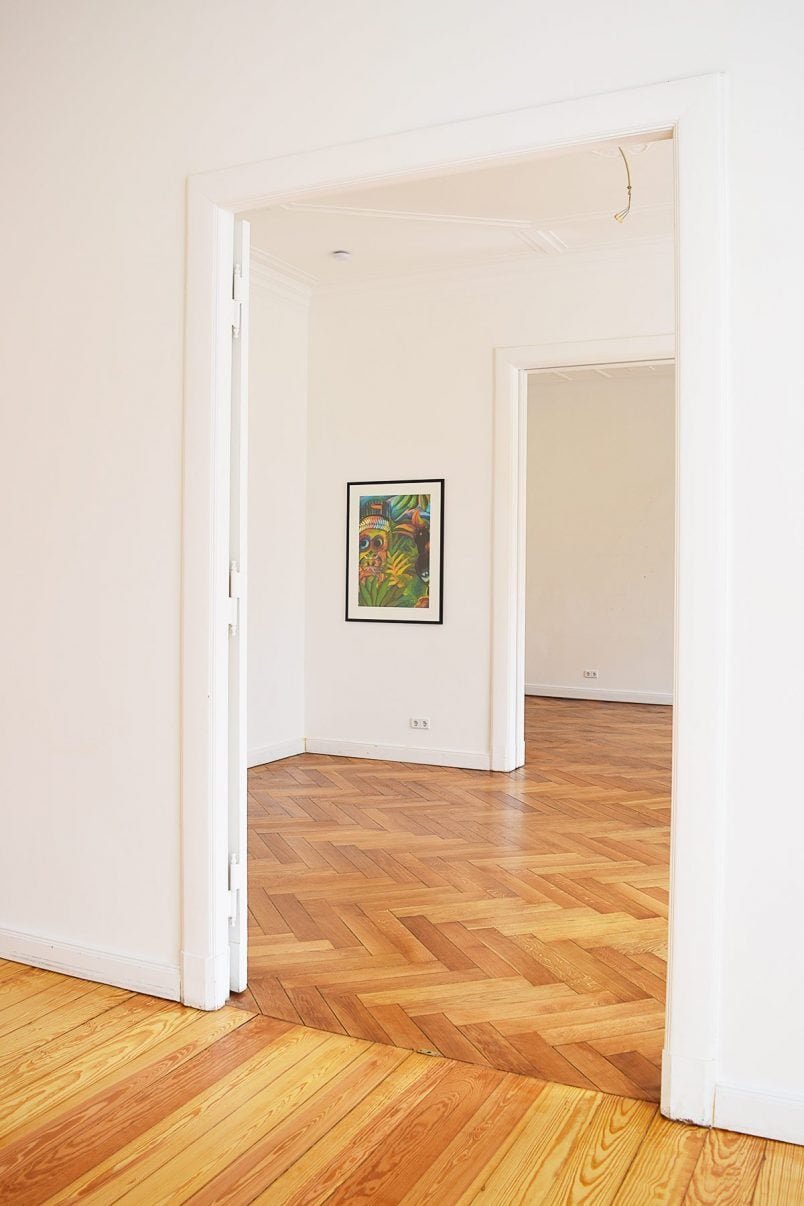
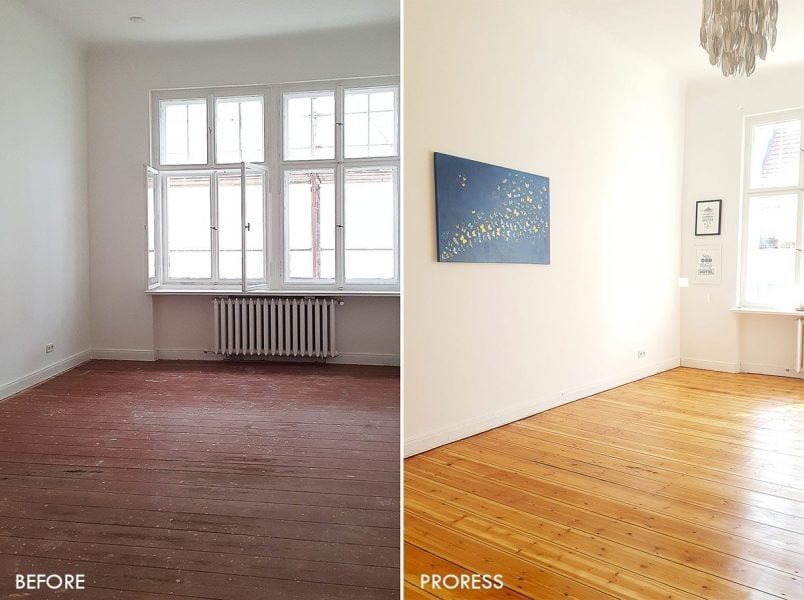
I’m so excited to finally be able to share our newly sanded and oiled floors!
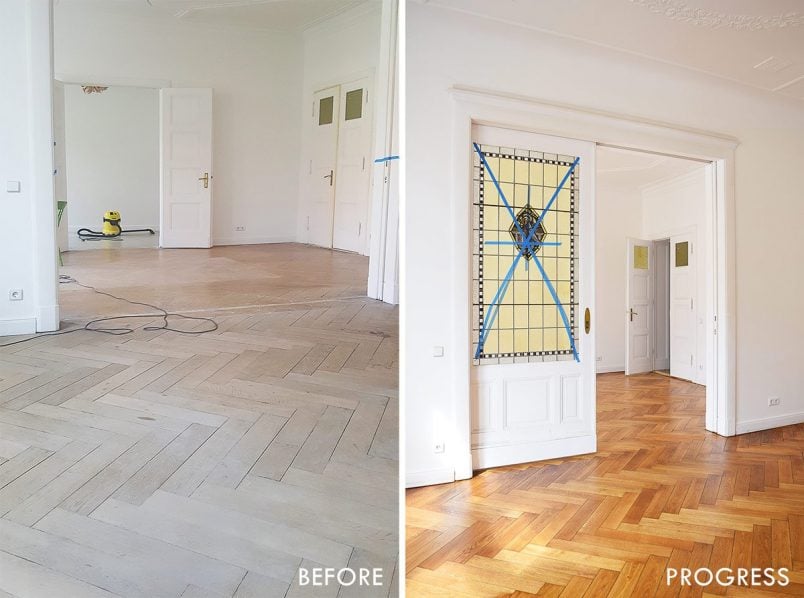
Okay, so it’s not a complete surprise as we’ve been sharing a few pictures of our finished floors over on Instagram and were completely impatient and shared a progress report a couple of weeks ago.
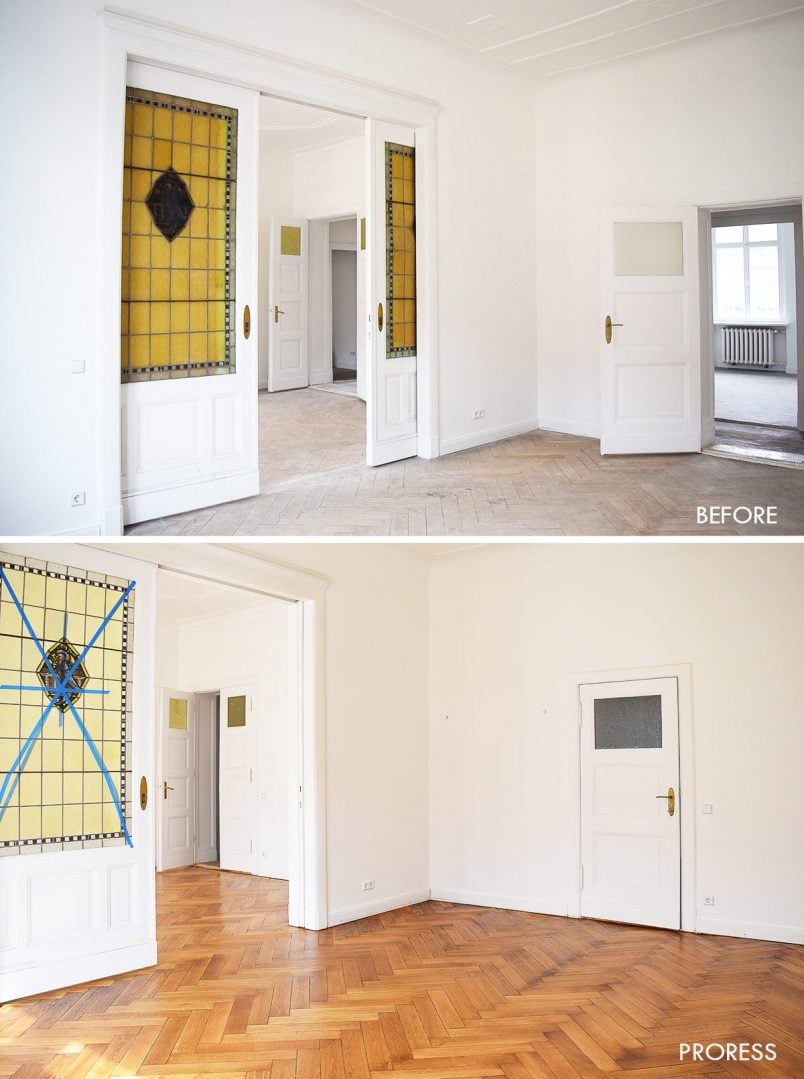
Now that the oil has hardened and our furniture is back where it belongs and no longer squashed in the hallway, bedroom and bathroom we can finally share our before & after pictures!
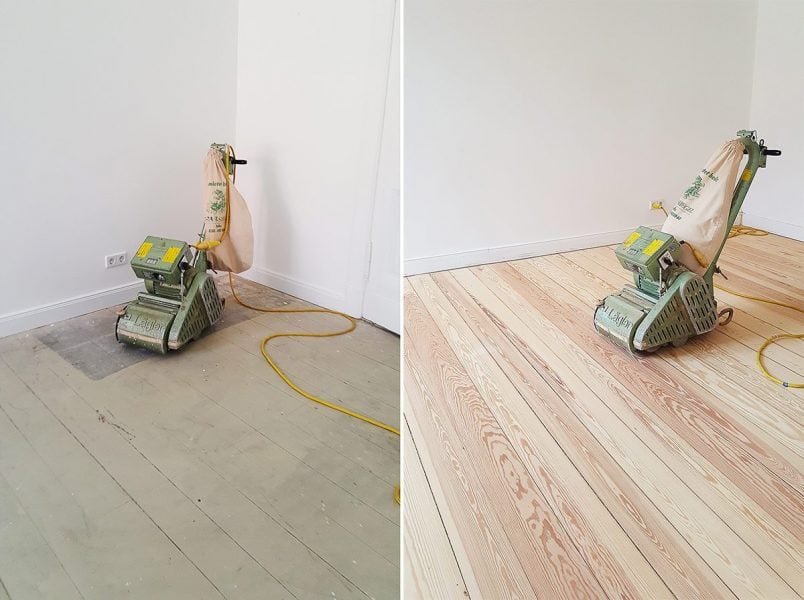
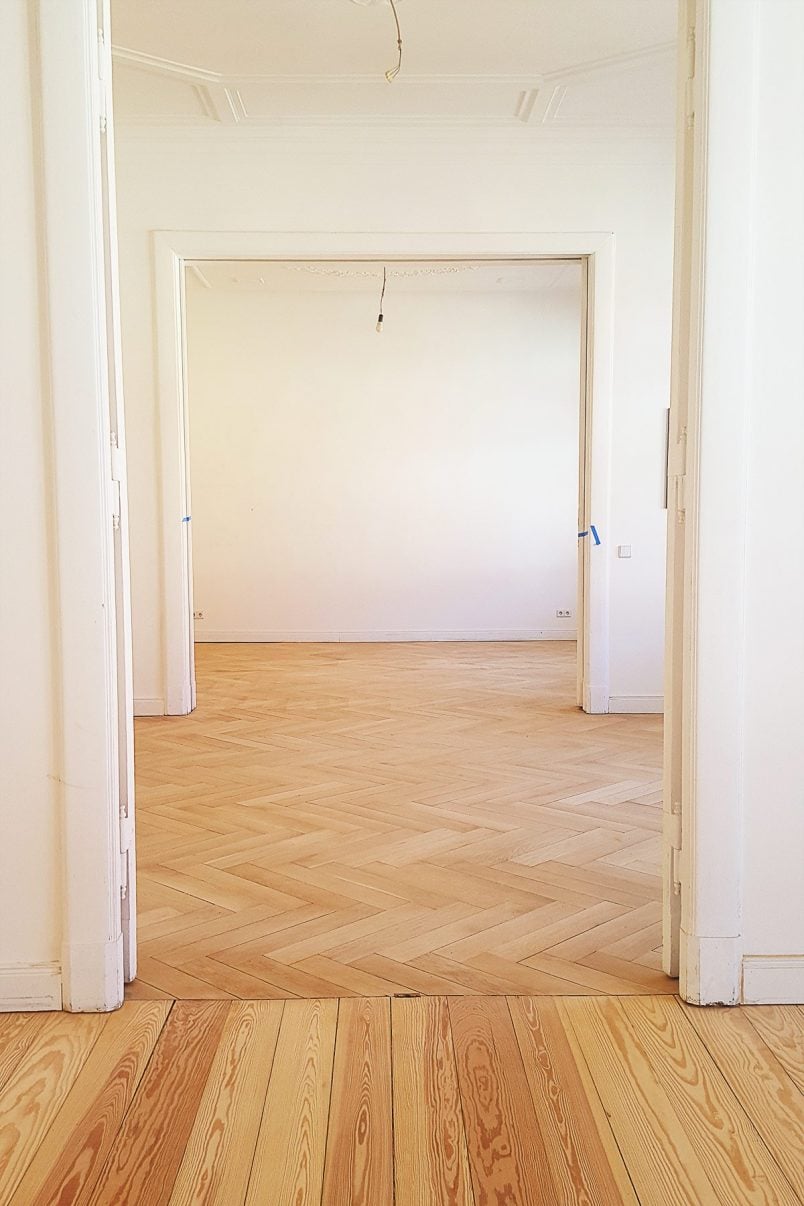
But as a reminder, this is what the floor in our home used to look like.
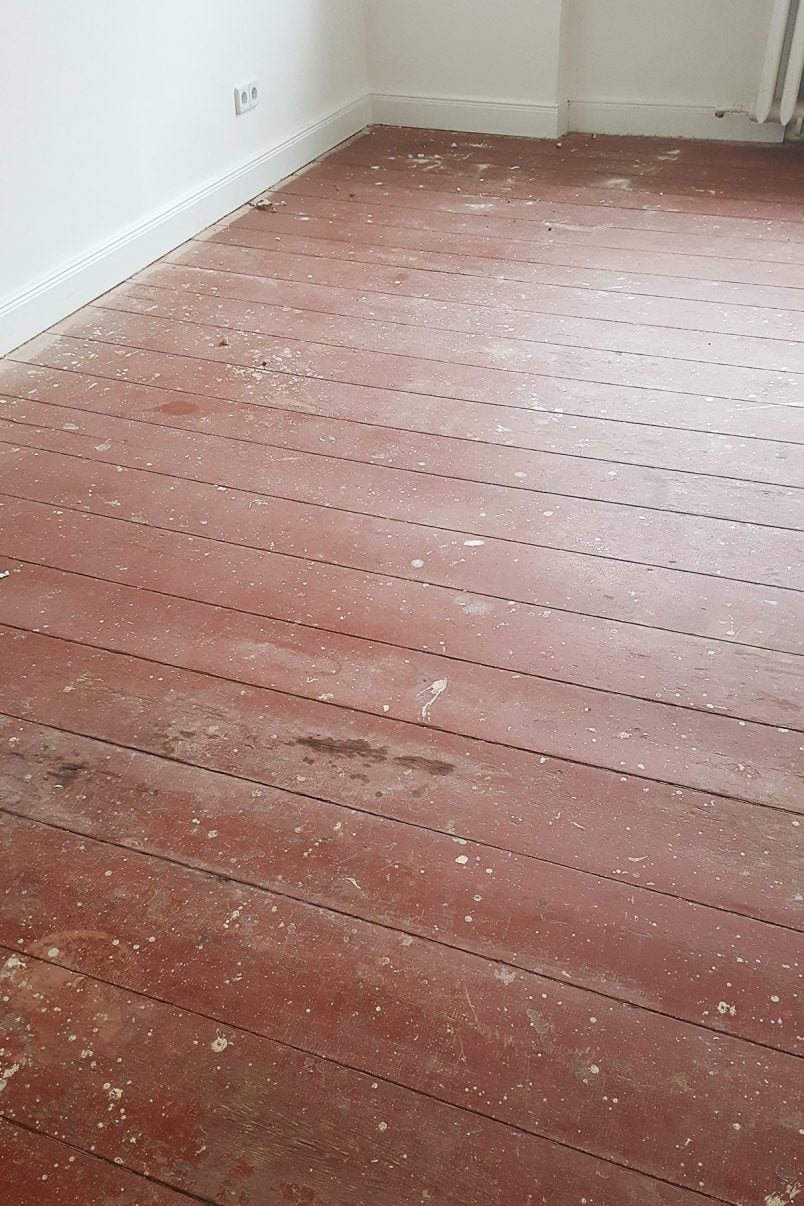
They’d been totally neglected. There were splashes of paint and water stains everywhere, random nails stuck up that would rip our socks to shreds and I’ve lost count of the number of splinters I’ve had to pick out of my feet!

The floorboards looked even worse. They’d all been painted in something called Ochsenblut (which translates to Oxblood!) which is a kind of paint that’s very typical in old Berlin properties but is an absolute nightmare to get rid of because it’s really thick and gooey and instantly clogs up your sandpaper.
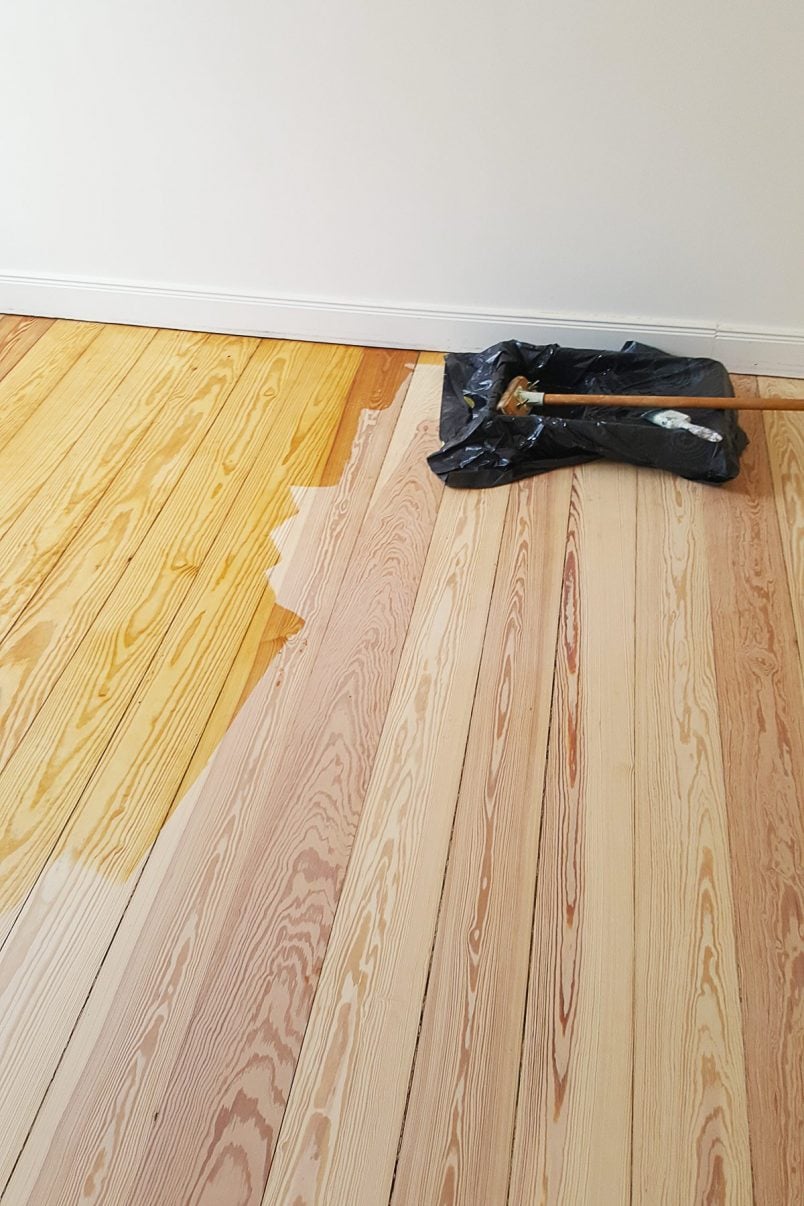
It took just over a week for me to sand and oil the floors and I’ll admit that I will scream if I ever have to sand another floor again. It’s such hard work!
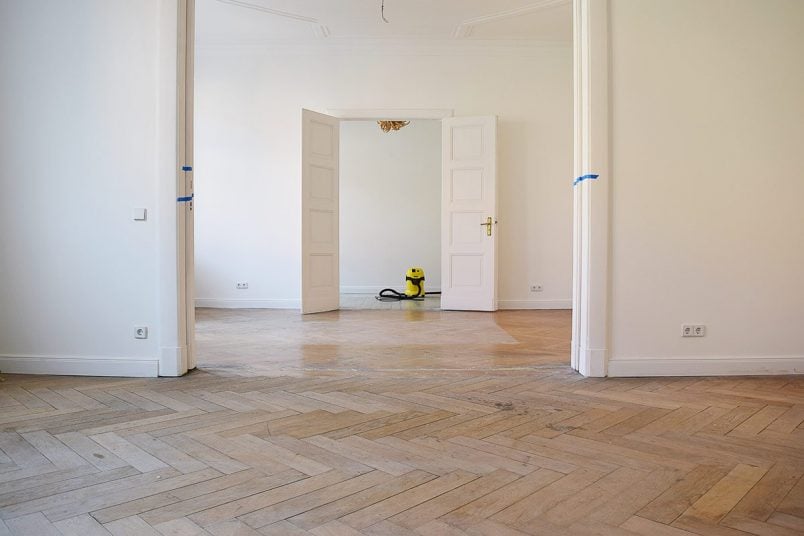
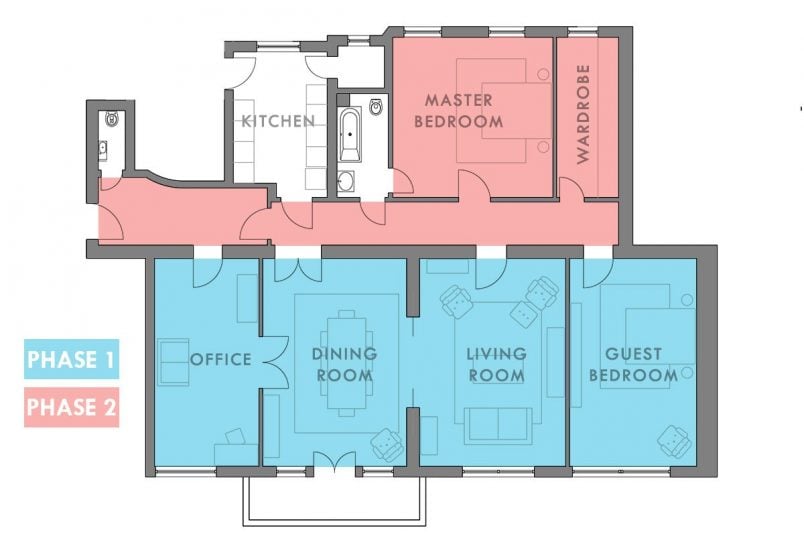
Having sanded the floors in our last home I knew what we were letting ourselves in for but that really didn’t make it any better. Worst of all, we’re still not done as we’ve only sanded just over half of the apartment! Argh!
As much as I like to moan about just how much work it is, it’s also been totally worth it! And I don’t just mean financially.
I definitely feel more at home now that the floor is done. It’s possibly a bit weird but I don’t mean because the apartment is looking so much better (although that’s, of course, a bonus) it’s because I feel like I have more of a connection to our new home. I know every floorboard and creaky bit of parquet, every knot, every random nail and every imperfect spot.

I’d be lying if it I didn’t think it has something to do with being proud of our achievements, too!
In our last house, we varnished all of our sanded floorboards but this time around we’ve decided to oil them. Varnished floors can so often look plastic-y. I really don’t like the shiny, artificial look which is why we were super picky about the type of varnish we used in our last home.
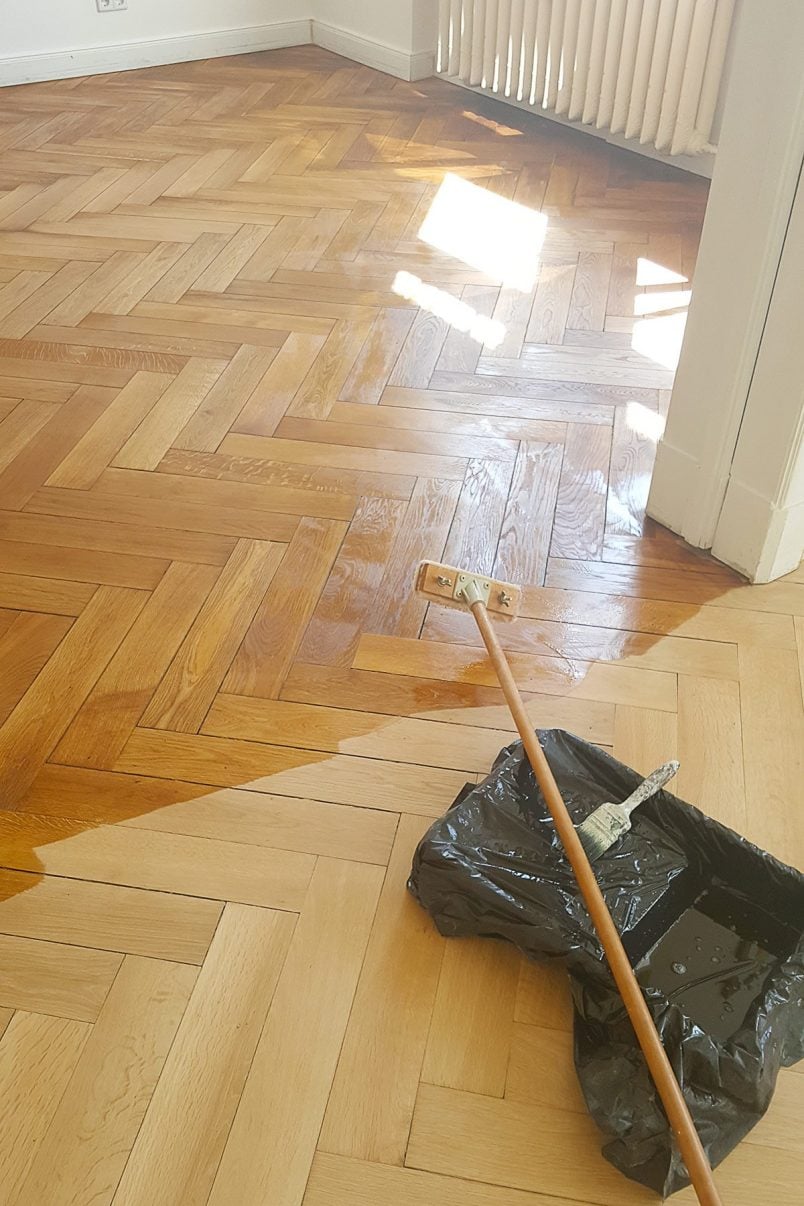
We were really pleased with how the floors in our last home looked but oil is still a more natural finish. That’s one of the reasons we think that it’s the better choice for our parquet floor in the dining room and living room.
Applying the oil was really easy but it was slightly more work than applying varnish as we had to polish/rub it in with a machine for a super durable and even finish. I guess only time will tell how well it really holds up!
Given that we’re living in the apartment and that all of our things are here we had to plan the logistics of our floor sanding project carefully. So far, we’ve sanded the front half of the apartment and we’ve booked the machines to sand the second half at the beginning of September.
As you can probably imagine, it’s not exactly something I’m looking forward to but I’m equally excited about having lovely clean and splinter free floors everywhere!
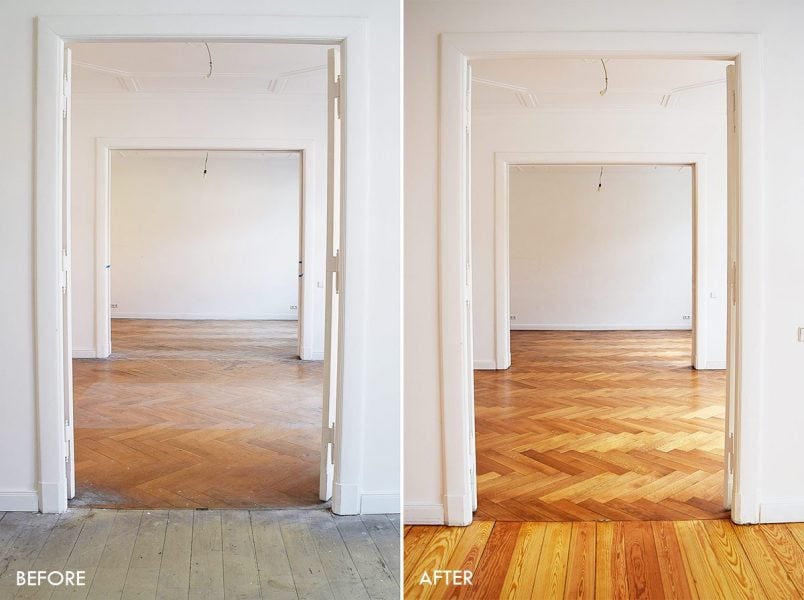
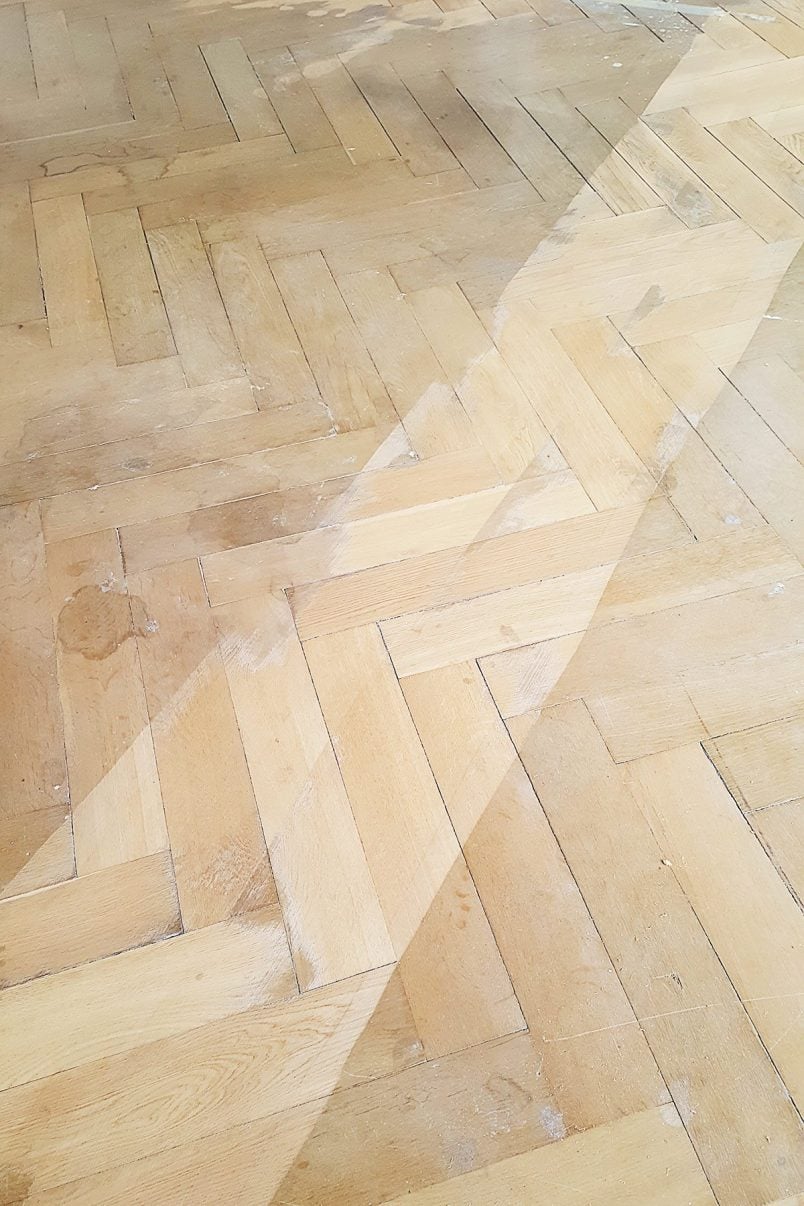
As much as I hate to admit it, there’s no getting around the fact that the floors aren’t perfect. They’re well over 100 years old so even with my best sanding efforts it’s no real surprise that there’s the odd imperfection.
One of my biggest concerns had been about sanding the parquet and my worries were partly justified. It was definitely much more difficult than sanding floorboards (which is ridiculously easy).
We’ll share a post specifically about sanding parquet flooring as well as a full cost breakdown when we’ve actually finished sanding all of our floors. At the moment it’s just difficult to compare a half finished project to our floor sanding quotes.
If you do already have any questions about sanding floors do let me know and I’ll be sure to include them in our next post. Just drop us an email at general@littlehouseonthecorner.com and tell us what you’d like to know!
Have you ever sanded your floorboards (or parquet) or are you planning to? If you have, did you also think it was ridiculously hard work? Do you have a favourite home improvement you’ve done to your home? Or a project you’ve sworn to never do again?
Forever Spaces says
What a transformation, the new floor is beautiful! Looking forward to seeing what you guys do with your kitchen and walk in wardrobe.
Christine says
Thank you! There’s so much to do but for now we’ll be giving the current kitchen a temorary makeover.
Cx
G says
Hi, great job guys, unbelievable difference! You have inspired me..
Surprised no-one else has asked, exactly which oil did you use? The finish is incredible.
Well done and thanks.
Christine says
We’re really careful about sharing products when we first use them as we always want to make sure that they’re as good as they can possibly be before recommending them.
The floors have been done for a couple of months now (which isn’t the longest amount of time) and they still look perfect. There’s not a scratch or dent in sight – even in the hallway. So far, we’re really happy with how they’re holding up and we’d definitely recommend the oil. We used two different types of oil – the base coat which we applied twice is Leinos Hard Oil 240 – http://amzn.to/2zx3G2Y (Affiliate Link) and for the third and final coat we used Leinos Hard Oil 245 which an oil & wax mixture – http://amzn.to/2zu8ZQv (Affiliate Link).
Cx
Gerry says
This has nothing to do with floors. I just discovered it an it blew my mind. Living in Germany now, do you have one of these toilets in your apartment? And did it surprise you when you discovered British toilets weren’t like this? And which do you prefer? So many awkward questions!
Christine says
Haha! Love this, Gerry – I think your comment has just possibly topped the list of the weirdest things we’ve been asked! ;)
No, we don’t have a toilet like that in our apartment. I have seen ones like it in the past but they’re super rare and I don’t think they’ve been used since the 70’s. Just boring standard toilets in Germany now! British toilets do have a weird flush lever thing though ;).
Cx
susan says
That is just astonishing. It looks, from your graphic, that you’ve actually done more than half of the area so … maybe the second half will go a little faster? Here’s hoping because it just looks amazing.
Christine says
Thanks, Susan! The floor plan is right and we have done a bit more than half. I really hope that the second half is a quicker and less painful experience, too! Admittedly, I’m not overly motivated at the moment! I guess I just need a bit of time to forget about how much I hate sanding floors!
Cx
Lucy says
Well they look bloody awesome, what an achievement! I am both in awe of all your hardwork and incredibly jealous! I really wish we’d done this to our floors when we moved in (we have a delightful orangey brown stain / varnish throughout the house).
As for the second half of the apartment – can you convince Jan to do it?! x
Christine says
Ohh, thank you so much, Lucy! For the second half, I’m hoping that we’ll be able to take it in turns with the sanding. I hurt my wrist the first time around (it’s just tendonitis) so I’m probably going to have to take it easy. The area isn’t as large either, so I’m hoping it won’t be too much work!
Cx
Eve says
Epic job guys – what a transformation! So beautiful!
We have done one room and it was incredibly hard work so I can only imagine what it must have been like doing a space that size. Also, those sanding machines are SO noisy aren’t they! My nerves were shredded by the end of doing one room (even with the obvious ear protection).
Christine says
Thank you so much, Eve! It’s mad how loud the sanding is. I was so relieved to hand back the machines after the week! Needless to say, I’m not looking forward to sanding the second half of the apartment!
Cx
Jessica@CapeofDreams says
Wow. They’re stunning. The imperfections only add to the charm. I will be interested to see how the oil holds up over time.
Christine says
Thank you so much, Jessica! I’d compared lots of oils and the one we decided on has a top layer that you have to apply that has wax in it which is meant to make it more durable and suitable for high-traffic areas. In theory, it all sounds great but it will definitely be interesting to see if it delivers what it promises!
Cx