We have so many updates planned for our new apartment and we keep changing our minds about what’s best to do!
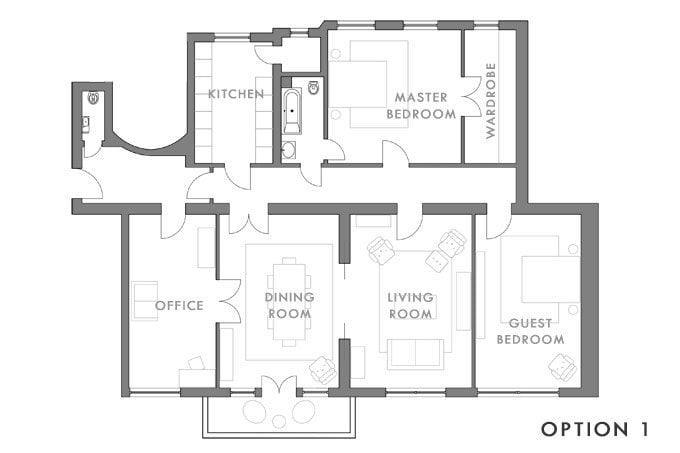
The one change that is certain, however, is that we’ll be turning the long, narrow room next to our bedroom into a walk-in wardrobe. We are already using it as a wardrobe now but instead of having to walk through the hallway to get to it we’ll have a direct door between our bedroom and wardrobe.
One thing we learned the hard way is that you can’t keep your clothes in the sun.
I had a lot of jackets and coats where one side had faded so much that it had turned yellow! Yep, all colour had been completely bleached out of some of my favourite clothes!
In an attempt to stop anything like that ever happening again (I’m still in mourning over some of my jackets that had to be binned) we’ve installed a UV light blocking foil. So, as well as our clothes hopefully staying nice and colourful, there’s also the added bonus for our neighbours who will hopefully not have to see us naked anymore when we get changed!

This is what you will need:
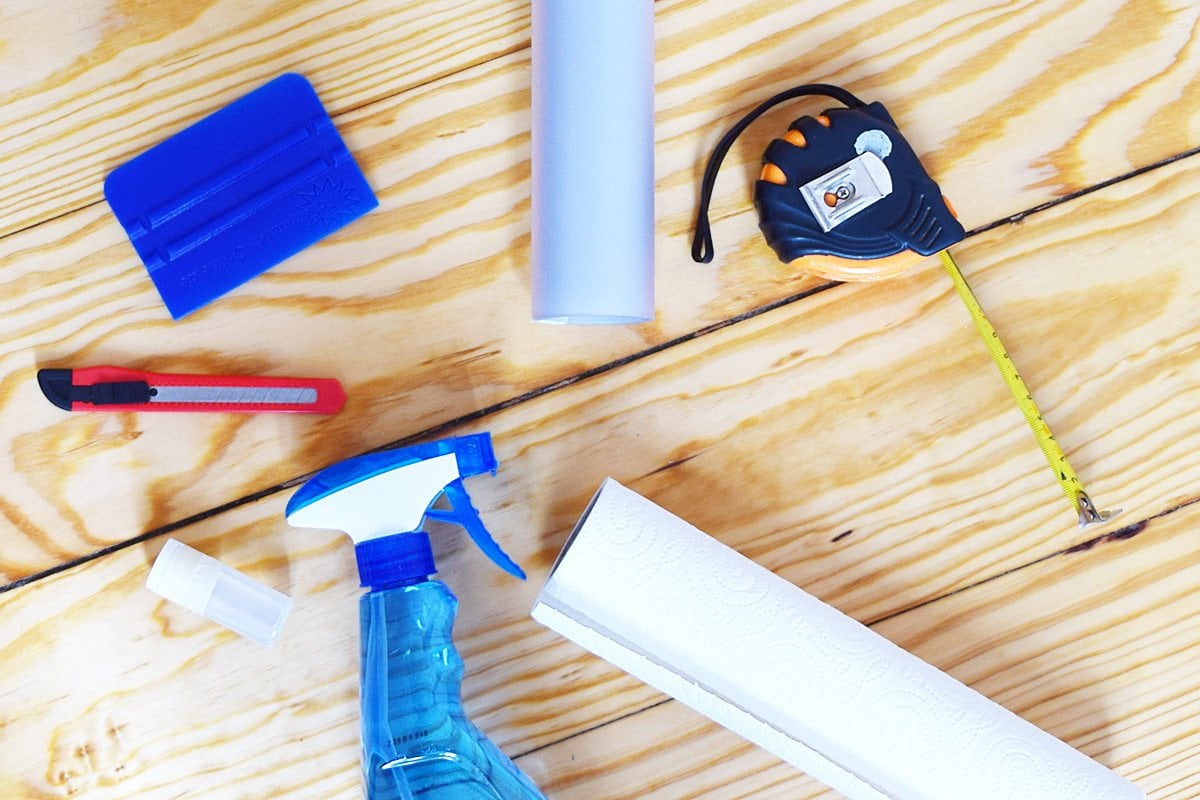
- Window Film (there are loads of different kinds, with different patterns. We opted for a plain frosted one with 99% UV protection)
- Cutter
- Installation Concentrate (or washing up liquid) – we ordered it together with the foil
- Spray Bottle
- Flexible scraper or squeegee
- Ruler (or something else that’s straight to cut along)
- Paper towels
This is how to install a DIY frosted window:
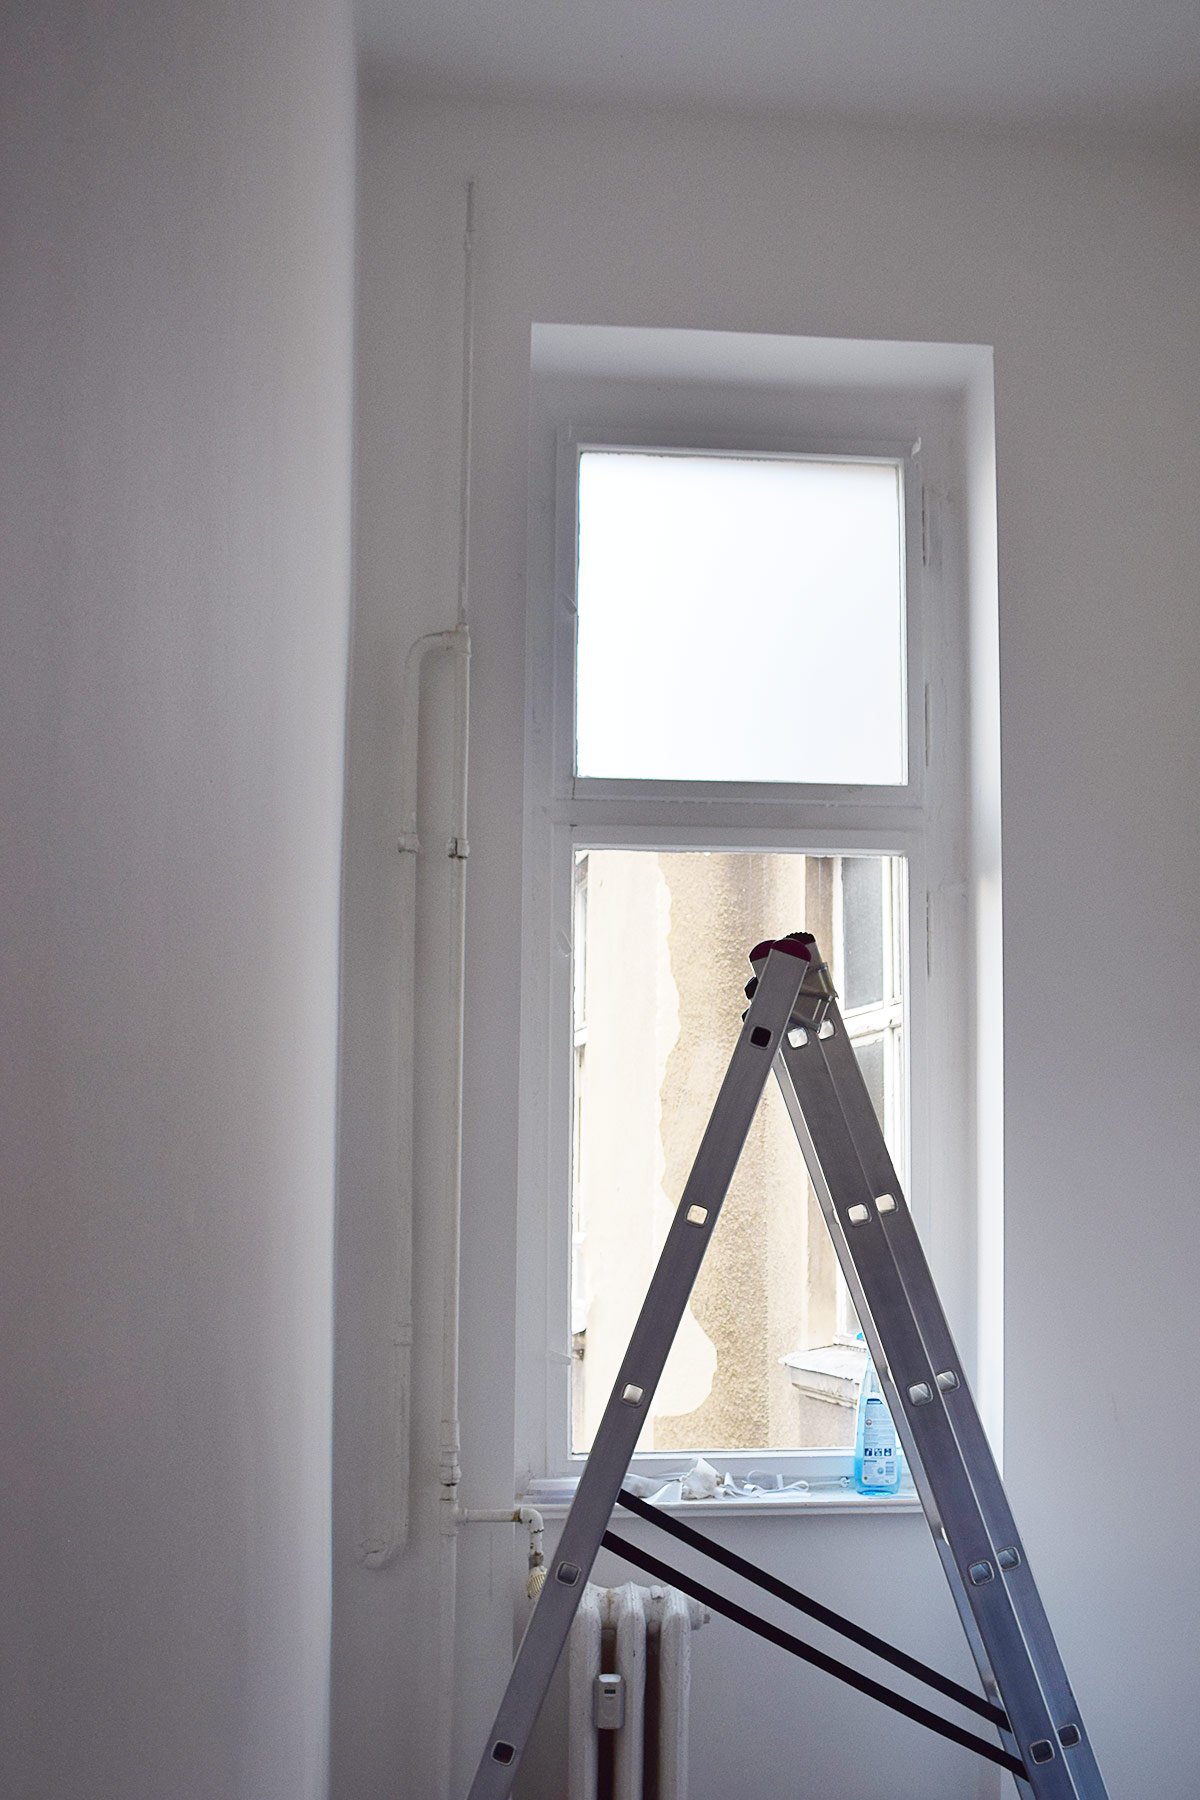
1. Start by thoroughly cleaning the window. You want your window to be as clean as it possibly can as any specks of dirt will be really annoying to remove later on when you’ve attached your foil (trust me – I know!).

2. Cut your foil roughly to the size of the window leaving a few extra centimetres overhang on each side to trim off once you’ve attached the foil to the window.
We could have ordered the film the exact size but given that our window is over 100 years old we figured that it may not be completely square and therefore thought it was better to cut it to size on the window instead.
Mix together the concentrate and some water in a spray bottle and thoroughly wet the window. Alternatively, you could mix the water with some washing up liquid but this could cause the foil to discolour or turn white.
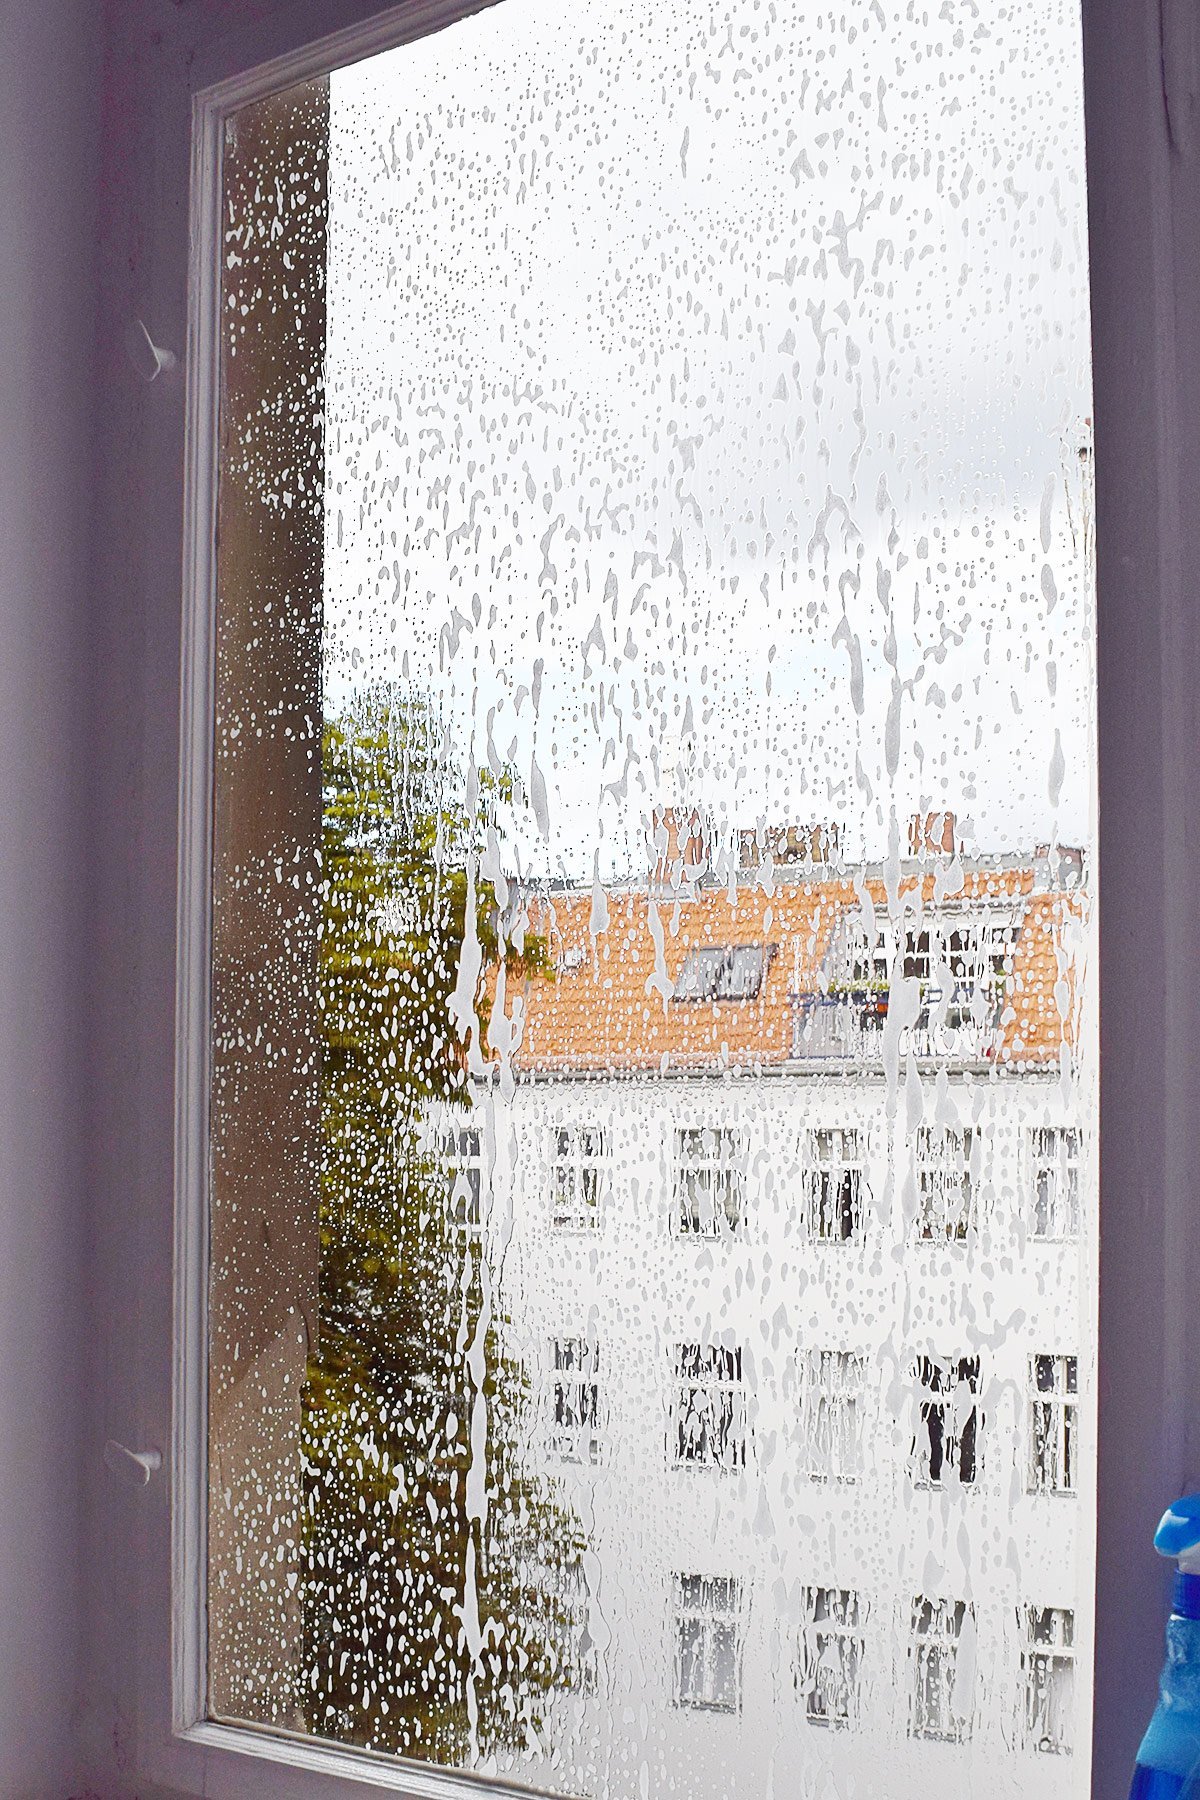
3. Now you’re ready to attach the foil. Peel the protective backing off the foil and spray the side of the foil that you’ll be sticking to the glass with more of the water & concentrate mixture.

The more liquid you use between the foil and the glass the easier it is to attach, move and remove bubbles but you do also tend to flood the area around the window so be ready with your paper towels!
For some reason, I’d expected the foil to be sticky but it wasn’t. As it’s a reusable film it makes total sense but was still a bit of a surprise.
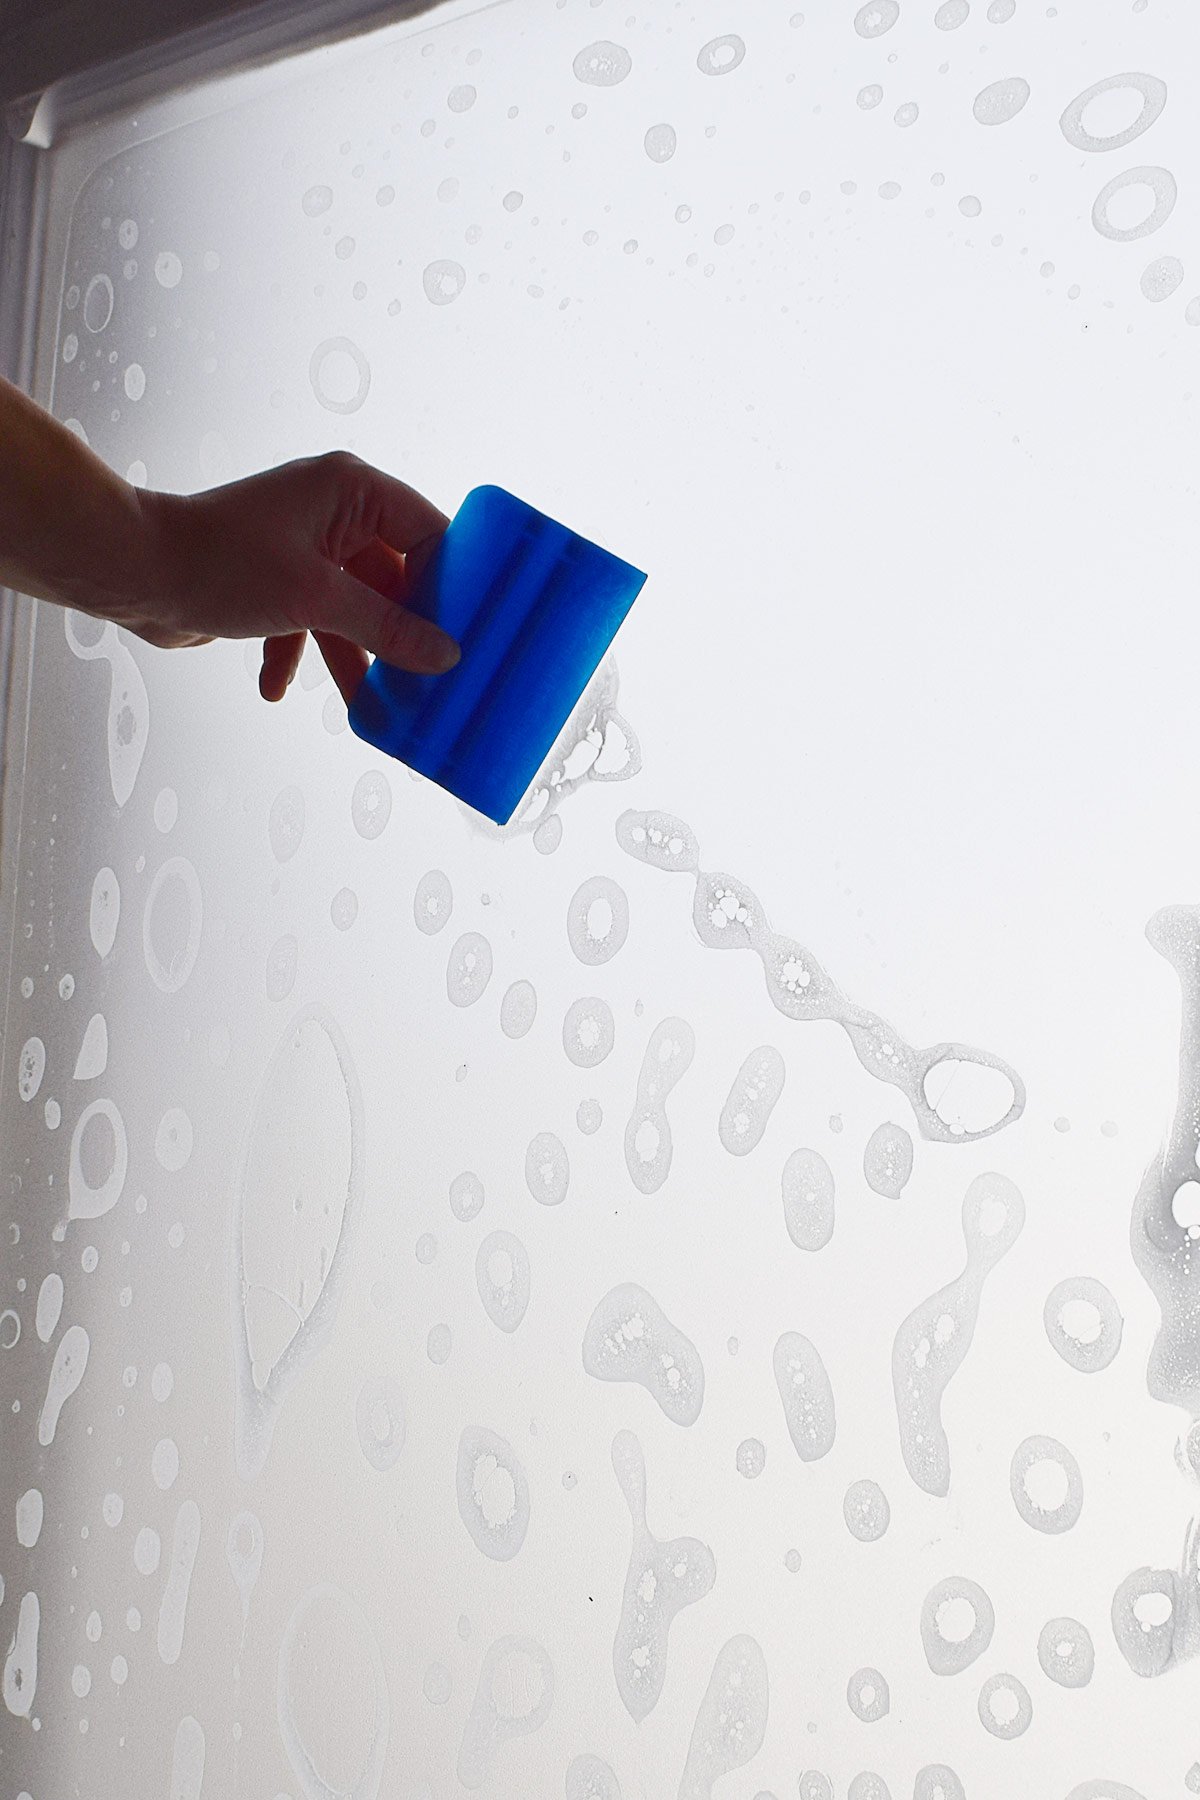
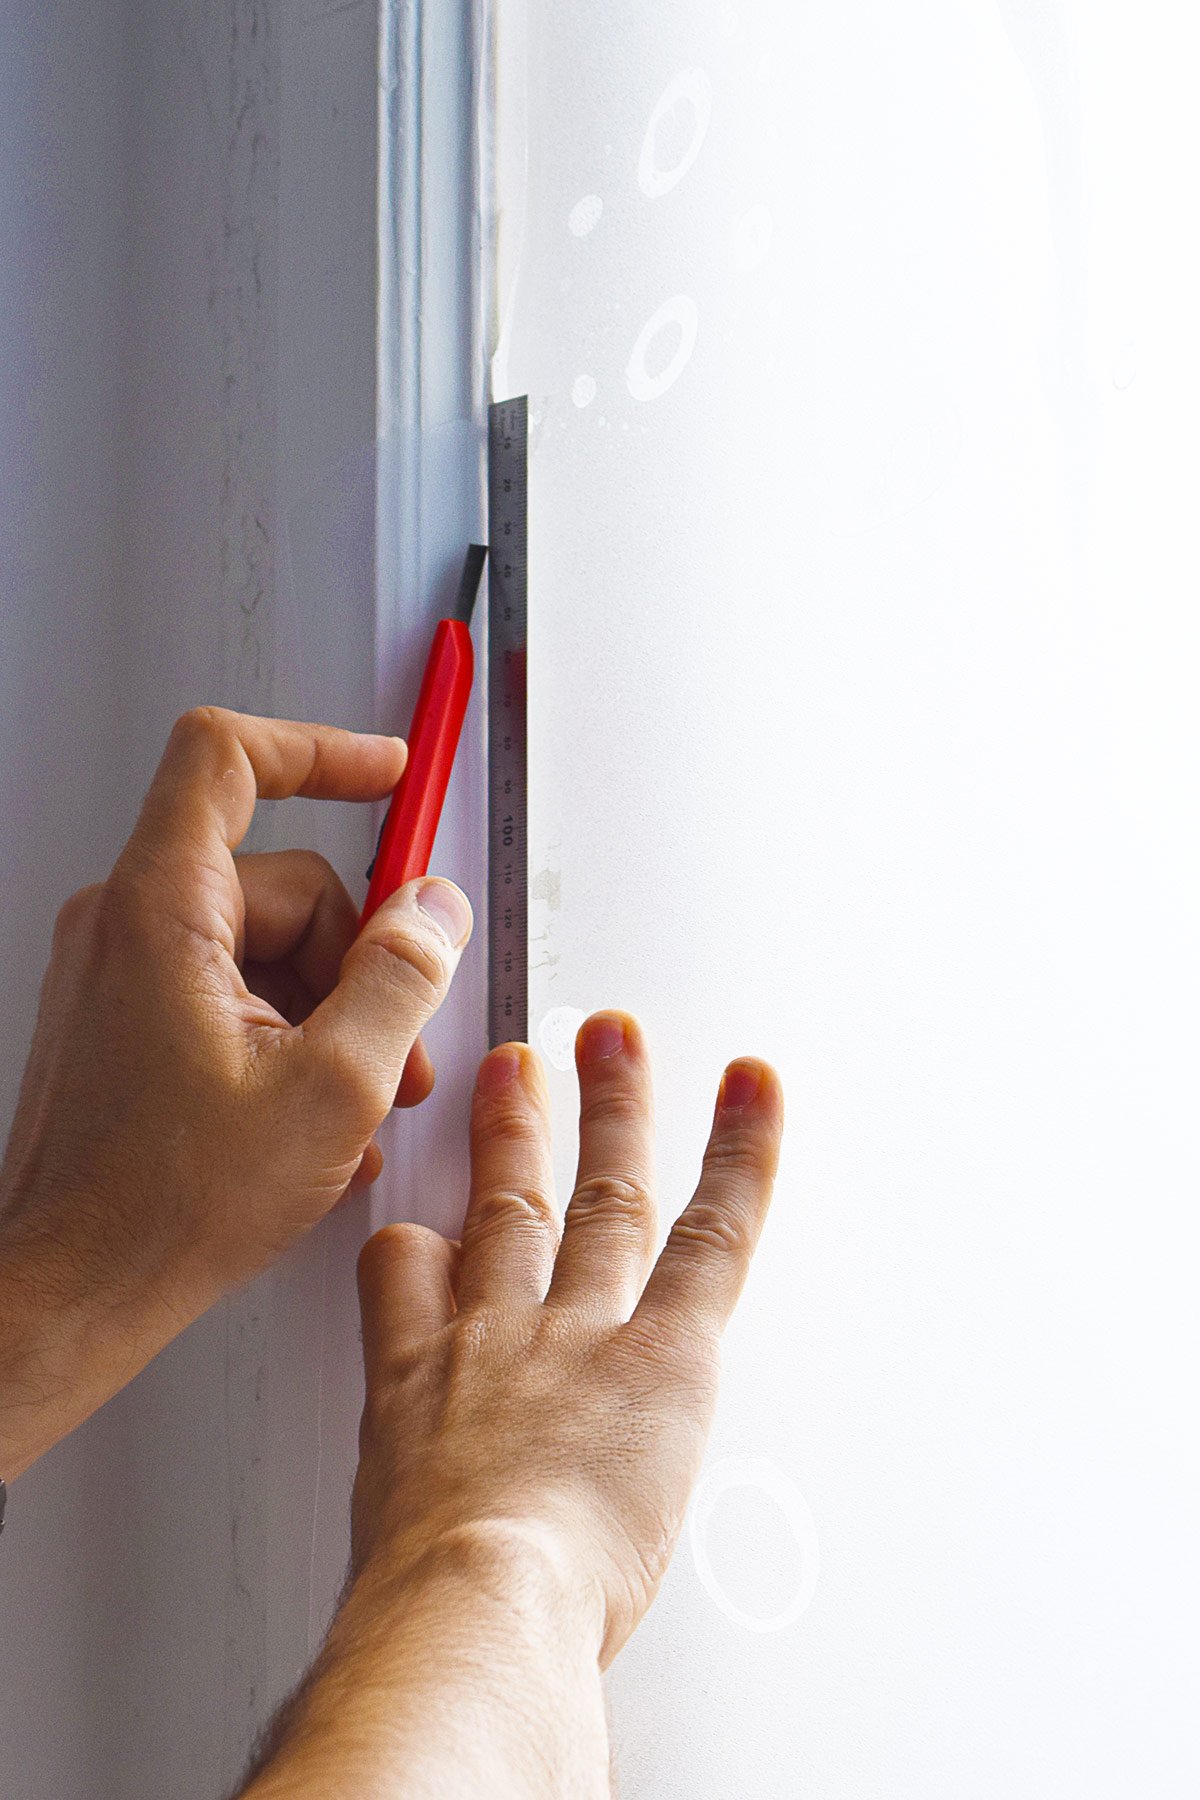
4. Place the film on the window and roughly position it. Then use the squeegee to push out the majority of the air and liquid bubbles – it’s weirdly satisfying and quick to do, before cutting away any excess foil around the edges of the window.
Using a ruler as a guide along the edges as a guide for your cutter made it really easy to cut a perfectly straight line.
This step was a bit fiddly, especially in the corners, but it really wasn’t difficult and if you’ve used a lot of liquid then the foil is easy to reposition and pull up again if you have to.
Once you’ve cut the foil to the size of the window use the squeegee to push out any remaining air bubbles and water. Then it’s just a matter of wiping away the excess moisture and admiring your work.
Tips:
- It’s definitely easier if there are two of you, especially on larger surfaces.
- Make sure the film more or less fits the window. A large overhang of excess foil makes the installation more difficult.
Ours was quite a bit larger and the edges kept flopping over which made both difficult to press against the window and to cut. - Make sure the window and foil are really wet. It makes it easier to push out bubbles.
- Use a really sharp blade to cut away the excess foil.
- Squeegee the edges really well! It’s where you’ll tend to miss the odd bubble as they can be difficult to see.
Overall, adding a DIY frosted window is an easy and very forgiving project. We even pulled the foil up a few times when we found specks of dirt under it (no idea how it got there!) and then reattached it.

We’re really pleased with the result. Our clothes will hopefully be safe and won’t be bleached a dirty yellow colour. It’s also nice to have a bit more privacy and block the view to the ugly courtyard (which desperately needs a complete overhaul).
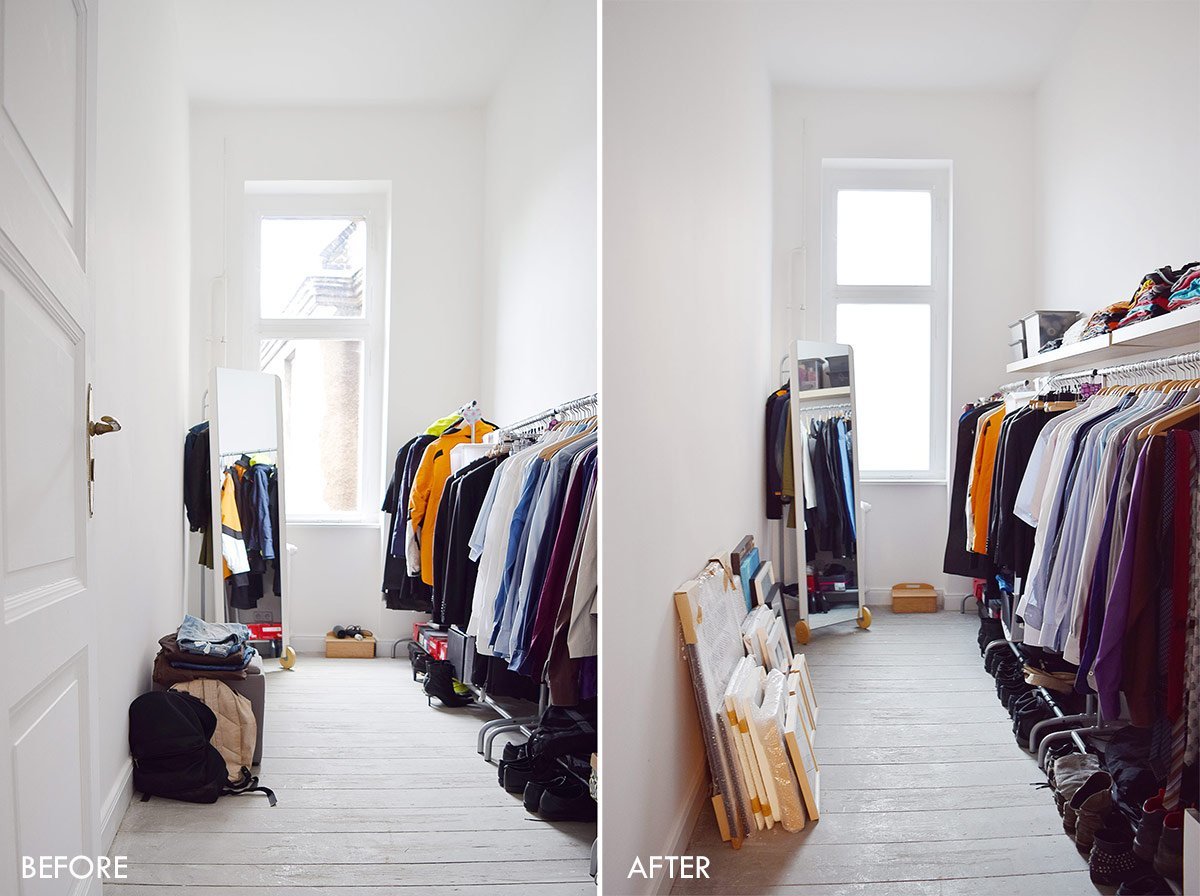
The room obviously still needs a complete makeover and I should probably start to hang some of our art which is stacked against the wall and seems to be multiplying every time I look. Having said that, it does function well as a wardrobe even if it isn’t a pretty space.
The ultimate plan for this room is to have some lovely built-in shelves and clothes rails. Ideally, we’d like something that makes use of the high ceilings, too. At the moment, it’s not a priority though and if I’m honest, I have no idea where to even start planning the room!
Do you have any tips for creating a perfect walk-in wardrobe? What’s your favourite way to organise your clothes? Do you have any tips for making the most of our super high ceiling (it’s about 3.6m!)?
Mandy says
My husband and I recently installed window film – it’s definitely easier with two of you!
I was looking at your floor plan and wondered if you had thought about moving the guest bedroom to where the kitchen is (and putting an en suite in the cupboard) and moving the kitchen to the office space and opening up the wall to the dining room?
You’ve probably thought of it but seems like a good use of space with the beds on one side and living on the other?
Christine says
Great minds think alike, Mandy! Our ultimate goal is to move the kitchen to where the office currently is! We’ve actually shared some of our layout options (you can read about them here and here). One of them even includes a secret room. ;)
I agree with you about having the bedrooms on one side of the apartment. That side is actually much quieter, too, so it would be ideal to have the bedrooms there. In reality, there are a few plumbing issues we need sort before we can decide on anything.
Neli says
My parents are living in an old house like that as well (although not in Germany) and they have a similar very small room. I know that in their apartment this was originally used as the bedroom for the maid. So perhaps also in your case? It would fit a bed and a cupboard easily :)
Love the idea of walk-in closet. It definitely is a very good purpose for the room now.
Christine says
That was our initial thought, too, Neli! We recently found out that there used to be rooms for the servants in the loft (there’s an extra staircase). I can’t help wonder if the layout of the apartment used to be different at that the room used to be larger but has been split into two (the other half now being part of the apartment next door). I’ll definitely visit the council at some point and see if they still have some old drawings! It’ll be really interesting to see who used to own the building and if any layout changes have been made!
Cx
Kerrie says
I wonder what the original purpose of that room was? It’s such a narrow room. Friends of mine got pull down wardrobe rails that had a handle to lower when you needed it. It may be great with your high ceilings. Great fun sorting out things like this, cheers
Christine says
I wondered about that, too – the proportions are just really weird.
I love the idea of a pull-down wardrobe! It sounds like it would be ideal for our high ceilings.
Cx
Meike B. says
Hello,
search for “Kleiderlift”. You can have models for installing in a wardrobe or others for wall mounting in a “begehbarer Kleiderschrank” . You can get them from the leading “Beschlägehersteller” (wie z.B. Hettich). Watch out how much kg they can carry! Clothes are very heavy…
LG
Meike B.
Christine says
Ohh, those are great tips – thanks, Meike! I’ll definitely have a look. I know that clothes are surprisingly heavy – I can still remember carrying the boxed into our new home! ;)
Cx
Daniel says
Alternatively, have you thought about a “library ladder” type set up? We had a our walk-in wardrobe fitted out by Sharps ( http://www.sharps.co.uk ) who used up every little inch available. And you have so much height!! So much potential storage space!
Christine says
That’s a great idea, Daniel! We’ve been thinking of installing some shelves with a library ladder in the living room but I’d never thought of having one in the wardrobe! We definitely want to make the most of the height – even if we only use it to store random things we rarely use.
Cx
Jessica@CapeofDreams says
Hmmm. I’ve never had trouble applying window film myself without a second person. I never get that many bubbles, but I don’t use a liquid when I apply it. I stick the top on first and peel off the backing as I attach it.
Christine says
I really struggled as it slid everywhere! Our film did say to use lots of liquid – maybe it’s because it’s a removable and reusable film? Your method sounds much easier, Jessica!
Cx