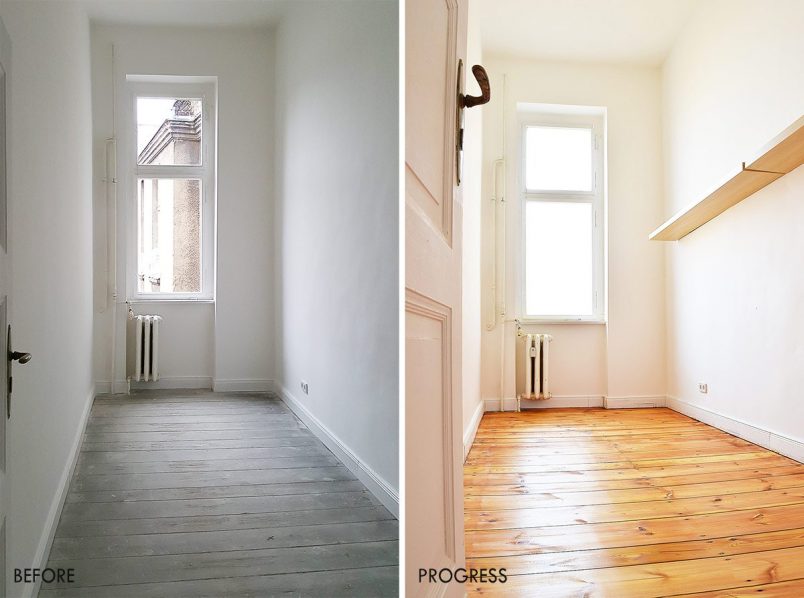
I know that you’re probably sick of hearing about our sanded floors – I know that I’m definitely sick of having to sand them but we’ve finally finished!
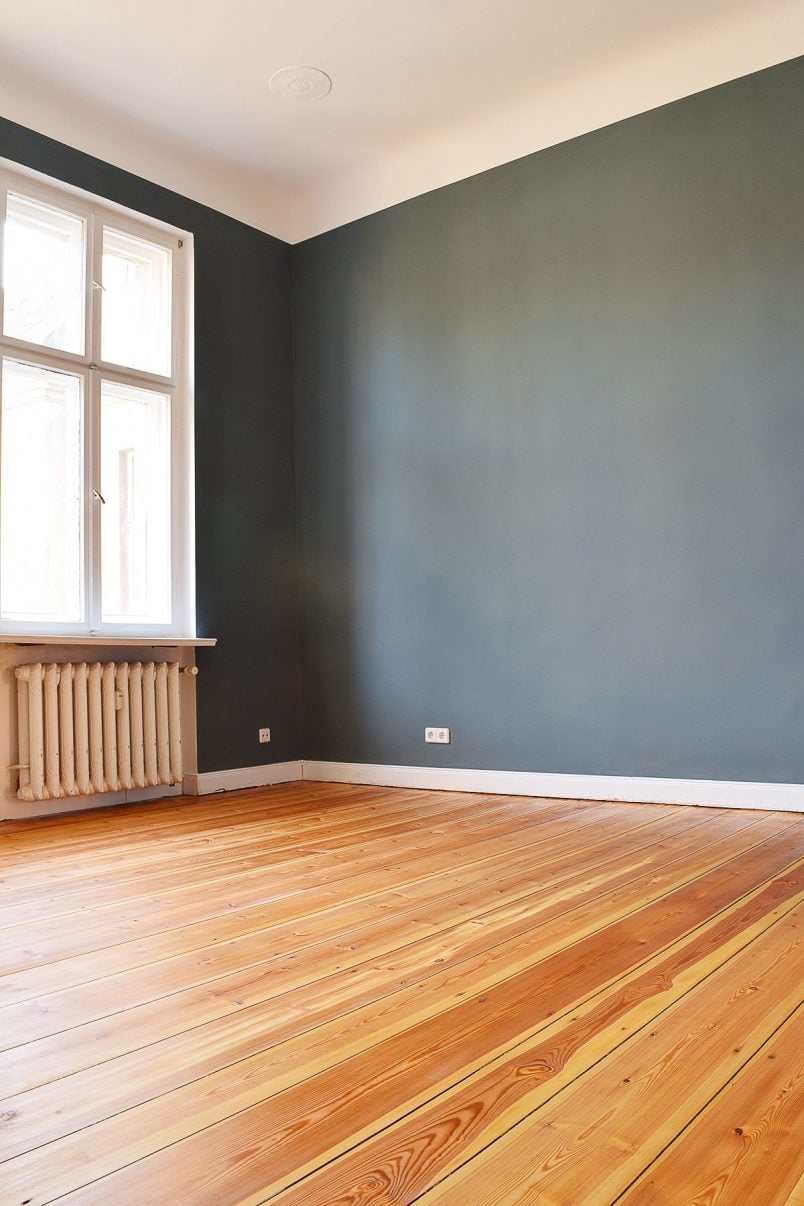
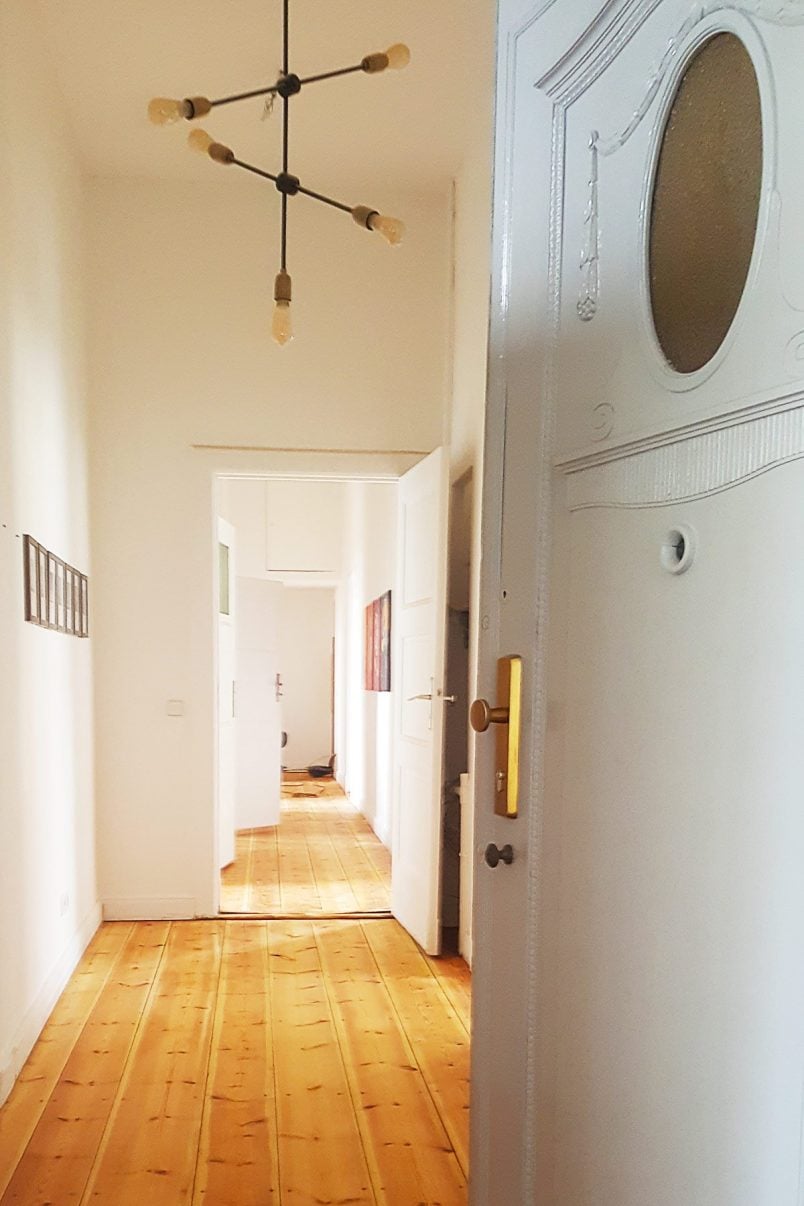
This not only means that the second half of our home is done – it means that all floors in our home are finished! No more floor sanding ever again! (Or at least for a very long while!)
Picture the champagne corks popping because I’ve seriously earned buckets of the stuff! It was such hard work!
Was it worth it? Yes, totally!
We’re so happy with how our floors turned out but it wasn’t all plain sailing.
As you know, things in Blogworld seem so perfect but we like to keep it real around here – sometimes too real – and all is not as it seems!
As we already had experience sanding floors (we sanded the floors in our Edwardian house) we knew what a totally horrendous job it is but we also knew it would save us a lot of money.
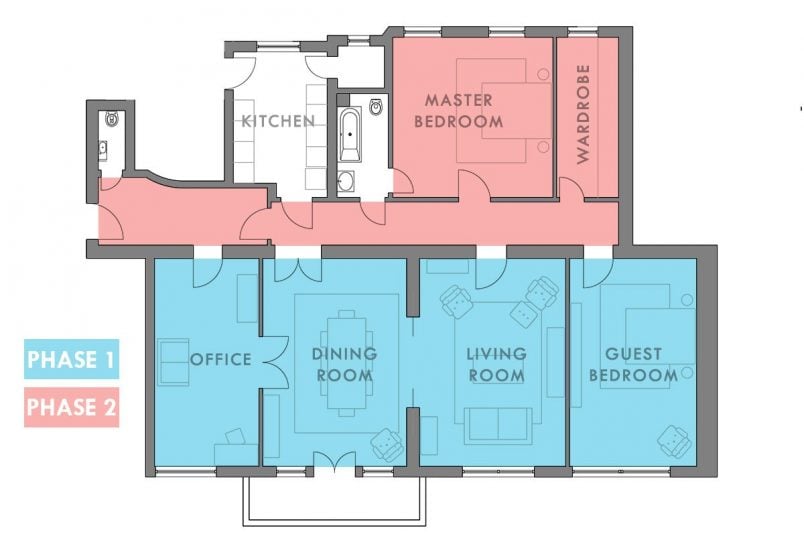
Although the part of the apartment we sanded this time is smaller than the first it actually took the same time as the larger half. It was a more difficult space to work in and for the first couple of days, I think I’d not adjusted the edging sander correctly which meant that it wasn’t sanding enough of the varnish and dirt away.
On top of that, a few things didn’t go quite to plan. So, as well as sharing some pretty pictures of our new floors, we’re also sharing a few things that didn’t work out as we’d expected!
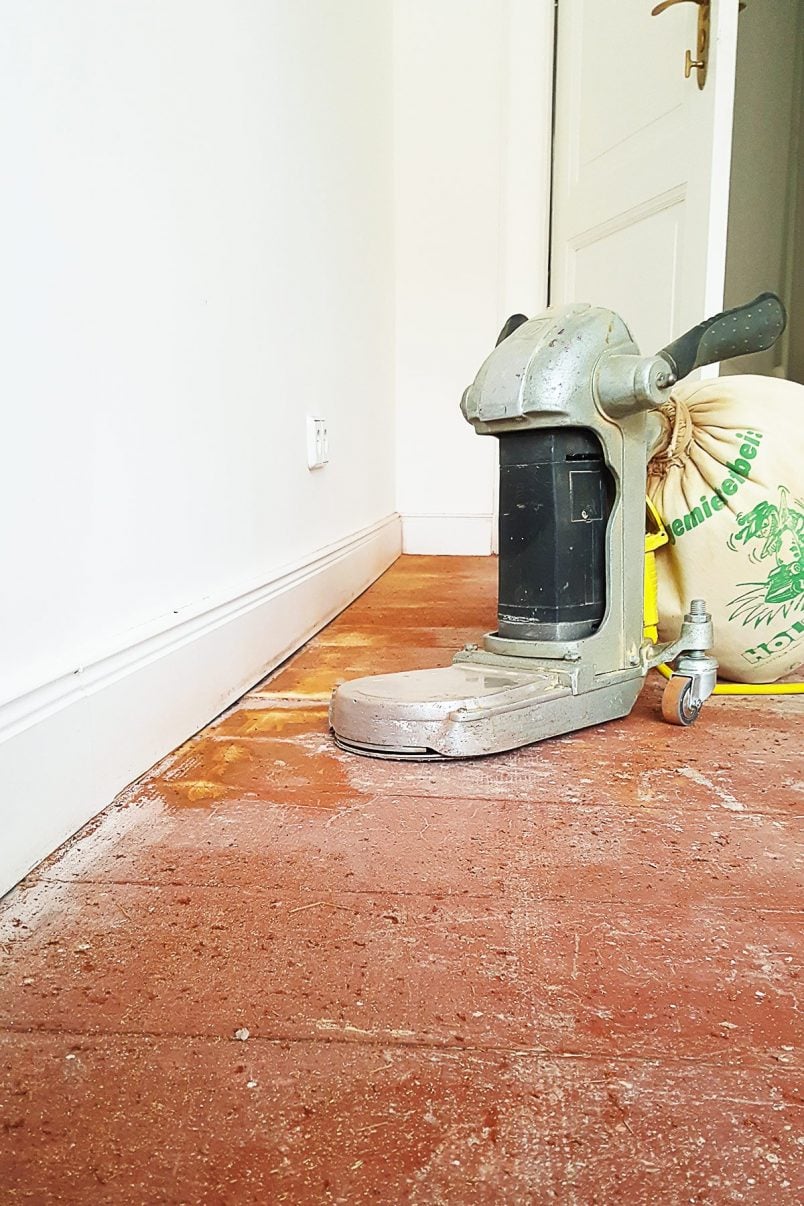
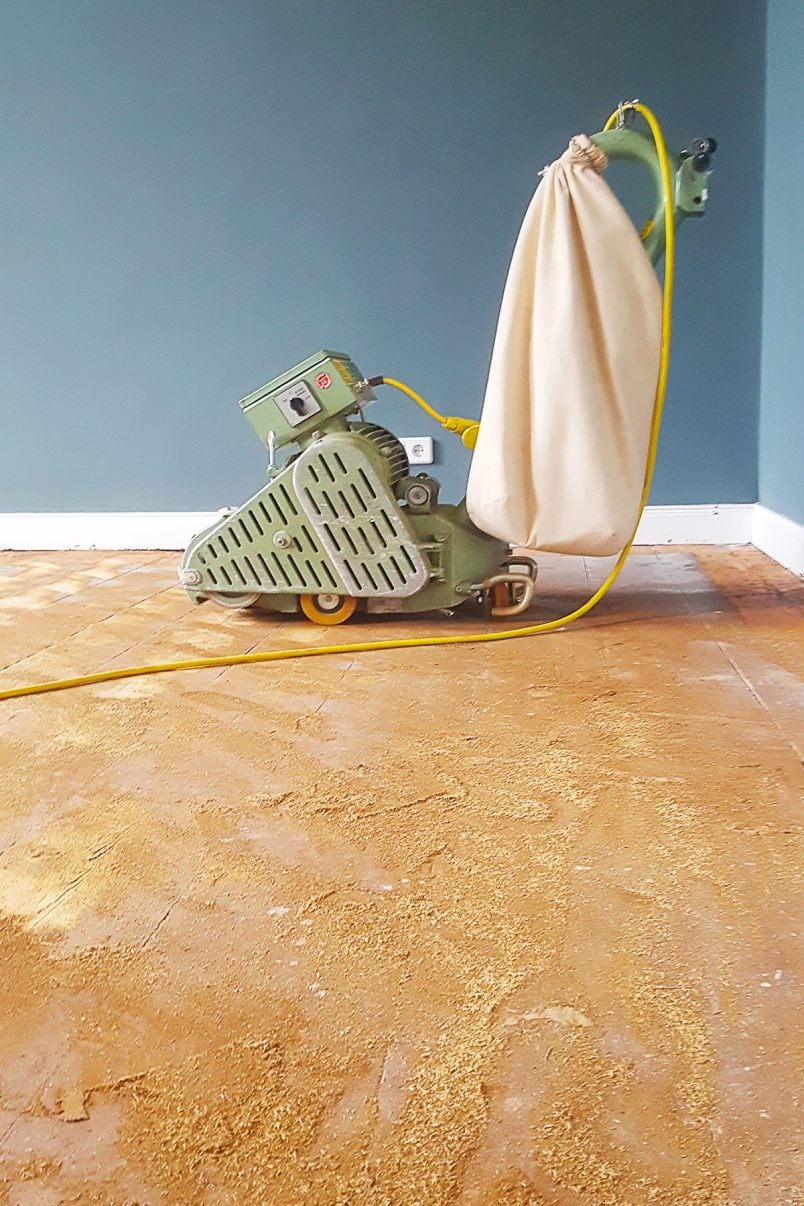
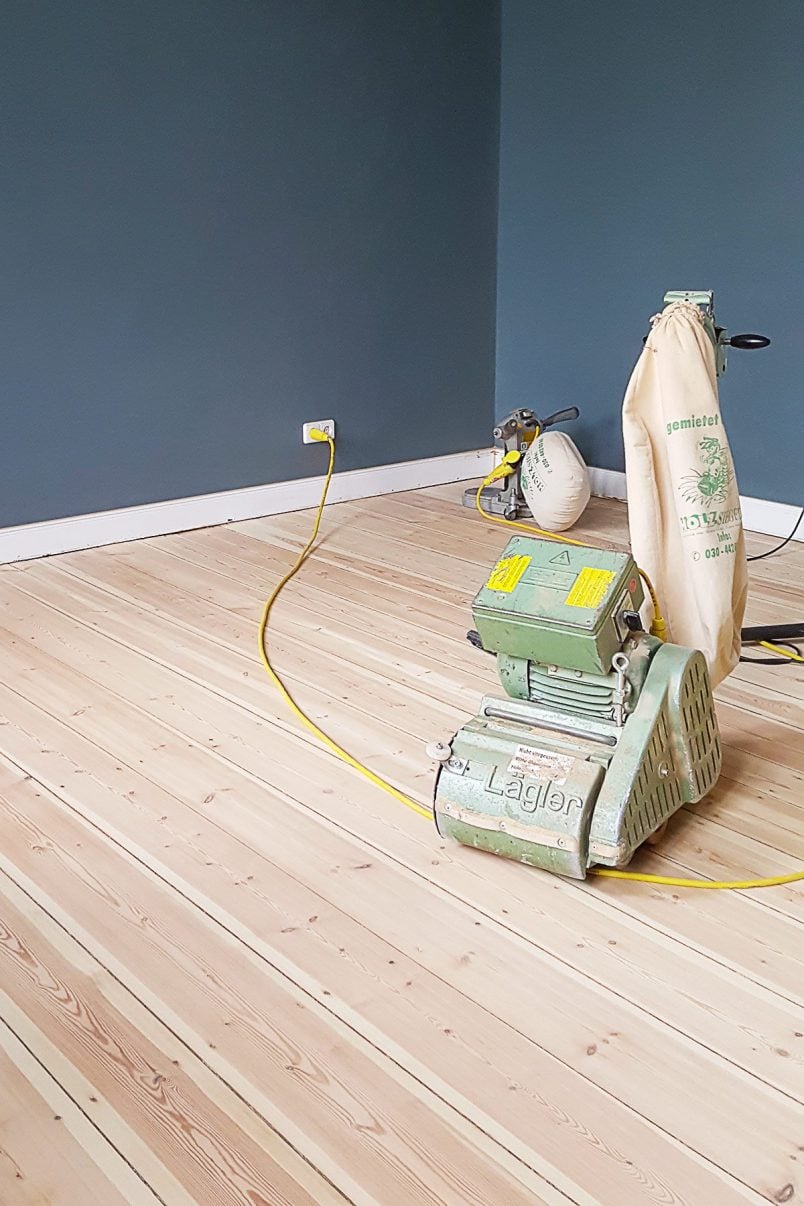
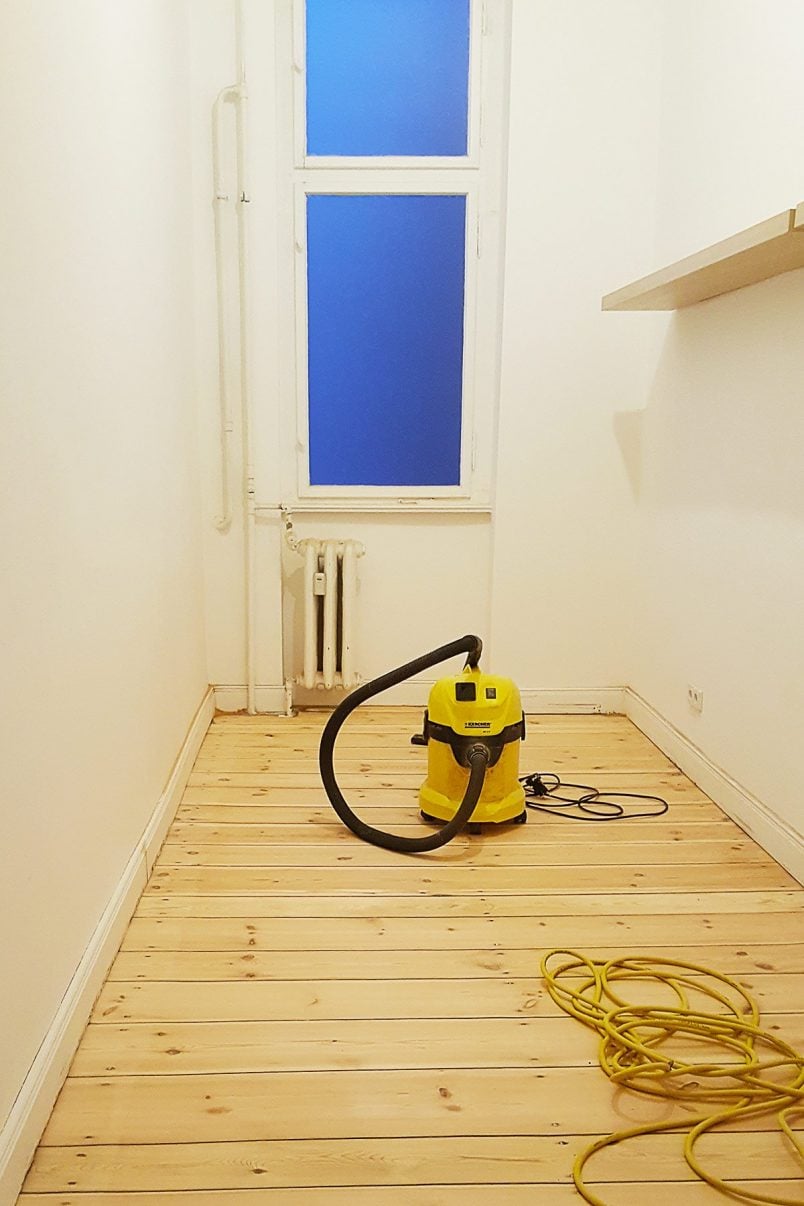
The machines.
- On the very first day of sanding the first half of the apartment, I couldn’t get the large sanding machine running! I thought that there was something wrong with our electrics as the fuse kept blowing. But in reality, it was just me being super ditsy as it turned out I just wasn’t holding the button on the machine for long enough!
- Later that same day, I was sanding the edge around our dining room floor and suddenly the edging sander just stopped and I couldn’t start it again so I had to wait for a replacement.
When sanding the second half of the apartment things really didn’t start to improve.
- The large drum sander is ridiculously heavy and when I tried to drag it into the bedroom, I damaged the almost finished floor leaving big grooves. I tried to repair the floor and thought I’d sanded them away but obviously hadn’t as they’re now super obvious after oiling the floor. (I might still try to remove them in the future.)
Oiling.
In order to give the oil as much time as possible to dry, I figured that I’d start work in the front hallway. That way, it would have all day to dry before Jan came home from work.
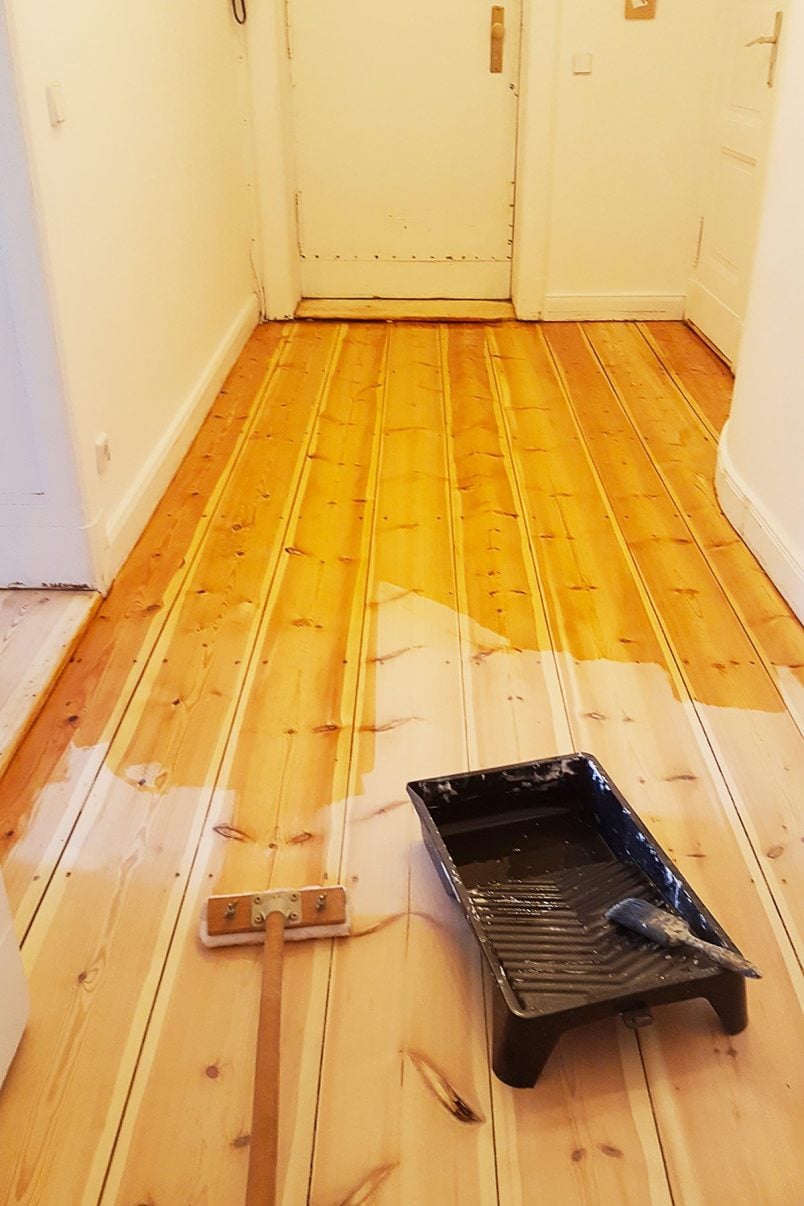
- So, I started oiling and had almost finished the floor before realizing that I had no food in the house. Not exactly the best start to the day but admittedly not the end of the world either.
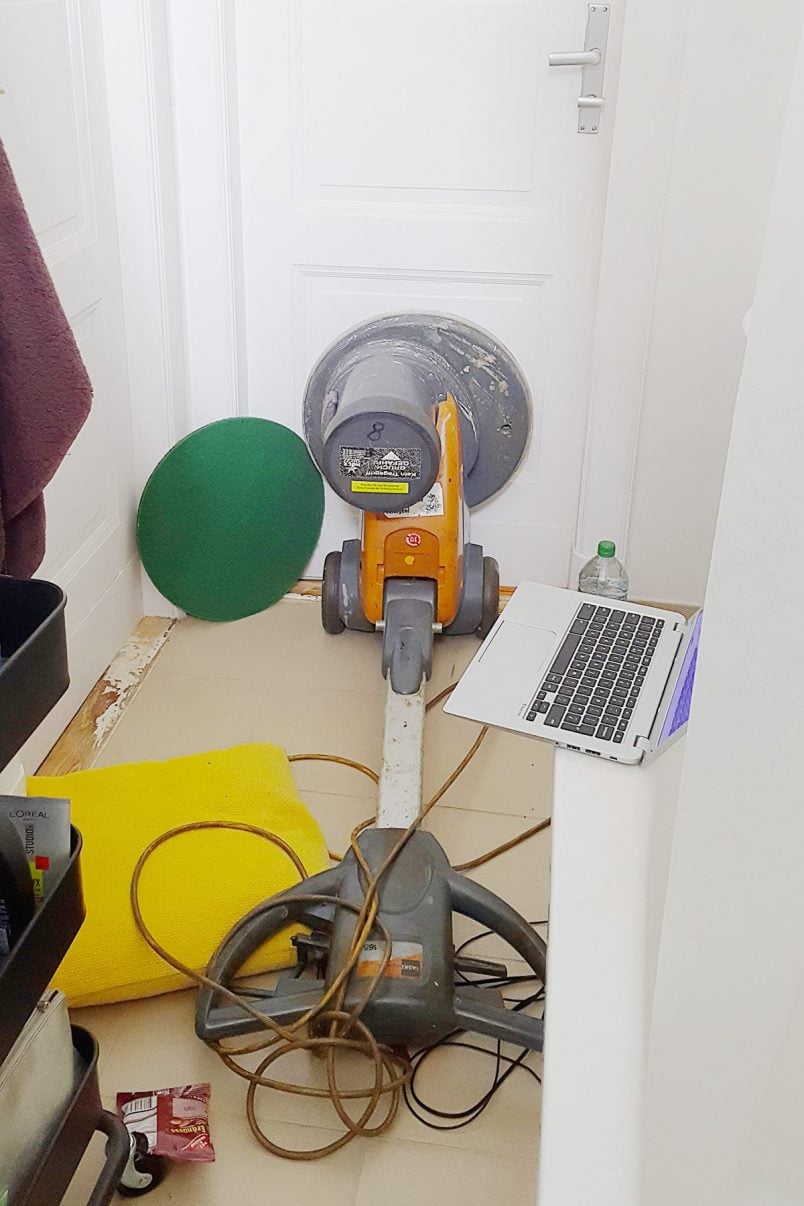
- Next on my list was oiling the master bedroom and the dressing room before moving onto the long hallway. Still all sounds sensible, right? Well, kind of…To be able to oil the hallway floor in one go I realized that I would have to either oil myself into the bathroom or the kitchen and wait there for the oil to dry.
I figured that the bathroom was the best option so I grabbed my laptop, a cushion and a packet of nuts (pretty much the only food in the house) and ended up sitting on the bathroom floor for 5 hours until the oil was dry enough to walk over! And in case you’re wondering, watching oil dry is exactly as exciting as it sounds!
- The oil we used needs a lot of oxygen to dry which is why I’d been working with the windows wide open. I guess it was almost inevitable that it would start to rain. And when I say rain I really mean it – it was throwing it down so much that it reminded me of being on a tropical holiday!
I ended up skipping across the floors I’d just oiled to close the windows and had to polish them again.
- Then the polisher somehow stopped doing what it should. The machine, in general, is really easy to use but for some reason, the pad just wouldn’t stay stuck under it anymore.
I still needed to remove the excess oil and polish the floor so I had to crawl over it and rub in the oil by hand.
Accidents.
- I managed to catch the cable under the sander (while it was running of course) and damaged it.
- When polishing our dressing room floor a small nail appeared out of nowhere (it must have been in the gap between the floorboards) and got wedged into the polishing pad. I didn’t notice for a few seconds but by then it was too late and it had scratched big ugly circles into my finished floor.
Overall, we had no huge disasters but when you’re stressed and so tired from spending hours sanding the floor you really can’t be doing with any of these things.
But, it’s really not all bad as our floors are finished and I think you’ll agree that the stress and hard work were worth it!
Don’t ever feel bad if your DIY experience isn’t as straightforward and problem-free as any of the guides you’ve read!
We all have off days, unexpected problems and ditsy moments (although I have more than my fair share of those). It’s all about the end goal and achieving a result you can be proud of.

Have you ever had any DIY disasters? Have you ever completed a home improvement (or any other) project that you’re particularly proud of? We’d love to hear your experiences!


Ed says
Hi,
found your site as just sanded the floorboards in one of the rooms in my house. They weren’t as bad as the ones as the ones you had to contend with, fortunately. It’s quite amazing to see floorboards look like new when the house is so much older.
I was wondering if you could tell me which oil/varnish you used, please? Also, do you know what woods the floorboards are?
I think mine are pine but I’m wary of what finish to use as I know pine tends to go an orangey colour with some finishes.
Thanks and your house looks amazing, by the way.
Ed.
Christine says
We used an oil finish in our current home and varnish in our last home. On both occasions, the floorboards were pine. You’re totally right about the orange/yellow tinge that pine floorboards can get. The varnish we used in our last home didn’t change the colour of them at all (although they were obviously slightly darker) and it left them looking very natural. The varnish we used was Granwax Aquathane in satin.
In our current home, we opted to oil the floors instead. So far, it’s easy to maintain and hard wearing. The oil did change the colour of the floorboards a bit though and they are slightly more yellow than before. Having said that, it’s not something you really notice when everything is the same colour. The oil we used is Leinos 240 followed by Leinos 245.
I personally prefer the oil finish but if you don’t want the colour of the floorboards to change, I’d probably recommend using varnish instead.
Hope that helps!
Cx
Ragnar says
How did you even manage to sand the wardrobe with the Hummel? It seems much smaller than the recommended minimum floor size (10 sq. m. I think?) and really too narrow to even start moving about with the large drum sander! Considering the space is that tiny you did an even more amazing job!
I’m generally amazed every time I see that German rental places even offer those large sanders. Each and every single one I’ve tried in Austria sticks to the smallest models, mainly Lägler Profit (the little brother of the Hummel you used) and Janser Jaguar. They’re designed for smaller rooms and “only” weigh aroun 45 kgs (the Hummel is close to 90) and fitting the sandpaper is slightly more foolproof so I suppose they do make good rental machines. Most of the ones we rented from three or four different places were fairly beat though and produced horrible lines on one side of the drum, only the last two (both Jaguar) gave nice results.
Seeing a really beaten floor come back to life is just absolutely amazing every time! The last one I sanded (the first one I truly did by myself, in the other cases my dad did a whole lot of the work) was 1960s parquet tile and the original finish was pretty much gone in spots and darkened unevenly in others, i.e. you could really tell where the previous owners had their furniture. After sanding it looked as good as new! And I’m still amazed to no end we managed to do it all in one afternoon! Brought the tools home around 3 PM and finished at 7, including the first coat of varnish (Bona water-based, decidedly not my first choice but the easiest to get)! Granted, it was only one small room but I still have a hard time believing we did it!
Christine says
Haha, yes – sanding the narrow room with the large sander was a bit difficult, to say the least. To be fair, all other rooms are much larger where the sander was much more suitable (it was a Lägler) and fitting the paper was really easy (it had a new drum, too).
It’s so amazing what a difference sanding a floor makes. It’s definitely hard work but so worth it. I’m so jealous that you managed it in an afternoon!
Charlotte says
It’s really good to hear your honest account of the work. And the floors look great!
Christine says
Thank you, Charlotte! Sanding floors is such a horrible job but it’s so worth it! I have to admit that I wouldn’t be sad if I never had to sand anything again in my life though! ;)
Cx
Genie says
The floors look wonderful!! Such an accomplishment. So far I’ve only sanded the floor in one room of my Victorian semi, but as I was totally on my own doing it, and couldn’t afford to hire a big sander (let alone carry it up the stairs) I ended up doing it with a hand-held belt sander! It took ages and the result is pretty rustic …. I couple of coats of white paint have hidden the worst of the mistakes, but it’s still flaking here and there where I didn’t prepare the surface quite as thoroughly as I should have. Thank goodness for shabby chic!
Christine says
Thank you so much, Genie! I’m actually in the middle of writing a post about the biggest floor sanding mistakes I see and trying to hand sand them with little machines is definitely the biggest of all! I do really feel for you and know just how much work it must have been! I’m really happy to hear that you’ve managed to make the floor work for you, even if the result isn’t quite what you’d expected!
Cx
caitlin says
Those floors look wonderful! Because this was such a large job and you are city dwellers, I had a question about how you navigated the sanding noise with your neighbors. Does your building have rules about what type of work can take place during what hours or time of year? Did you ask permission or forgiveness from your neighbors upstairs and down? The neighbor thing can be very tricky, I’m curious to know how your situation went. I’m hoping very well and if you had any advice.
Christine says
Thank you, Caitlin!
You’re so right about the noise issue. Sanding floors is extremely noisy and given that we’ve not been in the building for a long, we really didn’t want to already upset our neighbours.
In Germany in general, there are very strict rules about when you’re allowed to make noise. Outside of those hours, it’s not uncommon for people to call the police!
I started working at about 7 each morning but didn’t turn on the large sanders till about 8 a.m. and always tried to finish between 6 and 7 p.m.
When we first moved in, we invited all of our neighbours around for some drinks to get to know them. They saw the state of the floor and we warned them then that we’d have to sand it. We also hung a notice in the communal hallway telling them what we were planning and when we’d be doing it.
We don’t have neighbours above and we made sure to time the sanding (both times) to coincide with times where our neighbours directly below us were away. They would have definitely heard the worst of it but everyone else in the building we’ve spoken to since has commented on how little they actually heard. We also kept the communal hallway clean and if there was ever any sawdust that made it out, we vacuumed it up immediately.
I should say, that all of our neighbours (we’ve met so far) are absolutely lovely and they seemed happy for us that our floors are finished more than being annoyed about a couple of weeks of noise. It’s an old building so at the end of the day someone is always going to be improving something! I honestly think that keeping people informed and letting them know what you’re doing and how long it’ll take helps to keep them happy as they know what to expect.
Cx
Meike B. says
Such a difference! The floors were such an eyesore before.
But the radiator in the wardrobe is ridiculous short! And you’ve got new “Heizkörperverteiler” (please insert english word) everywhere.
Christine says
It’s amazing how much difference the sanded floors make to the feel of the whole apartment! It’s actually made the whole place feel much more finished and livable. No need for any more DIY ;)
Yep, we’ve had heat cost things installed. They’re not pretty but they’ll hopefully help us save some money. As much as I love our original radiators, we’re seriously thinking about having the one in the wardrobe updated. You’re so right about it being a weird size and it just takes up too much space in the small room.
Cx
Lucy, Kent ~ England says
Great job C! I promise in no time at all the memory of the horror part will seem much less relevant set against your beautiful home.
Way back in 1982 in my first “own” home a 1 bed maisonette I too ended up in the bathroom with a packet of biscuits, a book (no laptops or wireless connection back then, cushion and 2 kittens for a day. When I did try to let us out of our little cell the door handle broke! No mobile phones and a then husband who often didn’t come home I ended up shouting at the top of my voice for help. Laughable now though.
Your apartment is looking really great.
Christine says
Ohhh, I know it must have been awful at the time but your story did just make me laugh! Glad I’m not the only one to be mad enough to work myself into the bathroom!
Cx
susan says
Those floors are gorgeous. After reading what you went through I’m not sure I’d be up for it myself. Good on you for getting through it all.
Christine says
Thanks, Susan! It was definitely worth it, even if it wasn’t fun all of the time!
Cx
Jessica@CapeofDreams says
Those floors were so gross looking before. The after might not be perfect, but the floors are beautiful despite the flaws, I’m sure. I don’t see the mistakes in the pictures.
Christine says
You’re so right, Jessica, the floors were awful! Not least because we kept getting splinters! The only two flaws are the ones I mentioned (scratched dressing room floor & dented/scraped floor in our bedroom). I know I’m a bit of a perfectionist which is why they annoy me. Overall, we are super happy with how the floors turned out! I’m not too bothered about the dressing room but I will try to sort the bedroom floor – I just can’t help myself! ;)
Cx