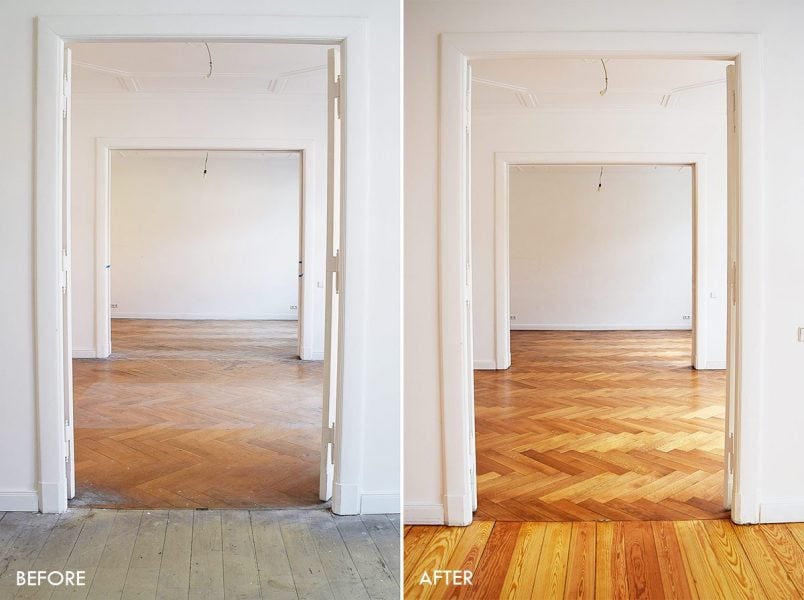
I have to admit that I’ve been a bit hesitant about sharing a “how to” for sanding parquet.
Essentially, it’s the same as sanding floorboards.
You still go out and hire sanding machines, you still spend countless hours walking back and forth with the huge drum sander and you still end up aching everywhere wondering what on earth you were thinking ever even considering tackling a home improvement job that’s such hard work.
But sanding parquet is different.
Yes, the process is the same, but there’s a lot more to consider, and I personally found it a lot more difficult than sanding floorboards.
So, as much as this is a how to sand parquet guide, it’s also a kind of warning.
First of all, there are different kinds of parquet.
Ours is solid timber, but most types (especially modern versions) are made up of different layers, of which only the top one is solid timber. This means that the parquet can only be sanded a number of times before the layer wears away.
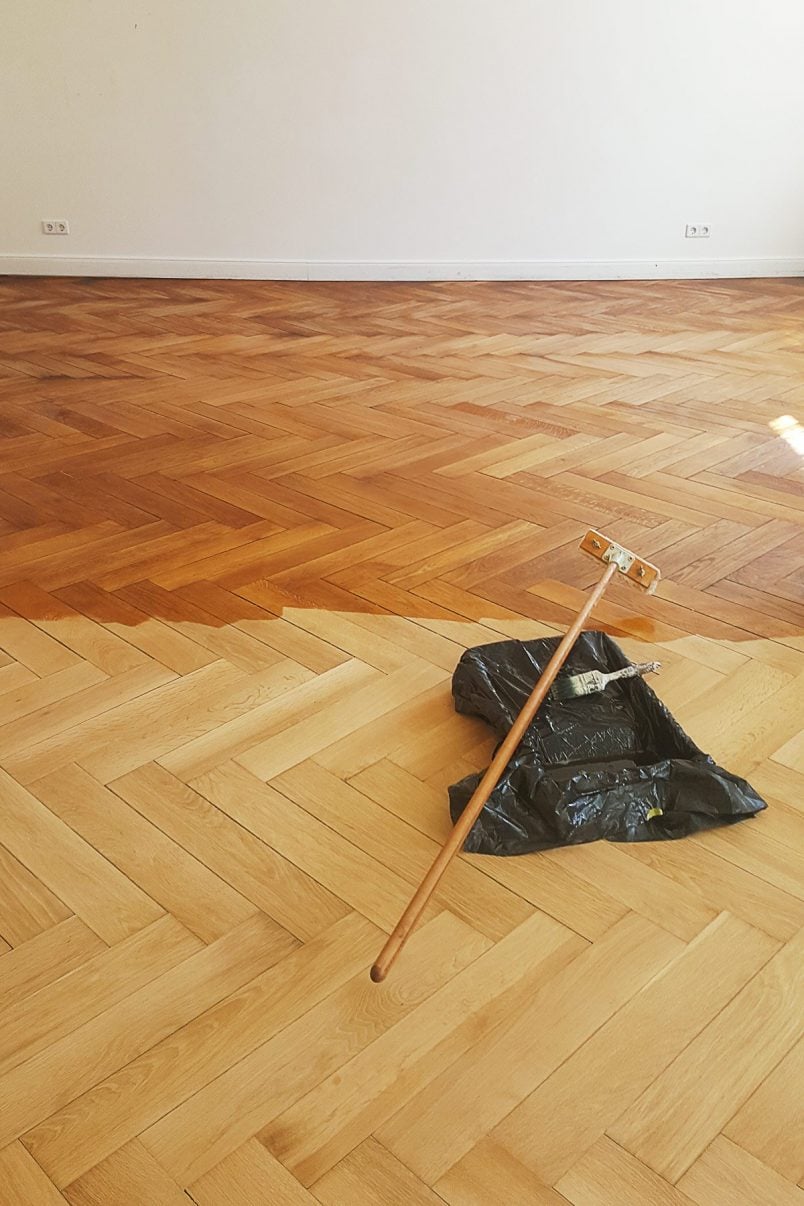
Then there’s the direction of the grain. Unlike floorboards, the parquet is usually laid in a pattern (ours is a classic herringbone). Usually, you would always sand timber in the direction of the grain but with parquet that’s almost always going to be impossible.
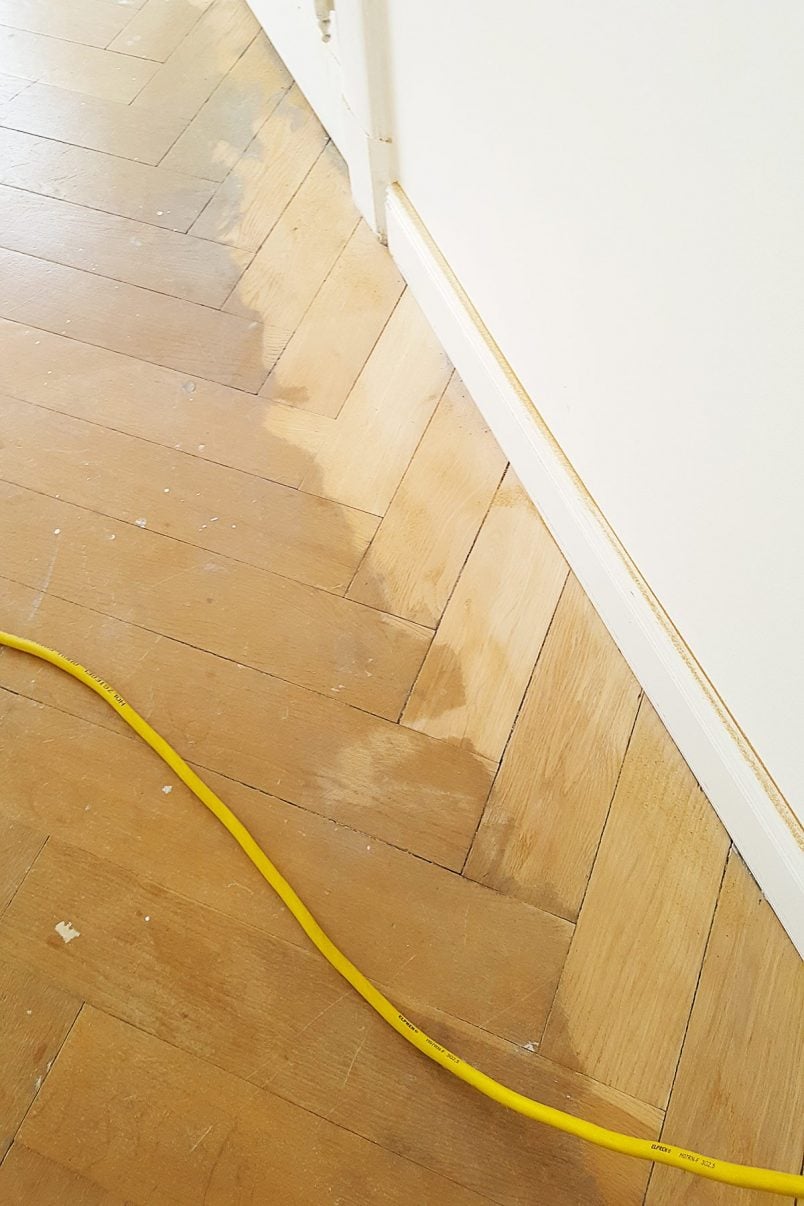
Something else to consider is the gaps between the floorboards. Over time, timber shrinks and moves, and inevitably, there will be some gaps between the individual parquet pieces.
If you have a floor that’s laid on a solid surface (like concrete) you can think about filling the gaps but if your floor is suspended it’s likely that the movement will be too much and any filler will break out of the gaps.
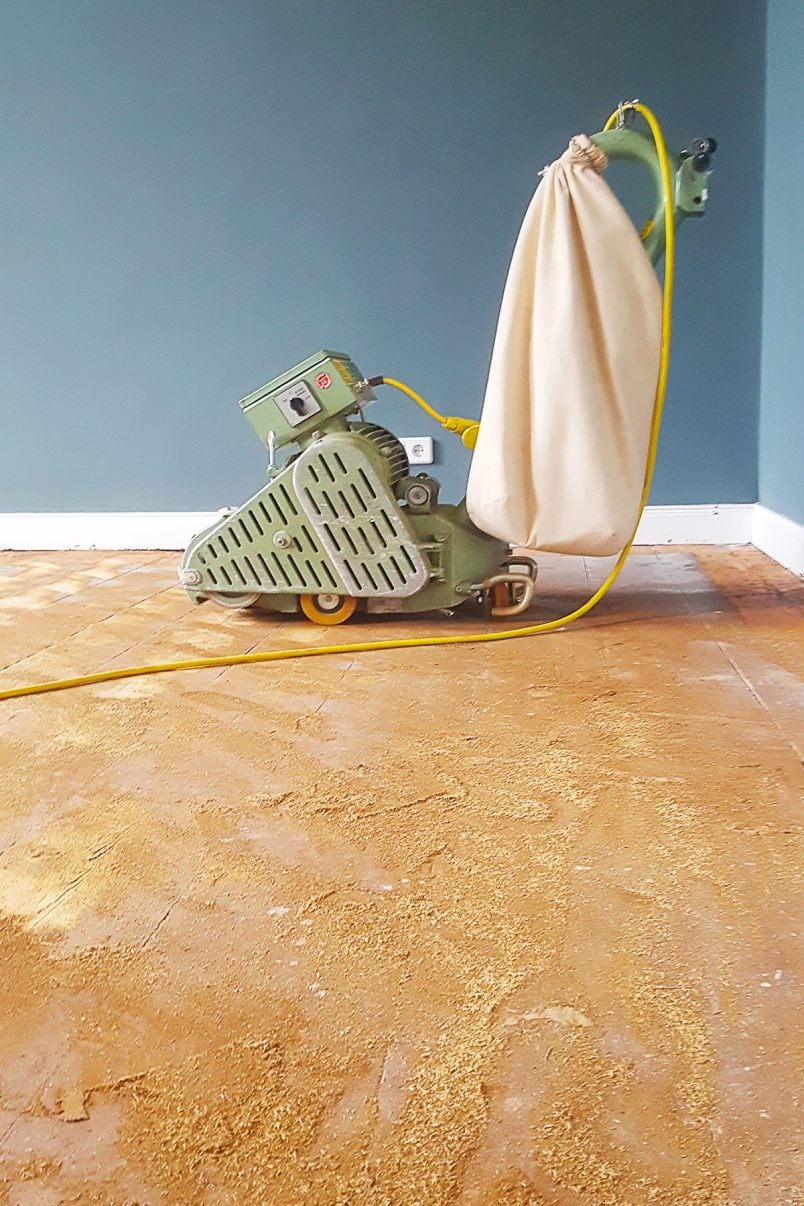
So now for the actual sanding.
As I already mentioned, the basic process of sanding parquet is the same as sanding floorboards. There are, however, a few small differences and additional steps involved.
1. Sand the floor as you would floorboards
The first steps in sanding a parquet floor are the same as if you were sanding floorboards.
Depending on the condition of your parquet, you can possibly start to sand with 40-grit paper, but it’s more likely you’ll have to start with something lower than that.
You never want to sand at a 90° angle to the grain and you should always finish in the direction of the light fall. In the case of a herringbone pattern, this means you sand at a 45° angle to the grain.

Work your way around the room with the drum sander and edging sander – first with the coarse paper, then again with the finer paper and so on until you finish with 120 grit paper. Always finish the last sand in the direction the light falls into the room.
You can see our full guide on how to sand floorboards here.
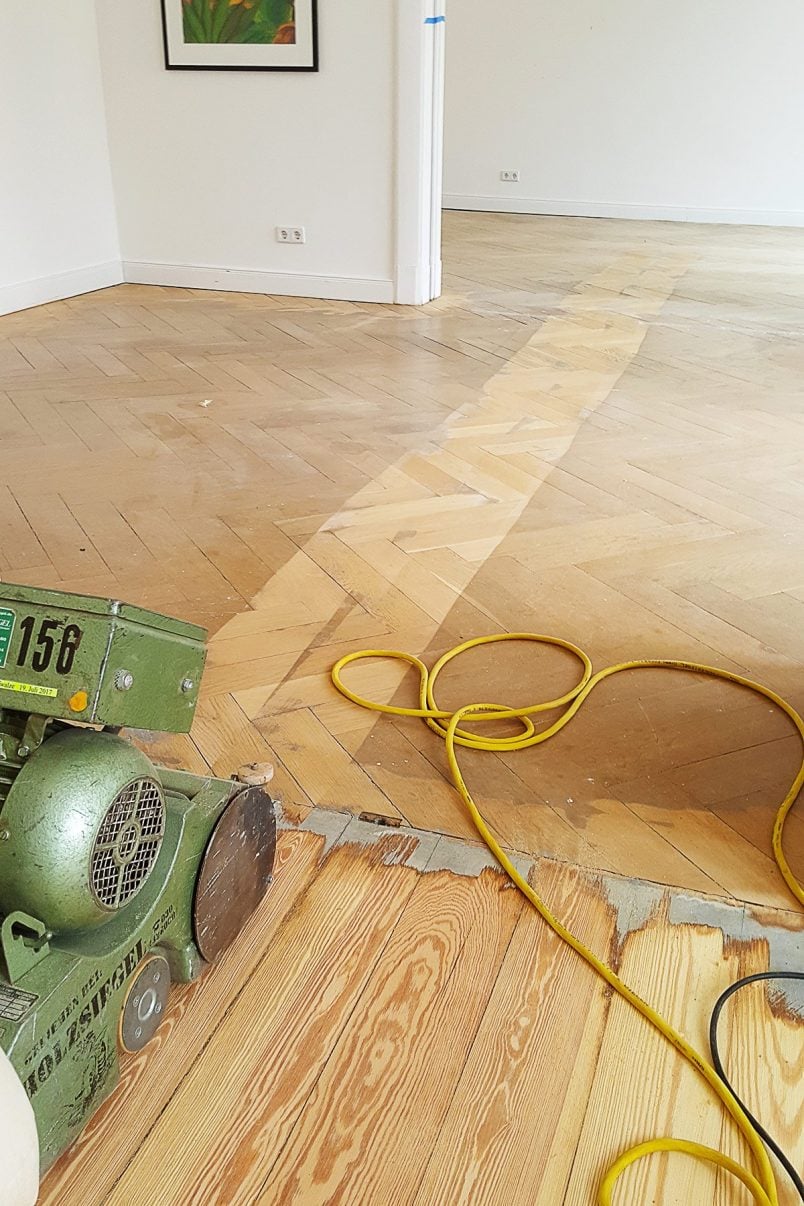
2. Floor Polisher/Buffer
This is the biggest difference to sanding parquet. When sanding floorboards you’d be finished and ready to seal them but parquet requires a bit more TLC.
When you’ve done the basic sanding, you’ll almost certainly see lines from sanding with the drum sander. This is where the second machine comes into play.
Unlike the large drum sander, it sands in circles, which means that you’re essentially sanding away any ridges and grooves until you achieve a perfectly smooth surface.
With the buffer, you have to go through all of the same steps as you did with the drum sander.
Work your way around the room with the machine again starting with the more coarse paper (around 40 grit), then slightly finer (about 80 grit) and then finish off with the finest paper (120 grit).

3. Clean
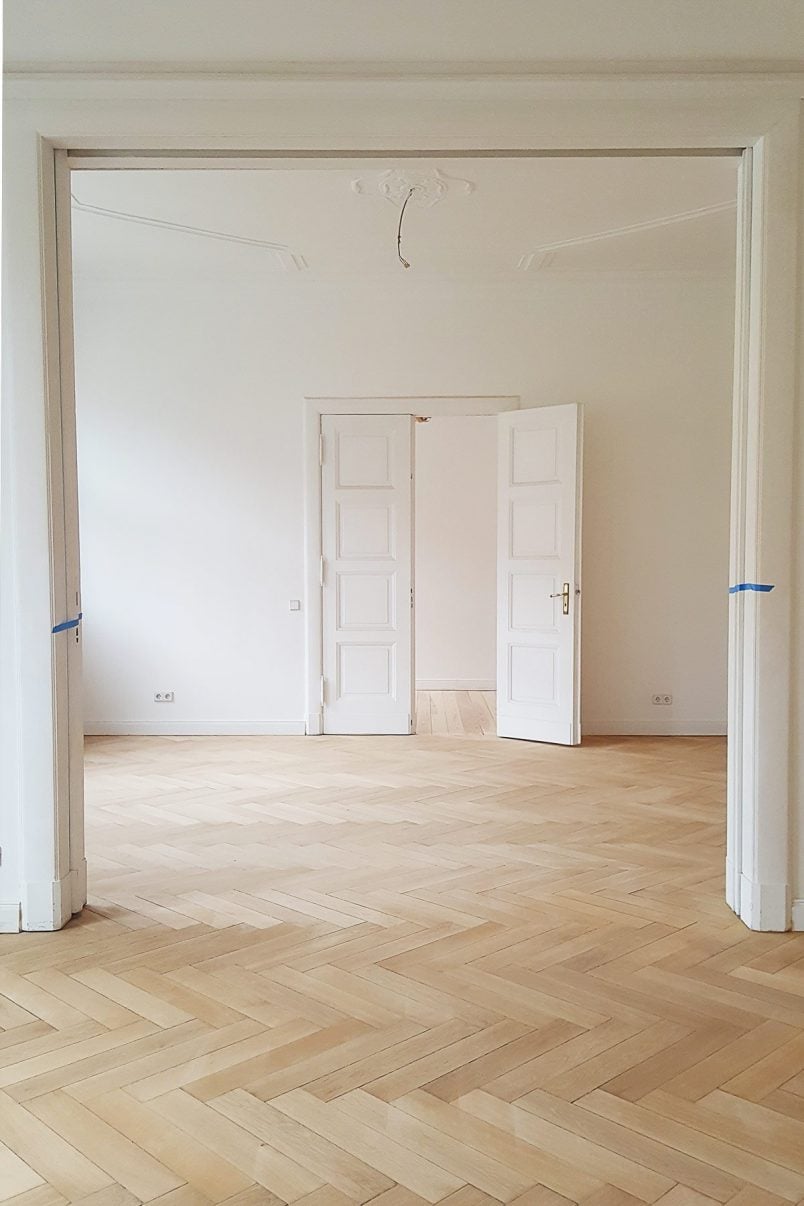
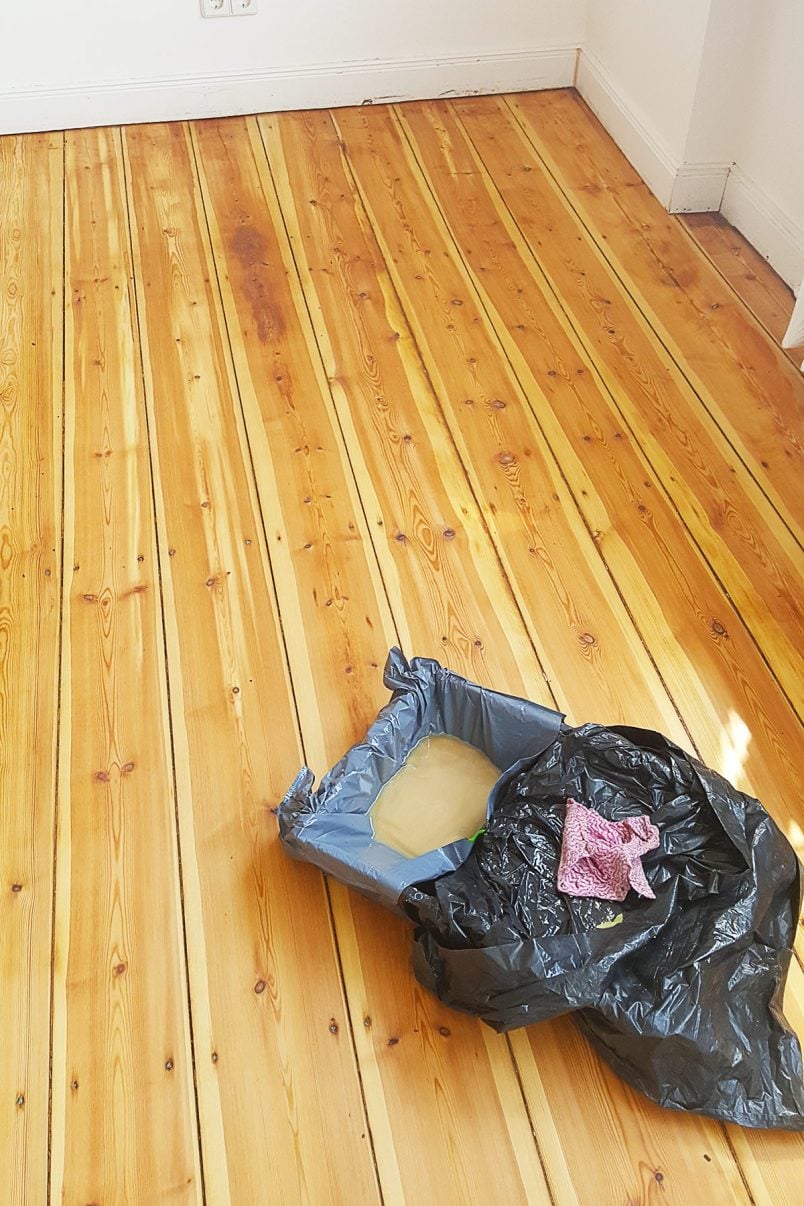
When you’ve finished sanding and smoothing the floor, it’s time to prepare it for your chosen finish.
The last time we sanded our floors we chose to varnish them but this time around we opted to oil our floors instead.

It’s so important to make sure that the floor is really clean and free of any dust and dirt. We vacuumed the floor so many times that I was almost convinced that I would end up sucking up the parquet if I carried on any longer!
We’d recommend paying particular attention to the gaps between the pieces of parquet.
The dirt and dust will inevitably settle in the gaps but vibrations caused by the sanding will also mean that any dirt that has been wedged solid in the gaps for the last generations will be loosened and bits of solid dirt will break out of the gaps every time you vacuum and especially when you start to oil or varnish the floor.
4. Oil or Varnish
Now, it’s time to seal your floor.
As I just mentioned, we opted for an oil finish this time around. It’s a more natural finish, and we felt it was a better fit for our floors – especially the parquet floor.
Exactly how you apply the oil will probably vary depending on the type of oil you use. We did a lot of research before deciding on an oil and in the end, we opted for this oil by Leinos.
With the system we used, you have to use two different types of oil. First, you apply a layer of the priming oil (Leinos Oil 240) and then, after waiting for around 15 minutes, buff and rub it into the floor with the buffing machine and special buffer pads.
Then, after about two hours, you apply a second coat of the primer before again waiting for around 15 minutes and rubbing it into the surface.
When you’ve finished applying the first two layers of priming oil, you have to wait for at least 12 hours for everything to completely dry before applying a finishing layer of oil.
The oil we used (Leinos 245) is an oil that has a percentage of wax which apparently is meant to make the surface extra durable.
We applied the first two layers of oil with a kind of broom to which you can attach a soft pad to apply the varnish. The third and last coat of the oil & wax mixture is just applied with a cloth that you basically wipe the liquid across the floor with.
The topcoat is meant to be extremely hard-wearing (so far it is), although I have to admit that the oils did really stink!
The biggest difference between sanding floorboards and parquet is in the machines.
We used two different machines to sand our parquet floor (three if you count the edging sander) whereas we only used one when sanding our floorboards.
Floorboards are also very forgiving. Parquet definitely isn’t.
It’s actually fairly difficult to achieve a flawless finish (which we didn’t!). Overall, we are pleased with the result but it’s far from perfect and we do have some visible lines from the drum sander depending on how the light shines on the floor.

Would we do it again? Probably.
I’m a firm believer in everyone being able to DIY. But (as much as I hate to do so) I would probably recommend having it sanded by a professional if you’ve never sanded a floor before and your parquet only has a thin solid top layer.
Tips For Sanding A Parquet Floor:
- Don’t sand the edges with anything finer than 80 grit. You could cause burn marks with finer paper.
- Spend more time than you think sanding with the buffing sander.
- Our floors are old and wavy. If it was in a newer building with a solid subfloor, I think that sanding a parquet floor would be easier.
- Wait as long as you possibly can before putting the furniture back. We put some of our things back after 3 days but it takes time for the oil to completely dry and the floor to harden and be protected. We’ve still not put back any rugs almost a month later!
Just as a warning – it’s s*it work but so worth it (both emotionally and financially).
Overall, it was definitely hard work, but given that we’ve saved thousands of Euros, it was also definitely worth it!
Have you ever sanded floorboards or a parquet floor? Have you ever tackled a project where you thought you may have been better off getting a professional to do the work? What home improvement job do you hate most?
If you found this post helpful, you will love these, too!


Arshad says
THANK YOU VERY MUCH FOR SUCH A NICE BLOG. I am planning to sand my two-room apartment parquet floor. There are quite sizeable gaps. Your blog didn’t say much about closing these gaps. Could you please explain a bit how I should go about closing the gaps in my floor?
After removing the baseboards, I saw that there is quite a lot of space under the baseboards. Do you think I should tighten the parquets? or Just filling it with some adhesive is how I should proceed?
Thank you,
Arshad
Christine says
Thank you so much, Arshad! We didn’t have many gaps so didn’t bother to fill anything. There are obviously lots of ways of doing this though. In our last house, we took up all floorboards in one room because the gaps were too large and pushed them all closer together. Obviously, that’s something that would be a lot more difficult to do with parquet. It sounds like you’d be best filling them. For this, I’d recommend making your own filler so that it matches your parquet perfectly. Don’t worry – it’s a lot easier to do than it sounds. When you’ve sanded your parquet, use some of the clean sawdust (not the stuff that still has varnish or dirt in it) and mix it with some good quality wood glue to create a paste that you squash into the gaps. When it’s dry, just sand everything again so that it’s smooth.
Hope that helps & good luck with your floor!
Cx
Helen says
This has been the most honest and calming point of information that I have come across within an internet rabbit hole where I have changed my mind 100 times as to whether we should go ahead and do our own floors. You have inspired me! I was wondering if you could help with a couple of questions…
1. We get the keys to our place next month and have 3 and a half days to do the louge, dining room and entrance (approx 45 sq. metres total) of parquet flooring – do you think we can sand and varnish in time to have furniture arrive on day 4?
2. How do you know if your parquet only has a thin top layer?
Thanks :)
Christine says
Congratulations on your new place, Helen! A lot will depend on the condition of your floor. If it’s in a good condition, is even and not covered in lots and lots of layers of varnish, you can sand it fairly quickly. How many layers of varnish are on it is pretty much impossible to tell but you can guess by looking at bits that have worn away or chipped. Basically, does it look like it’s thin? Are there patches where it looks thinner or does it look like there’s a solid layer of varnish on top? As for timescales, I’m really sorry to say that it would be very difficult to achieve everything in 3 days. I think that it would probably take you that long to complete the floor sanding and varnishing but it then needs drying time. If you’re varnishing your floors it’ll take at least a week for the varnish (will obviously depend on the make) to dry enough so that you can have a lot of traffic and furniture being moved around. For anything like that, I’d probably even give it two weeks of drying time. Oiled floors can be used a bit quicker but I’d still give it a couple of days drying time before putting anything back and definitely a couple of weeks before putting things like rugs down.
I know that’s really not what you want to hear but you really don’t want to go through the hard work of sanding your floors only to have them ruined again while you’re moving in. If you have absolutely no other option, I’d probably oil the floors and then try to protect them as much as possible while you move in.
Good luck with the move and your floors!
Cx
Abi says
Hi What model of buffer sander do you used on your floor. am struggling to find one?
Christine says
We used a Lägler ELF for all of the sanding and a Taski ergodisc for all of the buffing. We hired the machines from a local hire shop which is generally what I would recommend. They’ll be able to advise you on what tools/machines you’ll need for your floors!
Hope that helps!
Cx
Kerrie says
I love your honesty lol. It does look brilliant, and remember there’s always a Margherita to reward yourself at the end!
Christine says
So true & I do love a Margarita!
Cx