A while ago, we told you about the projects we are planning for this year. You can read more about our plans here. One of the things on our impossibly long To-Do list is sorting our 4th bedroom. This is what it looked like when we moved in.
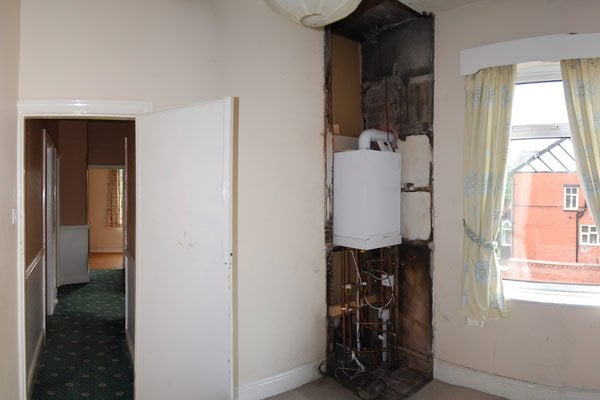
Except for the boiler in the corner of the room, it doesn’t look too bad, but in reality, the wallpaper is dirty and falling off the walls, the carpet is stained and badly fitted and worst of all, the back wall is completely damp due to a leaky chimney.
Bizarrely, it almost looked better then than it does now.
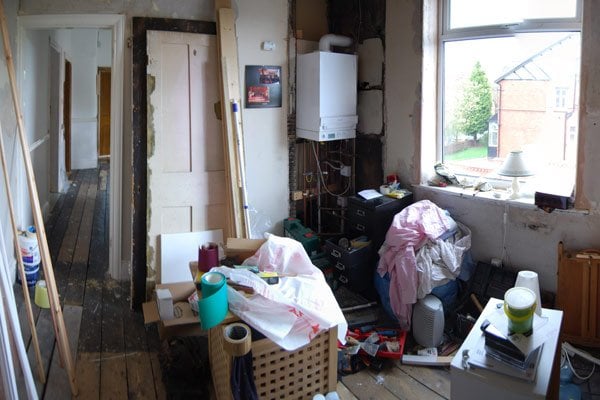
We’ve already stripped most of the walls, removed the carpet and filled the room with a huge amount of junk.
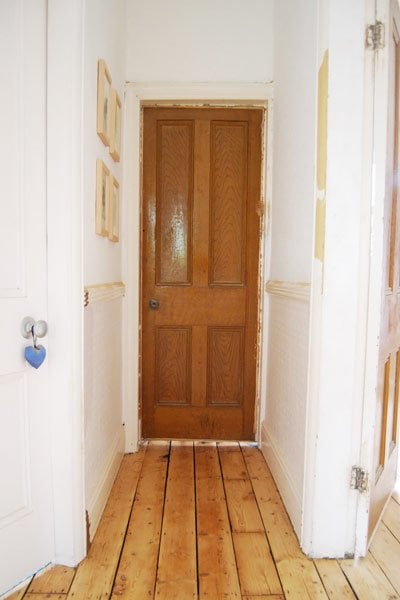
You can also see that the door originally opened up into the room and not towards the wall. All of the doors in our house open in the same way, which is kind of weird but apparently typical for Edwardian houses.
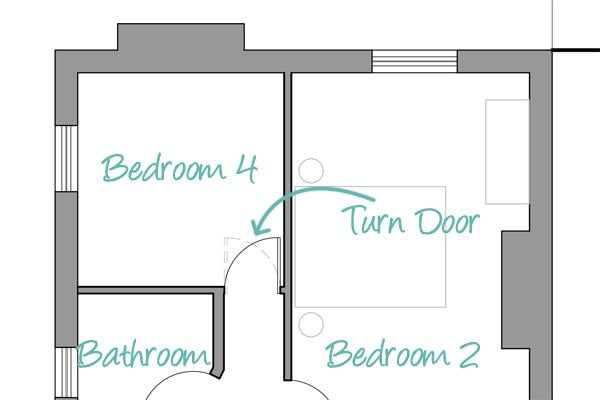
As the room isn’t huge, we’ve decided to turn the door so that it opens up towards the wall. We think that it will make the space in the room more usable (The thin dashed line shows the door as it currently is).
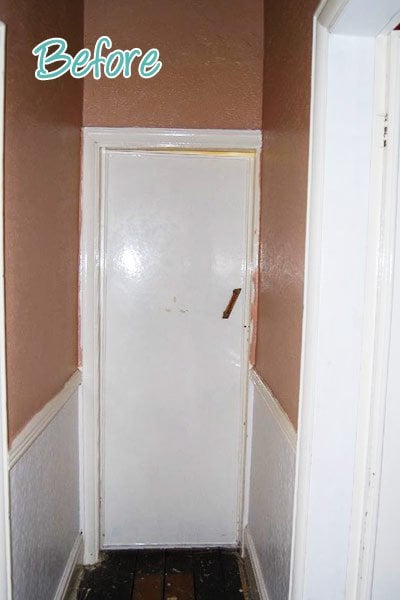
When we moved in, all of our original Edwardian doors had been boarded up and painted so many times that all of the original door and door frame details had been lost under all the paint.
We have already restored our living room door and hope to get around to restoring this door at some point in the future, too. For now, we just want to get it hung so that we can at least close the door on all of our junk.
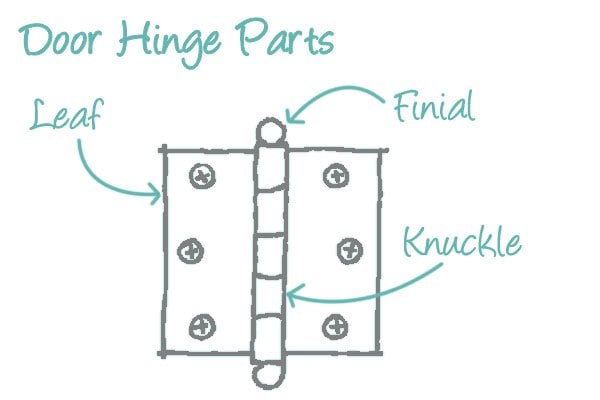
We’re reusing the original hinges, which, after a long soak in some paint stripper, have actually turned out okay again.

The only problem is that they aren’t adjustable which makes it even more important to attach the door in the correct position.
Start by holding the door upright and square against the door opening, and use wedges to hold it in place so that you have a bottom clearance of about 10 mm.
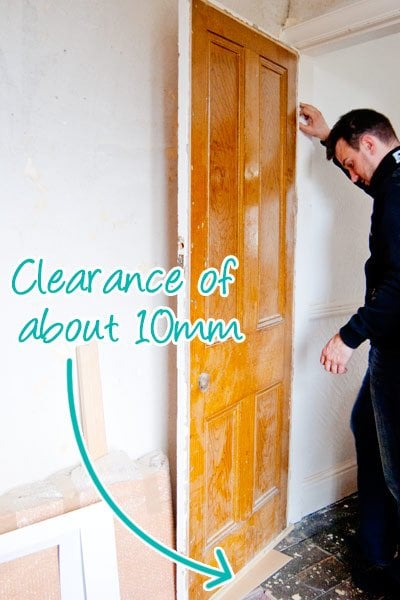
You should also leave a small gap of about 2 mm at the top of the door.
We already have the hinge positions given, as we are reusing the existing door. If you are fitting a new door, the top hinge position should be about 175 mm from the top of the door, and the lower hinge should be about 250 mm from the bottom of the door.
For us, there was no chiselling because we are reusing the existing door and door frame. After attaching the hinges to the door, open them up and, with the knuckle clear of the door and frame, mark around them.
Then all you have to do is screw everything together. That’s all there is to it.
The only problem is that our old door has completely warped – so bad in fact that it won’t close properly and there are huge gaps at the top and bottom. We’re not sure how we’re going to solve the problem yet, but for now, it will just have to do.
Have you ever hung a door? Do you have any advice for us on solving the problem with the warped door?
caitlin says
Here’s a trick we used to use on warped cabinet doors when I worked in antique restoration. Take door off (I know), clamp door between two solid pieces of wood (4×4 or 2×4 on end), every 18″ or so. You might have 5 or 6 of these along the entire door. Apply steam, and tighten clamps to flatten warp. You can steam over several days and continue to tighten and flatten. Pray to the woodworking gods, then leave door in clamps for at least a week. We used this method on furniture, or course, and it does work. I don’t know though for a regular paneled door. It’s a pretty door, they don’t make them like that anymore. As an aside, does the door get direct sun or sit over a vent? That could be contributing to the problem.
Christine says
That sounds like a great tip, thanks! If we are allowed to keep the doors after our loft conversion, we’ll definitely give it a try!
Cx
sara says
Your projects are moving a long so nicely (from a readers point of view ha!) I don’t know much about door hanging, but I do have to replace a few of the upstairs ones in my old house that I keep avoiding. (Panels have been kicked out and plexiglass put in…strange). And look at that old carpet in your hall way (that is so gone now – I read yesterdays post – you’ve done so much work on them wow!!!)
Christine says
Haha, not sure it feels like thinks are moving along – or at least that’s what it sometimes feels like! I’m sooo glad that carpet has gone – it was all down the stairs, too.
It actually wasn’t hard to hang the door, the main problem for us is that the door is so warped. I’m sure it’s something that you can do yourself!
Cx
Magali@TheLittleWhiteHouse says
It’s funny how because we both live in old houses we do the same things at one point or an other. Would you believe I changed my bedroom door last month. My bedroom has a slanted roof and the door opened inside and on the only wall where the bed should go if I want a wardrobe to go on the other wall. Now the door opens in the corridor… The bedroom seems twice as large as it seemed before. I had a warped door in my dining-room. We put it on the floor with heavy things on where it wasn’t straight and even if it’s not perfect now, it closes… Perfection is not for old houses!
Christine says
Thanks for the tip Magali. I’m pretty sure that our door isn’t salvageable though. If we could get our door to close as much as yours, we’d already be a huge step further. If we ever get round to starting our loft conversion, we will probably have to renew the doors anyway. So annoying.
Cx