With so many doors around our house in a complete state of disrepair, it was inevitable that we’d be sharing a door makeover with you sooner or later.
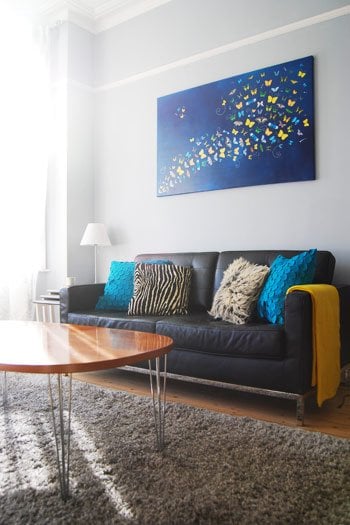
Our living room has already come a long way since first moving into our house. But, as with all of our other rooms, there is still a lot of work to do.
The door is just one of the things on our long project To-Do list. This is what it’s like at the moment.
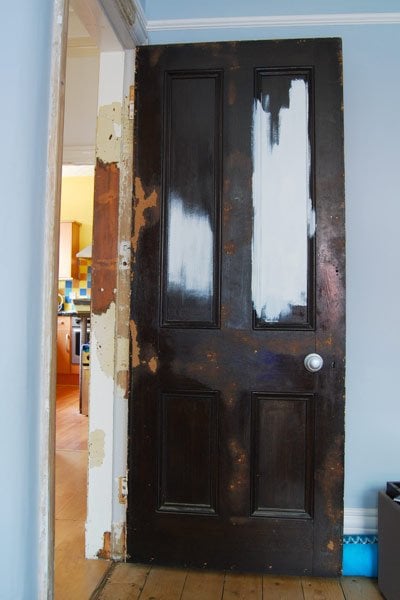
It really looks out of place with our newly plastered and painted walls and sanded floorboards. It feels like the whole room is let down by the door. It really makes it feel unfinished and very much like a building site.
Now, after a few hours of stripping and sanding, this is what it looks like.
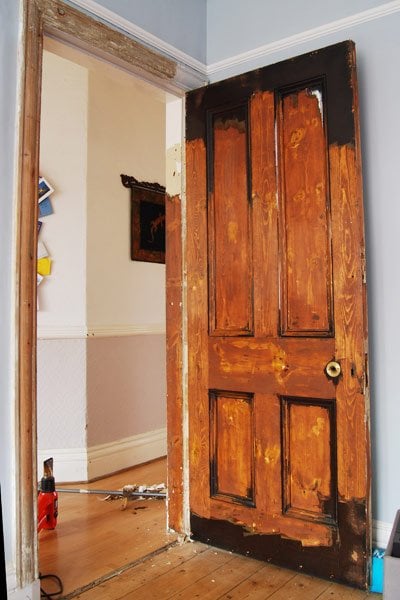
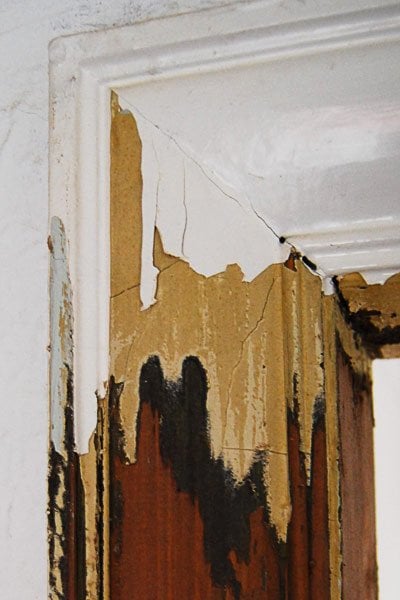
Not a great improvement is it? As with the staircase, we used a heat gun to strip the paint. There is only one layer of paint on the door, so it’s proving quite easy to strip, the door frame though is another matter.
There are so many layers of paint on it that it’s taking forever. The detail on the frame and door isn’t helping matters, either. There are so many curves and corners! As usual, sanding is taking much longer than expected.
After a few more hours of sanding, it’s time to paint the door. Don’t forget to prime the knots with a knotting solution! If you skip this step, the knots will eventually shine through the new paintwork. Annoyingly, we missed one or two when restoring our bathroom door. You can see them here.
When painting a panelled door, you should start by painting the beading and then the panels.
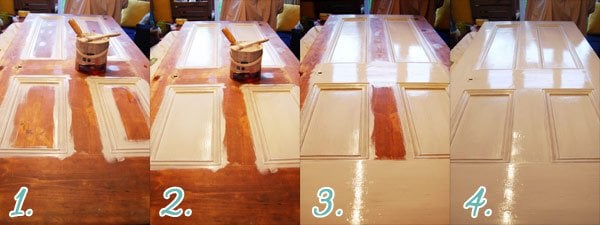
Then you can start to paint the rest of the door. Start with the horizontal areas and finish with the vertical ones. This way you should avoid brush marks. Remember to also finish on an upward brushstroke, as this will also minimise any brush marks.
Let the paint completely dry and then sand the whole area with very fine sandpaper. We usually use 240 grit paper to do this.
Using the same method as for the door, we stripped, sanded and painted the frame, too. As usual, everything took longer than expected, but lucky for you, there’s no need to wait to see the result as here it is
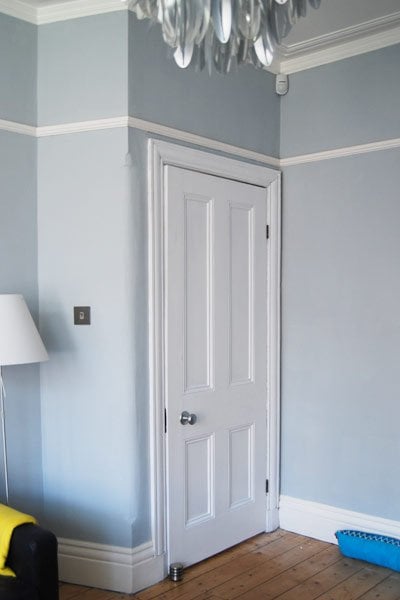
It makes such a huge difference to the whole feel of the room.
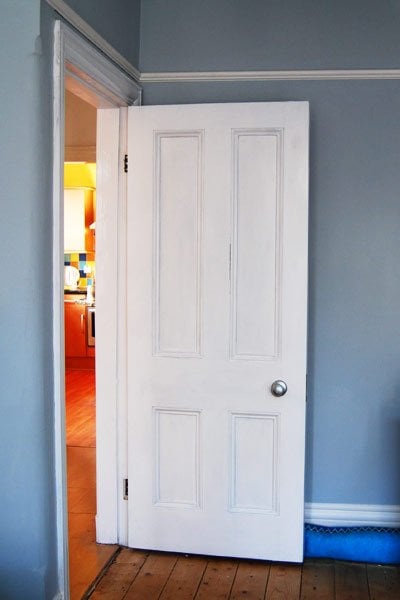
The corner of the room seems so much brighter and the room now definitely has that finished feel. As usual here are our before and after pictures.
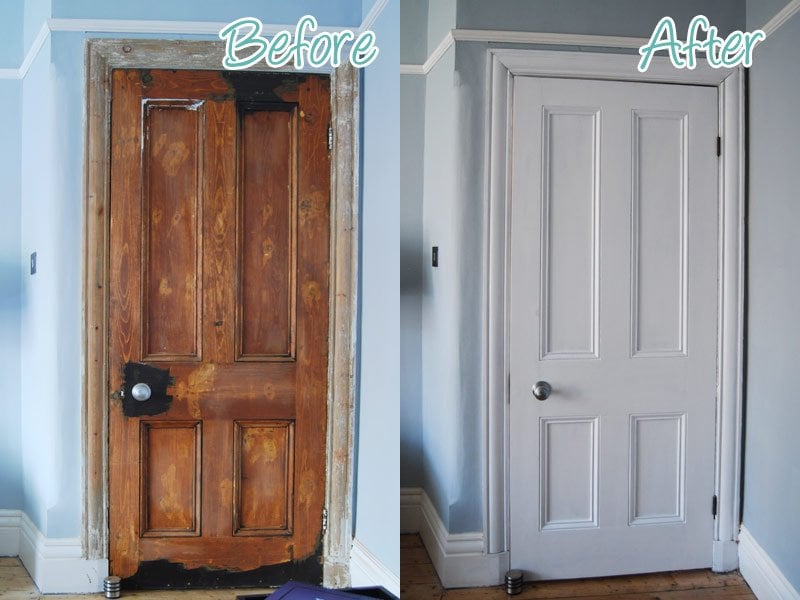
We’re so happy to have finally restored the living room door and more importantly it was the last bit of building work that the room needed!
Of course, we still need some more furniture and just general finishing touches, but the room itself is finished! Still can’t quite get over it!
What do you think of our finished door? We are painting all of the woodwork in our house white, but do you think that we should have left the doors in the natural wood finish?
Heather says
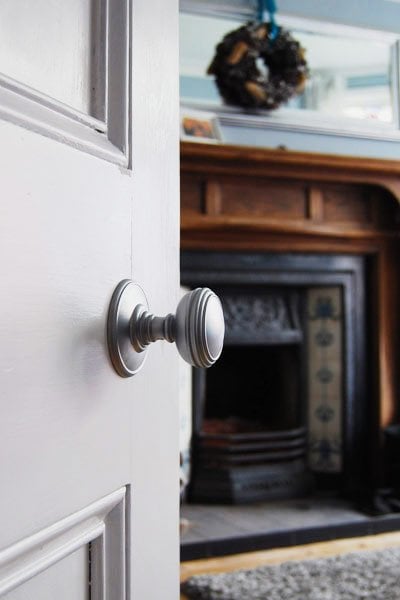
Looks great! We have these exact doors in our house. How did you update the door handles?
Christine says
Thank you, Heather! We just bought new door knobs and attached them to the door using the existing (original) holes. It was really easy and straightforward. These are the door knobs we used.
Hope that helps but do let us know if you have any other questions and we’ll do our best to help.
Cx
Jade T says
Hi what is the door knob product? Love it but can’t find anywhere! Jade
Christine says
They’re gorgeous door knobs, aren’t they? The ones we opted for have concealed fixings (I hate seeing screws) are these Delamain door knobs in satin chrome.
Cx
Sarah Fitzgerald says
Hello,
I came across this while looking for ideas for restoring our Victorian doors – they’re currently covered with board!
The white colour looks fab and so bright!
Just wondering what finish you used on the doors and matching skirts and door surrounds? And do they still look good?
Many thanks!
Christine says
Thanks for the compliments about our doors, Sarah!
We used the same paint on almost all of our doors, skirting and frames. It’s all Dulux oil-based paint in an eggshell finish. It worked well but we did find that it started to turn a bit yellow over time (apparently they’ve since changed the paint so that that doesn’t happen anymore).
We eventually switched to Farrow & Ball All White floor paint in modern eggshell (we found the floor paint to be really durable). It’s waterbased so easier and quicker to apply.
Cx
Lucy says
That door knob looks fab. I have been looking everywhere but couldn’t find one like it… Would you be kind and let me know where I could get something like that? Thanks.
Christine says
Thanks Lucy. The door knobs are Delamain plain mortice knobs in satin (with concealed fixings). Had them for 4 years now and they still look as good as new. Can’t remember where be got them, but I’m sure google will be able to help! ;)
Cx
Hollie says
Hi
What size are the knobs?
Christine says
These are the knobs that we used.
Cx
Marsha Decker says
The door looks GREAT!!!.. Wow… the hard work totally paid off and it looks amazing! I just can’t get over it. I actually thought the reveal pic was what you wanted it to look like (from a magazine) and then saw it was your actual door. So wonderful! Congrats! and although I love exposed wood… the white is refreshing and looks perfect in your room. Congrats again!
Christine says
Wow, thank you! That’s so kind. Only another 7 doors to go! ;-)
Cx
Magali@TheLittleWhiteHouse says
I love the door in white! As much as I love wood doors, I believe in old houses white doors and trim bring more light in.
Christine says
Thanks. We’re really happy with the result, too. The door had previously been stained, so it would have been almost impossible to achieve an even wood colour. I still can’t believe how long it took us to get round to painting the door, especially as it makes such a difference to the room.
Cx