The main project we’re meant to be working on at the moment is remodelling our guest bedroom, (you can read about our progress so far here) but as usual, we got ever so slightly distracted.
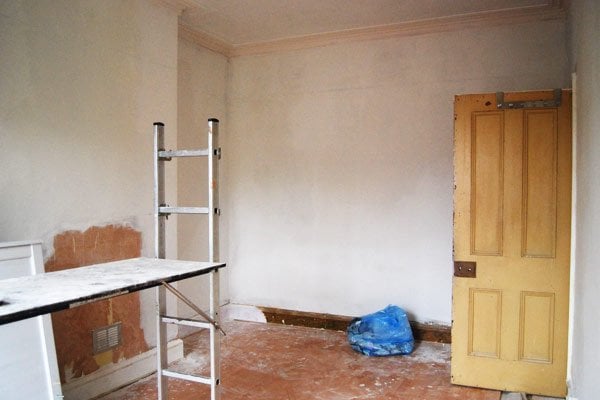
As you already know, we ripped out the laminate flooring in the bedroom and got so carried away, that we also ripped up the even worst laminate floor in the hallway, too.
Well, we couldn’t just leave it like that, could we? As you may have already guessed from our Facebook, Twitter and Instagram updates over the weekend, we have been extremely busy.
In case you’ve not already guessed – we’ve sanded the hallway floor!
Let’s start back at the beginning.
This is what our hallway floor looked like last week.
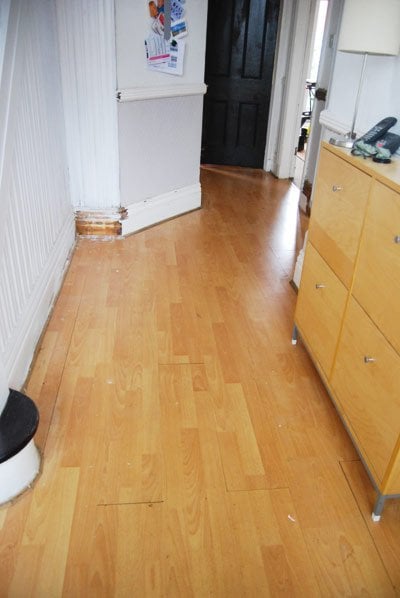
Things could really only get better, couldn’t they! Luckily after ripping up the laminate flooring, we discovered the original wooden floorboards.
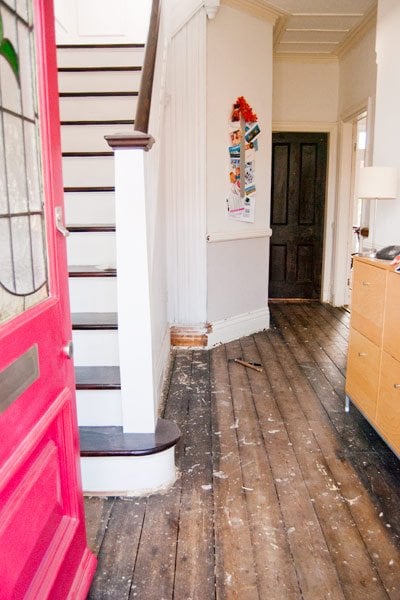
Except for a patchy stain and paint marks all over, the boards are in a fairly good condition, which made our decision to sand them an easy one.
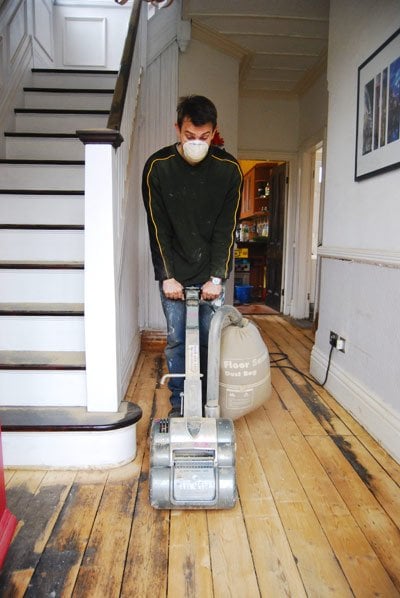
Not too long after moving in, we had the floor in our living room sanded (read more about it here). It looked easy enough to do, so this time, we decided to do it ourselves. After hiring the necessary machines, we started by sanding around the edges of the room with an edging sander.
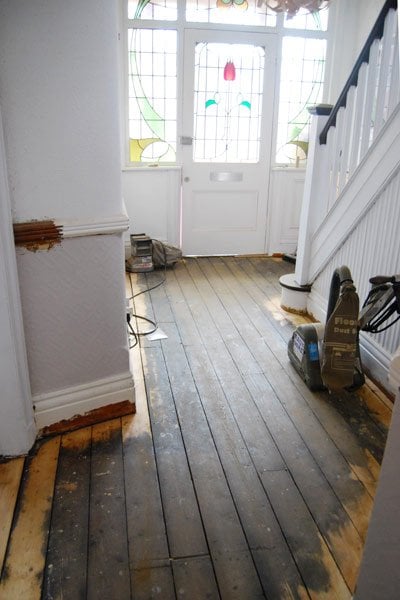
Then we used a large floor sander to sand the boards.
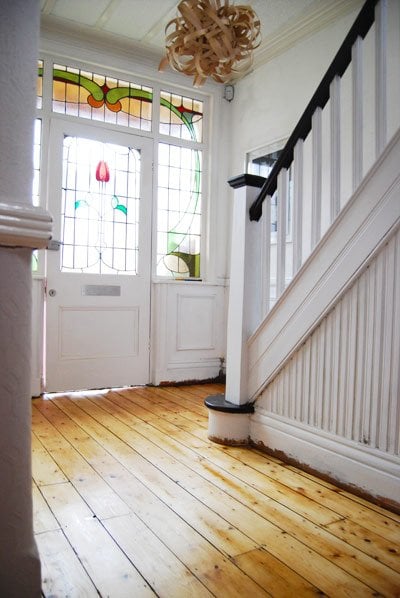
This is the result after a lot more sanding.

We’ve decided to leave the boards the natural wood colour, so the next job was to varnish the floorboards. As it’s the main entrance and fairly high traffic area, we applied three coats of varnish (the same one we used on our staircase restoration project).
As always, here are our before and after pictures.
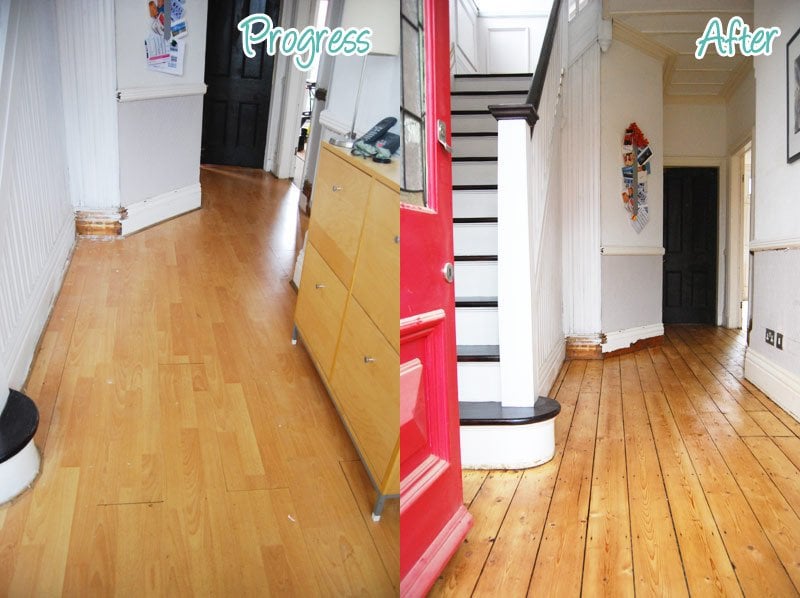
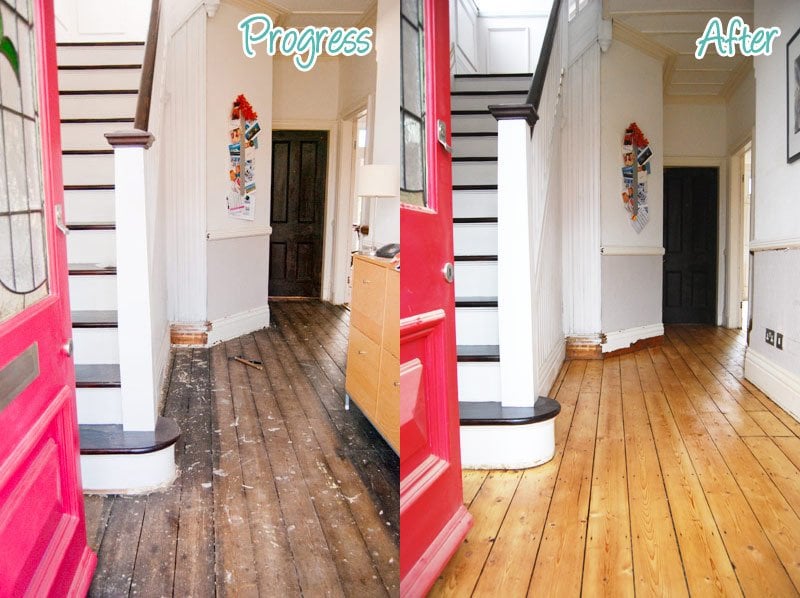
We couldn’t be happier with the result. We’ll update you with the details of the process, costs and the mid-sanding disaster we had in a day or two.
What we’re you up to this weekend? Have you ever sanded your own floors?
Matthew says
Looks great. Did you consider filling any of the gaps? We have a similar floor but our floorboards do not look in as good condition and gaps are bigger.
Matt
Christine says
Thank you, Matthew! We did have some rooms where the gaps were larger. In our bedroom, we lifted all of the floorboards and pushed them closer together and in the small guest bedroom the gaps were just too large and we covered the floor. The groundfloor gaps were already fairly large and I’m not sure I’d recommend keeping your floorboards exposed if you have gaps that are very big. It’s probably also worth saying, that we insulated under the whole ground floor – exposed floorboards would just be way too cold otherwise! Sorry, I can’t be more help!
Cx
Louise says
What a relief to get that fake wood off. I understand the high traffic issues. Here we traditionally have a lot of pine flooring. Endless discussion on DIY sites on best treatments to keep the light color, and not having it go yellow, and keep it fresh. The preferred treatment is oil, or soaping it. When it is varnished you get cracks and scrapes that turn black, or have to varnish it so heavily it looks like plastic all over again. On the other hand, oil needs repeating, soaping takes years to build up a dirt resistant surface. They also require frequent scrub-downs… So anyhow you turn there is a problem, but it keeps people talking =) For hard traffic areas i think dark linseed paint or varnish is the only way to go, but in bedrooms or such i would go with white tainted wax or oils to keep some of the wood feeling.
Christine says
The varnish we used for the hallway floor is the same varnish that was used for the living room floor. We paid to have the floor in the living room sanded and varnished about 2 years ago and it still looks as good as it did the day it was done. The varnish has held up great with no marks or cracks at all! Fingers crossed that the hallway holds up as well, too!
Cx
sj says
Wow! The floors are gorgeous! What were they thinking when they covered them with something not as beautiful?
Christine says
Thanks. It’s weird to cover up original floorboards, but then nothing surprises us anymore in this house!
Cx
Abby H. says
Looks absolutely awesome!! I have been wanting to get our beat-up wood floors sanded, but I think you’ve inspired me to try it ourselves. Did you have to use any wood filler for cracks between the boards?
Christine says
Thanks Abby! It was really easy to do, you could totaly do it yourself! I’m not going to lie, it was really hard work and I’m still aching all over. We didn’t fill any of the gaps, mainly because we have insulated under most of the floors (and will insulate under the rest of them before the winter). I have seen special gap filling products, that may be worth looking into if you have larger gaps.
We were sneaky and sanded another floor at the same time and will be sharing all of the information amd a cost breakdown soon.
Cx
caitlin says
Well, haven’t you guys been busy little bees! I hadn’t checked in for a couple days and you’ve gone and completely upgraded that entrance hall. Looks amaaaaazing. It’s true what Sandra said about the house getting its soul back. How was the dust factor in the rest of the house, btw?
Christine says
Thanks Caitlin! Just don’t mention the dust factor, I’ve never seen so much in my life! It’s everywhere and as soon as we clean it away, it settles again and looks just as bad as before – poor Jan has to clean his shoes every morning before going to work. So glad that the result is worth it.
Cx
PS. We’ve been even busier than we’ve let on. Can’t wait to share!
Sandra says
Why on earth would some cover real wood floors with fake wood floors?!? I am so glad that you are giving your home its soul back!
Christine says
I know! Surely it must have been more expensive to buy all of the laminate, too!
Cx
Magali@TheLittleWhiteHouse says
It looks amazing! I haven’t sanded, but I moved all the furniture in my bedroom as I suddenly had a better idea: the room does look bigger, but I’m exhausted and sore!
Christine says
Thanks so much Magali! We’re really happy with the result! I love to move furniture around, too – exhausted just thinking about it tho!
Cx