Even if you have absolutely no DIY skills, one of the easiest ways you can save money on your home renovation is by doing the messy prep work yourself.
Removing old layers of wallpaper, ripping up faded carpets and cleaning bricks are all very easy home improvements and can save you a lot of money. Another easy DIY project is removing laminate flooring and we’re sharing how to remove laminate flooring + a secret tip that will make removing a laminate floor completely effortless.
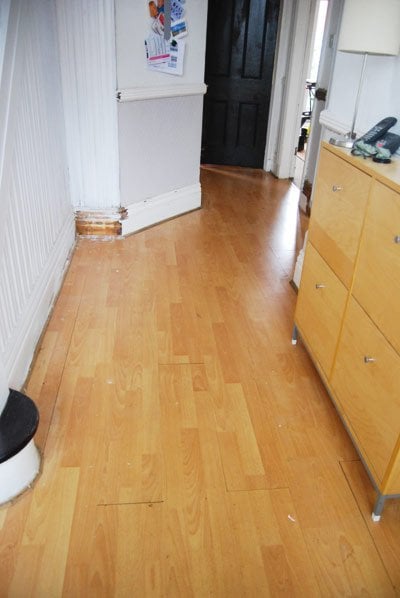
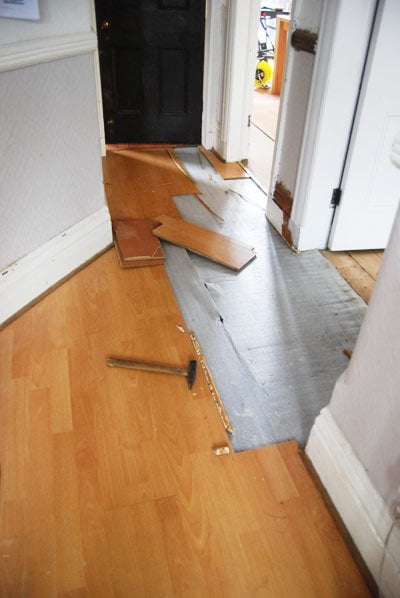
Last week I already ripped out the laminate flooring in our guest bedroom and because it was so quick and satisfying to do I got a bit carried away and took up the laminate floor in our hallway, too.
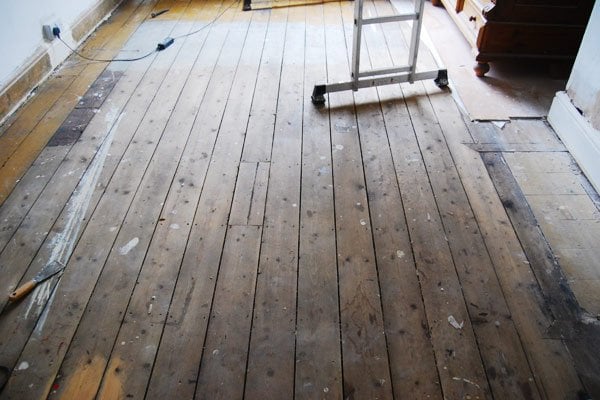
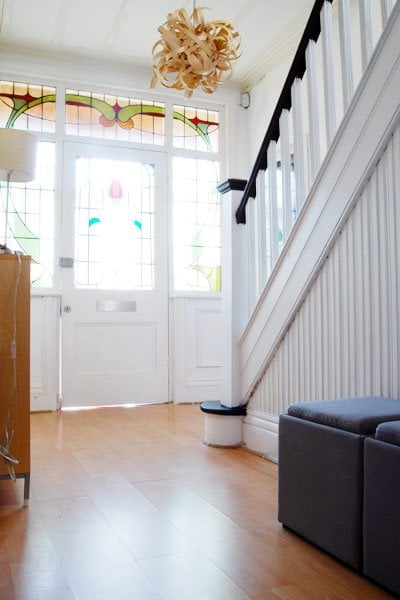
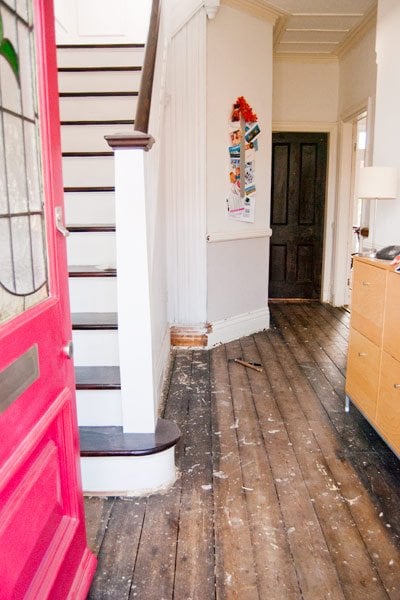
The laminate in the hallways doesn’t look too bad in the pictures but it was badly laid, wavy and damaged and I’m so happy that it’s gone, even if the floorboards underneath don’t exactly look much better (yet!).
What you will need to remove a laminate floor
This post contains affiliate links. We only recommend products we love and think that you will, too! Read our full disclaimer here.
- Stripping knife
- Crowbar or pry bar (you don’t need a special laminate flooring removal tool)
- Safety gear like gloves, goggles & kneepads
How do you remove laminate flooring?
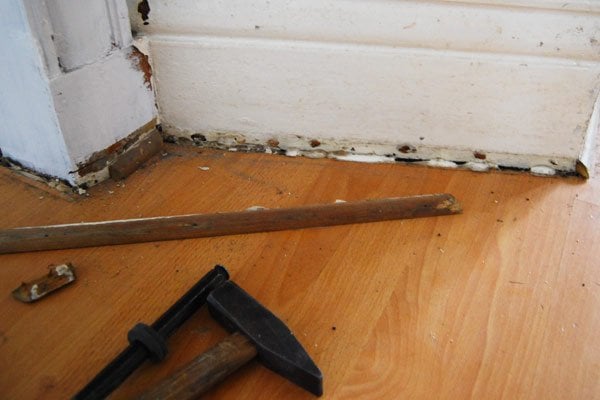
How you start removing the laminate will depend on how the floor was laid. There are two scenarios – the first is where the skirting boards were installed after the laminate and sit on top of it. The second, more likely scenario, is that the laminate runs up to the skirting board and a quarter-round moulding strip covers the join.
The easiest way to remove the moulding is by wiggling a filling knife between the moulding strip and laminate flooring and then using the knife as a lever to wiggle the strip free. If it’s too firmly attached push the end of a pry bar into the small gap that you’ve created and lever the moulding strips away from the skirting.
You can use the same process for removing both the skirting and moulding strips but we don’t recommend removing the skirting boards unless you really have to.
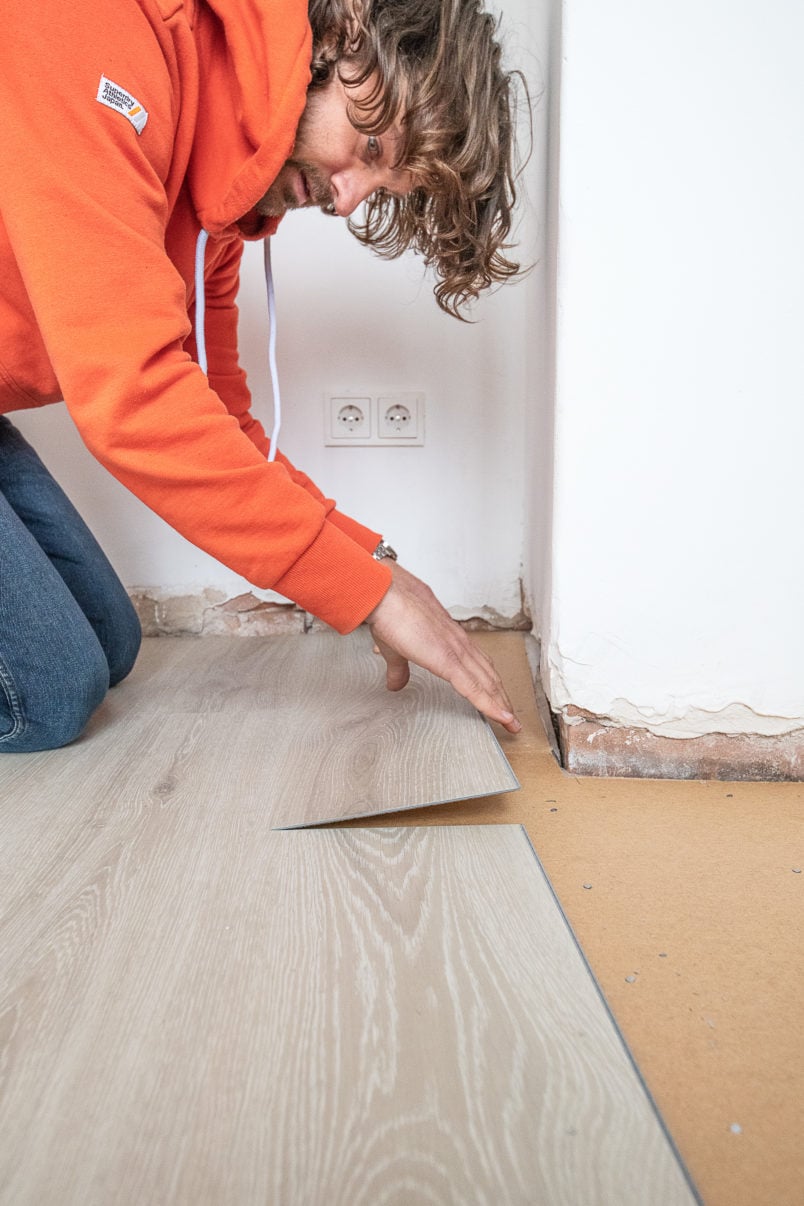
After removing the strips you can start to take up the laminate floor. Most laminate floors are floating and aren’t glued to the subfloor which makes them really quick and easy to remove.
It’s really just a matter of picking up a piece of board, giving it a wiggle if it’s stuck and taking it away. The individual pieces of laminate are also just slotted together so once you’ve taken up the first couple of planks the rest of the floor is really easy to pull apart.
Yes, it’s that easy to remove laminate flooring.
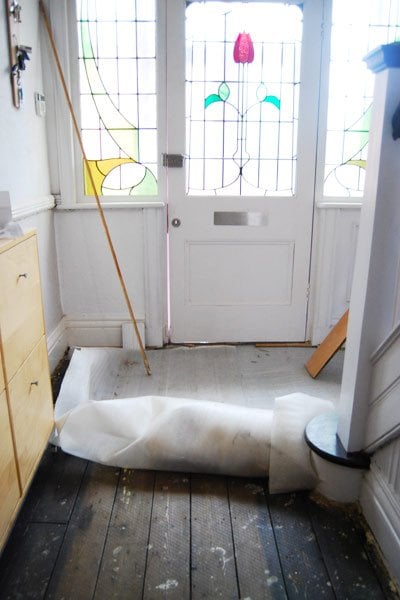
Once you’ve removed the floating laminate you’ll probably find a layer of underlay. This is usually loosely laid on top of your subfloor so again it’s just a matter of picking it up and throwing it away.
It doesn’t matter if you’re removing laminate flooring in your kitchen or your staircase – the process is always the same.
SECRET DIY TIP
If your laminate flooring is in a good condition, head over to your local Facebook groups and give away your laminate flooring there.
We’ve seen countless posts where people give away their laminate floor on the condition that someone removes it themselves. This will save you time taking up the floor but it will also make someone happy and reduce waste. A total win-win situation!
Now that we’ve removed the last bit of laminate flooring in our house, we can finally start to put things back together again. At the moment, it really doesn’t look like much of an improvement but it is already so much better than before.
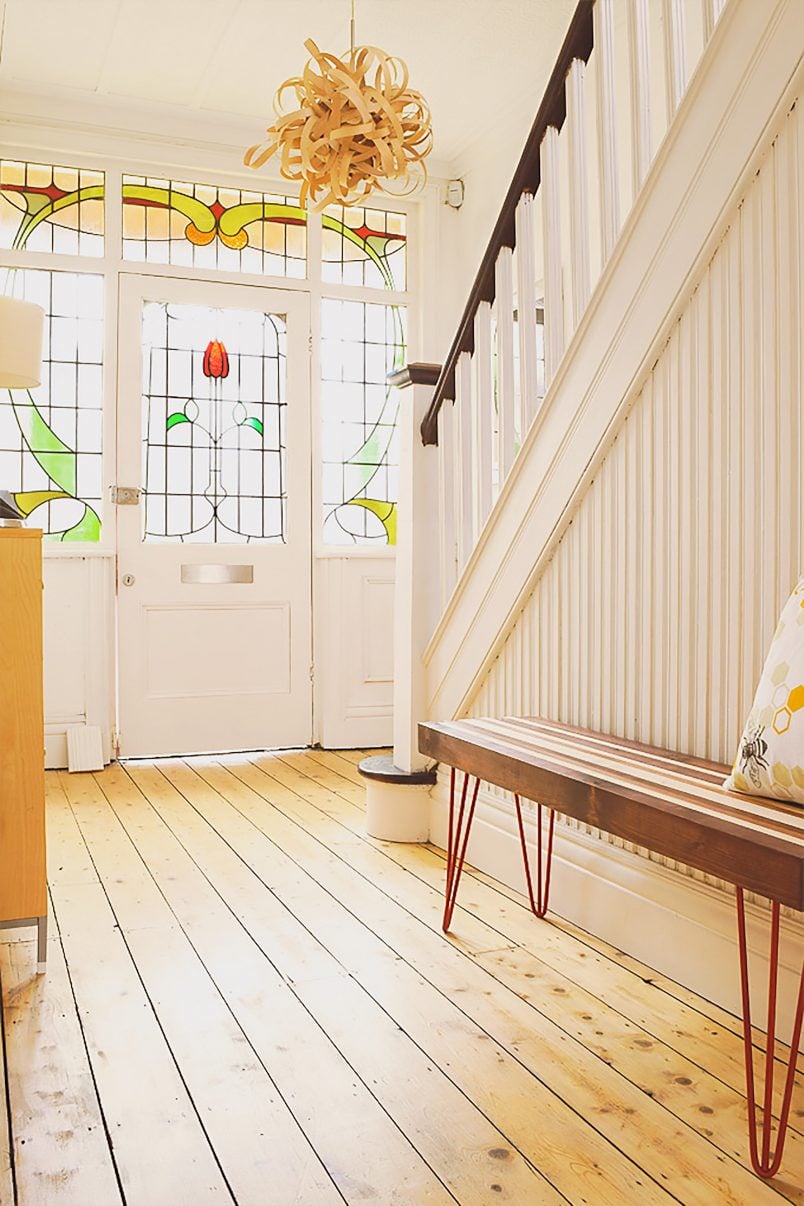
We already completely stripped, sanded and painted the staircase and the next project on my list is sorting our new flooring. We definitely won’t be installing new laminate flooring in here and are planning on sanding the floorboards in the hallway. I can’t wait to see what they turn out like.
Removing the laminate flooring was a bit of a spur-of-the-moment project that turned out to be much easier than expected. I wonder what Jan will say when he gets home. Last time when I painted the whole hallway white (it used to be a really awful brown), he didn’t even notice!
How To Remove Laminate Flooring FAQ
Yes, removing laminate flooring is very easy and you don’t need any experience or special tools to do it. Just follow the instructions above to remove your laminate flooring.
In most cases, the flooring is laid floating which means that it just rests on the subfloor and isn’t attached to it. You may find that the individual laminate boards are glued together. If that’s the case you can snap them along the join to easily break them apart.
If you remove the flooring yourself it’s completely free to remove laminate flooring. Depending on where you live, there may be a small charge for you to dispose of the old flooring but most councils will take the waste for free at the recycling centres.
This will depend on how large the surface is. For an average-sized room that’s about 15m², it shouldn’t take more than 2-3 hours to completely remove laminate flooring.
If the flooring is in a good condition, you may want to use it somewhere else or give it away for someone else to use. Removing laminate flooring without damage takes a bit of care but is possible. Most laminate flooring is slotted together so it’s easy to take to pieces without damage. Be careful not to damage the edges and you should be able to remove the laminate flooring without damaging it.


Lauren says
I absolutely love the look of original floorboards, yours look amazing even before being sanded! We’ve just moved into a large Victorian house converted into flats (we have the ground floor) and I want to do this in our hallway and perhaps the lounge at some point. I’m just very worried about drafts as we are the ground floor and I assume there will be no draft proofing. I’ve heard things can get very cold if this isn’t done properly and we aren’t experienced DIYers at all! Do you have any advice on this?! I should probably just get someone in to give me a quote for draft proofing, as we don’t have a huge amount of time to do it ourselves unfortunately :-(.
I think what you have done to your house is amazing by the way! Perfectly in keeping with how it was supposed to look!
Lauren x
Christine says
Thank you Lauren, that’s so kind!
We would definitely recommend insulating and draught proofing the floor if you’re planning on just having floorboards! It would just be way too cold otherwise.
We have a little crawlspace under our house, so for us it was easy to do, but I honestly can’t see you ever been warm again if you don’t. For the gaps between the skirting and floor, we actually just used some weatherstrip tape. It was cheap, took about 15min per room to install and is really effective. (You can read about how we filled the gap here and about how we insulated our floor here.
Hope that’s some help! Good luck with your floors!
Cx
caitlin says
All I can say is, YES YES YES to those floors! That took courage. The transformation is the equivalent of having a guy with a really bad comb-over decide one day to shave his head. Dork to stud, just like that. Looks great.
Christine says
I know! It’s such a huge difference! Wait till you see what we’ve been doing to it this weekend! Now all I need to do is transform Jan from the dork into the stud, too ;-).
Cx
Kerrie says
I am not a big fan of laminate so even tho it ‘s a big job, I still love the progress you’ve made. I thought of you when I saw this amazing picture on pinterest of pull out drawer/ cupboards under a stairway. Have you seen it?
Christine says
Thanks Kerrie! We’re not fans of laminate either, so already think the floor is an improvement, too! I know the drawers/cupboards you mean – they’re pretty amazing. If we could, we’d already have built them, but the staircase leading to our cellar is under the staircase to the first floor, so sadly not cupboards for us…
Cx
Leslie says
Better already! No more invisible laminate, and making room for old, beautiful wood. Love it. Nice work!
Christine says
Thanks Leslie! Hopefully it will look even better after this weekend…
Cx
Magali@TheLittleWhiteHouse says
It does look better, no kidding! Have you decided what you’ll do upstairs? And that other project, have you torn down the wall between your kitchen and your dining-room?
Christine says
We’ve have decided what we’ll be doing upstairs and in the hall! Hopefully we’ll be able to share the result next week. I wish the other project was the wall between the kitchen and dining room! Still sorting out details with the structural engineer. I can’t wait!
Cx
Abby says
Wow! Even with the floorboards needing some love, it’s such a huge improvement over the laminate! You can just tell that is what your house is supposed to look like.
Christine says
Thanks Abby! I still get a shock every time I walk through the front door – somehow I keep forgetting that the laminate is gone. I fully agree, the floorboards already look so much better than the laminate!
Cx