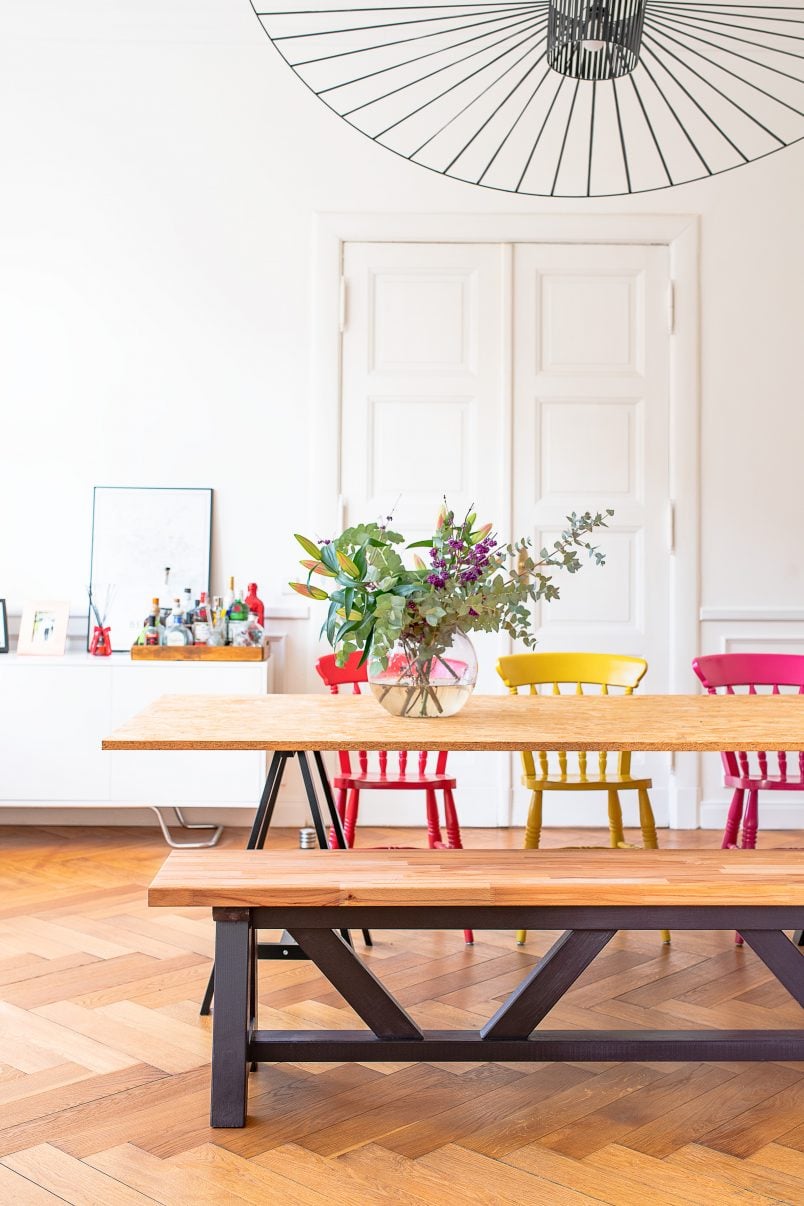
Can you spot a difference in our living room?
We’ve been having loads of fun in here lately adding more furniture and accessories including our new super comfortable ottoman and our DIY terrazzo dining table (more on both projects soon) along with our fab new DIY ribbed side table which we’re sharing today!
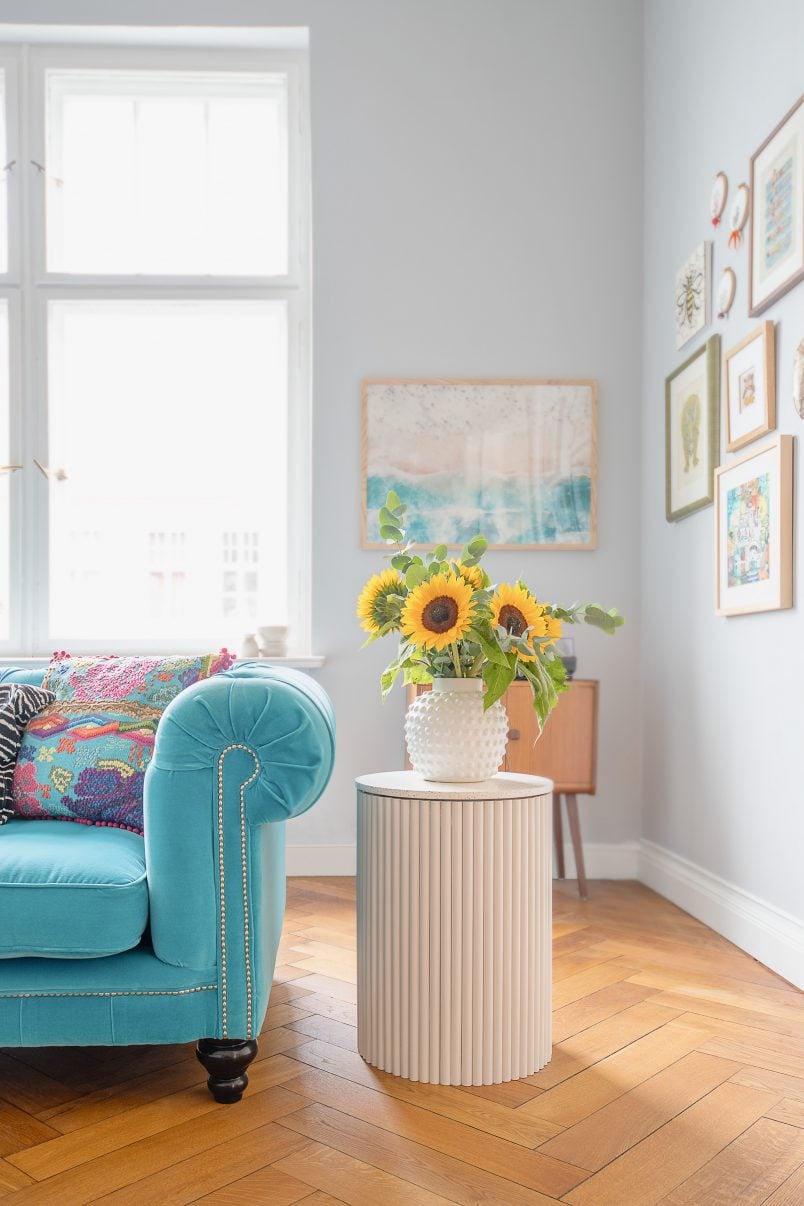
Ribbed furniture is really on-trend at the moment but all of the gorgeous ribbed side tables I kept seeing were way, way out of my budget so I knew I’d have to get creative and build a side table myself.
I’d wanted to try a similar project like this for so long but could never work out what to buy to stick the ribbed timber to or how to build this modern side table without the help of loads of fancy tools.
As you can see from the result, we got there in the end and I couldn’t be happier with how it turned out! Best of all, it’s such an easy project and it’s really more of an assembly job than a DIY project!
Here’s what you’ll need to make your own modern ribbed side table:
This post contains affiliate links. We only recommend products we love and think that you will, too! Read our full disclaimer here.
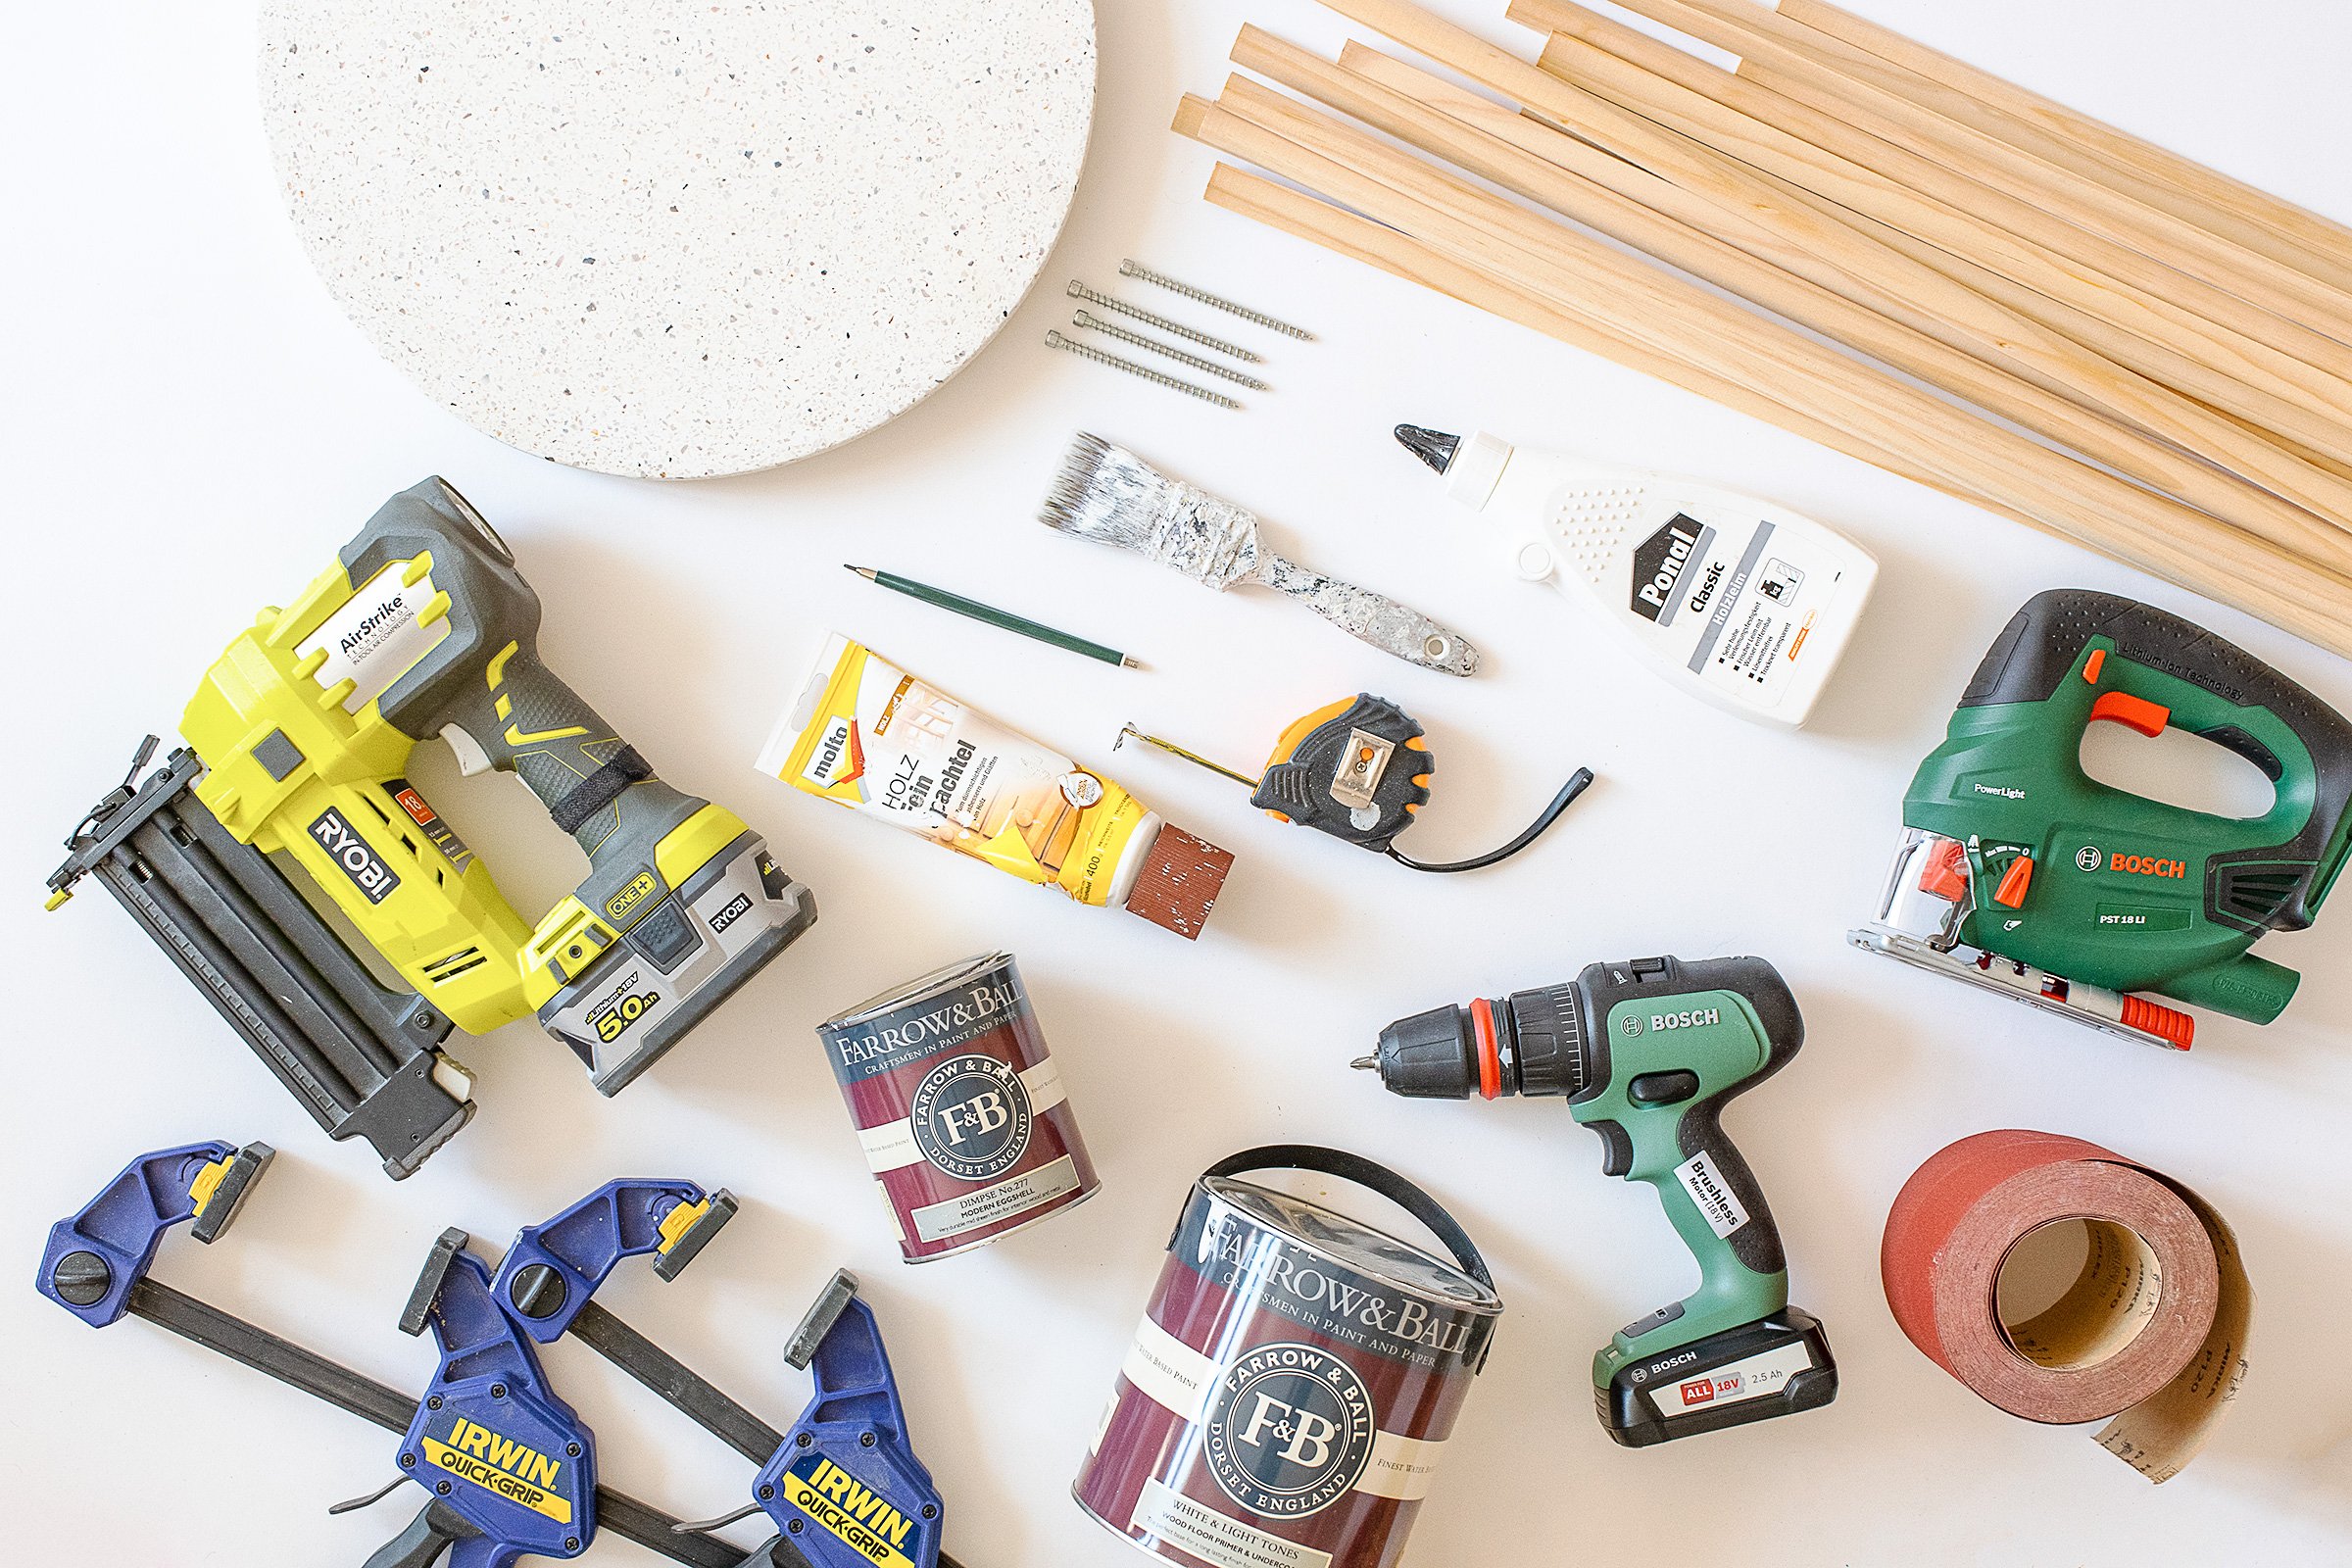
Supplies:
- 1 x Round plate or tray | We used this gorgeous terrazzo plate, which is ideal for this project
- Half round moulding | The exact amount you’ll need will depend on the size of your table. We used 15 strips of 18mm 2.4m moulding for our table, which is 40cm in diameter and 54cm high
- 2 x pieces of timber that are the size of your plate or tray | We just used some offcuts as it really doesn’t matter too much what they look like because they will be completely hidden
- 3 x pieces of timber that are the height of your table (minus the thickness of the top of the table and the thickness of the two offcuts (take a look at the progress pictures, and it’ll all make more sense)
- Wood glue | We always use this wood glue, which we love
- No Nails adhesive
- Sandpaper
- 6 long screws | Around 6-8 cm long (depending on the thickness of your timber)
- Primer & paint | We used Farrow & Ball wood primer and Ammonite Estate Eggshell paint
- Pencil, tape measure + a nail and some string to draw two large circles
- Felt protectors
Tools:
- Jigsaw | We have this super basic jigsaw which does the job
- Mitre saw | We love this basic mitre saw, which we’ve used for years for almost all projects. We recommend owning a mitre saw, but a much cheaper option that would work for this project would be a fine saw and mitre box. There’s never any point in splurging on tools you won’t use, but a mitre saw is a versatile tool to own!
- Clamps
- Spirit Level
- Caulk Gun | Opt for a metal one – the plastic ones are useless
- Paintbrush | We love our Purdy paintbrushes and use them for every project!
Shop The Supplies For This Project!

This is how to build a DIY reeded side table:
Start by cutting all of your moulding strips to the same length.
Our table is 54cm tall which means that we cut all of our strips 52.5cm long with the help of our mitre saw (the plate we used for the top is 1.5cm thick which is why the strips are shorter than the overall height of the table).
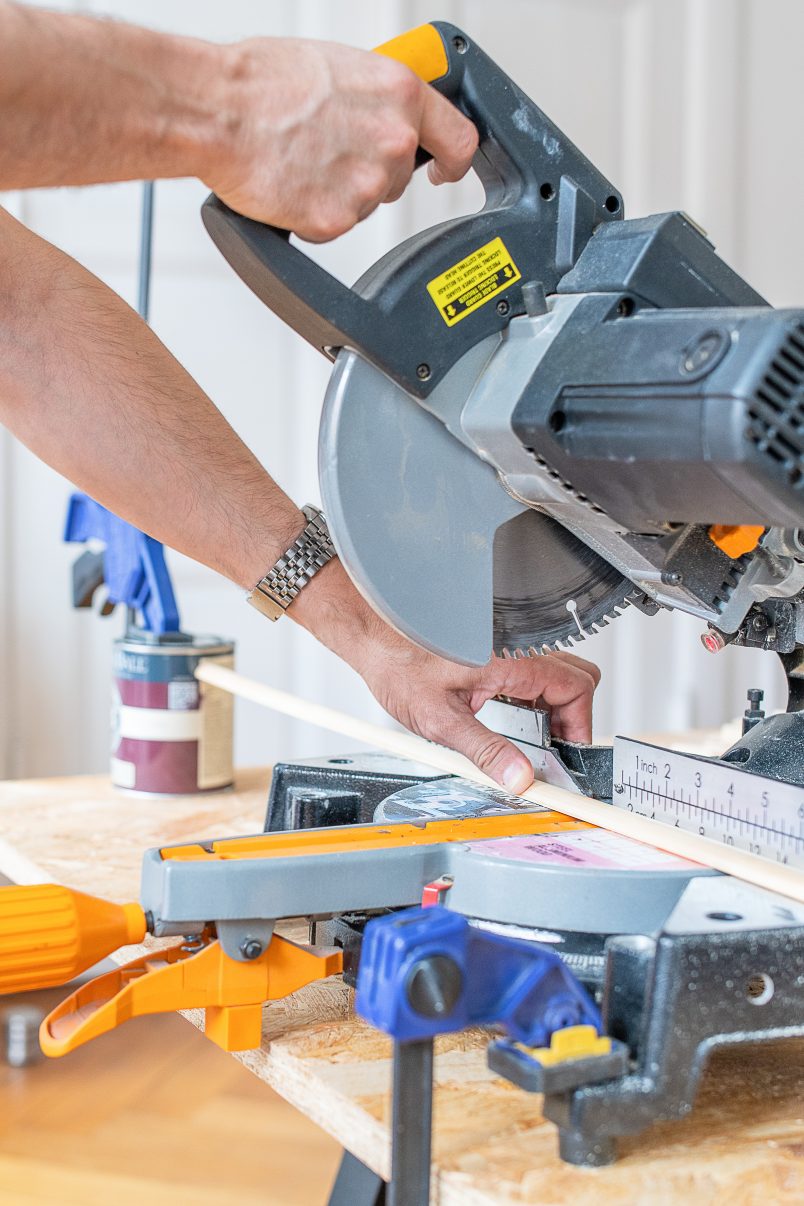
We love our mitre saw and it’s a great tool to make lots of precise cuts. We’d definitely recommend getting one as we used it for countless projects, but a fine saw and mitre box would work for this project, too. It’ll just take a bit longer to cut all of the strips.
As you can see, we also built ourselves a really fancy super basic measuring block out of a can of paint that’s clamped to the table. By doing this, we didn’t have to measure each individual piece of timber and could just push them against the paint can before cutting them. Not exactly high-tech but it worked for us.

After cutting all of the strips to the required length, cut out two circles of timber. These two circles will make up the top and bottom of the frame you’ll be attaching the timber moulding strips to.
The two circles of timber won’t be visible so you can just use some offcuts of timber if you have any lying around. We actually used some of our old kitchen worktop but anything that’s at least 12mm thick would work fine.
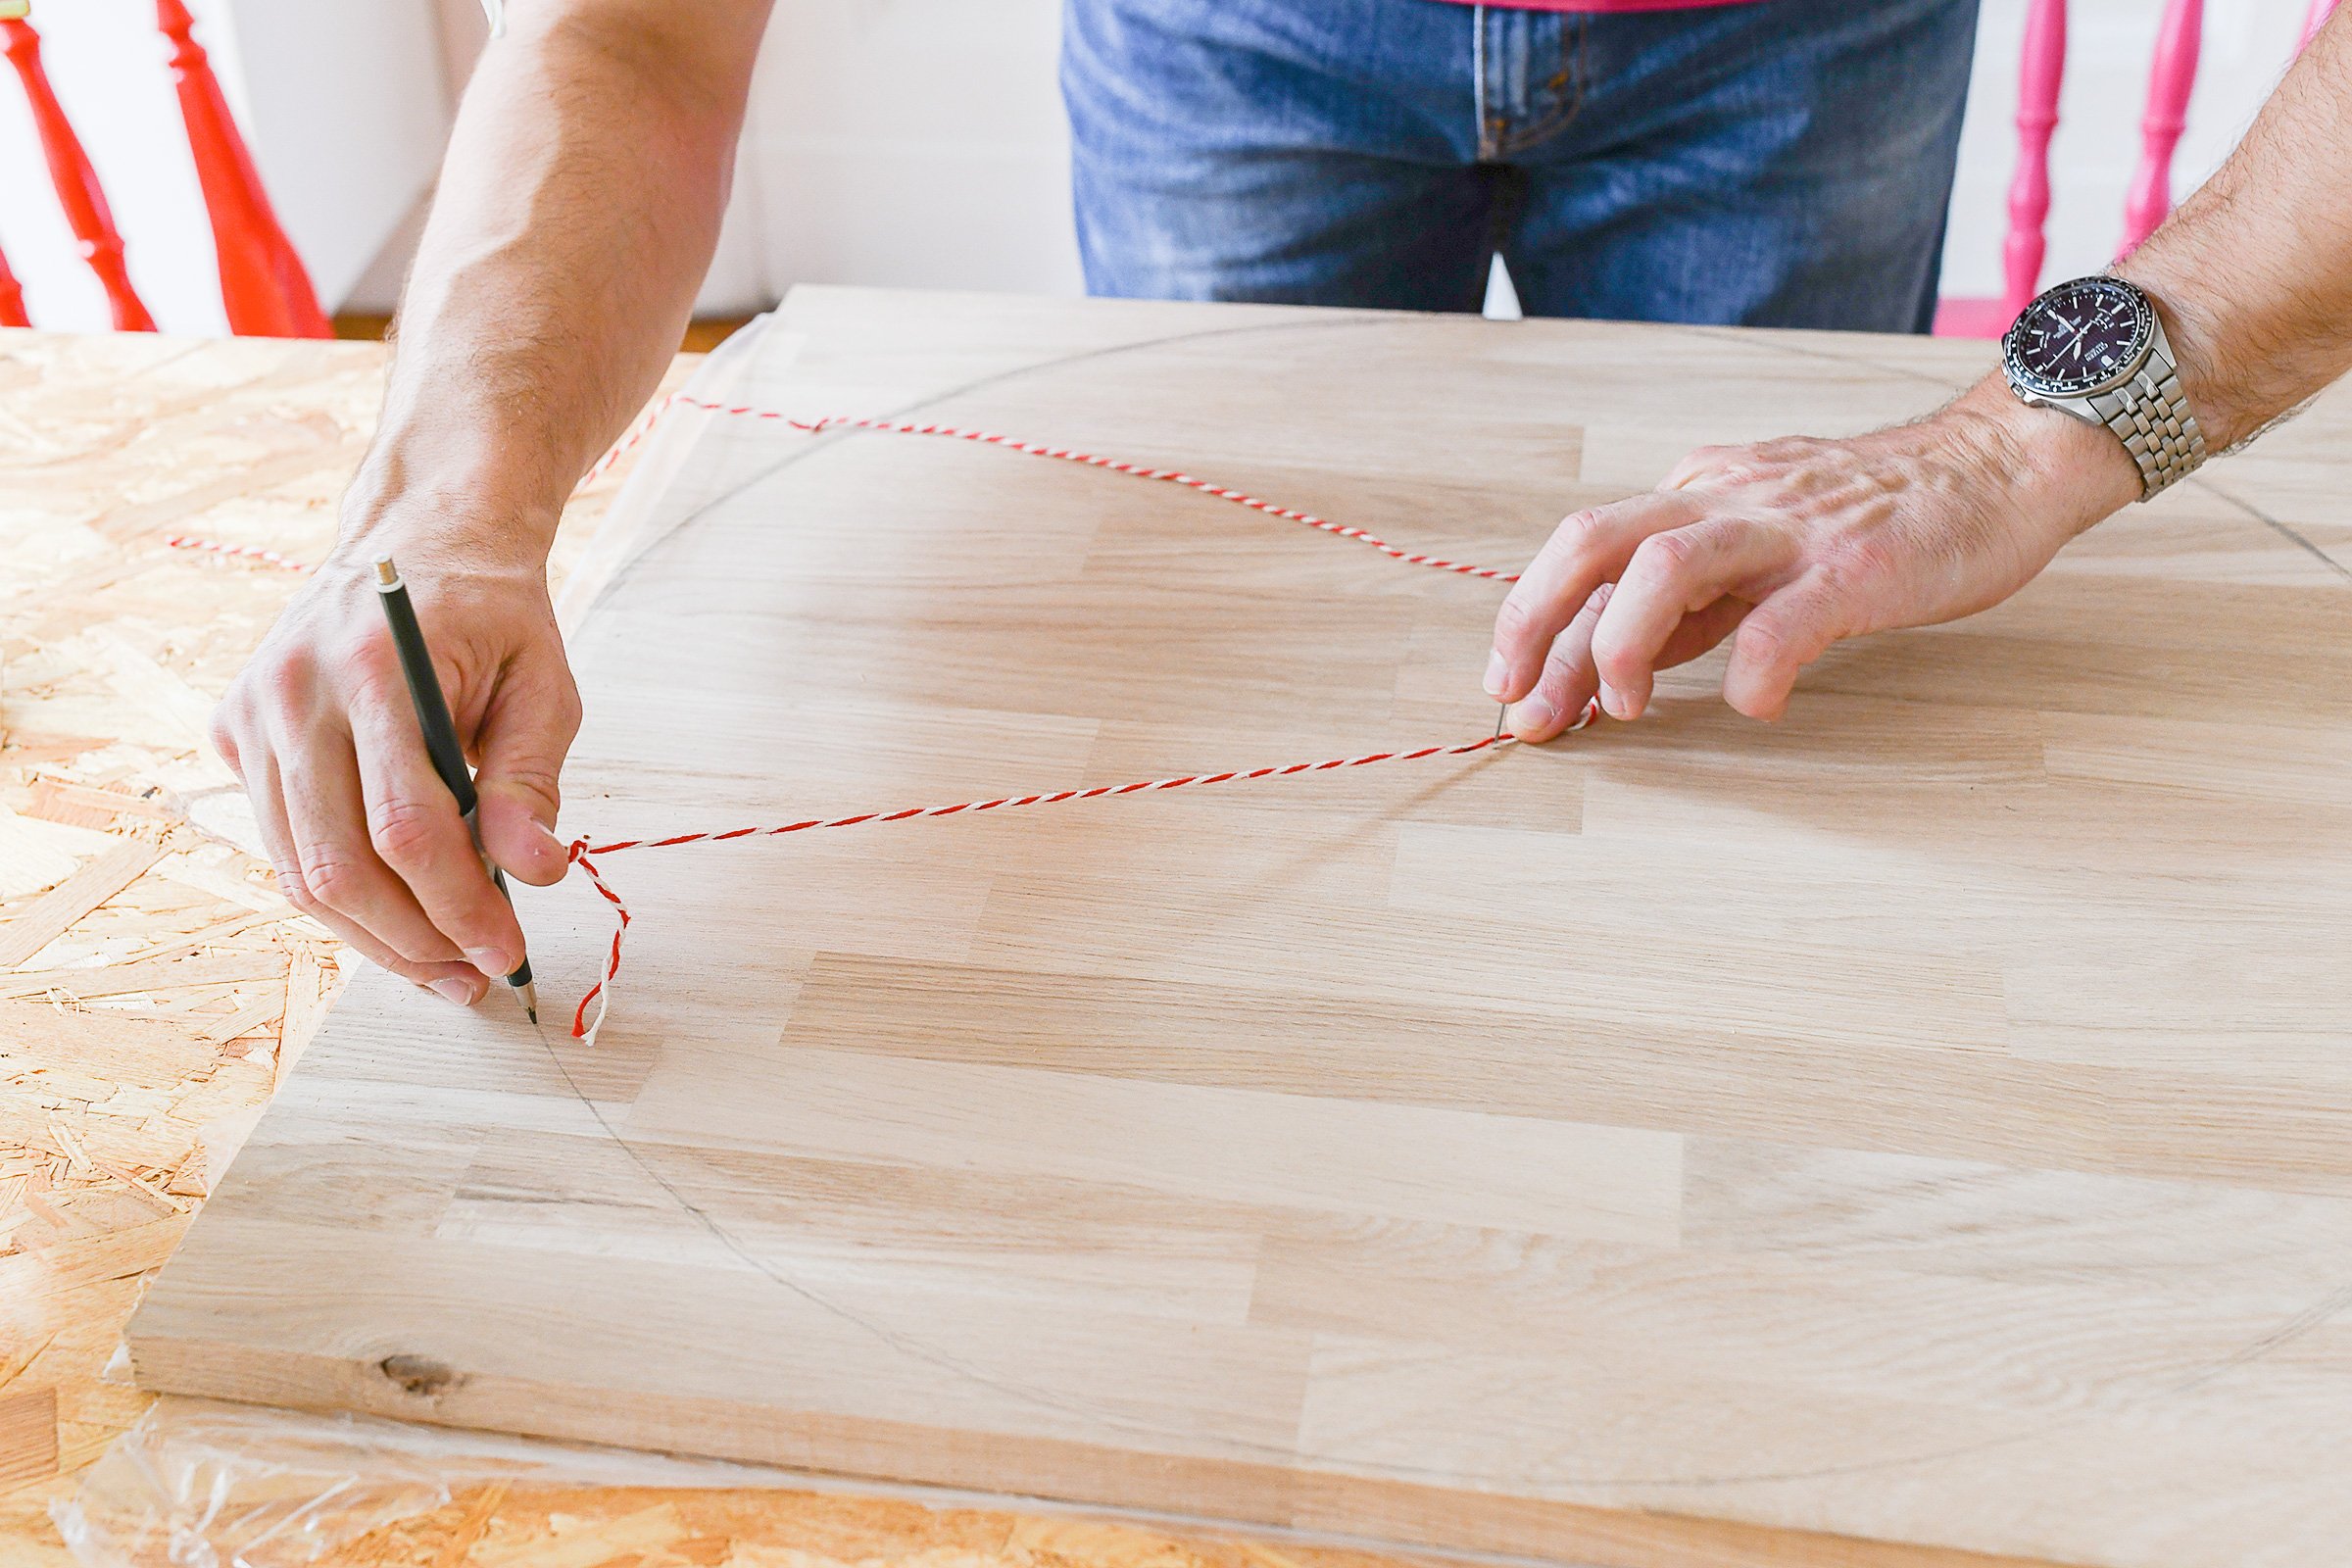
Draw a circle with a 38cm diameter onto the timber (we used a nail and some string to hold the pencil to draw the large circle) and cut it out with a jigsaw. (The size of these inner circles is the diameter of the top of the table – in our case 40cm minus 2 x the thickness of the timber moulding – ours is 10mm thick)
It’s always a good idea to be as precise as possible, but cutting out perfect circles with a jigsaw isn’t easy so don’t worry too much if it isn’t 100% accurate as the circles will be completely hidden.
The last thing you’ll have to cut is the inner supports of the table that you’ll be attaching the two round pieces of timber you just cut to.
In our case, that means that the timber pieces are 47cm long (55cm overall table height – 1cm tabletop thickness – 2 x 4cm inner circle thickness).
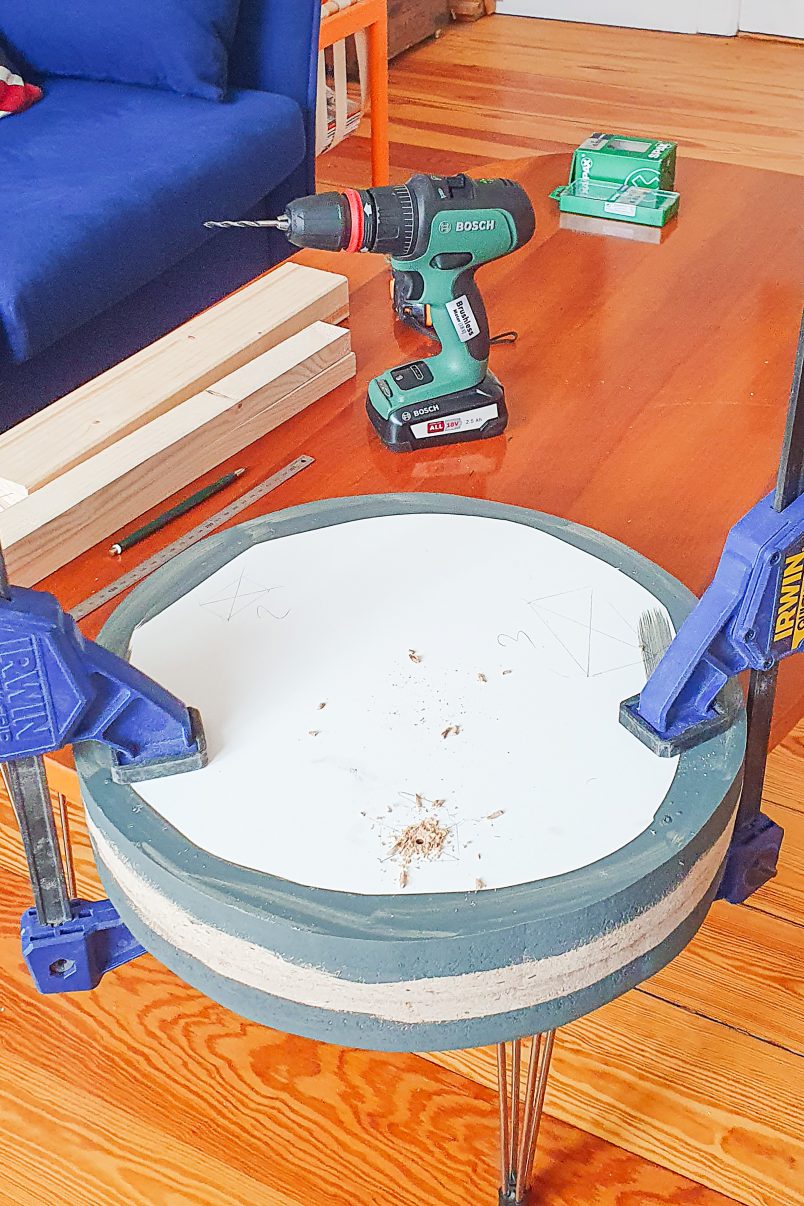
To help ensure that the two circles will be exactly over each other, we clamped them together and predrilled holes where we would attach the supports.
As you can see, we also painted the edge of the circles in a dark colour. This isn’t really necessary, but we didn’t know if any of the timber would be visible through the joins and figured that any imperfections would be less obvious if they were painted dark. It’s a step you can totally skip, though, as it really wasn’t necessary!
Double-check that all of your moulding strips are exactly the same length before giving them a coat of primer. It’s really important that they’re the same length as it’ll be difficult to assemble the table otherwise.
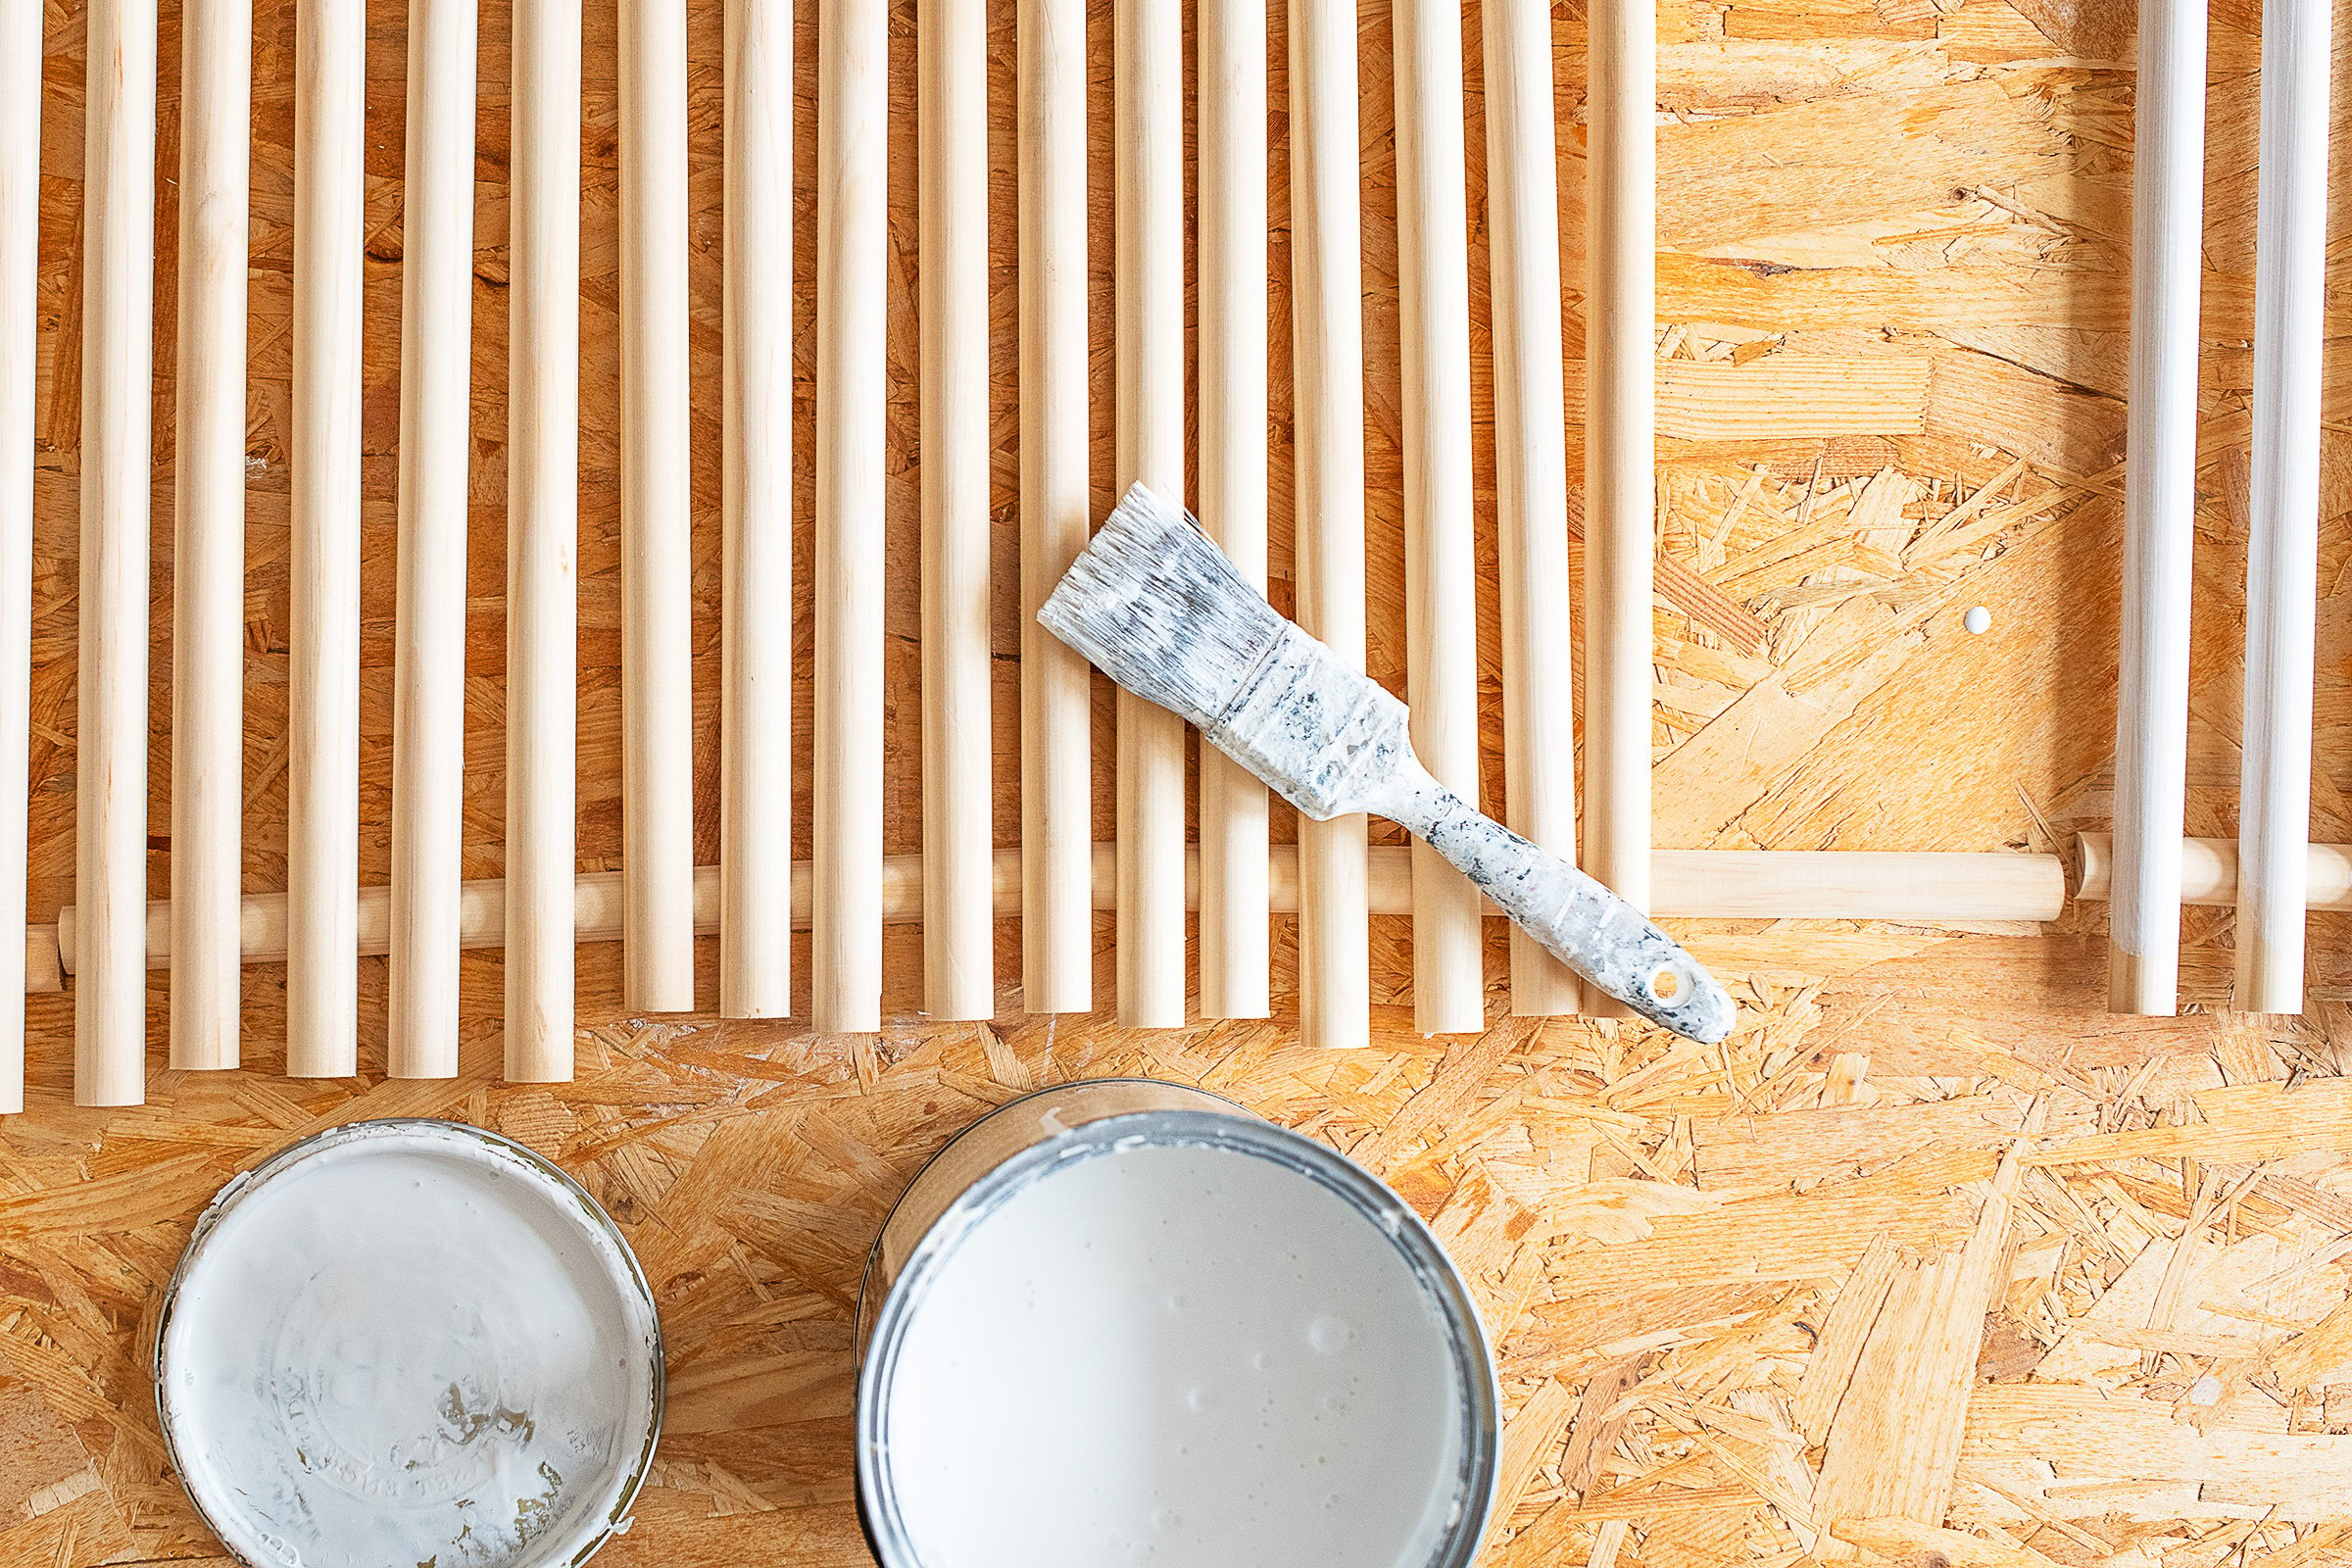
Let everything dry, and then give the moulding strips a light sand with 240 grit sandpaper to remove any imperfections before cleaning and painting them with your chosen paint finish.
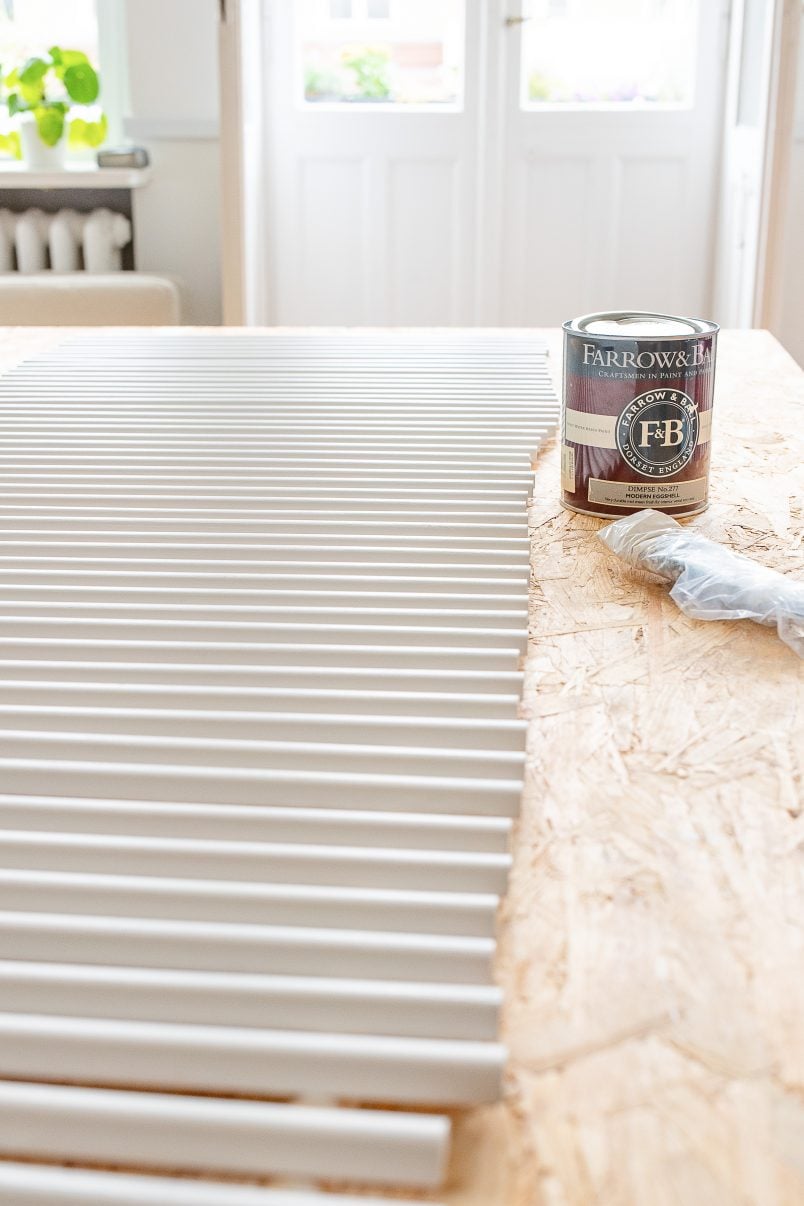
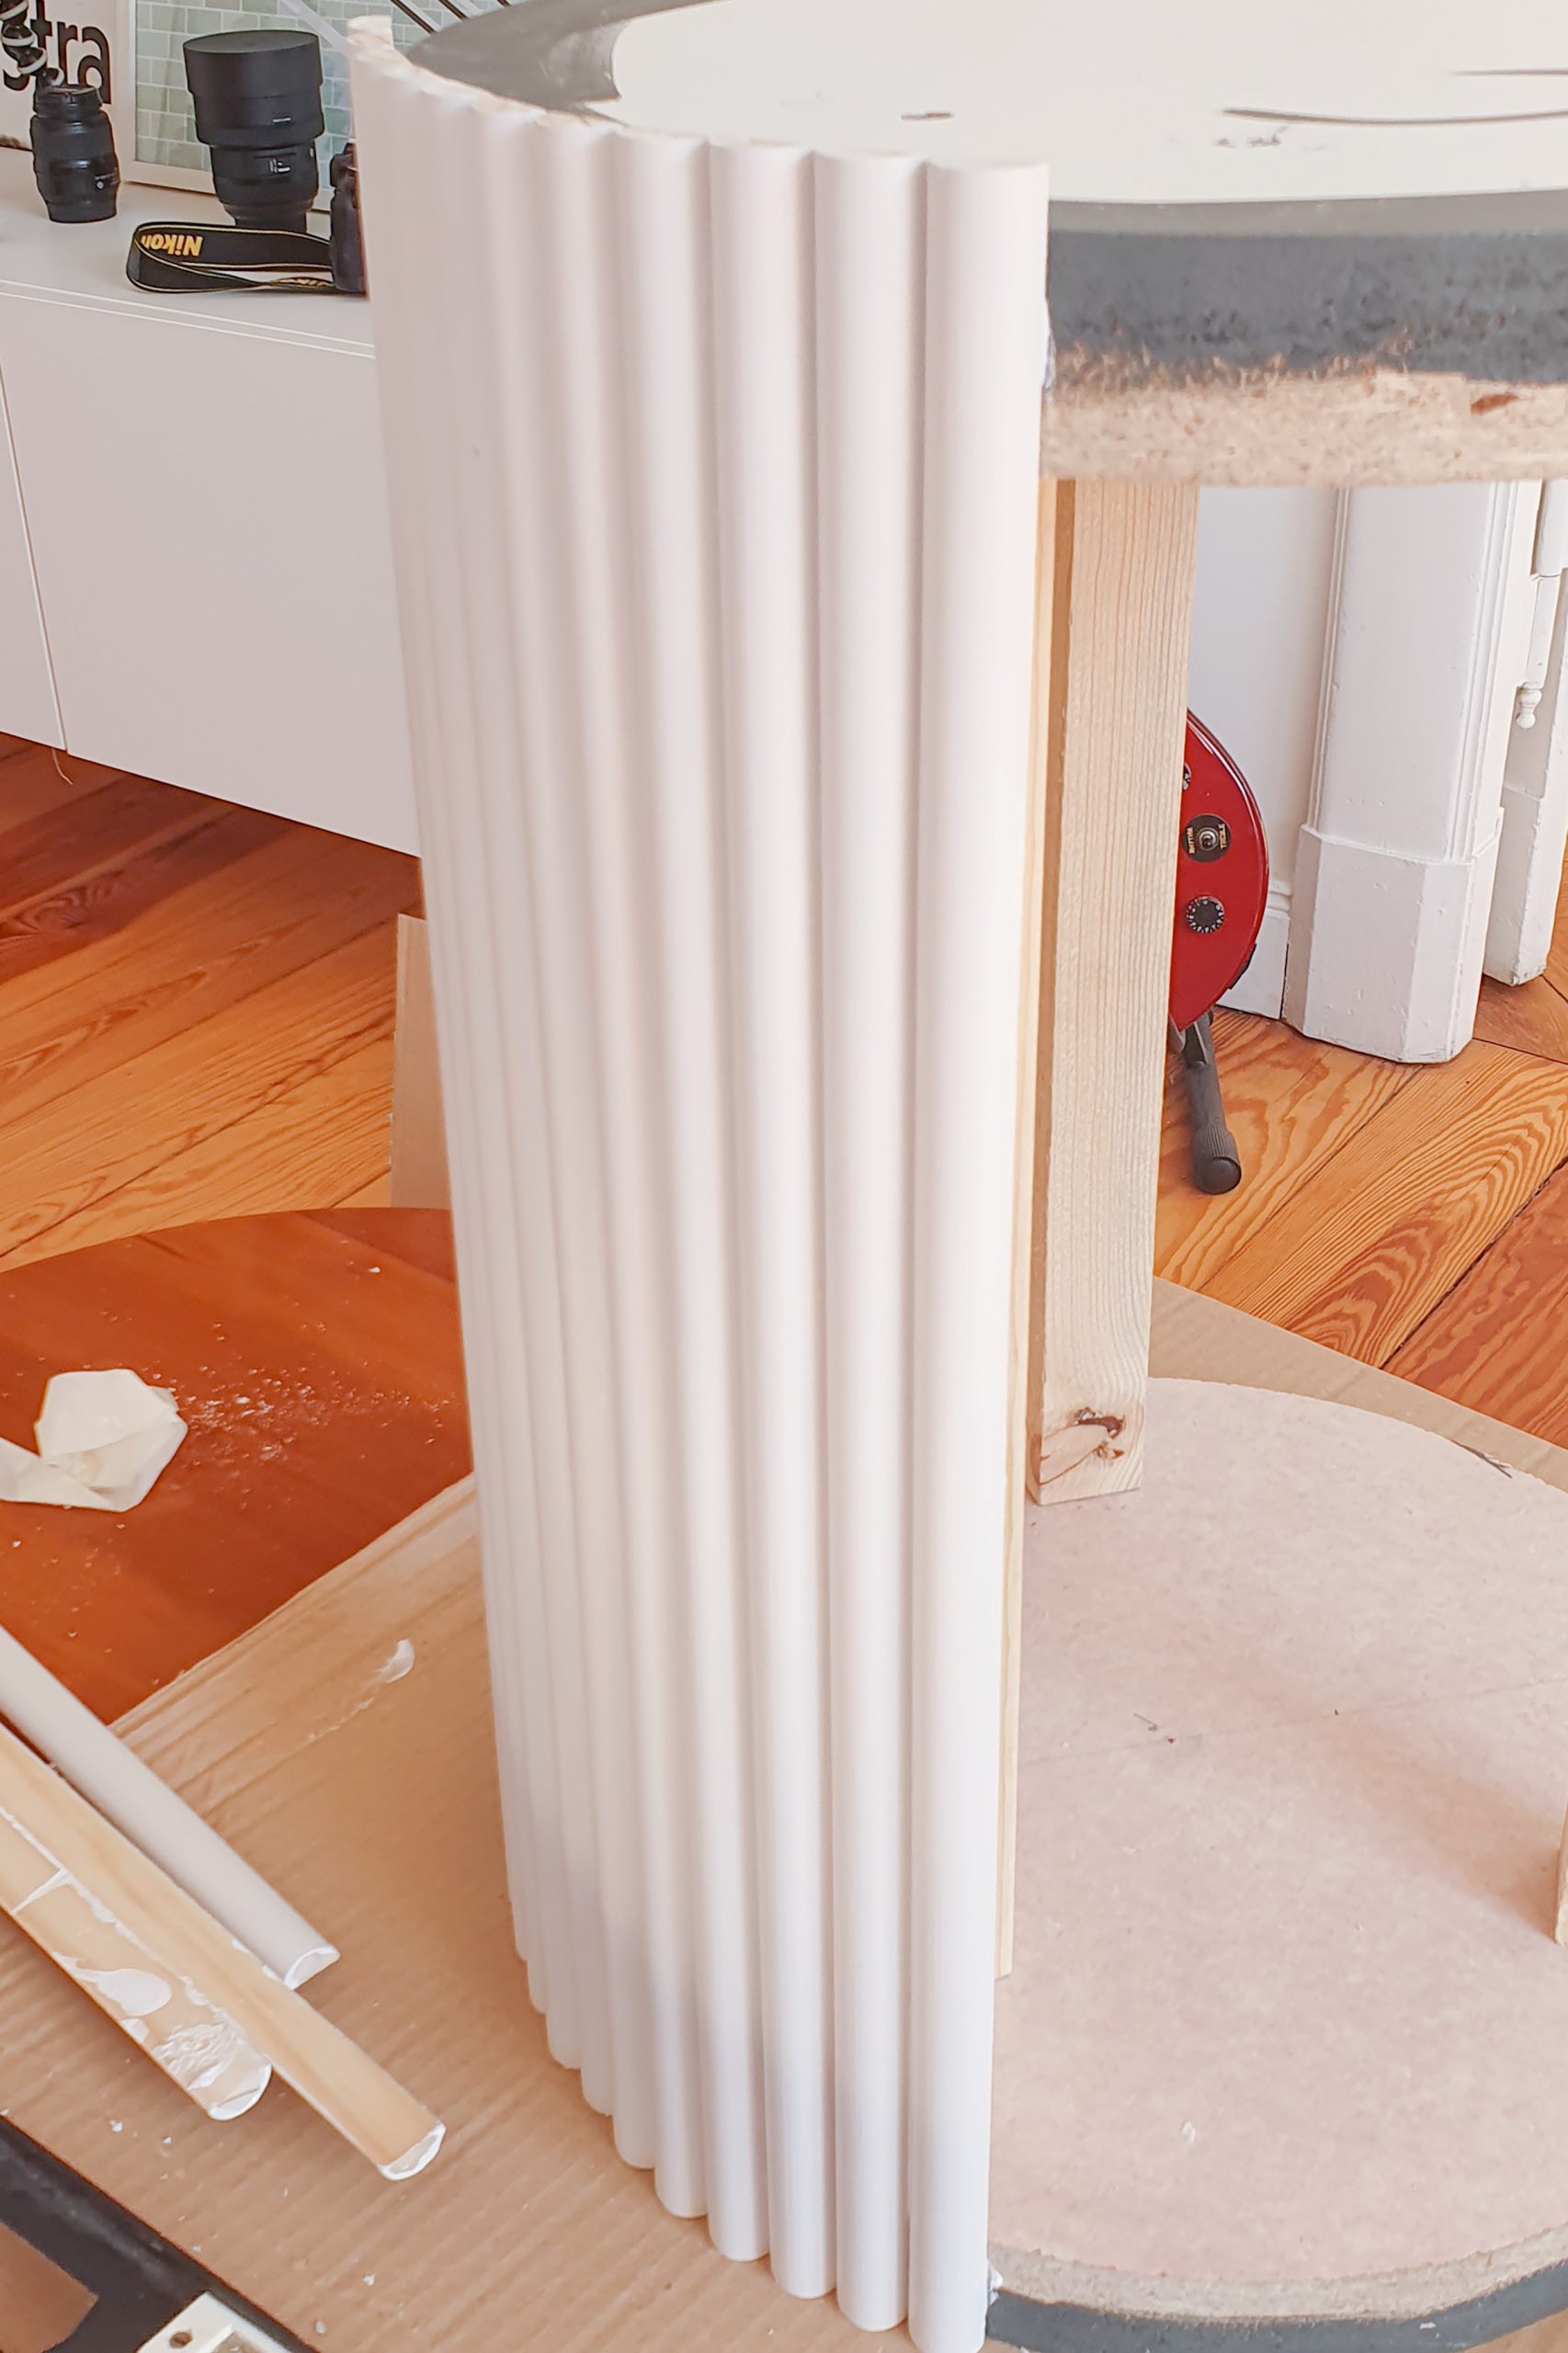
We painted all of our strips in Farrow & Ball Ammonite, which we had left from painting our front door. When you’ve finished painting all 59 pieces of moulding and everything has completely dried, you can finally start to assemble your table!
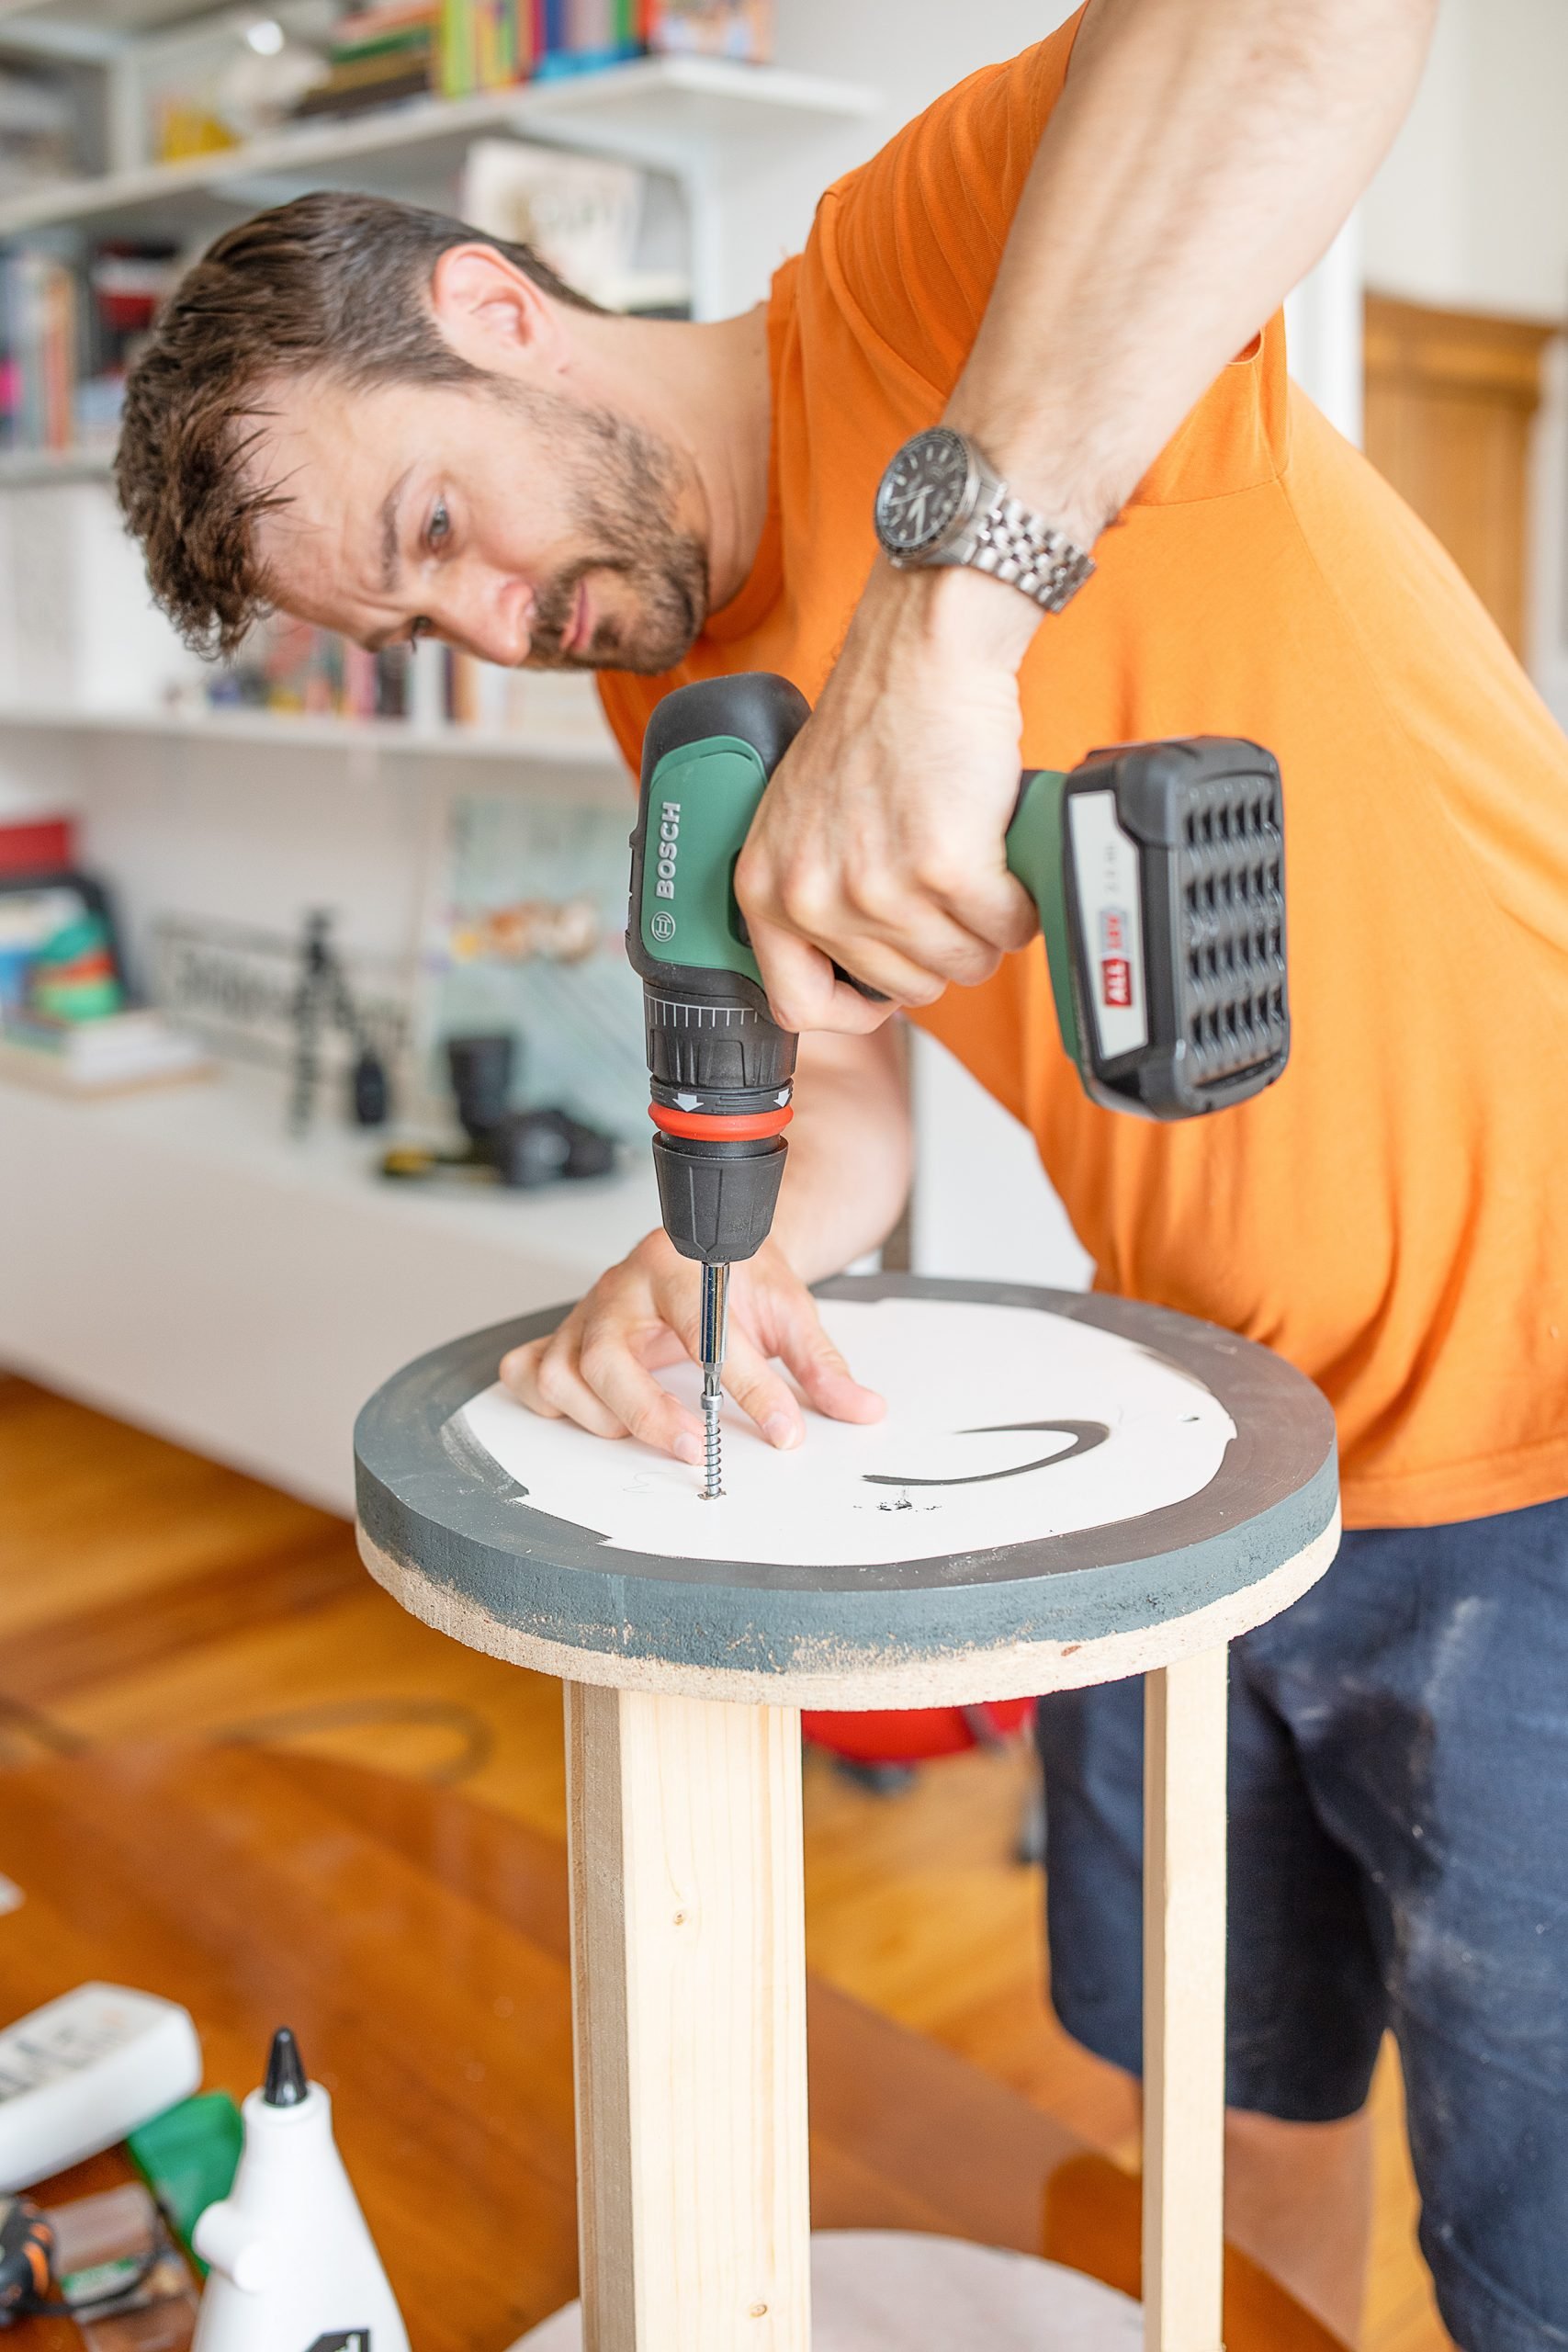
Lay one of the timber circles on a flat surface and glue the three structural pieces of timber over one of the pre-drilled holes you made earlier with some wood glue.
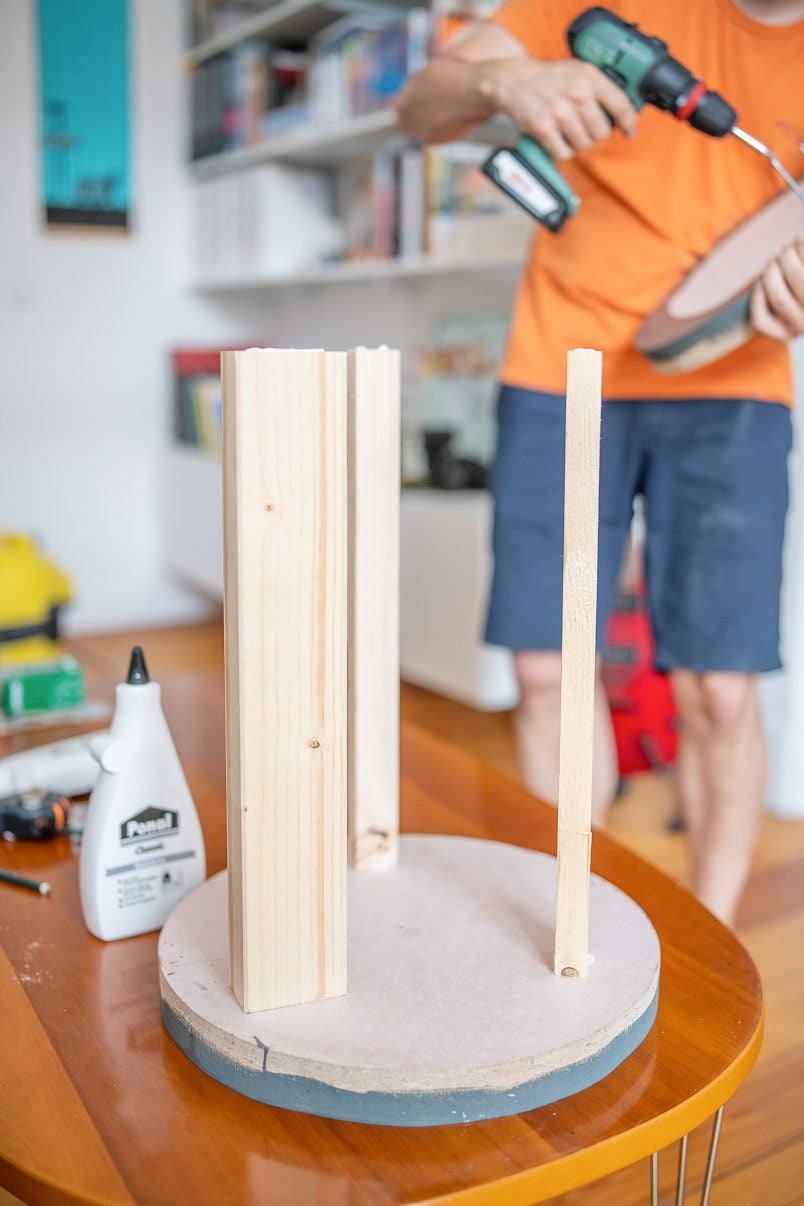
Then, glue the second circle on top, making sure that both circles are exactly over each other.
For some additional support, screw a timber screw right through each end into the timber, making sure to countersink the head of the screw.
This isn’t exactly the prettiest thing you’ll ever see, but it’ll be completely hidden, so there’s no need to worry. It’s just the basic frame of your DIY side table to which you can now start to attach the moulding.
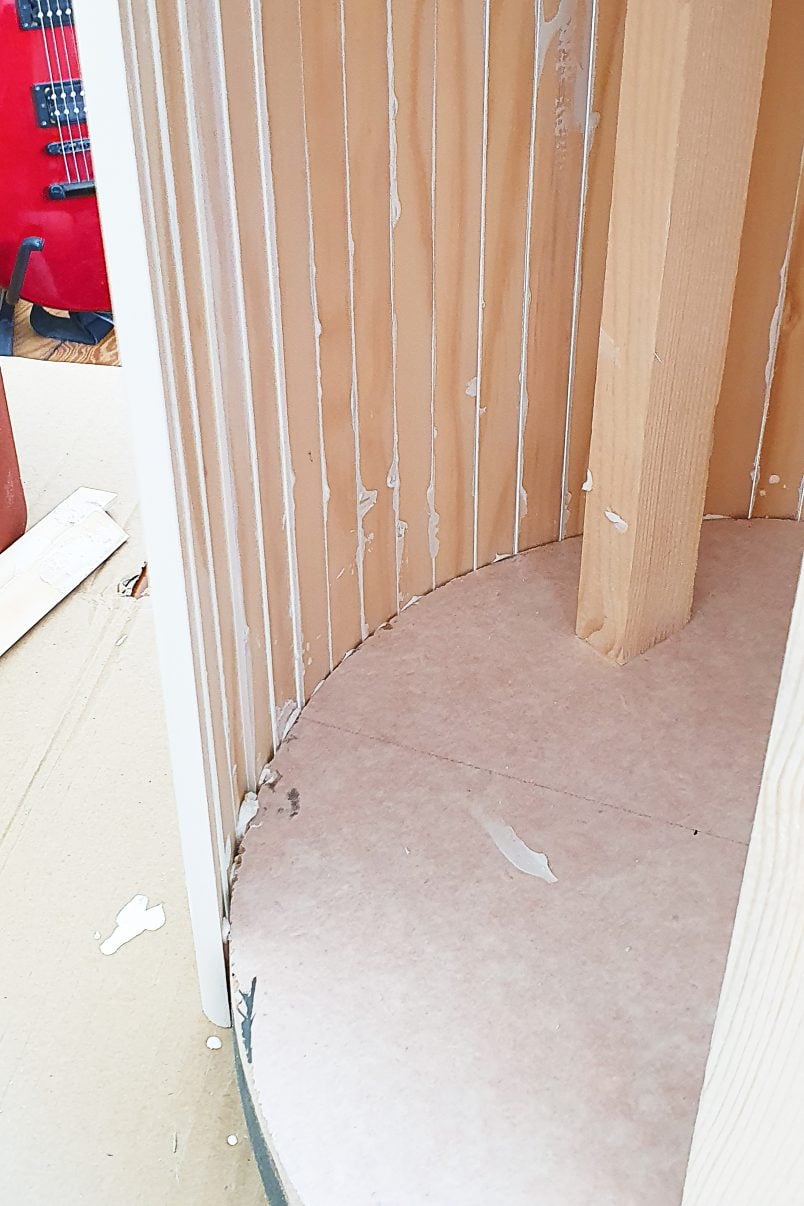
Apply some adhesive to each end of a moulding strip and glue it to the two circles.
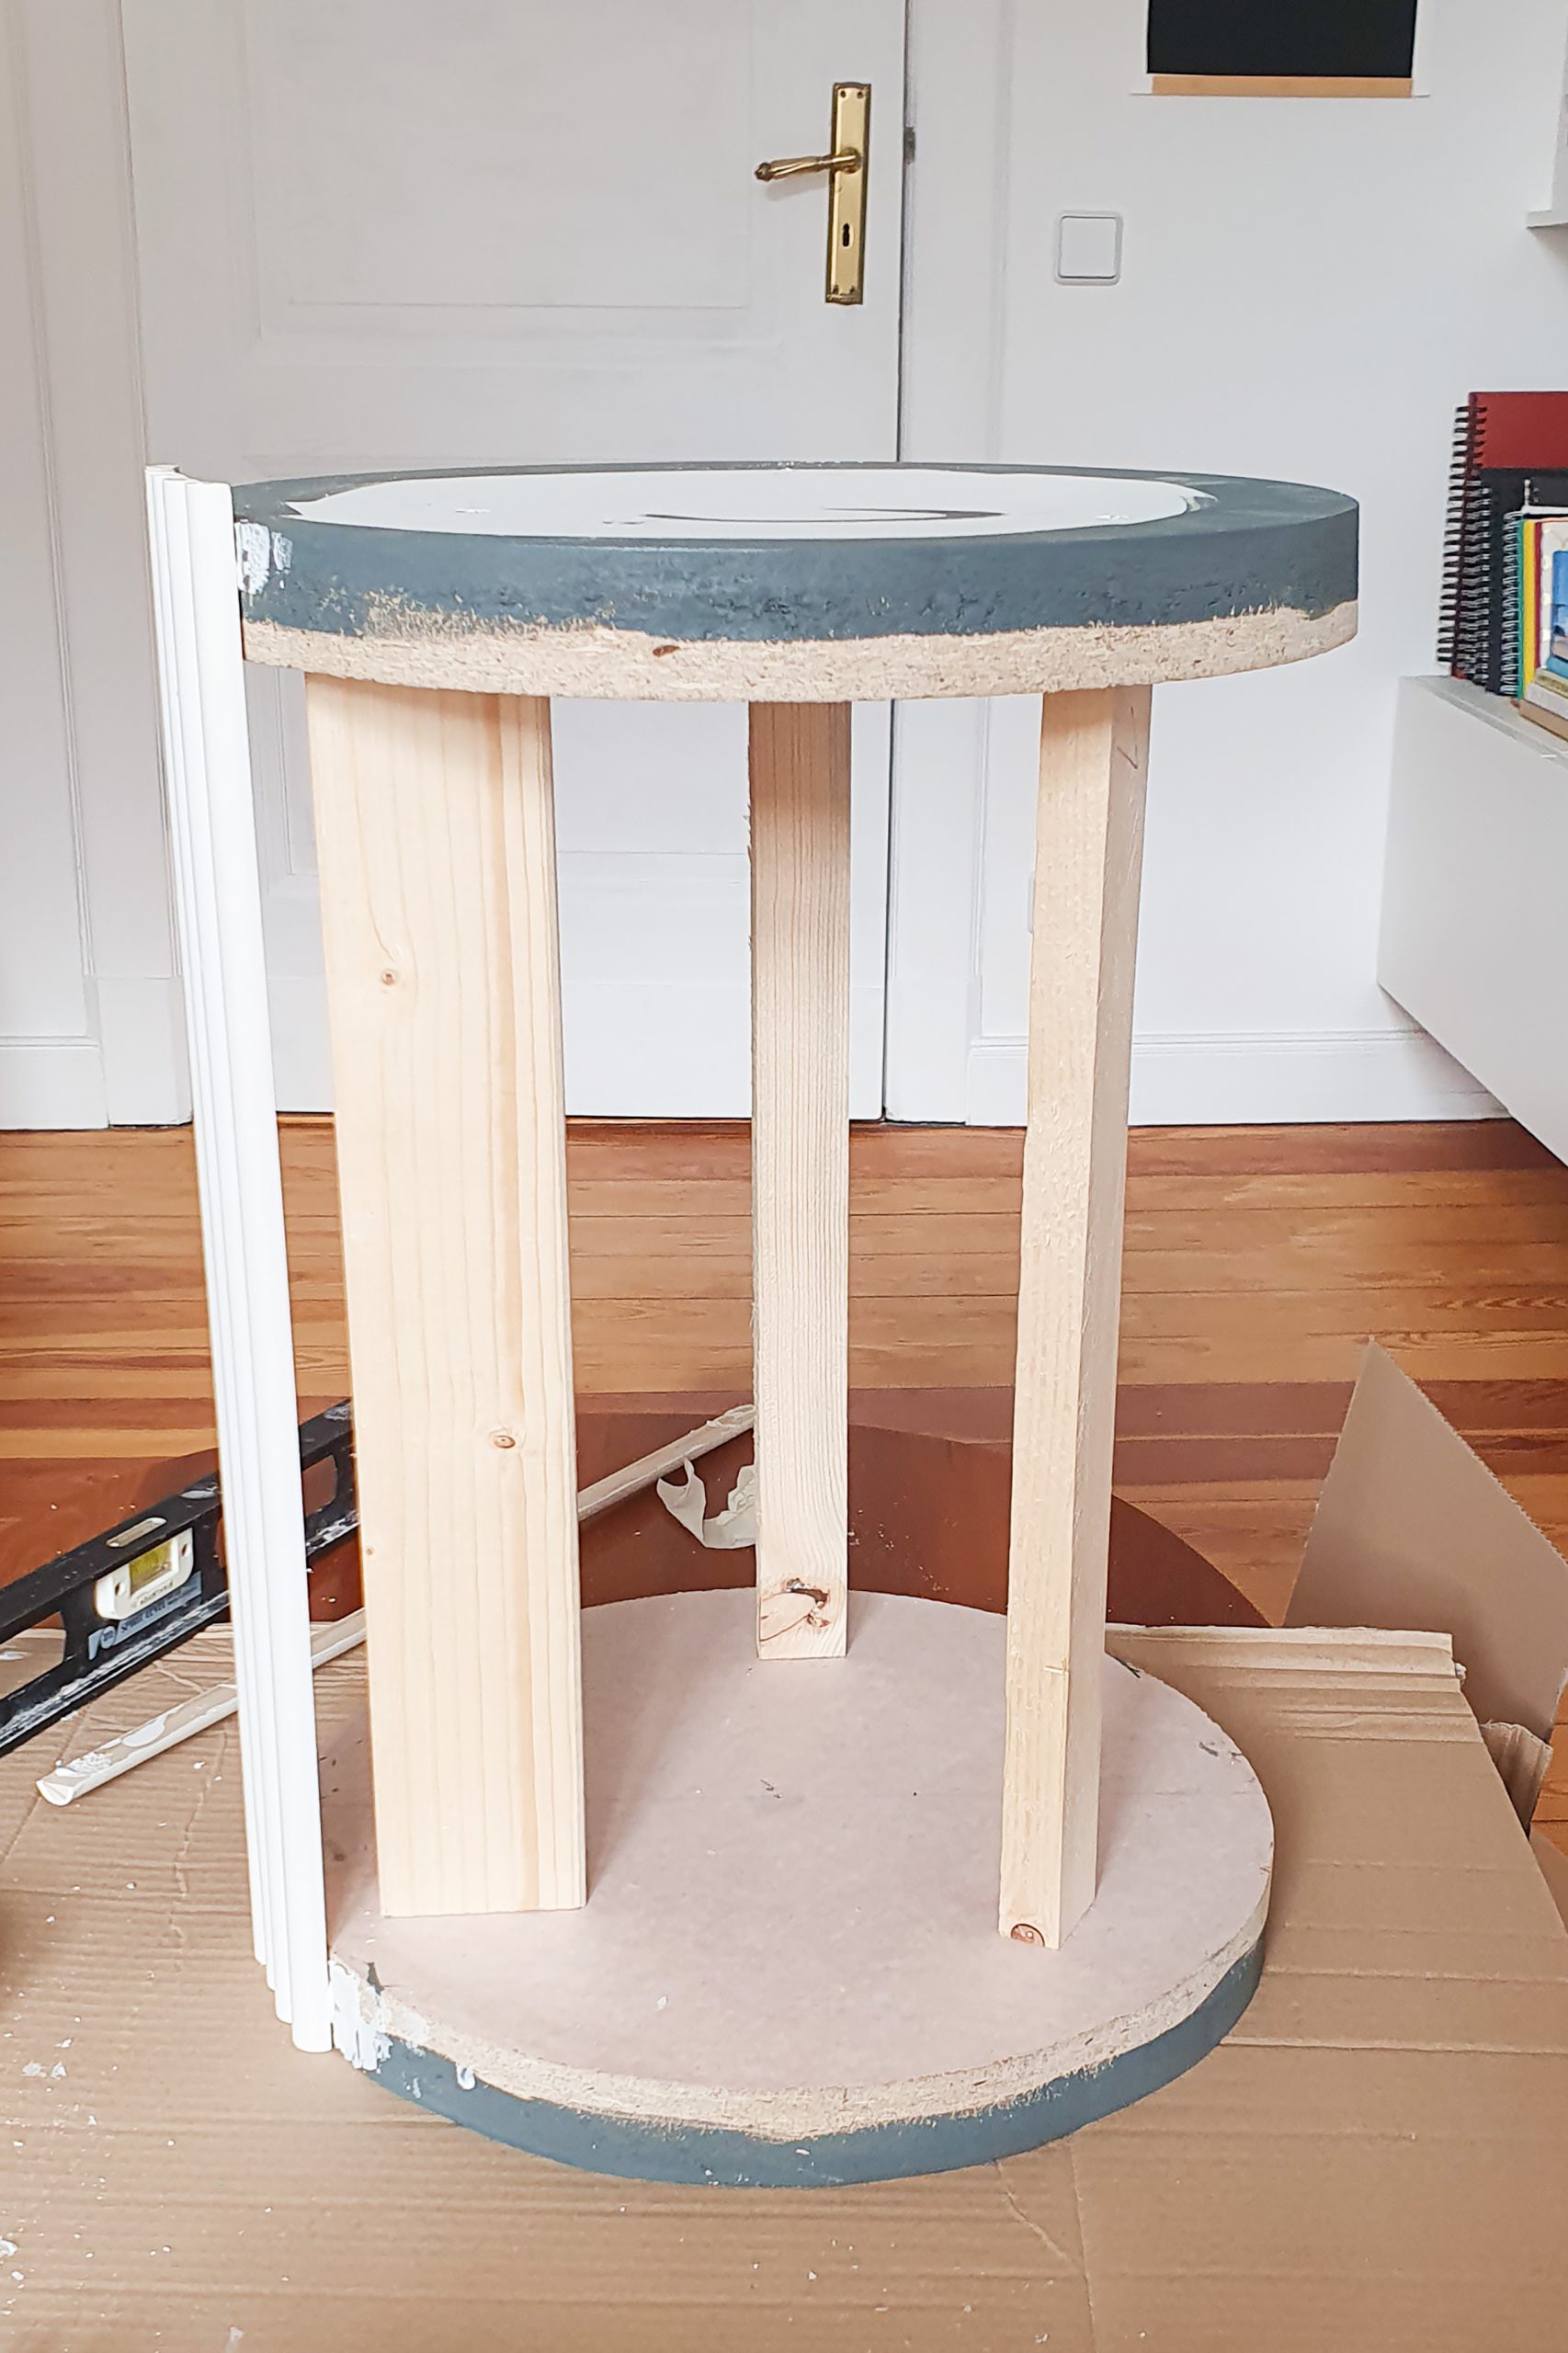
Work your way all the way around the frame, attaching the strips one at a time, making sure not to leave any gaps, and checking that everything is perfectly straight and level with a spirit level.
The thick adhesive is great to use to balance out any imperfections in your inner circle construction.
As you can see, we sometimes used a lot of glue and sometimes very little to make sure that each of the dowels was completely level.
All that’s left to do is attach the top of the table. Apply a thick layer of No Nails adhesive and place the top onto the inner timber circle. Then, weigh it down with some books while the glue dries.
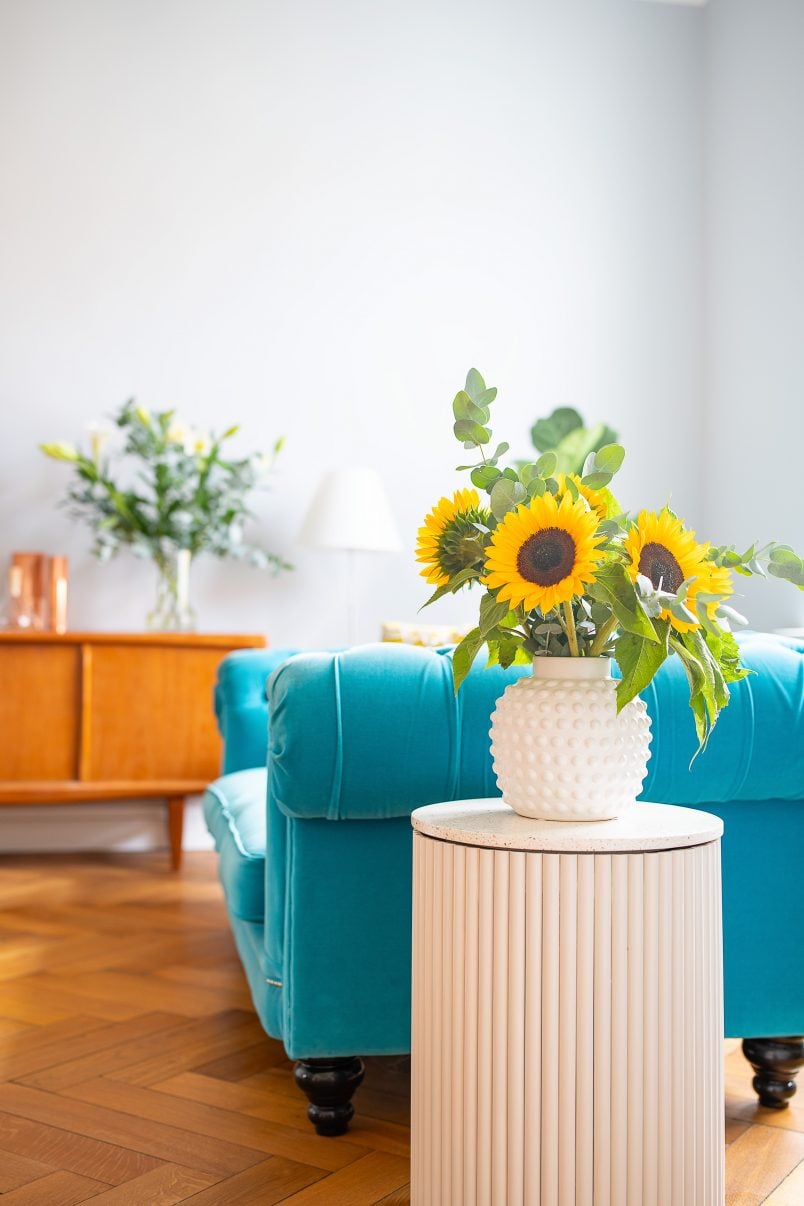
I absolutely love how this ribbed side table turned out, and I love how quickly and easily you could change the look of it to suit your interior just by painting it a different colour or changing the top. Wouldn’t a marble top look fantastic?
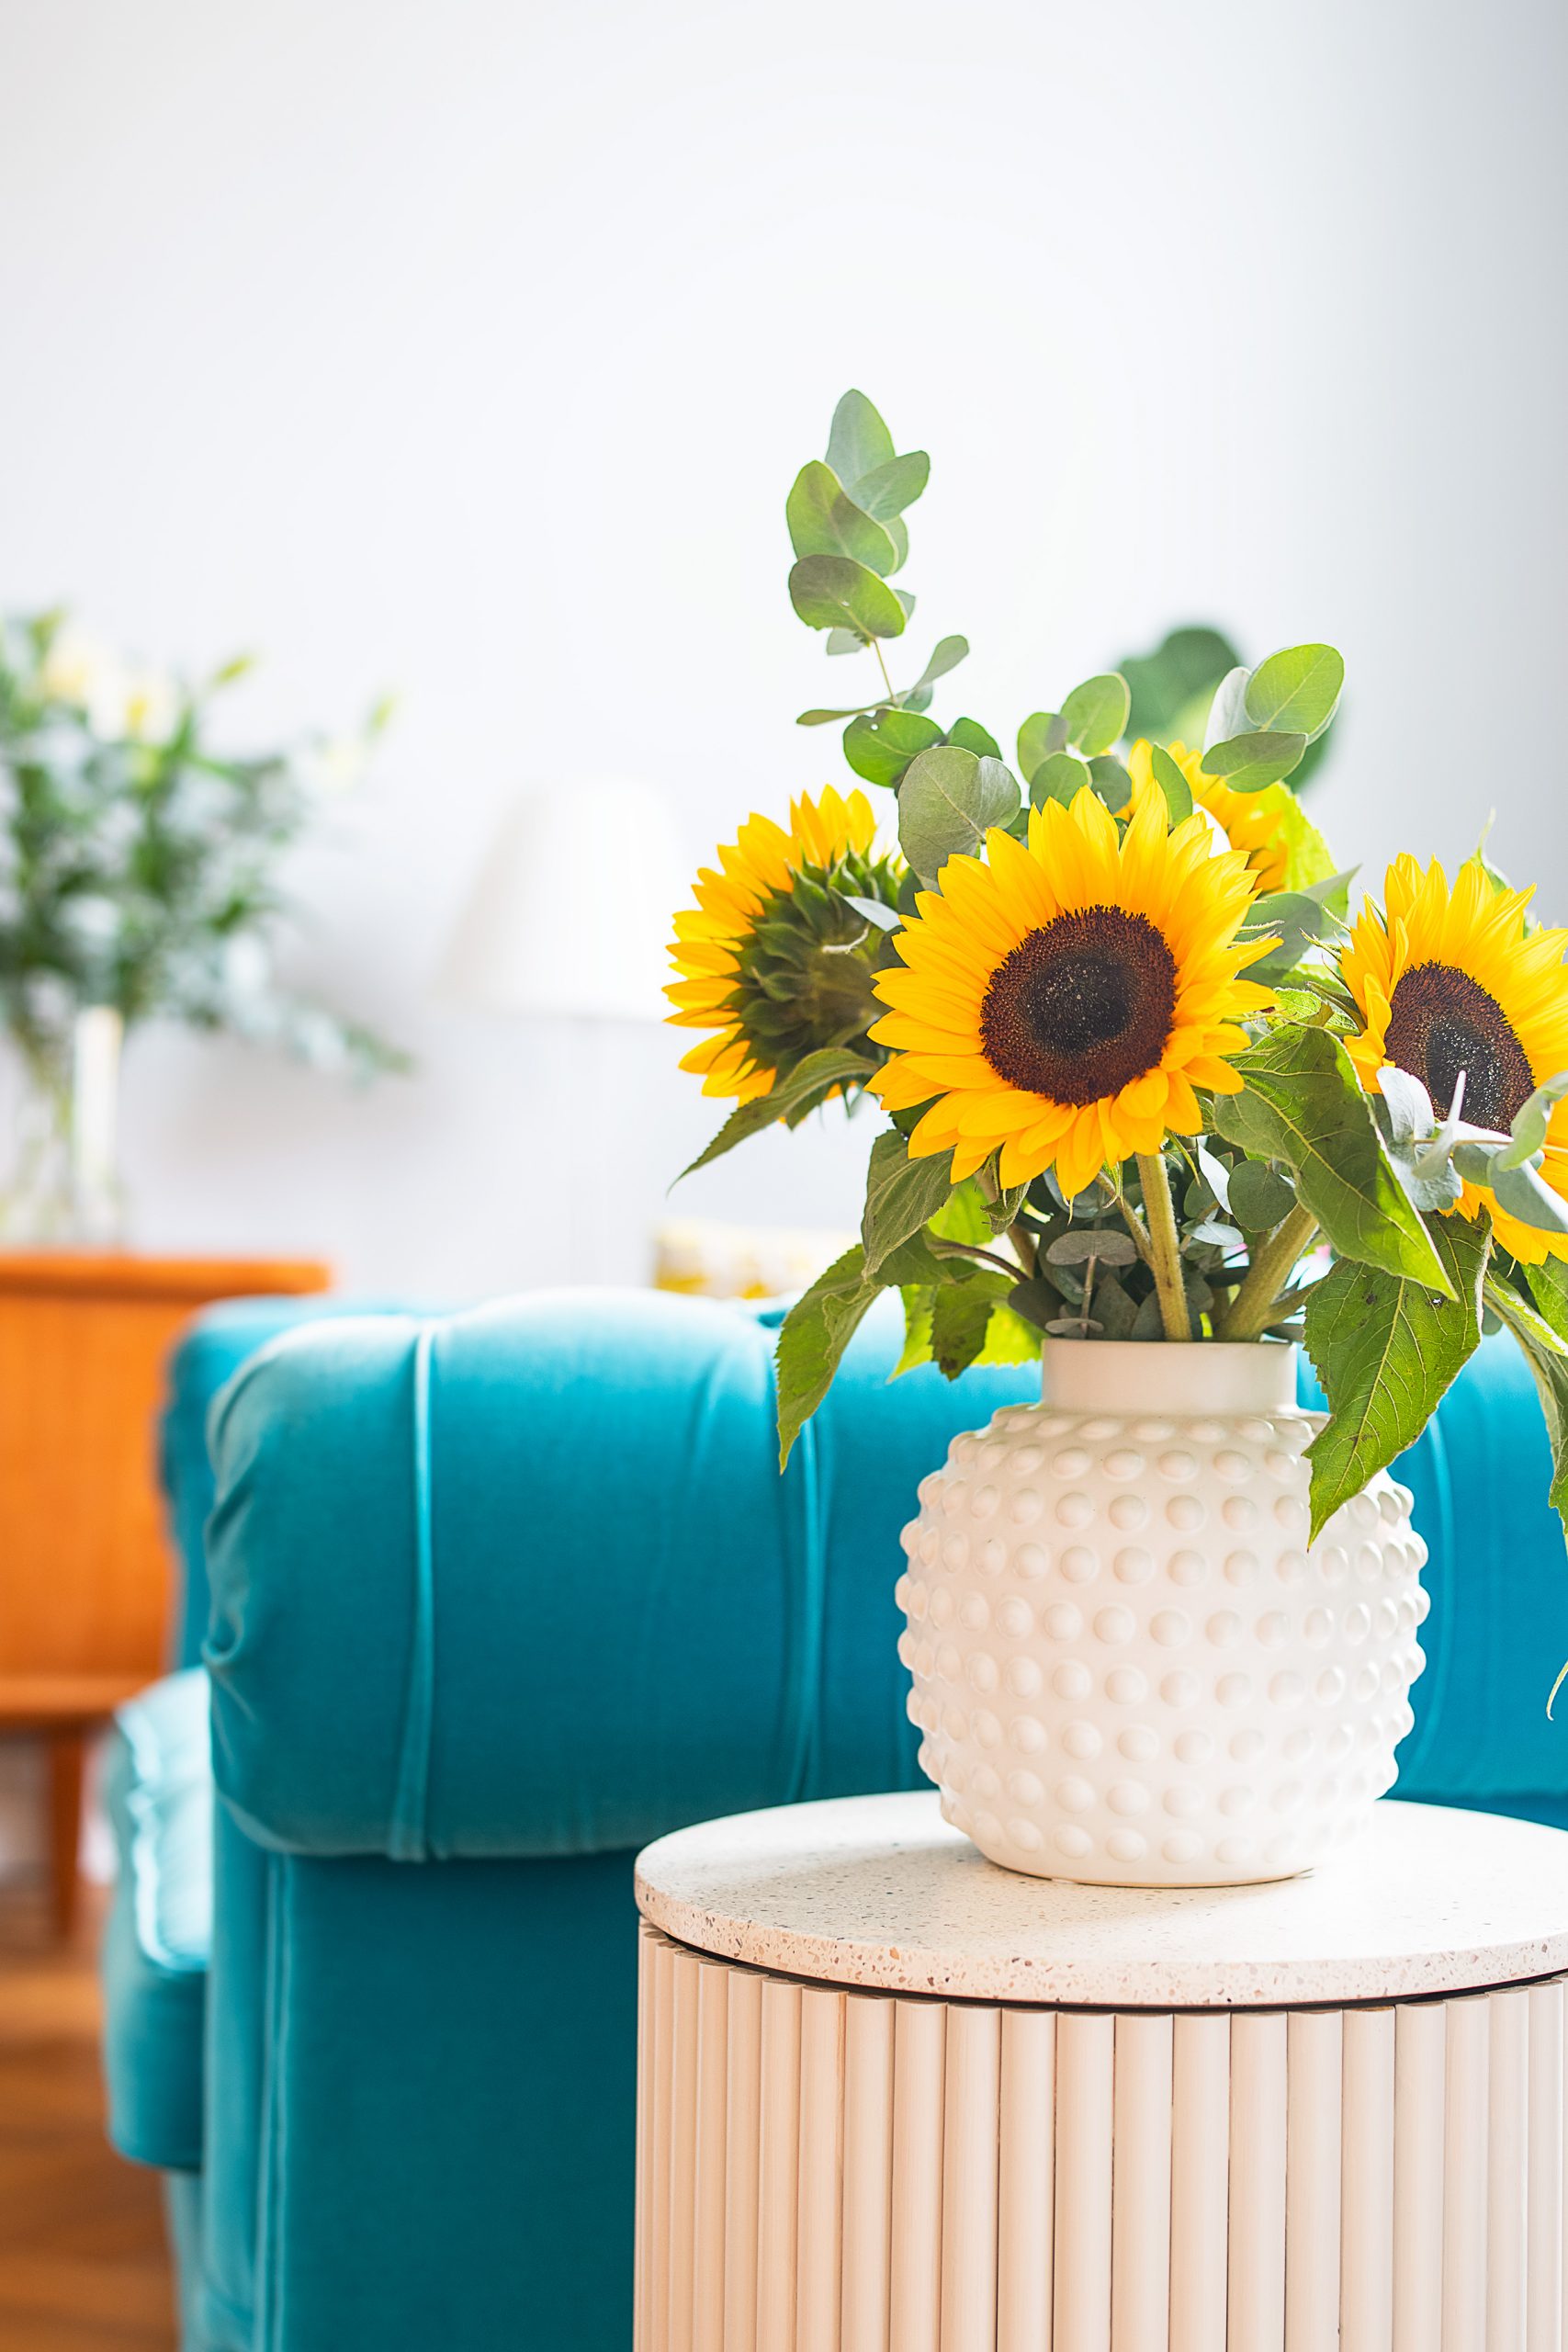
Tip: We left a small shadow gap between the top of the table and the ribbed sides because we felt it would give a more sleek and professional finish. You could just as easily have no gap at all though.
If you use the same plate as a tabletop as we did, make sure to double-check your measurements a few times as the bottom of the plate isn’t exactly level and bows outwards slightly.
It’s surprising how quickly the cost of some projects can add up, and I know that it’s always helpful to see a breakdown of how much a project actually ended up costing.
Ribbed Side Table Cost (as a rough guide, as we already had some of the supplies):
- Terrazzo plate – £55
- Moulding – £37
- Sandpaper, wood glue and adhesive – £3
- Paint – £4
Total: £99
If you’re looking for a more budget-friendly option, a wooden top would look fab, too! You could use something like this lazy susan from Ikea, which would be perfect and a total bargain, too!
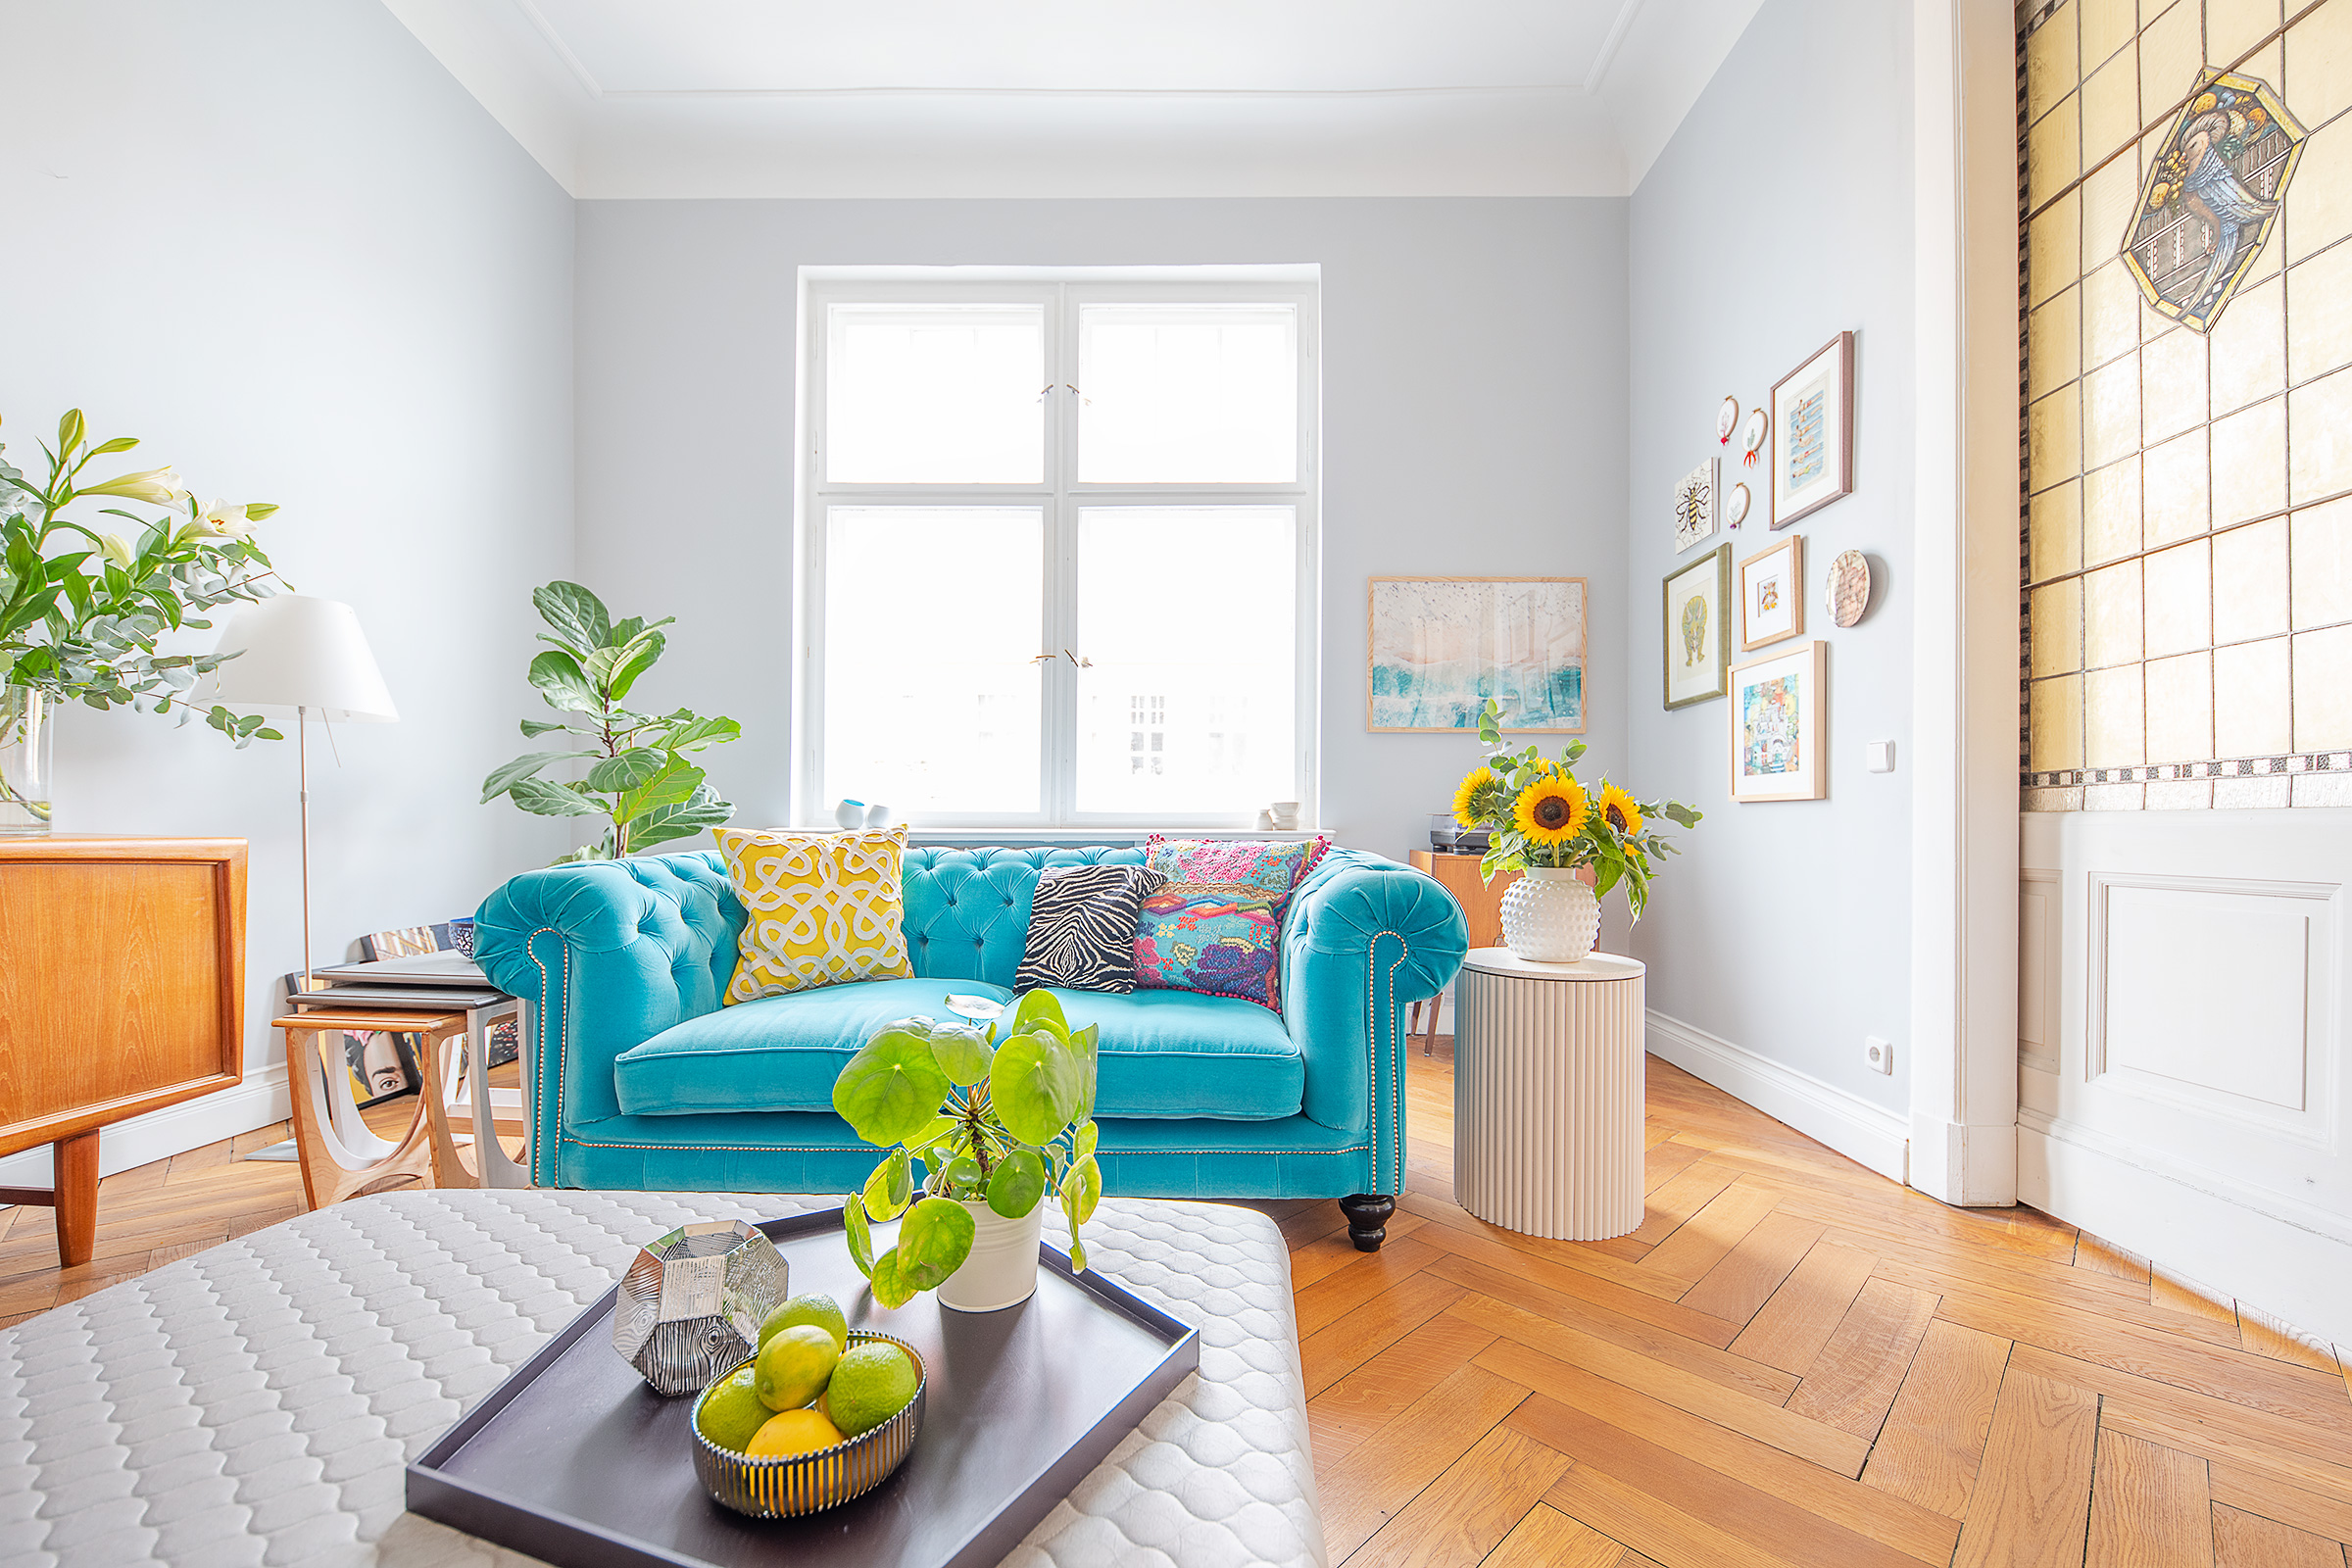
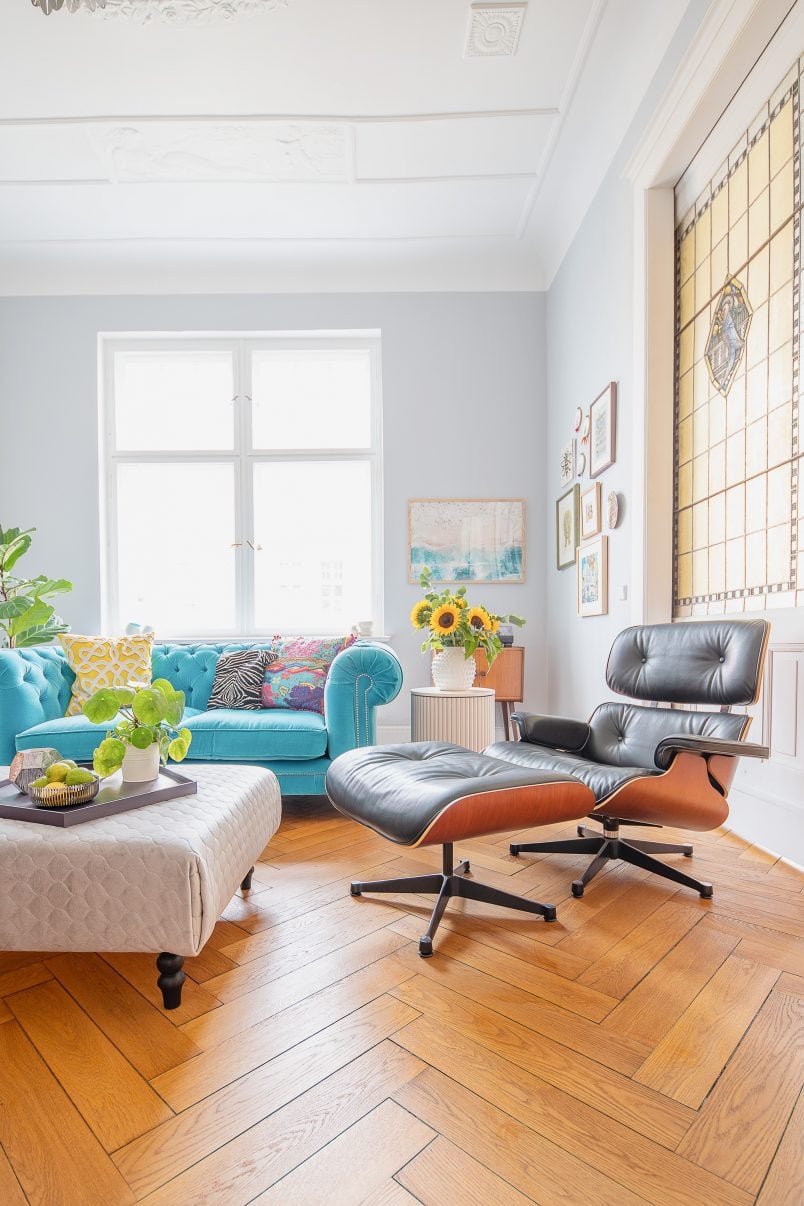
I’m so glad that our living room is finally starting to take shape. Our new modern side table looks great, but we still need a rug, and I still hate the colour of the walls. Oh, and curtains would be nice at some point, but hey, we’ve only been in our home for 3 years! :)
Do you also tend to love things you can’t afford? Does getting a room completely finished also seem to take you forever? What’s your favourite trend of 2020? Do you love reeded furniture as much as we do?

Kerry says
This is amazing!! I actually thought it was made from some kind of cushioned fabric from your first picture – I would never have guessed they were wooden dowels! Such a great idea – your DIYs never fail to amaze me!
Christine says
Aww, thank you so much, Kerry! That means a lot coming from you!
Cx