Hi. My name is Christine and I can’t stop painting things.
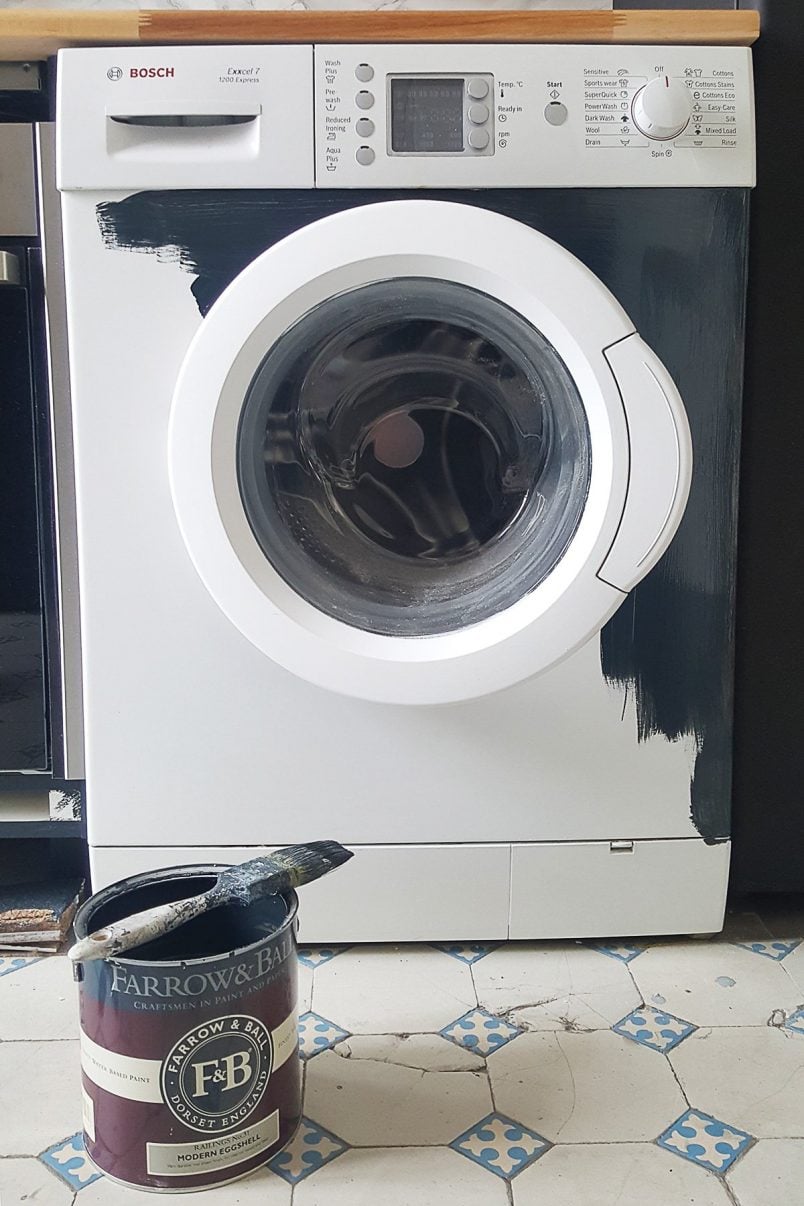
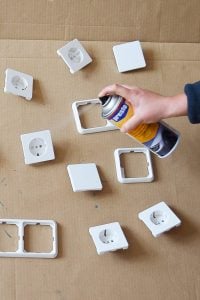
In the last few months I’ve painted walls, doors, radiators, skirting boards, light switches & sockets, cupboards and, if you saw our epic kitchen makeover reveal last week, you will probably have seen that we painted a fridge and even washing machine, too!
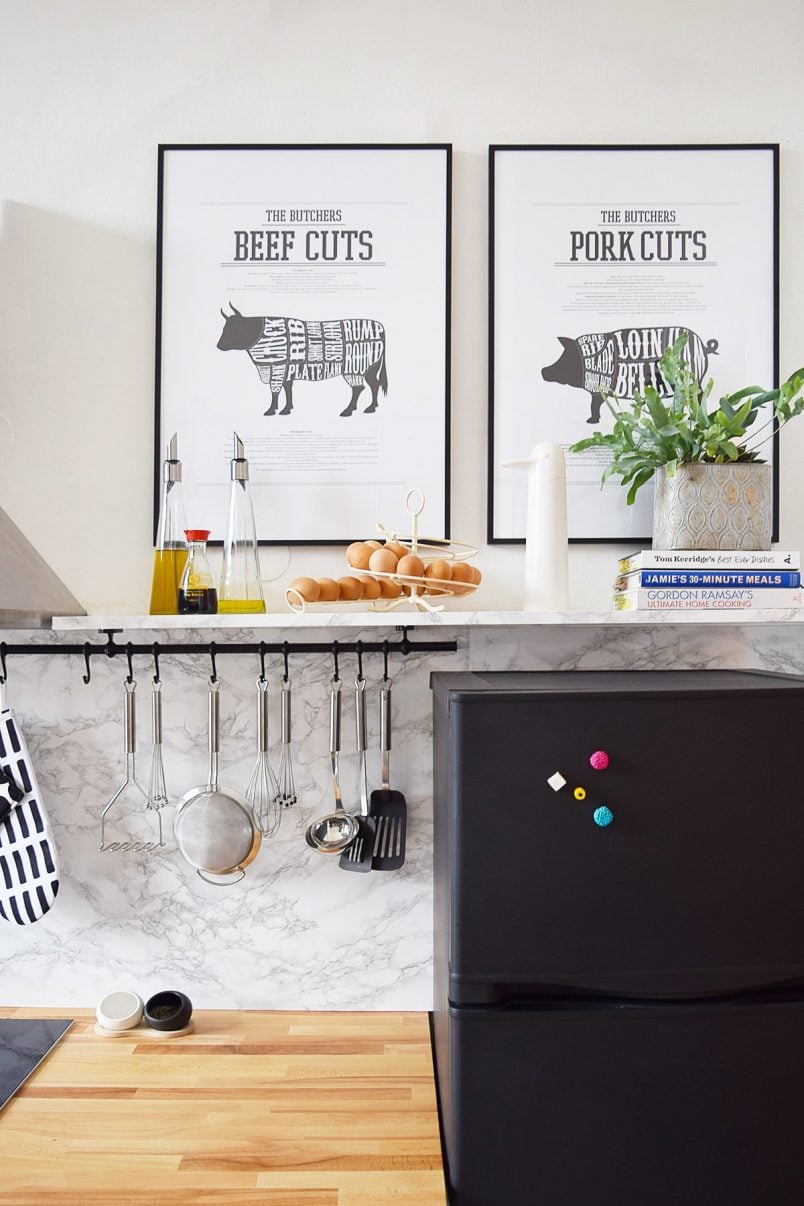
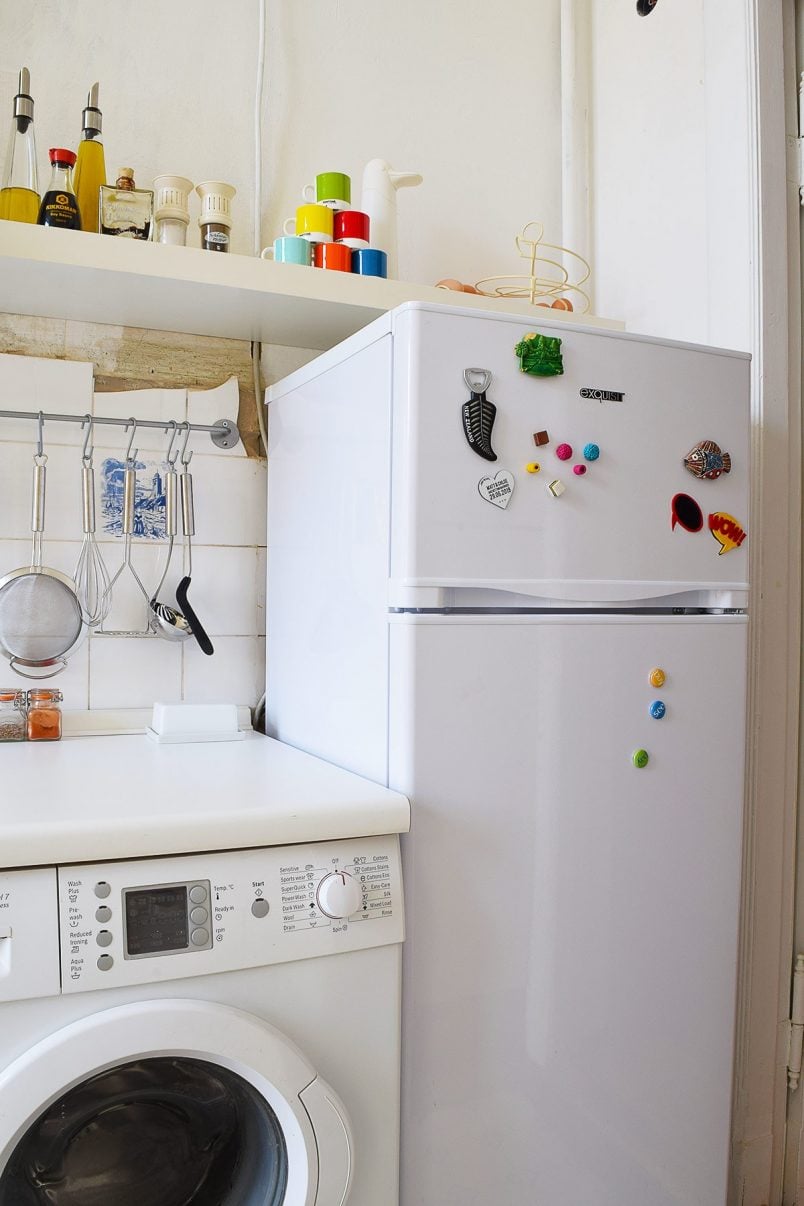
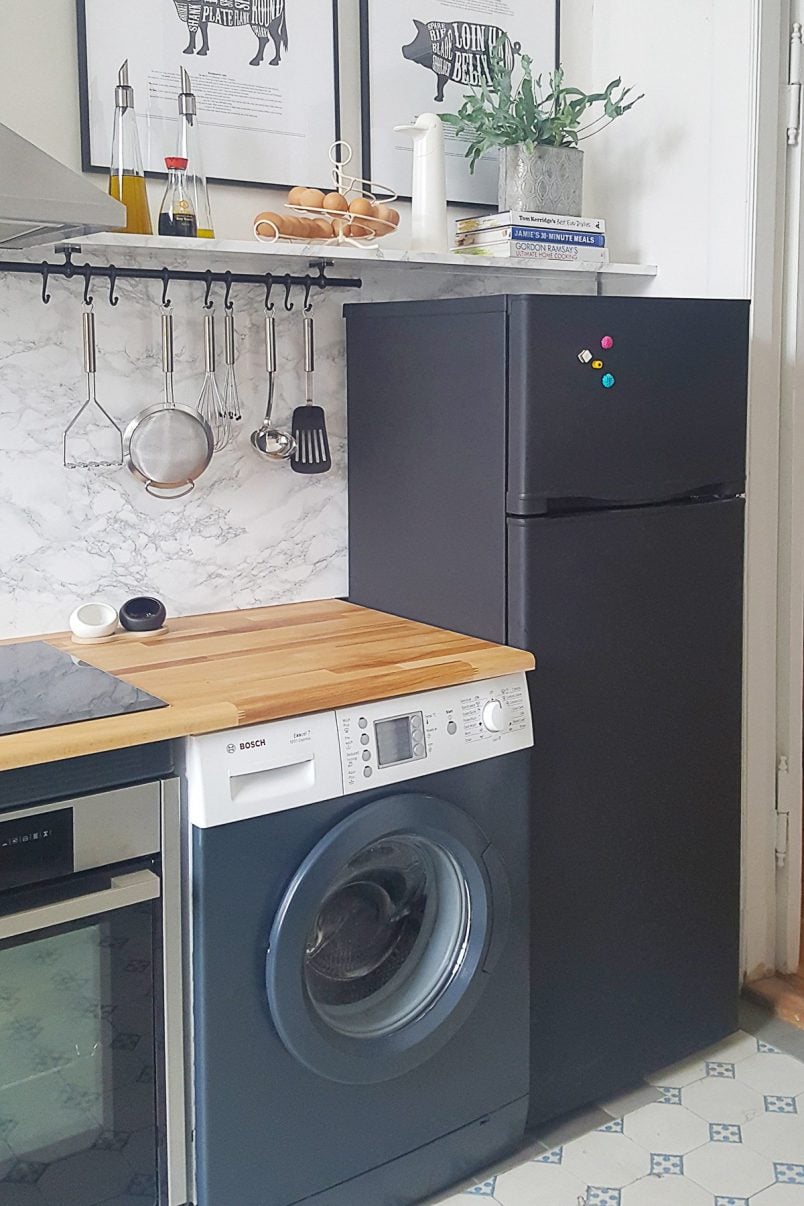
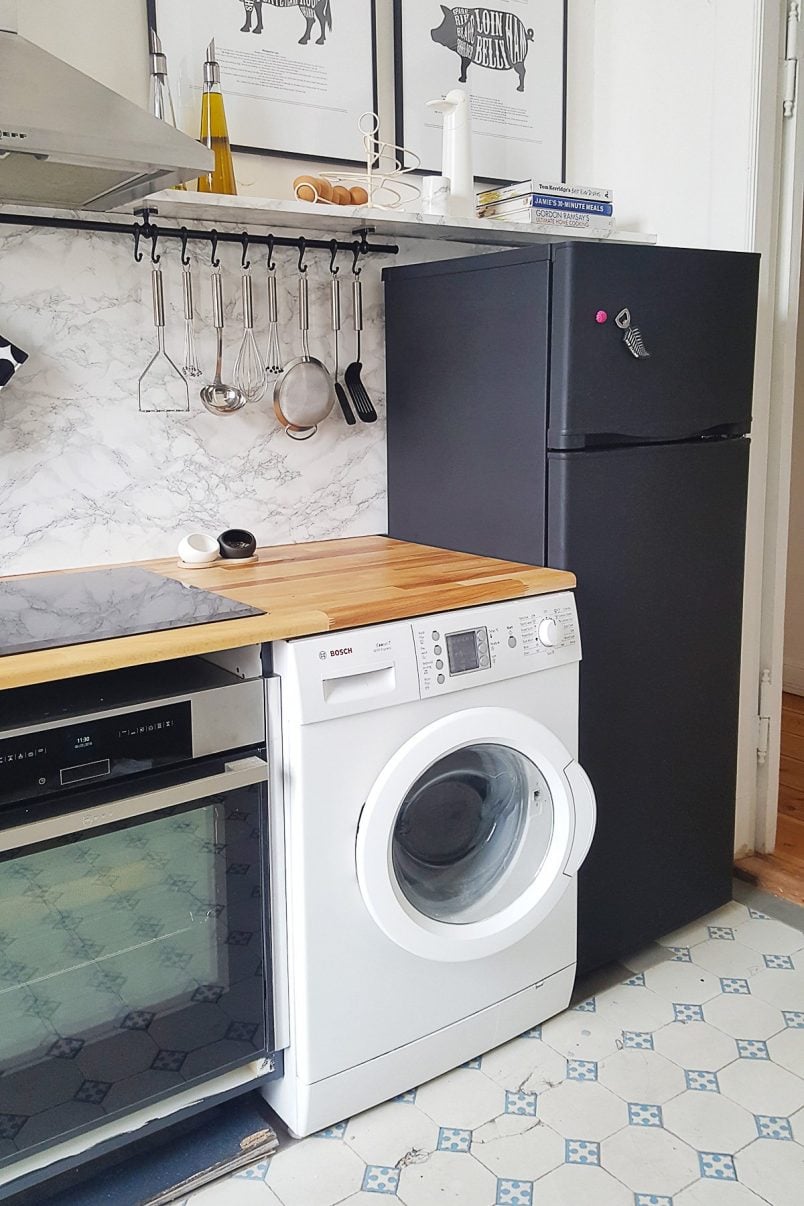
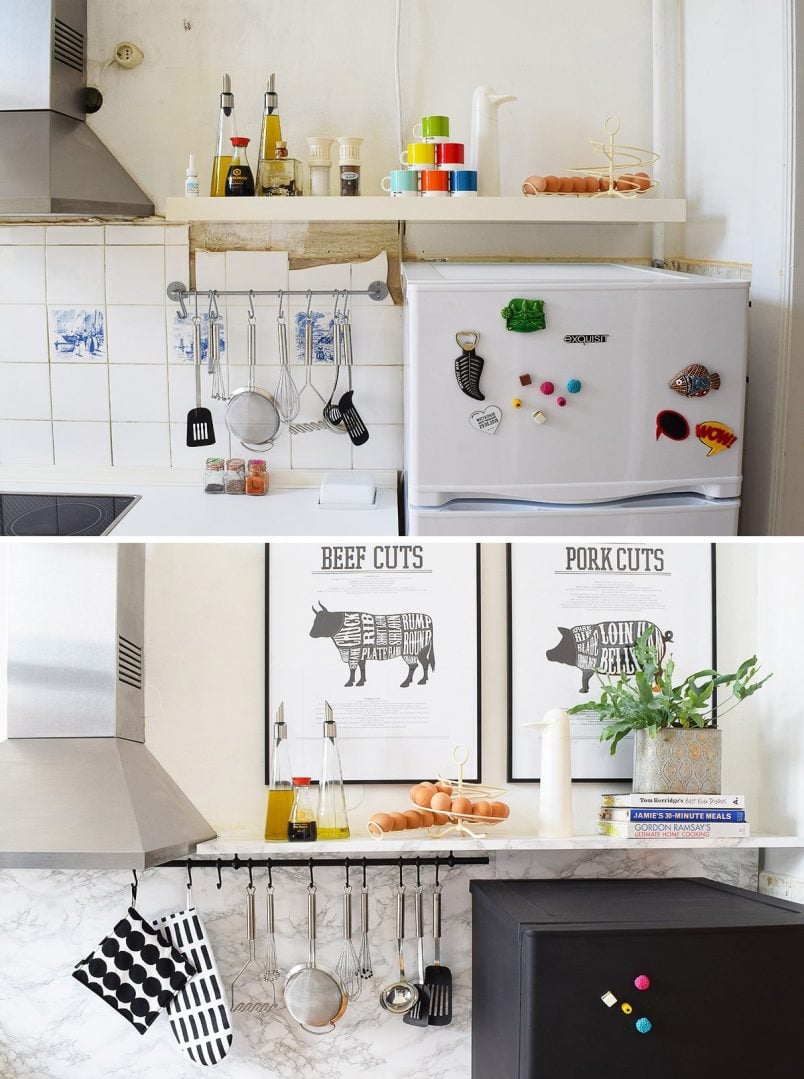
Don’t they look fab? After going through all of the efforts of painting pretty much everything else in the kitchen we really couldn’t leave the fridge (and washing machine) plain white, could we?
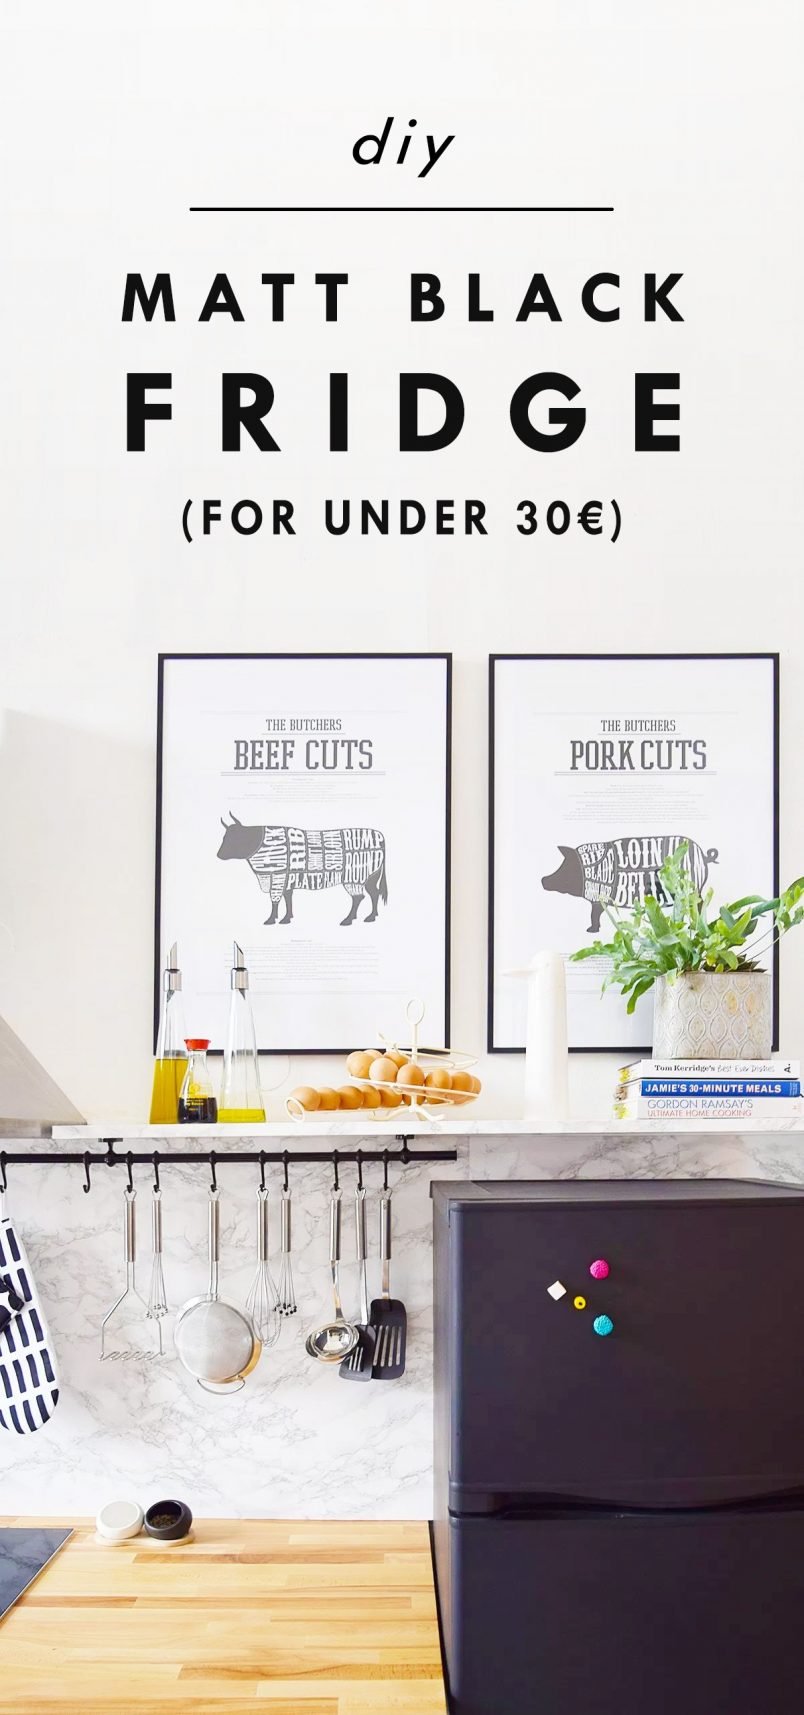
Have you seen super trendy matt black fridges popping up lately?
I love how the matt black finish makes it look so sleek and modern but usually, matt black fridges are total budget busters and cost thousands.
Our makeover, on the other hand, was much more budget-friendly and cost a lot less. And when I say a lot less I really do mean it as the whole project came in at under 15€!
Yep, about two hours of work and 15€ is all it took!
So, if you’re wondering how we managed to achieve the look of a modern & luxury fridge on a pretty much non-existent budget here’s the secret to achieving the super matt and durable finish – it’s chalkboard paint!
As well as the fun factor that chalkboard paint gives you, it’s a really durable paint, too.
It’s the most matt black and I hate the thought of chipped or worn paint so on something that’s used as frequently as a fridge it really has to be a finish that’s hard-wearing.
It’s only been painted for just over a month, so it’s hard to say just how well it’ll hold up over time but so far it’s still in perfect condition! We’ll keep you updated though!
Update: After two years the fridge still looks perfect. There were a couple of tiny scratches on the handle that were easy to touch up. It’s still a project we highly recommend!
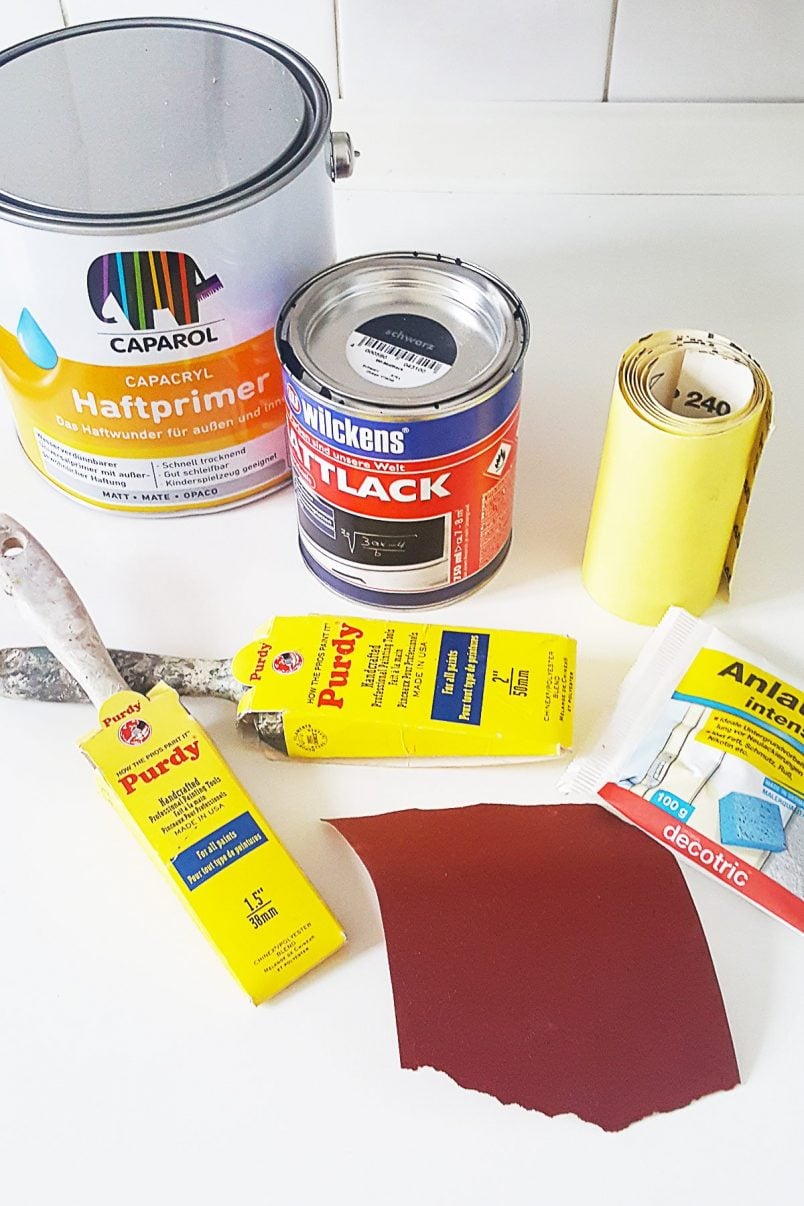
If you’d like to paint your fridge, this is what you will need:
This post contains affiliate links. As always, we only recommend products we love and think that you will, too! Read our full disclaimer here.
- Paint – We used this chalkboard paint (it’s the same paint that we used to paint the bed in our guest bedroom, too.) but any satin paint that’s suitable for metal will work, and you can choose any paint colour you’d like
- Sugar soap, gloves & water
- Primer – This is the primer we used to prepare the fridge and prime all of our kitchen cabinets. It’s a bonding agent, which means that it will help the paint finish adhere to it. A great alternative primer would be Zinsser 123 primer, which everyone raves about!
- Paintbrush or roller – we use our favourite paintbrushes for every painting project. We’ve had them for over 6 years and they’re still as good as the day we got them.
Here’s our 4 step guide on how to paint a fridge:
Step 1
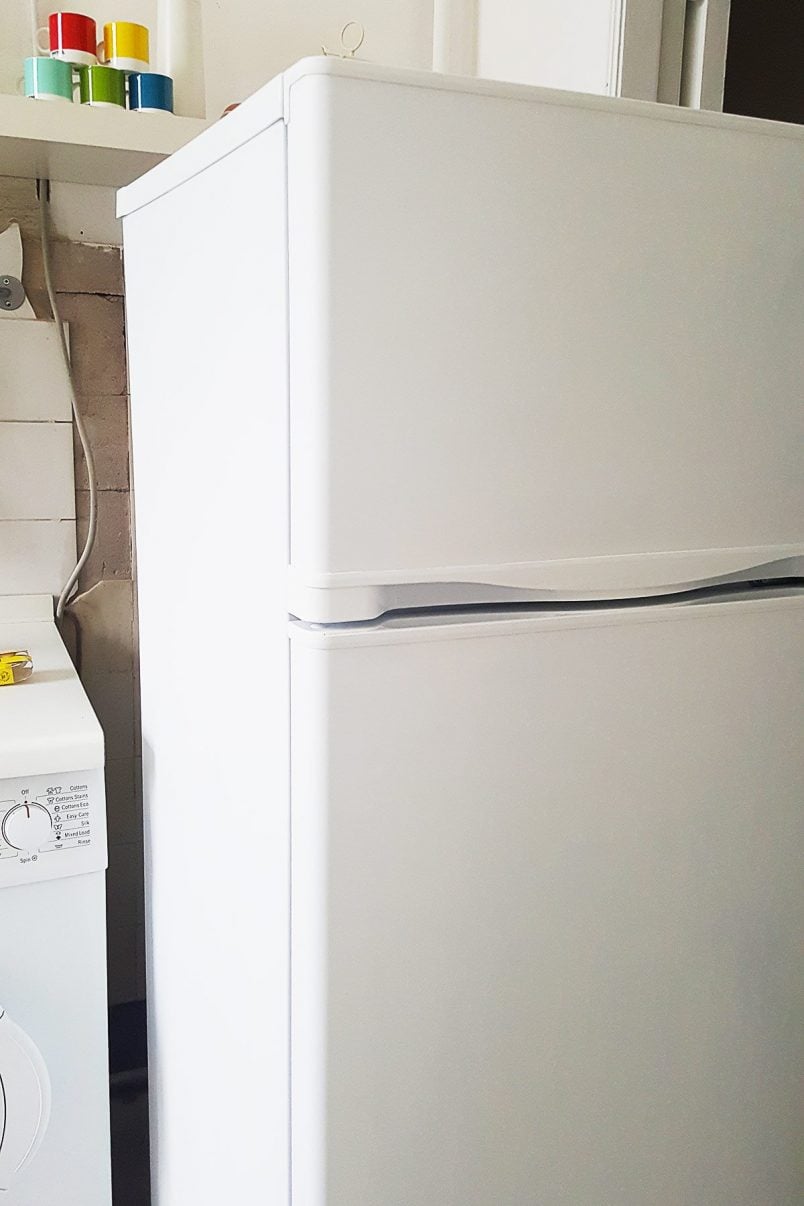
Clean The Fridge
No matter what you paint, preparation is always the most important step!
Start by giving the fridge a good clean. If we’re painting something, we always use sugar soap to clean the surfaces. It’s slightly abrasive and is great for removing any grease, too!
A nice surprise when preparing the fridge was that we realised that it’s possible to remove the logo in the middle of the fridge door – and it’s surprisingly easy, too!
We just slotted a wallpaper scraper under the edge, wiggled it around a bit and the logo just popped off!
Step 2
Sand The Fridge
After cleaning the fridge it’s time to give the entire surface light sand. Our go-to sandpaper for sanding in any kind of paint preparation is 120 grit.
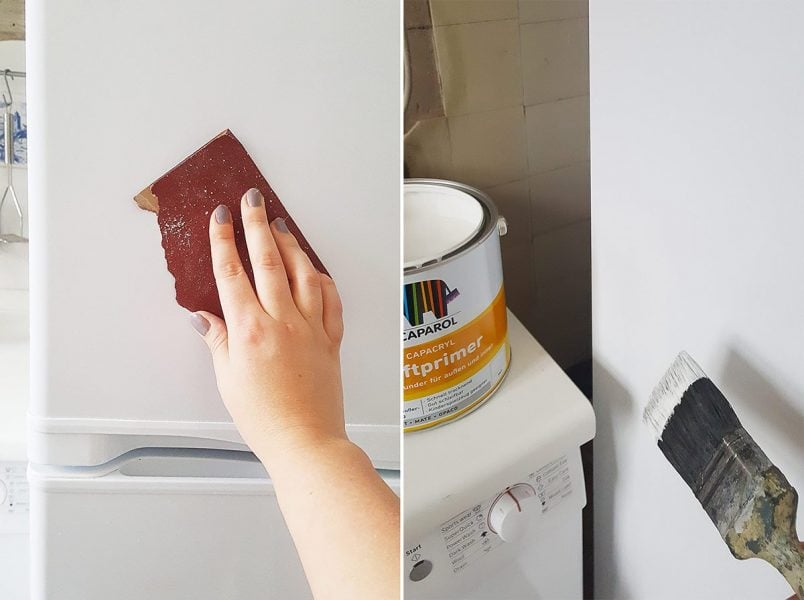
You only need to give it a light sand by hand to roughen up the surface slightly. This will give the paint a rough surface to stick to and will ensure a long-lasting finish.
Step 3
Prime The Fridge
When the surface of the fridge is prepared it’s time to get out your paint.
Because the fridge has a smooth plastic finish it makes it difficult for any paint to adhere to it. Sanding it will help but to ensure a long-lasting finish it will have to be primed, too.
Using a primer that has an adhesion-promoting agent in it is the best way to prepare the surface for your chosen paint finish.
Paint the surface with an even coat of primer making sure to avoid drips and brush marks (good brushes will help with this!).
Then, when it’s completely dried, give it a very light sand with the 240 grit sandpaper. This will remove any air bubbles and provide a better key for the next layer of paint. Then wipe away any dust with a damp cloth.
Priming the fridge with an adhesion-promoting primer is definitely the most important part of this project. It’ll ensure that the paint really sticks to the plastic fridge surface and help achieve a long-lasting finish.
Step 4
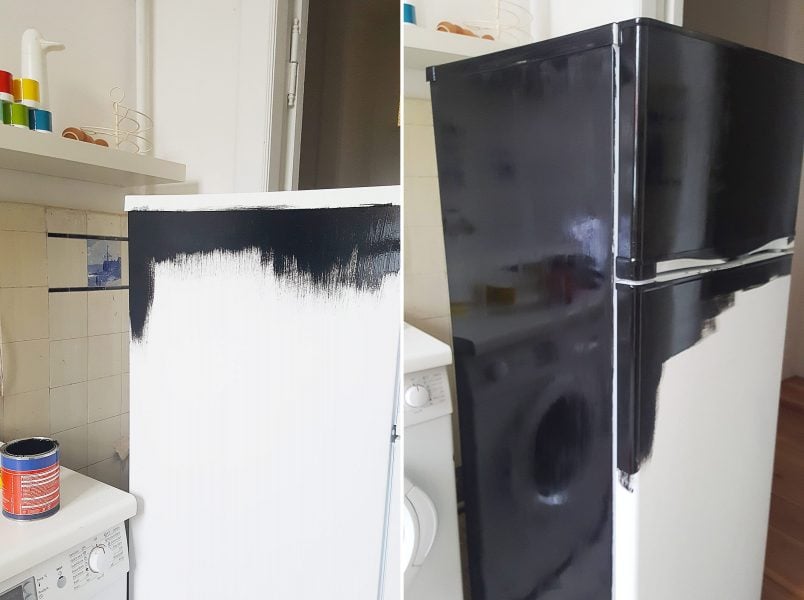
Paint The Fridge
Now that the fridge is primed and prepared, you can start to paint it in your chosen finish.
No matter what paint you decide to use, I’d recommend applying at least two coats of paint. One coat may be enough to cover the fridge, but applying a second coat will ensure that it’s more hard-wearing and scratch-resistant.
The only paints you shouldn’t use to paint your fridge are spray paint or chalk paint, as they just won’t be durable enough to withstand the day-to-day wear and tear.
You can get specialist appliance paints to paint your fridge, but you don’t have to buy these expensive paints. Using regular satin paint that’s suitable for metal will give you more flexibility with your choice of colours, and you can paint your fridge any colour you want. You can use black fridge paint or even neon yellow if that’s the look you’re after.
We always paint with a paintbrush, but you could, of course, use a foam roller to paint the surface if you prefer.
Apply a thin and even coat of paint covering the surface of the fridge (obviously only the paintable areas on the outside and not the back or inside!) and wait for it to dry completely. Painting the refrigerator handles is totally optional, but as ours are integrated, we decided to paint them, too.
Then, give it a light sand with the 240-grit paper, wipe it clean, and apply the final coat of paint.
Wait for it to dry for at least two weeks before even thinking about adding magnets or using chalk on the fridge.
The secret to a long-lasting finish is to use a really good adhesion-promoting primer and to really make sure that you let the paint dry thoroughly. In the beginning, it’ll be quite delicate, but after it’s fully cured it’ll be a lot more durable and hard-wearing.
I totally admit that I had a few concerns about this project. How well would the paint stick? Would it scratch easily? What about selling the fridge at some point? Would wallpaper be a better (and more fun) option?
Let’s face it, no one wants to spend hours painting something only for it to get chips and scratches a short time later.
Needless to say, our fridge gets a lot of use and is opened more than just a few times every day.
I purposely waited a while before sharing this project as I wanted to make sure that the finish would be durable. Well, I’m happy to say the result really couldn’t be better! No scratches or marks, and it’s easy to wipe clean, too.

I guess only time will tell if the finish is really long-lasting (we’ll share an update in a couple of months), but it was only a really cheap fridge that we’d only ever purchased as a temporary solution, so we didn’t feel guilty about painting it.
* Update: The finish lasts amazingly well. Even after a couple of years of use, it’s held up amazingly well.
We only painted the washing machine a couple of weeks ago, so the verdict on how well it will last is still out. The painting steps are exactly the same as painting the fridge. The only difference is the finishing coat which is the same paint we painted our kitchen cabinets with.
How To Paint A Fridge FAQ
Yes! The secret to painting a refrigerator and achieving a durable finish lies in the primer. Always use an adhesion-promoting primer before applying your paint. This will provide the perfect surface for the paint to stick to and will help avoid any chips or scratches in the paint finish in the future.
All you need to paint your refrigerator is some adhesion-promoting primer, paint, sandpaper and a paintbrush. Painting a fridge is a fun project that can easily be done at home.
Yes, you can change the colour of your refrigerator by painting it or even applying vinyl wallpaper). It’s easy to do, and you can change it to any colour you want.
Using the right kind of primer is key when painting smooth surfaces like fridges. An adhesion-promoting primer will help the paint stick to the surface and will stop the paint from peeling off.
Our favourite primers for smooth surfaces are Caparol Haftgrund and Zinsser 123, which are both perfect primers for painting fridges.
No. Whilst you can, in theory, paint most things with chalk paint, it’s not something we recommend for fridges as the finish won’t be durable enough to stand up to day-to-day wear and tear.
If your refrigerator has spots of rust, try to remove as much of it as possible before painting. Sand the rust spots with some 120 grit sandpaper and clean the surface. Then, prime the area with rust-blocking paint.
After sealing the rust spots, you can prime and paint the fridge following the instructions we’re sharing here.
We always prefer to paint with a brush, but you could use a foam roller to paint your fridge, too. It’s all down to personal preference, but we do recommend investing in a high-quality brush for the best possible results. We’ve had the same set of brushes for over 10 years, and we still use them for almost all of our painting projects.
Painting a fridge is a very affordable project. You only need a couple of sheets of sandpaper, some primer and paint to completely transform your fridge.
In total, it cost about 15€ to paint our fridge. (This is an estimate as we still have lots of paint and primer left over that we will use for another project).
Have you ever painted an old fridge (or another appliance)? Do you love to paint things as much as I do? Painting is clearly my favourite type of home improvement project. What’s your favourite type of DIY project?


Kristina says
I’m confused – in the beginning of your article you say you used “chalkboard paint.” Yet a couple times near the end of your article you say you cannot use “chalk paint.“ Am I missing something here?
Christine says
Yes, “chalk paint” and “chalkboard paint” are two very different things, Kristina. If you want to achieve a finish that’s like a chalkboard that you can write on with chalk, you’ll defininitely have to use chalkboard paint. Chalk paint on the other hand is often used for painting furniture and giving it a distressed look.
Hope that helps clear things up!
Cx
ancygl says
Nice article
Christine says
Thank you! Hope you found it helpful.
Cx
Joe says
Hello. I am going to be painting a chest freezer and I had 2 questions. First, the tools list says you’ll need 240 grit sandpaper but in the instructions its says to use 120 grit sandpaper. Which one did you use?
My second question is about the plastic pieces. Did you sand the plastic pieces such as the handle and the hinge covers before painting them as well?
Thanks in advance for answering my questions!
Christine says
I used both sandpapers, Joe. Before painting, I sanded everything with 120 grit sandpaper and between each coat of paint, I sanded everything with 240 grit paper (anything around that number will be fine though). Sorry if I was a bit unclear on that – I’ll update the instructions.
I sanded everything that I wanted to paint and that was visible including anything plasticy. Our hinges weren’t visible so I didn’t bother with them.
Hope that helps and happy painting!
Cx
P.S. I’d love to see a picture of your finished fridge.
Rachelle says
Did you paint the outside rubber seal as well?
Christine says
Yes, Rachelle, we painted the visible edge of it but not the flat bit that touches the fridge.
Cx
Vikki Turnbull says
Hi. Thank you so much for this. I’m a complete novice, bought a second hand fridge for £20 and it now looks a million dollars. The only primer I could get in the UK was in a spray form and I wish I had masked everything up before I started spraying. A tip for any other first timers.
Christine says
That sounds that an epic transformation, Vikki! Thank you so much for sharing! Spray paint definitely has a way of going everywhere, doesn’t it?! I accidentally sprayed our parquet black once but luckily I was able to clean it again! Have fun with your fridge!
Cx
terence tucker says
Thinking of totally repainting the kitchen:- cabinets Fridge/freezer etc…what of floor tile paint?
Christine says
It’s always best to use the right kind of paint for the surface you are painting. The primer and types of paint you use will make a huge difference between an okay finish and one that looks great and last long. You might want to check out this post where we show exactly how we painted our kitchen cabinets and share the exact products we used, too.
Cx
susan lemon says
How did the paint wear over time?
Christine says
We actually just shared a post about what our kitchen looks like two years after painting everything! You can see the full post about how it’s holding up here. The fridge is holding up really well! There are a couple of tiny marks around the handle (which I’ve coloured in with a Sharpie) but other than that there are no chips or scratches at all.
Hope that helps, Susan!
Cx
Isabel says
Your fridge looks absolutely great! I´d love mine to look just like it! Just one question, I assume the rubber seal on the fridge was originally white. Did you paint that as well? In my case, you can see the rubber from the side and would stand out if I leave it white.
Thanks!
Christine says
Thank you so much, Isabel! Yes, we painted the rubber seal (ours was white, too) but only the side of it that’s visible when the door is closed and not the bit that sucks to the fridge (if that makes sense).
Happy painting!
Cx
Anosha says
How much paint did you use to paint the fridge?
Christine says
I’d say about half a 750ml pot of paint (so about 350ml of primer plus 350ml of chalkboard paint) maybe a bit less…
Hope that helps!
Cx
Andrea at the creative coastal home says
It looks really good Christine, I may try that! I’ve started thinking about my kitchen, although it’ll be a white before I do anything in the room.
Christine says
Thanks, Andrea! There’s always so much to do, isn’t there? I sometimes plan complete rooms and then change my mind before even starting work on it. Not exactly helpful when you’re trying to get loads done! ;)
I love the fridge update, too. It definitely works so much better with the dark cabinets.
Cx
Flo says
I love what you did to your kitchen, that fridge is no exception!
Christine says
Thank you, Flo! It’s amazing what you can achieve with a bit of paint and some hard work, isn’t it?
Cx