Little House On The Corner

DIY & Home Improvement

MENUMENU
  • Blog
  • Projects
    • Our Favourite Projects
          • DIY Outdoor Daybed with Canopy
          • DIY Outdoor Daybed With Canopy

          • DIY Epoxy Resin Dining Table
          • DIY Epoxy Resin Dining Table

          • 5 Floor Sanding Mistakes And How To Avoid Them | Little House On The Corner
          • What No One Will Tell You About Sanding Your Floors

    • Home Improvement & DIY
          • Hallway with Paean Black Front Door After Editing With Interior Presets for Lightroom by Little House On The Corner
          • How To Create A Home Renovation Budget

          • Floorsanding In Progress
          • What No One Will Tell You About Sanding Your Floors (& How We Did It)

          • How To Plan & Install Panelling | Little House On The Corner
          • How To Plan & Install Panelling

    • Painting & Decorating
          • painted wardrobe in Soumak by paint & paper library
          • How To Paint A Wardrobe

          • Dark Blue and Grey Painted Kitchen Cabinets
          • How To Paint Kitchen Cabinets + Tips For A Professional & Long Lasting Finish

          • What To Do When You've Chosen The Wrong Paint Colour?
          • What To Do When You’ve Chosen The Wrong Paint Colour & How To Fix It!

    • Furniture Projects
          • DIY Slatted Radiator Cover
          • DIY Slatted Radiator Cover

          • Beat Floor Lamp and Bar Cart
          • DIY Bar Cart

          • DIY Dining Room Bench | Little House On The Corner
          • DIY Dining Room Bench

    • Outside & Garden
          • DIY Logstore
          • DIY Log Store

          • DIY Slatted Garden Fence | Little House On The Corner
          • DIY Slatted Garden Fence

          • How To Lay A Gravel Driveway
          • How To Lay A Gravel Driveway

    • Free Printables
          • Cleaning Checklist - Free Printable
          • The Best House Cleaning Checklist

          • Free Printable Paper Houses for Advent Calendar
          • DIY Printable Advent Calendar Village

          • The Easy and Free Way To Organise Screws and Nails
          • The Easiest Way To Organise Screws And Nails

    • Craft & Art
          • DIY Pegboard
          • DIY Pegboard

          • DIY Modern Geometric Serving Tray
          • DIY Modern Geometric Serving Tray

          • DIY Guess Who Game - Setting Out Board | Little House On The Corner
          • DIY Guess Who Game

    • Cleaning & Organizing
          • Cleaning Checklist - Free Printable
          • The Only Cleaning Checklist You’ll Ever Need

          • DIY Floating Spice Rack | Little House On The Corner
          • DIY Floating Spice Rack

          • 30 Day Spring Clean Checklist - Little House On The Corner
          • 30 Day Spring Clean Challenge

    • Holidays & Festivities
          • DIY Giant Star and Snowflake Light | Little House On The Corner
          • DIY Giant Star and Snowflake Light

          • Free Halloween Printable Book Covers
          • Halloween Book Covers (Free Printable!)

          • Gingerbread style paper advent calendar village - Little House On The Corner
          • DIY Printable Advent Calendar Village

  • House Tour
        • Our Edwardian House
        • Our Edwardian House
        • Our Berlin City Centre Apartment
        • Take The Tour | Our Art Nouveau Apartment | Little House On The Corner
        • Our Berlin Art Nouveau Apartment
        • berlin riverside apartment house tour
        • Our Berlin Riverside Apartment
  • Shop
    • Build Plans & Printables
    • Shop Our House
    • Our Favourite Amazon Finds
    • Our Favourite Tools
    • Where We Shop
  • About Us
    • Contact
    • Work With Us

DIY Storage Bins To Organise Your Kitchen Pantry Storage

  • Facebook
  • Twitter

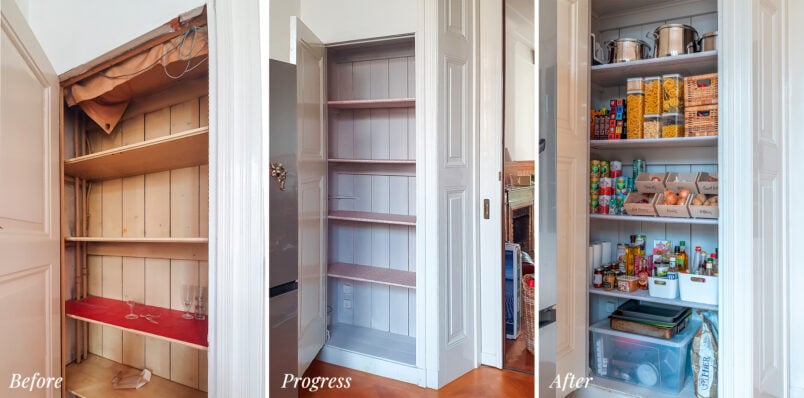
For the past few weeks, our pantry cupboard has been overflowing. 

It’s been getting more and more chaotic and unorganised. So, in an attempt to get organised, I built some DIY storage bins to upgrade our pantry storage and keep our potatoes and onions neatly stacked together.

stackable storage bins in pantry

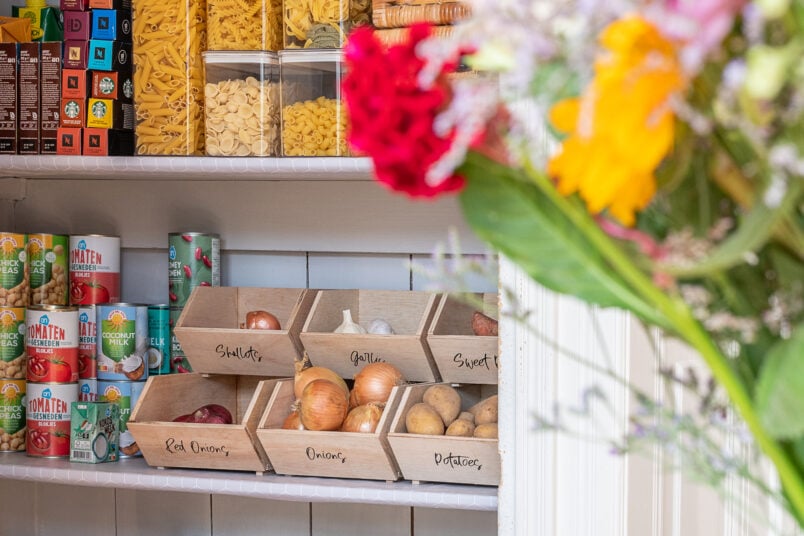
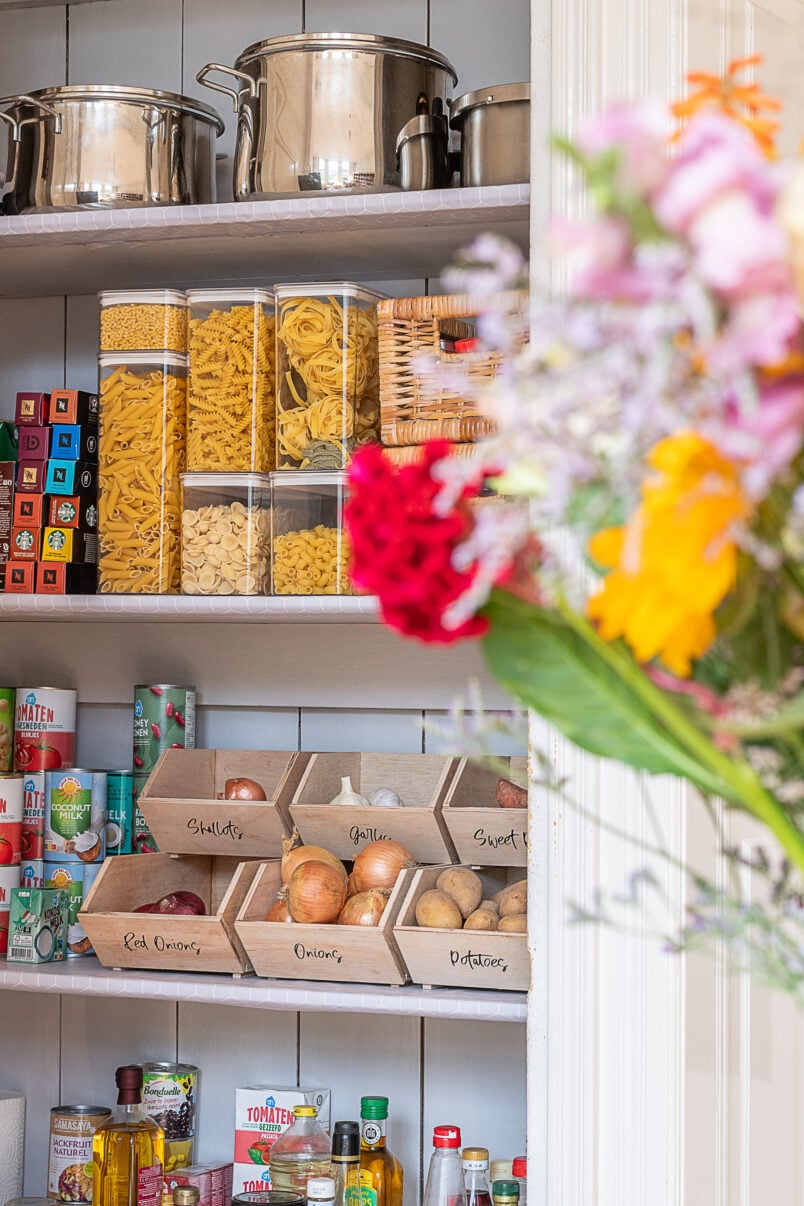
Doesn’t it look so tidy and organised? I love how much more organised the space is and keep opening the door to look at how pretty it is (which probably makes me a bit weird).

I’ll definitely be building a few more of these stackable pantry storage bins as were so easy and cheap to build. Each bin only costs about 3€ in materials to build making them a super budget-friendly way to organise your pantry.

vegetable storage bin with onions

This is such a beginner-friendly project, and we’re sharing exactly how you can build your own DIY storage bins to keep your space organised, too.

This is what you will need to build the DIY storage bins: 

This post contains affiliate links. We only recommend products we love and think that you will, too! Read our full disclaimer here.
  • 8mm thick plywood sheets (you’ll need approx. one 122cm x 61cm sheet to build two large boxes and two small boxes)
  • Table saw (or you could get it cut at the store where you buy the wood, in that case, you’ll then need a mitre saw to chop up the long strips)
  • Table saw ripper jig (obviously you’ll  only need this if you’re using the table saw but we highly recommend it)
  • Mitre saw
  • Clamps
  • Wood glue
  • 120 grit sandpaper
  • Tape measure & pencil

How to build your own DIY storage bins:

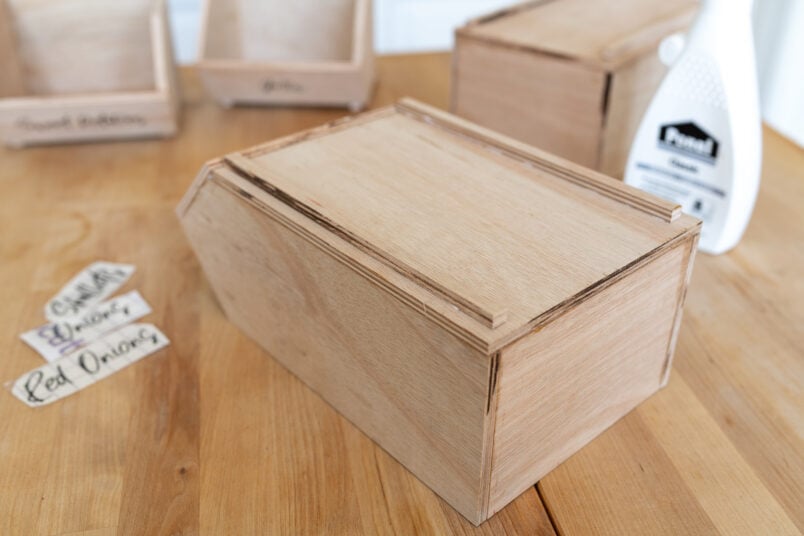
These pantry storage bins are so quick to build. Each storage bin is made of just 5 pieces of wood and is glued together to make the build as easy and quick as possible so that you can start organising your kitchen pantry storage almost immediately.
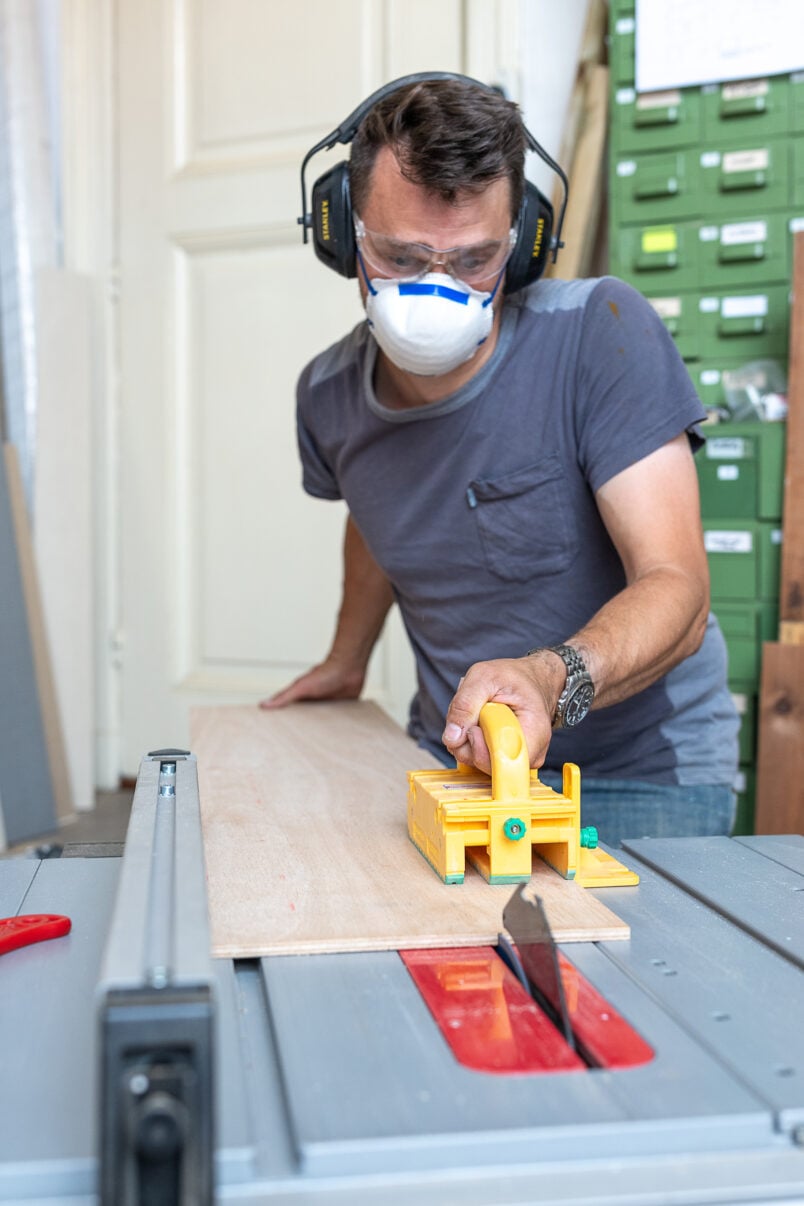
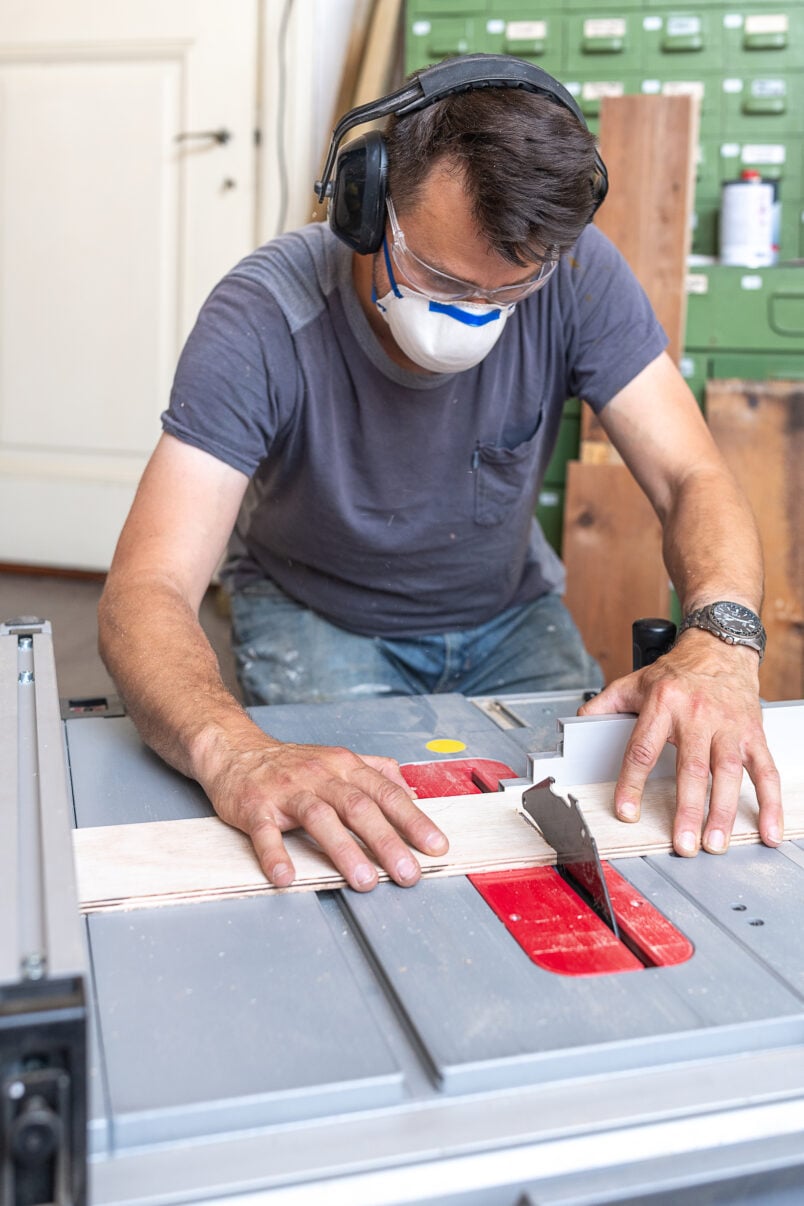
stackable vegetable bin in pantry

Step 1
Measure & Cut

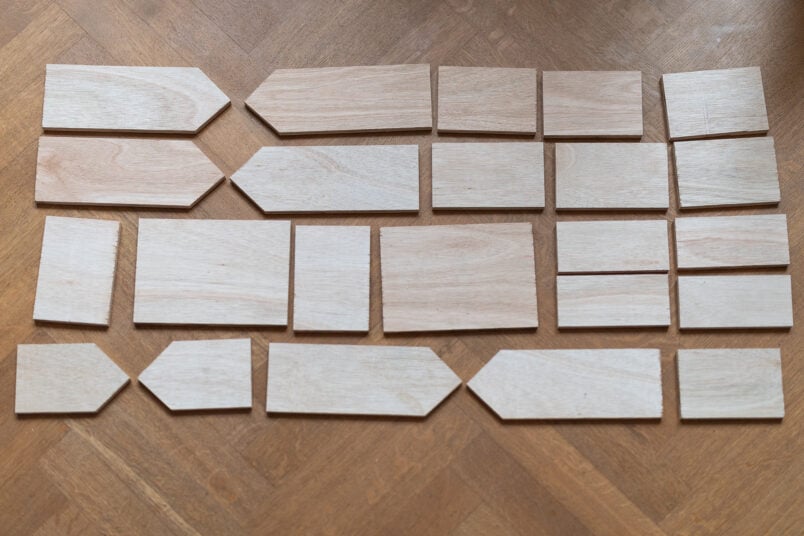
Start by cutting all of the pieces you need for your box. We used our new table saw to cut all of the pieces and then cut the angled front edges with our mitre saw.

Obviously, not everyone has a table saw so you could use a plunge saw or circular saw instead. DIY is all about doing what works for you and you can always adapt any plans to suit your situation.

cutting wood for diy vegetable storage bin

For each large box you’ll need: 

1 x 15.9cm x 24.3cm for the base

2 x 12.5 cm x 3o.5cm for the sides

1 x 8.8cm x 17.5cm for the front

1 x 12.5cm x 15.9cm for the back

For each small box you’ll need: 

1 x  15.9cm x 11.8 cm for the base

2 x 12.5cm x 18 cm for the sides

1 x 12.5cm x 15.9cm for the back

1 x 8.8cm x 17.5cm for the front

cutting pieces of wood with table saw

Step 2
Sand The Edges

When you’ve cut all the pieces, give everything a light sand to remove any rough edges and ensure that the pieces are smooth on all sides. 

pieces of wood prepared for diy storage bin

Step 3
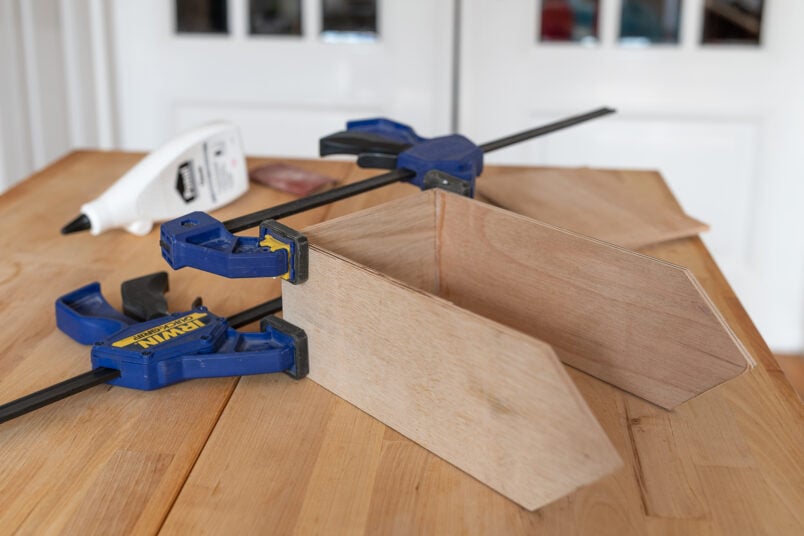
Assemble The DIY Storage Bins

Run a bead of wood glue along the edge of the pieces and stick them together. 

assembling vegetable storage bin

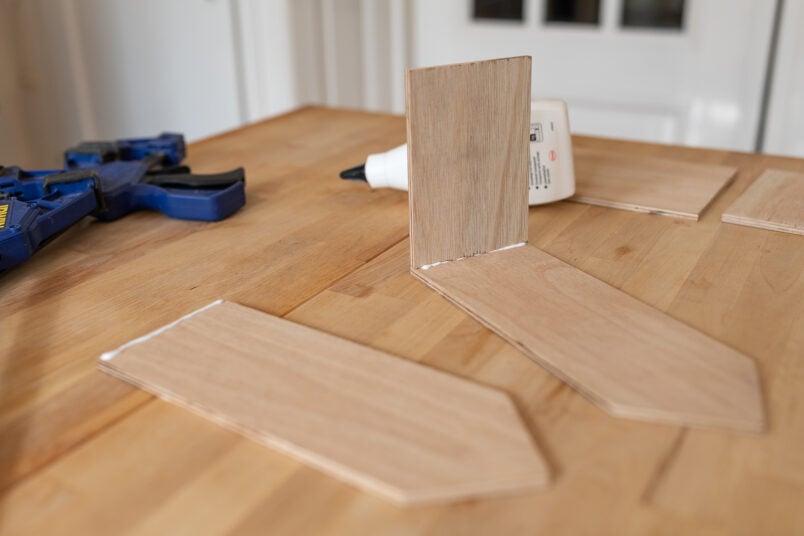
We found it easiest to assemble the side pieces first. When the sides have dried you can then easily glue them to the base of the storage bin. The front panel and raised feet are the last things to glue in place.

Use some clamps to firmly push the pieces together while the glue dries.

assembling diy storage bin for your pantry
assembling storage bin for vegerable bin

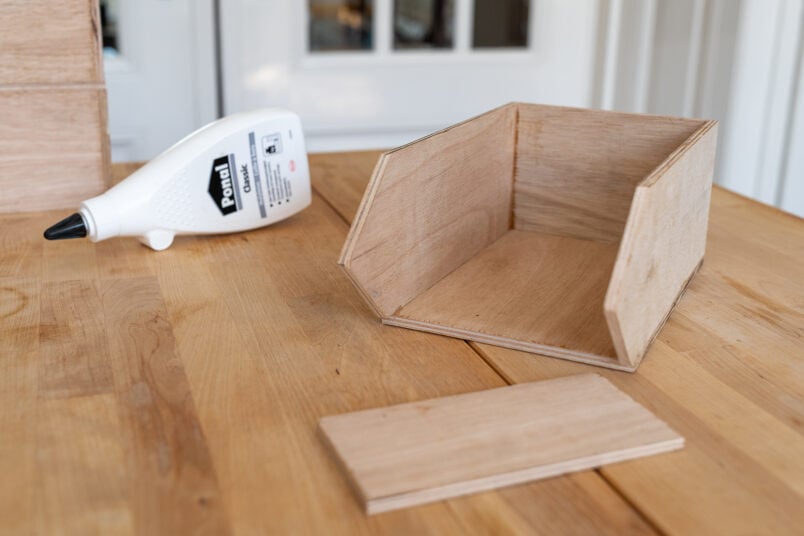
We also added some little feet to the bottom of each storage bin, so that they slot together perfectly and make them easy to stack.

diy stackable storage bin for vegetables

Step 4
Add Labels (Optional)

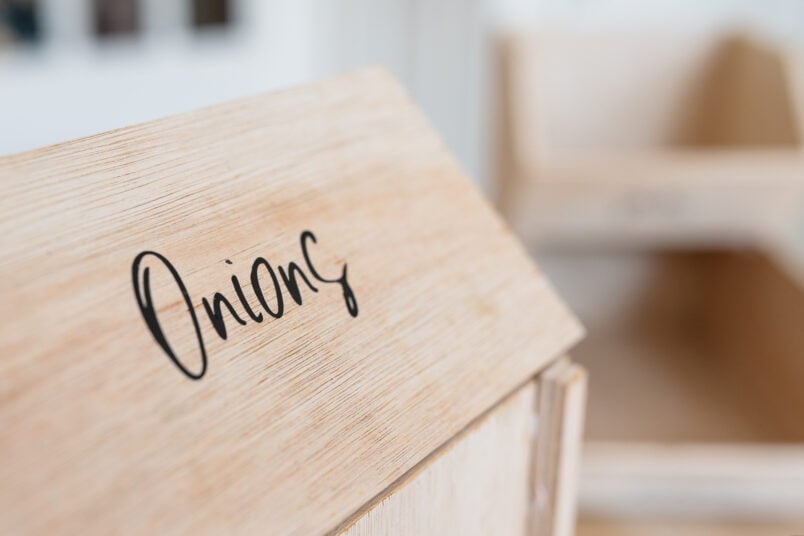
The last step is to label your new storage bins. 

You could use sticky labels, write directly on the wood or get nice labels at places like Etsy. We made our own labels to stick to the pantry storage bins with our new favourite gadget that you can check out here. 

diy storage bins for pantry

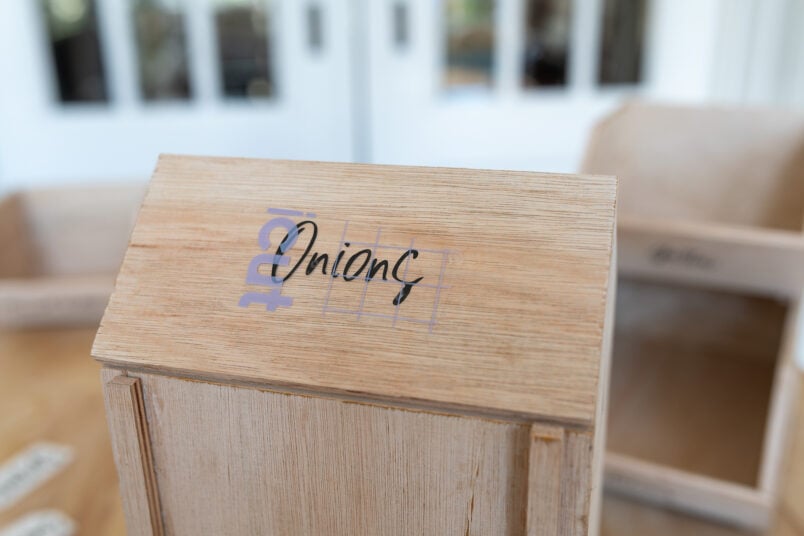
Obviously, you don’t have to label your storage bins but I think it adds a nice finishing touch and will hopefully help everyone know where things belong.

stickling label on diy storage bin for veg

Step 5
Have Fun Organising Your Kitchen Pantry Storage

The last thing to do is put your new DIY storage bins into your pantry or cupboard and start having some fun organising. 

stackable vegetable storage bins

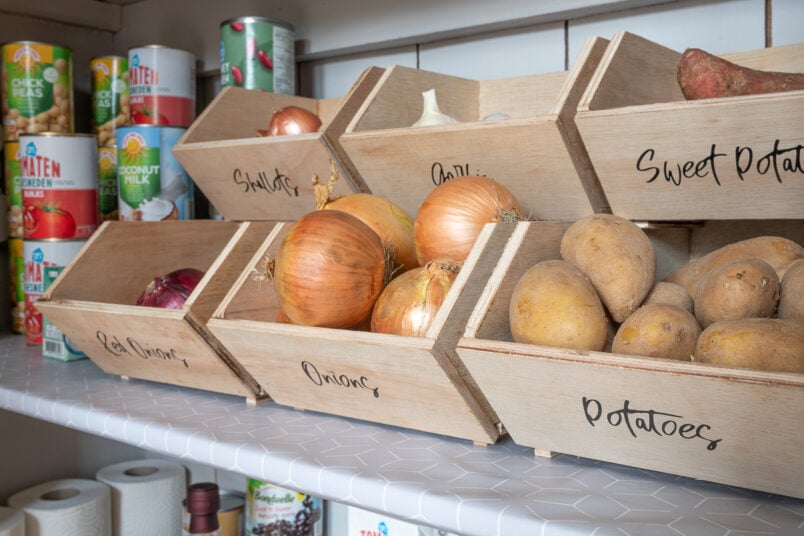
We designed these bins so that they are stackable and can be placed on top of each other to make use of any available cupboard height.

I already love how much tidier and more organised our pantry storage cupboard looks.

Our temporary kitchen setup in the living room isn’t ideal and I can’t wait until we can afford a new kitchen, but in the meantime, our upgraded pantry storage works so much better and will help us keep at least some of our home tidier.

organised pantry before and after

These bins would work well in so many places and you don’t have to limit them to pantry storage. They’d be fab to organise your craft supplies, make-up, toys or your DIY supplies like screws and nails.

If you like this project, you will love these ones, too!

Cozy Outdoor Area with hammock and lanterns
7 Easy Ways To Create More Space In Your Home
Cleaning Checklist - Free Printable
The Ulitmate Cleaning Checklist (Free Printable)
The Easy and Free Way To Organise Screws and Nails
How To Paint A Wardrobe - Easy DIY Guide
How To Paint A Wardrobe | DIY Tutorial
  • Facebook
  • Twitter

Christine Leave a Comment

the PAST
the FUTURE

Subscribe To Our Newsletter

Sign up with your email address for secret projects, DIY advice & lots of fun!

Privacy Policy

Leave a Reply Cancel reply

Your email address will not be published. Required fields are marked *

This site uses Akismet to reduce spam. Learn how your comment data is processed.

Painting Checklist

Our Favourite Tools

*Contains Affiliate Links*

Things To Know

ABOUT US

CONTACT US

DISCLAIMER

Privacy Policy

Shop Our Home!

OUR FAVOURITE TOOLS

SHOP OUR HOME

Disclaimer

As an Amazon Associate I earn from qualifying purchases.

Please read our full disclaimer here!

Let’s Be Friends!

Keep Up To Date!

Subscribe for exclusive content and tutorials!

Thank you!

Copyright © 2023 · Little House On The Corner · This Website is powered by Cloudways and the Genesis Framework