Painting a garden fence is one of the easiest things you can do to freshen up the way your garden looks. No matter what colour you choose, it’s important to choose the best fence paint to ensure that your fence will stay looking good for as long as possible.

Painting a fence is easy, but there are a few things to consider before you get out your paintbrush.
Before You Start
When painting a garden fence, keeping your neighbours happy is important. Talk to them before you paint the fence. You can only paint a fence you own, so get permission to paint it if it’s not yours, even if you only paint the side facing your garden.
Nobody wants blobs of paint seeping through to their side of the fence, so be mindful of your neighbours’ concerns (even if it’s your fence) and offer to paint their side of the fence in case any paint does end up on the wrong side of the fence.
Yes, it’s a lot of hassle to paint more than you had planned, but it’s so worth it for a good relationship with your neighbours.
How do you prepare a wooden fence for painting?
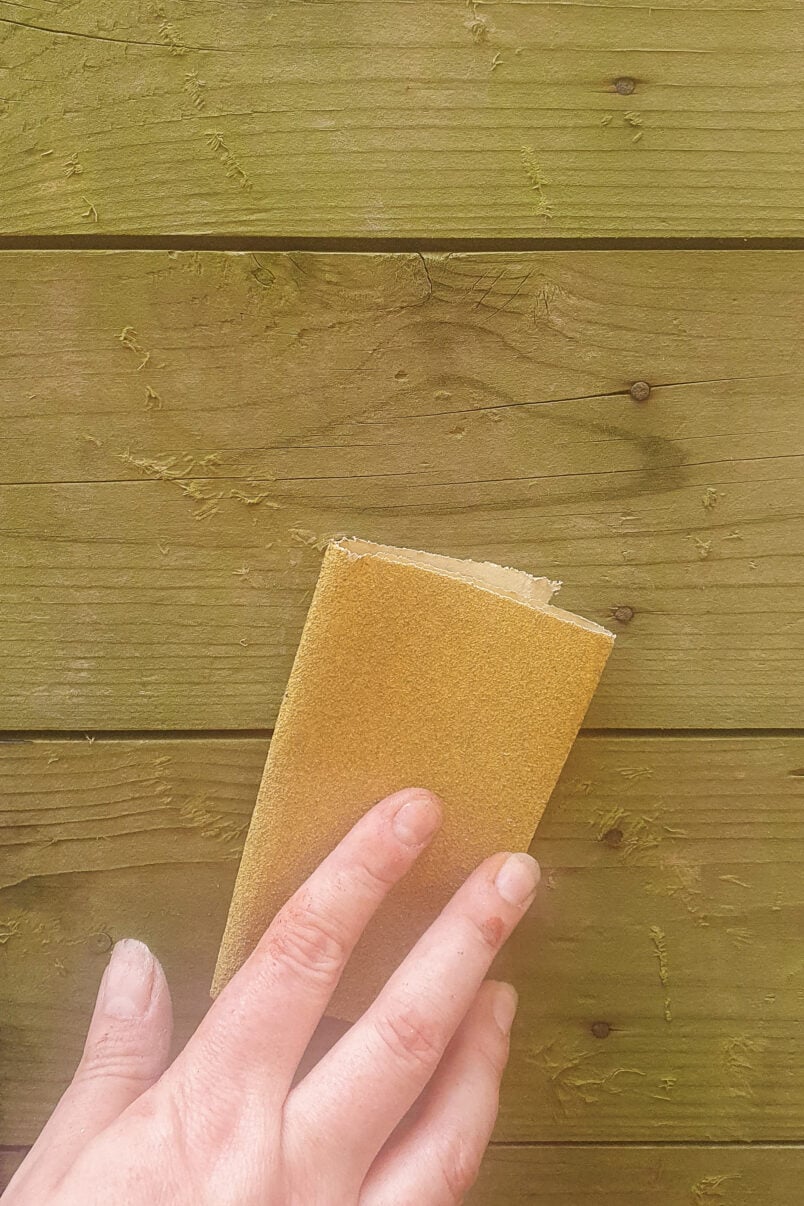
If your fence has been previously painted, remove any loose bits of paint and ensure the surface is clean and dry. If you’re painting a previously unpainted fence, just ensure it’s clean and dry.
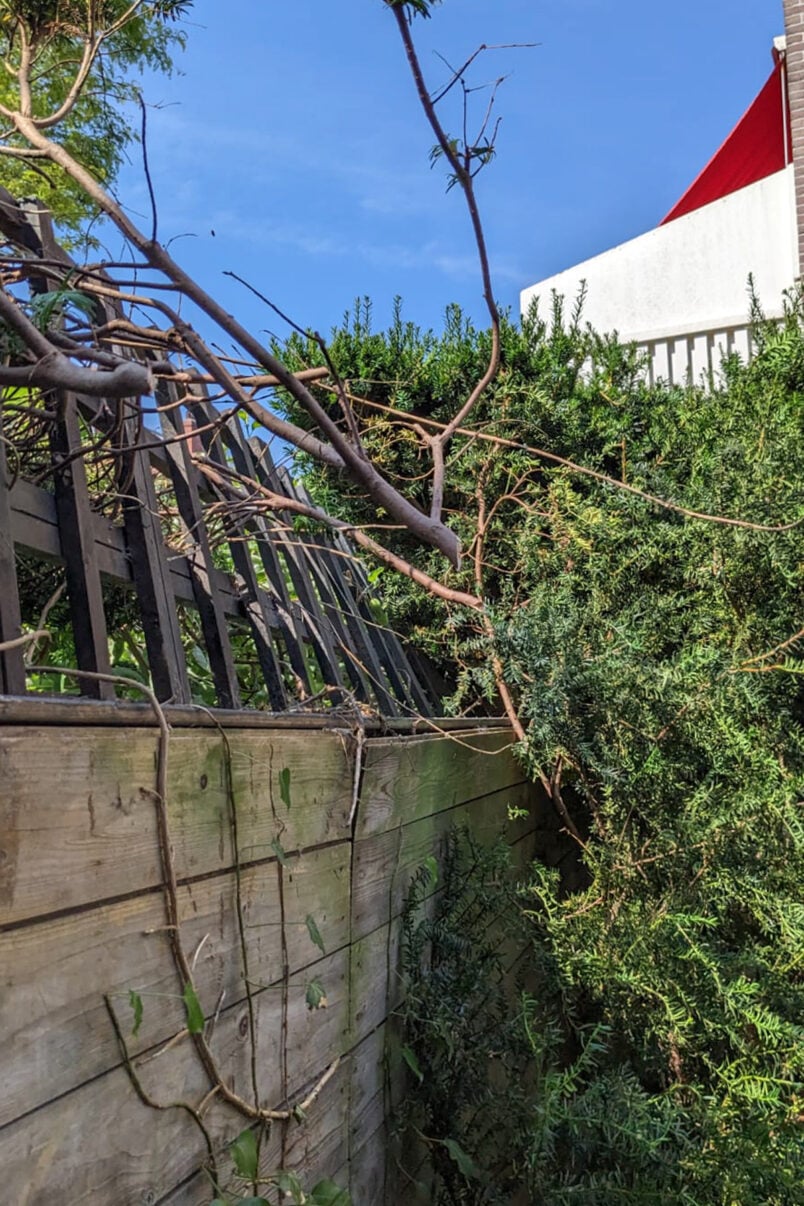
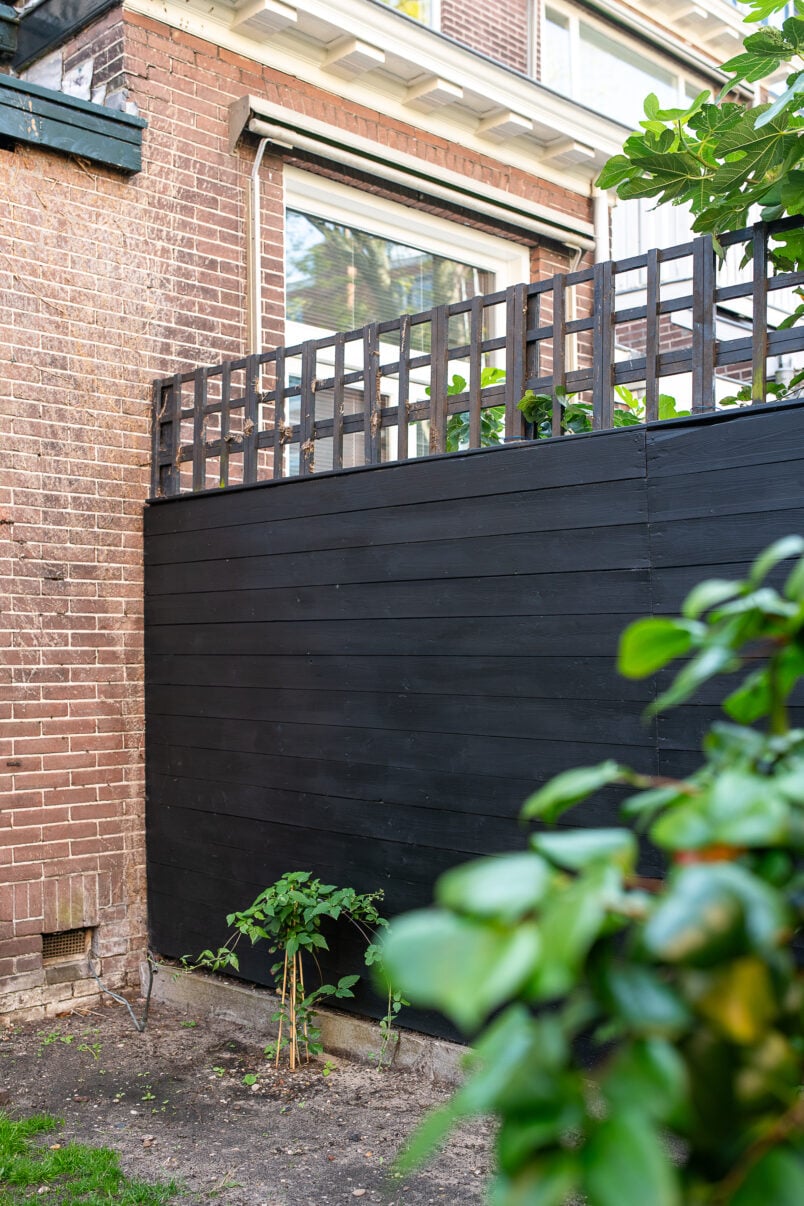
If you have any bits of old plants growing up the fence, you’ll also have to remove them.
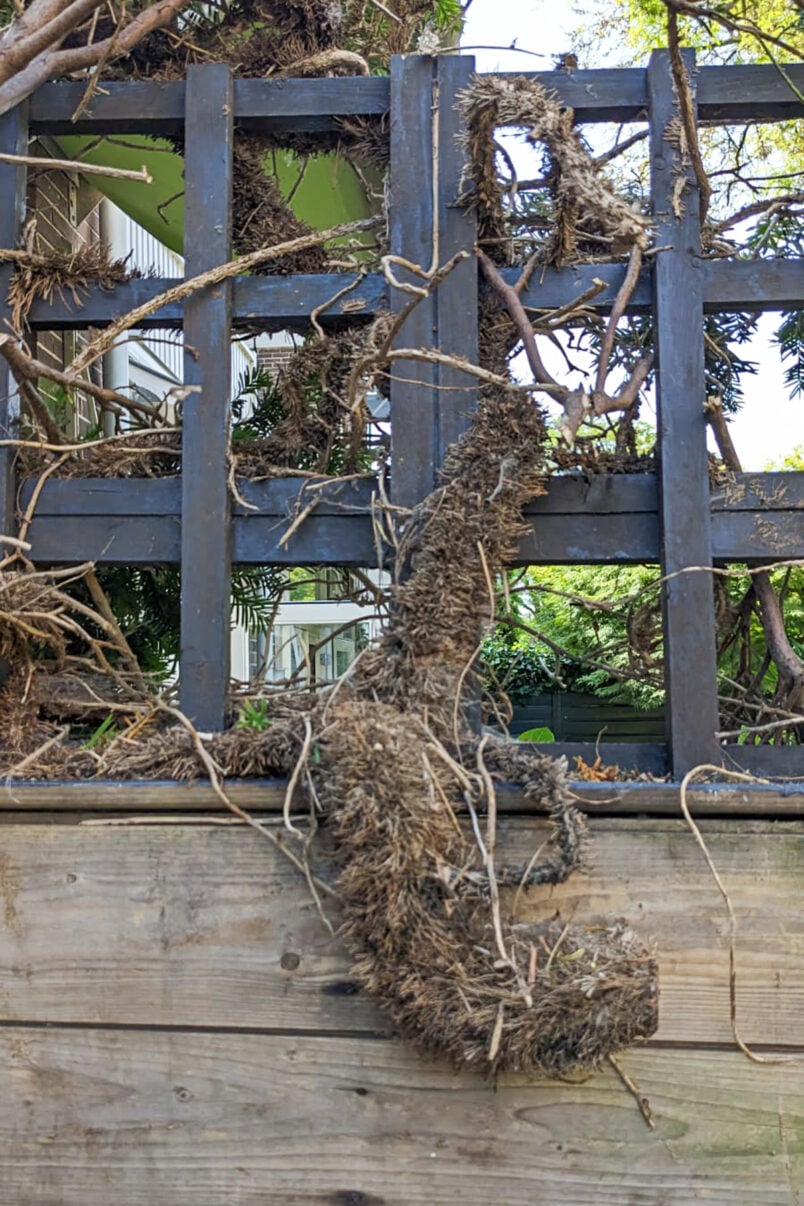
We had ivy stuck to the wooden fence panels that were super stubborn (yes, that huge furry worm is ivy). If you have a similar problem, you’ll have to sand away any bits of old plants and debris to ensure that the new paint will adhere to the wooden fence panels.
We also had to make a couple of repairs to our fence as some of the boards were rotten, and part of it was leaning into our neighbour’s garden!
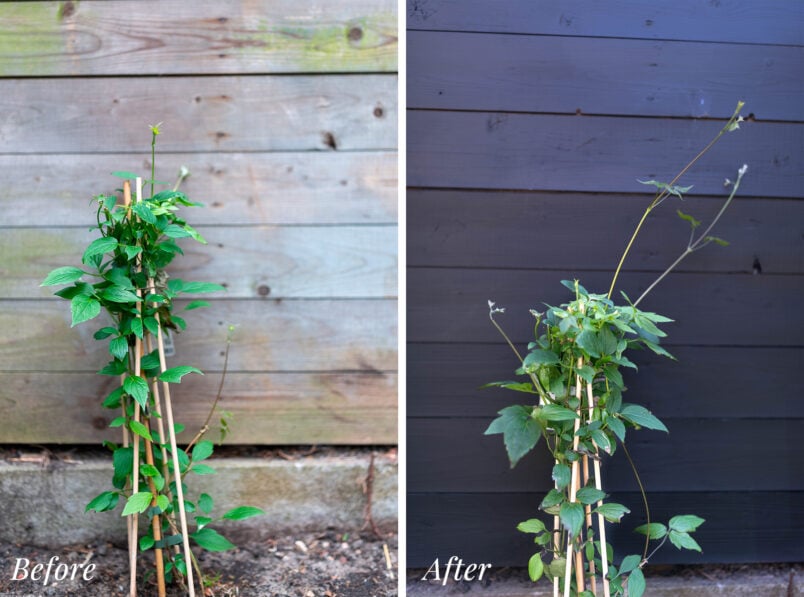
The only other preparation you must make is to protect any plants you may have. Cover them while you’re painting to keep them safe.
What is the best way to paint a fence without the paint seeping through?
There are two main factors when it comes to painting a fence without the paint seeping through to the other side.
Firstly, it’s vital to use the right kind of fence paint (more on that later), and secondly, the method you use to apply the paint is important, too.
How to paint a garden fence
This post contains affiliate links. We only recommend products we love and think that you will, too! Read our full disclaimer here.
All you need is a paintbrush and some fence paint. If your fence is dirty or covered in flaky paint, you’ll also need some sandpaper and a brush to clean everything before you paint it.
Step 1
Get Out Your Paintbrush & Paint Your Fence
You could use a roller but fence panels tend to be very uneven, and using a brush will help you push the paint into all of the grooves between the planks. Just make sure to use a large paintbrush to save time.
By using a brush to paint your fence, you also have more control over the amount of paint you use which will help avoid paint seeping through to the other side of the fence.
Don’t use too much paint, as it will drip and seep through the gaps and holes in the fence. Only use as much paint as necessary, and don’t overload your brush. Be extremely careful around knots and larger grooves so that no paint ends up on the wrong side of the fence.

Step 2
Paint The Fence Again
Once the first coat of paint has dried, apply a second coat of paint to ensure a durable finish and optimal protection for your fence.
As you can see, painting a fence is really straightforward but there are a few other things to take into consideration for the best possible result.
Painting tips for the best result
- Don’t paint in direct sunlight. You don’t want the paint to dry too quickly, as it can cause cracks in the finish.
- Don’t paint in high humidity. Moisture in the air will slow down the drying process and promotes the growth of mould.
- Always ensure the surface you’re painting is dry and clean.
- Multiple thin layers are always better than one thick layer of paint.
- Don’t paint when it’s windy. Soil and leaves will blow against your fresh paint and will ruin the finish.
What is the best fence paint?
For any outdoor project, you always have to take extra care when choosing the paint to ensure a finish that lasts.
This is especially true when it comes to your fence as it’s likely to be a large area that takes a lot of time to paint, so you will want to avoid having to paint everything again a year or two later because the paint quality let you down.
The best fence paint to avoid paint seeping through
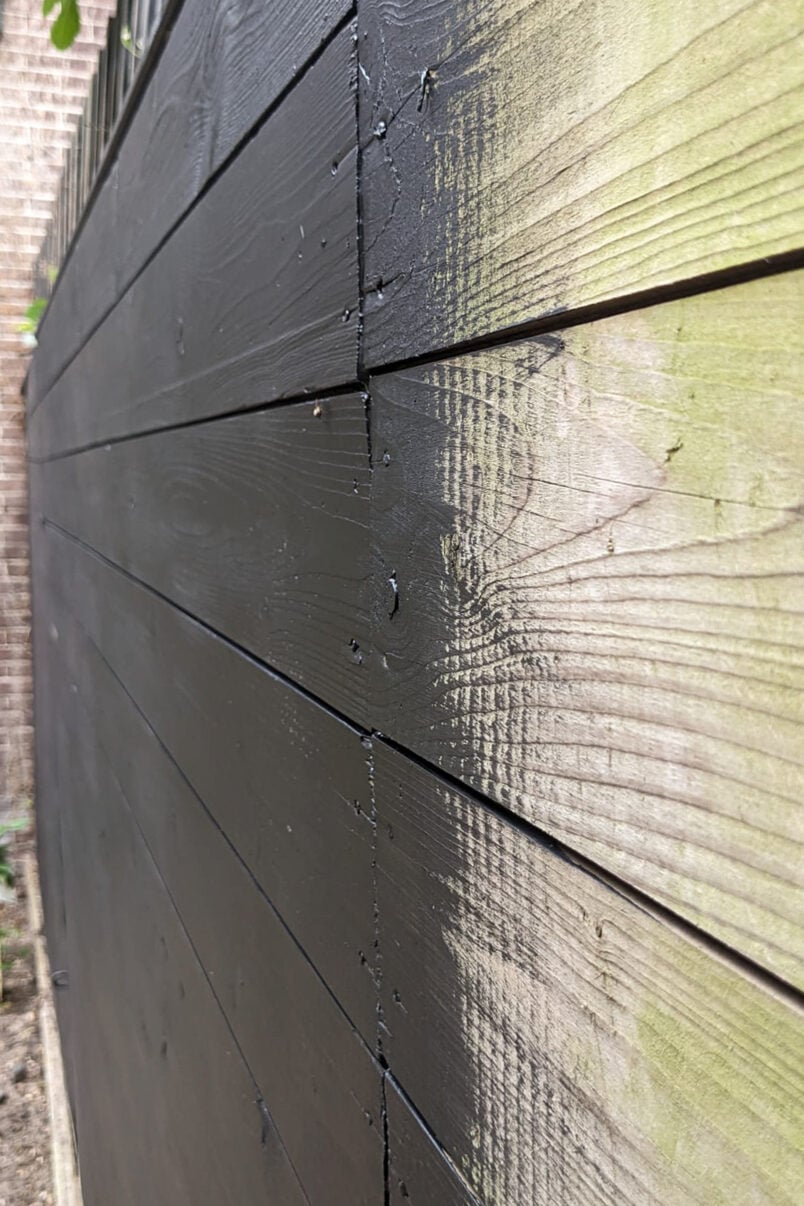
The paint we used is one of our favourite paints ever. It covers really well in just one coat (although you should apply two), and it’s extremely thick, which is the secret to painting your fence without the paint seeping through.
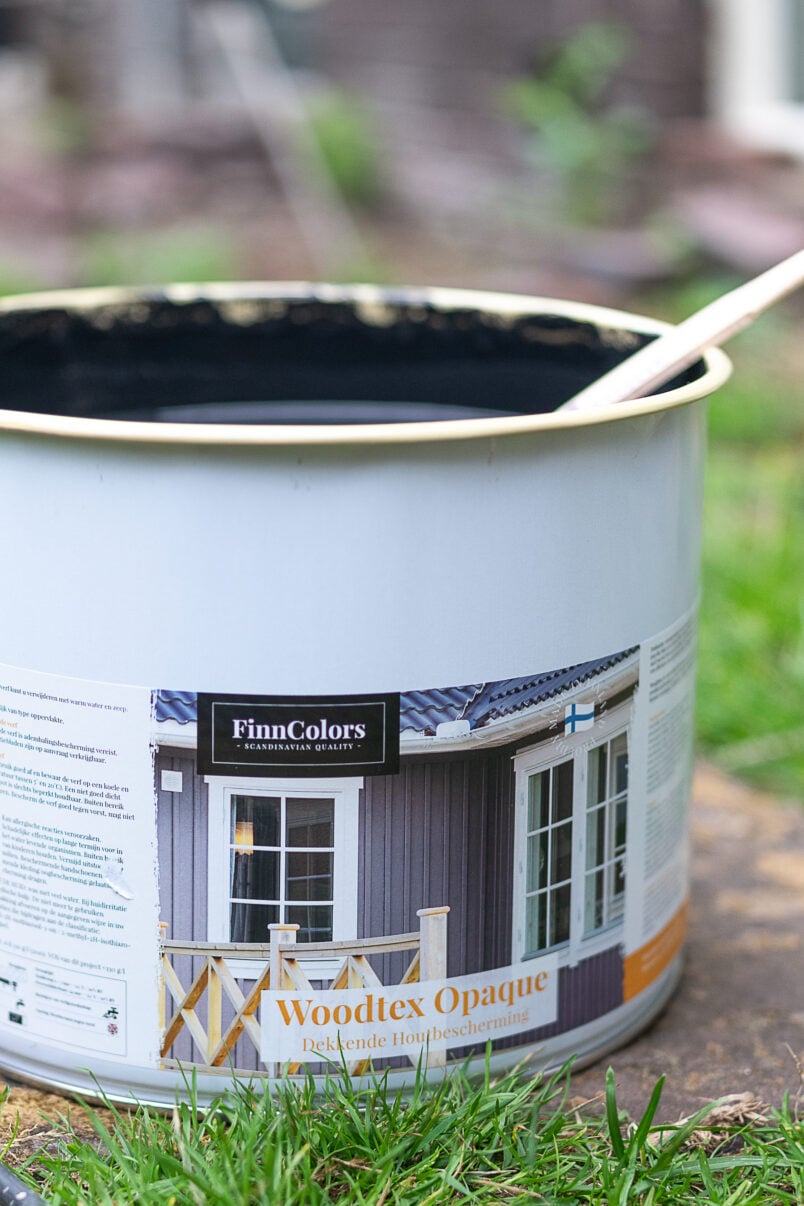
It penetrates deep into the wood and is breathable, so gives the wood perfect protection without cracking or peeling. It has a beautiful silky matt finish and provides protection against mould.
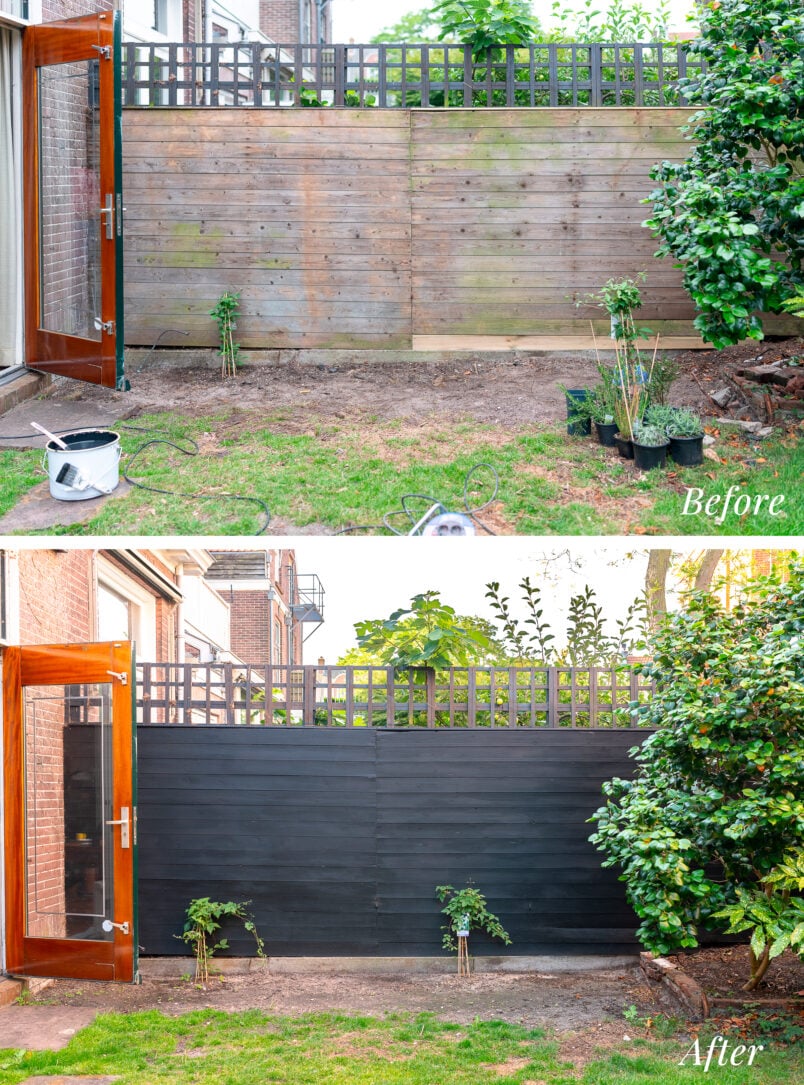
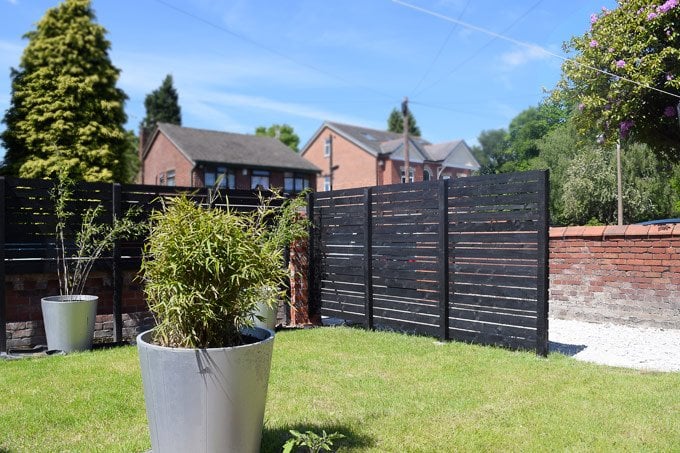
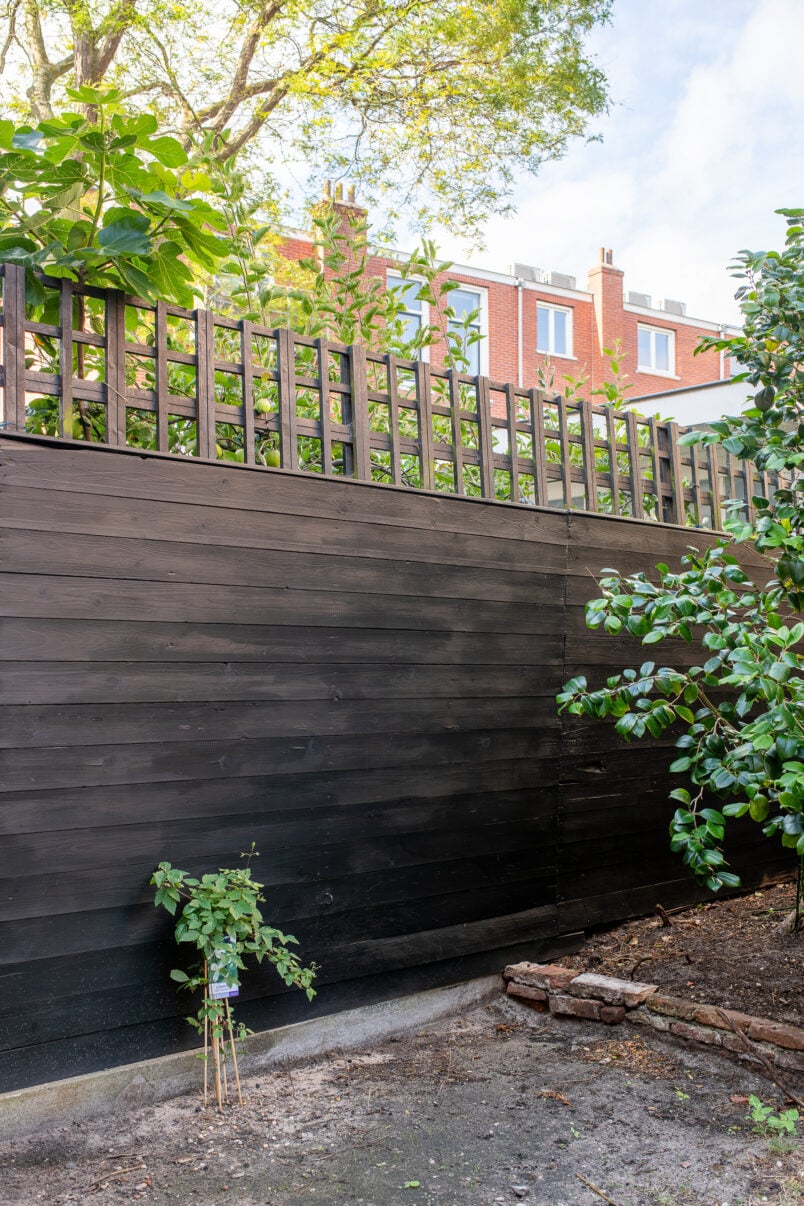
We also love that you can have the paint mixed to almost any colour in one of the common colour systems like RAL or NCS, which allows you to get the perfect colour for your outdoor woodwork like fences, playhouses, garden sheds, barns, etc. Our fence is painted in pure black (RAL 9005)
The only drawback to using this fence paint is the price.
A 2.7l can of paint costs just under 100€. We have a fence on two sides of our garden and will also be painting our carport with the same paint, so we bought the big 9l can, which cost a whopping 276€. Yikes.
Budget-friendly fence paint (alternative)
If you want a more affordable option, we recommend using Cuprinol Garden Shades. It’s the paint we used to paint our fence in our last garden, and it turned out really well, too.
We absolutely loved the slatted fence we built ourselves (it was so easy to do). You can read the full tutorial on how to build a slatted garden fence that’s super budget-friendly here.
It’s great paint, but it is very thin which means that it drips and, more importantly, there’s a very big chance of it seeping through to the other side of the fence as it can easily run through any gaps and knots.
We also had to touch up a few areas after a couple of years as it was already looking quite worn, especially in areas where plants were rubbing against the fence.
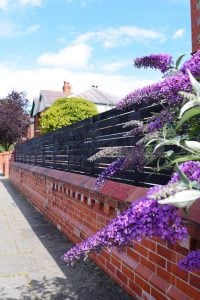
Having said that, it is great paint, and we recommend it as long as you don’t have to worry about your neighbours. We’re big fans of black fence paint and used Black Ash for our fence, but there are lots of other colours available, too.
Why you shouldn’t use a paint sprayer to paint your fence
It feels like every fence painting tutorial tells you to paint your fence with a paint sprayer. There are lots of reasons why you shouldn’t, though.
Yes, it’s tempting to get quick results, but using a paint sprayer has many drawbacks.
You have less control.
It’s inevitable that you’ll overspray with a paint sprayer. You must be meticulous about the areas you cover to avoid paint ending up where you don’t want it.
You also can’t control the amount of paint you use, which means that it’s more likely that paint will dribble through to your neighbour’s side of the fence.
There’s more waste.
In current times, it’s not uncommon to pay upwards of £100 for a medium-sized can of outdoor paint. Do you really want to spray it and end up covering areas that don’t need painting?
If you have a fence with gaps between the panels, we highly recommend using a brush to paint it. Not only will you save paint, but you’ll also not end up with lots of paint splatters everywhere (or spend hours covering all surfaces before painting).
It can be messy.
Don’t get me wrong, we love using a paint sprayer, but when it comes to outdoor projects, it’s not the best tool. Even the slightest bit of wind means that the paint will end up everywhere.
Ideally, it’ll just end up all over your plants and garden, but, more realistically, it will end up all over your neighbours’ property, too. Don’t underestimate how far the paint splatters fly. It can end up on your neighbour’s patio, furniture and even on cars parked on the road.
If you live in the middle of nowhere with no neighbours and don’t care where the paint ends up, use a sprayer. Otherwise, it’s just not worth the risk. Use a paintbrush to paint your fence instead.
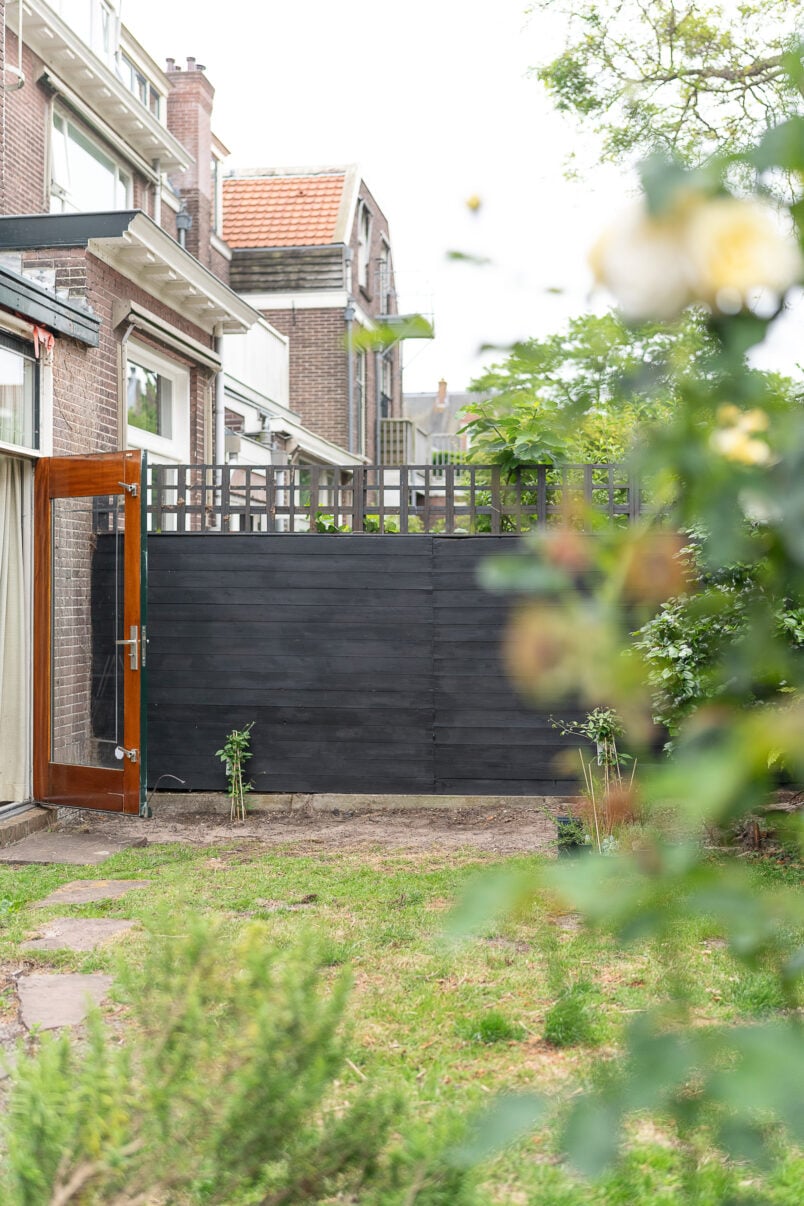
Why you should paint your fence black
Don’t be nervous about painting your fence black. Black fence paint is the best neutral colour for almost any garden or yard.
It’s a super modern but classic look that surprisingly blends into the background, making your space look larger and, more importantly, making your plants look amazing and vibrant.
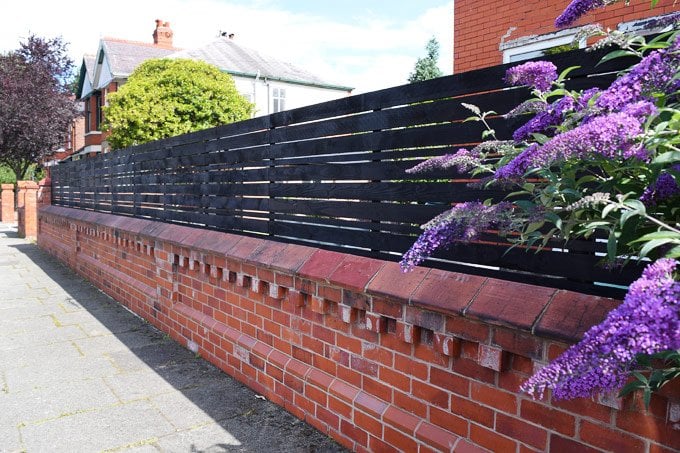
All of the colours pop against the dark background, which becomes almost invisible and makes the plants the focal point.
Way back in 2016, everyone thought we were mad when we said we were going to paint the garden fence in our first home black. We love how it turned out, and it’s one of the best design choices we ever made.
That’s why we had no hesitations about painting the fence black in our new home, as we know it’s the best colour for a garden fence.
How To Paint A Garden Fence FAQ
Most outdoor fence paints don’t require a primer before painting. They are formulated to withstand the elements and provide protection against mould. Both of the fence paints we recommend – the budget-friendly Curprinol paints and the more expensive Woodtex paint- don’t require a primer.
As always, painting anything will depend on the look you want to achieve. You probably won’t want to paint if you have a super high-quality cedar fence that weathers to a beautiful soft grey over time.
Most fences aren’t that luxurious, though, so painting them is a great option to make them look fresh and modern as well as protect them from the elements.
We’re big fans of using a paintbrush for almost all painting we do, especially when painting a fence.
You can also use a roller in addition to a paintbrush if you have a large area to cover. Just make sure that the roller has a long pile to reach all of the grooves in the fence panels.
Painting a rusty metal fence is surprisingly easy. You can find a detailed tutorial on how to paint a metal fence including all of the tools and the best paint to paint a metal fence here.
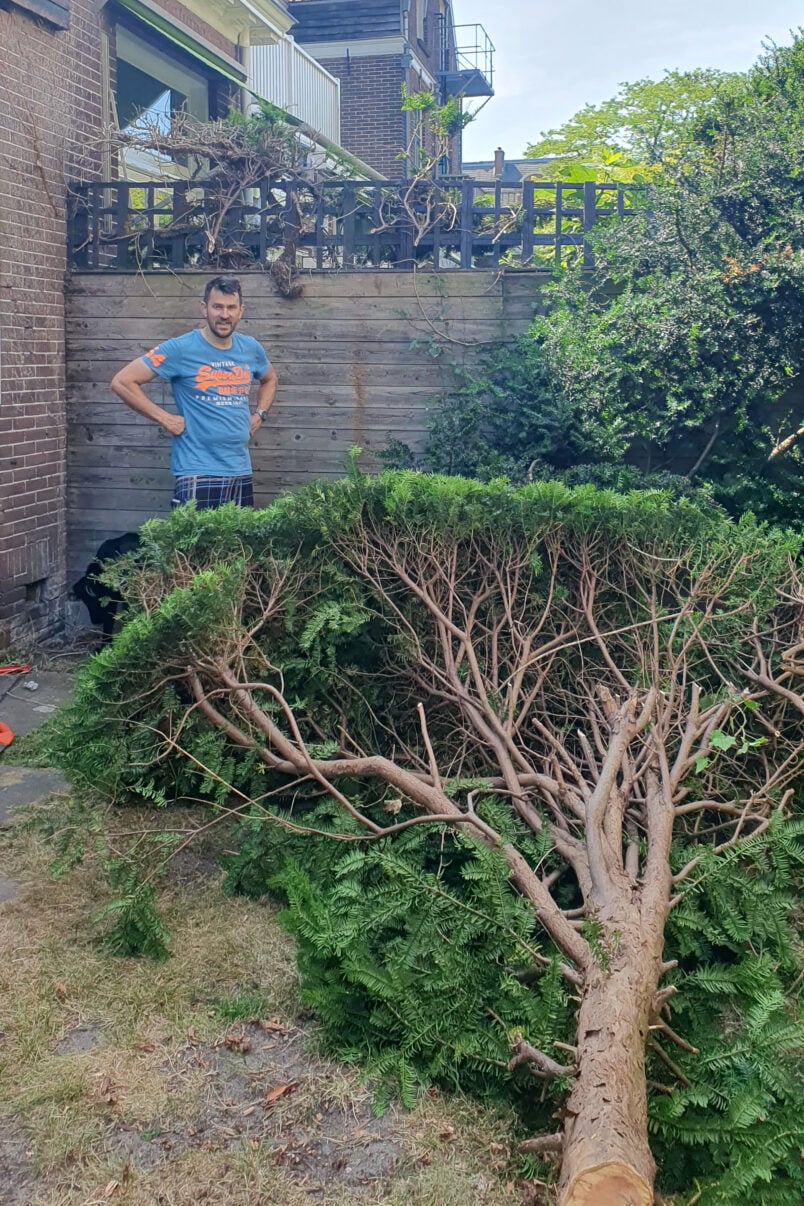
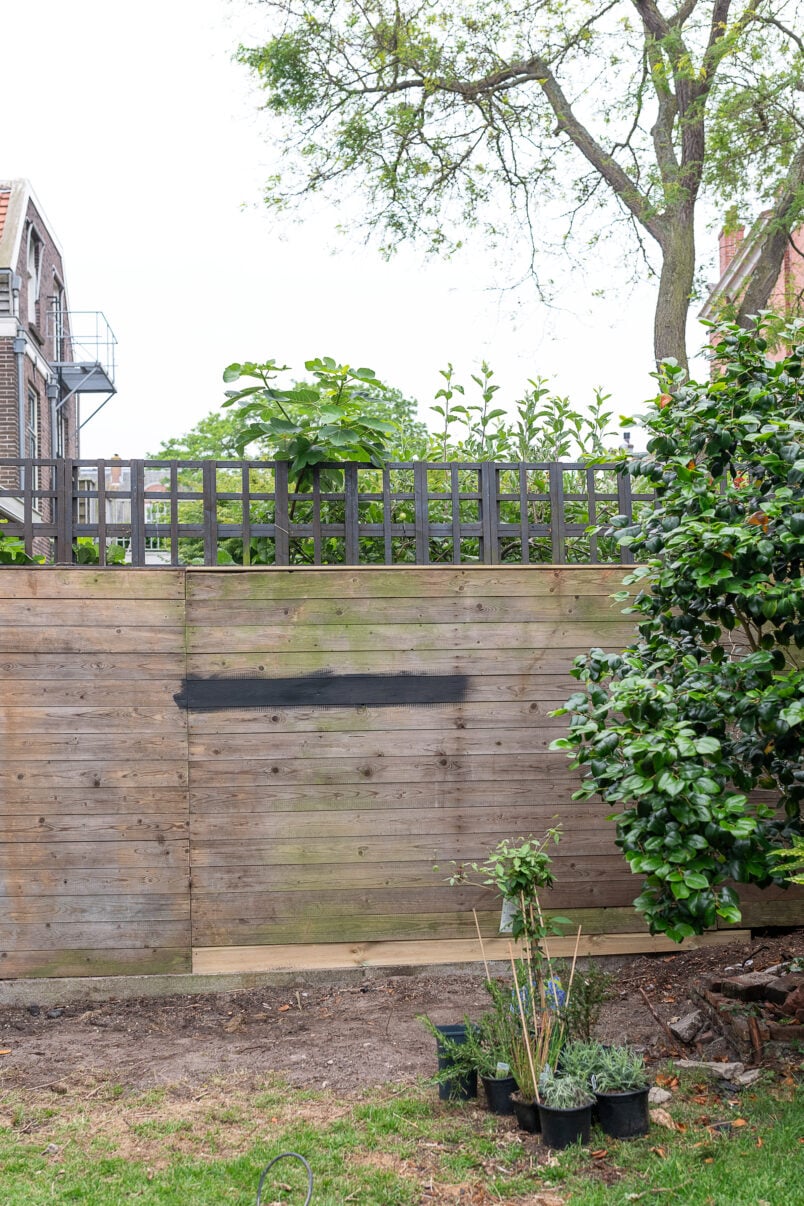
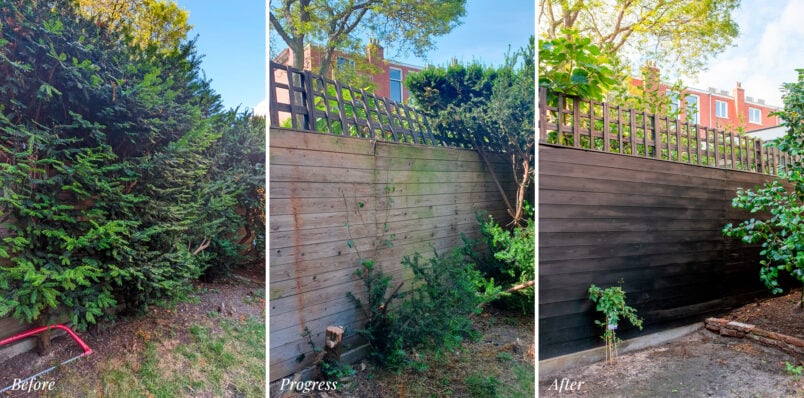
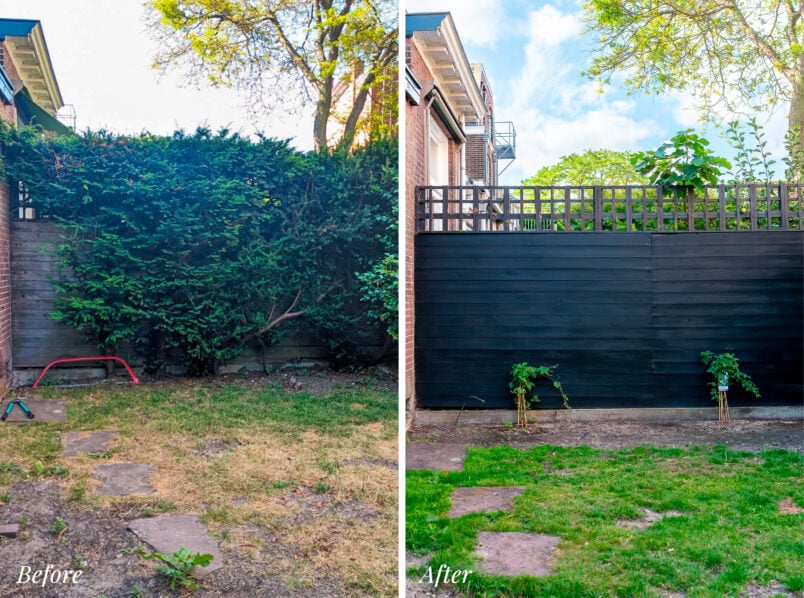
Painting the fence was probably the quickest part of this whole makeover.
Cutting down the overgrown bushes took a few hours, but digging the enormous roots out of the ground seemed to take forever. It easily took a couple of days (of on and off work) to completely remove them.
This was still a fairly quick transformation, though, and I’m so happy we decided to paint the fence black. It looks so sleek and already makes the whole garden look so much better.
There’s still a lot of work to do in the garden, but it’s already a huge improvement. I can’t wait to see what our new plants look like when they start flowering in spring.


Leave a Reply