Building your own furniture is easier than you probably expect. Our new DIY console table is a perfect beginner-friendly project to help you learn some basic woodworking skills and create a fantastic piece of bespoke furniture at the same time.
We built this wooden console table out of reclaimed wood that we salvaged from taking down the wooden slat wall that used to separate this room from the one next door. You could just as easily build it out of new timber, though.
The best thing about this DIY wood console table, apart from the fact that it was almost free to build, is that it’s an ideal project to try if you don’t have much DIY experience.
It’s meant to look rustic, so it doesn’t matter if you have perfect joints or if something isn’t 100% flat. It’s meant to be like that and will still look fantastic.
And, as always, we’re sharing exactly how you can build a console table like this one yourself.
To make building a console table like this one as easy as possible, we’ve also created some free step-by-step plans for you to download. Just enter your email address in the box below and get them sent straight to your inbox.
We always find it helpful to see how much projects cost to build, which is why we’re sharing a full breakdown at the end of this post, too.
Here’s what you will need to build a DIY console table:
This post contains affiliate links. We only recommend products we love and think that you will, too! Read our full disclaimer here.
Materials
- 19mm thick timber slats
- Wood glue
- Sandpaper (in various grits)
- Screws
- Danish oil or wax
- Stain (optional)
- Console table plans
Tools
- Mitre saw
- Table saw
- Kreg Jig
- Cordless drill & selection of drill bits, including a countersink bit
- Sander (we switched to this sander a while ago and love it, it’s the best we’ve ever used)
- Interface pad (optional, but it’s great for uneven surfaces)
- Clamps
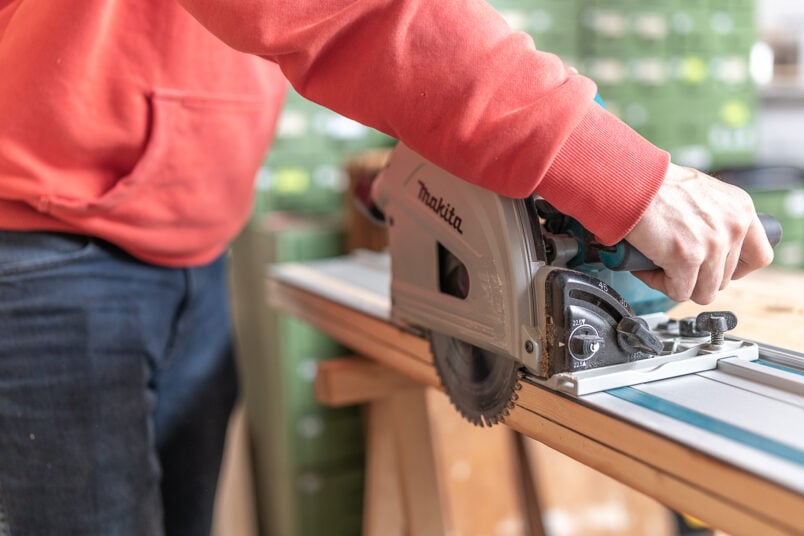
- Circular saw, or plunge saw (optional – cut everything on your table saw or skip the table saw and cut everything with a plunge saw)
- Router (optional but recommended – sand the edges smooth instead)
- Impact driver (we love it, but you can use a cordless drill instead)
Please remember that we’ve been DIYing and building furniture for a long time, and our tool collection has grown significantly over the last few years.
We’ve listed the exact tools that we used to build this DIY wood console table, but don’t feel like you have to rush out and buy all of them to achieve a similar result.
Having said that, these are all tools we love, use and highly recommend.
How to build a DIY wood console table:
Step 1
Measure & Cut The Timber
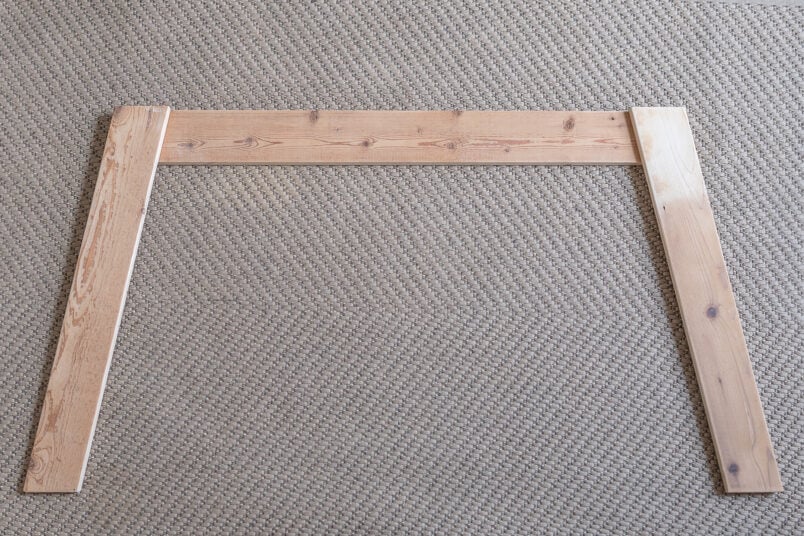
To build the console table legs:
You’ll need 4 x legs that are 100mm wide and 763mm long cut at a 13° angle and 2 x horizontal support pieces that are 100mm wide and 1108mm long also cut at a 13° angle.
To build the console top:
We wanted the top of the console table to be quite chunky, and as we’re using just 19mm thick reclaimed wood for this project, decided to stick two layers of timber together to give us a thicker console top.
If you’re building this table out of new wood, we’d recommend opting for some thicker timber – about 38mm is ideal – to build the top. That way, you’ll have to make fewer cuts and can skip the second step of having to glue everything together.
We’ve included both options in this tutorial, so choose the one that works best for you.
Option 1: If you are using thicker timber to build the console top, follow these steps:
You’ll need 3 pieces that are 14cm wide and 140cm long to make the top. These three pieces will be joined with some pocket holes in the next step.
Option 2: If you’re using thinner timber that you want to double up for a thicker top, follow these steps:
If you are using thinner timber, you’ll need 3 pieces that are 14cm x 140cm. In addition, you’ll also need another 2 pieces of the same size (14cm x 140cm) and 2 more pieces that are 7cm x 140cm.
DIY TIP
If you are using thinner timber to build the console top, we recommend adding a couple of centimetres to the overall size of the top. When glueing the timber together, it can be difficult to get it to align perfectly. By making it slightly larger, you can then trim it to the correct size when the glue has dried giving you perfect edges.
Step 2
Drill The Pocket Holes & Assemble The Top
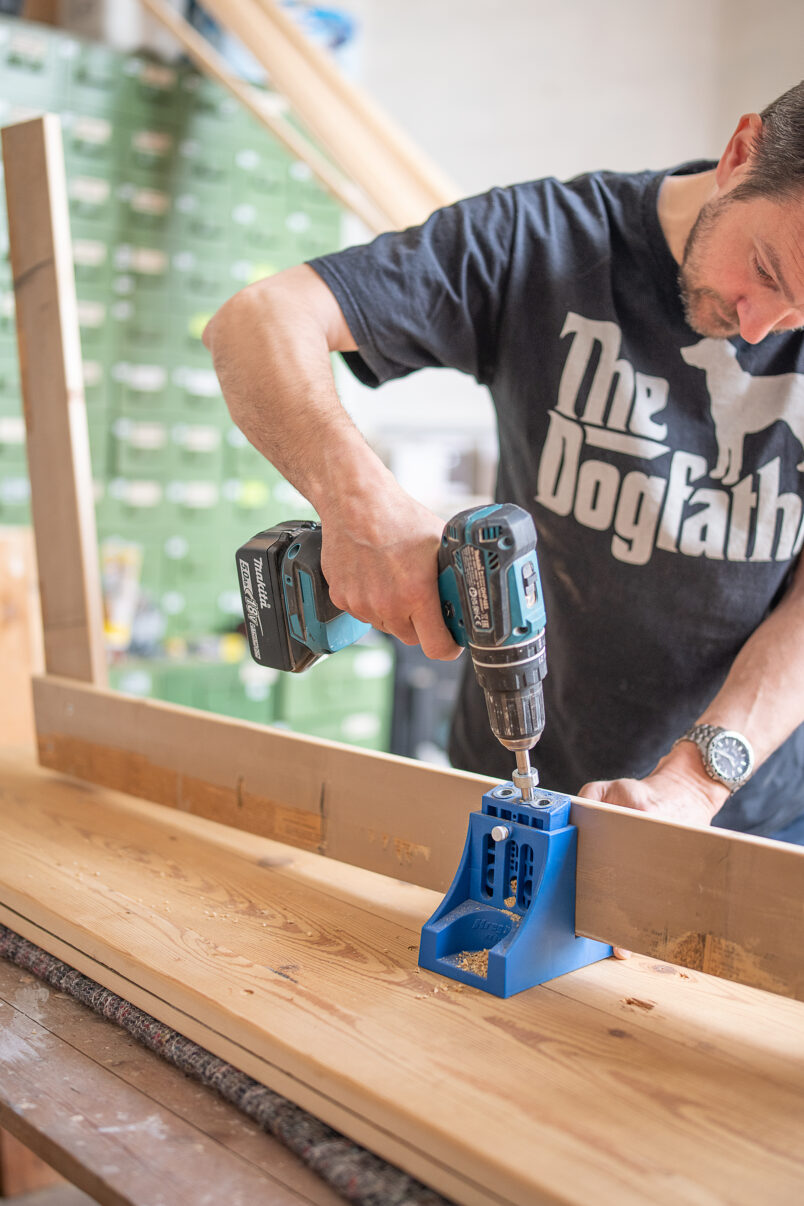
To join the individual pieces of the DIY console table top together, we used pocket holes.
The Kreg jig pocket hole gadget is so easy to use and helps you achieve strong connections by using just a couple of screws and some wood glue. It’s also really easy to hide the connections, which is why we love it so much.
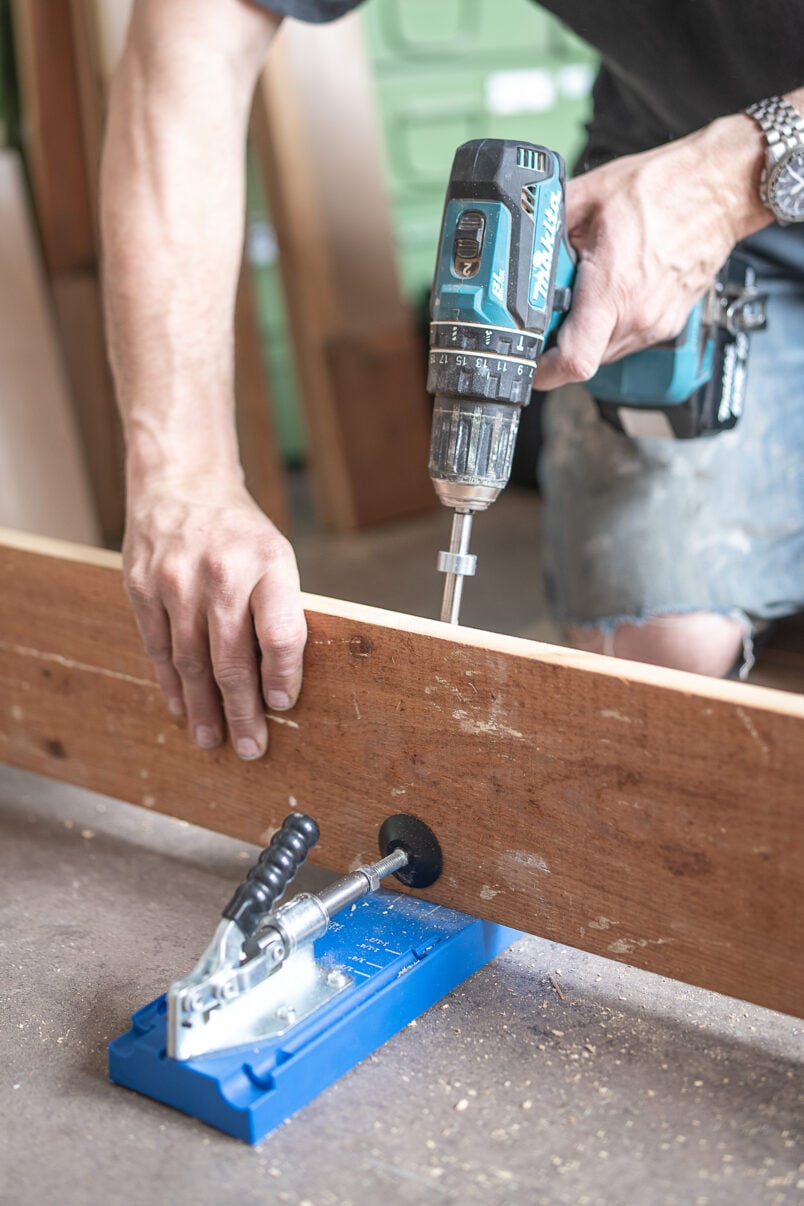
Just pop the pieces of timber into the jig and drill a hole.
When you’ve prepared the holes, line up the pieces of timber, apply some wood glue along the edge and then clamp the two pieces together before adding some screws in the pocket holes to join the pieces together firmly.
If you are doubling up the top for a chunkier look (as we did), then you’ll have to repeat the process with the other 4 pieces of timber. When the two individual console top pieces have dried, apply some wood glue and clamp them firmly together while the glue dries.
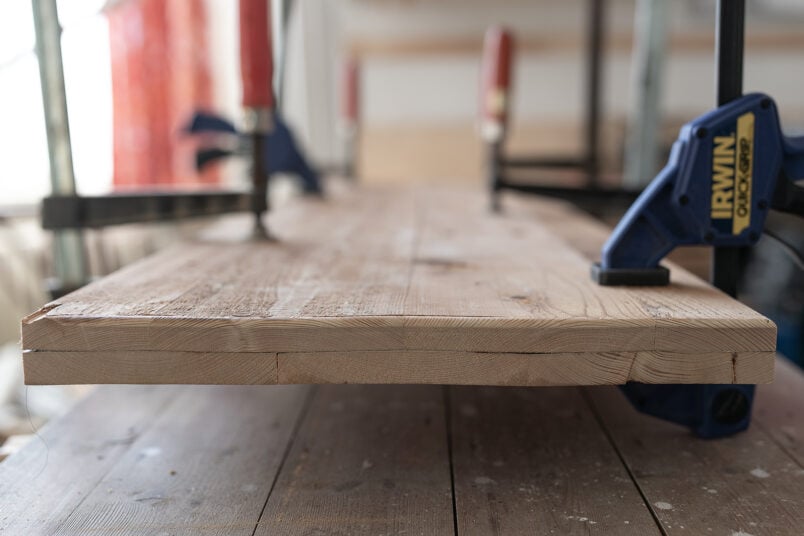
We also recommend adding some screws on the underside to ensure that the pieces are very firmly connected to each other.
Plung SawIt’s really difficult to align the two pieces that make up the top of the DIY console table perfectly, so we recommend making it slightly larger and then cutting it down to the correct size with a plunge saw.
This will give you a perfectly straight and smooth edge without much effort.
Step 3
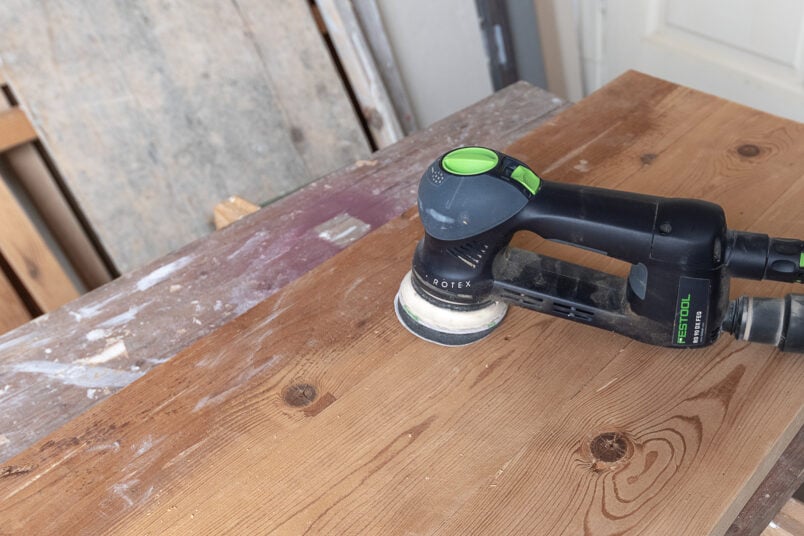
Sand Everything
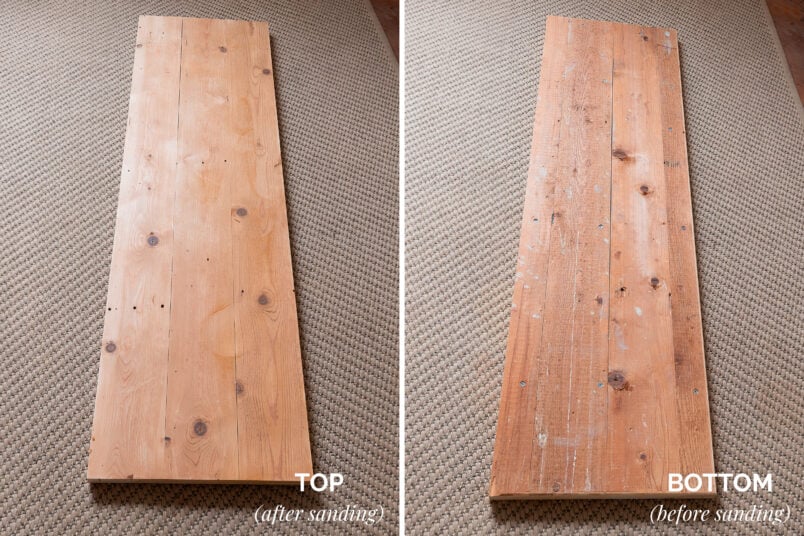
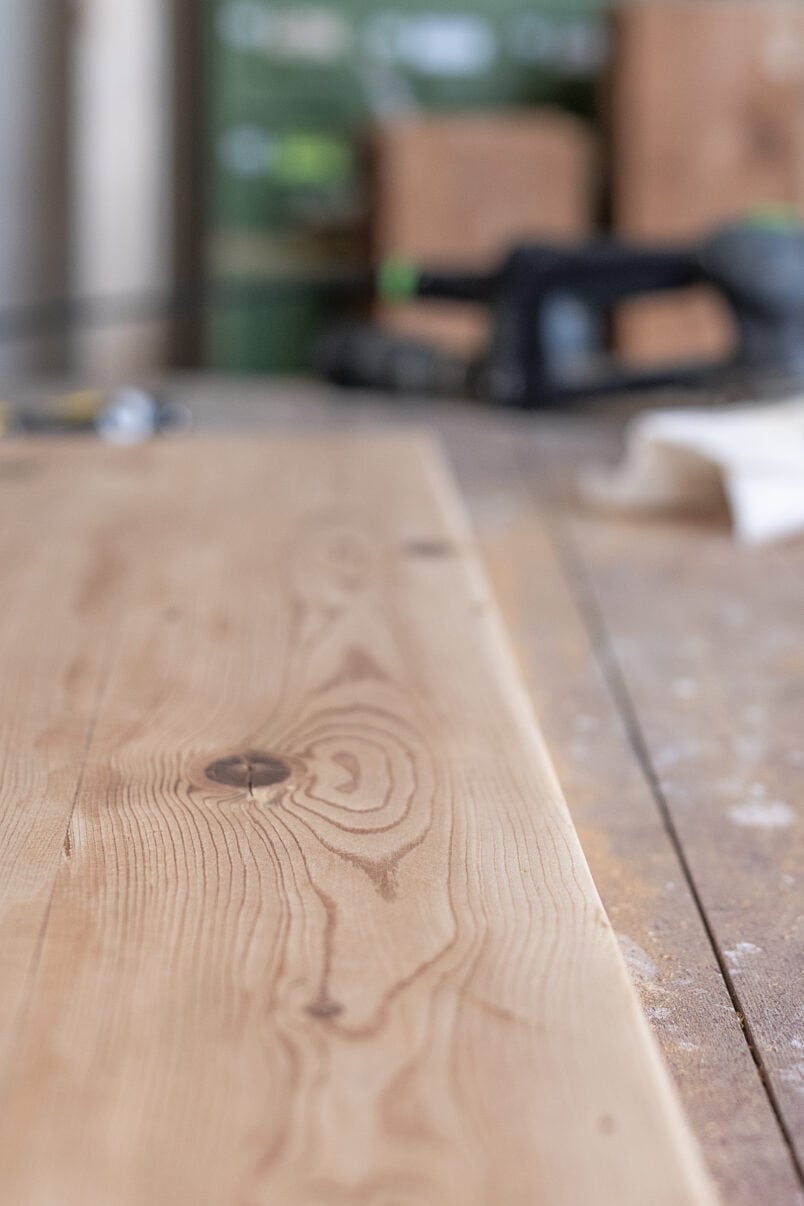
We wanted to keep the texture and style of the reclaimed wood we used, but that still meant that it needed a very, very good sand. Whether you’re using reclaimed wood or brand-new timber, you will have to sand everything so that it’s completely smooth before assembling the DIY console table.
The wood we used looked so rough when we first started to think about building our wooden console table, and we weren’t sure it would be salvageable, but after a bit of sanding, it looks amazing.
It just shows you how much it’s worth considering repurposing items you find and how much can still be made out of old materials.
When sanding, always start with the coarsest grit and then move on to finer grits. You can read our full guide to sanding wood here, but as a general guide, we recommend starting with 40 grit sandpaper, then about 80 grit, 120 grit and 240 grit to finish off.
Just sand the wood, starting with a coarse grit and moving on to finer grits until it’s completely smooth.
We didn’t want the surface to look too perfect, so didn’t want to sand too much of the character of the old wood away, but we did want to make sure that the surface of the DIY console table was completely smooth so that it would not only feel great but also stop us getting any splitters from the rough wood.
When finishing furniture before painting, oiling or varnishing, we always finish with a light sand of at least 240 grit sandpaper for a super smooth finish.
DIY TIP
Read our full guide on how to sand wood here. It shares everything you need to know about sanding before painting and includes a helpful cheat sheet so you know exactly which sandpaper to use for which project.
Step 4
Round The Edges
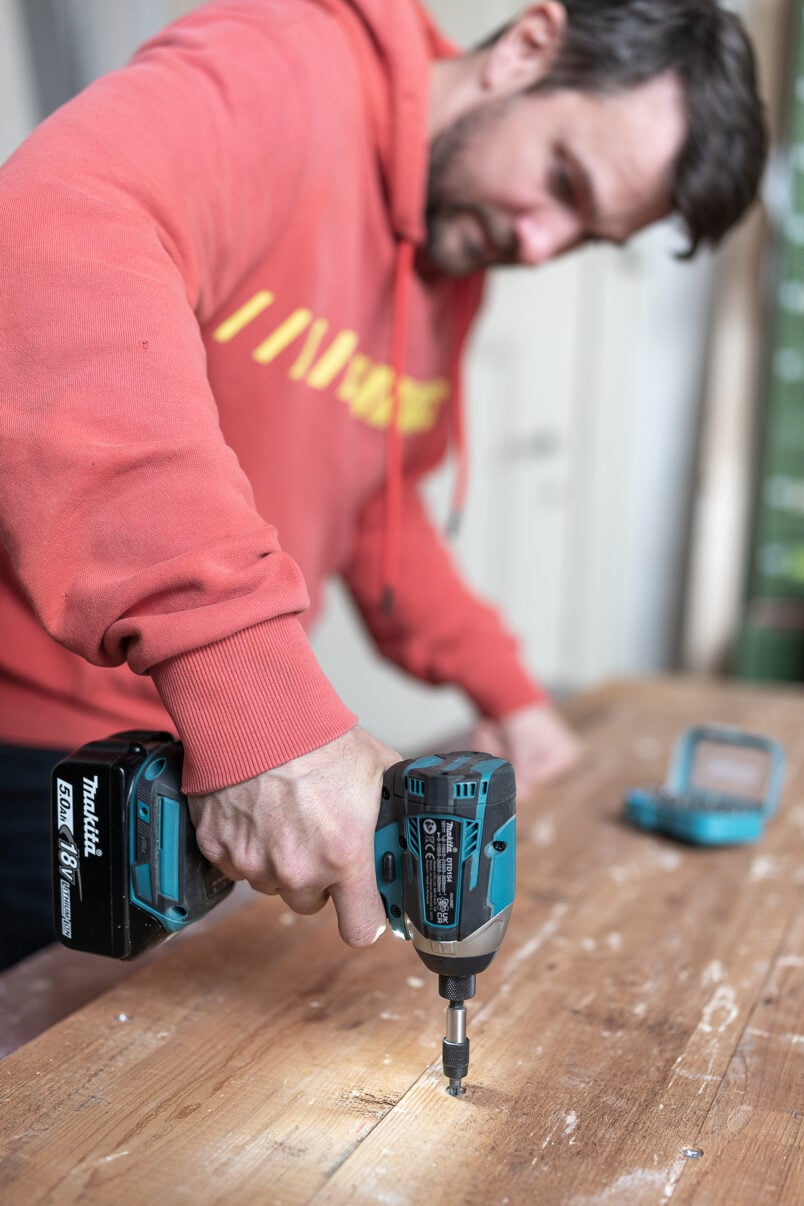
This step is completely optional, and you can sand any hard edges to soften them slightly, but adding a nice smooth curve with the help of a router will give the simple console table a much more professional look.
Using a router is really easy. Just pop the bit you want to use into the machine and slowly run it along the edges, where it will shave off the wood. We opted for a plain 3mm curve on all of the edges and a 6mm curve on the console top, which I think works really well.
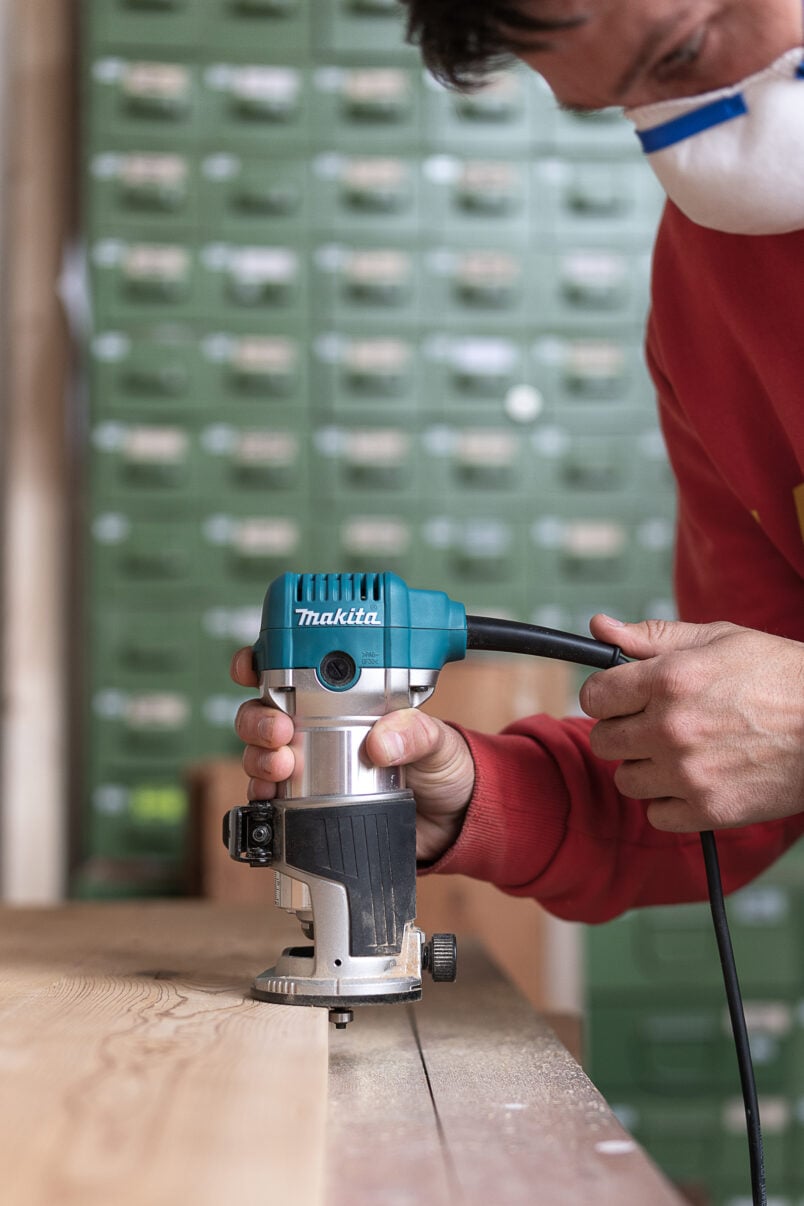
When you’ve finished adding the curve, give the edges another light sand to ensure they’re completely smooth.
Step 5
Assemble The Table
As there are only five pieces, the quickest part of this project is assembling the console table.
Each of the console table legs consists of 3 pieces. Two legs and one long horizontal piece that holds them together.
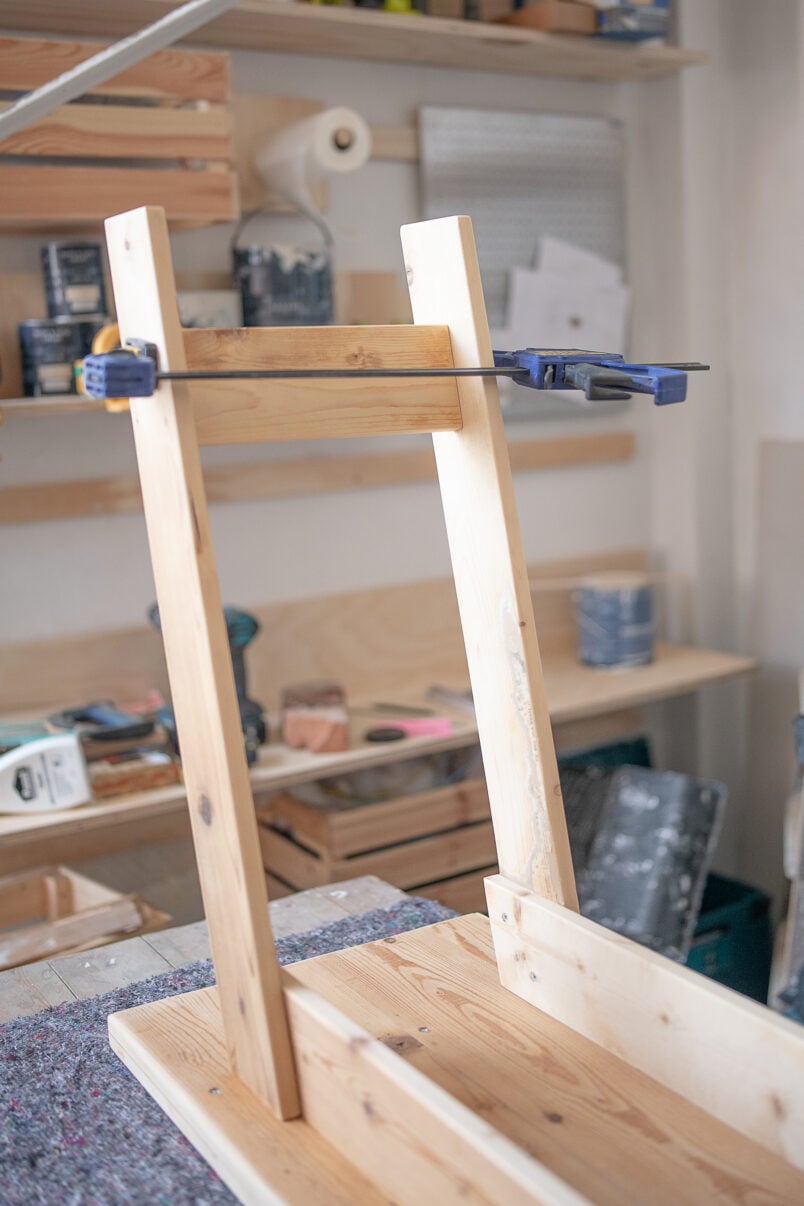
Lay them on your workbench (or floor) and align the pieces so that the angles of the legs and the horizontal support match. Then, apply some wood glue and clamp the pieces together.
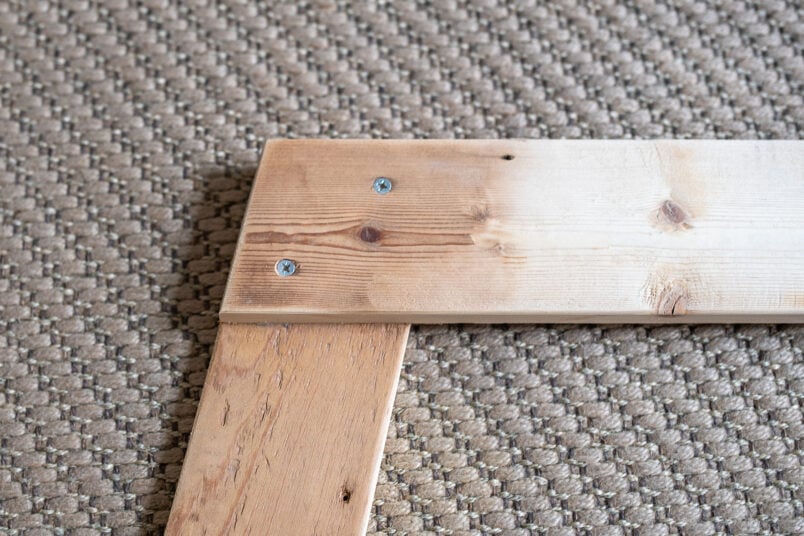
Next, add two screws to the top of each overlapping section. It’s important to add two screws to each side so that the leg can’t rotate around just one screw if the wood glue doesn’t hold.
DIY TIP
Always predrill a hole when you’re adding screws, especially when using soft or reclaimed timber. It will reduce the chance of the wood splitting. Depending on the screws you’re using you will also need to use a countersink bit to prepare a little groove for the head of the screw to disappear in and be completely flush with the surface of the wood.
To attach the legs to the top, we used pocket holes. Drill a couple of pocket holes along the inside length of the horizontal support, holding the legs together. Our console table is quite long, so we drilled 5 holes in each leg.
Flip the top of the console table over and position both legs. We left a 70mm gap around the front and back. If you’re using the same measurements as we did, the bottom of the legs should align with the edge of the console top.
Make sure everything lines up and fits before applying some wood glue to the top edge of the legs and screwing them in place with the help of the pocket holes.
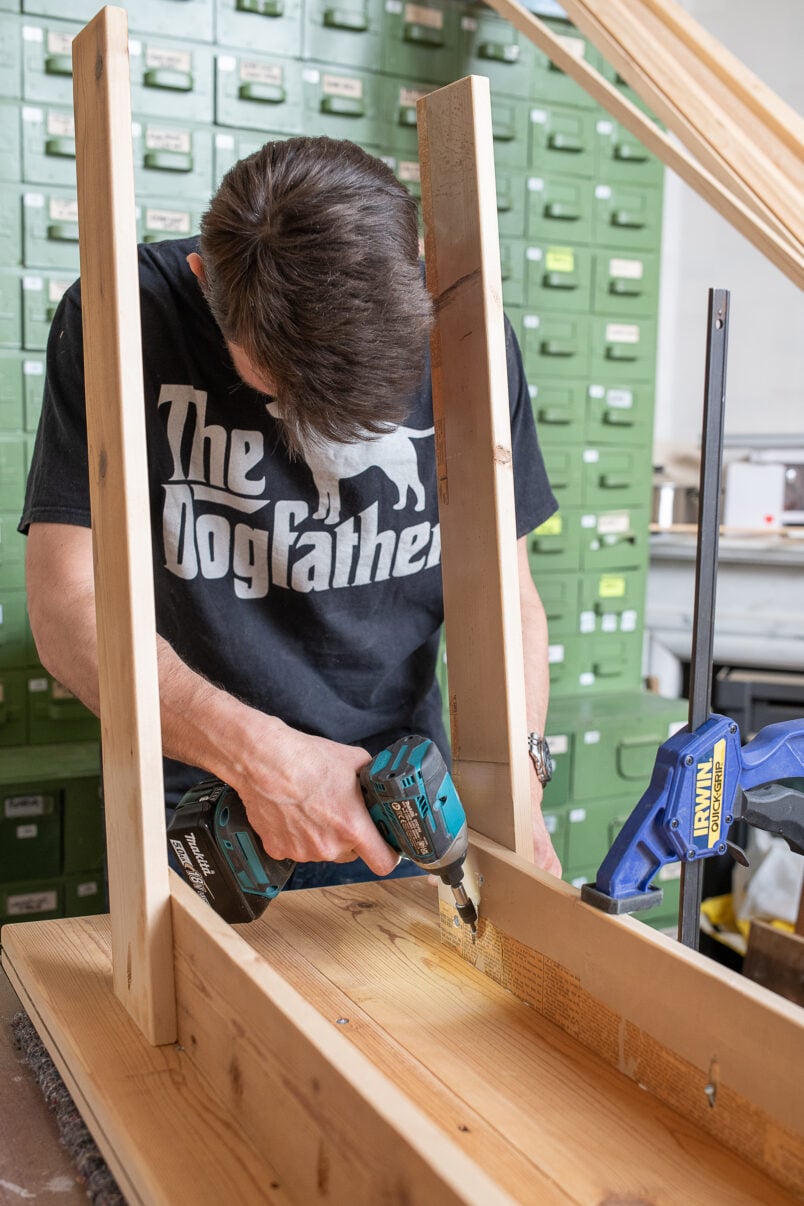
The last thing to do is add the two little leg support pieces. Apply some wood glue to each end and slot them between the legs.
If you want to use this console table to place very heavy items on, you may want to add another horizontal support piece at the bottom of the legs, too. We want this DIY console table to double up as a mini desk for guests, so want the bottom to be open and allow space for a chair.
Step 6
Stains &/or Oil The Surface
Originally, I’d planned on staining the wood, but I love how it turned out after just sanding, so decided to leave it the original colour.
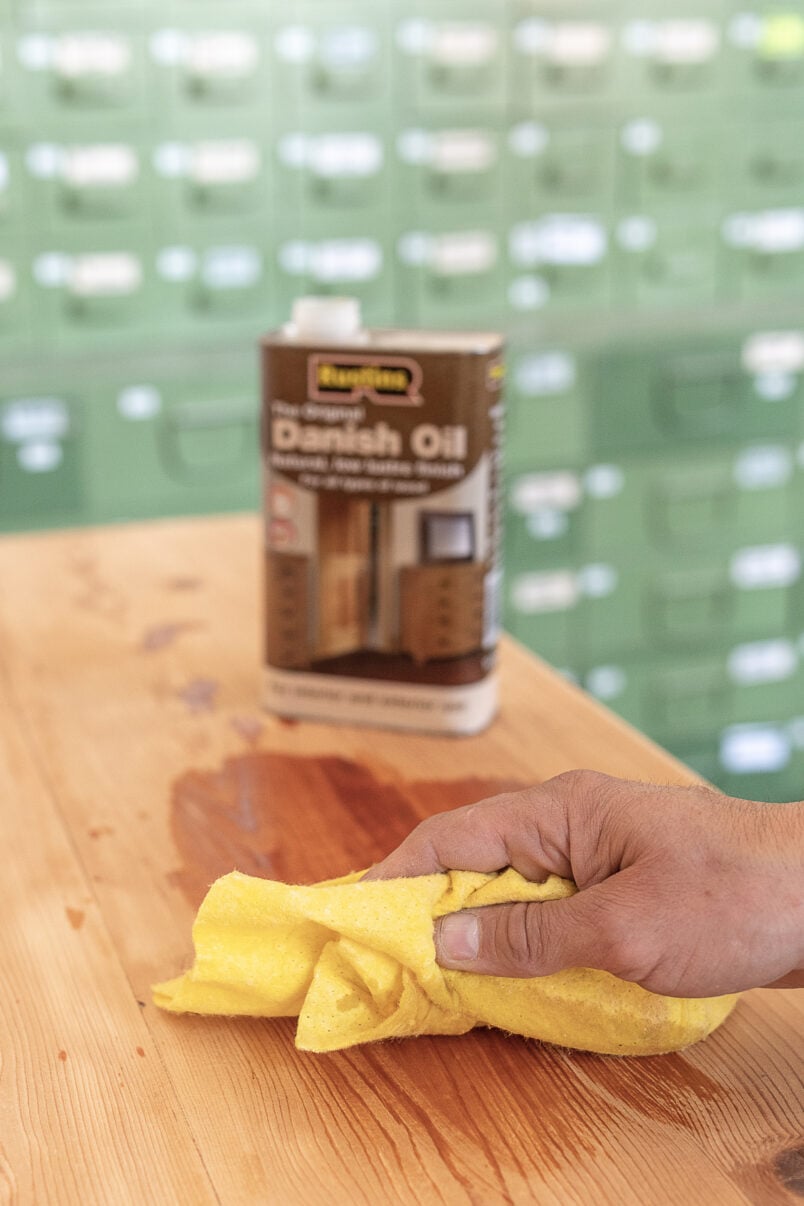
To finish the table off, you will have to protect it with some oil or wax. We love using Danish oil to treat all of our wooden furniture as it gives you a perfect result every time and is super hardwearing.
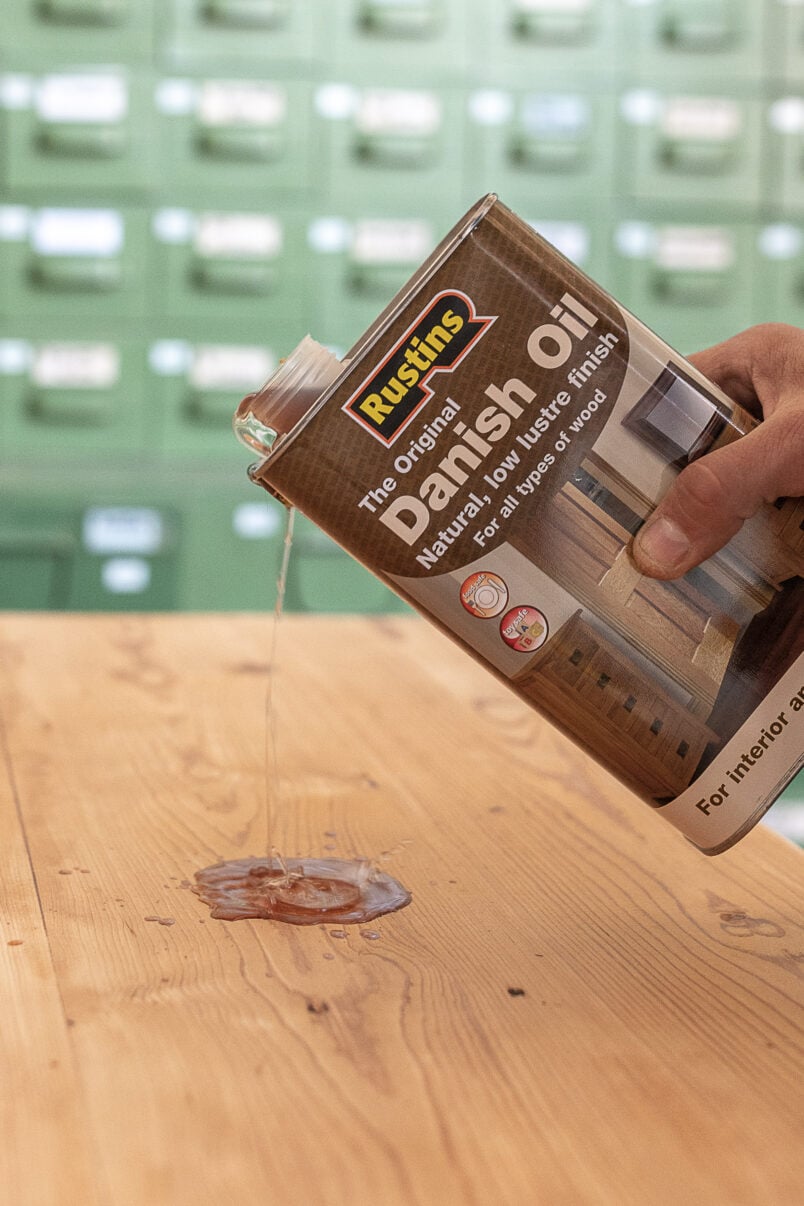
To apply the Danish oil, drizzle it over the surface of the wood and evenly distribute it with a clean cloth. Wait for about 15 minutes and then wipe off any excess. You’ll have to repeat this process a couple of times – we usually apply 3 coats – so that the wood is saturated and completely protected.
And that’s it! Your new DIY console table is finished.
It took us about 3-4 hours (plus drying time between the steps) to build this table. Using pocket holes made the process really quick, and depending on the condition of the wood you’re using, you might not have to spend quite as much time sanding as we did.
This obviously isn’t high-quality joinery, but I honestly think this table looks and feels great, and no one will ever know how easy it is to build.
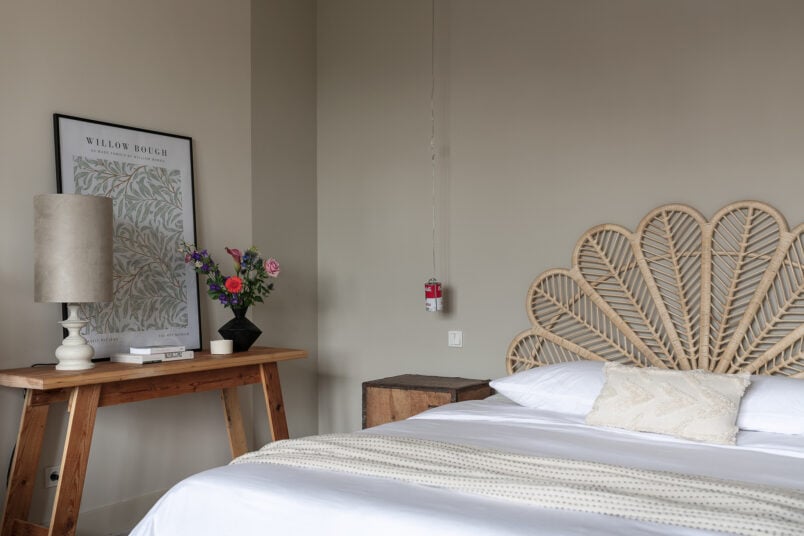
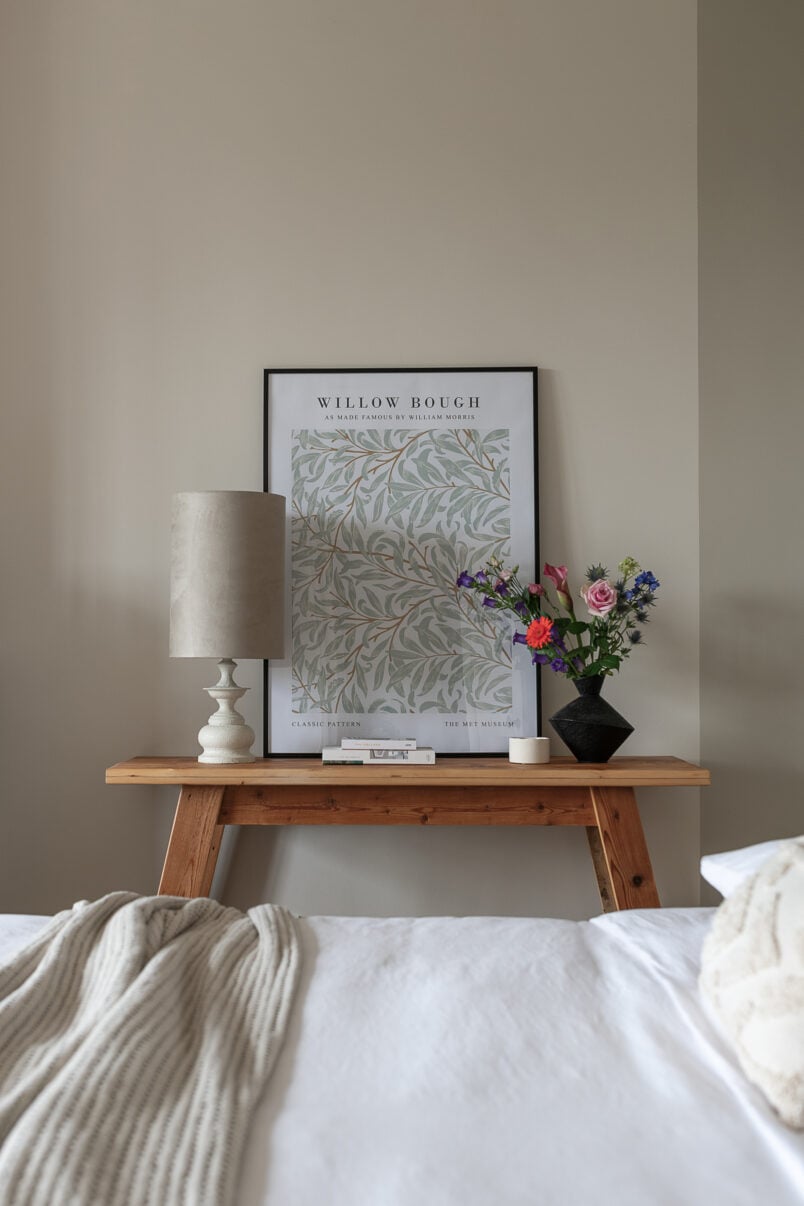
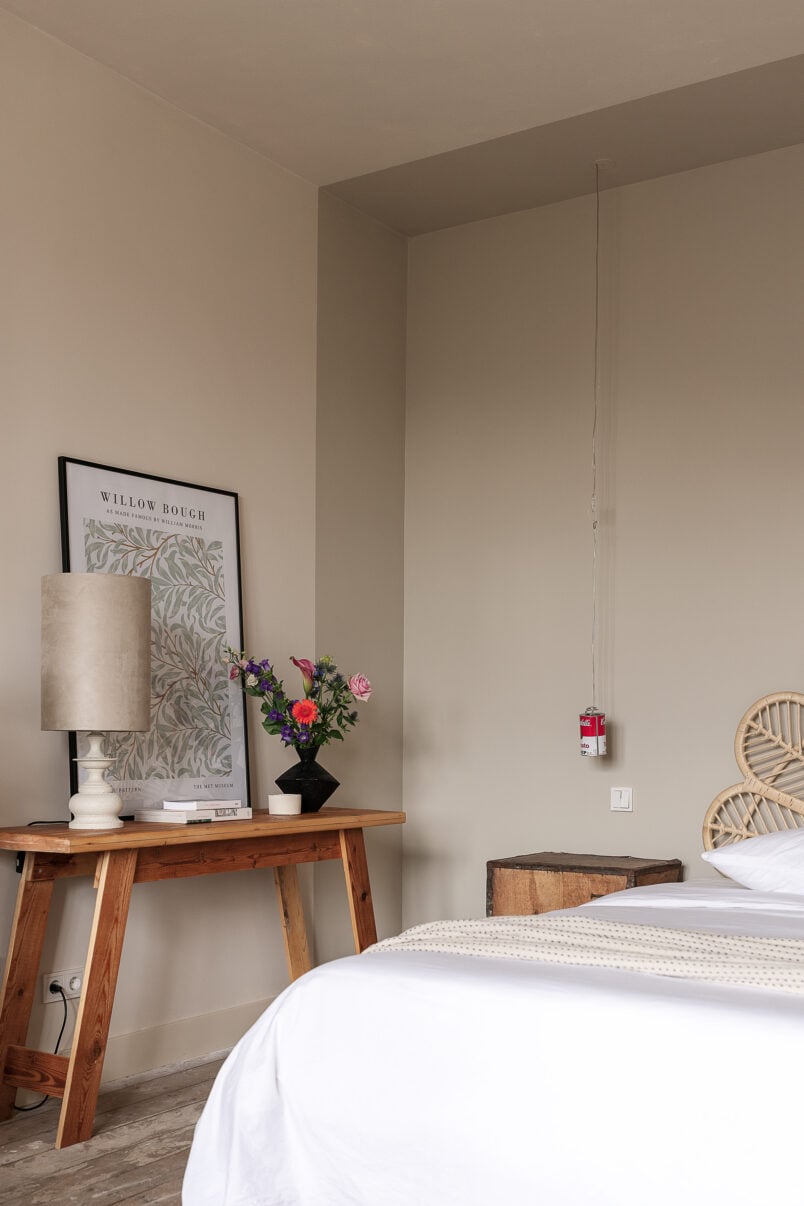
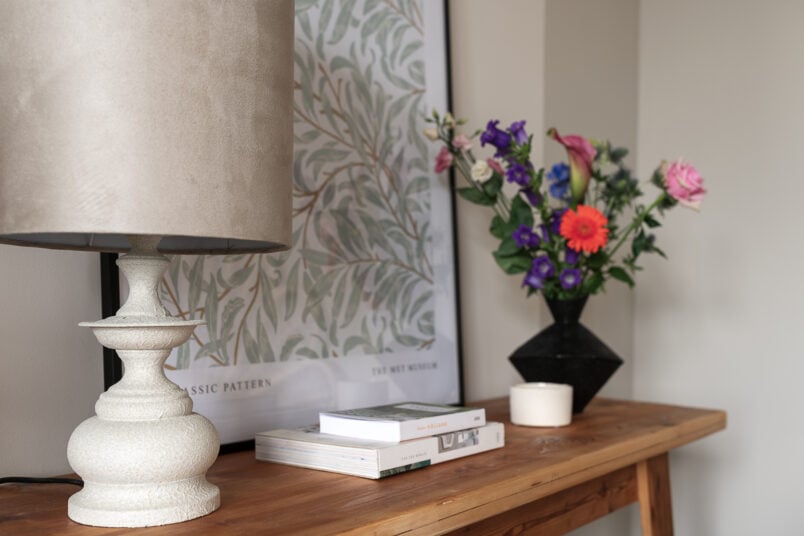
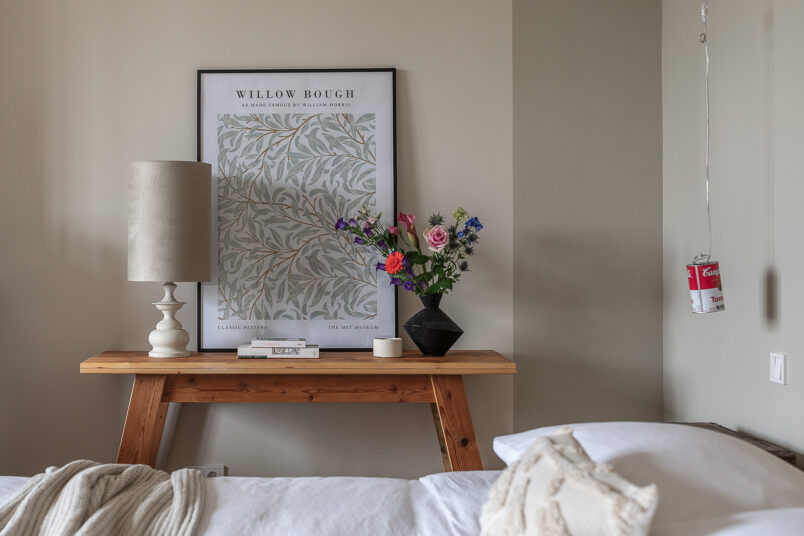
This wooden console table isn’t our usual style, but I love how it looks in our guest bedroom. It has a bit of a coastal vibe, which I love, and I think it works so well with the rattan headboard and lampshade.
How much does it cost to build a DIY console table?
As I already mentioned, we built this table out of reclaimed timber that used to be part of the timber wall separating this room from the one next to it. For us, that meant that this table was (almost) free to build.
Here’s our cost breakdown:
Timber | Free
Screws | 4€
Wood glue | 3€
Sanding disks | 4€
Danish Oil | 4€
Total Cost: 15€
(This is an estimate based on the quantities we used and doesn’t include tools or electricity)
Don’t forget to download our free DIY console table plan with 3D diagrams to make building this wooden console table as easy as possible!
I can’t believe I never built a console table, as it was such an easy DIY project. Console tables are so practical and versatile, especially when you build one yourself, as you can make it the perfect size for your space.
I already have lots more console table ideas for various spots in our house. Our hallway is still very empty so I think my next job will be creating a console table design for our entry.
How To Build A Console Table FAQ
It took us about 4 hours to build this console table, plus some overnight drying times. Depending on the wood you’re using, cutting all of the pieces takes a while, but if you’re using pre-cut wood, the process will be even quicker.
Yes and no. We think a rounded edge makes the console table feel much more high quality. Having said that, a router is an expensive tool, so we’d recommend hiring or borrowing one if you’re planning on using it for this project.
Console tables are perfect for so many places in your home. They are great for entryways, behind sofas, narrow hallways, or multipurpose furniture that doubles up as small desks in bedrooms.
A good quality sander will make achieving a perfectly smooth finish on your wooden console table much easier. You’ll also need a couple of sandpaper grits ranging from 120 grit to 240 grit for the best results.
Our new sander is by far our favourite one ever (and we’ve had a few). It is very expensive, though, and you definitely don’t need to make that kind of splurge on a tool to build this table.
Yes, of course! That’s the beauty of DIY! You can always adjust any of the measurements to suit your needs and create the perfect console table for your space.
We still have some of this reclaimed wood left over, and I love it so much that I already have another project planned that I’d like to build with it. As always, we’ll share the project here, so pop back soon so you don’t miss it!


Leave a Reply