Plastering walls doesn’t have to be difficult, and we’re sharing a secret method that will make it easy for you to plaster walls yourself.
With prices for building materials and tradespeople at an all-time high, we’re tackling more and more home improvement projects ourselves. This DIY plastering method will help you achieve perfectly smooth walls yourself for a fraction of the price a professional would charge.
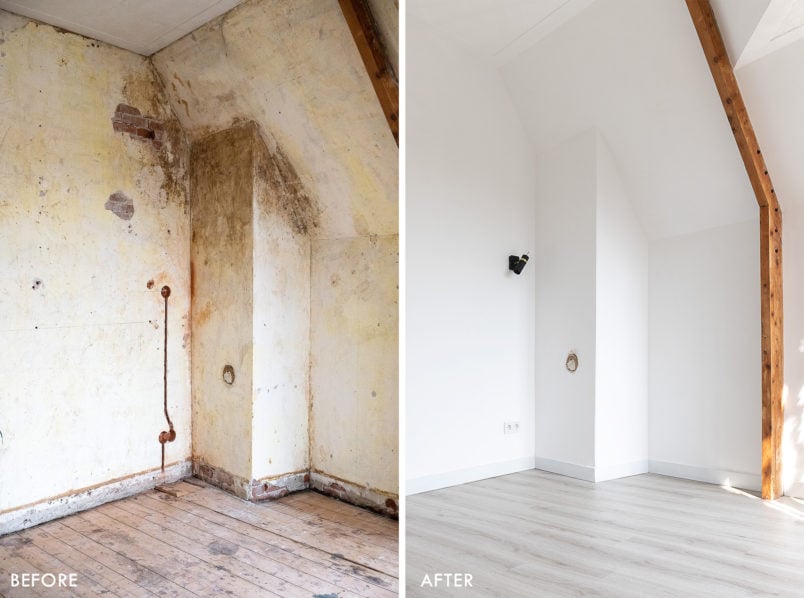
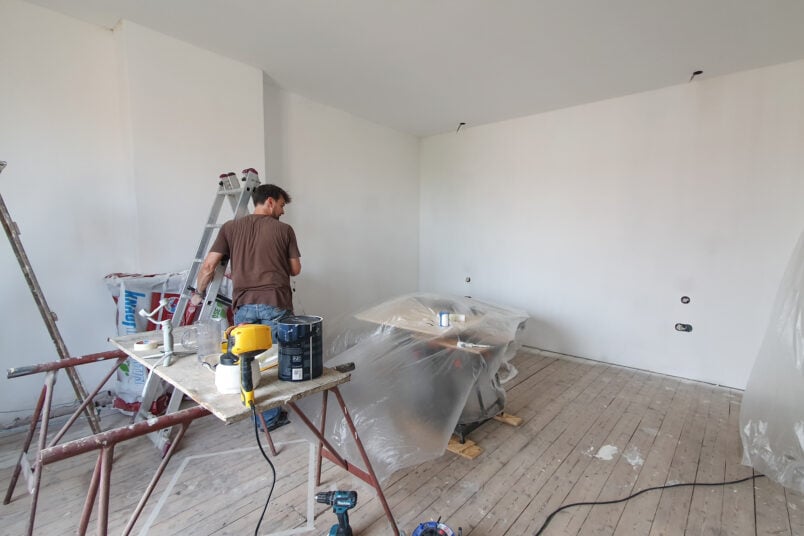
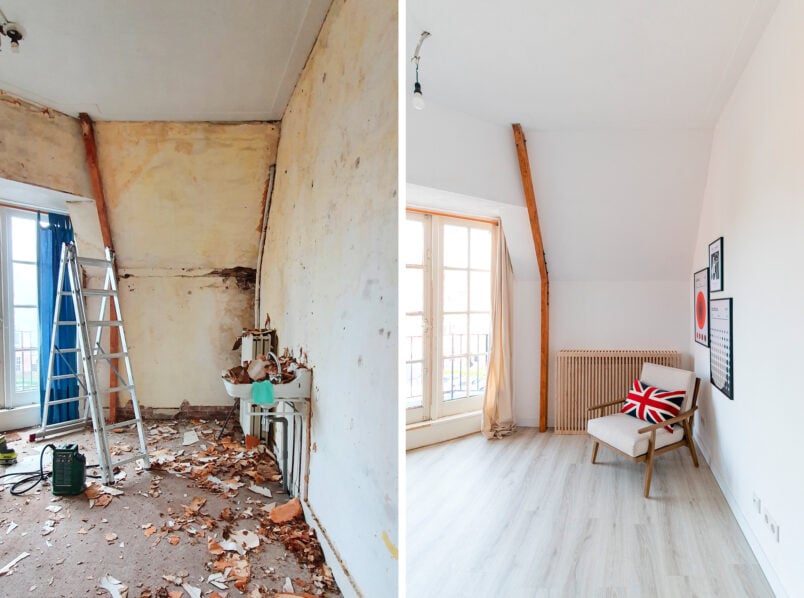
Don’t believe me? Well, take a look at the room I just finished plastering and painting.
Learning how to plaster a wall yourself may not have been something you thought you could ever do, but this plastering DIY method makes it surprisingly easy, and we’re sharing our secret do-it-yourself plastering tips so that you can plaster your walls, too!
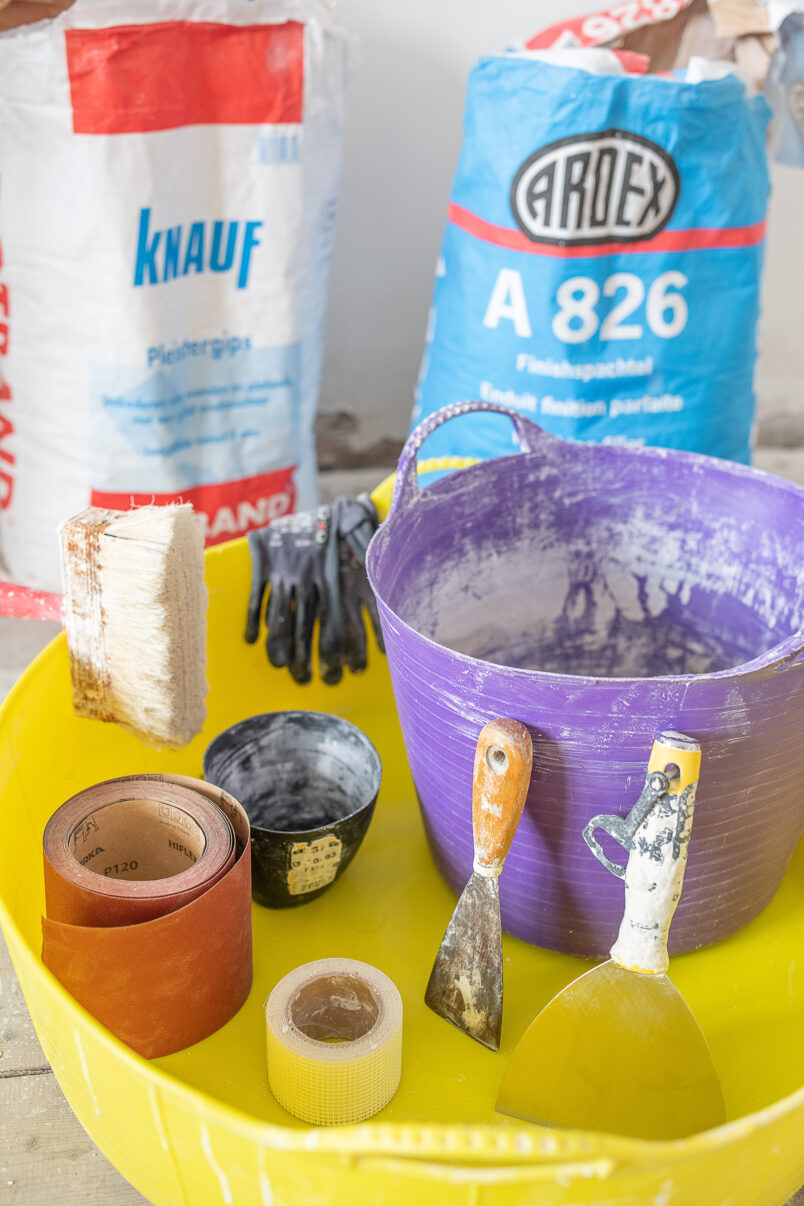
Plastering Tools & Supplies
This easy way to plaster a wall slightly differs from the traditional way of plastering, and the biggest secret to plastering your walls yourself is using the right plastering tools and supplies.
Using the right products makes the biggest difference to the whole plastering process and will help you easily achieve perfectly smooth walls.
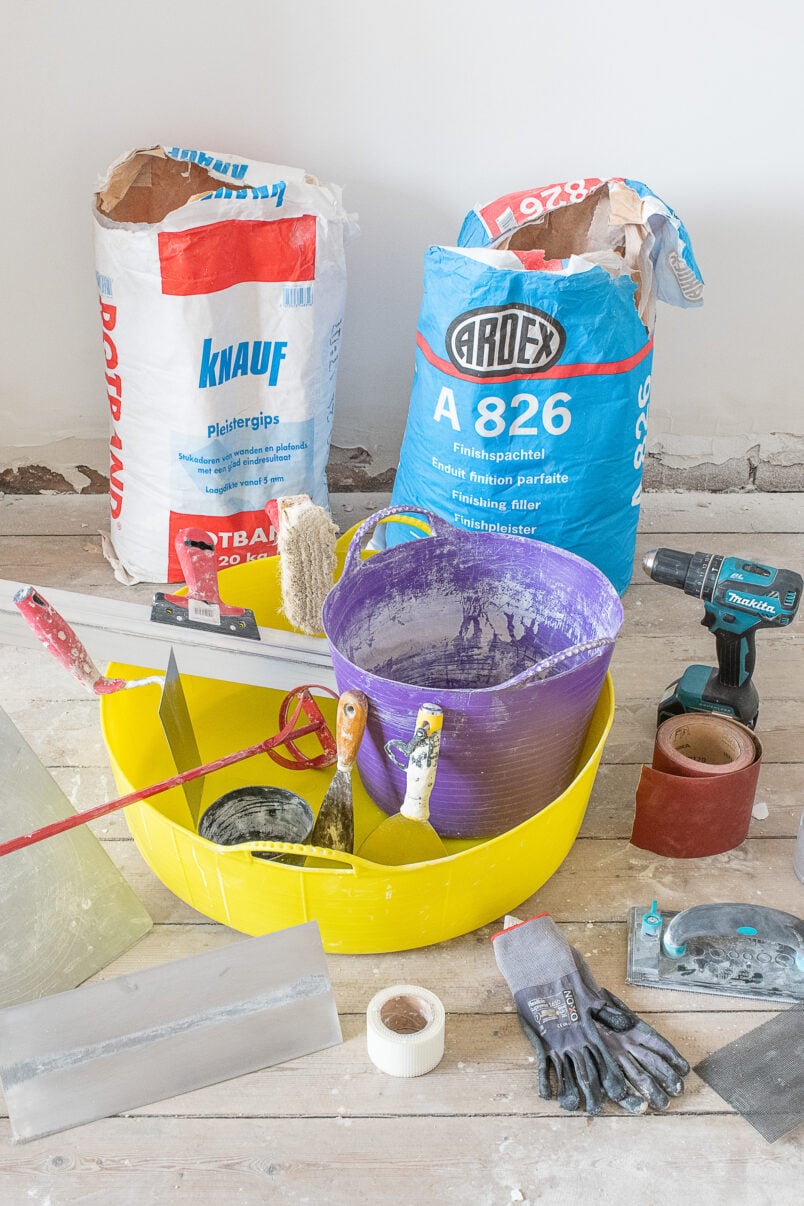
These are the tools you’ll need to plaster your walls yourself:
This post contains affiliate links. We only recommend products we love and think that you will, too! Read our full disclaimer here.
- Joint Knife
- Flexible Plastering Bowl
- Stripping Knife
- Ultra Fine Finishing Plaster
- Pasting Brush
- Jointing Tape
- A couple of buckets – We love these flexible buckets and highly recommend this large 35l one that keeps everything contained and this smaller 14l one to help keep your tools clean.
- Something to cover your floor
- Gloves
- Scales
- Measuring Jug
- Hand sander & mesh
If you are filling larger holes or channels where you’ve had new electrics laid, you will also need:
If you want to plaster larger areas, we’d also recommend (these are optional, though!):
What Is The Difference Between This Method Of Plastering and “Normal” Plastering?
When skimming or plastering a wall, you traditionally apply plaster that’s a few millimetres thick (or more). When plastering your walls with the method, you only apply a very, very thin coat of plaster, which wouldn’t be possible with normal plaster.
We always recommend using tools and supplies you already have, but in this case, it’s important to use the right kind of finishing plaster. Do not try this method with normal plaster, which has to be applied a minimum thickness and won’t stick to your walls using this DIY plastering method!
If you want to learn how to plaster and skim walls in a more traditional way, we highly recommend taking a course. I completed one a couple of years ago, and it was a great way to learn the basics.
How To Prepare A Room For Plastering
You don’t have to remove old plaster before replastering your walls, but you do need a clean, dust and dirt-free surface to be able to plaster your wall. Remove old wallpaper, repair cracks and thoroughly clean your walls before starting any work.
You should also cover your floor to protect it from all of the dust and dirt you’ll be making. Plastering is a messy business!
Step 1
Remove Old Wallpaper Before Plastering Your Walls
You can’t plaster over wallpaper as the paper will suck the moisture out of the plaster, become soft and fall off the wall taking your new plaster with it.
We find the easiest and quickest way to remove wallpaper is with a wallpaper steamer. We’ve had ours for years, and it’s helped us strip endless amounts of wallpaper (not just in our home).
Step 2
Repair Cracks and Fill Holes in Plaster
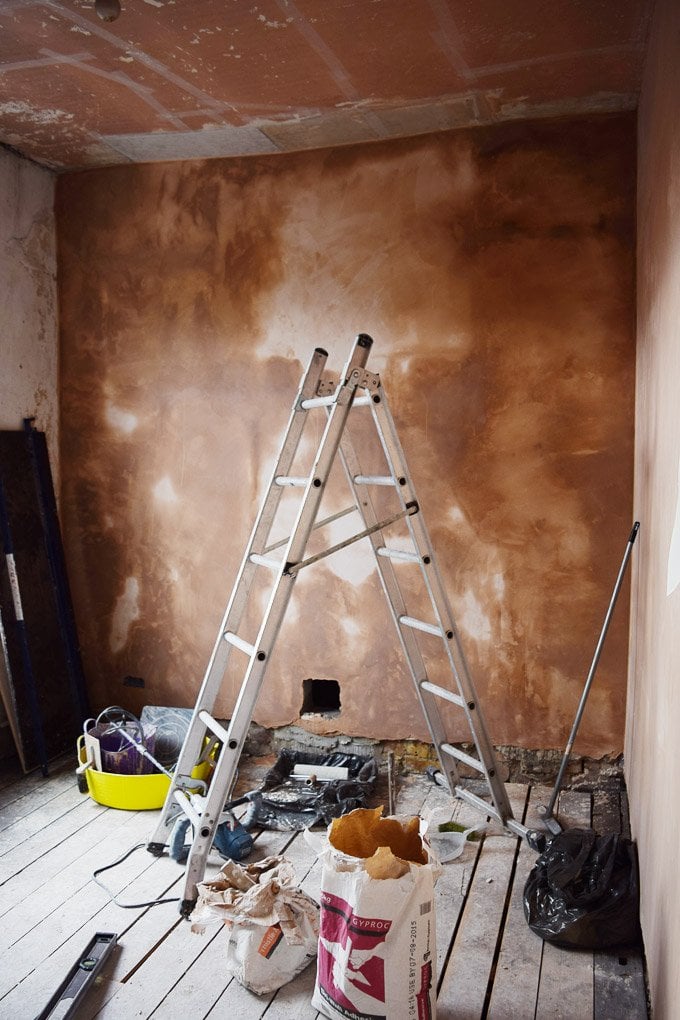
You need a safe and sound surface to be able to plaster your walls easily. Check that no areas of the wall sound hollow, as this could mean that the plaster is no longer stuck to the wall behind it, and remove any loose bits of plaster.
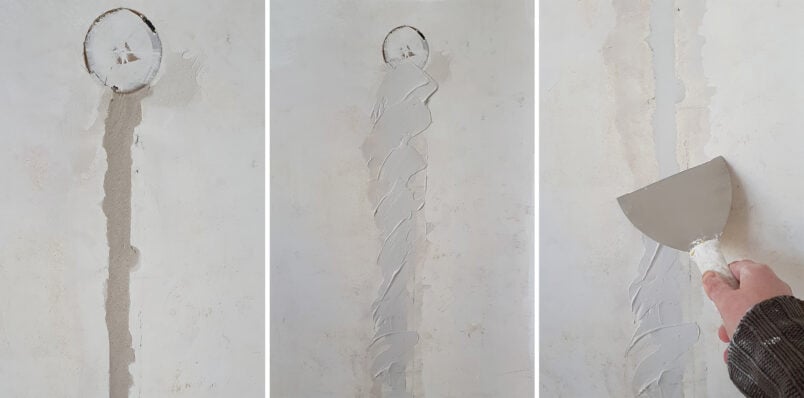
Next, fill any big holes and cable channels with some bonding plaster. The finishing plaster is expensive, so you don’t want to waste it on thicker areas where you can use a cheaper product.
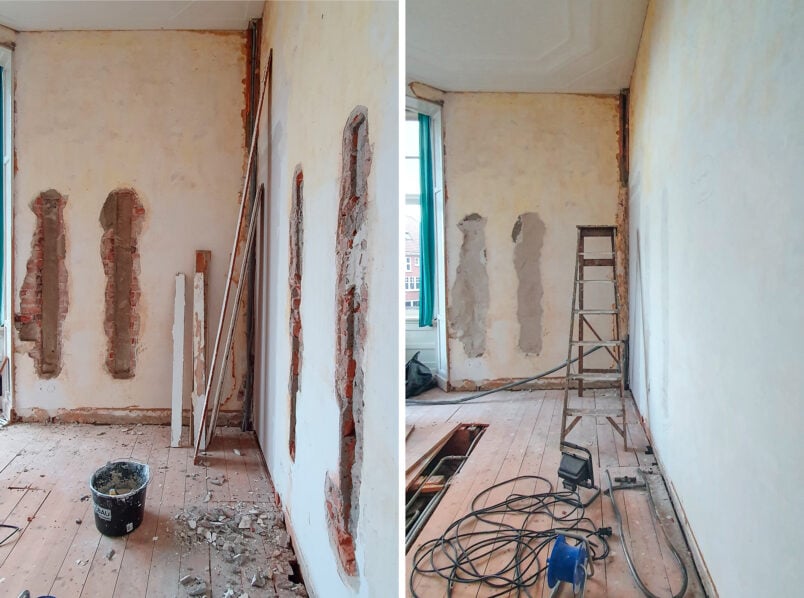
When filling any holes, make sure that there’s no dust or dirt in the hole. It will be almost impossible to remove all dirt, which is why you also have to wet the hole. Just use an old paintbrush and some clean water to generously “paint” the hole to remove any traces of dust that could stop the plaster from sticking.
After filling all the big holes and channels, move on to repairing any cracked plaster. It’s important to repair any cracks and not just plaster over them, as they are very likely to return otherwise.
You can read our full guide on how to plaster cracks so they don’t come back here.
Step 3
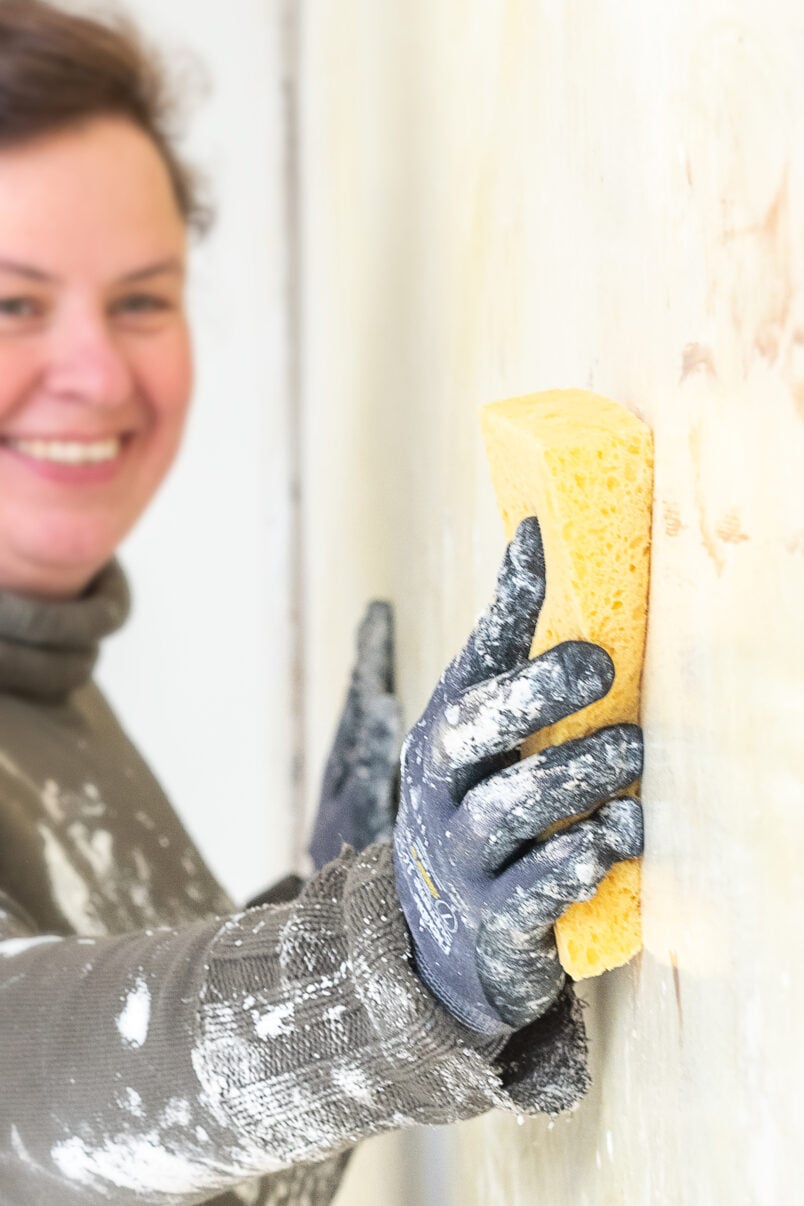
Clean Your Walls Before Plastering
There’s no getting around the fact that cleaning your walls isn’t a fun job, but getting them prepared the right way will make plastering them so much easier.
It’s vital to ensure your walls are 100% clean and free of dirt, residue or wallpaper bits.
You will be thinly scraping the new plaster over the surface of your wall, so it’s important that it’s as clean as possible; otherwise, you will catch bits of dirt and plaster with your jointing knife, which will drag through your new plaster finish, making it super messy and a complete pain to repair.
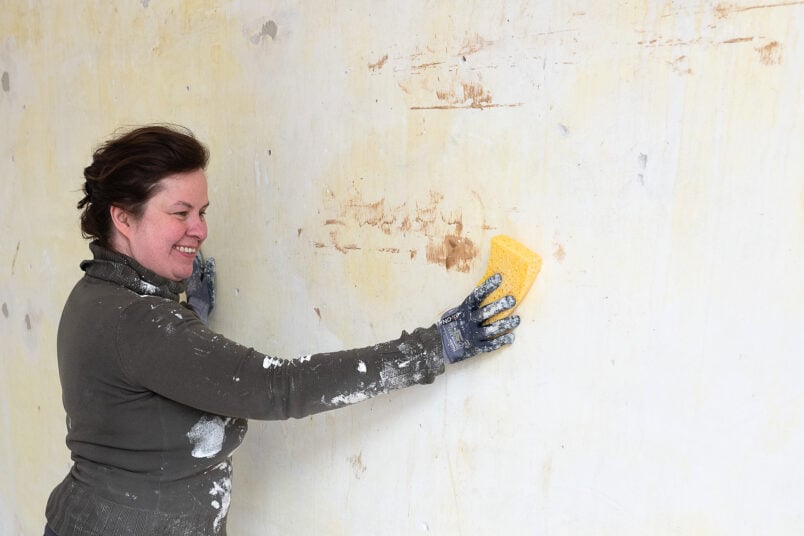
Get a clean bucket of water and a sponge or large brush and wipe over the walls to remove any last bits of paper and dirt you might have missed. Let your walls dry completely before moving on to plastering them.
How To Plaster Walls As A Beginner
Step 1
Preparing to plaster your walls
Mixed plaster starts to dry quickly, so it’s important to get all your DIY plastering tools and supplies organised before mixing the plaster.
Make sure you have a clean bucket of water, a brush for cleaning your tools and all supplies close by so that you don’t waste time looking for something.
Plastering is messy, and having a large tub to keep all of your tools and buckets together will help keep your space much cleaner and will give you somewhere to place all of your wet tools when you’ve finished, too.
Step 2
How To Mix Plaster
This is where this plastering starts to differ from traditional plastering, where you have to mix large amounts of plaster in one go. Because you’re only applying a very thin coat of plaster, you can mix small amounts, giving you more time to apply the plaster and making the plastering process much less stressful.
This plaster is the reason you can plaster your walls yourself, even as a DIYer.
It’s amazing. It’s super fine and can be applied to a feather finish, which basically means you can scrape it along the wall to a completely smooth 0mm finish, and it still sticks to the wall and gives you great coverage.
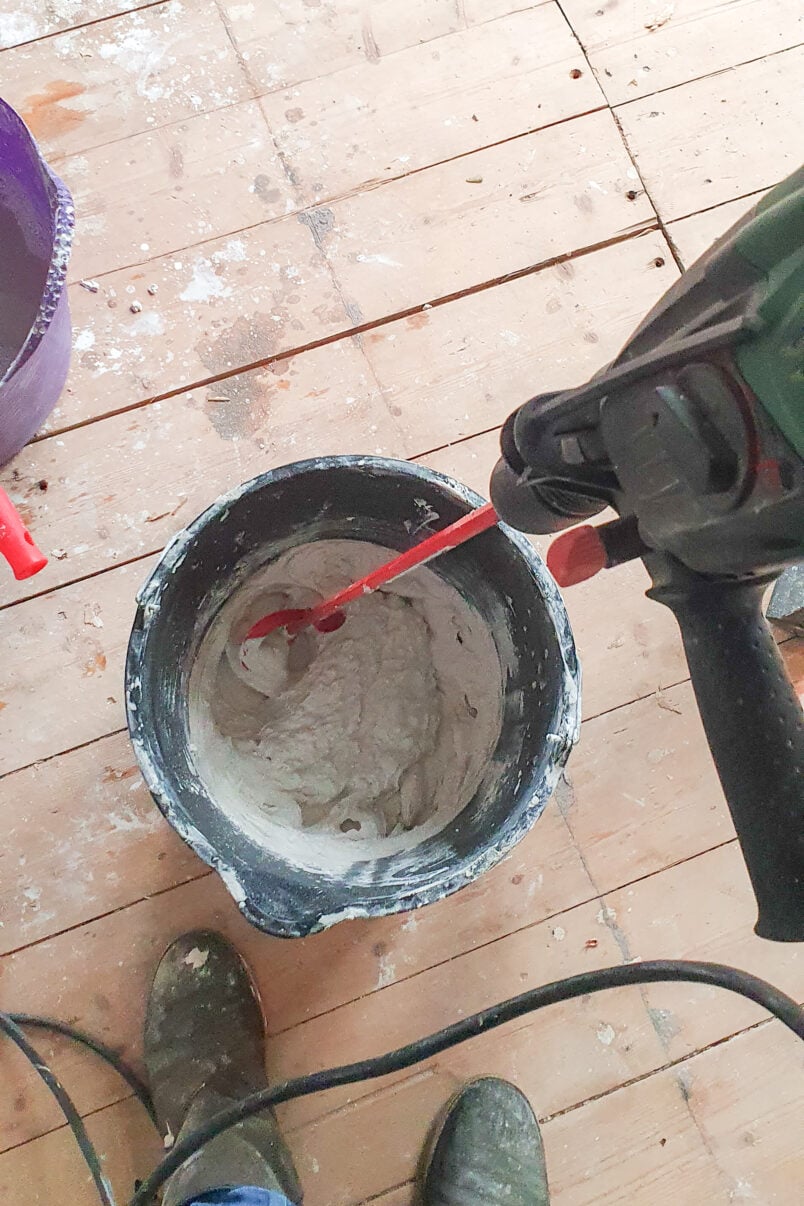
Mixing plaster is easy. Start by weighing your water in a flexible plastering bowl, and then add the finishing plaster and mix it thoroughly with a stripping knife until there are no lumps. Let it stand for about a minute, and mix it again before applying it to your wall.
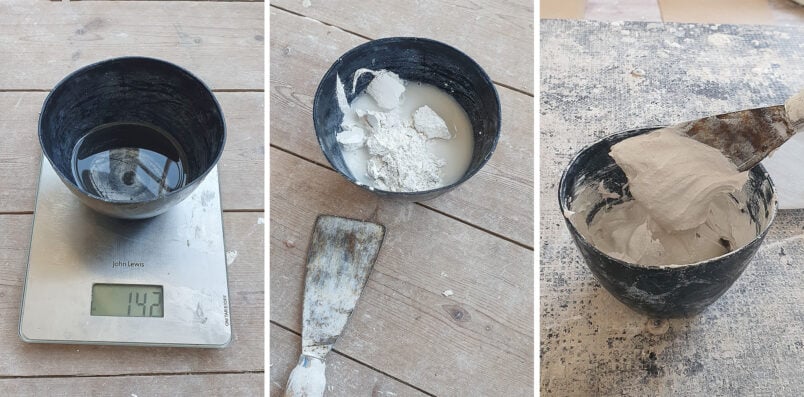
When you first start, we recommend mixing a small amount (about 70g of water with 100g of finishing plaster), but once you get more confident, you can mix double that (or even more) to cover a larger area.
You can purchase the finishing plaster ready mixed, which would be fine if you only plaster a small area. A large bag of unmixed plaster works out much cheaper, though, and as we have a whole house to plaster, that’s what we’re using.
You can also use the finishing plaster as a filler for small holes. There’s no need to have lots of different products, as this does it all. Just mix smaller amounts depending on how much you have to fill. Once you’ve used this plaster, you’ll never go back to anything else.
Step 3
Plaster A Wall + The Secret To A Smooth Finish
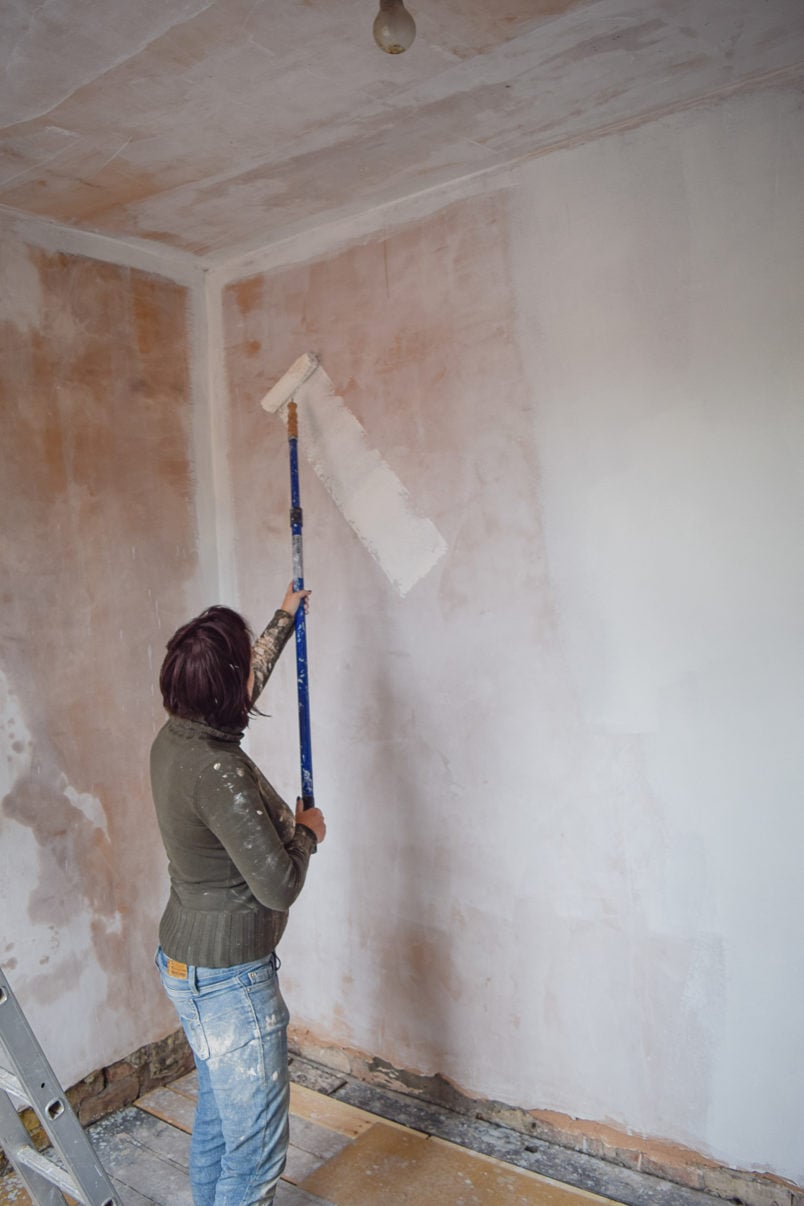
Use your stripping knife to take a lump of the mixed plaster out of the bowl and squash it onto the wall. Then, use your joint knife to scrape the plaster over the surface of your wall, filling any holes and cracks as you go.
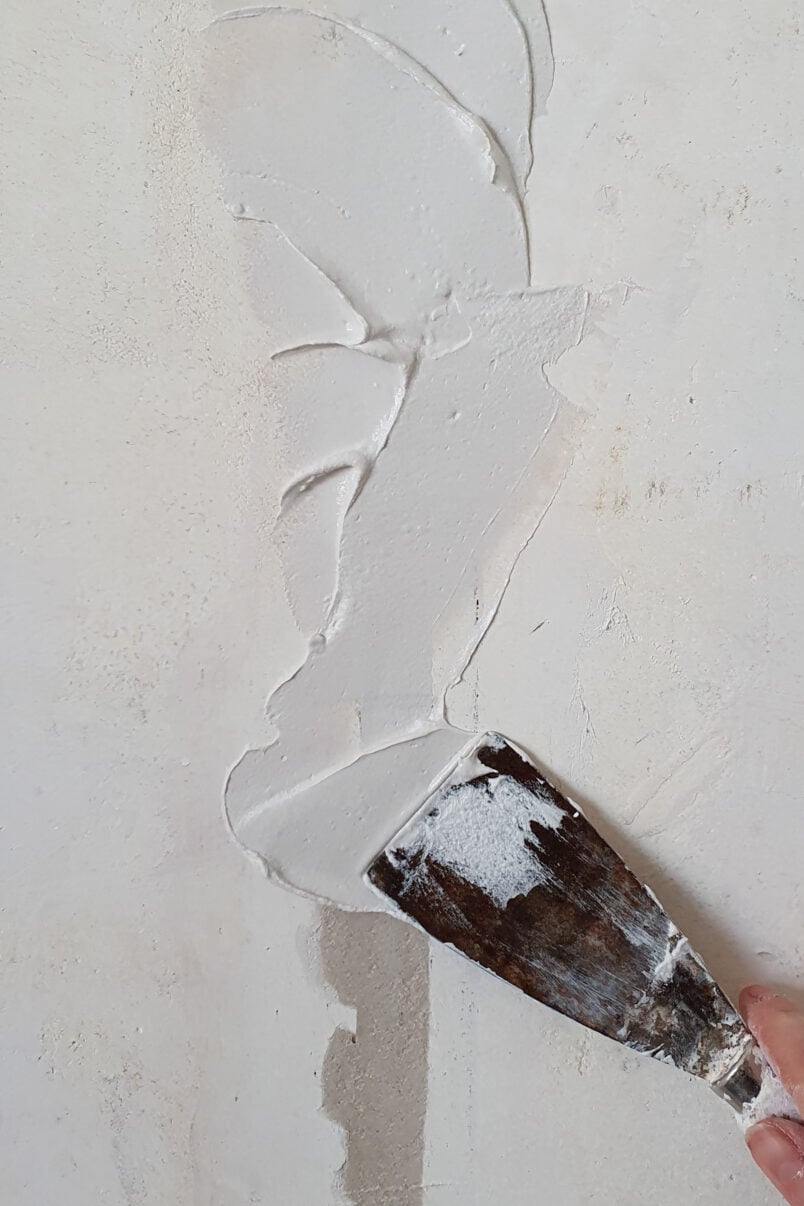
You only apply a very thin coat of plaster, which is the secret to achieving perfectly plastered walls even if you’ve never plastered before.
Using the existing walls as a guide to drag the joint knife along ensures you apply an even and super-thin coat of plaster. This makes it so much easier to achieve a perfectly flat and smooth wall.
Because this plaster is applied so thinly and the edges are feathered to 0 mm, you can also stop plastering at any time and don’t have to finish whole walls before you can stop. This is another reason that this method is so much easier for a beginner.
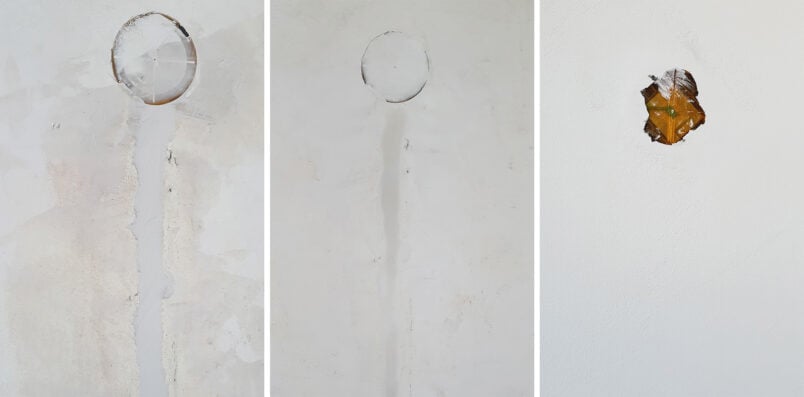
Keep mixing small amounts of plaster and applying it to the wall with your joint knife until you’ve covered the whole wall. The finishing plaster dries white, making it easy to see where you’ve already plastered.
Check the wall for any imperfections. If necessary, apply a second coat of plaster in the areas that still need smoothing.
If you are covering a larger area, we also recommend investing in a finishing trowel. It’s perfect for covering larger areas.
Don’t attempt or expect to fill very deep or large holes in one go.
The plaster will shrink when it dries. The first time you apply it, it will bubble up and then shrink but not be completely flat. Don’t worry; this is completely normal.
Step 4
Sand The Plastered Walls
In theory, you don’t have to sand your walls after using this finishing plaster. But, as a beginner, you probably have a few imperfections (we definitely did), so gave all walls a light sand with some 180 grit sandpaper after the plaster had dried.
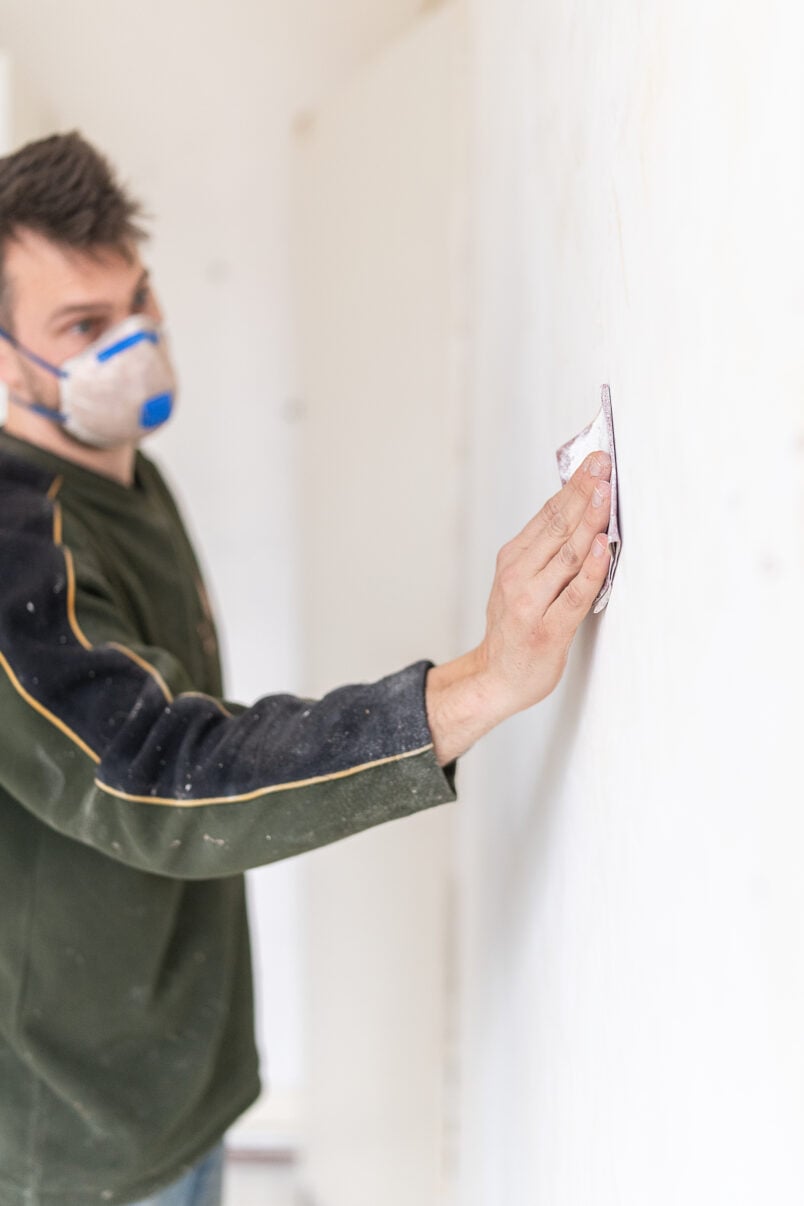
The plaster is so easy to sand and you only have to quickly rub over your walls to remove any imperfections.
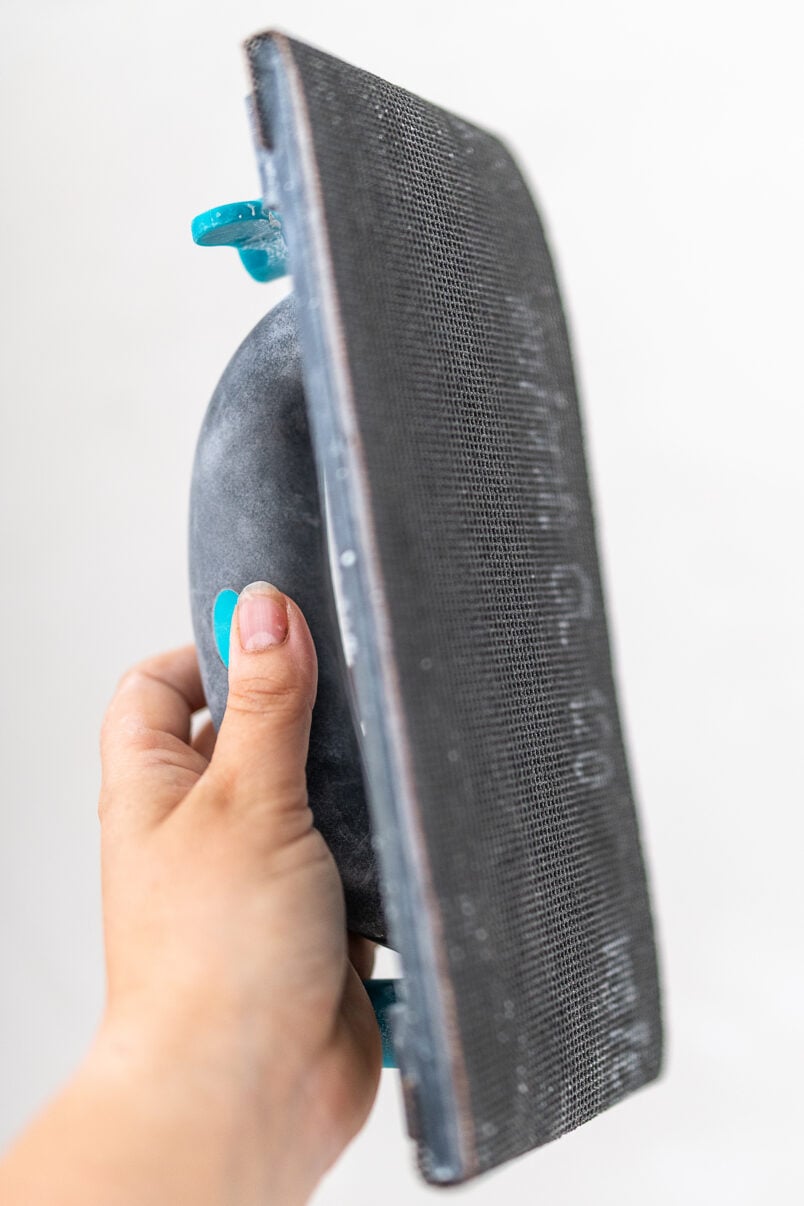
You can use normal sandpaper to do this, but we find mesh sanding sheets better as they don’t clog up as quickly and are nicer to work with. When sanding walls, you place the mesh into a hand sander, which is easier to hold over a longer period of time than just a piece of sandpaper on its own.
Step 5
Clean The Walls & Remove Dust
When you’ve completed all the plastering work, you’ll find that your room is covered in dust and dirt. Wipe down the walls with a damp cloth or sponge to remove all traces of dust and prepare them for painting.
Step 6
Paint Your Walls
This plaster only takes a couple of hours to dry, so you don’t have to wait for weeks until you can start painting your newly plastered walls. If you’re quick enough, you could even paint your newly plastered walls the same day!
How Easy Is It To Plaster A Wall?
Plastering walls takes a bit of practice, but you’ll probably be surprised at how easy plastering walls yourself is using this method. You can easily plaster your own walls and achieve a perfectly smooth plastered finish.
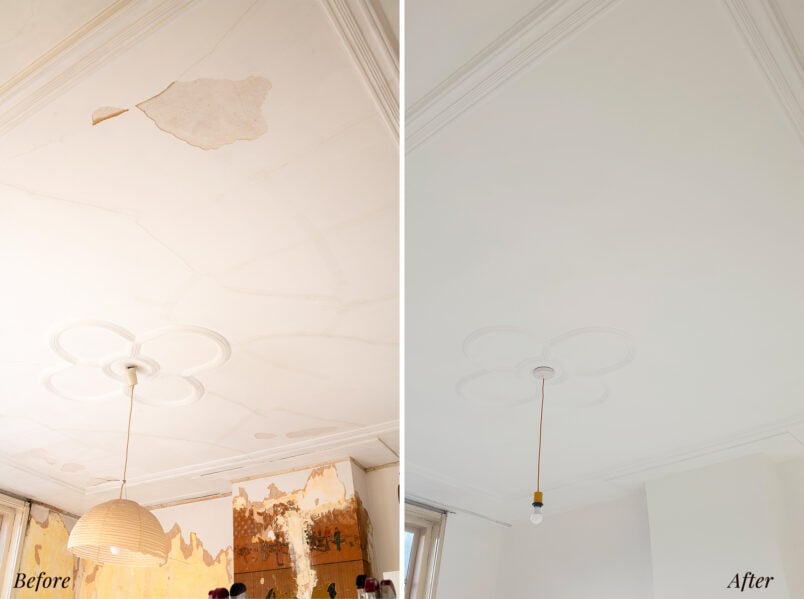
Plastering a ceiling, however, is much harder work. If you’ve ever painted a ceiling, you’ll know that it’s more difficult than painting a wall, and the same goes for plastering.
Working over your head is never fun, and although this plastering method works perfectly well for ceilings, too, just be prepared for it to take longer and be harder work.
We’ve used this method to plaster whole rooms, but it’s a great technique to use when you only need to patch walls. It can be applied so thinly that it’s ideal for filling over channels after laying cables for new sockets or switches.
How Much Does It Cost To Plaster A Room?
As a rough guide, it will cost about 18€ (or £15) to plaster one square metre of wall. This means that it will cost you roughly 777€ (£683) to have one medium-sized room plastered (based on a room that’s 16m² with 2.7m high ceilings).
Obviously, a lot of things will influence the cost, like the location, the condition of your walls, the experience of the tradesperson, etc.
How much can you save by plastering walls yourself?
To plaster one room, we used roughly half a bag of finishing plaster, a bag of bonding plaster, some sandpaper, a quarter of a roll of jointing table, plus water and electricity. We did all of the work ourselves, so obviously, we saved 100% on labour costs.
The grand total to plaster a room from start to finish using our DIY plastering method is 43€ (£36). That’s a saving of a whopping 734€ (£645) per room! Based on an average home, this means that you will save about £6500 on your home renovation.
(Obviously, these are estimates and will depend on many factors, including your location, size of your property, condition of your walls, etc.)
How long does it take to plaster a room?
It took us about 2 full days to plaster this room which we spread over 5 days because this gave us time for the plaster to dry in between coats. This included filling all of the electrical channels and repairing cracks in the plaster walls.
Any type of plastering is fairly time-consuming and messy, and this DIY plastering method is no different. Having said that, I would say that it’s no more time-consuming than the traditional way of plastering.
How do you paint over freshly plastered walls?
You will have to wait for the plaster to dry before you can paint it. To ensure the paint sticks, you’ll also have to apply a mist coat. It’s really easy to do, and you can read everything you need to know about painting newly plastered walls here.
Plastering FAQs
No! This method is perfect for patching your walls without having to plaster a whole wall. It’s perfect if you’ve moved a socket or switch, need to patch holes in plaster walls, or have any small repairs!
Yes! Even novice DIYers can plaster their walls themselves using this plastering method. Achieving smooth plastered walls is surprisingly easy, even if you’ve never plastered before. It’s also very forgiving, as the plaster is very easy to sand if you have made any mistakes.
You can try sanding your walls, but in most cases, they will need a lot of filler to even out any holes and imperfections. In the long run, adding a thin layer of finishing plaster will probably be less work.
You only need to remove any loose plaster before replastering your walls. Check for hollow-sounding areas where the plaster could be loose, and make sure that the walls are clean and dust-free before starting any work.
When skimming your walls, you only apply a thin coat of plaster over your existing plaster to smooth out any imperfections. The term plastering covers a wider range of work that includes skimming as well as plastering rougher surfaces like covering a brick wall from scratch.
Plastering over cracks is easy, but in order to ensure they don’t come back, you will have to tape the joint before you apply the skim coat. We shared a full guide on how to plaster cracks so they don’t come back here.
Repairing a crack in a ceiling is easy, and you can repair a cracked ceiling yourself even with no experience. You can see a full guide on how to repair a cracked ceiling here.

DIY Plastering Tips For A Smooth Finish
- The thicker you apply the plaster, the more difficult it will be to achieve a perfect result (as a DIYer). The thinner the plaster is, the easier it is to use your existing flat wall as a guide for applying the new plaster.
- Make sure to keep your tools extremely clean. Any bits of dried plaster or dirt will make it impossible to achieve a smooth plastered finish, so wipe down your tools regularly with clean water.
- Mix small amounts of plaster until you have plastering practice. Then, slowly increase the amount you mix to be able to cover larger areas more quickly.
- Don’t stress if it’s not perfect after the first coat. The finishing plaster we recommend can be applied very thinly so you can easily go over any holes you missed in a second coat.
- Don’t skip sanding the wall, even if the plaster feels smooth. Sanding the plaster will make your walls super smooth.
- Clean your walls before painting to remove any dust.
- This method works best if you have relatively flat walls. If they have a texture, you will have to apply a thicker coat of finishing plaster making it more difficult to achieve a flat surface as a beginner.
- If you live in a very old house, check if this type of plaster is suitable before caring out any work. Often, lime plaster is more suitable for older properties.
- Take your time – this is not a job you want to rush. Ensure you feel relaxed and have enough time to spend smoothing the walls to achieve a good finish.
This DIY plastering method that we shared will help you achieve perfectly smooth walls yourself and is very easy to do even if you’ve never plastered before. It’s also perfect for patching and plastering small areas that you need to repair.

Leave a Reply