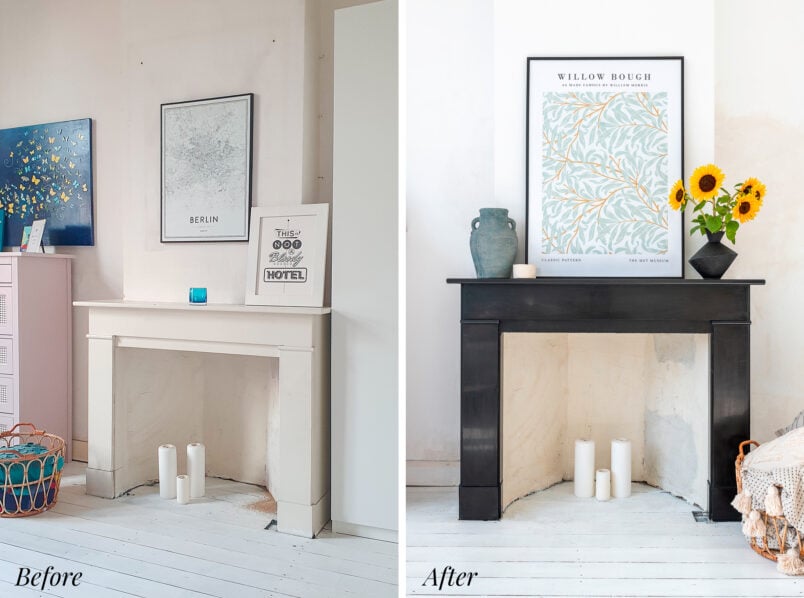
We found a black marble fire surround in our guest bedroom!
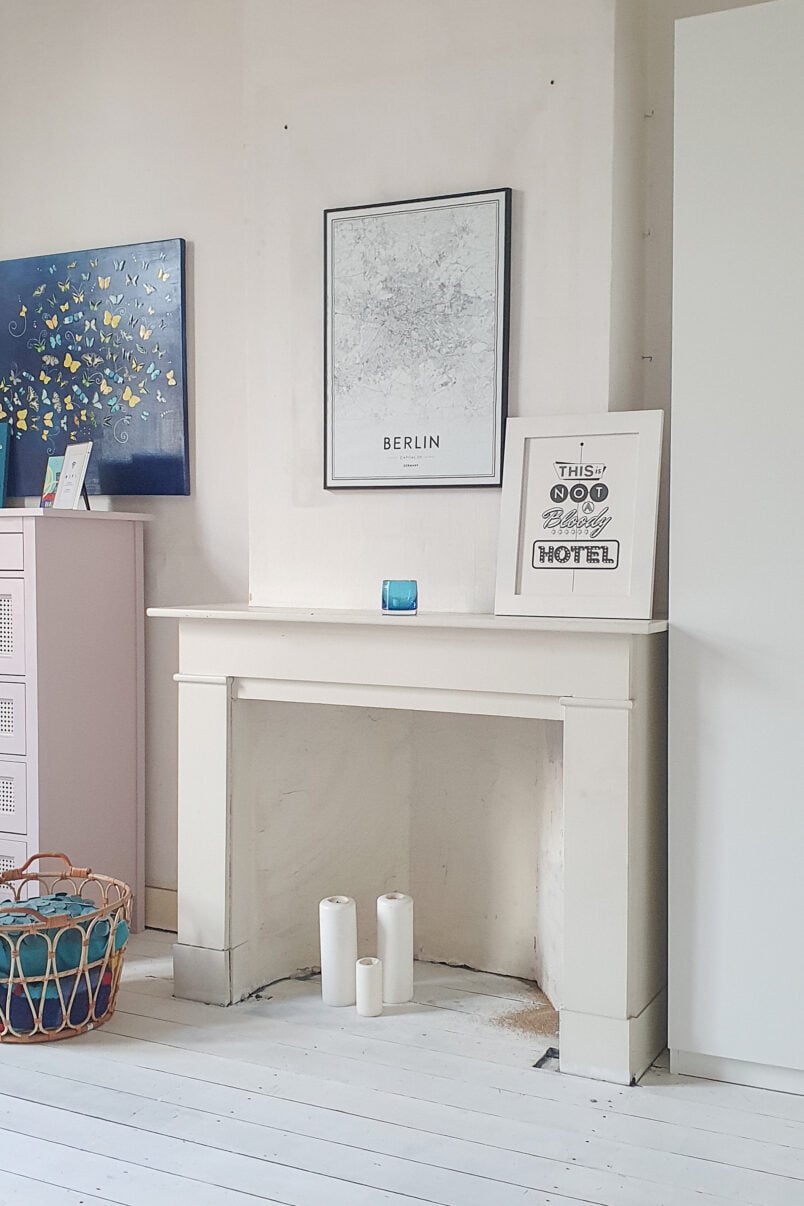
I know it sounds mad to “find” an antique marble fireplace surround, but I’d honestly not paid the room much attention. With more pressing renovations to tackle, we ignored the room until we recently had a little mishap while having our wood-burning stove installed in the room below (you can see what happened at the end of this post).
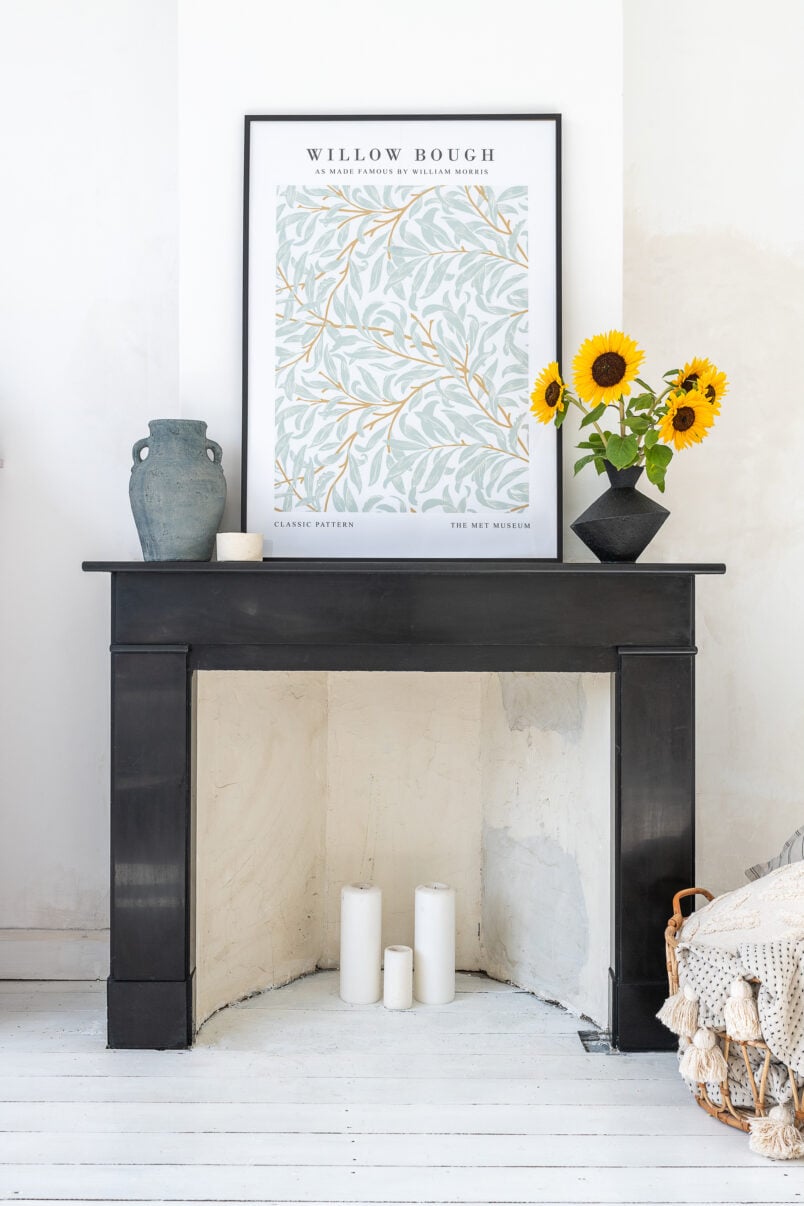
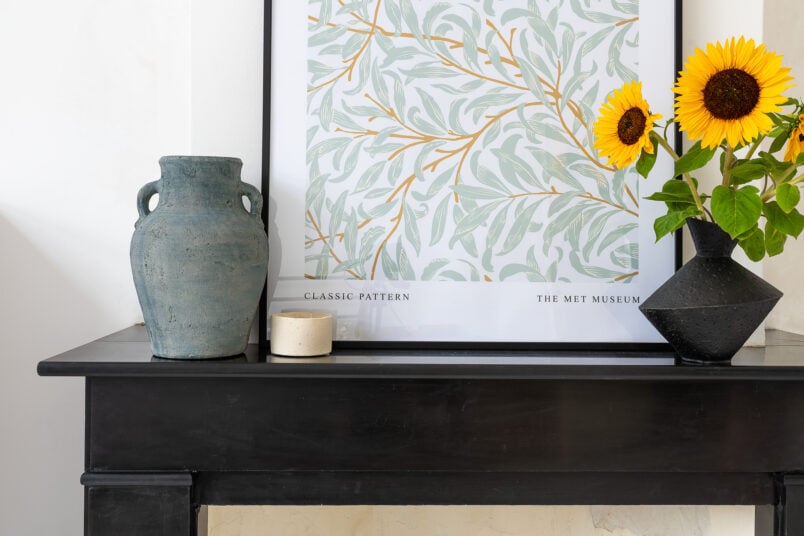
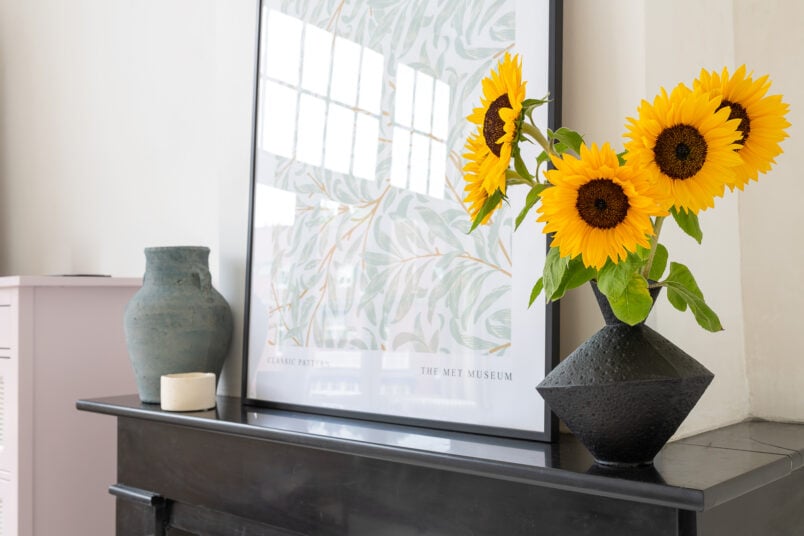
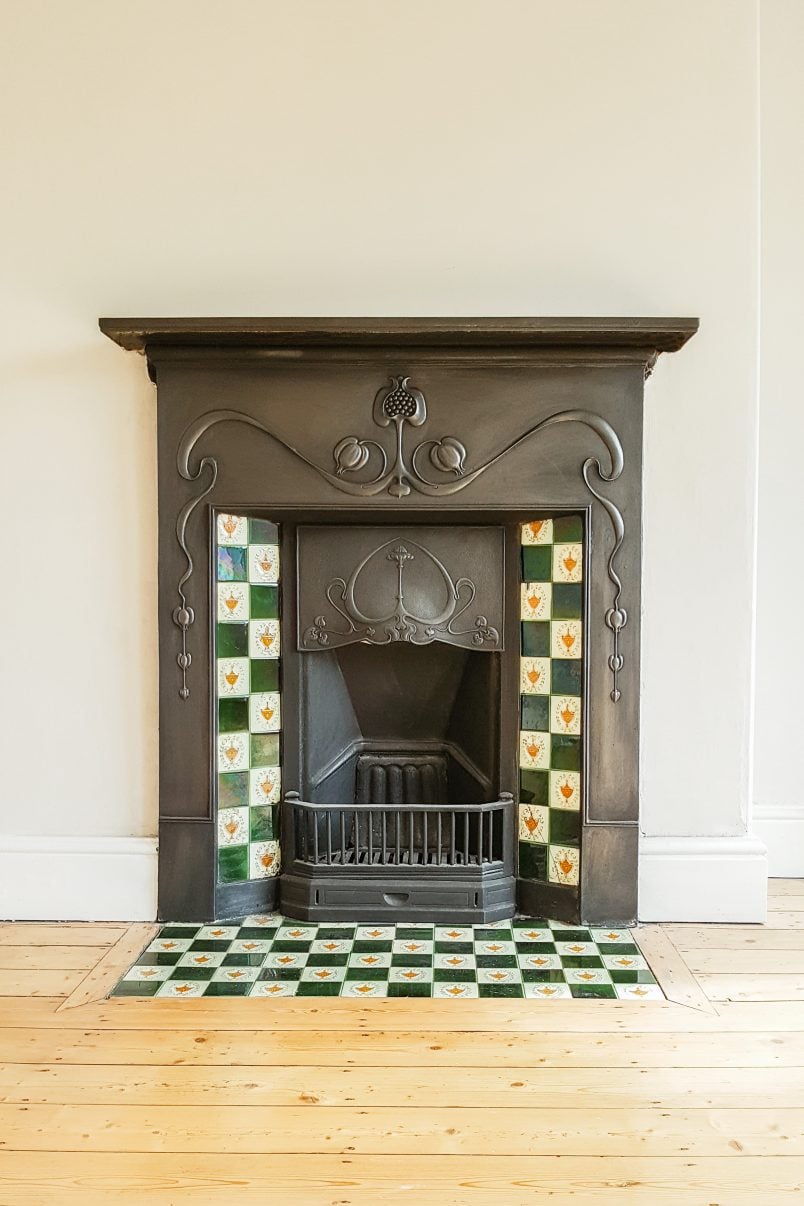
And now, after a lot of scraping and cleaning, our fireplace surround now looks like this!
If you’re lucky enough to find a marble fireplace surround in your home, we’re sharing exactly how to remove paint from marble or granite and restore your fireplace surround to its former glory.
And, if you have a marble surface that’s scratched, we’re also sharing a super easy way to make them disappear, too.
What you will need to strip paint off marble or granite
This post contains affiliate links. We only recommend products we love and think that you will, too! Read our full disclaimer here.
- Paint stripper (choose which is right for you depending on the type of paint you want to remove)
- Protective gear (you’ll definitely need gloves and protective eyewear)
- Plastic scrapers
- Bucket and lots of clean water and cloths
- Cleaner suitable for stone and marble
- Colour intensifier (it’s available for dark colours (which is the one we have) and light colours)
- Marble polish
- Optional: Masking tape & acrylic filler
Things to know before you start removing paint from marble
- Stripping paint is messy. Cover and protect the surrounding area with drop cloths and tape off the walls with masking tape and paper. The paint stripper we recommend really works, so don’t risk it stripping or damaging things it shouldn’t.
- Old paint can contain lead. Always take the necessary safety precautions and test the surface before you start any work. You can read our full guide on how to safely deal with lead paint here.
- Even though marble and granite are very durable, they can scratch easily. It’s important to use the right tools and always test a hidden patch to ensure the supplies you’re using work for you. Don’t use metal scrapers or sand the surface, and be careful when using anything that contains acid, as it can damage the surface.
- If you use your fireplace as a heat source (ours is purely decorative), you’ll obviously not be able to use it for the duration of this project.
How To Remove Paint From Marble Or Granite
Although stripping paint is messy, it’s always a very satisfying job, and it’s very easy to do, even as a total DIY beginner. The paint-stripping method we’re sharing works really well for removing old layers of paint from marble surfaces like our fireplace surround or marble kitchen countertops.
We also used almost the exact same method when stripping the cast iron fireplaces in our Edwardian house, which turned out beautifully.
Step 1
Protect The Surrounding Area
Cover the floors with drop cloths and tape over any walls to protect them from the paint stripper. Applying the paint stripping paste and, more importantly, removing it is very messy.
Step 2
Apply The Paint Stripper
Use a plastic scraper to cover the whole area you want to strip with a thick layer of the paste, and then cover the paste with the blankets that are included. Ensure there are no air bubbles, and press the paper blankets firmly against the paste.
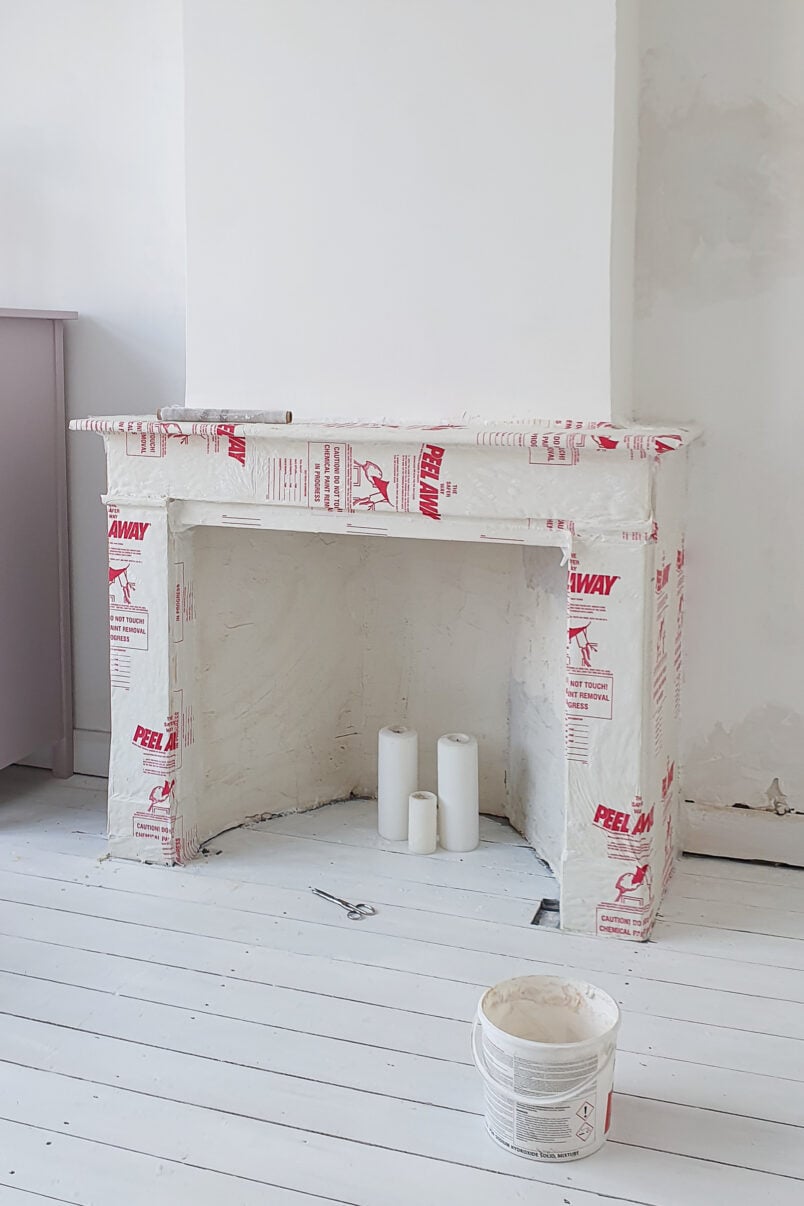
Don’t forget to wear safety gear when using the paint stripper!
Over the last 10 years of DIYing, we’ve tried more paint removers than I can count. This is the only one that we recommend as it really works. There are different versions of it available depending on the type of paint you’re stripping.
As I mentioned above, be careful when stripping marble and other natural stone as the acid can damage it. Do a test patch and check which stripper is right for your surface before you buy and apply it.
Step 3
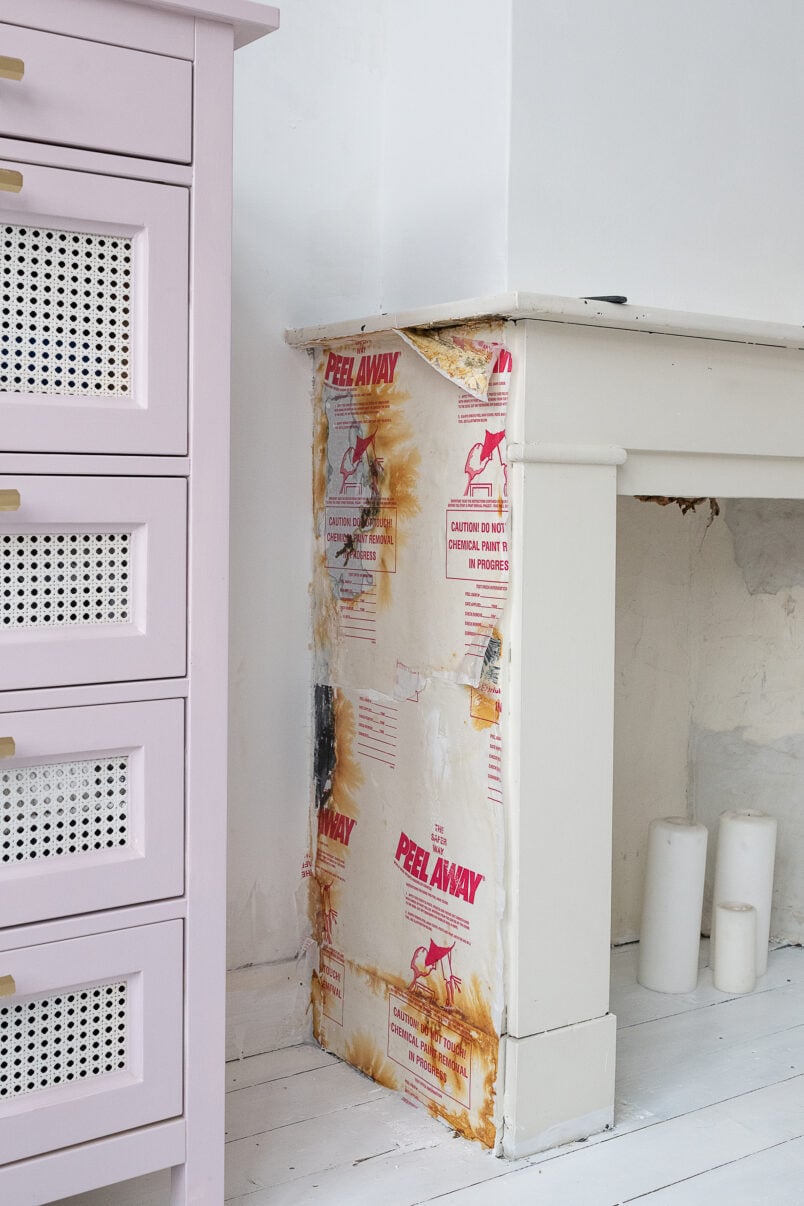
Wait For The Paint Stripper To Work & Remove The Paint
Leave the paint stripper to do its magic overnight.
You’ll see the blankets start to change colour as the stripper reacts with the paint. We don’t like to let the stripper get too dry before removing it, but you may have to wait up to 24 hours for it to work fully.
Keep checking and remove it when the paint has softened and it all pulls away from the marble.

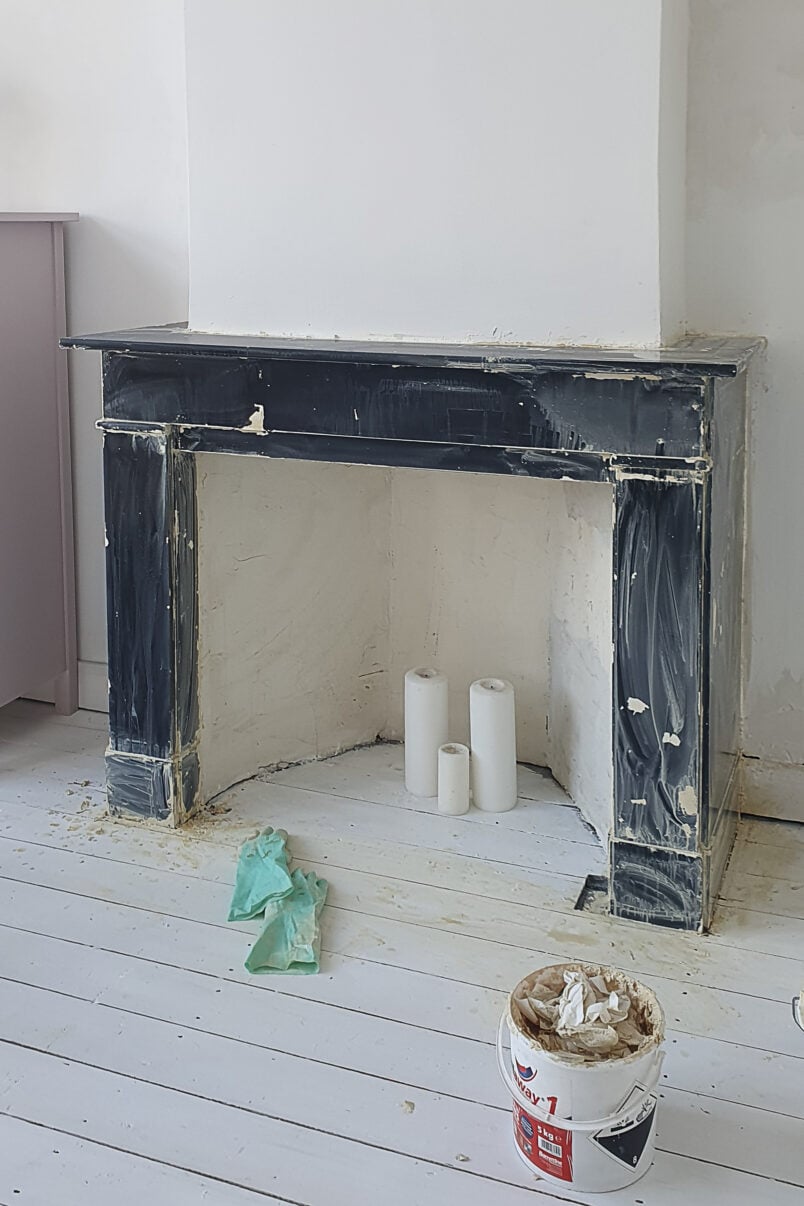
Depending on how thick you’ve applied the stripper and how many layers of paint you need to remove, you may need to repeat the process. Luckily, we only had a few very stubborn bits of paint left that we were able to scrape off while cleaning off all of the paint stripper residue.
Step 4
Clean Everything Thoroughly
The worst bit about using a chemical paint stripper like the peel away paint remover we used is the mess it makes. Get yourself a clean bucket of water and a really good stone cleaner to wipe down the surface. Repeat the process until it’s as clean as possible.
If the paint stripper you’re using contains a neutraliser, use it after cleaning the marble as much as possible first. (Check the manufacturer’s recommendations and details on how to use it).
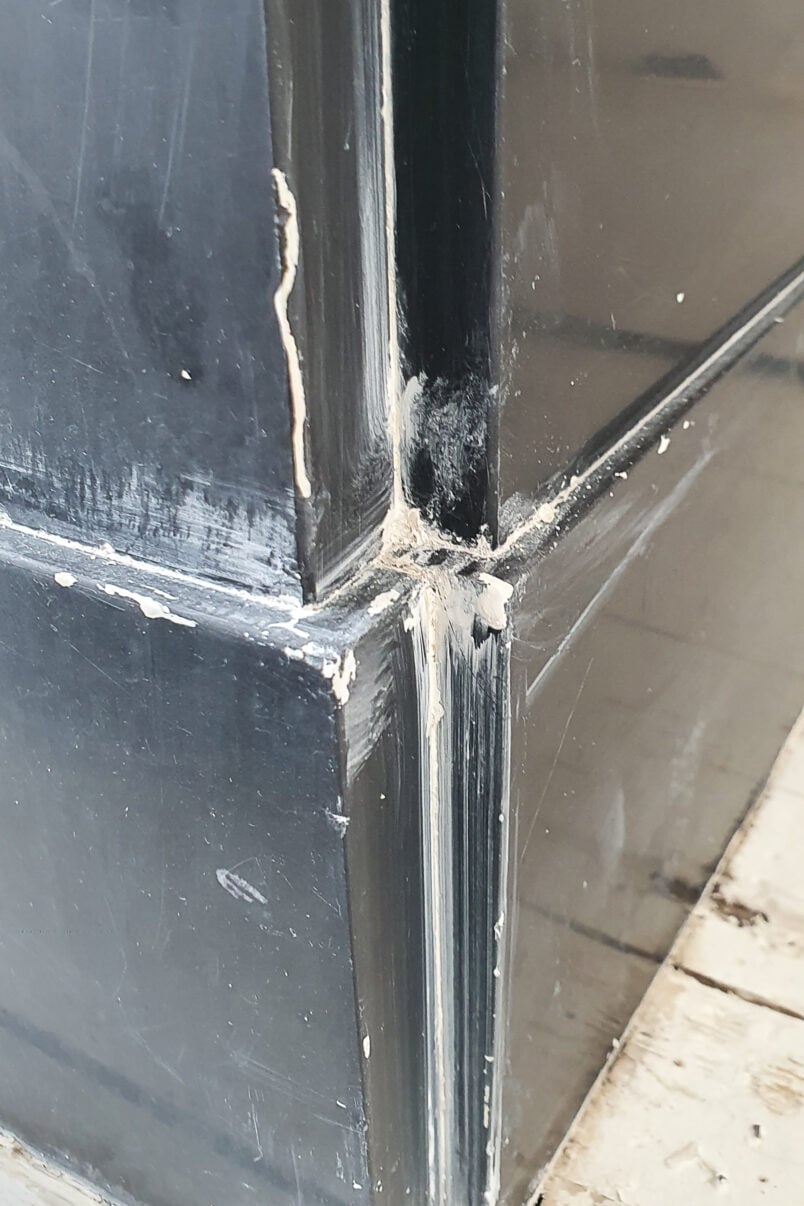
Although our marble surround isn’t very detailed, there was still a lot of paint stripper stuck in the gaps and joins. I ended up picking at it for hours and hours with toothpicks to scrape out as much dirt as possible.
Step 5
Apply Colour Intensifier
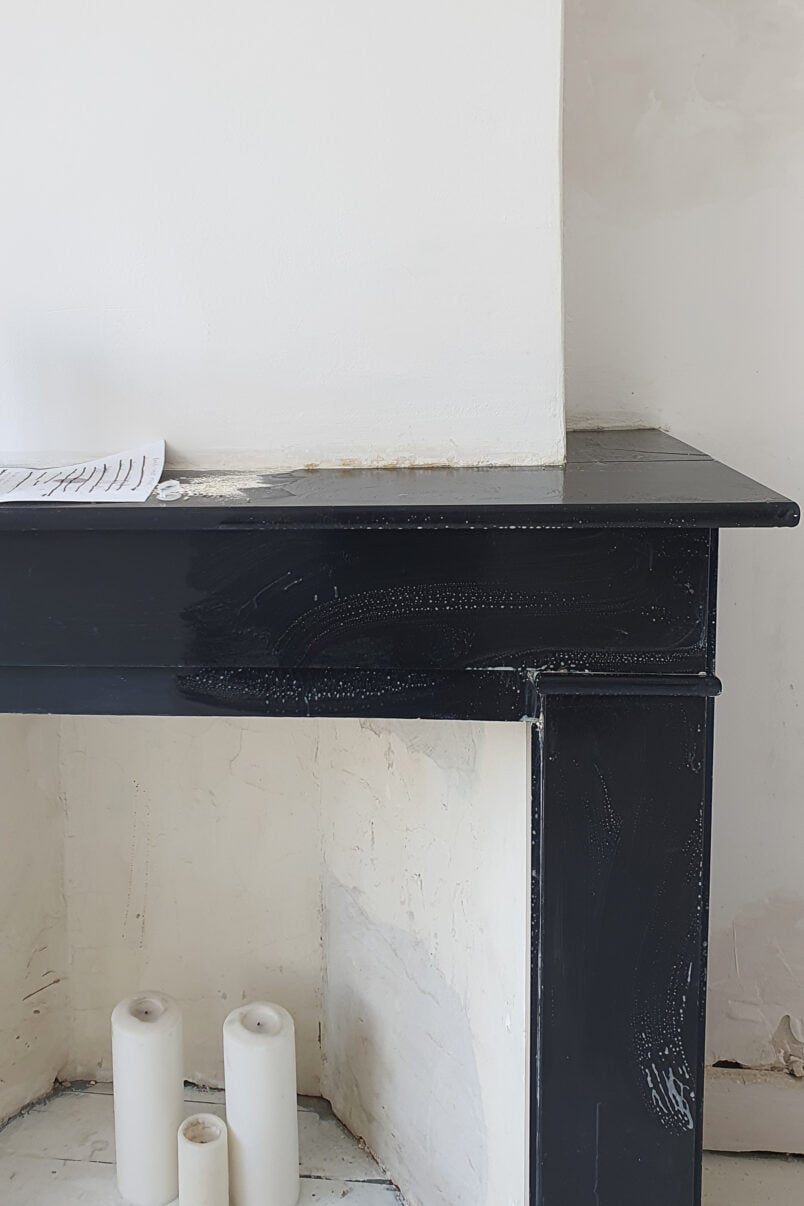
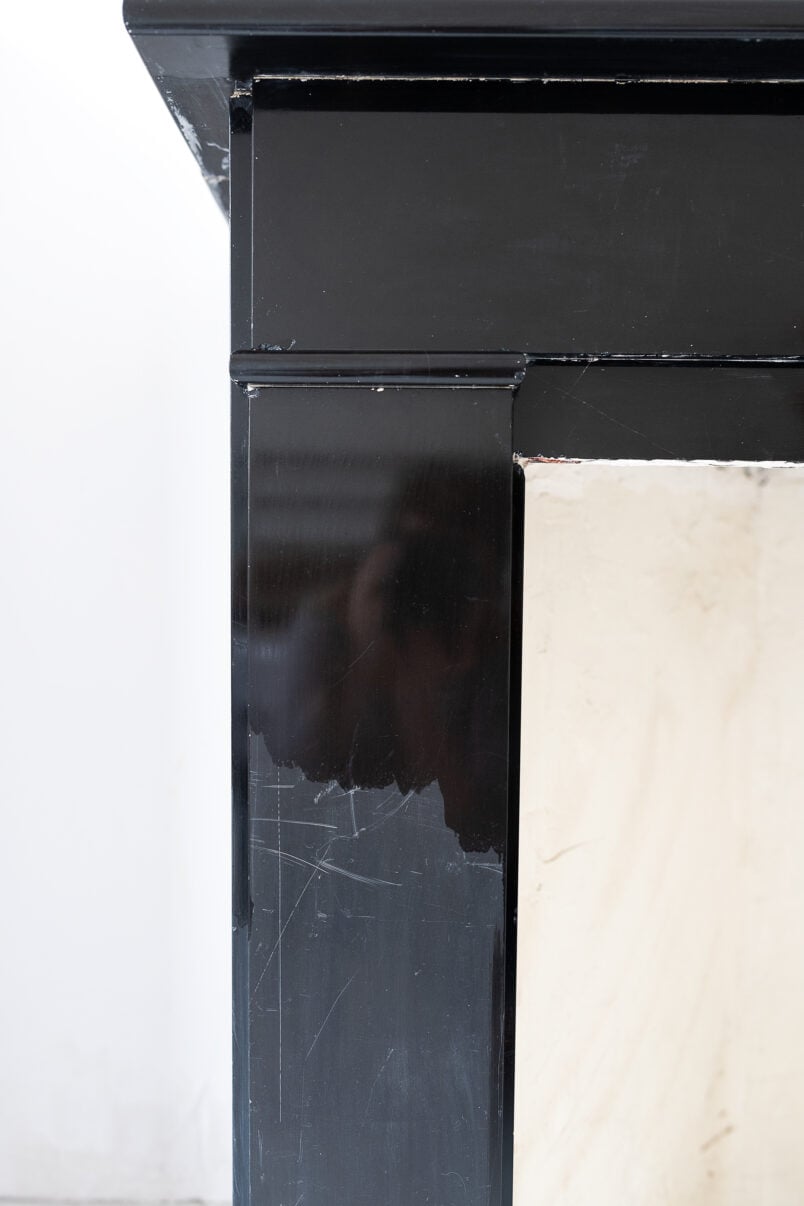
Although we used a plastic paint scraper to avoid scratches, our marble still looked damaged after we removed the paint. I assume that’s why it had been painted in the first place.
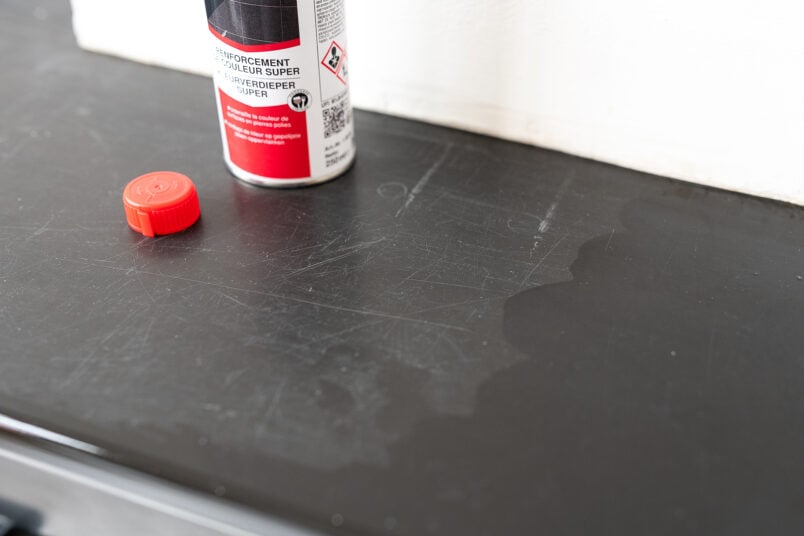
The colour intensifier we used works like magic. You can immediately see a big difference when you apply it. The black becomes so much darker and shinier, and almost all of the scratches disappear.
Use a cloth to wipe the colour intensifier all over the surface and let it soak into the marble for about 15 minutes. Then, wipe off any excess.
Step 6
Fill Any Gaps (optional)
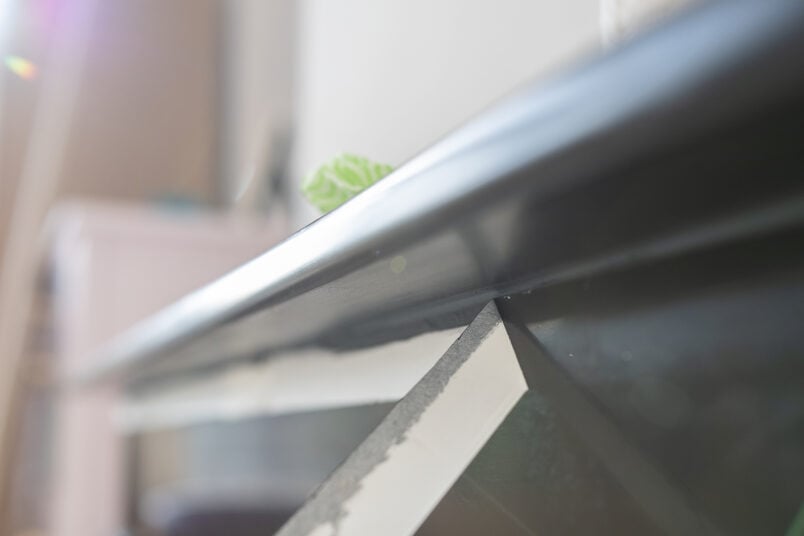
Because our fireplace has moved and cracked slightly over the last 100 years, you can see some of the mortar that’s glueing the pieces together in the joins.
This probably won’t be an issue if the marble surround is a lighter colour but as ours is black, the imperfections are very visible.
I’m sure specialist products are available, but we decided to use black caulk around the joints to hide the gaps. If you look very closely, you can see that it’s a slightly different colour, but I think it looks so much better with the gaps filled.
DIY TIP
Stick some masking tape along the edges where you need to caulk. Apply the caulk and smooth it before removing the tape for a super clean and mess-free finish.
Step 7
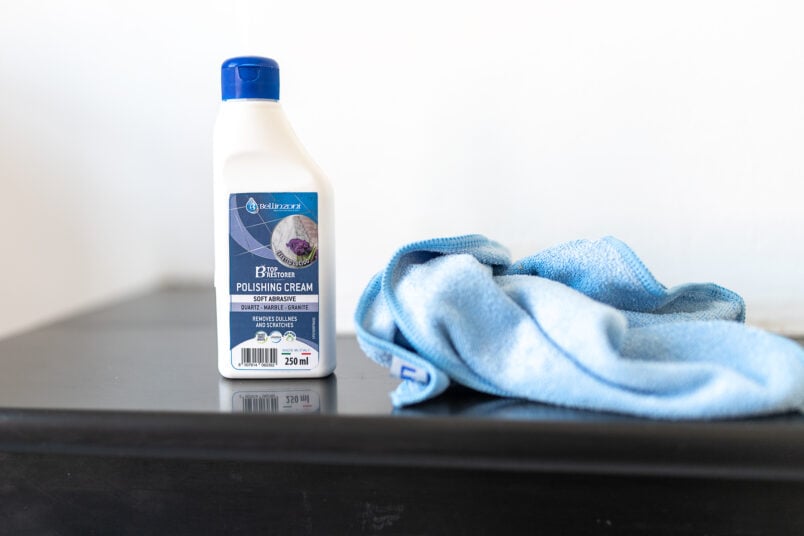
Appy The Marble Polish
The very last step is to apply some polish to protect the surface.
You can get polishing pads to use with a cordless drill if you really want to buff the surface, but we found that rubbing it in by hand with a cloth worked well and gave everything a lovely smooth and low-lustre finish.
How To Clean A Marble Fireplace Surround
All we do to keep our marble fire surround looking this good is give it a regular wipe with a soft, dry dust cloth. We don’t use any products for the day-to-day cleaning at all.
If it does get dirtier (we are still renovating, after all), we use this stone cleaner to remove any dirt build-up and then polish it again with a bit of the marble polish.
It’s important never to use harsh cleaners or abrasives on marble as they can damage or discolour it. If you’re unsure, always try any products in a small and inconspicuous area before you use them.
How To Remove Scratches From Marble Or Granite
For removing light scratches in marble or granite surfaces, we recommend using a colour intensifier which makes the scratches almost disappear with minimal effort.
It’s just a matter of rubbing the liquid over the marble, letting it soak in for 15 minutes and then wiping off any excess.

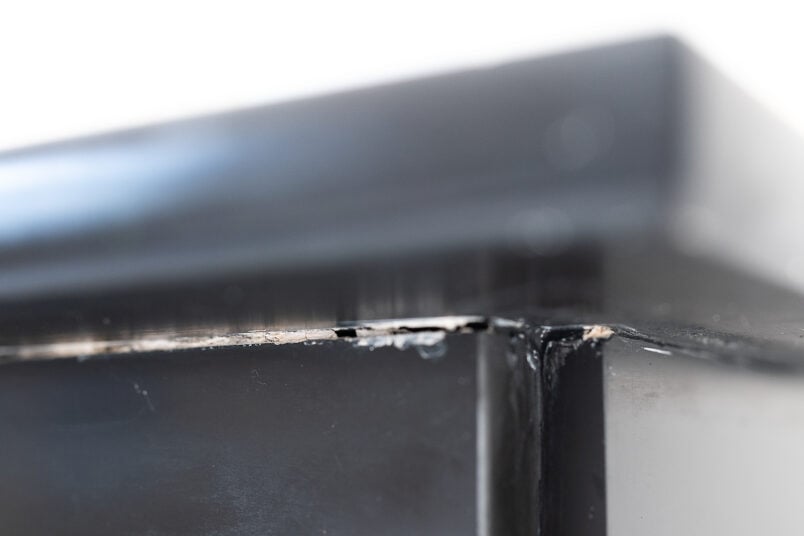
Now, if you’ve made it this far, you’ll probably want to know about the little accident we had while installing the wood-burning stove in the room below.
If you follow us on Instagram (you should be by the way), you may remember the messy accident when having the chimney lined for our new wood-burning stove in the living room below.
The fireplace installers had to create an opening in this bedroom fireplace to be able to wiggle the new flue through. Generally, it’s not a problem, but they must have scratched and chipped the painted marble surround in the process. They also didn’t close the hole they made for the flue properly, and all of the insulation came pouring out.
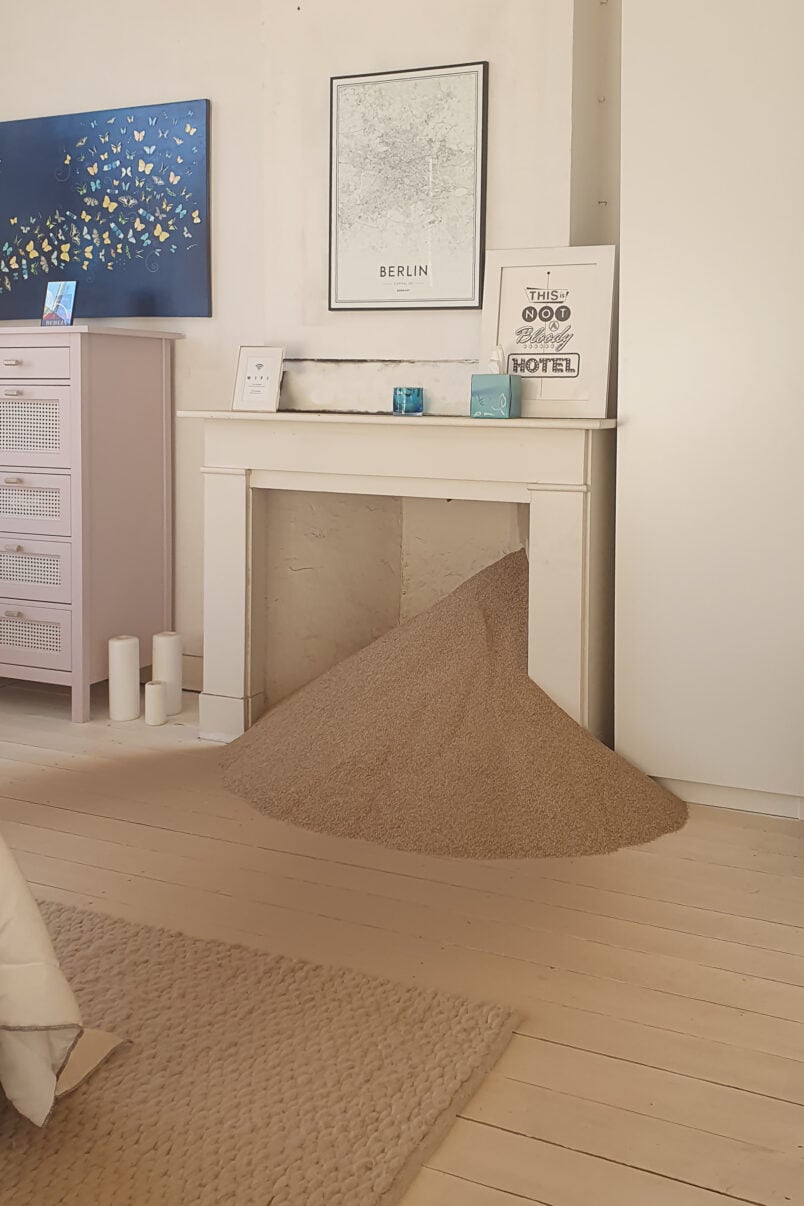
It was almost worth it to see the look on their faces, though.
There’s obviously still an epic amount of work to do in this room but you’ve got to start somewhere, and behind the scenes, we’ve actually already updated the electrics, repaired the ceiling and plastered most of the walls in here.
Fingers crossed, we’ll have a big reveal for you soon!

Leave a Reply