We’ve recently been getting a lot of questions regarding the restoration, maintenance and running of our original Edwardian fireplaces and have put together this little list that will hopefully answer most of your questions and give you a helping hand.
This post contains affiliate links. We only recommend products we love and think that you will, too! Read our full disclaimer here.
Restoration
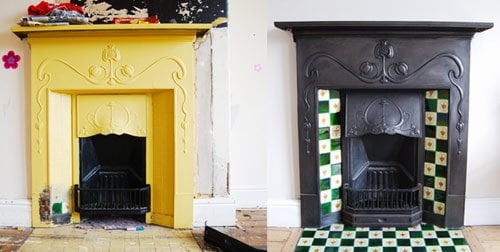
How do you restore a cast iron fireplace?
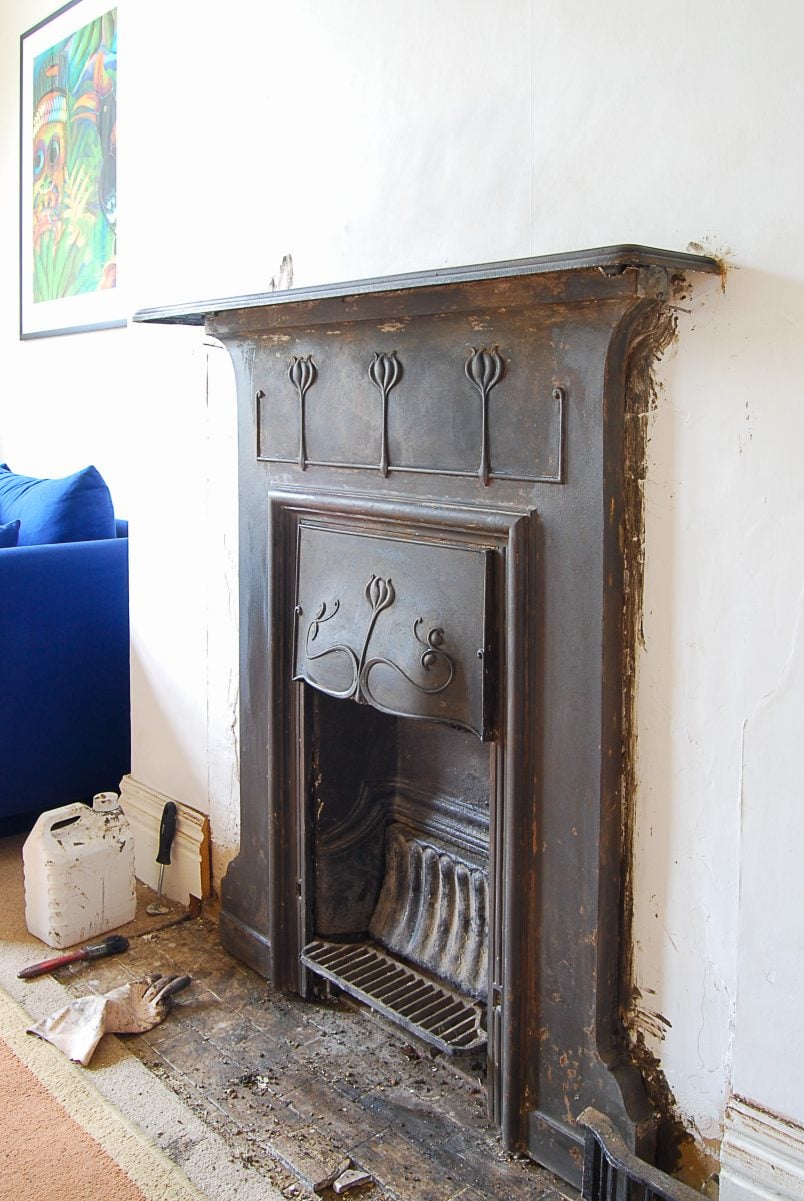
Our cast iron fireplaces were covered in layers of paint. We started by stripping everything with a chemical paint stripper. You should never use a heat gun on cast iron, as the sudden difference in temperature can cause the cast iron to crack.
What paint stripper is best?
We used a slightly different method for each of the two fireplaces we restored. We stripped the fireplace in the master bedroom with Nitromors and stripped the fireplace in the guest bedroom (formerly in our dining room) with Peel Away.
You can check out each of those methods in more detail here and here. We LOVE PeelAway. It worked really well and stripped away all layers of paint in one go.
What do I need to restore a cast iron fireplace?
- Paint Stripper | We absolutely love Peel Away, and it’s the only paint stripper we recommend
- Plastic scraper | Using a metal scraper could damage the cast iron, which is why plastic scrapers are ideal
- Gloves | It goes without saying that stripping a fireplace is messy work. Chemical strippers are also really harsh, so always wear protective gear!
- White Spirit | To clean the cast iron fireplace. Don’t use water to clean it, as it will rust.
- Fine Steel Wool | Steel wool is perfect for getting rid of the odd stubborn bit of paint and cleaning detailed areas.
- Grate Polish | For the finishing touches, you’ll have to apply a layer of grate polish. It’ll protect the cast iron and turn it a lovely deep black colour.
- Lots of old rags or kitchen paper
It’s stripped. Now what?
After removing all of the paint, we found that the cast iron had a thin layer of rust on it. Most of it came off with the stripper. To remove any left-over paint residue and rust, we gave the whole fireplace a sand with some fine steel wool.
Okay, it’s stripped and sanded. How much more can there be?
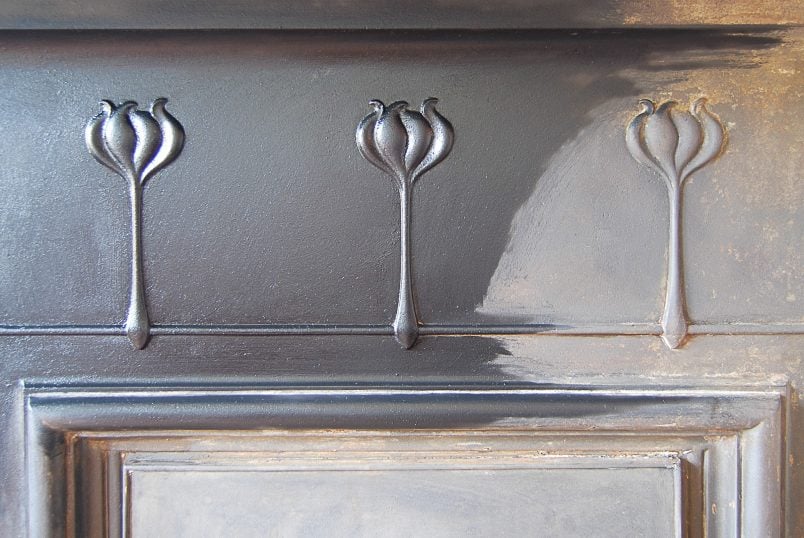
Don’t worry, you’re almost there. The next step is the easiest and most fun – applying the grate polish. Make sure your cast iron is cleaned and dust-free. Then, mix a small amount of grate polish with a bit of white spirit.
The addition of white spirit makes the paste much easier to apply, and it also goes much, much further. When it’s dry, buff it to the desired sheen with a soft cloth.
Oh, and wear gloves – I had black fingers & fingernails for about a week after doing it without… Ups.
What grate polish did you use & how much will I need?
We probably used about a quarter of the tube of grate polish (mixed with white spirit) to cover the whole fireplace.
How does the finish hold up? Does the polish wear off?
It depends. Our fireplaces in the bedroom and living room have a slightly polished finish. If you touch or wipe them, a small amount of black grate polish will rub off, but not much.
Our fireplace in the guest bedroom has a slightly more matt finish (same paste and application, but just not polished), here the polish will rub off much more easily – although we like the matt finish, we will probably polish it just to make it more durable.
How often do you need to reapply the polish?
We’ve had the fire in the living room for three years and haven’t had to reapply the polish yet. It still looks exactly like it did on the day we had it installed.
How much does it cost to restore a cast iron fireplace?
If you’re willing to do the work yourself, it’s a much more affordable project than you probably expect! Paint stripper is expensive, but that’s almost all you need! In total, it cost us about £70 to restore each of our fireplaces.
Running
I’m really struggling to light my fire. Do you have any tips on how to light a coal fire?
We really struggled with this in the beginning, too.
After a few years of practice, it’s definitely become easier. The trick is not to be too delicate. Start by layering your fire. We use about three small firelighters, a load of kindling on top and then a few coals balanced on top of the kindling.
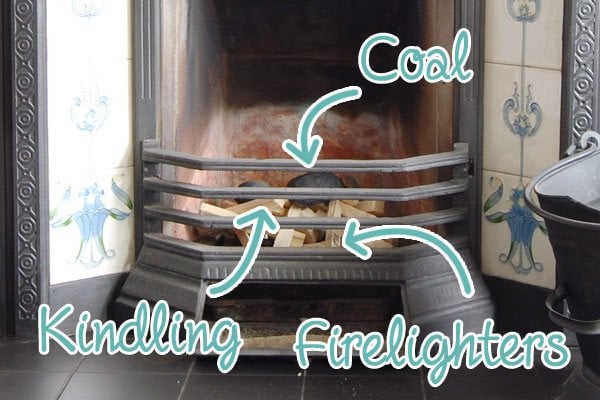
Add more coal (quite a bit) when the first coals are glowing. Make sure you have the bottom vent open to allow a lot of air to circulate the fire. Once it’s going, you can close the vent.
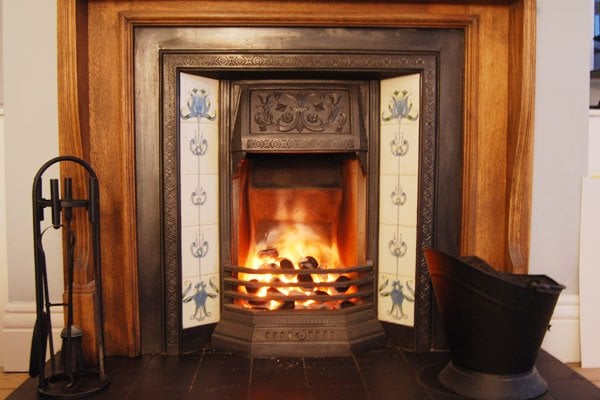
It will take a couple of hours before the fire really gives off a lot of heat.
How often does it require cleaning?
It all depends on how often you use it. I will usually give it a quick wipe after every use and a more thorough clean after about every fifth use.
How do you clean it, and how long does it take?
For the quick clean, we just give everything a quick dust and wipe with a standard duster. For a more thorough clean, I first sweep away any dirt & dust and then clean & polish everything with a rag and WD–40. You should never use water on cast iron as it will rust.
The quick clean is a 5-minute job maximum. The more in-depth cleaning takes about 15 minutes.
How much wood do you use?
As we live in a smoke control area, we aren’t allowed to burn wood in our open fires. Most cities in the UK fall in this category, and you can check out if you’re in one here. We burn smokeless coal in our fires.
Okay, so how much coal do you use?
Each winter, we use about four 50kg sacks of smokeless coal. We have central heating and only use the fireplace in the living room – the ones in the bedrooms are purely decorative. We probably have the fire on for about 3-4 evenings a week for about 4-5 hours.
Anything else?
Don’t forget to have your chimney swept regularly – at least once a year (more often if you use your fire a lot)!
You can find a chimney sweep in your area on the NACS (National Association of Chimney Sweeps) homepage. A poorly maintained chimney can lead to house fires, so don’t skimp on having your chimney swept! Not having your chimney swept regularly could even invalidate your house insurance!
Do you have any safety tips?
Burning fuel will result in the production of carbon monoxide. For safety reasons, we have a carbon monoxide detector in our rooms where we use the fireplaces. They are only around £15 and could potentially save your life!
Oh, and, of course, you should never leave your fire unattended.
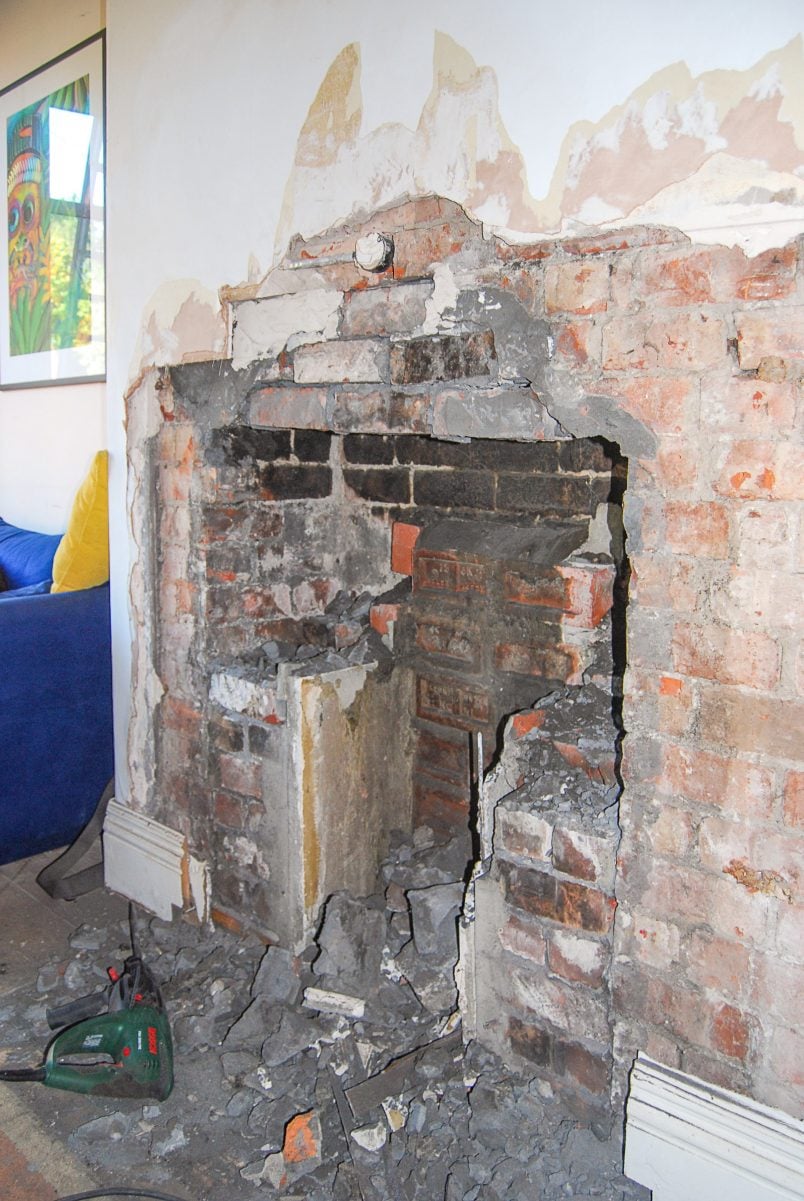
Installation
I don’t have a period fireplace, but I’d like one installed. Where do I start?
We spent a few weekends going to reclamation yards and fireplace restoration centres just looking at the fireplaces on offer. It’s a good idea to take exact measurements of your chimney breast and room with you so that you don’t fall in love with a fireplace that is not the right size for the room.
It’s also a good idea to get to know your neighbours and see if they still have any original fireplaces. It’ll give you a better idea of what style and size fireplace would have originally been in your home, too!
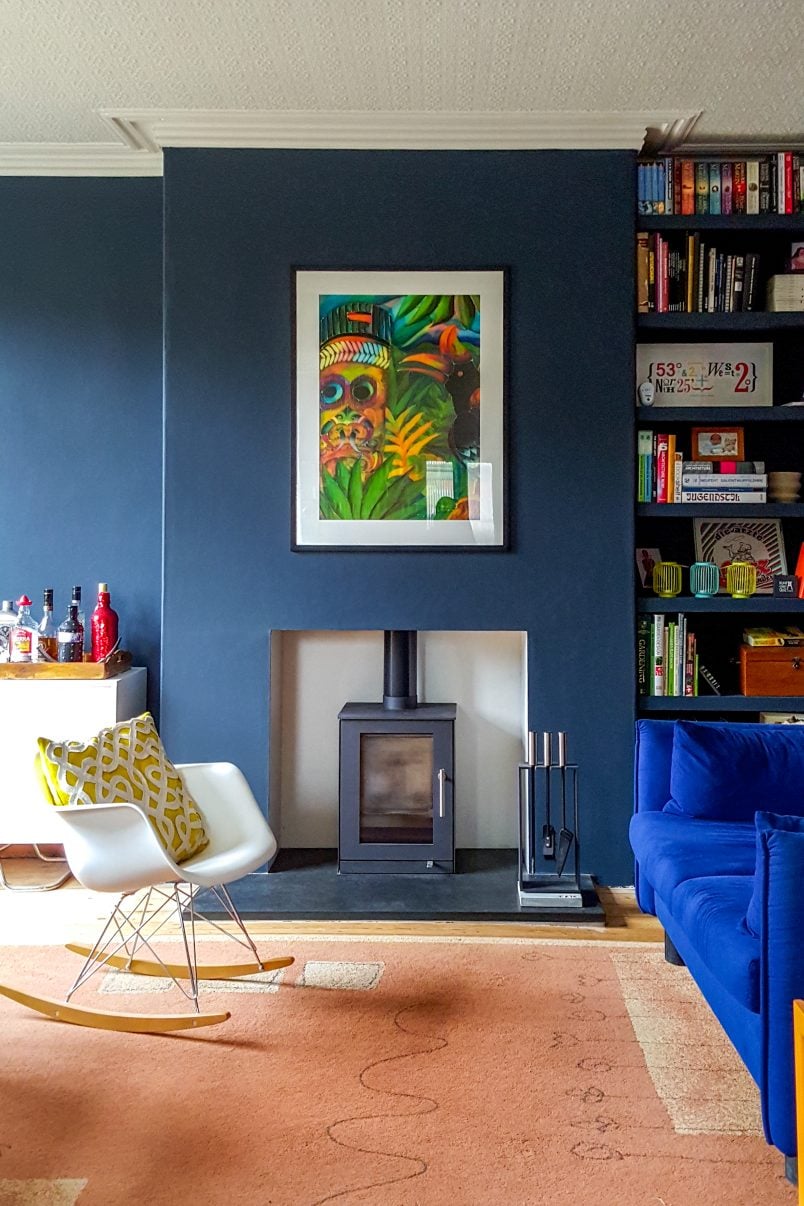
We had a wood burner installed in our dining room, and there are a few things to consider when choosing a wood burner, too. The process is similar, but there are differences, so we’d recommend reading this post where we share everything you need to know about having a wood burner installed, too.
I’ve chosen a fireplace, now what?
You have the stove fitted by a professional. Even if you think that this is a job you could do yourself, you will need certain certificates to comply with building regulations. A good installer will also check the state of your chimney and flue and make sure that everything is safe and secure.
Let us know if you have any other questions or any advice you’d like to share. We’ll try to answer if we know the answer!

Niki Jewett says
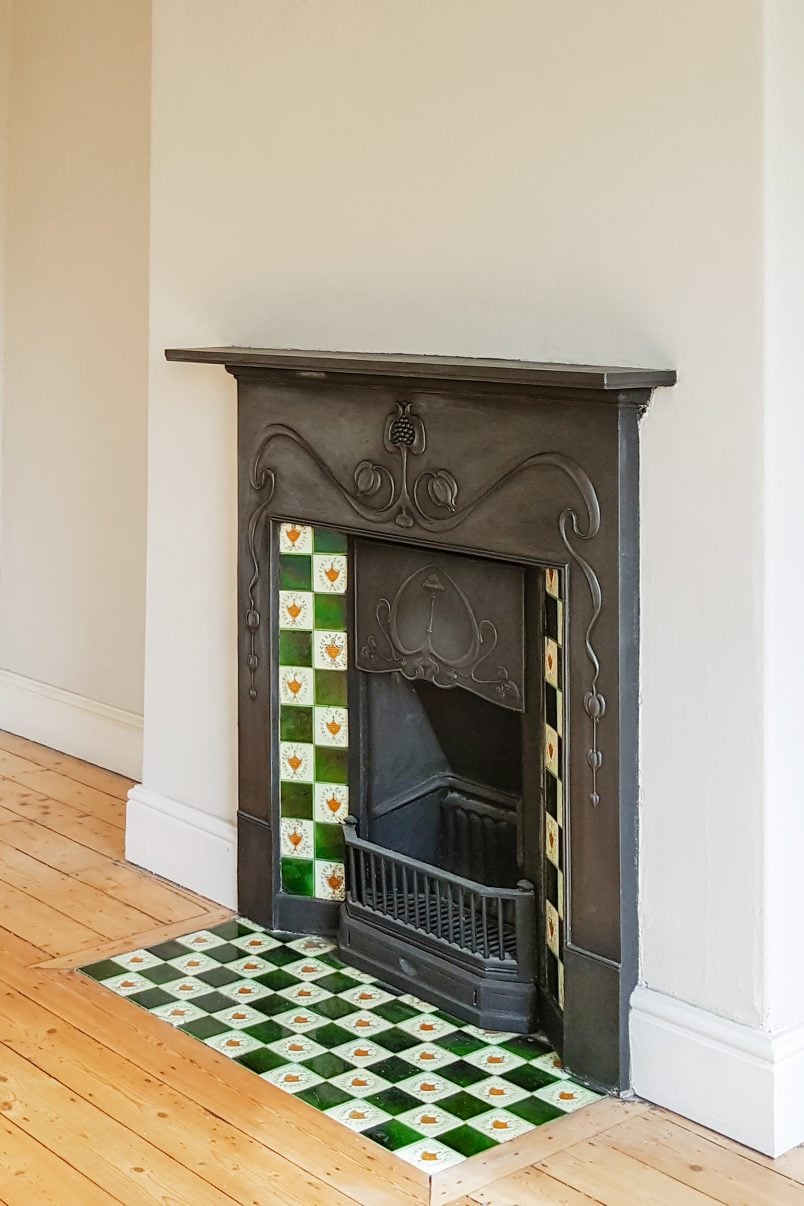
Do you have any tips about replacing the damaged victorian floor tiles in a hearth. I have original victorian quarry tiles in a terrible state. Any tips?
Christine says
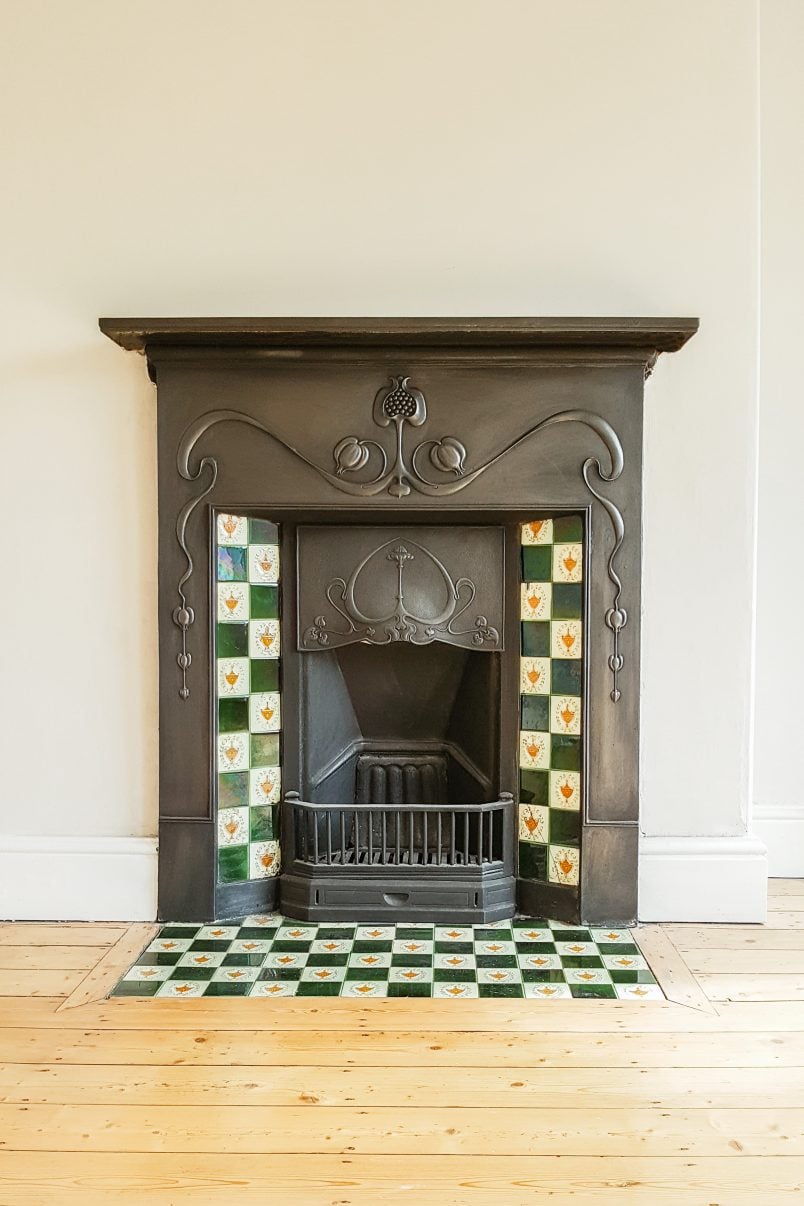
If you want to replace all of the tiles, it’s relatively easy as you can find lots of reclaimed original tiles at antique fireplace shops or get great-looking reproductions. If you just want to replace a few, you can have the design copied onto new tiles. We did it for our guest bedroom fireplace hearth and it turned out really well. You can see how we replaced the broken original hearth tiles here.
Hope that helps, Niki!
Cx
Lisa says
Hi! I am lucky enough to have recently installed a cast iron Edwardian fireplace which is very very similar to yours, down to the Art nouveau styling!
My question is related to the damper – is this the hood part over the grate (which moves in and out?) I’ve found that the hood slides back down causing smoke to back into the room. Any tips? I’ve only lit one fire since installation and will be firing up the carbon monoxide alarm in the meantime! Congratulations on your beautiful fireplace! I love mine
Christine says
It’s a gorgeous fireplace isn’t it, Lisa?! We loved it so much (we moved house so don’t have it anymore). We never used the fireplace as it was in one of the bedrooms and purely decorative but I do remember the good being very stiff and when it moved it stayed in place.
I would definitely recommend popping down to a local fireplace shop that deals with antique fireplaces and ask what they recommend. It must be a common problem so hopefully, the experts will be able to give you some advice.
Sorry, I can’t be more help. Enjoy your fireplace!
Cx
Lisa says
Hi , your post has been so helpful , thank you !
I’ve been trying restore a cast iron fireplace rhat I inherited with my home . The cast iron had been painted with silver paint . I have been through 3 bottles of paint stripper and am still struggling to get all the silver off. Have been using steel wool dipped in paint stripper and white spirits but still struggling to get all of it off. Do you have any added suggestions for me please … many thanks
Christine says
So glad you found it helpful, Lisa! There are a few things I would recommend to make the process easier. Firstly, leave the paint stripper on the fireplace and let it work for a couple of hours (or more depending on the paint stripper you are using) so that it has time to work. You can cover it with clingfilm so it doesn’t dry too quickly. We always recommend PeelAway to strip paint as it’s by far the best paint stripper we’ve used. If you are still left with stubborn bits, you can get attachments for your cordless drill that will help remove the last bits of paint in grooves and hard to reach areas. (something like this). It’s still hard work but I’m sure it’ll be worth it in the end.
Hope that helps!
Cx
Christos says
How about having the fireplace sand blasted? That seems an easy solution.
Christine says
We always recommend having anything you can remove dipped or sandblasted. Often, fireplaces are plastered into the wall (as ours was) and removing it would cause a lot of damage so stripping it in situ is often the only solution.
Cx
Jennifer Holdford says
Someone has sealed the cast iron fireplace in my bedroom with a brown putty that has gone hard. They haven’t done a tidy job so looks a mess.
Any suggestions on how to tidy it up so its not so obvious?
Christine says
That’s such an annoying problem to have to solve, Jennifer. I’m not sure what the brown putty is, so it’s difficult to advise on how to remove it. Having said that, I’d try to scratch off as much of it as possible (maybe a bit of sanding will help to smooth it, too) and then freshen up the fireplace with some grate polish.
It sounds like it would be best to remove the putty and start from scratch, though.
Hope that helps!
Cx
Val says
Hi guys, I love your work and really appreciate the detailed information and photos.
We have just removed a highly detailed, patterned cast iron fire surround from our bedroom and plan to use it as a backing for our multi fuel burner in the living room. We removed many layers of thick black paint and it looks fantastic now. I don’t want to blacken it again with iron paste. Can you recommend anything that will protect it against the fierce heat but keep it’s natural colour?
Many thanks
Val
Christine says
Thanks for the feedback, Val! Traditionally you would use the grate polish on the fireplace. If you polish it (a lot) it does turn more of a gunmetal colour but it’ll obviously still be darker. I’m not really sure what kind of product will protect the cast iron otherwise.
Maybe you could try and visit a reclaimed fireplace store to see if they offer any products that would do the trick? I know that our local store was always happy to help and gave great advice!
Good luck with finding what you’re looking for!
Cx
Catherine Dolliver says
Hi I am considering buying an old surround (either sandblasted or painted white!). Is there a reason that you used polish rather than stove paint? Will stove paint be just as effective if I want the fireplace black. Also (I know nothing about fireplaces and have never had an open fire) I seem to only be buying a surround…what else will I need to buy to be able to light my open fire (other than a hearth which I will tile).
Thanks in advance
Catherine
Christine says
Yes, we used grate polish for both of our fireplaces. There’s no reason other than it’s traditionally the way that fireplaces were treated. It’s really black, so it should do the trick in terms of the finish you’re looking for.
In terms of the parts you will need I would recommend visiting a fireplace shop to see what full fireplaces look like. Then you can work out what parts you will need.
Just remember, that any fireplace will have to comply with building regulations and will have to be fitted by an approved HETAS installer. You will also have to have your flue checked to make sure it’s suitable and it will have to be cleaned regularly. Otherwise, it could invalidate your home insurance!
Cx
Colin Brady says
Hey, I restored two fireplaces after reading your post. Got them sandblasted in the end as it was taking ages with stripper! I’ve used black polish but if any water hits the fireplace it’ll still rust. Any tips to seal?
Christine says
How exciting, Colin! I’m sure they look amazing. If we could have removed the fireplace in our bedroom we would have had it sandblasted, too!
Cast iron will always rust when it comes in contact with water. It’s kind of inevitable. We were usually pretty careful so only had minimal problems. When you clean your fire don’t use water and use WD40 instead. If you do have a few small rusty patches, give them a scrub with some fine steel wool and reapply the black polish. The only way I know of to avoid any problems is to paint the fire but I personally think that black polish and a bit of TLC every now and then is a compromise worth making for a better and more authentic look.
Cx
Victoria Todd says
Hi guys, your fire looks great! Can you tell me if there is black paint on a fireplace you should remove it before you use it? Or do you know if it’s safe to use with the black paint on the surround?
Thanks, Vicky
Christine says
Thanks, Victoria!
There are specialist paints for fireplaces so it’s difficult to say it’s okay to use without knowing exactly what it’s painted in. I would assume that it’s okay to have paint on the surround though.
Cx
Megan says
I love your blog for ideas and how-to guides. Thank you!
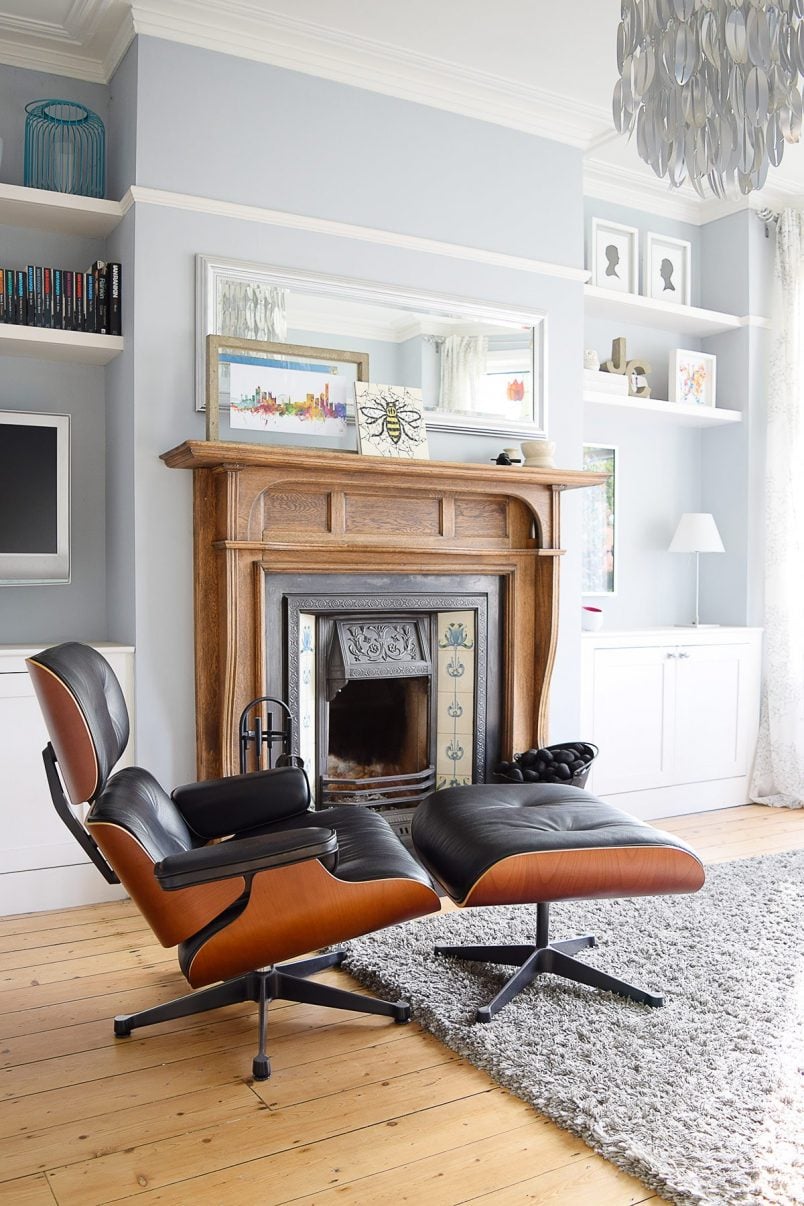
Where did you find your wooden surround?
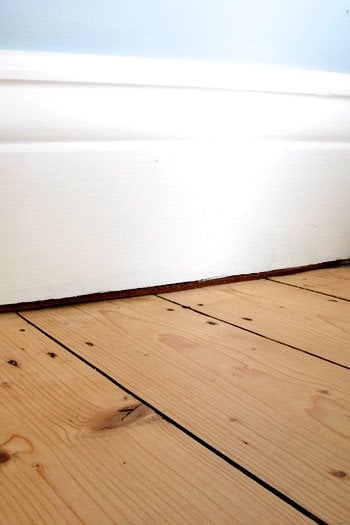
Also, we’re getting a woodburning stove, and just had the slate hearth installed. Guess who forgot to factor in the fact that we still need to sand the floors? A useful tip for the start of all of your posts is “what else needs to happen to this room?” Argh.
Christine says
Thank you, Megan! We bought our surround together with the fireplace at the Antique Fireplace Restauration Company.
It’s always annoying when you realise that things should have ideally been done in a different order, but I wouldn’t worry about it too much. You can still sand the floors up to the hearth, you’ll just have to be a bit more careful.
Cx
Callum says
Hello,
I have recently moved into a house with a fireplace much like the ones pictured. The grate has broken and I need to replace the ashpan but the front is working fine. One question I have is the ashpan that is currently in there doesn’t come out of the opening at the bottom of the front for ease of emptying, is this just how these fireplaces work that when you want to empty the ashes you need to remove the front part to pick up the ash tray or am I missing something here?
Christine says
Our ashpan is the same, Callum. We can swivel it around slightly to get it out of the opening (and don’t have to remove the front) but it is always a bit fiddly. I’m not sure if that’s the way it always is, but I guess the ashpan has to be fairly large to collect all of the dirt.
Cx
Callum says
Thanks for the reply, yes I thought that might be the case, I’m struggling to find an ash tray that’s small enough to get through the opening at the front and not too small so it doesn’t collect anything! Will continue my search online for one!
Ed Halvey says
Hi guys
Great work on the house, pretty much want to do all the same things! Can I ask, do you find the open fire creates a draught that can cause the room to be chilly in the morning? Is a stove better in this respect? I love the open fire, but the thought of the up- draught making the room cold in the mornings puts me off!
Thanks, Ed
Christine says
Thanks Ed!
Yes, the stove is more draught free, but I wouldn’t say that the open fire makes a huge difference to the temperature of the room. Our Edwardian home admittedly isn’t the warmest, but I’d say that’s down to a lot more than just the open fires.
Cx
Lauren says
Hi Christine,
We have just moved into our first house – an Edwardian semi that needs a total refurb! I have spent two days stripping 4 layers of paint from 1 of 3 painted fireplaces. I have followed your instructions with paint stripper, wire wool and white spirit, but there are still some really stubborn parts around the small details. Did you put the black paste over your fireplace at this stage, or did you take each and every last piece of paint off before polishing the paste on? Luckily the carpets and wallpaper is very dated, so I haven’t needed to worry about the mess as much (and it is very VERY messy-as you know well!)
Thanks,
Lauren & Scott
Christine says
Congratulations on your new home! Yes, we had a few very stubborn bits of paint, too. It’s definitely better to remove all paint, as the paste doesn’t stick to it very well. Addmitedly, we did have a few little spots of paint left when we applied the paste and overall it worked fine. I personally think that it would be almost imposssible to remove everything! Hope that’s some help!
Cx
Christine says
Hi Lauren, I just kept on plugging away and also used some wire brushes about tooth brush size. Then I got the big guns out and put some wire brush heads on the drill! Don’t be to delicate, they can take a pounding and you see much better results.
Andrew says
Incredibly brilliant post! You answered all the relevant questions in one go. Your blog deserves some kind of recognition and I believe this is one of the best blogs related to fireplace restoration or maintenance.
CHRISSY says
HI, THANKS FOR ALL THE INSIGHT INTO YOUR RESTORATION. WE ARE RESORING AN IN SITUE LATE VICTORIAN, CAST IRON FIRE WITH A SLATE SURROUND. (IT HAD BEEN PAINTED IN HAMERITE METAL PAINT!) OH LORD WHAT A JOB!!
MY QUESTION IS THE FIRE IS MISSING SOME PARTS, IT ONLY SEEMS TO HAVE THE FRONT GAURD? AND ASH PAN COVER/VENT. DO YOU KNOW WHERE I START TO GET THE MISSING PARTS??? THANKS FOR ANY ADVICE. X
Christine says
You’re welcome, Chrissy! Stripping Hammerite sounds like an awful job – we certainly don’t envy you! For your missing parts, I’d check out some of your local fireplace restoration companies and shops that sell reclaimed fireplaces. They’ll probably be able to get hold of the missing parts for you.
Good luck finding what you need.
Cx
Vicky Andrew says
We had this issue. Have an unusual sized fire missing front bars and ashpan. In the end (v recently) went online to http://www.wardantiquefireplaces.co.uk – they are in London and we are not. They had the pattern for our fire, and seem to have 100s of others. They recast the missing parts for us and now it looks amazing. Can def. recommend them!
Christine says
That’s an amazing tip! Thanks for sharing, Vicky!
Cx
Nicola says
We have bought a victorian fireplace that has been sandblasted but not polished, would you advise polishing before or after its fitted?
Christine says
We’d polish it before as it can be quit a messy job and could end up all over your walls.
Enjoy your new fireplace!
Cx
Nicola says
Thats what i was hoping you would say! thank you.
Robert Lee says
I have restored cast iron fireplaces in my Victorian house, and once cleaned
the best finish is obtained using Liberon Cast Iron Paste.
Christine says
Thanks for the information, Robert! The Zip polish we used worked great for us, but if we ever restore another fireplace we’ll bear it in mind. We bought our Zip paste at a local fireplace restoration centre – it’s the paste they use for all of their fireplaces, so I assume the finished and results of most pastes out there will be similar.
Cx
Jane Harrison says
We are about to attempt to replace the tiles on a cast iron fireplace. Someone retiled over the beautiful original tiles and they are beyond restoration now. So the whole lot has been removed and now we have a gap for the new tiles to go, and it looks like the slip into the surrounds – I’m planning to buy antique tiles (at great expense) but I’m not quite sure how to fit them? Have you ever done this? Any advice?
Thanks
Jane
Christine says
Hi Jane! It’s hard to believe that someone would tile over original tiles – so annoying! We were lucky and still had the original tiles in our bedroom fireplace. For our living room fireplace (which we had installed) we chose the tiles but had them fitted by the company we bought the fireplace off. I wonder if the shop where you are buying the tiles could advise you on how to fit them – or even fit them for you! Sorry we couldn’t be more help!
Cx
Kevin Gibson says
We’re trying to blacken a fireplace with black grate polish, but the polish doesn’t seem to be taking, or sticking, to the fireplace. Did you have this problem?
Christine says
No, we didn’t have that problem at all. All I could suggest is giving the fireplace a rub down with some fine steel wool and then cleaning it with white spirit. That should remove any grease and residue that may be stopping the grate polish sticking to the fireplace. Hope that’s some help, Kevin. We’d love to know how you get on – good luck!
Cx
Marie Roxanne says
With the yellow fireplace… how come you didn’t make the “fence” or “grate” yellow why keep it black?
I love the look of both of them, you did a great job!
Christine says
Thanks Marie Roxanne! Originally it would have all been black, so I guess that’s why we decided to stick with it. We’d really never even considered anything else.
Cx