Before you run out to have a cracked ceiling repaired or even replaced, you’ll be happy to know you can fix an even severely cracked ceiling yourself.
Repairing cracks in ceilings is easy, but there are a couple of essential steps you shouldn’t skip when fixing a crack in a ceiling so that it doesn’t end up coming back.
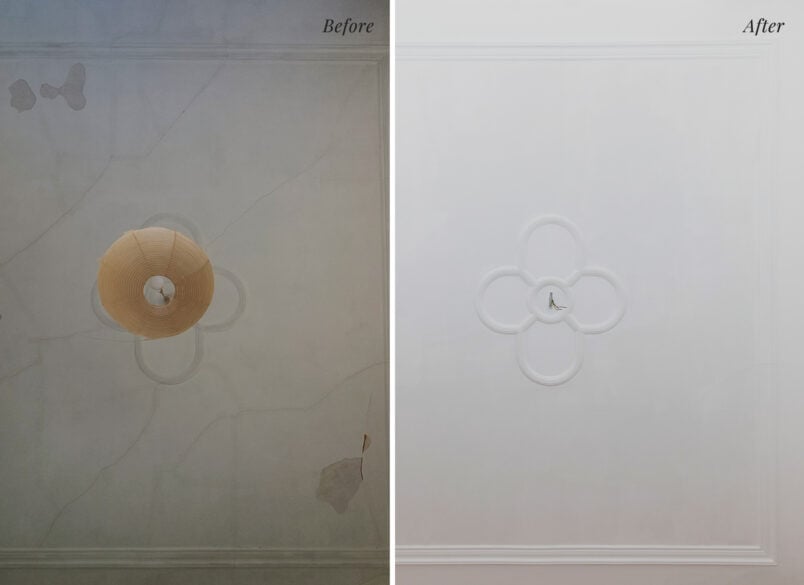
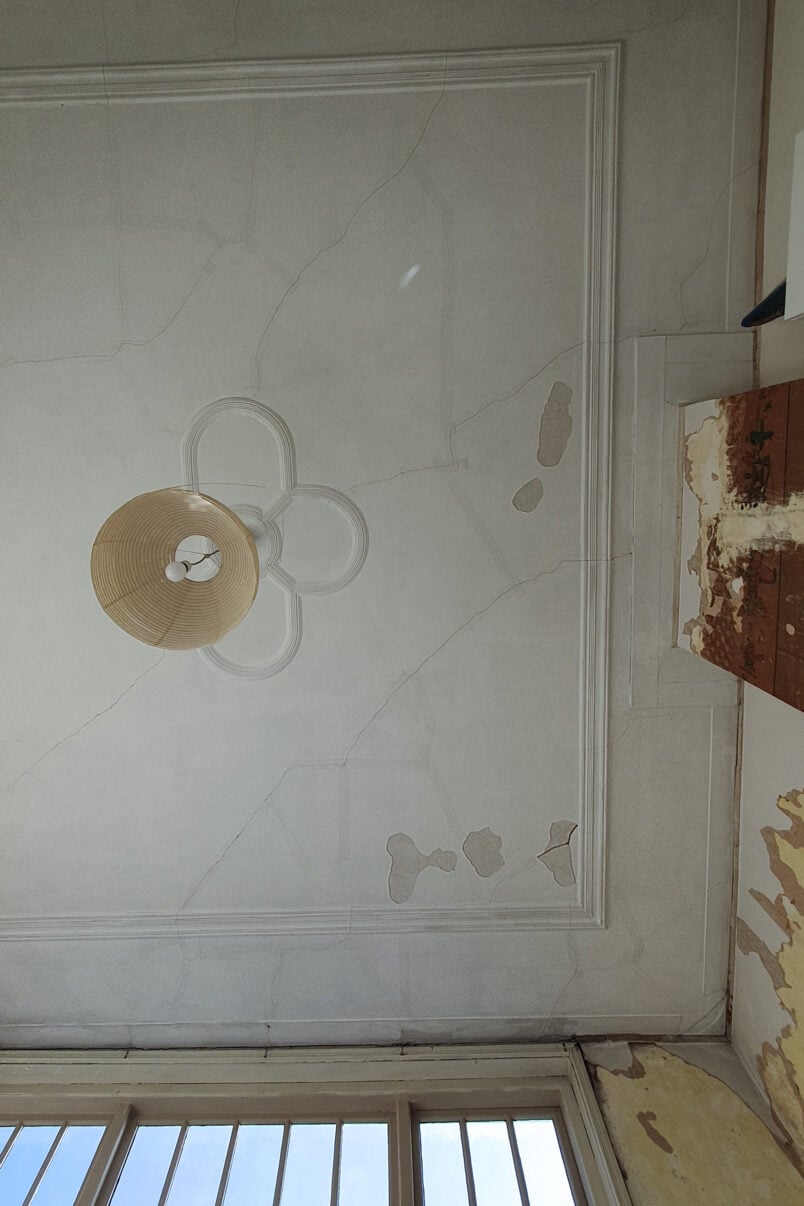
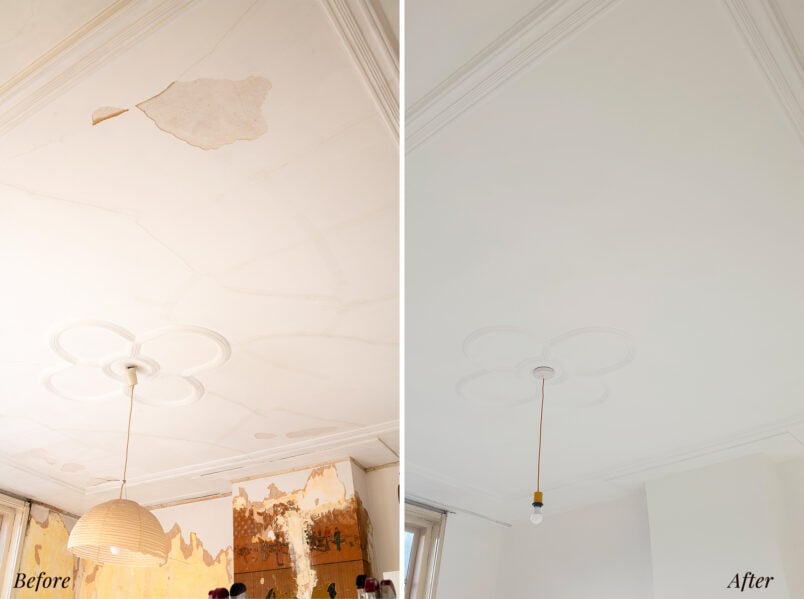
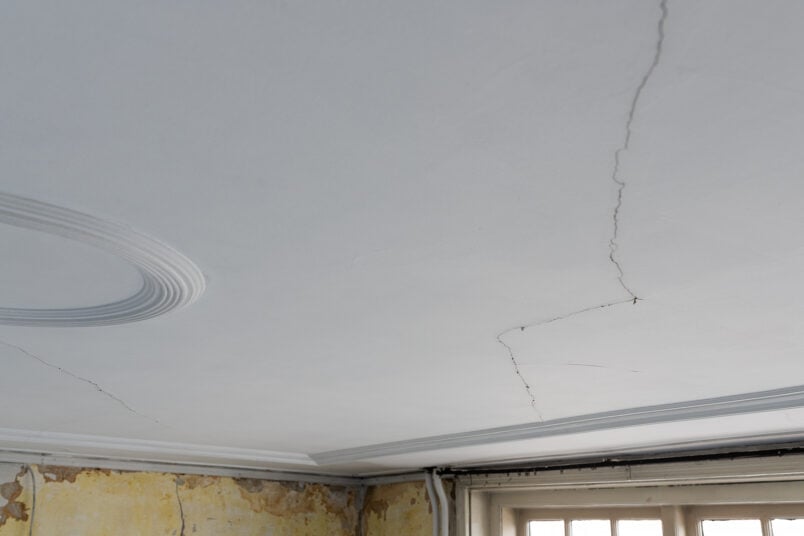
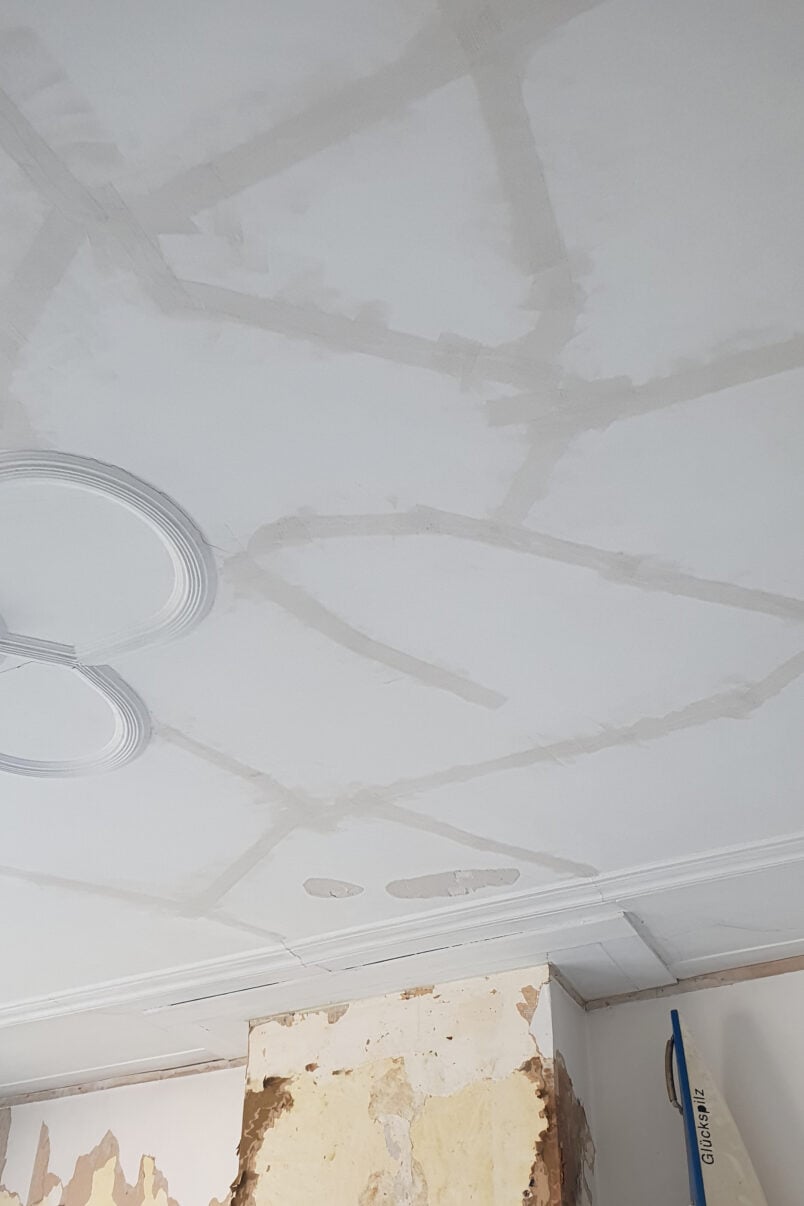
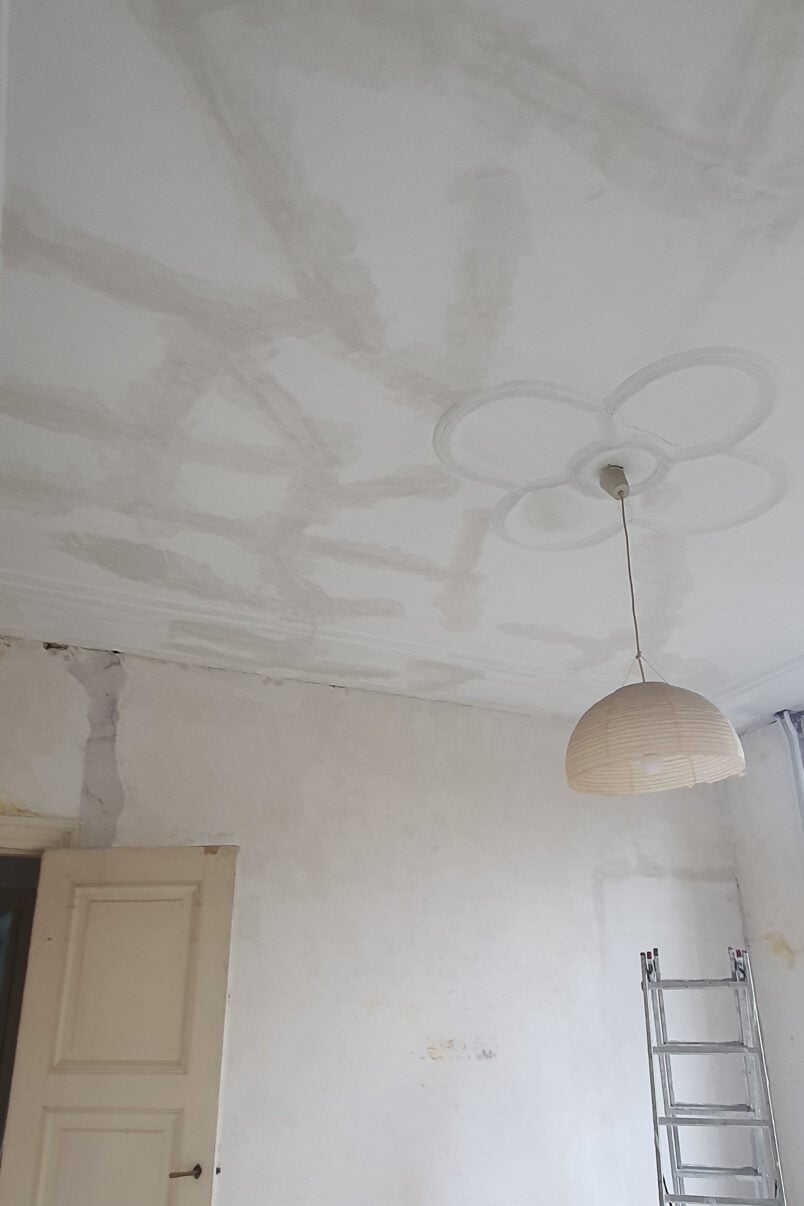
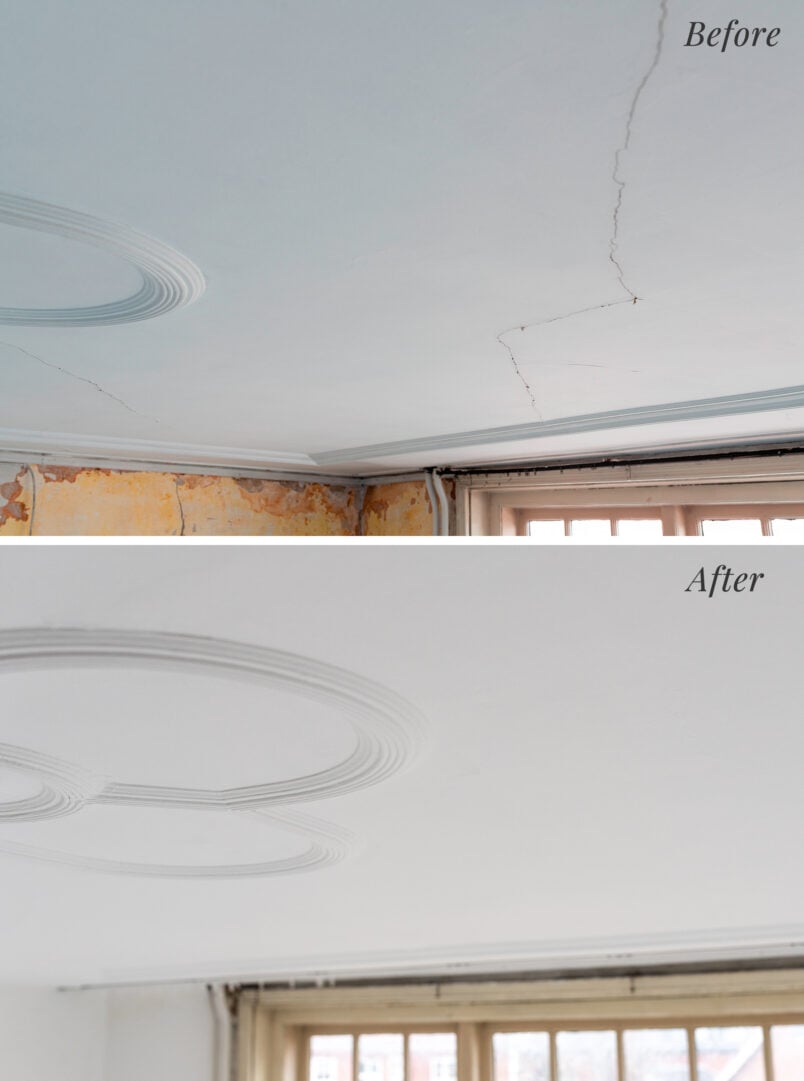
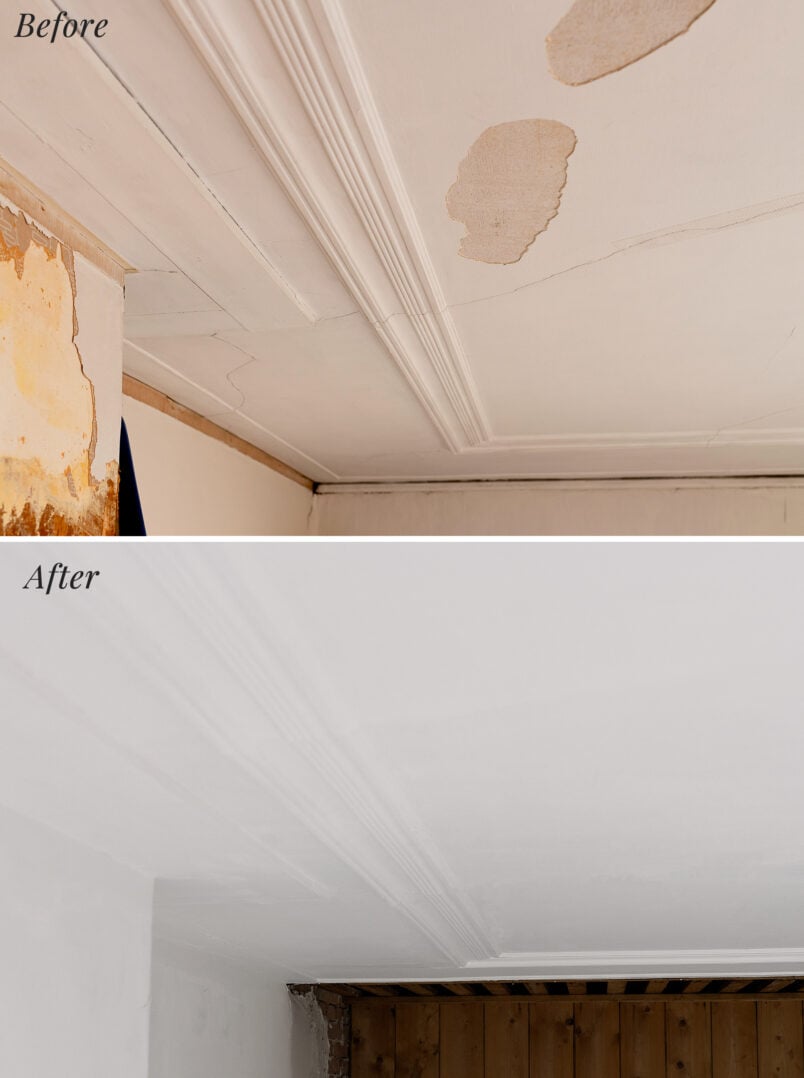
Just look at the ceiling in our guest bedroom, which looked like something out of a horror movie. But, after a few hours of work and a coat of paint, it’s ready to last another 120 years.
Cracks in ceilings are very common, but luckily, fixing a cracked ceiling is easy and something even a beginner DIYer can accomplish.
If you have a ceiling that is so cracked that you think you have no other option than to tear it down and start again, think again. We sharing exactly how to fix a crack in a ceiling yourself to save you hundreds (in our case, thousands of Euros) by doing the work yourself.
What you’ll need to repair cracks in a ceiling
This post contains affiliate links. We only recommend products we love and think that you will, too! Read our full disclaimer here.
- Joint Knife
- Flexible Plastering Bowl
- Scraper Tool (this is a versatile must-have gadget!)
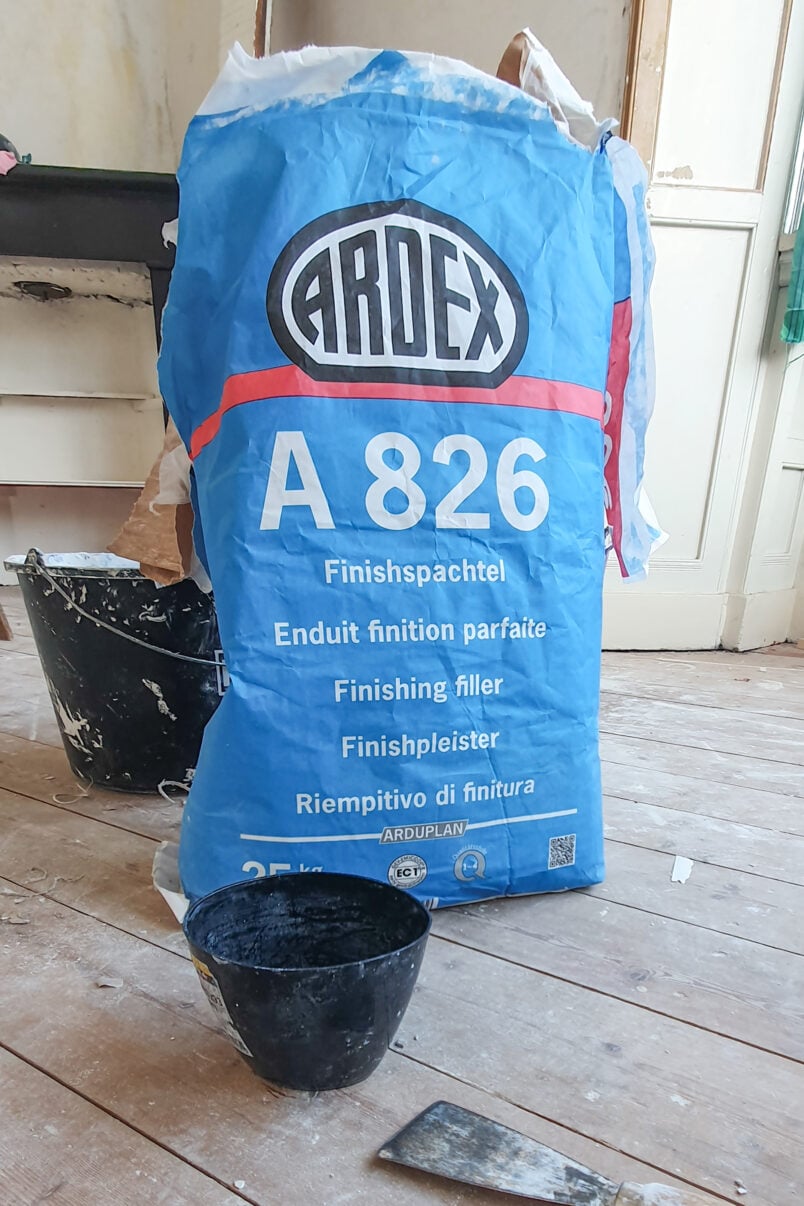
- Ultra Fine Finishing Plaster
- Jointing Tape
- Gloves
- Scales
- Sandpaper
- Optional: Finishing Trowel (we highly recommend one for covering larger areas)
The Best Way To Fill Cracks In A Ceiling
Step 1
Remove loose bits of plaster
Start by removing any flaky bits of plaster and any plaster that feels loose or sounds hollow with a scraper tool.
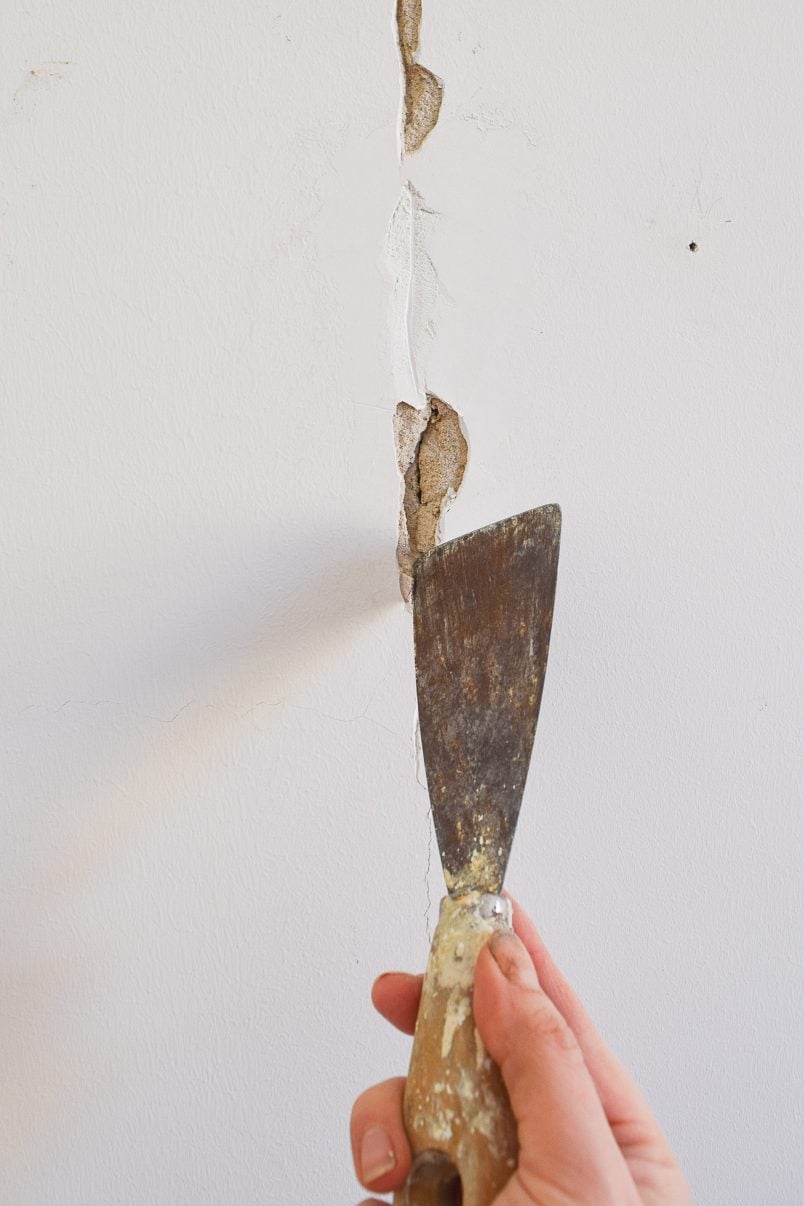
Wiggle the scraper tool under the loose plaster and carefully pop off the plaster that’s loose until you can’t remove any anymore.
Step 2
Rake out the cracks
Next, scrape along the crack with a Stanley knife or scraper tool.
The aim is to remove any last bits of loose plaster and widen the crack so you can squash the new plaster into the crack, and it has a firm and sturdy surface to adhere to.
Your ceiling will probably look worse now than when you started, but it’s the only way to ensure that the new plaster will firmly stick to the ceiling and not end up falling off.
Step 3
Tape the crack
We recommend using jointing tape to cover the crack, no matter how big or small it is. Taping over the crack is the only way to ensure that the crack won’t reappear in the future.
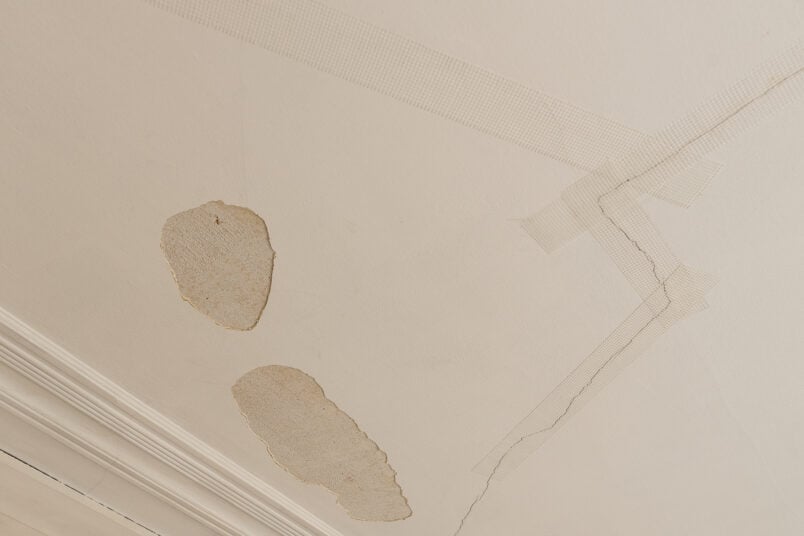
Roll a length of joining tape off the roll and cut it by tearing it along the edge of your jointing knife. There’s no need to use scissors, which is especially helpful when you’re balancing on top of a ladder.
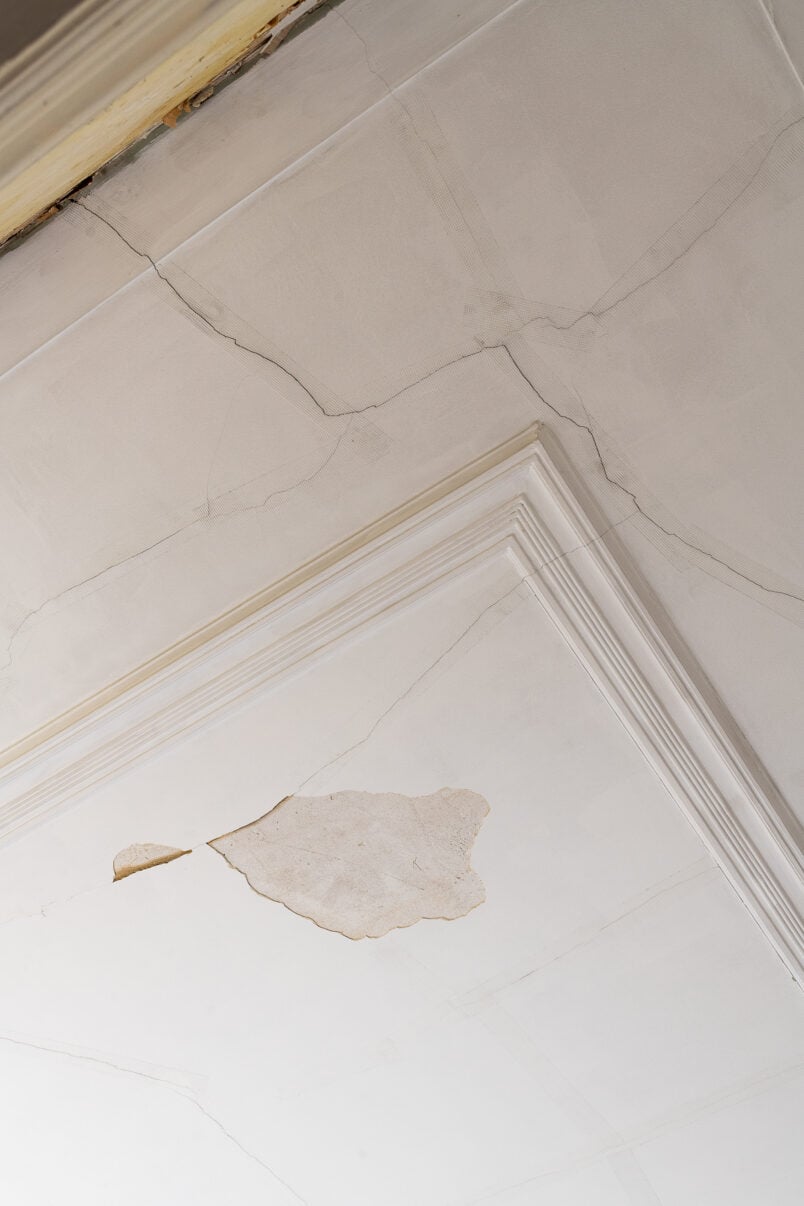
The tape is slightly sticky on one side to stay in position when you press it against the ceiling. Taping is the most crucial step when fixing a crack in a ceiling, as it provides reinforcement and stops the crack from reappearing.
Step 4
Add plaster
The type of plaster you use is also important when repairing cracks.
The plaster we recommend can be thinned out to achieve a feather edge. It’s perfect for filling cracks because you can thinly apply it and smooth it out at the edges. It’s also easy to sand (although you don’t have to), so you can still achieve a super-smooth finish even if your plastering isn’t perfect.
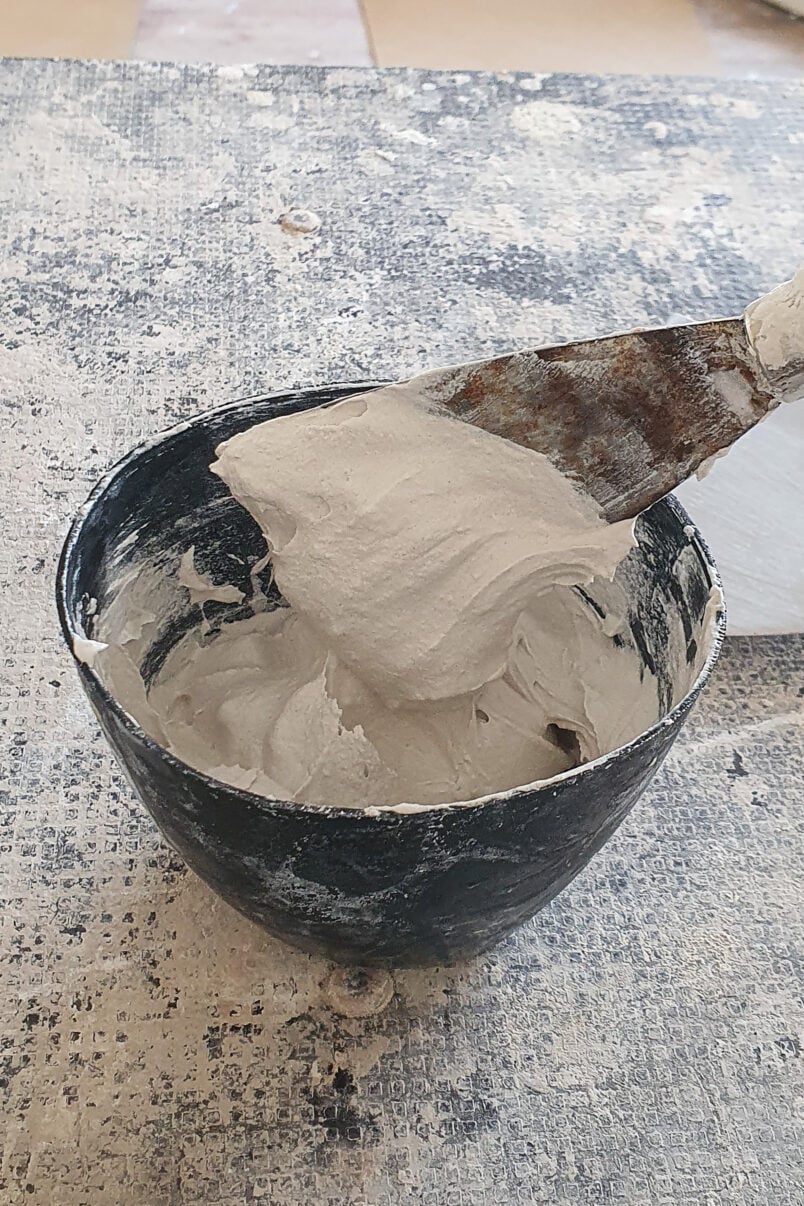
Not only is it ideal for ultra-fine skim coats, but it also has fibres in it that help prevent cracking. We have 25kg bags of the plaster because we’re using it to skim all of our ceilings and walls, but you can get smaller 5kg bags, too.
When applying plaster to fill cracks, don’t just run your towel or knife along the length of the tape and crack. Work at a 90° angle to the crack to firmly push the plaster into the crack and grooves of the tape before spreading everything out evenly.
As DIYers, we like to do this process in two steps.
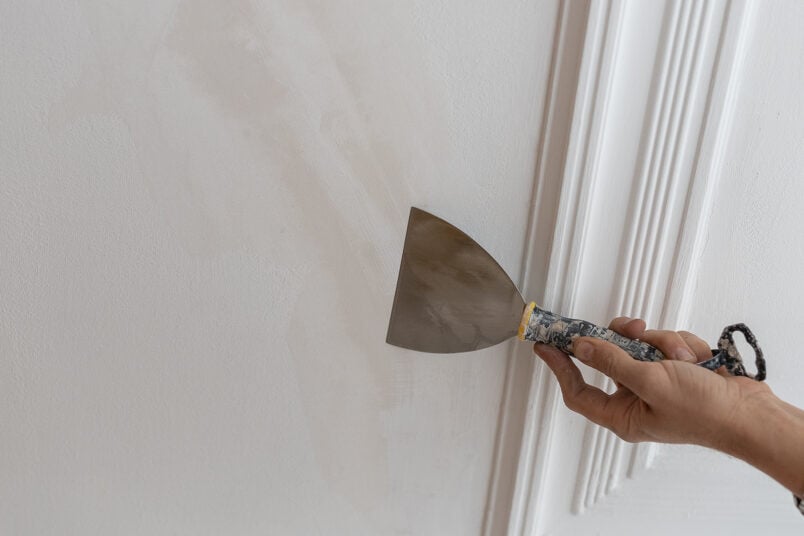
Plastering in two steps makes it easier to get a smooth finish without sanding. With the first coat of plaster, you fill the crack and smooth over the tape. When the first layer has dried, you can apply a second coat of finishing plaster.
The second coat is much wider than the first to be able to thin out the edges and achieve a smooth transition between the new plaster and the existing ceiling.
DIY TIP
If you only have one or two small cracks, you can use a ready-mixed flexible filler to fill the cracks. This flexible filler is also great for filling gaps along your staircase, as it copes well with slight movement and doesn’t crack.
Do not use plain gypsum or Polyfilla to fix ceiling cracks, as it dries hard and will pop out of the crack again. Ideally, use a product with fibres like the finishing plaster or the ready-mixed filler to give it extra enforcement and strength to avoid cracking.
Step 5
Sand the crack
When the plaster has dried, sand any imperfections with 120 grit sandpaper. The finishing plaster we used is very easy to sand, so a quick rub will be sufficient to achieve a smooth finish and hide the ceiling repair.
Step 6
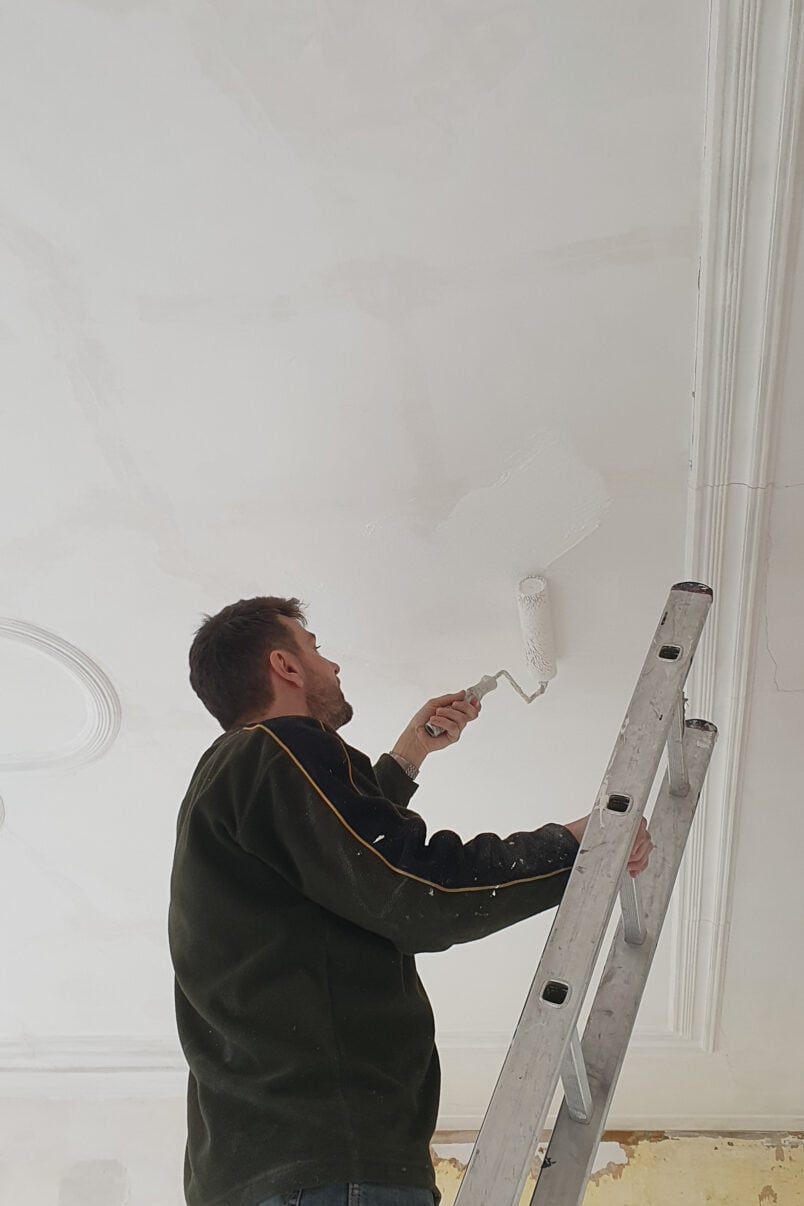
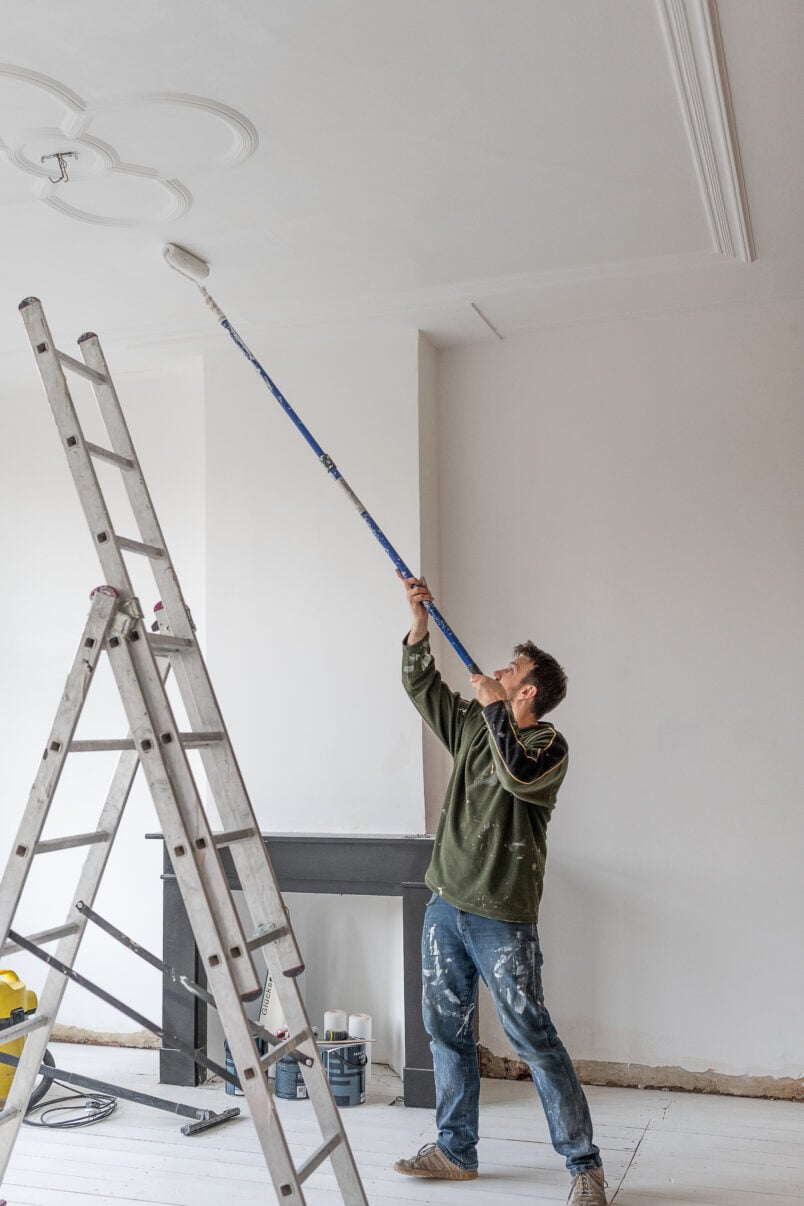
Paint the ceiling
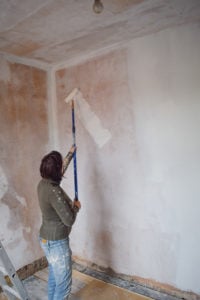
Painting over the filled crack is the last step when repairing a cracked ceiling. We filled dozens of cracks and painted the whole ceiling with white emulsion. If you’ve just fixed a few cracks, you could just paint over the area you filled.
How much does it cost to repair a cracked ceiling?
The exact cost will depend on many factors like the size of the cracks, type of ceiling, texture of the ceiling, etc.
Replacing our ceiling entirely would have cost around 2000€ if we’d paid someone to do it, but with some work, some tape and plaster, we managed to repair everything for less than 20€ (not including paint or tools).
When should you worry about cracks in a wall or ceiling?
If you have structural cracks, you will need professionals to repair the issue that’s causing the crack first. As a very rough guide, I start worrying about cracks that are large enough to stick a small finger in. Always consult a professional if you have any cracks you’re worried about.
What is the best filler to fix ceiling cracks?
A product like this ready-mixed flexible filler is ideal if you only have to fill a few cracks. If you have larger cracks or more than one or two, we recommend taping and filling them with flexible plaster using the abovementioned method.
DIY TIP
You can use the same method to repair cracks in walls, too. Check out this guide, where we show you exactly how to repair a crack in a wall so it doesn’t come back!
How To Fix A Crack In A Ceiling FAQ
Can ceiling cracks be repaired?
Fixing a cracked ceiling is simple, and you can quickly repair it by following the few simple steps we share in this tutorial.
How do I keep my ceiling cracks from coming back?
It’s vital to use a flexible filler to repair a ceiling crack to prevent it from returning. If you have larger cracks in your ceiling, use a combination of jointing tape and a flexible compound to fill and smooth over them.
What is the best tape for cracks in the ceiling?
There’s no need to buy any fancy mesh disks. Just some cheap jointing tape, the kind that’s used when building a drywall, will be enough to secure the cracks and help prevent them from returning.
Can you paint over cracks in a ceiling?
If the crack is very fine, you can just paint over it, but there is a chance it will return. Ideally, you’ll always fill a crack in a ceiling with a flexible filler or use jointing tape and plaster to fill and cover the crack first.
What causes cracks in a ceiling?
Ceiling cracks usually occur because there is movement in the structure. Almost all houses move slightly; timber beams and floor joists also sag over time. Most of the time, this isn’t anything to worry about, but you should consult a professional if you have larger cracks or cracks that continue from the ceiling down your walls.
As you can see, repairing a cracked ceiling is achievable even as a DIY beginner. You don’t need many tools or materials, and you can save a lot of money by doing the work yourself.
Now we just need to repair our master bedroom ceiling, which is even worse than this one. We’re expecting it to fall down any day now, so fingers crossed it stays up for a couple more weeks until we can find time to repair it.


Leave a Reply