Ad // This post is in collaboration & contains affiliate links. We only recommend products we love and think that you will, too! Read our full disclaimer here.
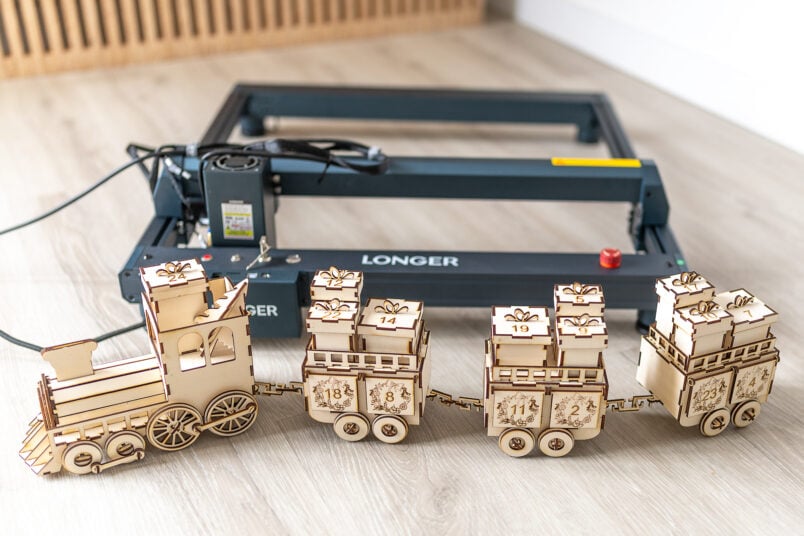
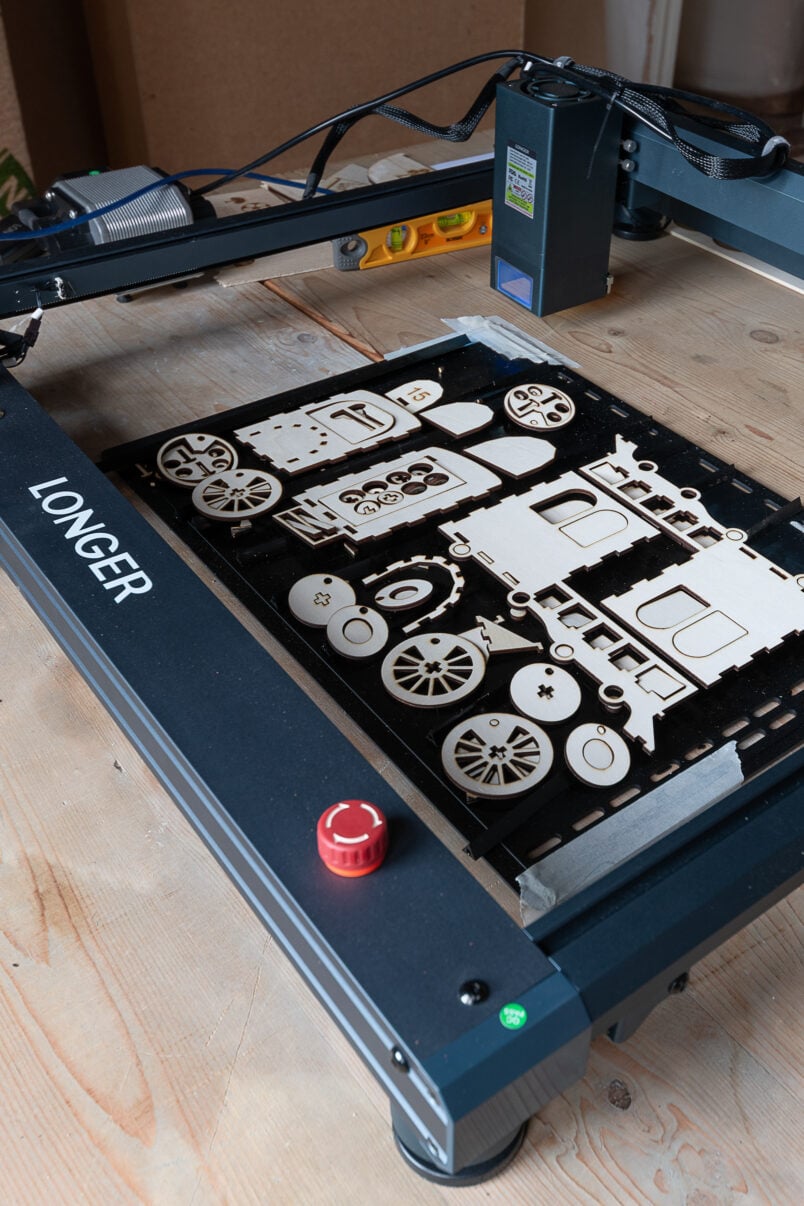
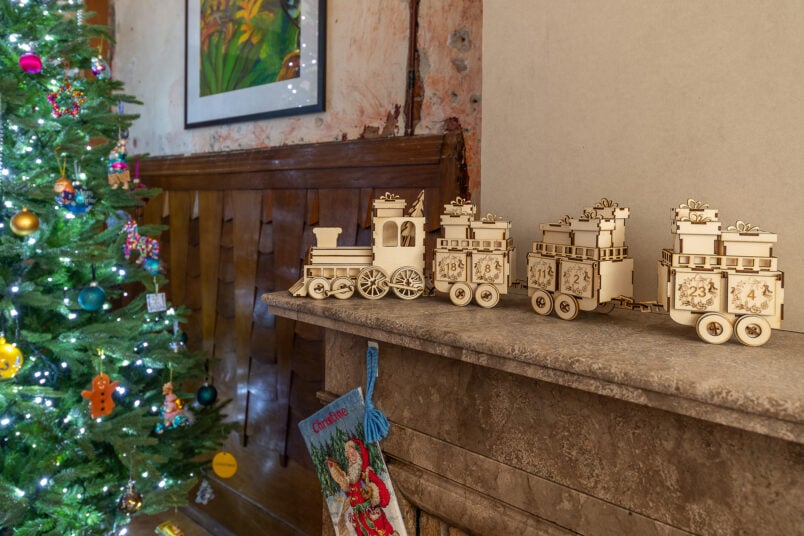
With December just around the corner, we’ve just finished making our first Christmas project of the year – a Christmas advent calendar train. Would you have guessed that you can make something this amazing at home?

Oh, and had I mentioned that you need absolutely no creative skills to make it? Thanks to our new Longer laser, it couldn’t have been easier to make.

I know laser-cutting machines seem like something you’d only find in professional workshops, but they’ve become very affordable over the last few years.
The possibilities for creating fun projects are almost endless, and laser cutting machines like our new Longer B1 20W laser are now suitable for people who love to make things at home, too.
What’s in the box?
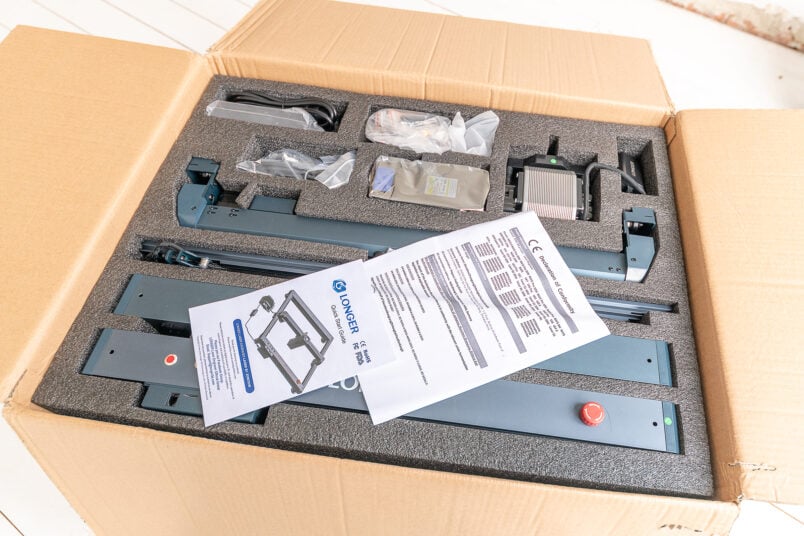
The Longer B1 20W laser comes in a large box with everything well packed and neatly separated in foam compartments with the necessary tools and supplies to assemble the laser. The included quick-start guide gives you a basic overview of how to assemble everything.
Having never assembled a laser before, I felt a bit overwhelmed. The instructions in the quickstart guide are basic, and it took time to work out how things go together.
Ultimately, the instructions were sufficient for me to assemble the laser, even though it’s something I’ve never done before. One thing I did like is how the screws and other components for each step of the assembly are in individually labelled bags with the step number indicated on them, so you know exactly which parts to use and when.
If I’d been less impatient, I would have seen that Longer had actually included more detailed instructions and even assembly videos on a USB stick you can find in the box with all the other tools to assemble the laser.
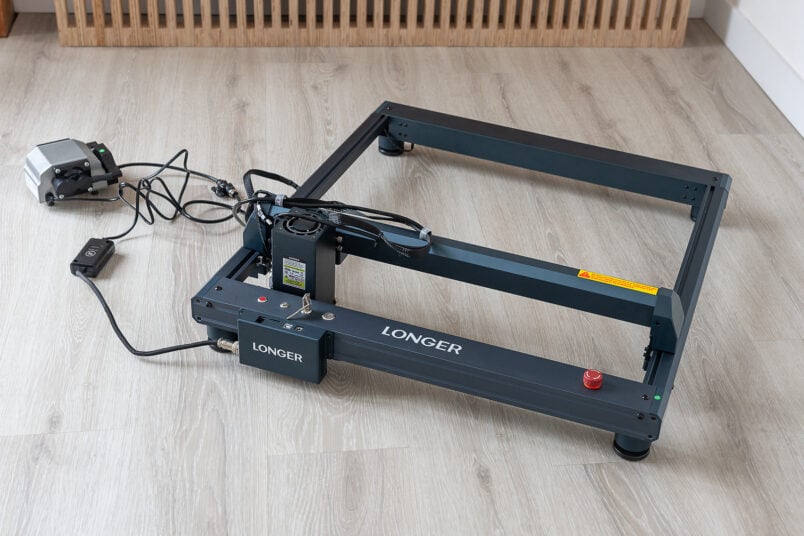
Overall, my first impressions of the Longer B1 20W laser were very good, and it feels much higher quality than I’d expected.
Design & Features
You can check all of the detailed specs on the Longer website, but you probably want to know what you can cut and engrave and ultimately make with it.
Here are a few technical specs of the Longer B1 20W laser:
- Laser output: 22-24W
- Working area: 450 x 440 mm
- Engraving speed: up to 36,000mm/min
- Includes a smart air assist system
- Connects to your computer via USB(B) or WiFi
- Works with MacOS, Windows and Linux (with LightBurn software)
- Lots of safety features (more on them in a minute)
What type of laser does the Longer B1 use?
We have the Longer B1 20W – it’s also available with even more powerful 30W and 40W lasers.
The 20W laser module combines four 6W diode lasers into one beam. It’s powerful enough to cut through 15mm wood, 8mm acrylic and even 0.05mm stainless steel in one pass. This gives you a fantastic amount of flexibility to create great projects quickly.
Software & connectivity
There are a couple of options regarding the software you can use with the Longer B1 laser.
You can use the LaserGRBL (free) or LightBurn, which is the industry standard when it comes to laser-cutting machines.
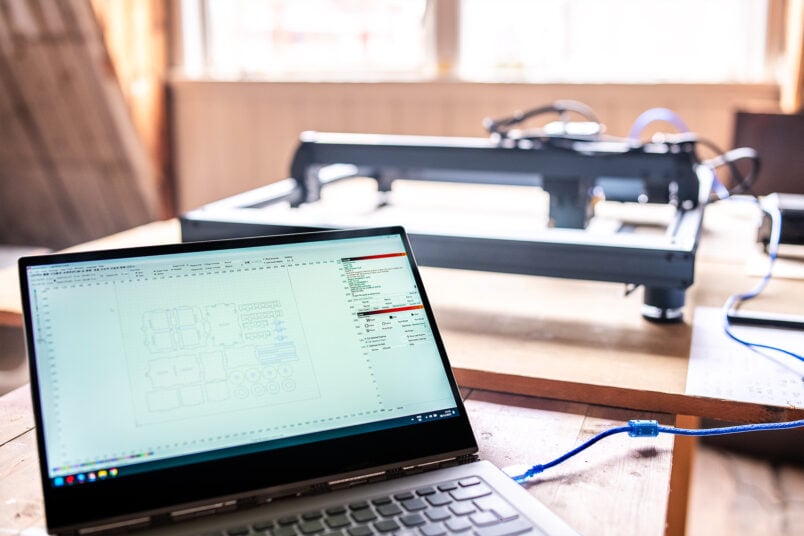
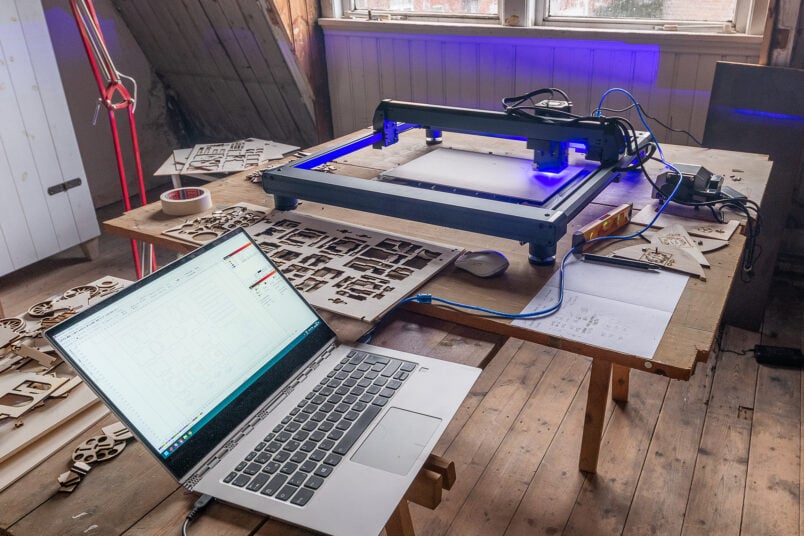
We downloaded LightBurn to use with our laser. It comes with a 30-day trial period, giving you plenty of time to test it before deciding if it’s right. It’s intuitive to use, and there are endless settings you can adjust to suit your project and the material you’re cutting.
You can connect the laser to your computer via Wifi or USB. It only includes a USB(B) cable, so you may need an adapter to USB(C) if you have a newer computer. I couldn’t get the Wifi to work (I’m sure I was just being ditsy), so I had to use my old computer, which still has USB(B) ports to connect to the B1.
Longer B1 safety features
The Longer B1 has four safety features, including a safety lock so no one can accidentally start the laser without the necessary key and limit switches that allow the machine to detect the boundary of the work area.
There’s also a large emergency stop button located in an easy-to-reach position on the top of the laser in case of an emergency.
Two safety features I particularly love are the flame detector and movement protection. If either of these are triggered, the laser will automatically switch off and return to the home position.
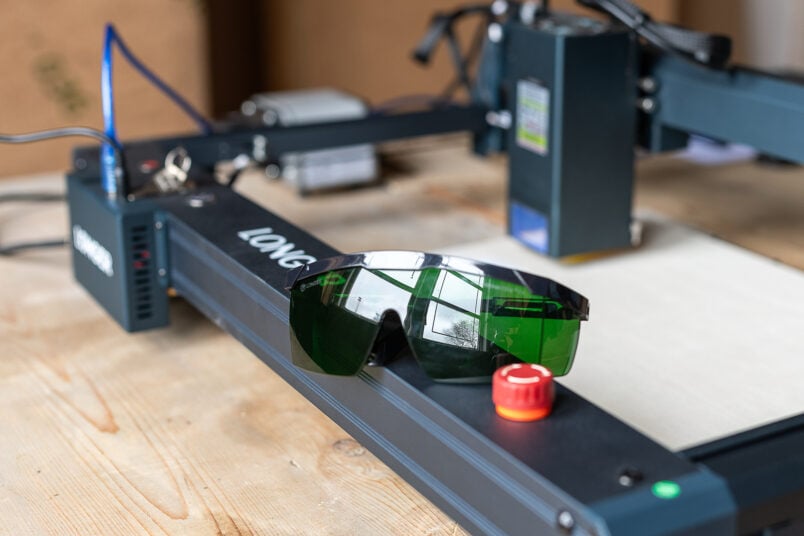
It is important to remember that the B1 is an open-frame laser. This means there’s no enclosure around the machine, and you have no protection from the laser beam. Safety goggles are included with the B1 that you should always wear when using the laser, as it can damage your eyes in a split second.
The laser goggles included have an OD4 protection rating, but we highly recommend upgrading them for even better protection.
Cutting and engraving with a laser will also produce smoke and fumes. You should only use the laser in a very well-ventilated area – ideally outside. If you’re working indoors, we recommend using an exhaust system to protect you from harmful fumes.
We worked in one of our (unrenovated) guest bedrooms and had the window open the whole time we used the machine. It wasn’t an ideal solution as the entire house still smelled of the cut wood, and since it’s nearly winter, working in a room for hours with an open window isn’t ideal either.

A laser engraver enclosure is available for the Longer B1 laser, which is a good investment if you are working indoors.
Finally, keeping the machine in sight while the laser is running is essential. The flame protector is a great feature, but even if it does notice a fire, you still have to be there to put it out. It’s also a good idea to have a fire extinguisher close by when working with a laser.
How to use the Longer B1 laser
As a complete laser novice, I had so many questions about how the B1 works and how to make things with it. How do you know where it will cut? What settings do you need to cut and engrave things? And what kind of projects can I make with it?
So, I figured the best way to discover all these things was by making something with the help of the Longer B1 laser. Our new advent calendar train may look like a complicated project, but it’s easy to make with the help of a laser cutter.
One of the best things about making things with a laser cutter is that you don’t have to be creative.
There are countless ready-made files that you can download to start making things straight away. Once you find a design you like – we found the template for this advent calendar train on Etsy – download it, drag it into the software and let the laser cutter do all the hard work. Then, all that’s left to do is assemble your project.
What you’ll need to make your own advent calendar train:
- Advent Calendar Train file
- Longer B1 20W laser
- 3mm plywood – we used 8 A3-sized sheets to complete this project
- Wood glue
How to make the laser-cut advent calendar train:
Step 1
Draw or download your template
Start by downloading the file on Etsy. It comes with all the parts you need to cut and some train assembly instructions.
Step 2
Open it in the laser cutting software
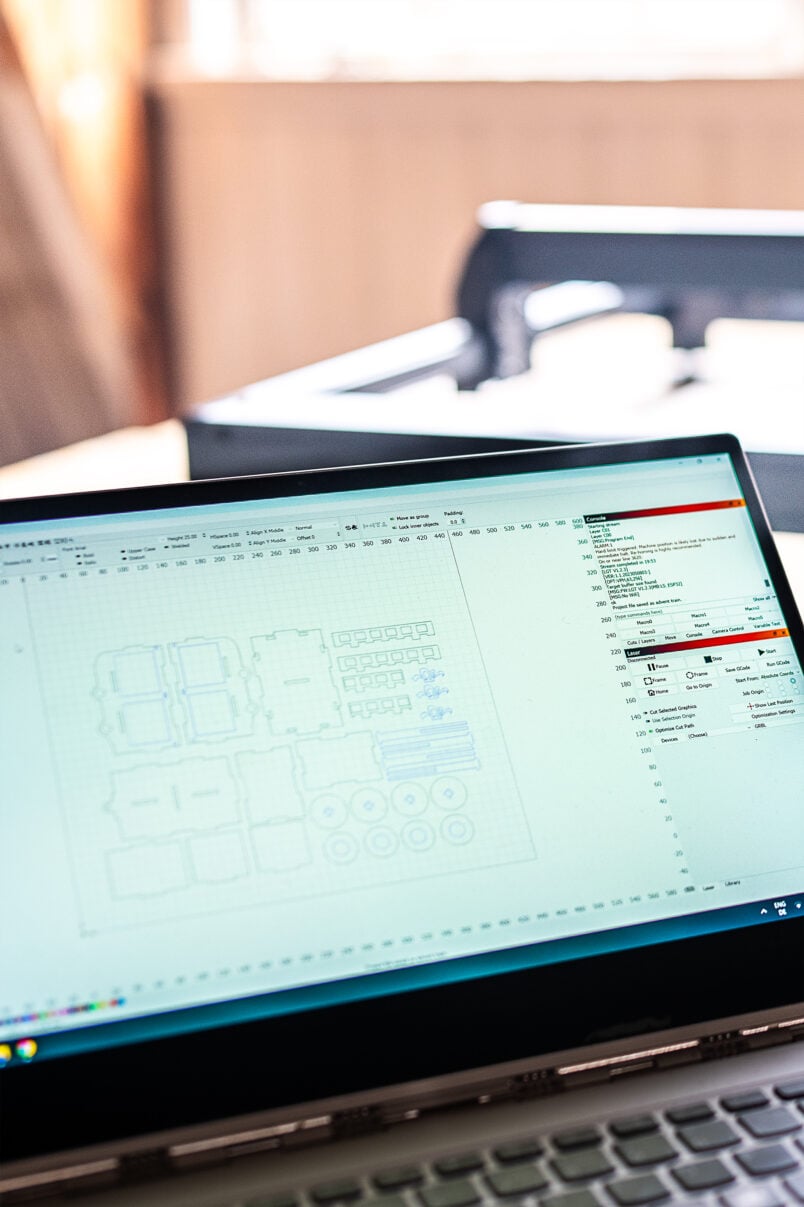
Drag the file into LightBurn (or whatever software you’re using). We moved the individual components around a bit so there would be minimal waste, and they’d fit on A3 sheets of plywood.
Step 3
Prepare the laser
Place the wood into the cutting area of the laser. Based on the grid in LightBurn that represents the working area, move the wood around to roughly position it to correspond with the position of the items in the software you want to cut.
Then, press the framing button in the software so that the laser component moves over the surface and shows you the outer edges of where it will cut.
I could never work out exactly where the laser would cut and found the easiest way was to make a test cut with small squares in each corner. After making a test cut, I could see precisely where the squares in my drawing corresponded with the cut-out squares on the wood in the laser. Then, it was just a matter of repositioning the wood and repeating the process until the squares were as close to the corners of the wood as possible.
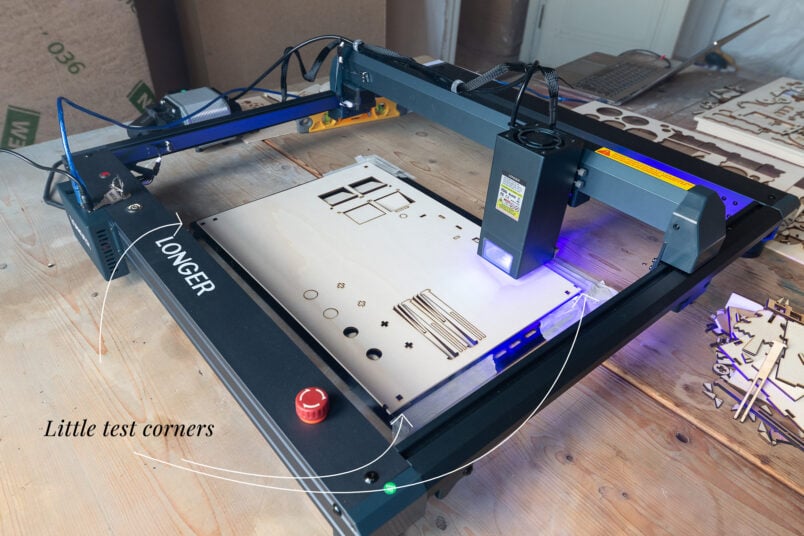
This gave me a frame to work within, and I could ensure all elements I wanted to cut and engrave were within this framed area. Because I needed to cut multiple sheets, I also marked the cutting area with some masking tape to know precisely where to position the next board in the laser for cutting.
Step 4
Adjust the height of the laser
There’s a little lever on the side of the laser that folds down to help adjust the height of the laser module for the material you’re using.
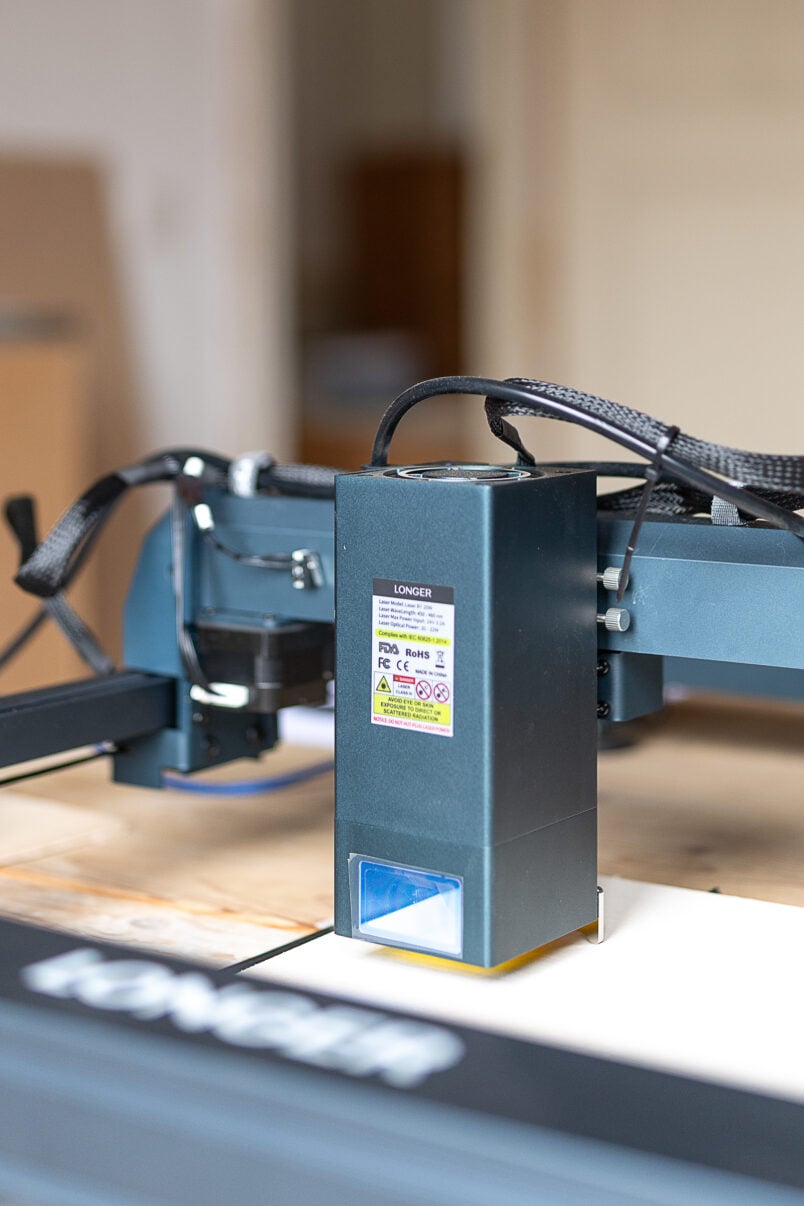
Loosen the screw at the side of the laser to be able to move the laser up and down so that the tip of the lever touches the top of the material. Then tighten the screw so that the laser can’t move.
Step 5
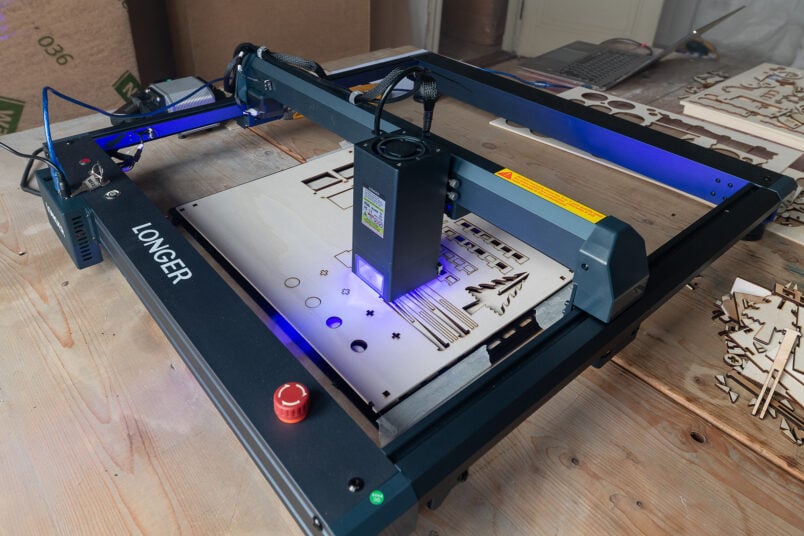
Start Cutting
I recommend always framing the area to ensure you’re cutting within the boundaries of the material you’re using. Then click the start button and let the laser do all of the hard work. Don’t forget to wear goggles to protect your eyes!
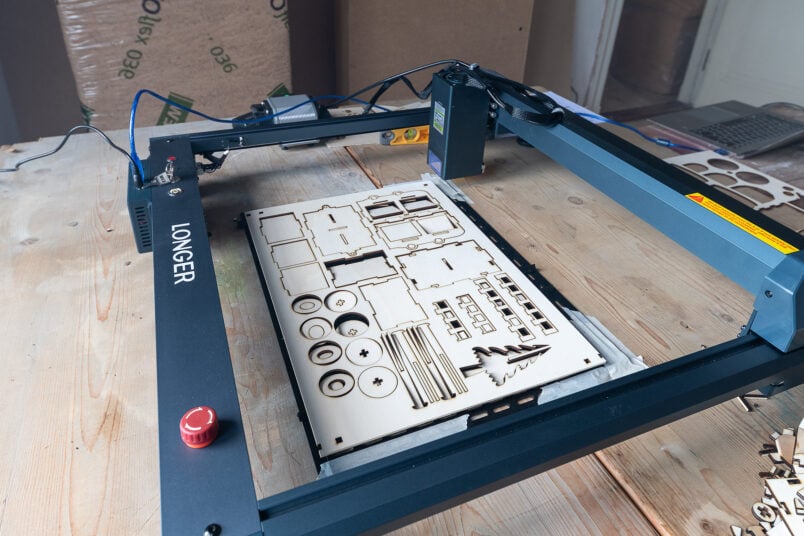
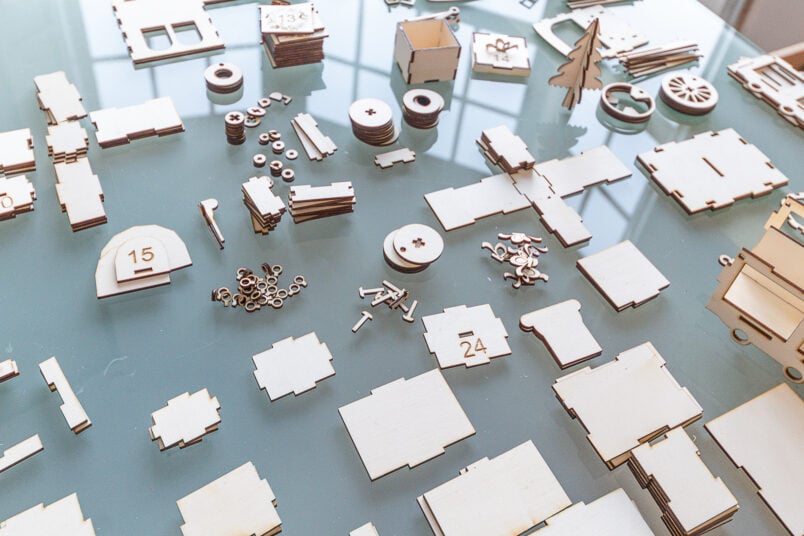
To make the advent calendar train, we used 8 plywood sheets, and it took on average about 25 minutes to do all of the cutting and engraving per sheet (the sheet with highly detailed boxes took a lot longer).
Don’t forget to check what material thickness is recommended for the project you’re making. I cut two full sheets of 4mm plywood before I realised that it was too thick and wouldn’t fit.
Step 6
Assemble the Advent calendar train
When you’ve cut all the pieces, all that’s left to do is assemble the train. The instructions included with the template are very basic, and it takes a surprising amount of time to glue everything together. It’s so worth the effort for the end result, though!
Which Longer B1 settings work best?
The laser settings to use will depend on what you are cutting or engraving. The speed and power settings will impact how the wood will be engraved and cut.
There’s a guide included on the USB stick with recommended settings for different materials. It’s a good starting point to run a few tests to see what works best for you.
What can the Longer B1 cut and engrave?
According to Longer, the 20W laser can cut or engrave over 1000 different materials, including wood, acrylic, leather and even steel. It can cut up to 25mm thick basswood and 25mm black acrylic with multiple passes.
Where can I get designs and templates to make laser-cut projects?
You can get creative and design projects yourself. We like getting creative and often design projects like these cute laser-cut bunny napkin rings in Adobe Illustrator. There’s absolutely no need, though, as there are many ready-made designs for you to choose from.
These are some of our favourite places to get designs for laser-cutting projects:
- Craft blogs
- Etsy
- Creative Market
- Creative Fabrica has endless designs and patterns. Click here for a free 7-day trial.
- Design your own in Adobe Illustrator

Things you need to know before purchasing a Longer B1 laser
- It’s not just a matter of plugging it in and starting to cut. First, you have to assemble the laser, which takes about an hour. Then, you need to find somewhere safe, sturdy and level to place it while it cuts. It has adjustable feet, so you can quickly level the machine.
- Once the machine is set up, you’re still not done. When using any laser, you should do a couple of test cuts to see which settings work best for your laser and the material you’re using.
- Laser cutting stinks, and the machines are a bit noisy, too. The fumes can be harmful, so ensure you’re working in a well-ventilated space and consider investing in an enclosure for your laser.
- Always wear safety goggles to protect your eyes from the harmful rays.
Is the Longer B1 laser right for you? + Final Thoughts
We absolutely love the Longer B1 20W laser.
It’s a powerful machine that gives you fantastic results. It’s perfect for avid crafters who enjoy making things and would love to try laser cutting and engraving. Because it’s so powerful, you can quickly cut and engrave a wide range of materials.
It’s perfect for making personalised gifts for friends and family, or you could even start your own Etsy shop to make and sell laser-cut projects.

If you are a complete beginner, you may want to consider the xTool M1. It’s a smaller, less powerful machine but quicker to set up. You can read our full review of the M1 here. Having said that, we highly recommend the Longer B1 20W laser if you plan on getting into laser cutting, as it’s so much more powerful and gives you versatility for thicker materials.
The Longer B1 20W is a fantastic tool that’s well worth the money. For such a powerful laser, it’s very affordable and would make a perfect gift for anyone getting into laser crafting.


Virgo says
It looks fantastic, but I guess still very few people have a laser at home :)
Christine says
Thanks, we love how it turned out, too! Lasers have become very affordable over the last few years. I think you’d be surprised how many people do laser cutting as a hobby now. We love our laser, it’s such a fun way to create personalised items and gifts.
Cx