We’re going all out this Christmas as my family is coming to visit and we want to make it really fun and special – just for the children, of course. :)
I got a lot of questions about our holiday paper garland over on Instagram (are you already following us there?!) so I thought I’d share exactly how I made it here on the blog!
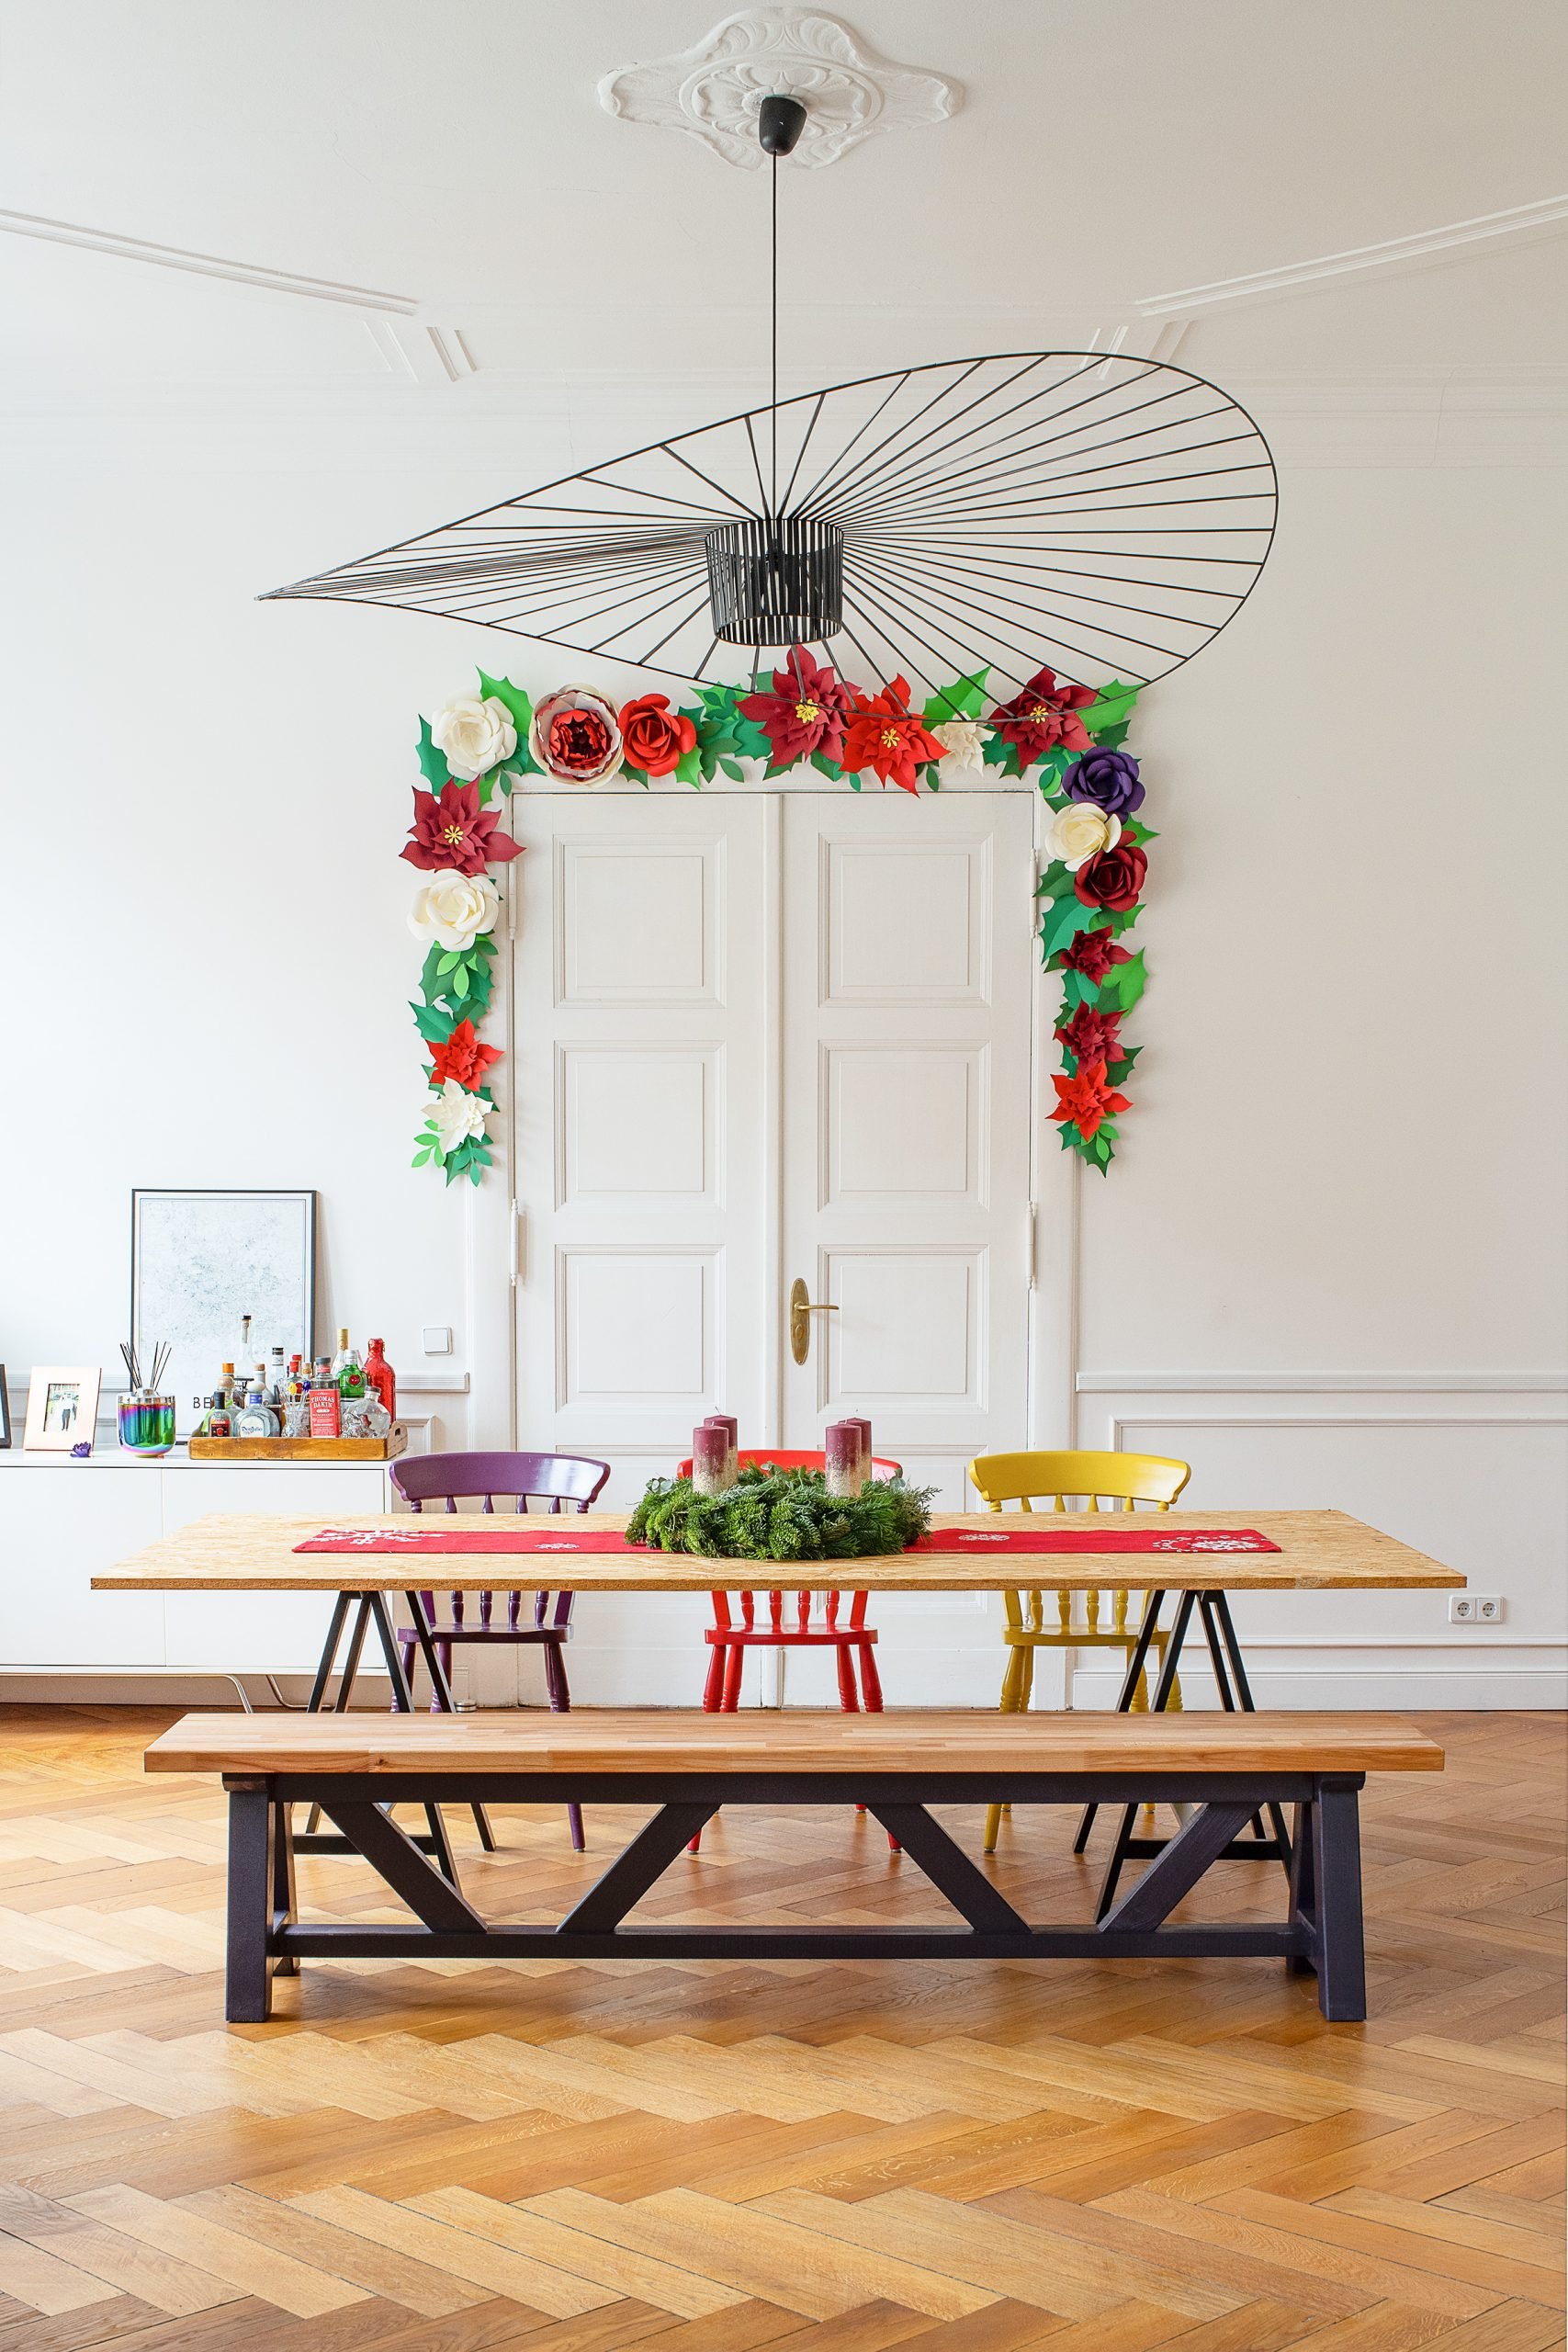
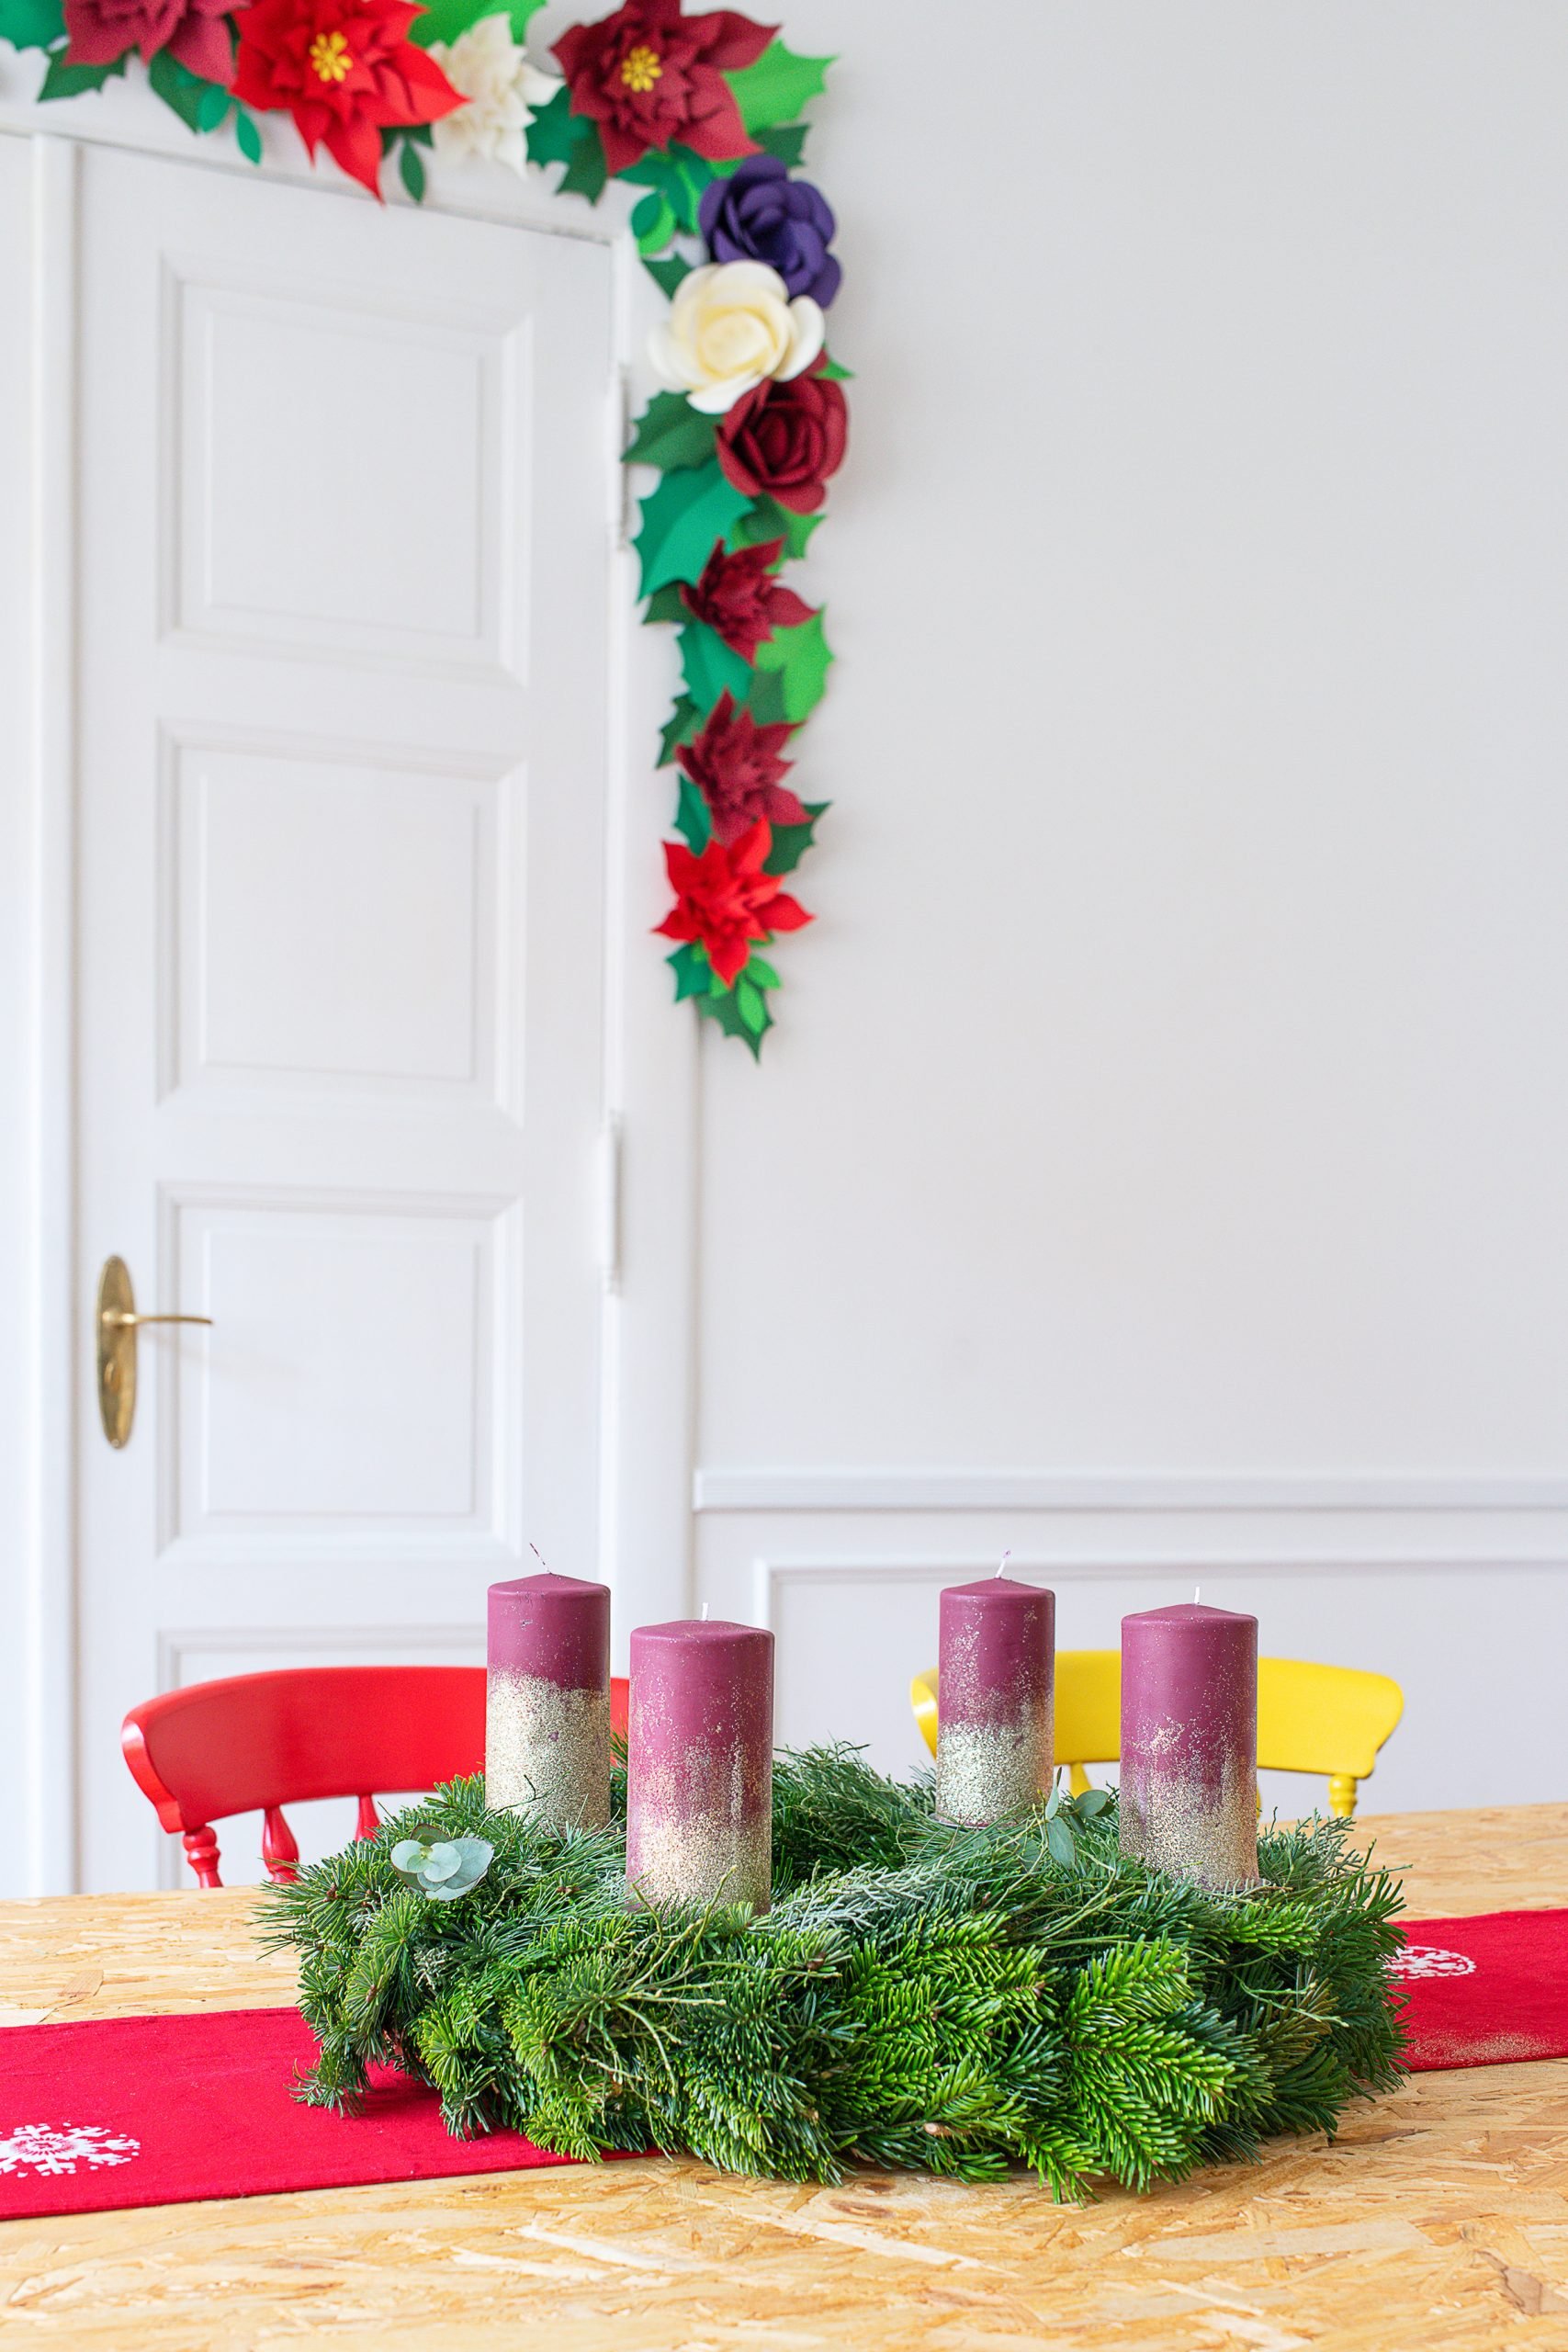
I already turned our hallway into a mini version of Blackpool with the 600 icicle fairy lights I stuck to the ceiling, I’ve put up our Christmas trees – yes, we have two and I’ve just finished decorating our dining room with our DIY paper Christmas garland!
It’s definitely starting to look festive around here!
Here’s what you’ll need to make a DIY Christmas paper garland:
This post contains affiliate links. We only recommend products we love and think that you will, too! Read our full disclaimer here.
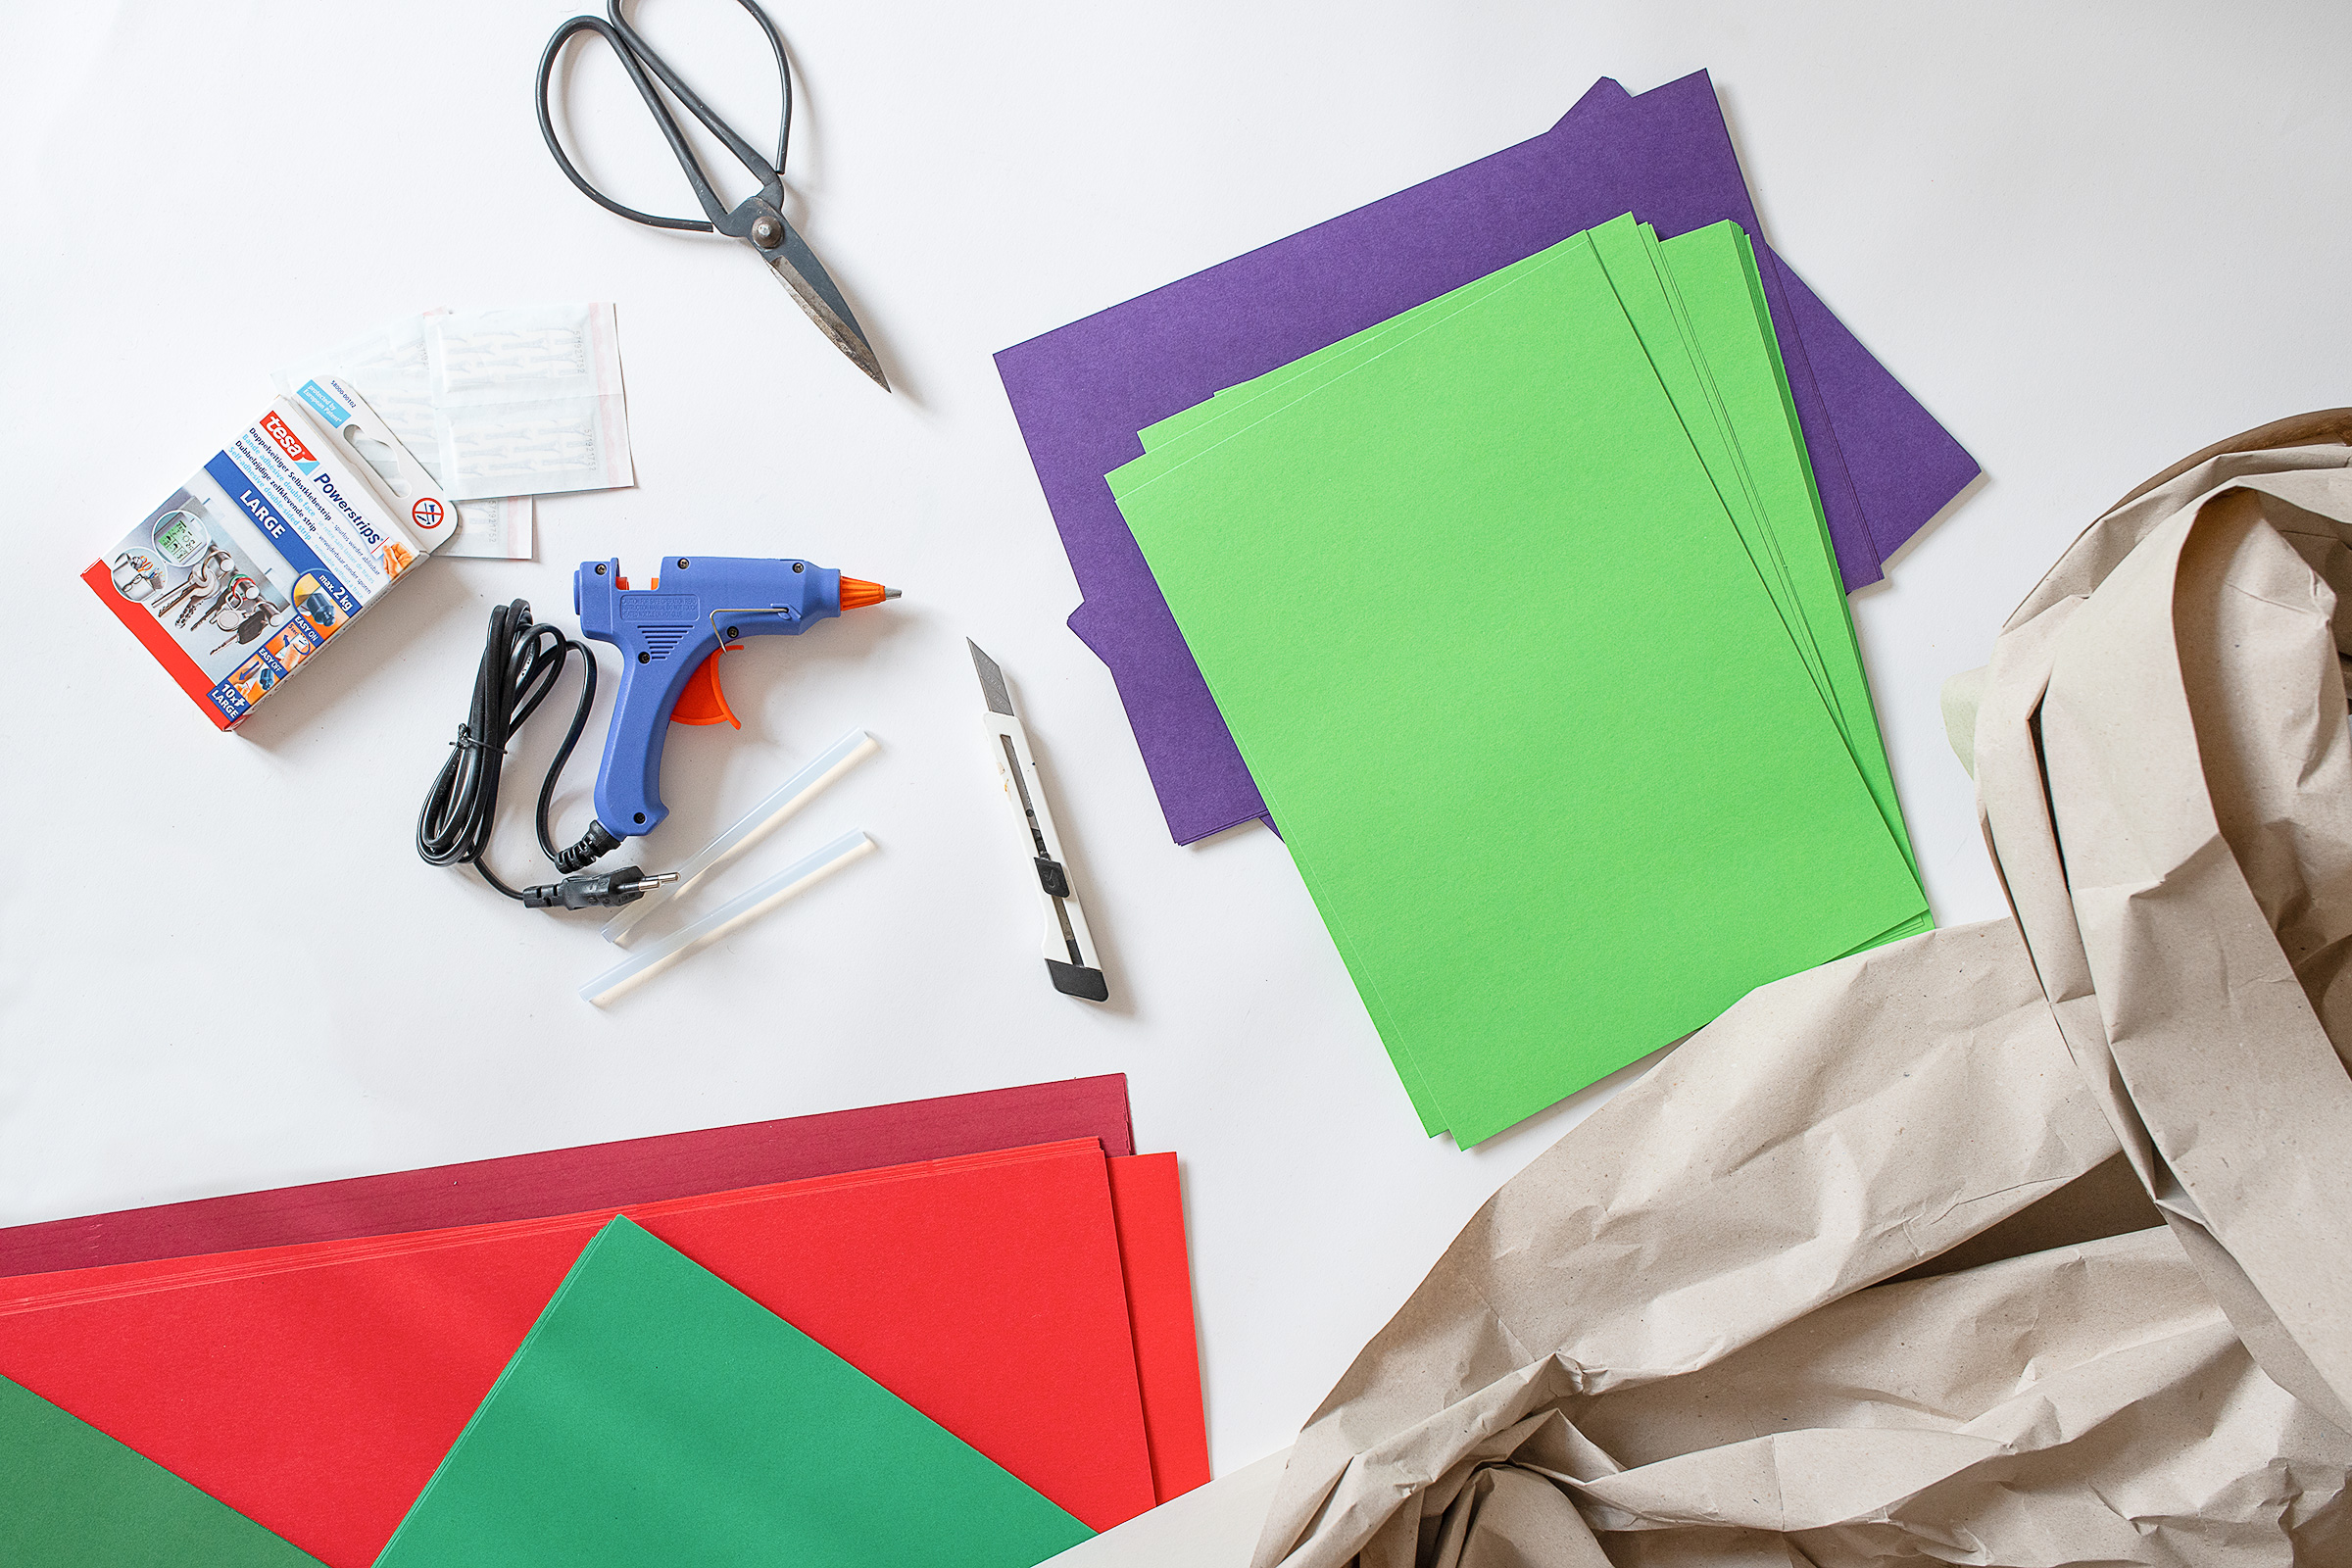
- Colourful paper in lots of different colours or card – nothing too thick about 120/m² works well (this is the paper we used)
- Scissors or a craft knife
- Glue gun & glue
- Tape
- Tesa Power Strips
- Packing paper
Here’s how to make a DIY Christmas paper garland:
1. Build The Base
Scrunch up some packing paper and twist it into a long sausage shape that’s the length you want your finished garland to be and secure it by wrapping some tape around it.

This will be the base of your garland that you attach all of the individual leaves and flowers to but is also a great way to work out the size you want your garland to be by laying it over your fireplace mantel, doorframe or wherever else you’ll be installing your garland.
2. Make The Leaves & Flowers
This is where you can start to get creative. There are hundreds of paper flower and paper leaf tutorials on the internet to choose from and once you get the hang of making a basic paper flower or leaf it’s really easy to put your twist on things.
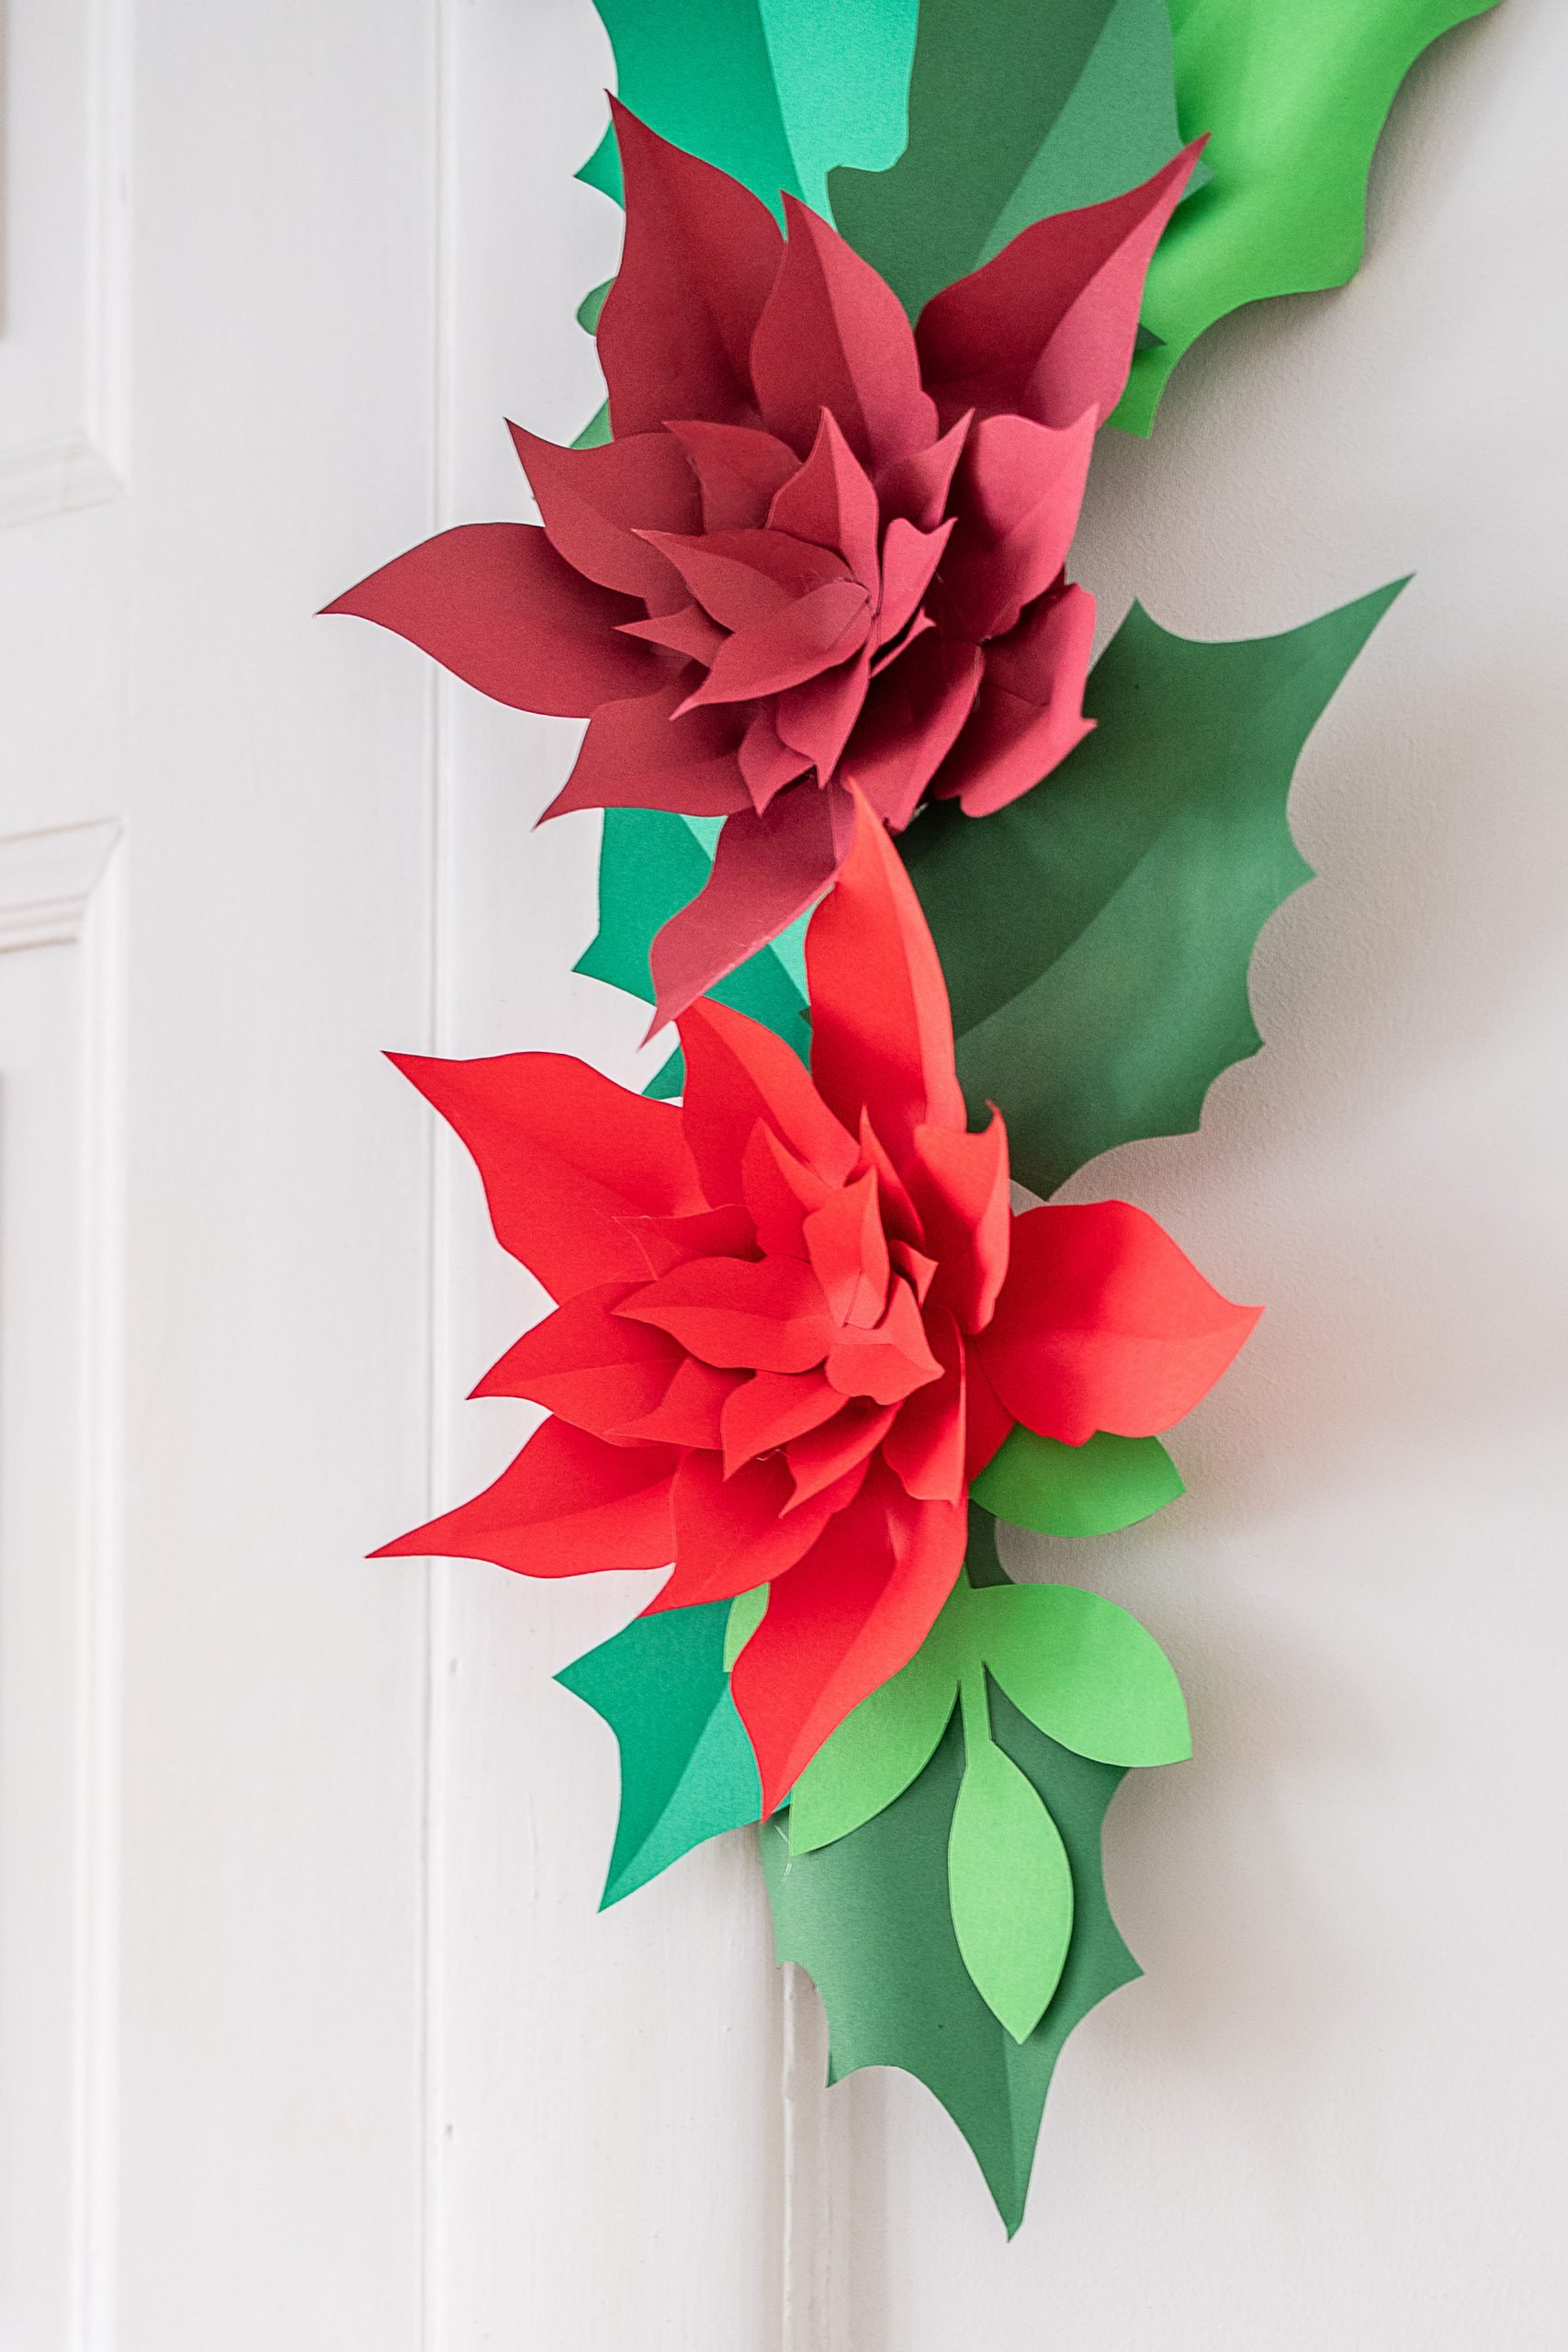
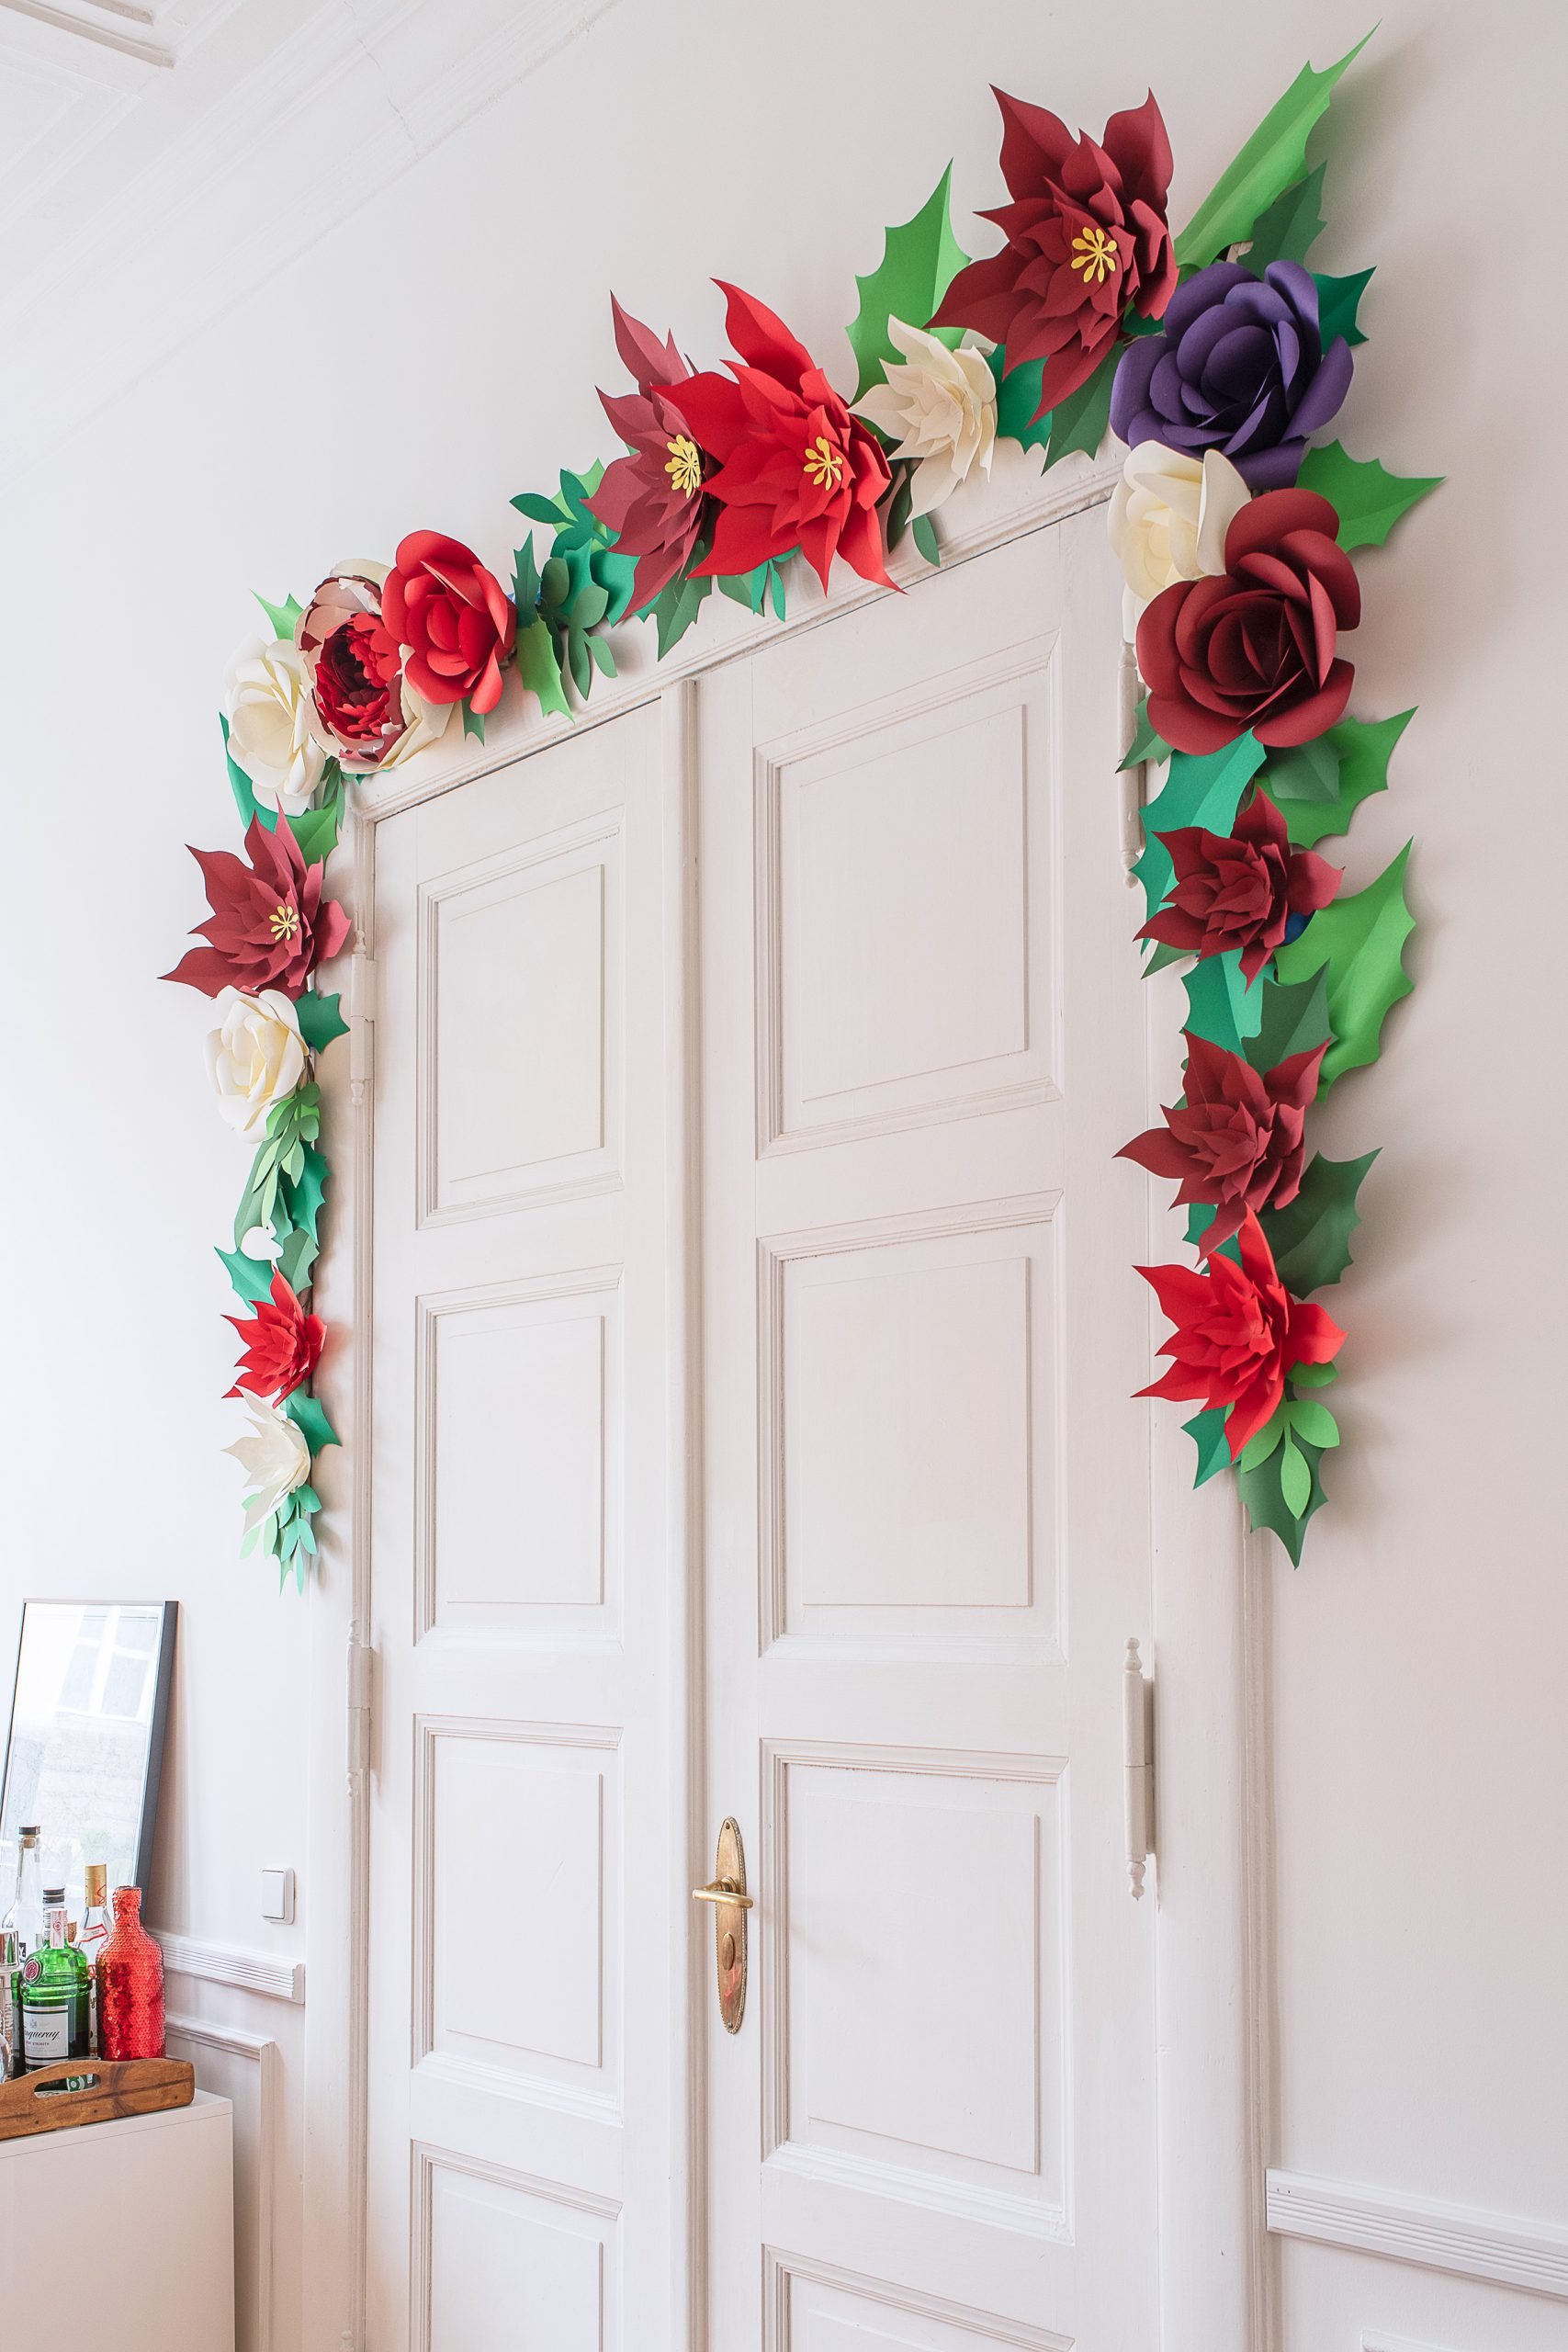
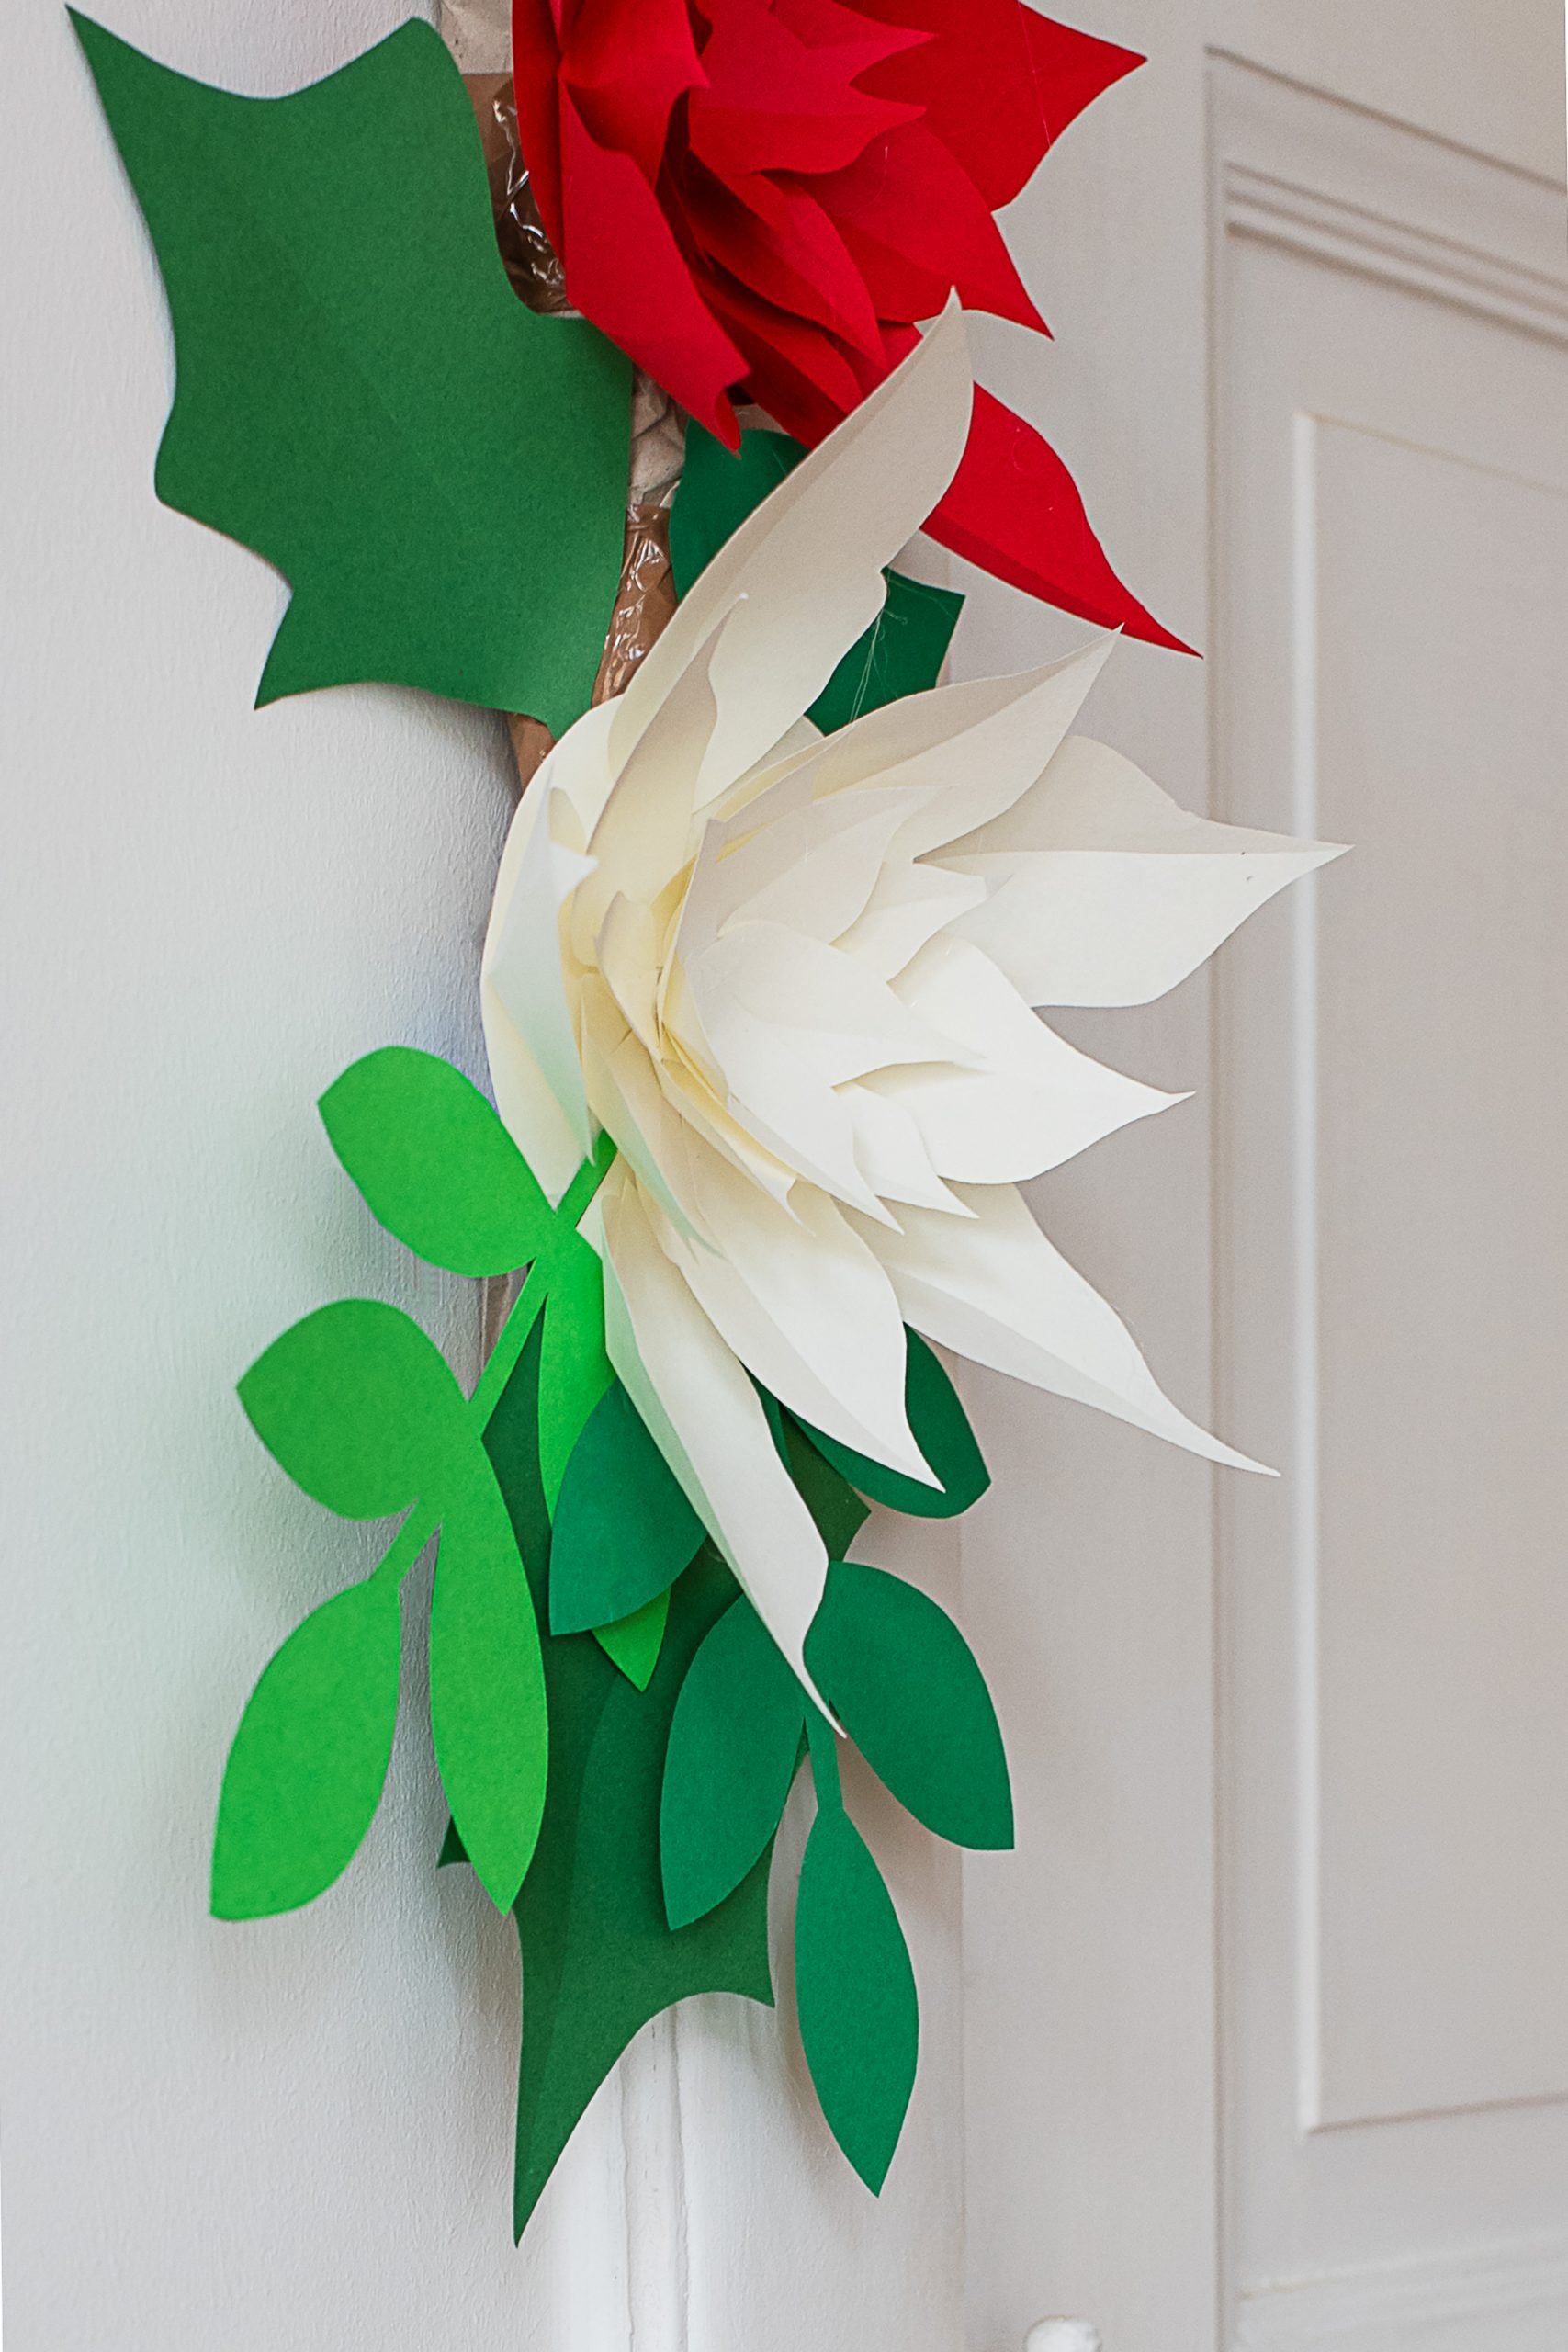
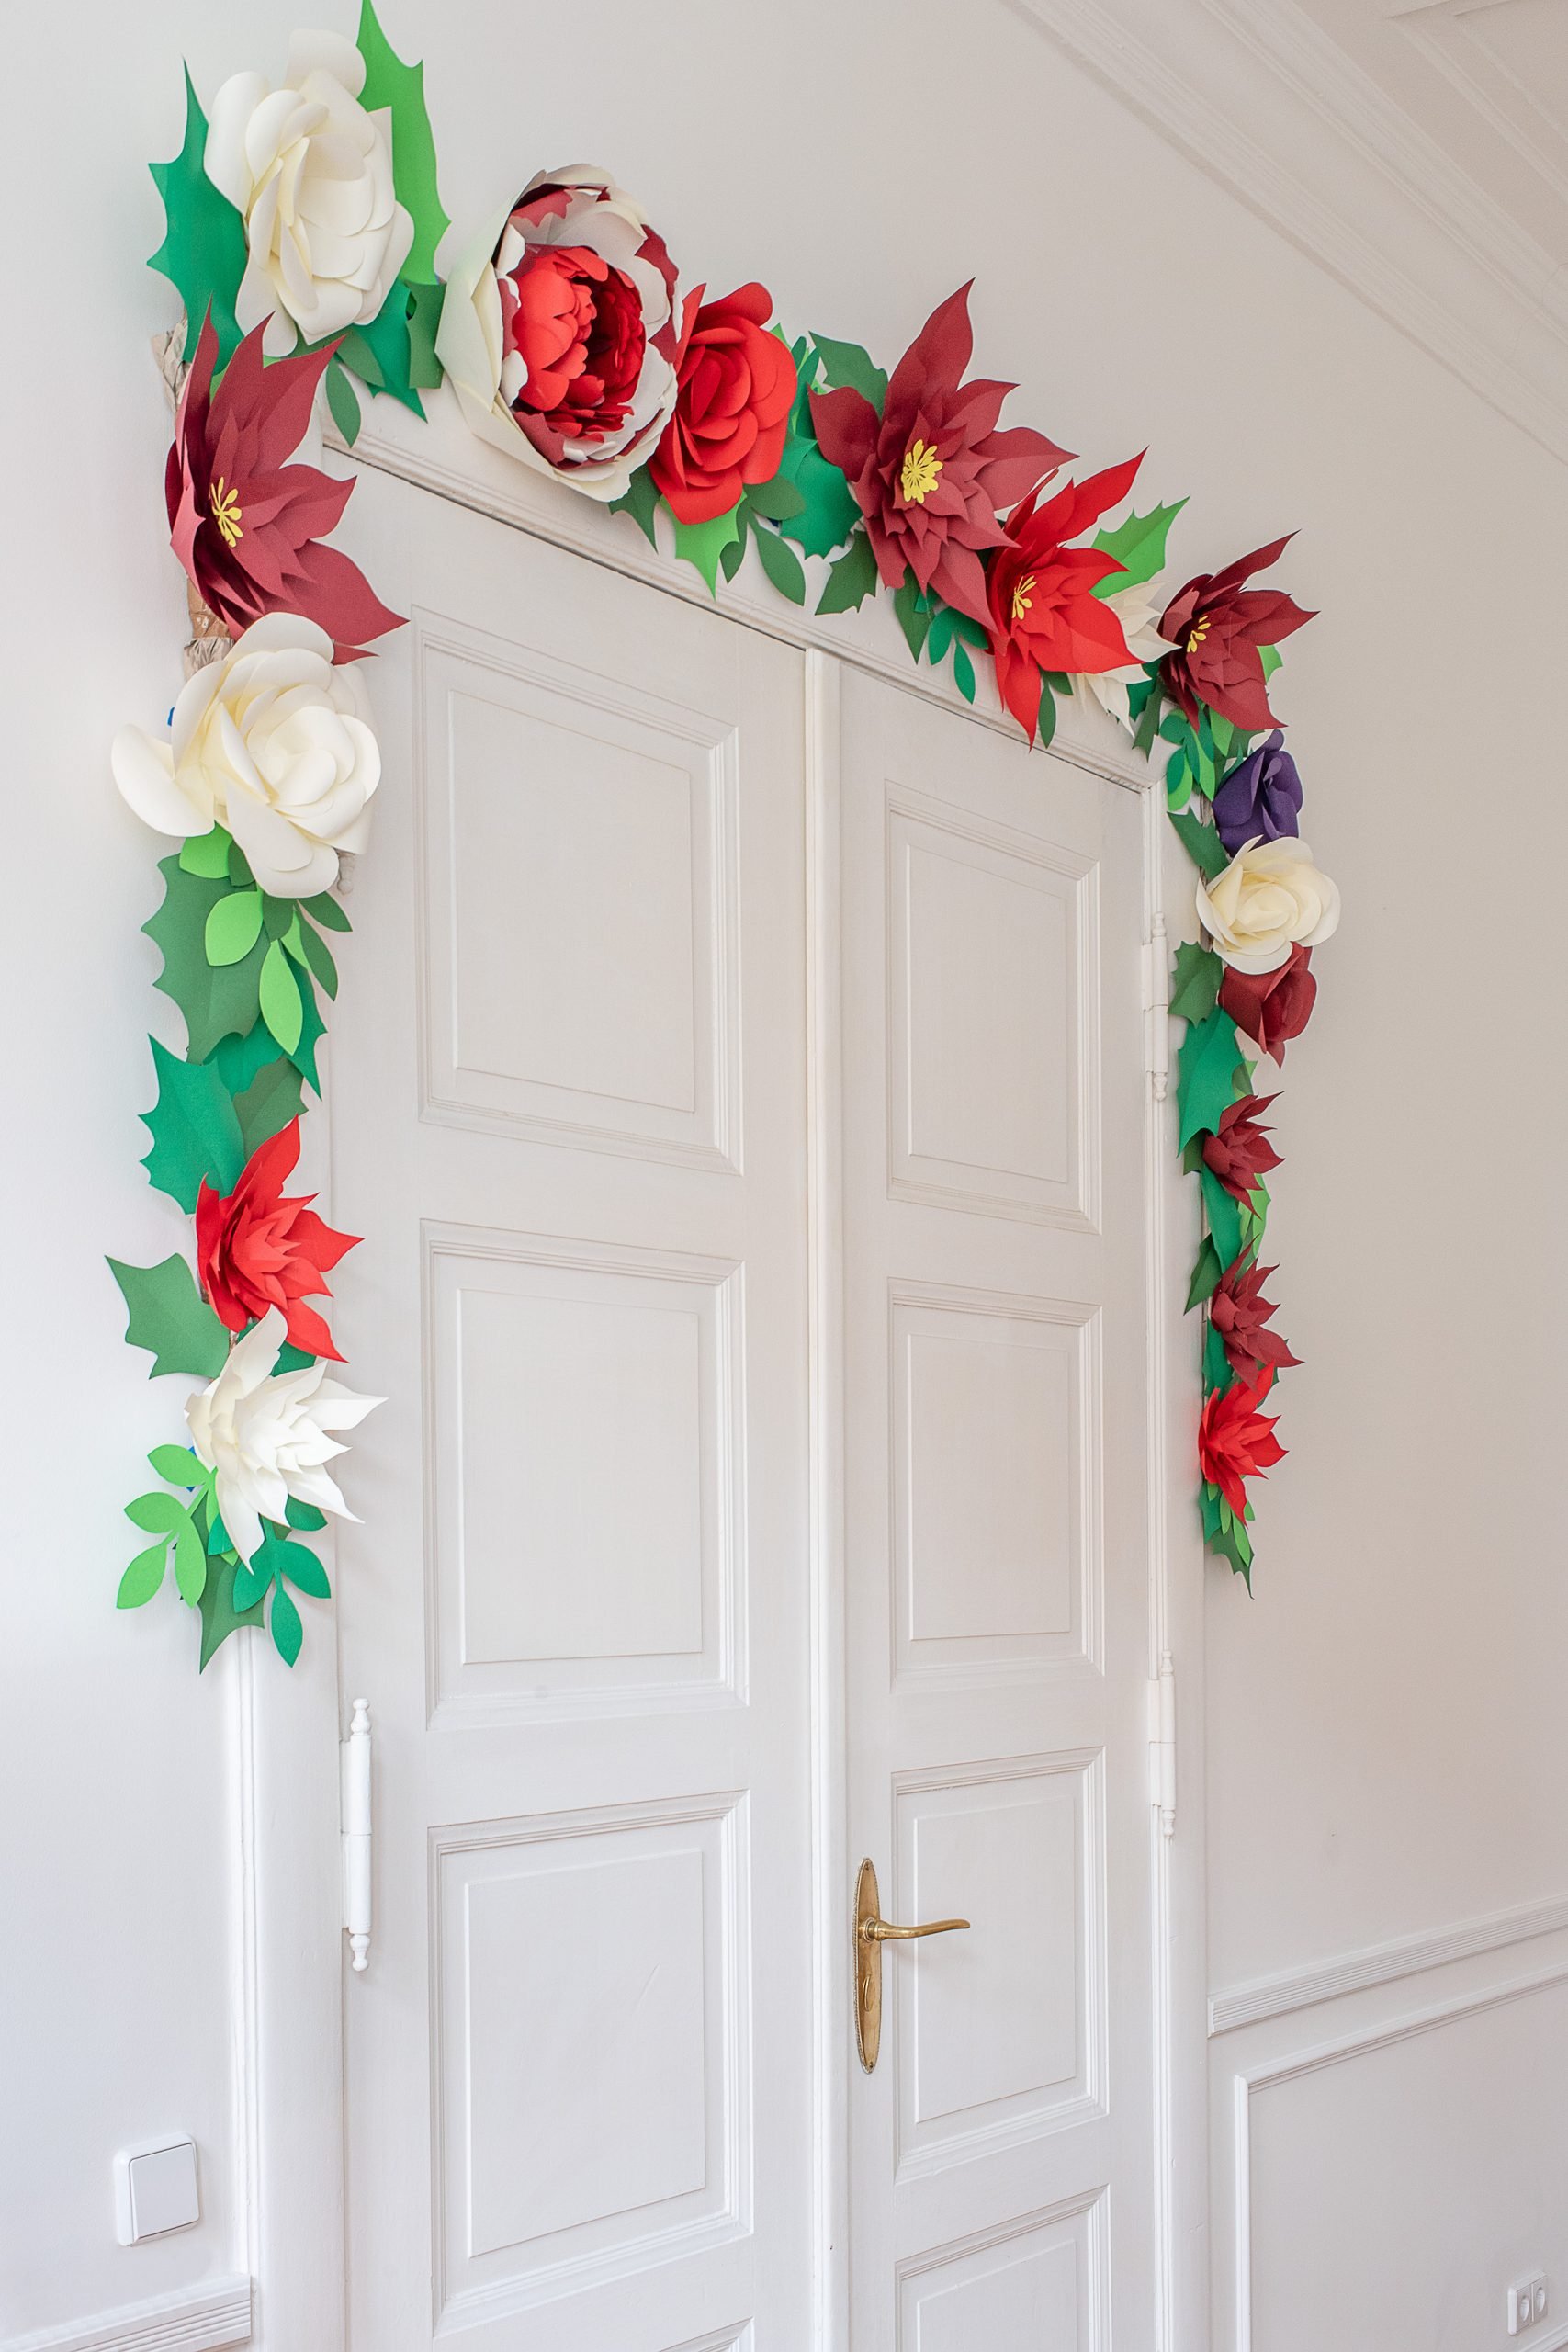
Because we’re making a Christmas paper garland, we opted to use mainly holly-shaped leaves along with lots of red and white flowers.
To make things easier, I made myself templates for all leaves and flowers so that they’d all be roughly the same shape. For a bit more variety, I made flowers and leaves in different sizes, too.
To make the DIY paper flowers and leaves it’s just a matter of using your template on the colourful paper and drawing around it before cutting out the shape with some scissors or a craft knife. To speed things up a bit, I cut multiple petals at the same time by laying a couple of sheets of paper on top of each other.
If you have a fancy cutting machine, there are loads of resources where you can download files and have the machine cut out the petals for you. It would speed things up a lot but cutting everything out by hand is fine, too.
To give all of the leaves and petals some definition and a more three-dimensional look, score and curl the edges of the leaves and petals. How much you curl and shape your leaves and flowers is totally up to you and you can always adjust them when you attach them to your garland.
To make the flowers, we followed a few DIY paper flower tutorials we found on the internet. We used this lovely Poinsettia template which you can download for free and we also used this paper flower template to make the red and white roses. I also made one Peonie (using this giant paper flower tutorial but I made mine half the size).
3. Assemble The Garland
Start by attaching the packing paper base to your doorframe (or whatever surface you’ll be displaying the garland). We used Tesa Powerstrips to attach it to the doorframe as they can easily be removed without damaging the surface underneath (we use them for almost all temporary decorating). As you can see, we also used a couple of strips of masking tape to make sure that it was securely attached to the wall, too.
Now the fun bit of this project starts – assembling your Christmas paper garland! As you’ve already done all of the hard work, it’s just a matter of attaching the flowers and leaves to your base with the help of a glue gun.
I started by attaching a couple of the larger flowers to give me a rough outline and then just kept adding leaves and flowers to build up the garland until I was happy with how it looked. If you can see the paper base (as you can see in the image below) just keep adding leaves until it’s completely hidden.
In an ideal world, I would have draped our paper garland over a lovely fireplace mantle as I think it would be a perfect way to welcome Santa when he pops down the chimney but I love how it looks over our huge double doors, too.
It wasn’t difficult to make but it did take a while to cut, fold and glue everything together. The amount of time it’ll take to make a garland will obviously depend on the overall length of the garland but also on how many flowers you’re making as these take a lot of time to cut and assemble.
To give you a rough idea of what to expect, our garland is about 5 meters long. It took me about 25 minutes to make a flower (you do tend to get quicker the more you make) and about 7 hours to make the whole garland in total plus another hour to stick it to the doorframe. The peonie is made up of 130 pieces of paper so, needless to say, it took a long time to make!
It’s definitely not a quick project but I love how it turned out! Now I just need to sort Christmas presents, order food, work out where everyone is sleeping, buy more plates, get our guest rooms prepared,… I think I have my work cut out!
Do you go over the top with your Christmas decorations? What are your plans for the festive season? Will you be having a house full of family, too?

Luxahaus.com says
A beautiful decoration for your home! It looks gorgeous
Christine says
Thank you!
Cx
Steve Zuckerman says
These color combinations of flowers on the door are so cute! I have pleased to read the entirety of the post as mentioned above in detail. You did a great job. I love your idea. Thanks and carry on!
Christine says
Thank you, Steve! It was a bit more work than expected but we’re delighted with the result!
Happy Holidays!
Cx
Sarah Taylor says
Wow! Beautiful garland.
And your light fitting is amazing – where is it from?
Christine says
Thank you, Sarah! It took a while but it definitely makes our dining room more festive!
I made the lampshade :)
Cx