There are so many tutorials on the internet on how to lighten stained wood furniture. They go through so many options, steps and endless lists of supplies that it can be difficult to know where to begin.
But, amongst all of these options, there is one very easy way to lighten dark stained wood furniture – all you need to do is sand it!
Yes, it’s that simple.
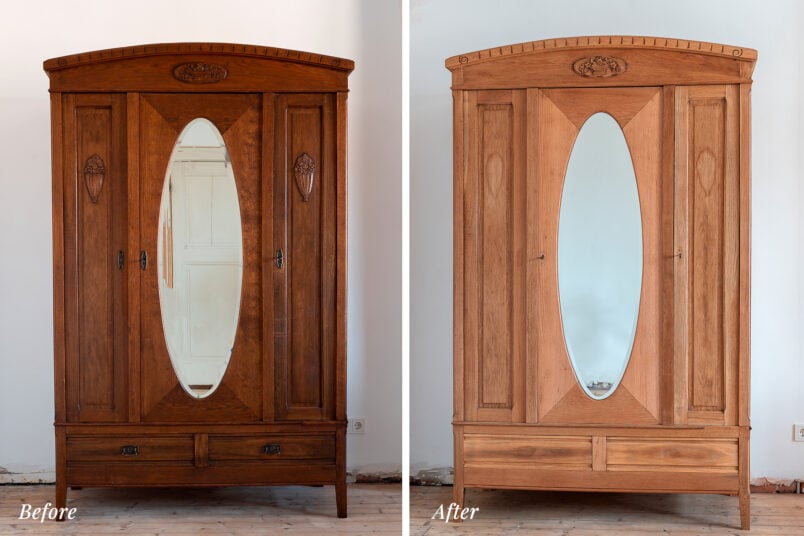
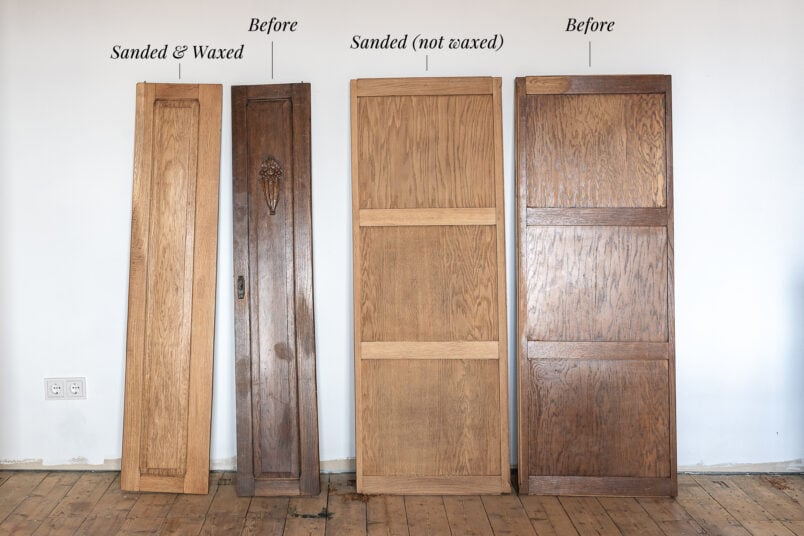
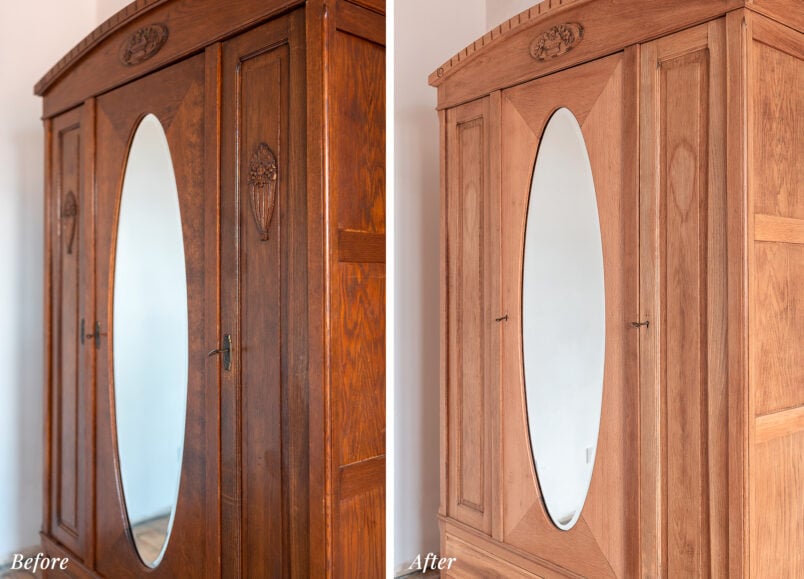
And, if you have a piece of furniture that’s too dark or not the colour you’d like it to be, we’re sharing exactly how we transformed this dark stained wardrobe to look more modern and make the wood lighter.

What you will need to lighten dark stained furniture:
This post contains affiliate links. We only recommend products we love and think that you will, too! Read our full disclaimer here.

- Paint scraper & detail scraper
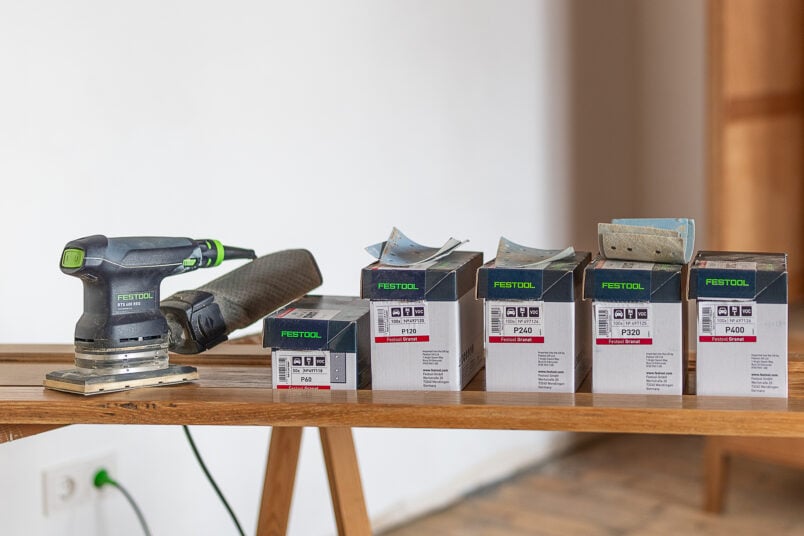
- Sander
- Sandpaper in various grits (we used 60 grit, 120 grit, 240 grit and 320 grit)
- Paint stripper (optional – this will depend on how detailed your furniture is)
- Clear Furniture Wax & cloth to finish (or oil)
- Dust mask
How to lighten stained wood:
The easiest way to lighten stained wood is by removing the stain.
It’s not difficult to do, and you don’t need to use any harsh chemicals, acids or bleach, but it does take a bit of time and work. We’re sharing the exact steps you need to take to lighten stained wood furniture so that you’ll end up with a piece of furniture you love, too.
Step 1
Check the wood and make sure it’s not veneer
Before you even start to think about removing the finish, it’s a good idea to check the condition of your piece of furniture and what it’s made of.
If it’s veneer, you will only be able to sand it lightly, so probably won’t be able to remove the dark finish completely. If the wood is heavily damaged, it also may be worth considering painting the furniture a lighter colour instead of stripping it.
Ultimately, the decision will depend on your preference and on the condition of the piece of furniture. If you decide to paint it, you can check out our full step-by-step guide on how to paint wooden furniture here.
Step 2
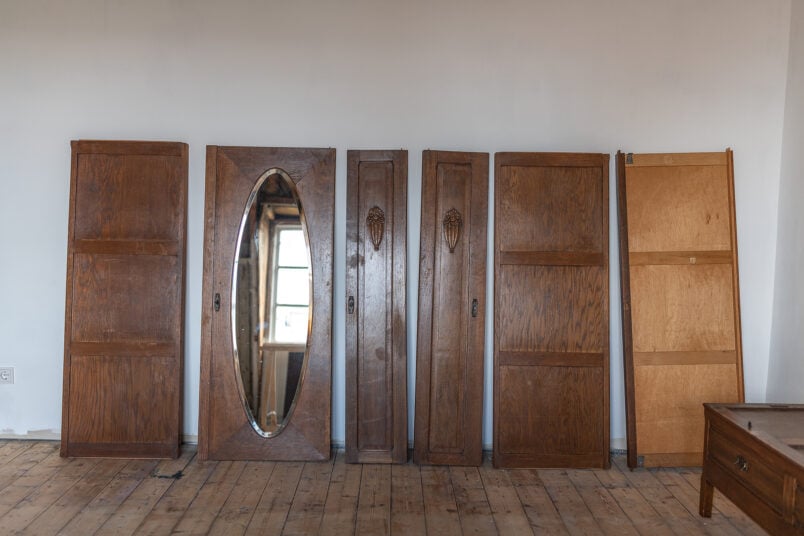
Take The Furniture To Pieces (If You Can!)
If possible, take the furniture to pieces as it will make it easier to move around and sand, but don’t worry if you can’t, as you really don’t have to. It just makes it a bit easier to work with.
If you can’t take it to pieces, remove the bits you can, like doors and drawers.
Step 3
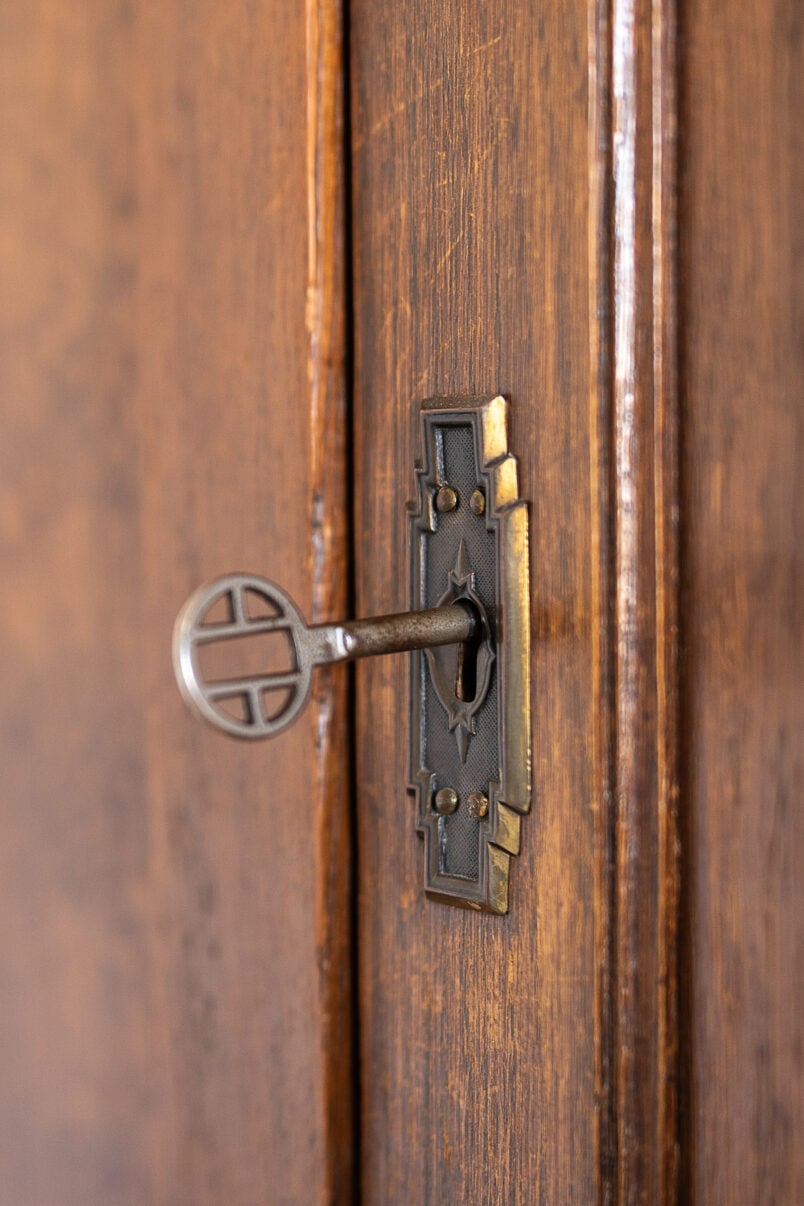
Remove Any Hardware
Sanding a flat and clean surface is so much easier than having to sand around any details or fitting, so remove any hardware or items that can get in the way while sanding and keep them safe until you can put them back after lightening the wood.
If your hardware is covered in paint, we shared a great method to remove the paint on Instagram that you can check out here.
Step 4
Scrape away the paint (or use a paint stripper)
Instead of trying to sand away the layers of stain, paint or varnish straight away, it’s always best to remove as much of the old layers as possible before sanding.
A paint scraper is a must-have tool when it comes to removing paint. We have two different ones. One is a larger paint scraper that’s perfect for large, flat surfaces, and a detailed scraper that comes with different-shaped blades for smaller, detailed areas and curves. I honestly can’t recommend these tools enough – they’re fantastic.
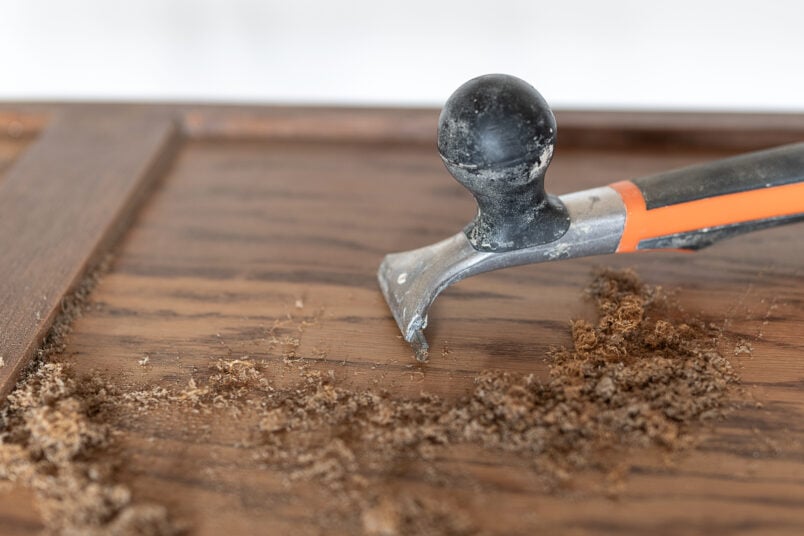
Using a paint scraper is really easy and very satisfying. Just drag it over the surface, applying even pressure. You’ll instantly see the layers of varnish scrape off.
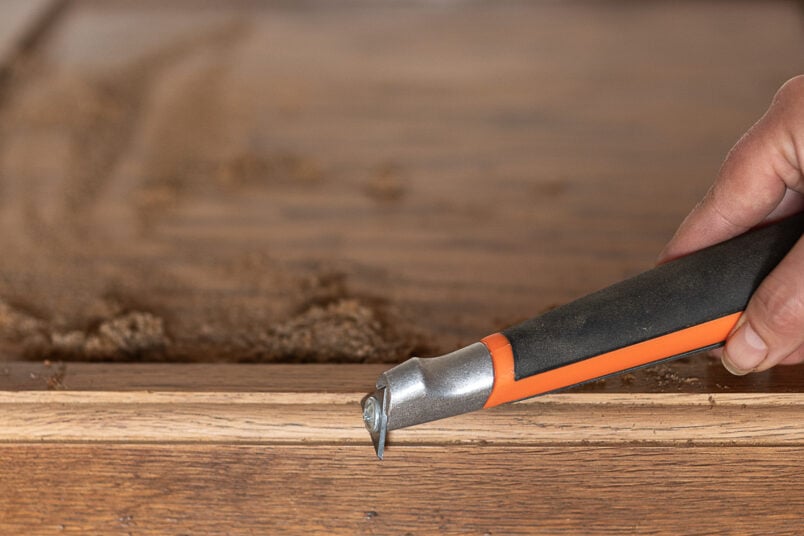
There are a couple of reasons why using a paint scraper or paint stripper before sanding is a good idea.
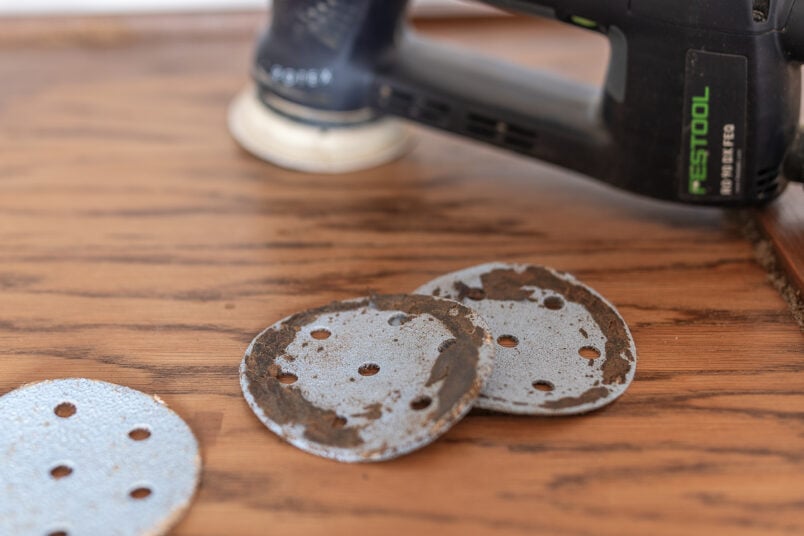
1. Your sandpaper won’t clog up as fast
The warmth generated by sanding will melt the finish, which will cause the sandpaper to clog up. Clogged-up sandpaper is useless as the fine sanding particles are covered in goo and aren’t able to sand away any of the finish.
2. You’ll save money
You’ll use a lot more sandpaper if you don’t remove some of the finish first and will waste a lot of sandpaper, which can be expensive.
3. It’ll make the overall process much quicker
You won’t have to change the sandpaper sheets as often, and you will be able to sand away the stain or varnish much quicker if it’s only a thin layer.
Alternatively, you could use a paint stripper to remove the varnish or paint layer. Using a paint stripper is a lot messier, though, so we try to only use it for detailed areas where we can’t use the paint scraper.
Step 5
Sand with coarse grit sandpaper
You can start sanding after removing as much of the paint finish as possible. Depending on how much varnish or paint there is left to remove, we start sanding with 60 to 80-grit sandpaper.
Sand until all traces of old paint, varnish or stain have been removed, and you can see the natural wood finish.
Using the right sander will make removing the old finish so much quicker and easier. If there’s one tool you should splurge on, it’s a sander, as you use it for so many projects.
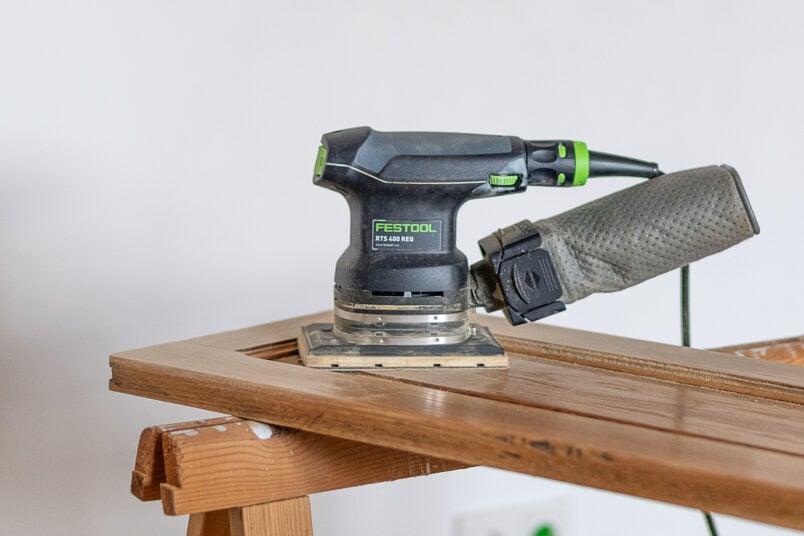
Having said that, the sander we have and recommend is very expensive, so use what you have. It may take a bit longer, but ultimately, the finish will be the same. And, if you’ve removed most of the old varnish or paint with a paint scraper first, you hopefully won’t have too much left to sand anyway.
DIY TIP
Read our full guide on how to sand wood here. It shares everything you need to know about sanding and includes a helpful cheat sheet so you know exactly which sandpaper to use for which project.
Step 6
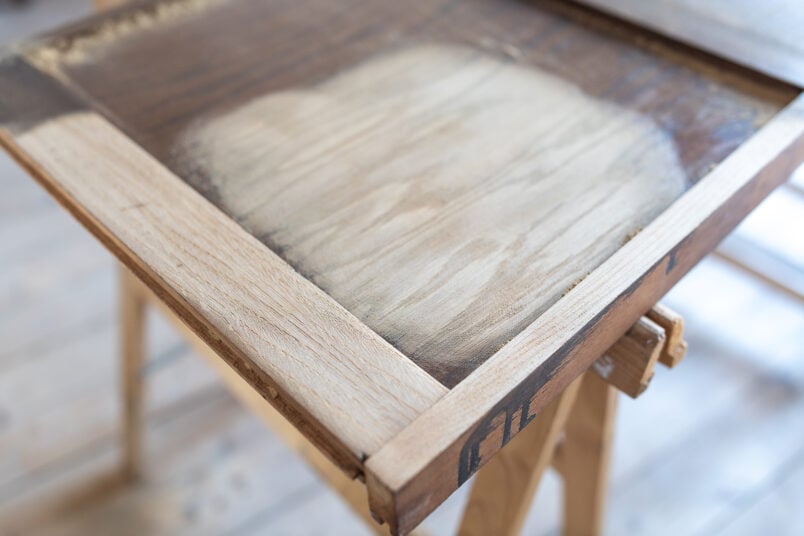
Sand with finer grits until smooth
Once you’ve removed all of the old paint or varnish with the coarse-grit sandpaper, you can start to sand everything with finer grits.
The sanded surface will be rough, and with each finer grit of sandpaper, you’re removing the scratches you made with the previous coarser grit you used. Sanding all of the varnish takes quite a bit of time, but you’ll find that sanding with the finer grits is a much quicker process.
Keep sanding the wood surface until everything is super smooth. We first sanded everything with 120-grit sandpaper, then 240-grit paper and finally with 320-grit and 400-grit sandpaper.
Step 7
Apply a protective top coat
Remove any dust and dirt with a vacuum cleaner and a soft, clean cloth.
You can also wipe the surface with white spirits (it’s called mineral spirits if you’re in the US) to remove any last traces of dust. Don’t use water to clean the freshly sanded wood, as it will make the grain rise, and you’ll have to sand everything again.
No matter what finish you use, it will darken it slightly. Generally, water-based finishes tend to change the colour of the wood less than oil-based finishes but you may want to test on a hidden area of your furniture to see how the colour changes before you apply it all over.
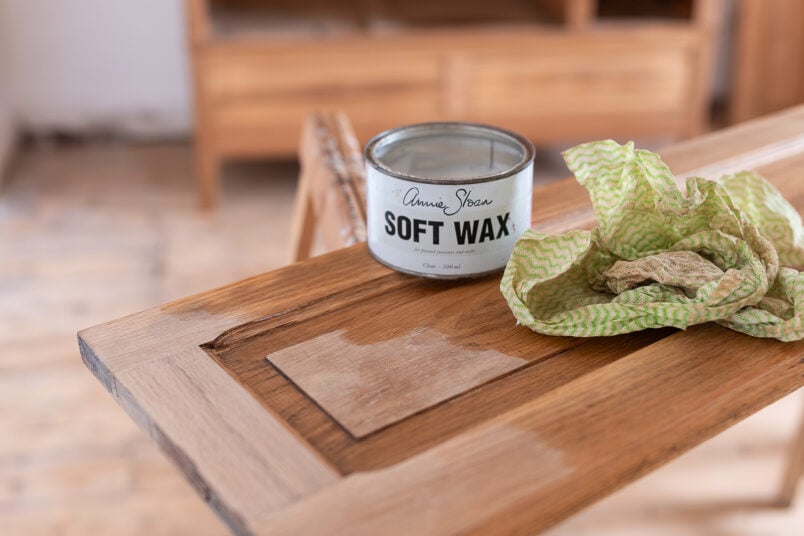
We used furniture wax we still had left over from another project to protect the wardrobe. Wax is easy to apply and will protect your wooden furniture and give it a very subtle sheen.
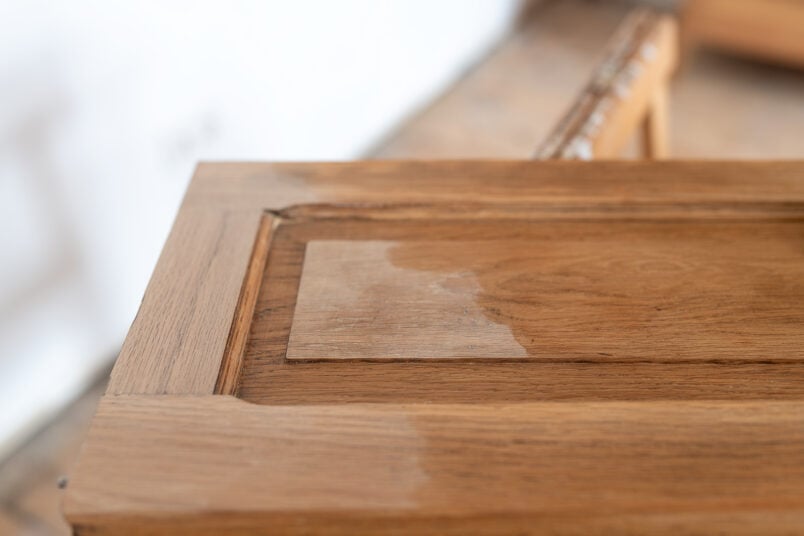
All you have to do is rub it over the surface of the wood until it’s soaked in and the surface is completely smooth and feels dry.
If you’d like more sheen to the finish or it’s not as smooth as you’d like, you can lightly buff the surface with some very fine 0000 steel wool (always in the direction of the grain) to polish the surface.
Alternatively, you could use Danish oil to protect the freshly sanded wood. It’s what we use for most projects and we love it. You can read our full guide on how to apply Danish oil here.
Step 8
Put everything back together & enjoy
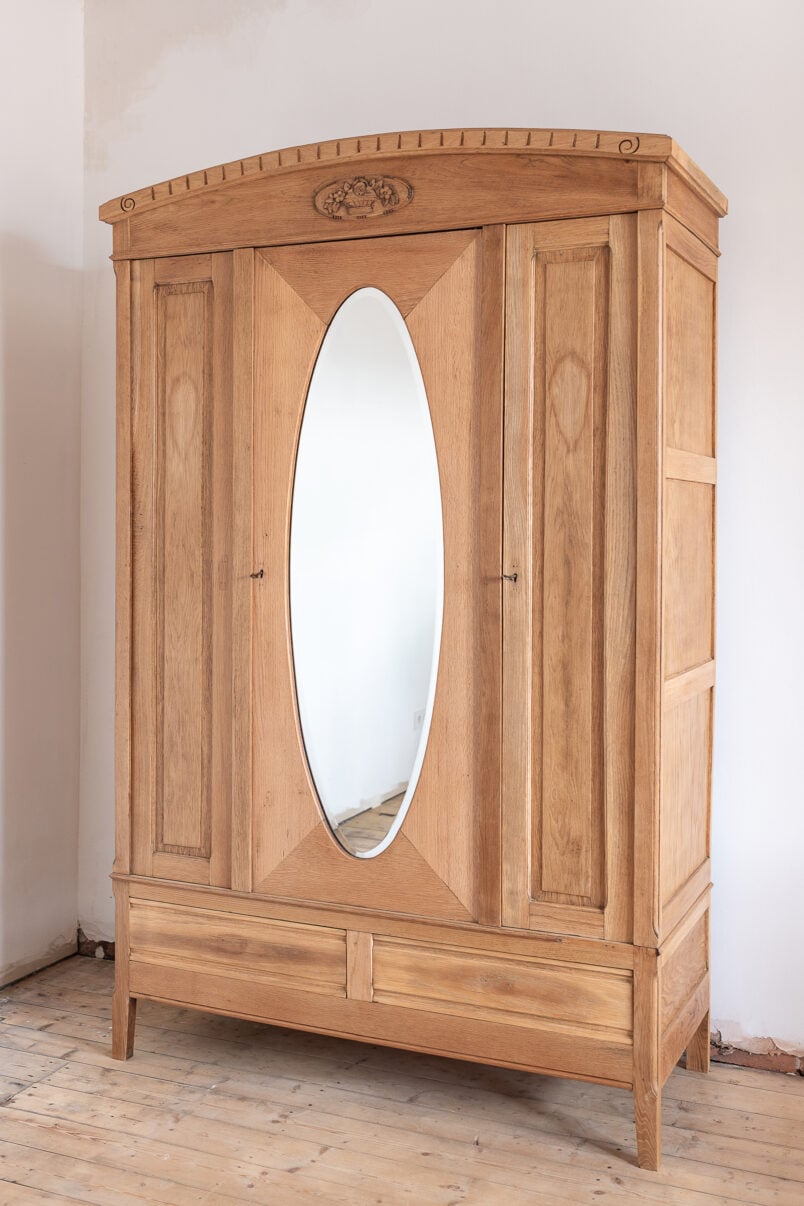
When you’ve finished applying the wax you can put everything back together again. We didn’t do anything to the inside of the wardrobe other than give it a very thorough clean and add a couple of additional shelves.
Time & Cost To Lighten A Stained Wood Wardrobe
As I mentioned, this is not a quick project but it’s so worth a bit of work to give an old piece of furniture a new lease of life.
Sandpaper | 17€
Furniture Wax | 13€
Total 30€
*This is a rough estimate based on the supplies we used and doesn’t include power tools or electricity we used.
I did this project over the space of a couple of weeks so didn’t keep an exact record of the time I spent. Sanding the detail took a long time but sanding the flat wooden surface didn’t take long at all. In total, I’d estimate that it took between 18-20 hours to lighten the stained wood and transform this wardrobe.
We still need to put the detailed elements and hardware back but it’s already looking so much better than before.
How To Lighten Stained Wood FAQ
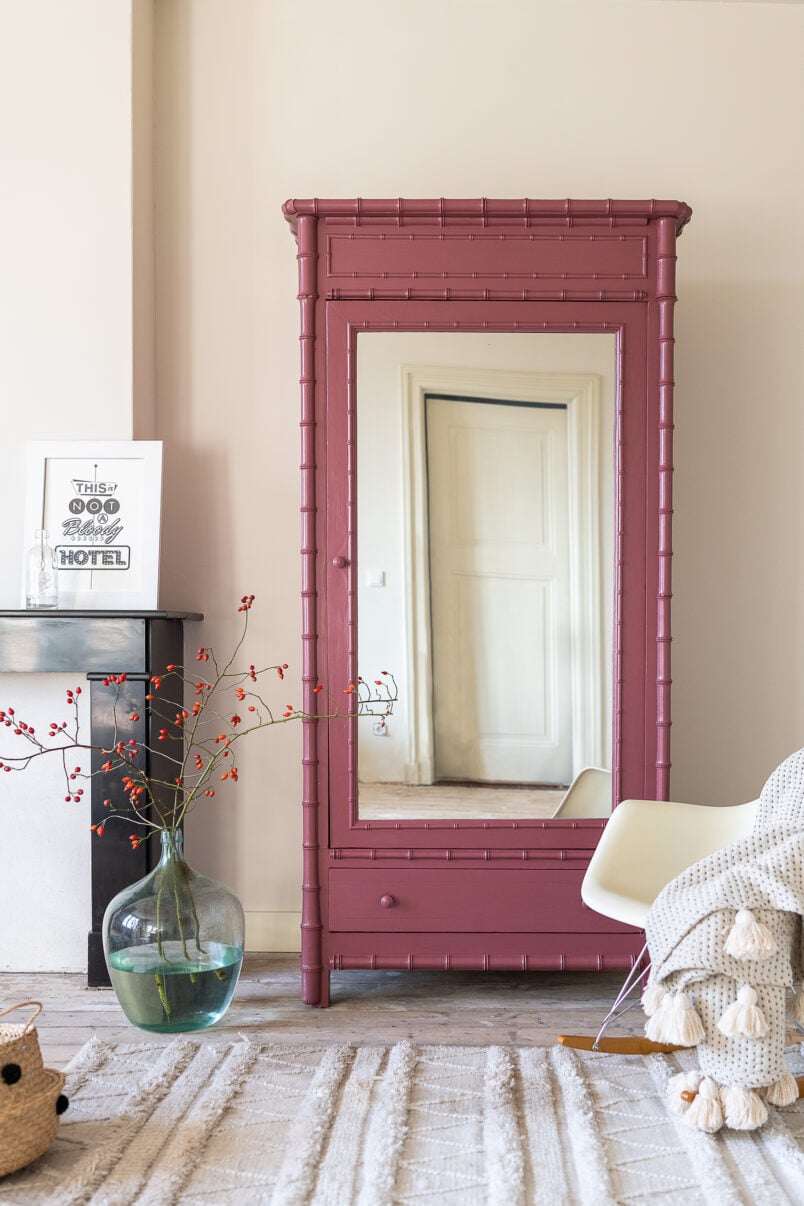
If you don’t want to (or can’t) sand the furniture, another option is to paint it. You can see how we transformed our vintage bamboo-style wardrobe with a coat of paint here.
Sanding is the best way to remove dark stains on wooden furniture but there are other options, too. You can paint it or, if the wood is still too dark (or orange) after sanding, add a whitewash to lighten the wood before sealing it with some wax, oil or varnish.
Another option is to bleach wood with household bleach or wood bleach.
There are countless places to find second-hand furniture. Ebay, local Facebook groups, reclamation yards and charity shops are all great places to look. For more information on the best places to find great reclaimed furniture check out this guide.
Removing a watermark from wood furniture is so much easier than you probably expect and you don’t need any tools to do it! Check out this guide where we share exactly how to remove a watermark from wooden furniture with one simple household gadget.

Leave a Reply