Last year didn’t quite turn out as we expected but one of the projects we did manage to start working on is restoring our period wood windows. It’s an absolutely epic task with a whopping 68 windows to strip, sand, repair and repaint.

It honestly wasn’t a job I’d been looking forward to, especially as I calculated it would take me about 1.5 days of work per window. And, if you do the maths – that’s a solid 102 days of window restoration!
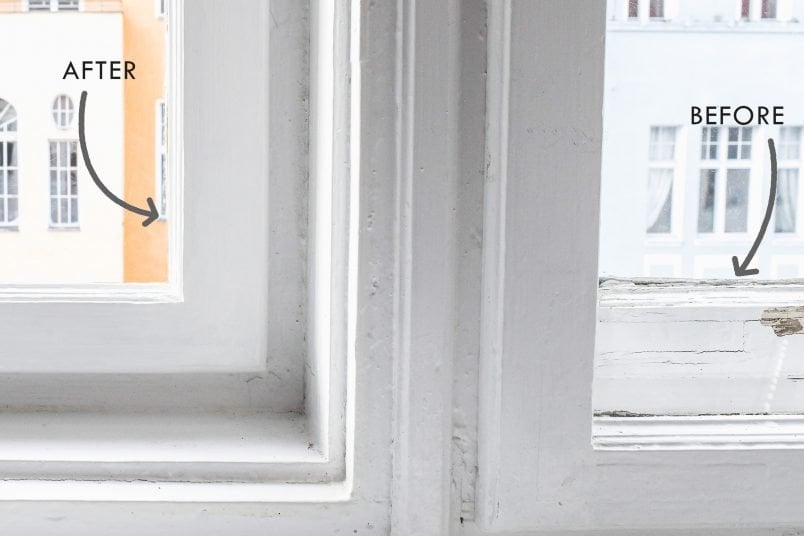
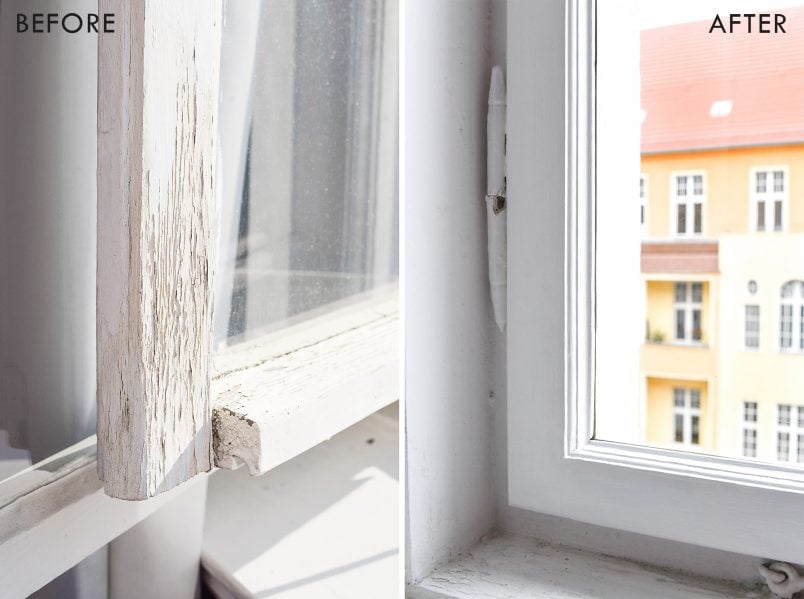
If you have wooden windows in your home, it’s really important not to even let them get to the state that ours are in. Having said that, our historical wooden windows are well over 100 years old and there is definitely no need to replace them!
Old windows can be restored and they can look as good as new!
Obviously, timber windows require regular maintenance but, if you take care of them, will last a lot longer than uPVC ones. After all, why would you rip out lovely original historic windows if you could repair them?
So, if you’re wondering how to repair your wooden windows and frames, what supplies and tools you’ll need and how much it costs to restore wood windows, you’re in the right place!
Here’s what you’ll need to restore wood windows (and to keep them well maintained):
This post contains affiliate links. We only recommend products we love and think that you will, too! Read our full disclaimer here.
- Sandpaper | A mixture of different grits ranging from about 40 grit, 120 grit to 240 grit)
- Wood Chisel
- Glazier Putty
- Glazier Tacks (we got ours at a local glaziers workshop)
- Paintbrushes
- Paint | Make sure to use paint that’s specifically for windows. It’s expensive but professional-quality paint is a must for this project!
- Wood Filler | Make sure that it’s suitable for windows
- Wood Glue
- White Spirit
- Putty Knife
- Glass Scraper
- Orbital Sander and/or Palm Sander (ideally, you’ll use a powerful sander like our new sander but it is very expensive)
If you’re completely stripping the paint you’ll also need one or two of these:
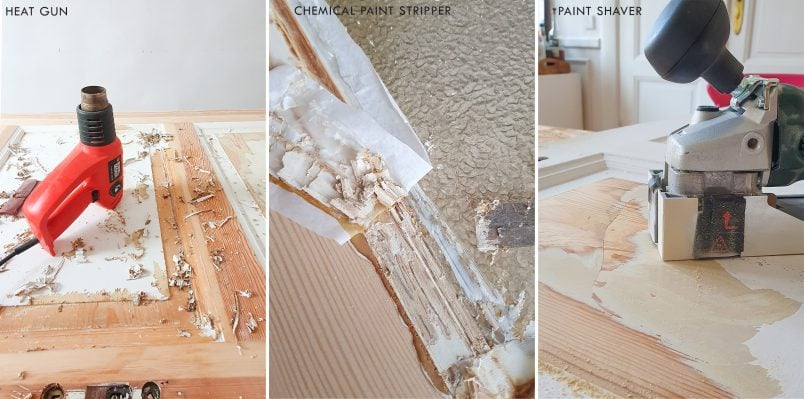
- Chemical Paint Stripper | This is the only paint stripper we recommend.
- Heat Gun
- Paint Shaver | Look at the video later in this post and you’ll know why we love it!
Here’s our guide to restoring wood windows:
1. Check the general condition of the window
Before you even start thinking about restoring the window check the overall condition. As much as even badly damaged timber windows can be restored, they may sadly be beyond repair so it’s important to find out exactly what you are letting yourself in for before starting any work.
If you have large sections of your window or frame that are rotten, they may still be salvageable but it’s probably a job that’s best left to the professionals.
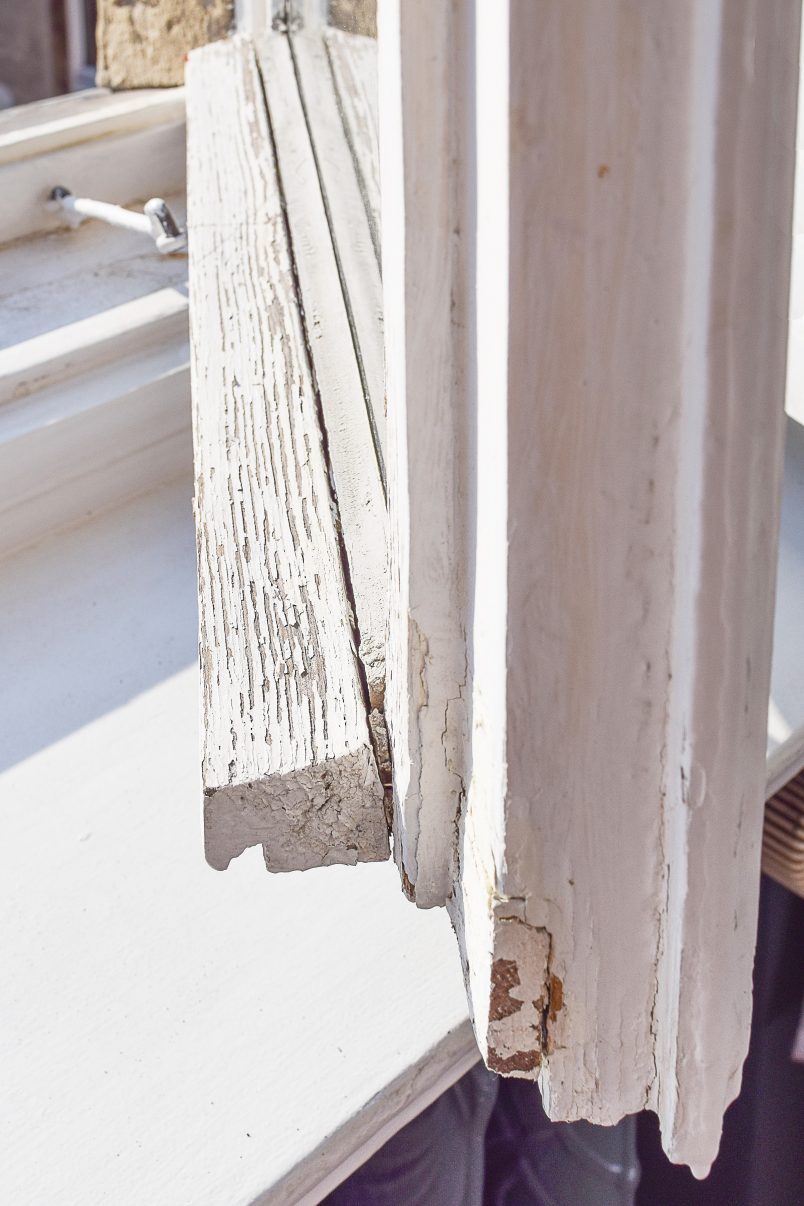
Stand back and take a look at your window. Does it still fit in the frame as it should? Is there any part of the window that doesn’t look right, wobbly, leaky or rotten? Is the putty in one piece or has it shrunk and cracked? What condition is the hardware in? Are the hinges still working as they should? Can you easily open the window?
Check that the casement (the part of the window with glass that opens) fits in the window frame and that it opens and closes correctly. If it does catch, make a note of the areas by drawing a big “X” with a pencil on the frame.
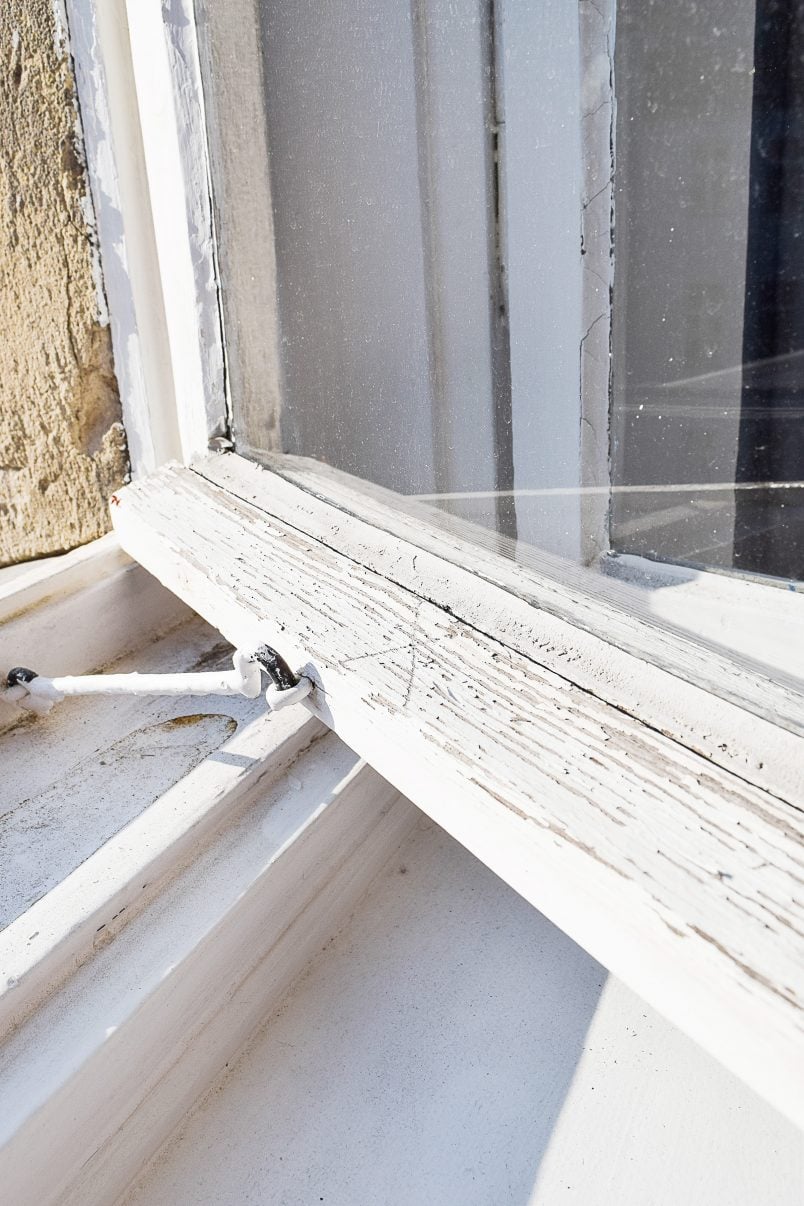
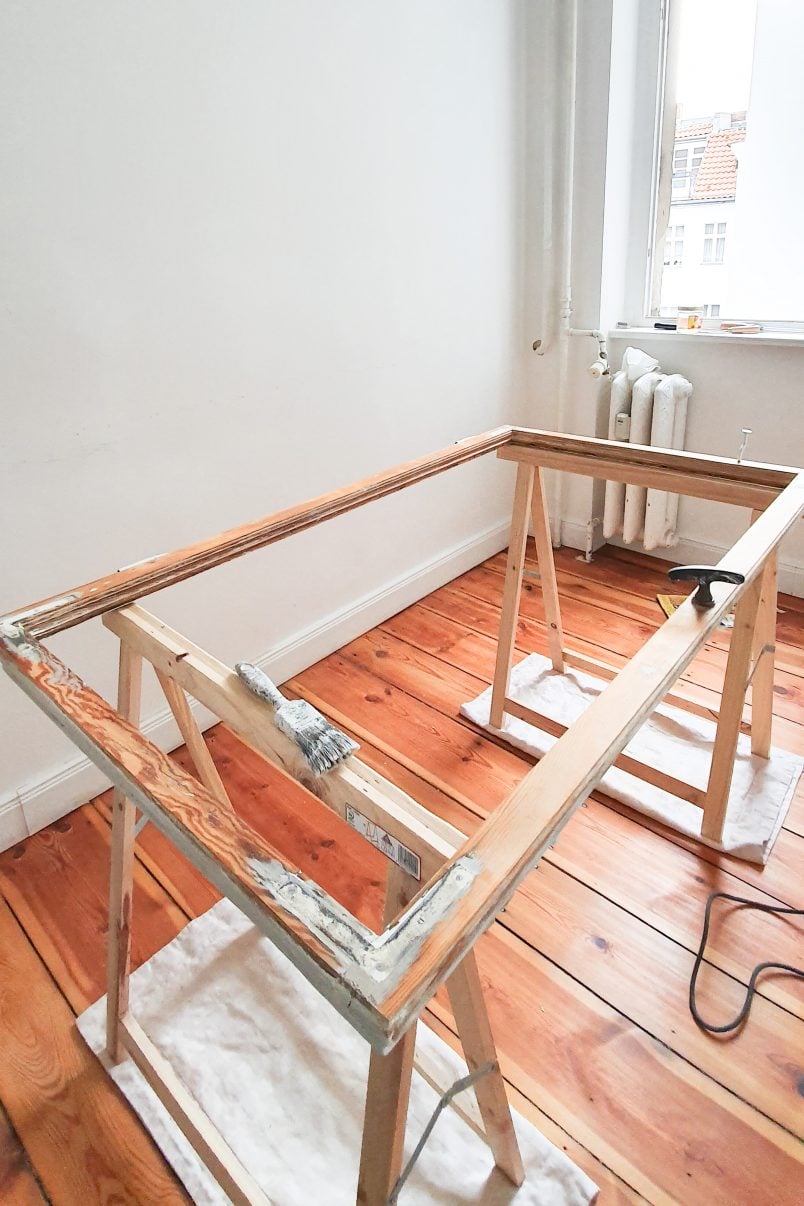
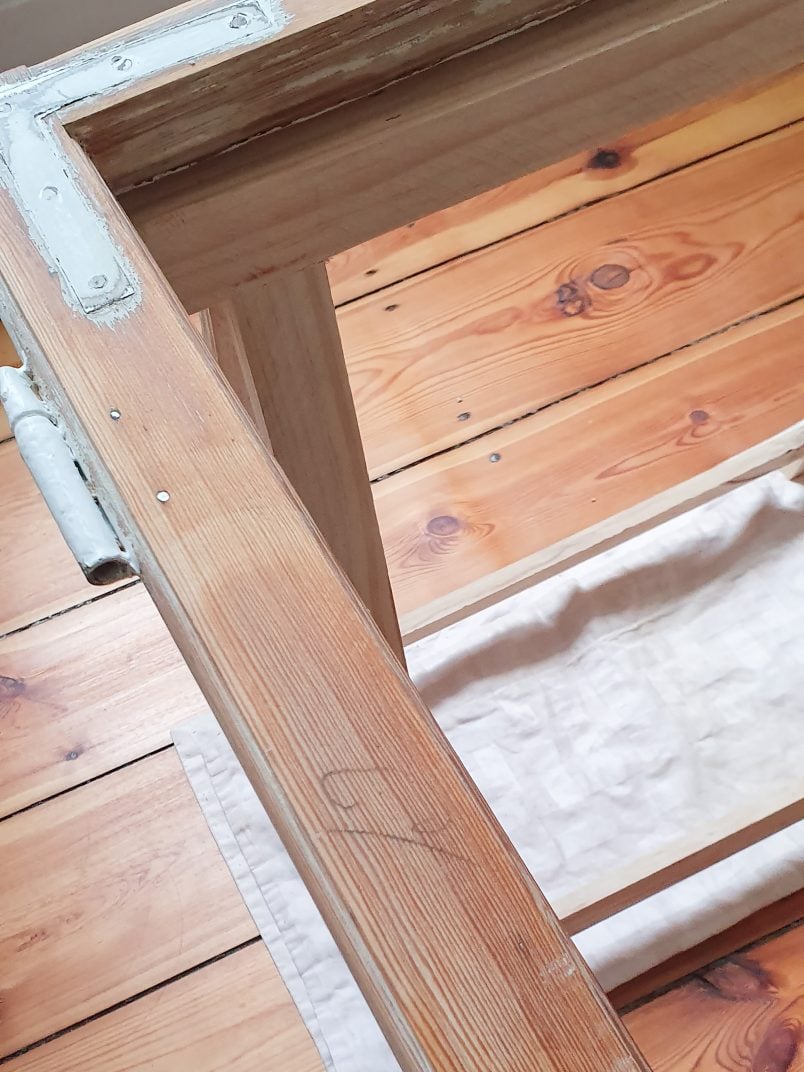
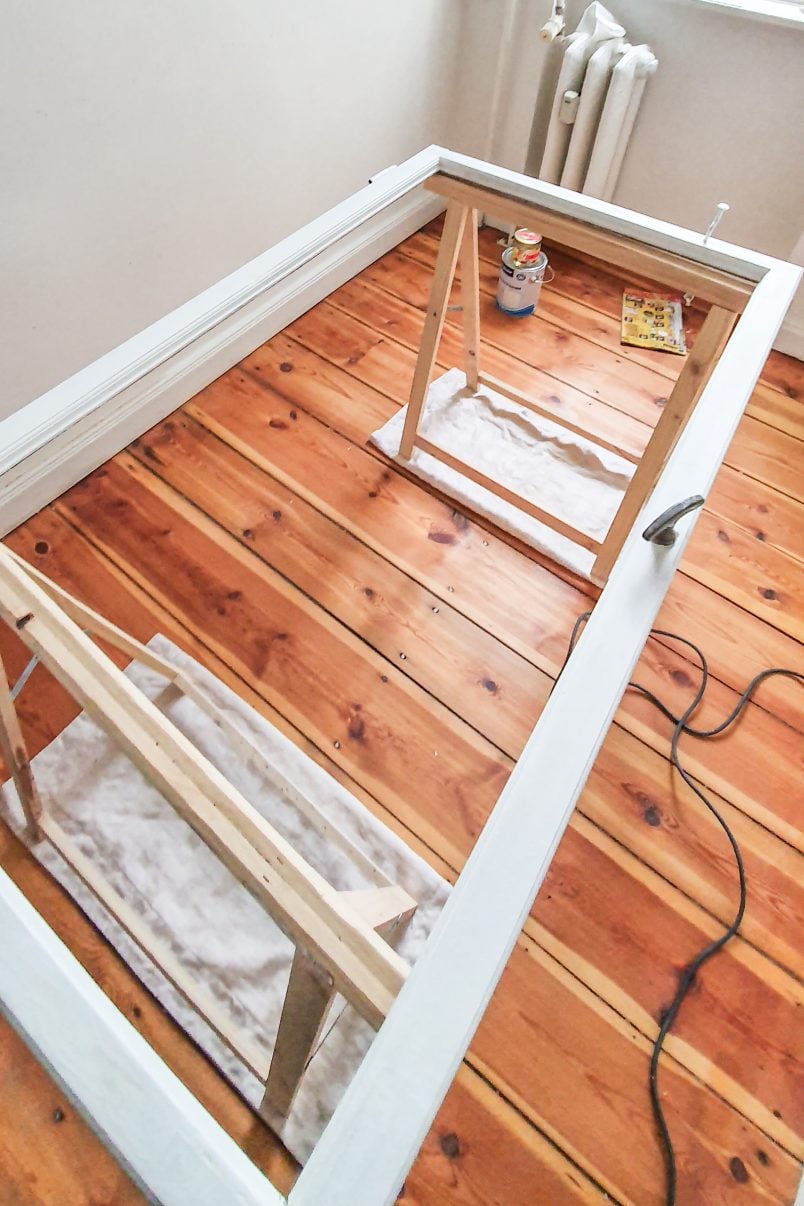
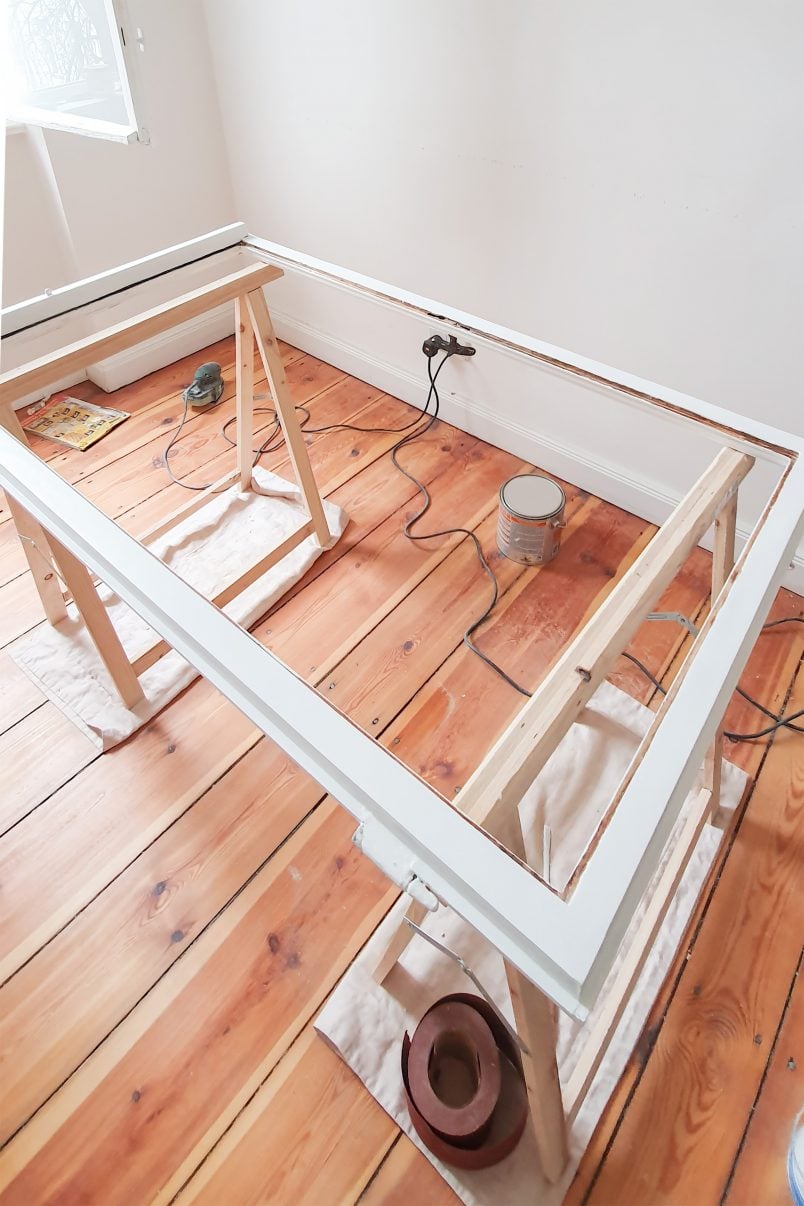
Next, remove the casement window from the frame in the wall and place it on a flat surface or some trestles so that you can easily access every part of it. Have another look at the condition of the window.
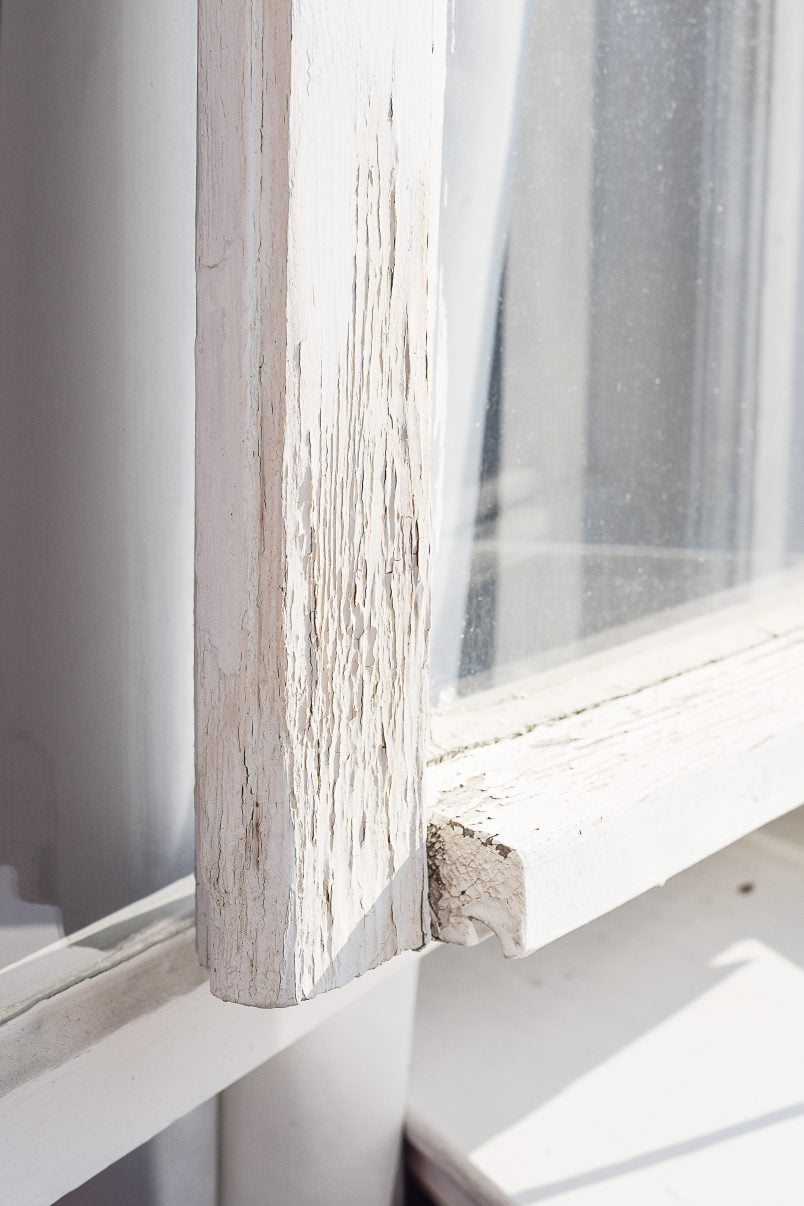
Are any parts rotten, loose or broken? If there are any really major issues, you may have to have the window repaired by a professional but you can definitely do the more basic repairs like sanding, filling and painting yourself.
Something that’s really important to remember is that you shouldn’t repair, paint or restore your windows in autumn or winter.
The cold and damp weather will make the timber swell slightly which could accidentally make you sand too much of your window away to get it to fit properly within the frame. When it shrinks again it may be too small and could end up leaky! Always sand as little as possible!
2. Remove the glass
This part of the process is a bit tricky and whether you remove the glass will again depend on how much work you need to do on the window frame.
It is, of course, easier to work on the window with the glass safely stowed somewhere else as there’s less risk of damaging it while you refurbish the wooden window frames but you could end up breaking it while trying to remove it, too.
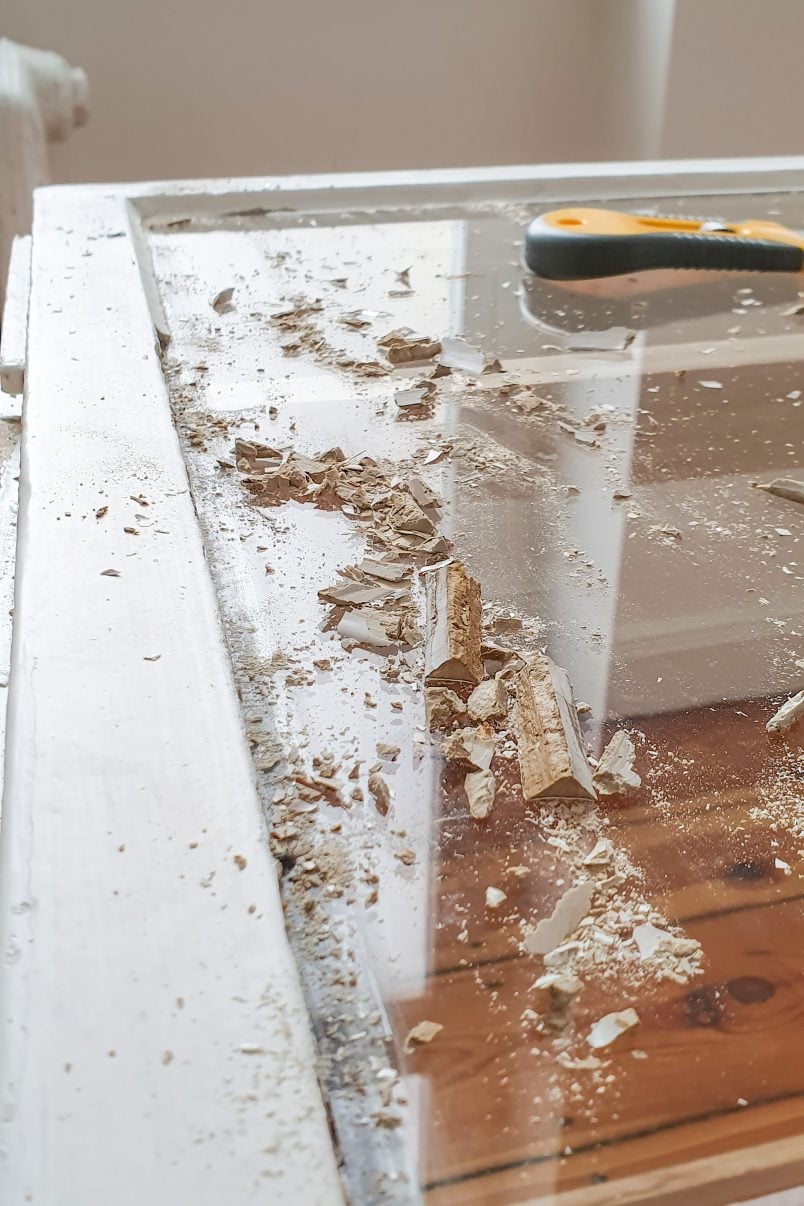
Start by removing any old putty. Old putty gets very brittle and you’ll probably find that most of it comes away in big, satisfying chunks when just lightly nudging it with a chisel.
Other bits may be more stubborn though and you really have to chisel away at them to be able to remove them. This is definitely the trickiest part of the whole process as you don’t want to risk breaking the glass.
We tried both methods – working on the window with the glass in place and working on it with the glass removed – and I personally prefer to remove the glass but I did accidentally break one pane while removing the old putty.
You have to be really, really careful!
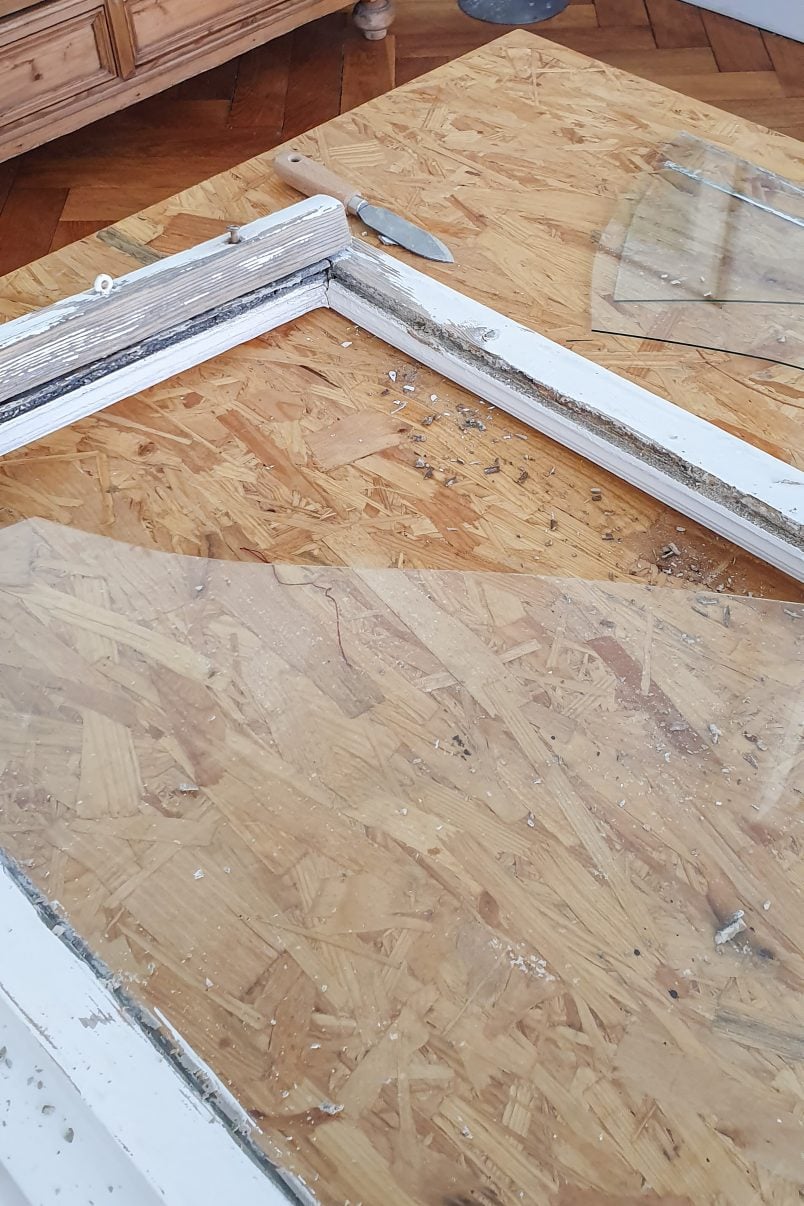
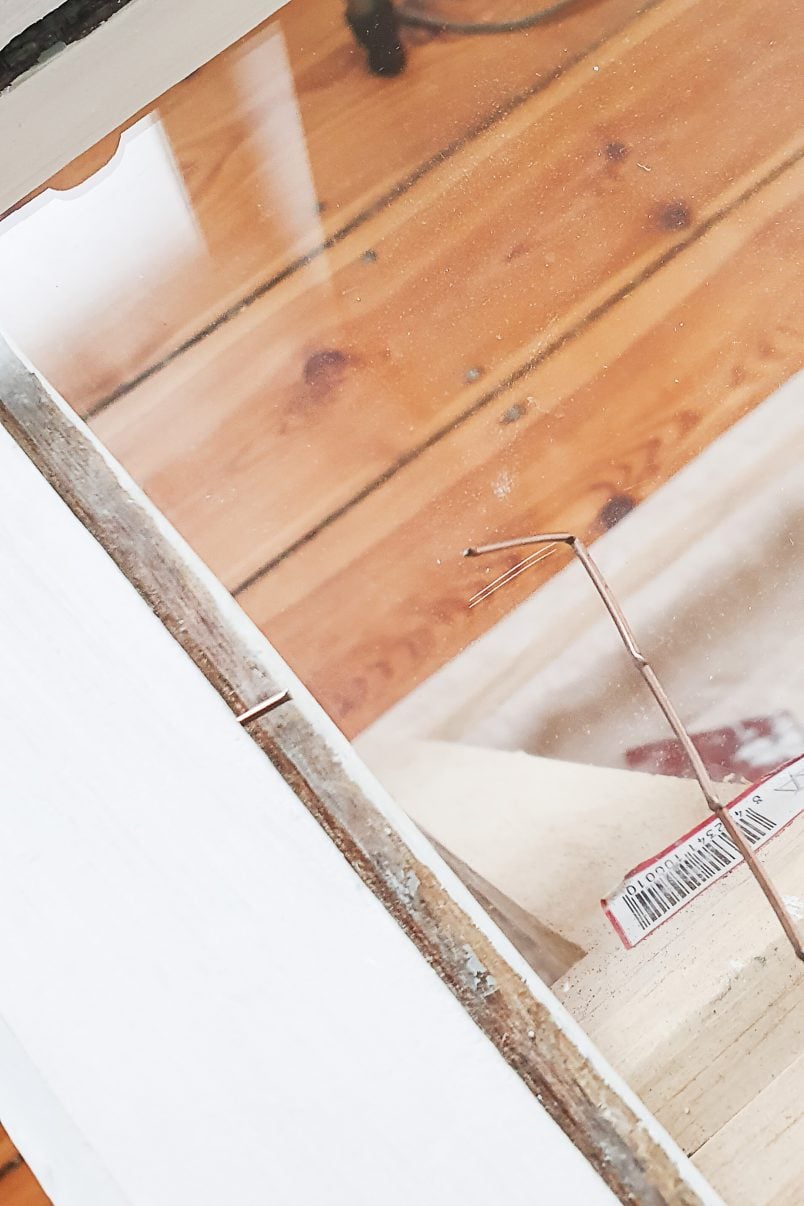
Once you’ve removed all of the putty, you’ll find that there are little glazier’s points spaced around 15 cm apart holding the windowpane in place. You can easily pull them out with some pliers.
There will almost certainly be loads of dirt, old paint and bits of putty still stuck to the glass so use a glass scraper to carefully scratch it off the surface.
Then all that’s left to do is carefully lift out the glass and store it somewhere safe while you work on the rest of the window frame.
3. Remove flaky paint and putty (or completely strip old paint back to the bare wood)
How far you go with any restoration is always up to you. I personally believe in aiming for the best possible result but you also have to be realistic which inevitably sometimes leads to compromise.
The condition of our windows varies quite considerably from one side of the building to the other and, whilst some windows will only need some very basic repairs and repainting, others will need a lot more TLC. Either way, it is messy work so make sure you have somewhere you can work without messing up your whole home!
We could probably have gotten away with just repainting this window but, as a perfectionist, I couldn’t help but go all out and remove all of the old paint as it was quite thick and hid some of the detailing.
If you don’t want to go through the efforts of stripping every last bit of paint, you’ll have to at least remove any loose or flaky bits of paint before sanding the surface.
If you do want to go the extra mile and remove the existing paint you’ll probably end up with a better finish but I’m not going to lie – it will take a lot longer to do!
As always, your main priority is to stay safe, so don’t forget to check for lead paint before you start to remove any paint, especially in older properties. We shared a full guide on how to deal with lead paint which you can read here.
As a very rough guide to the different paint stripping methods (yes, I’m aware that we’re actually stripping a door on these pictures), we find that a heat gun is great for most detailed areas and large surfaces although you can’t use it near glass or on cast iron.
Chemical strippers are great for really detailed areas and anywhere that you can’t use a heat gun, sanding is best when you’ve already stripped the majority of the old paint and our new secret weapon – the paint shaver – is perfect for large flat surfaces but not for any curves or detailed areas.
All of these methods have pros and cons and for the quickest result, you’ll probably find that it’s best to use a combination of the different methods.
We’ll be sharing a full guide on how to strip paint soon, so let us know if you have any questions or if there’s anything specific you’d like us to cover!
Whichever method you choose, it’s always important to wear the necessary safety gear!
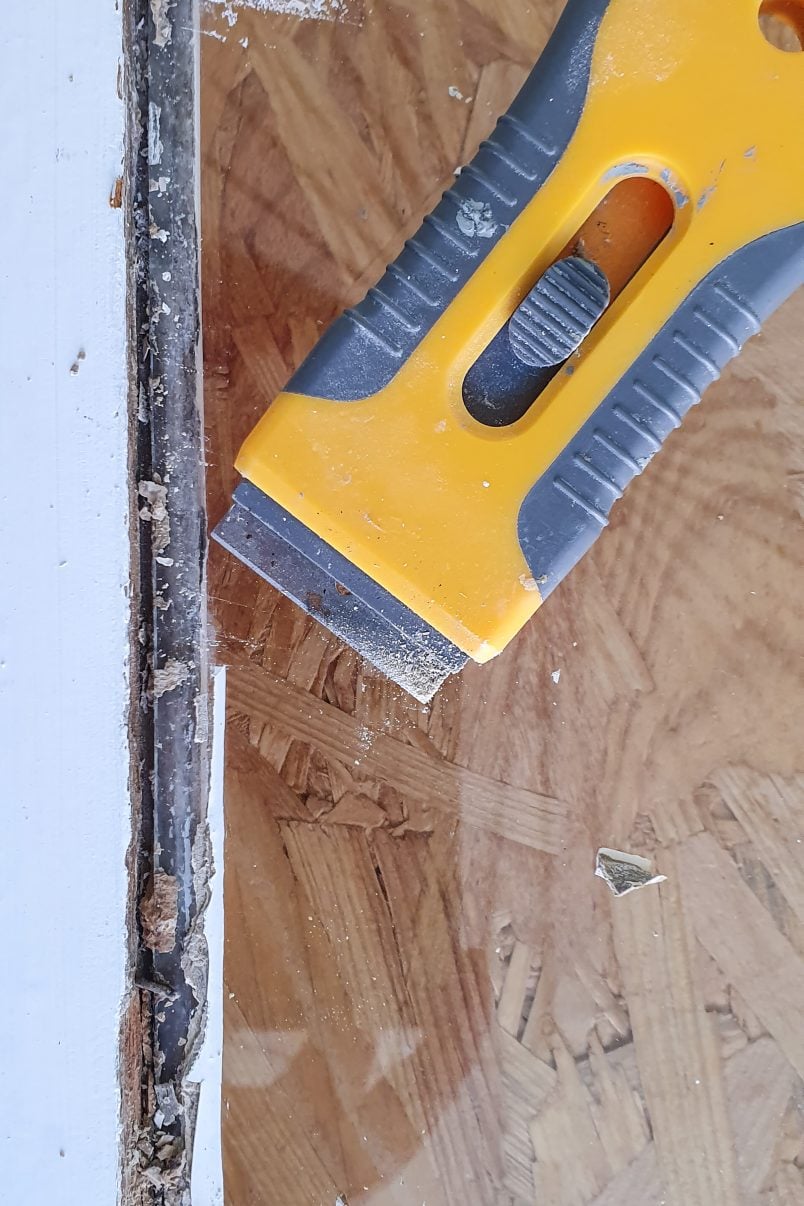
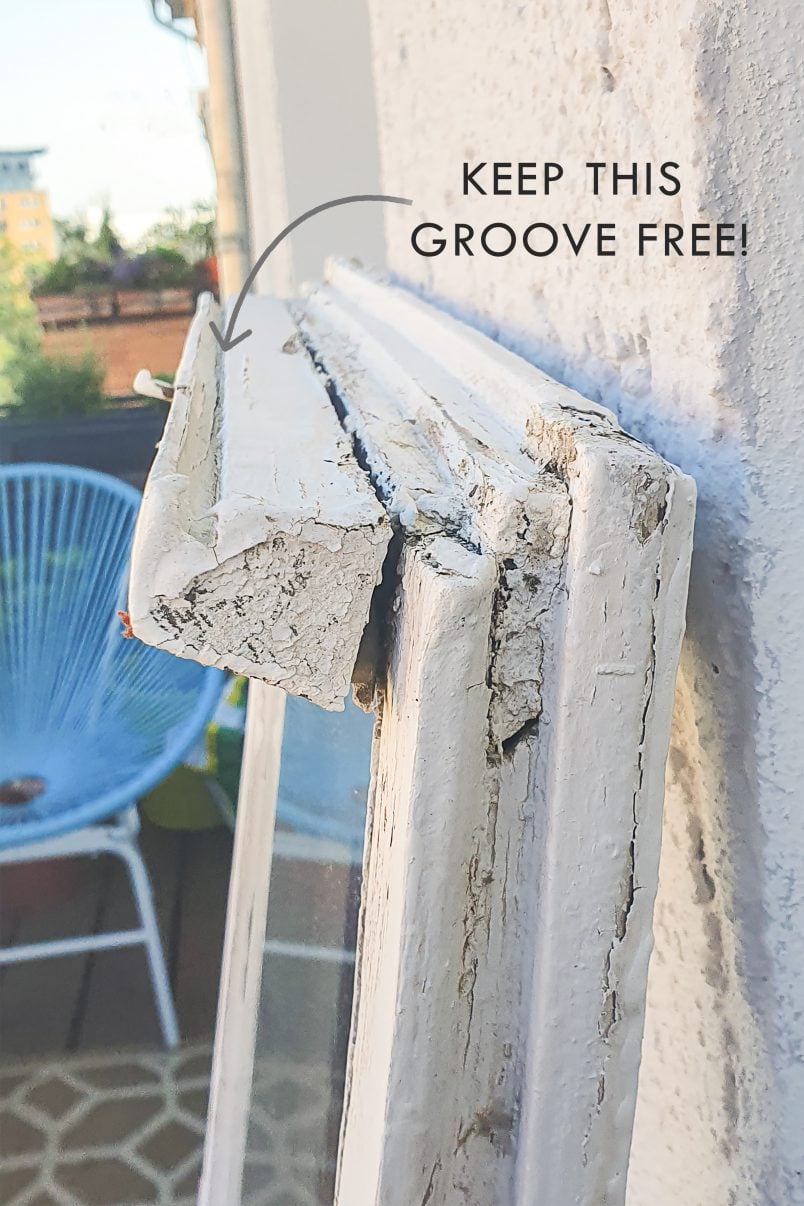
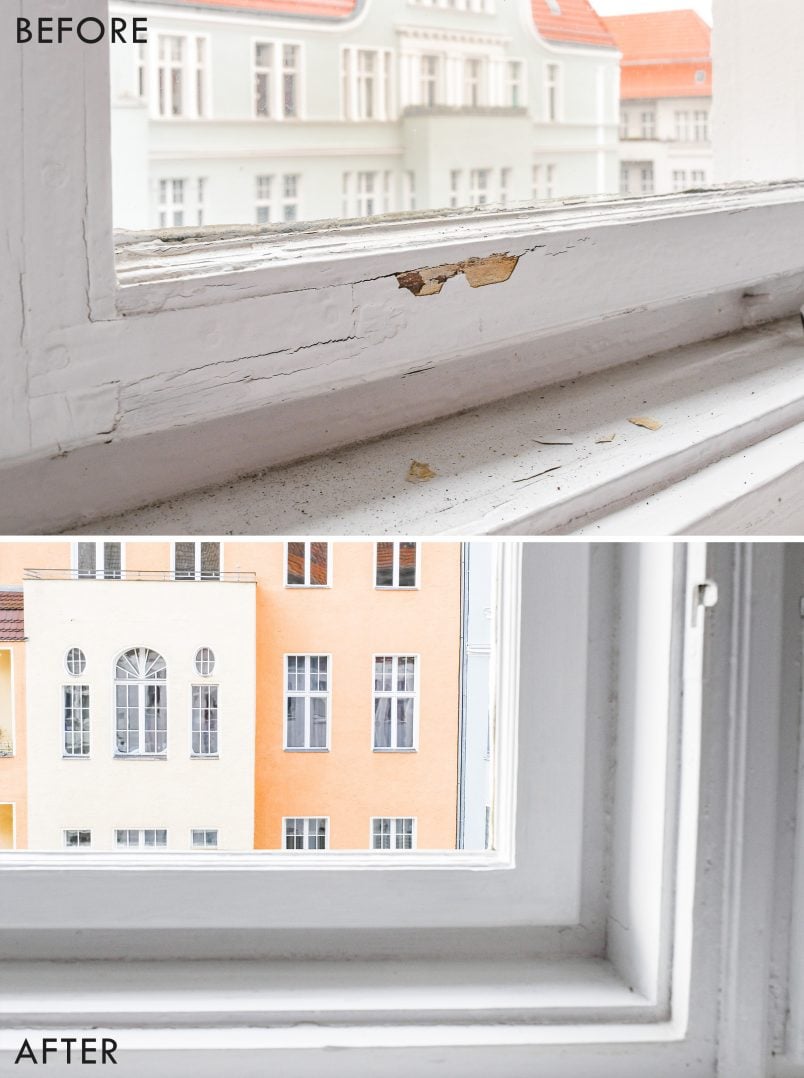
Strip as much of the old layers of paint off your window as possible and pay particular attention to the window sill. To allow water to drip off the underside of the window sill and keep it away from your window it’s important to keep the groove that runs along the length of the sill completely free.
4. Repair any problem areas
After removing the old paint you can really start to assess the condition of the window.
Are there any bits that need more attention than you thought? Now’s the time to get your wooden window frame repaired.
Fill any cracks with some wood filler (that’s suitable for windows – it has to be flexible and suitable for outdoor use), glue any wobbly bits back together with some high-quality wood glue and make sure that everything is dry, smooth and secure.
As you can see, we decided not to remove most of the hardware. We left the hinges in place as we were worried that removing and refitting them could cause them to be wobbly and not as secure as before and working around both the hinges and the handle was easy!
Before moving on to the next step, it’s a good idea to check that the improvements you’ve made to the casement have worked. Put it back in the frame and check that it closes correctly and doesn’t catch anywhere. If you still have a few problem areas, you’ll have to repair or sand them now.
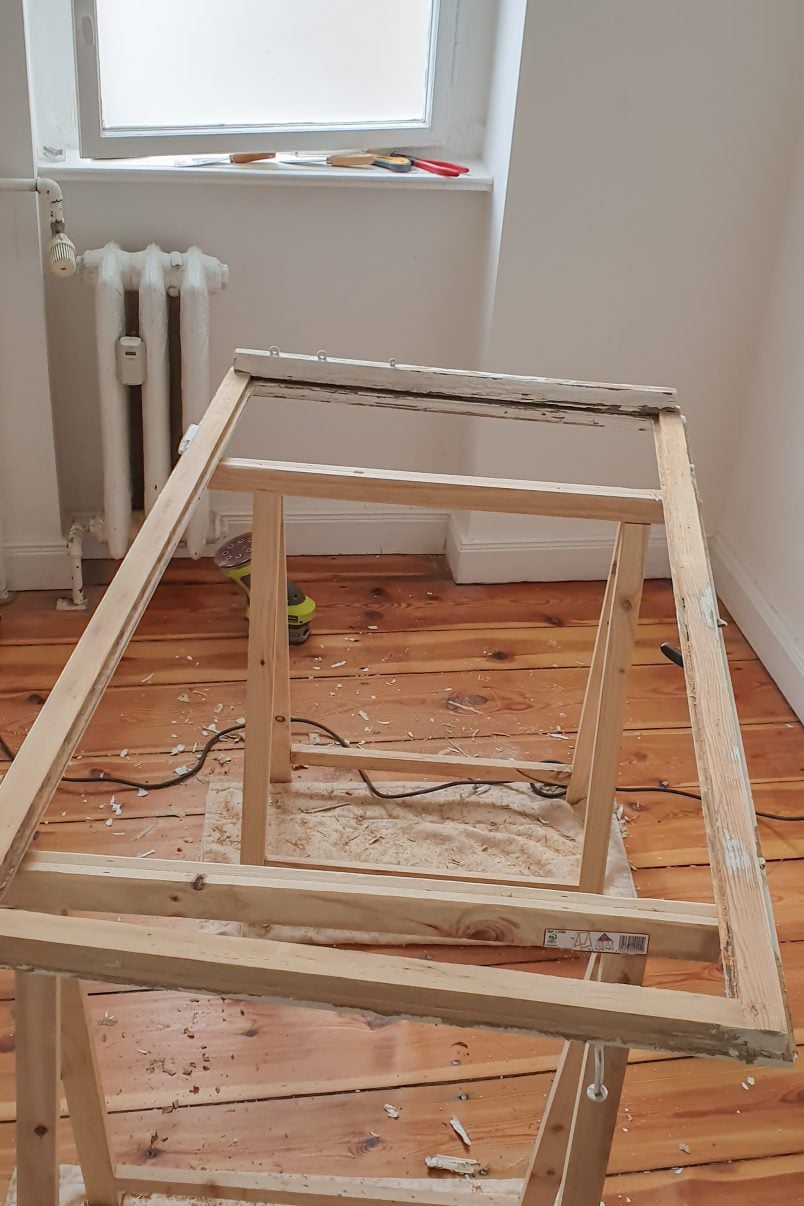
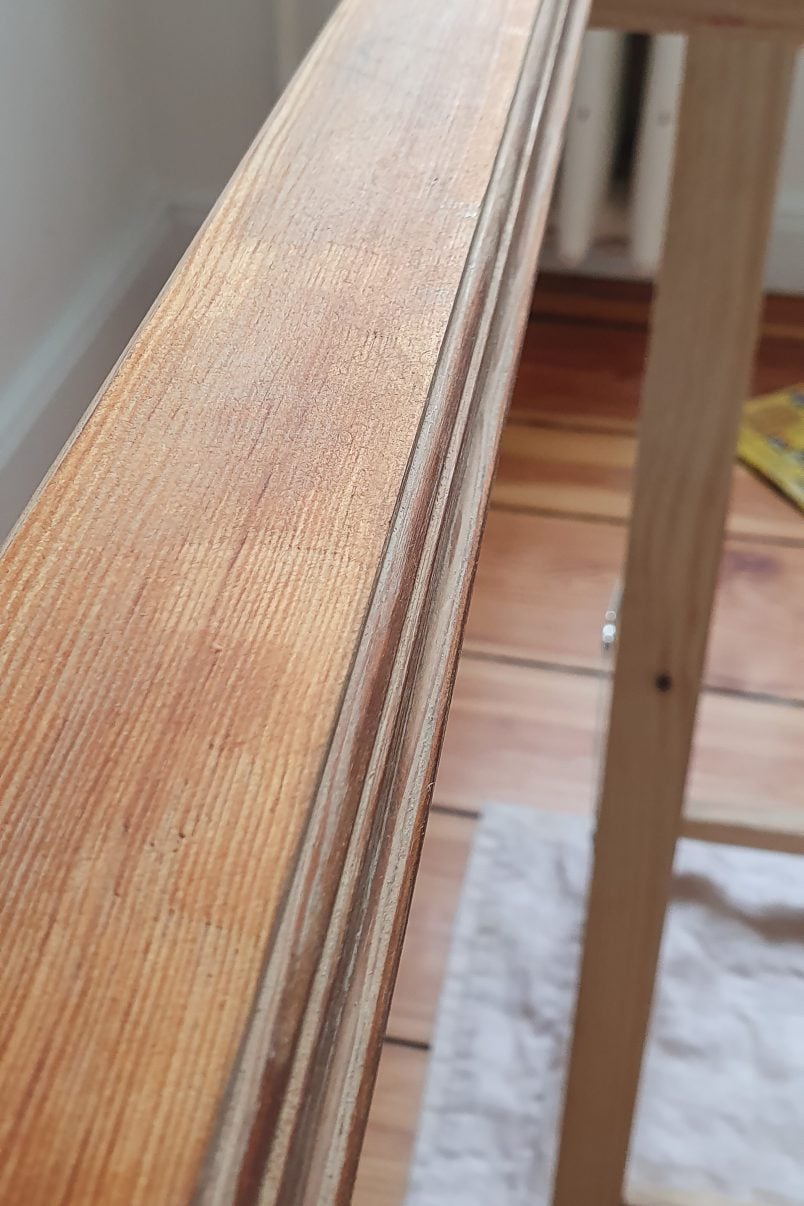
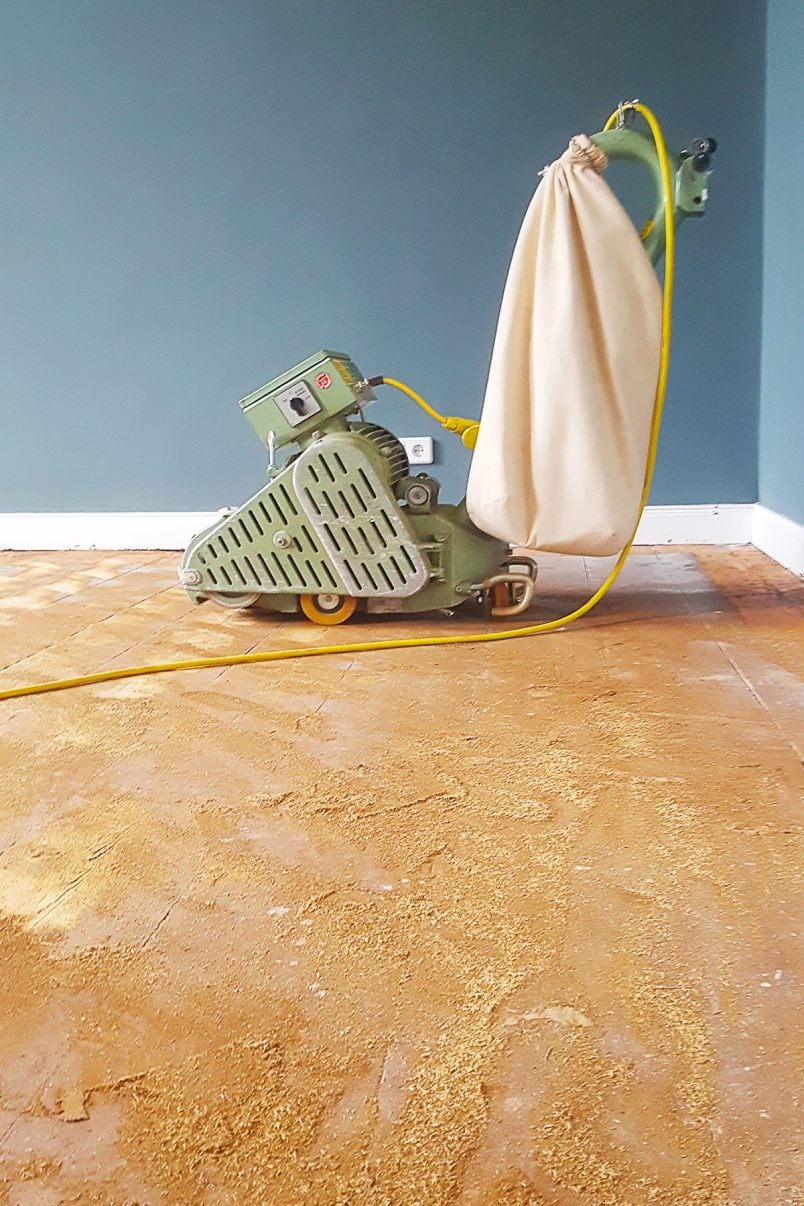
5. Sand
Now the more fun part of the project can begin – finally putting everything back together again. There’s still a bit of work to do before you can get out your paintbrush, though.
I’m the first to admit that sanding old windows isn’t exactly the most fun way to spend a couple of hours but it really does make the difference between an okay finish and an amazing finish that not only looks great but also lasts for a long time, too.
As before, you’ll probably find that a combination of different methods and sandpaper grits gives you the best results.
Use a sander with around 40 grit sandpaper for an initial smooth of the main surfaces and a mouse sander for any more detailed areas and the sides. Obviously, you could sand by hand (which I did a lot of, too) but using electric sanders will make the process much quicker.
When you’ve sanded everything with the coarse paper, you can then move on to sanding everything with the finer grits until your frame is completely smooth. Be careful not to sand your frame too much, though!
When sanding your old windows, don’t forget that you want to remove as little as possible so that your window still fits perfectly in its frame in the wall.
DIY TIP
Read our full guide on how to sand wood here. It shares everything you need to know about sanding before painting and includes a helpful cheat sheet so you know exactly which sandpaper to use for which project.
6. Clean, Prime & Paint
After all of the sanding, you can finally start to paint everything!
Choosing the right paint for wooden windows is essential to ensure a long-lasting and professional finish. We did endless research when choosing the best paint for wooden windows. There are seemingly endless options but it’s really important to choose paint that is specifically designed for wooden windows.
What is the best paint for wooden windows?
Our windows are painted with Rubbol BL Ventura Satin which we highly recommend. It’s both a primer and paint in one which means that you only have to use one product to paint your windows.
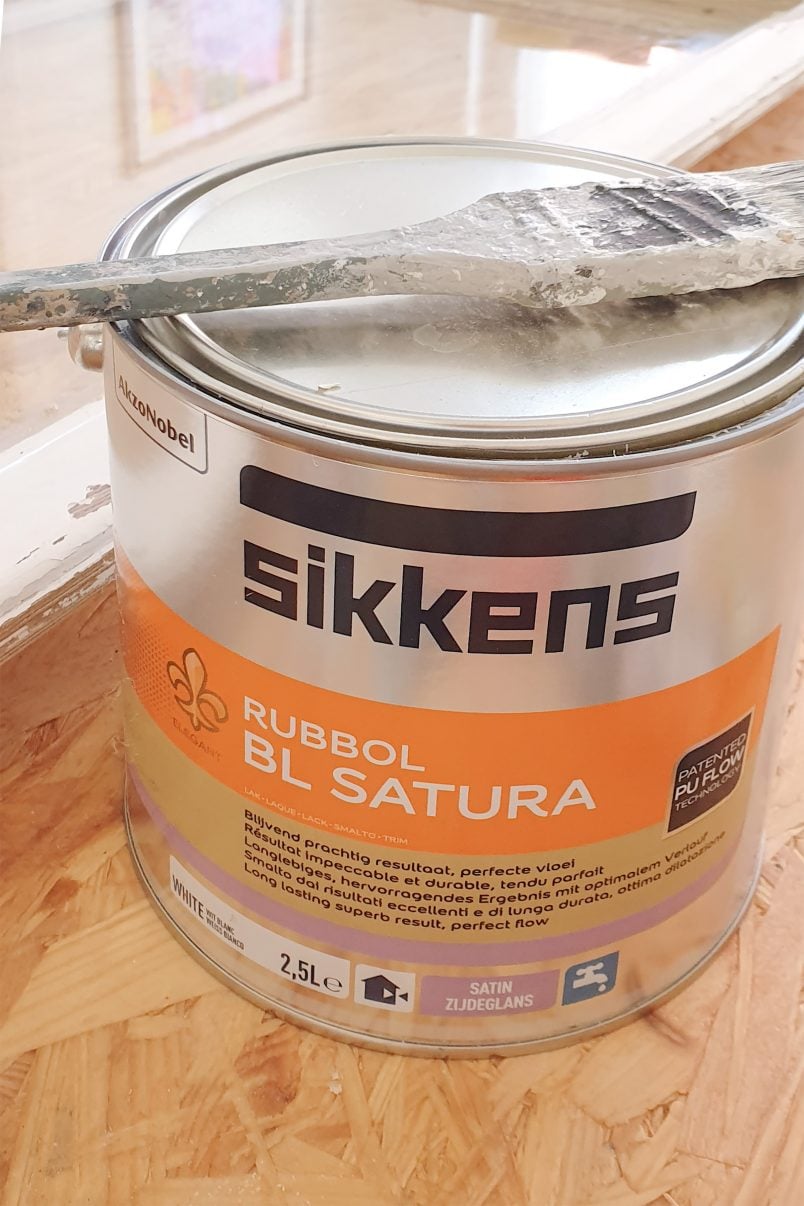
It’s a paint that professional painters use, so it is pricey but it’s definitely worth the investment! More importantly, though, it was really easy to work with. It’s specifically designed to be used on windows and is both elastic and moisture-regulating which is obviously perfect for wooden windows.
It’s also water-based which means that it dries quickly and it’s easy to clean your brushes afterwards as you just need to rinse them under water.
Don’t use cheap paint as it will probably tear over time!
How to paint wooden windows
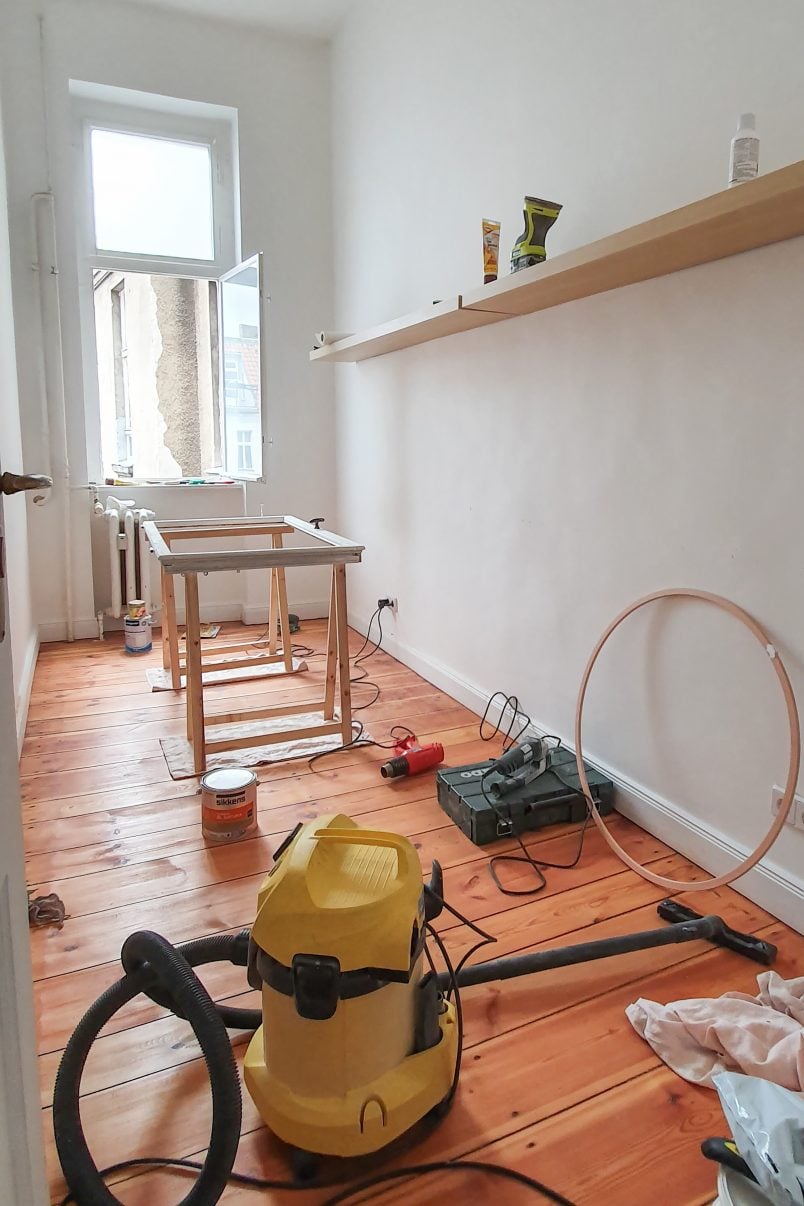
Give your window a thorough vacuum and clean. We love our Kärcher vacuum cleaner which we use for all building work as it’s indestructible and perfect for these kinds of jobs.
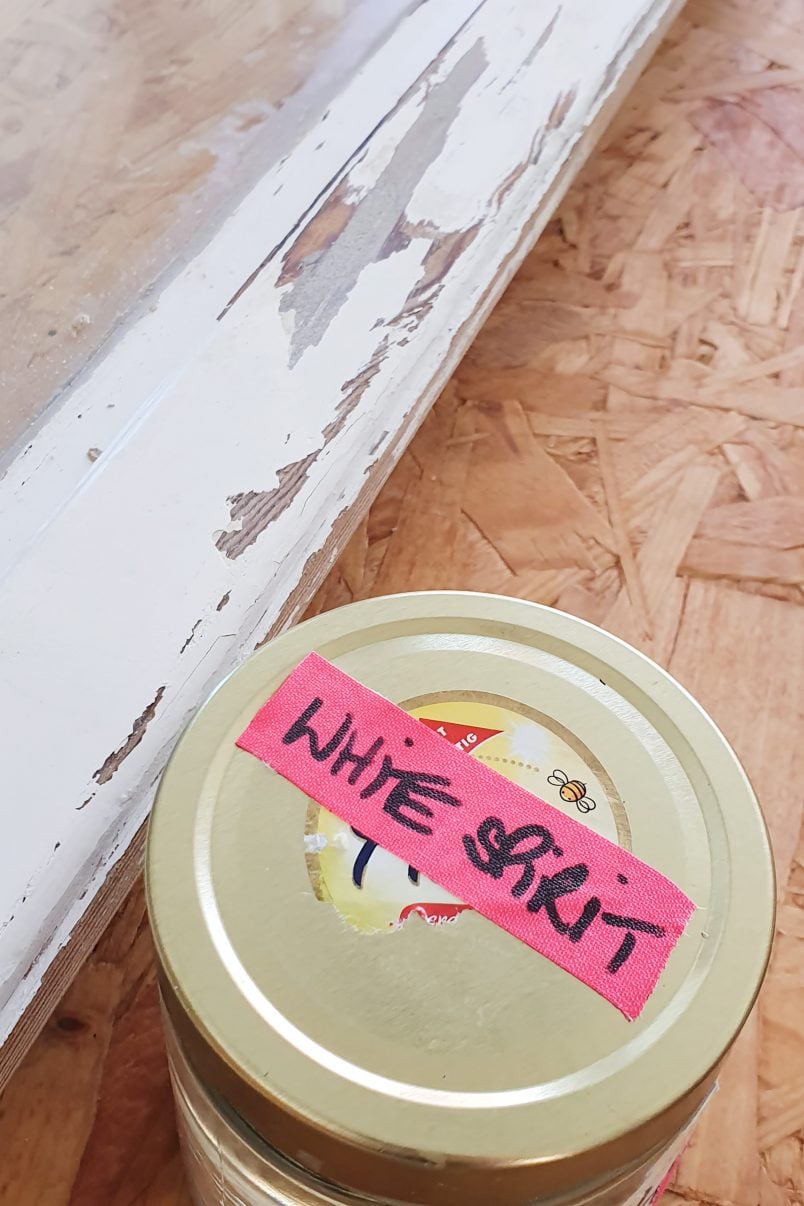
When you’ve removed as much dirt as possible, wipe the surface with a cloth that you’ve dipped in some white spirit to remove any tiny bits of dust that are still on the surface.
You’ll have to apply at least three coats of paint. A primer and two coats of your chosen paint finish in order to properly protect your window. As I mentioned, the paint that we used is an all-in-one primer and paint, so we only had to use one type of paint for the whole project.
Apply a thin and even coat of paint all over your window frame. Lots of thin coats of paint are always much better than one thick one! Applying lots of thin coats also makes it much easier to avoid drips and achieve a smooth brushstroke-free finish.
Make sure to also use good paintbrushes which will make it much easier to get a perfect finish. We always recommend the paintbrushes we use, as we’ve been using the same set of brushes for almost all projects for nearly 10 years and they are still great!
Let the first coat of paint dry and then give everything a very light sand with some fine sandpaper (about 240 grit). This will remove any imperfections and roughen up the surface slightly to provide a good base for the next coat of paint to adhere to.
Clean away any dust from sanding and give the window another coat of paint. Repeat these steps (painting, drying, sanding, cleaning) until you’re happy with the coverage.
If you are restoring your wooden window frame (the bit that stays in the wall) the steps are exactly the same as we’ve explained above. Just make sure to take extra safety precautions when working near an open window.
7. Install The Glass
After painting your window the last thing to do is put the glass back in the frame.
Just pop the glass back into your newly painted window and secure it with some glazier’s tacks (we got ours at a local glazier).
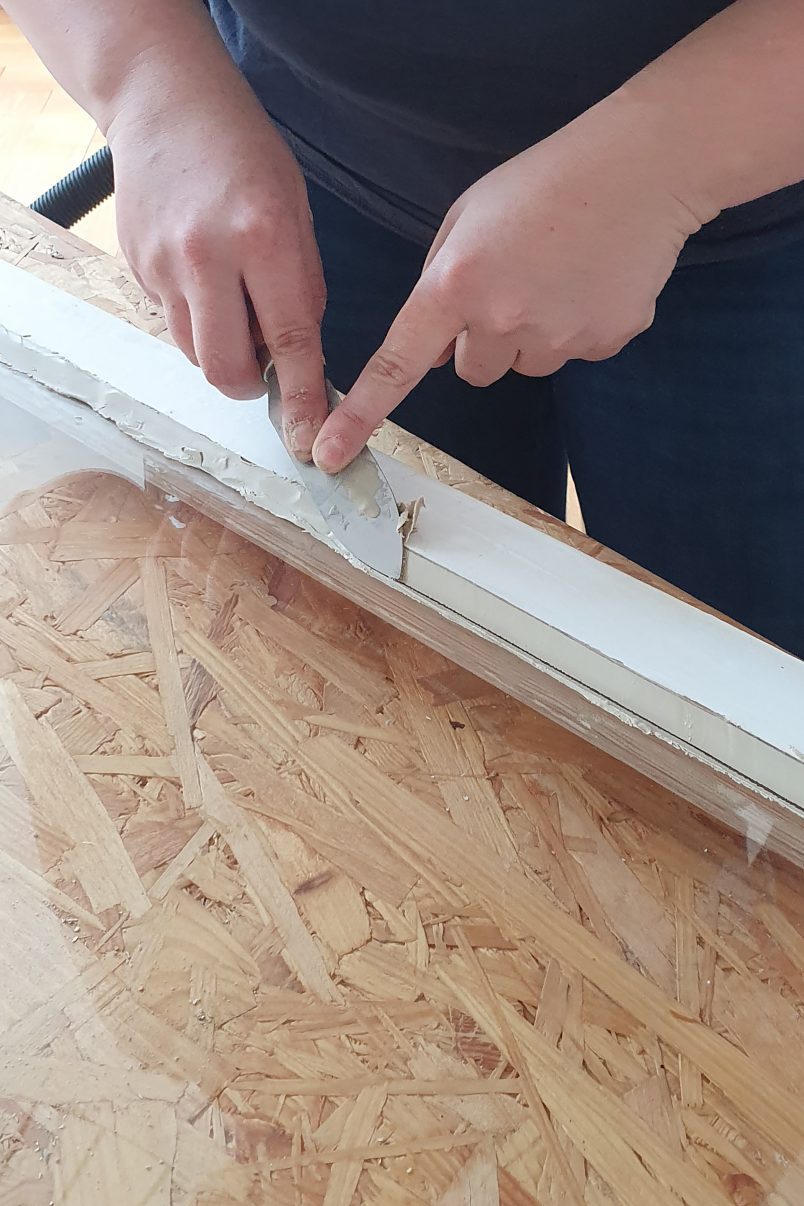
The last thing to do is to fill the edge with putty.
Take a lump of glazier’s putty and knead it for a couple of minutes to make it soft and pliable. It’s a bit like playing with playdough except that it’s a bit sticky and oily.
When it’s soft, squash it around the edge where the frame and glass meet. Make sure to really squash it into the gap.
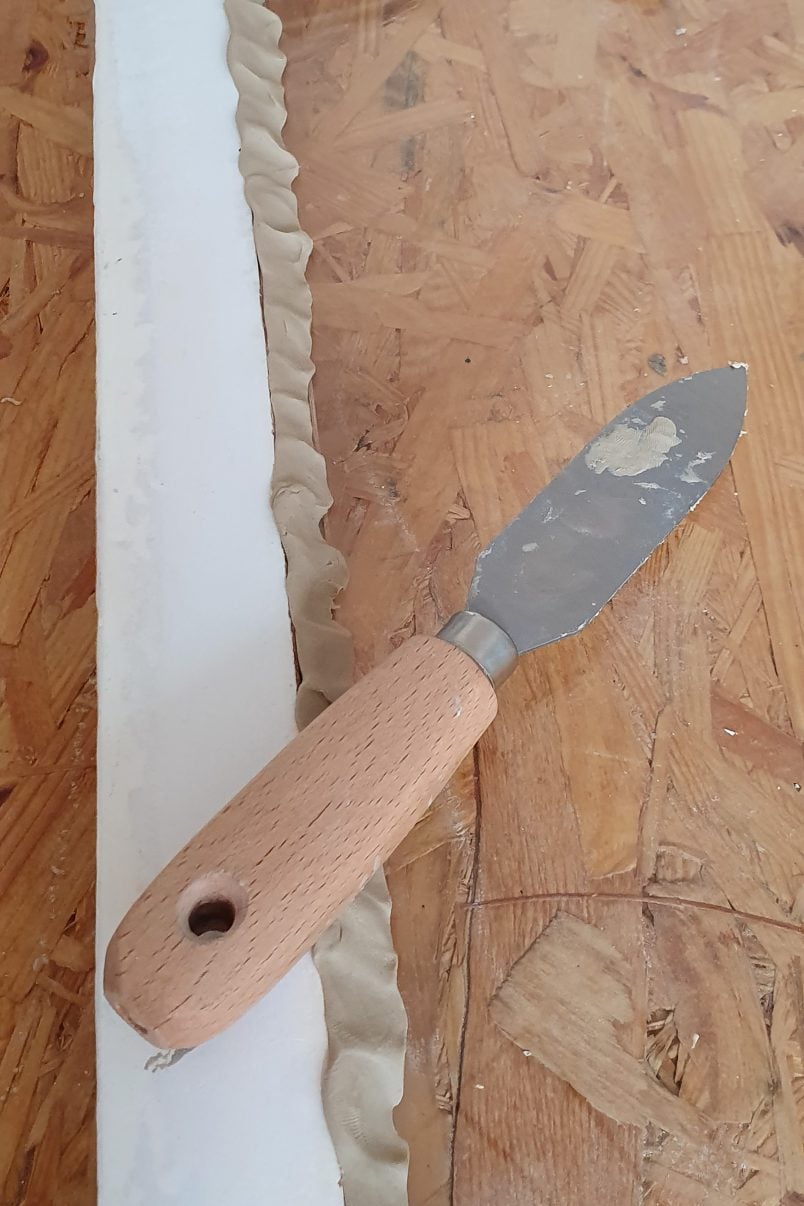
Then, take off any excess with a putty knife. Hold the knife at a 45° angle and press it really firmly against the edge of the frame and glass. Then just drag it over the putty, squashing it in place and cutting off any excess at the same time.
I weirdly really enjoyed this part of restoring the window. It only takes a couple of minutes to do and if you don’t get it right the first time, you can just go over it until you achieve a result you’re happy with.
Adding the putty isn’t difficult but it takes a bit of time to get it perfect. Practice makes perfect and it’ll become much easier and quicker after the second window. Wait for the putty to completely dry before painting it – depending on the putty you use, it’ll take at least 30 days or more!
Now, I’m sure you’re going to want to know how much it costs to restore wood windows.
We’re sharing a full cost breakdown of our window restoration but I should say that total cost will very much vary depending on the size of the window and what condition it’s in.
Sanding Disks & Sandpaper| 3€
Wood Filler | 1€
Paint | 10€
Putty | 1€
Total (does not include the cost of tools or electricity): 15€ | £13
Hopefully, these numbers will give you an indication of what to expect when you restore wooden windows, even if they are only based on the cost of restoring one casement (about 120 cm x 70 cm) and not the complete window. If you do break the glass, a single sheet that’s roughly 110 x 65cm will cost around 30€ to replace.
Obviously, this is only the first step in restoring the window. All other casements still need to be restored and the whole window frame will also need sanding, filling and repainting, too.
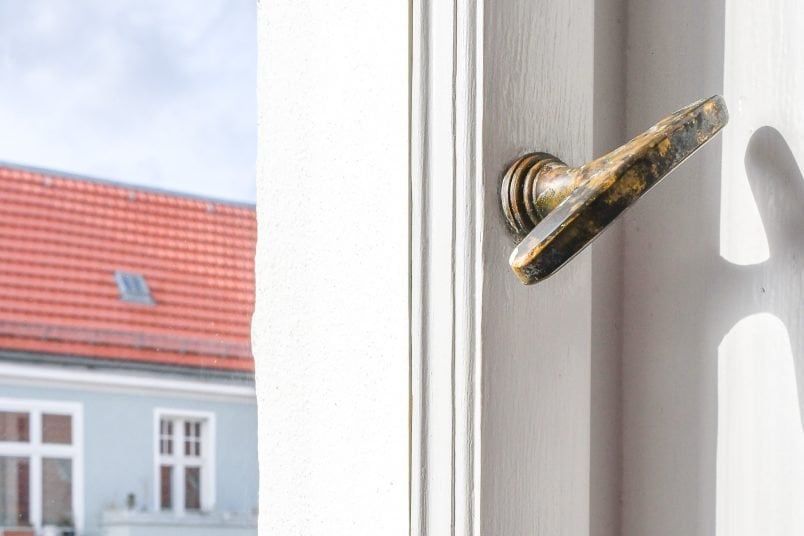
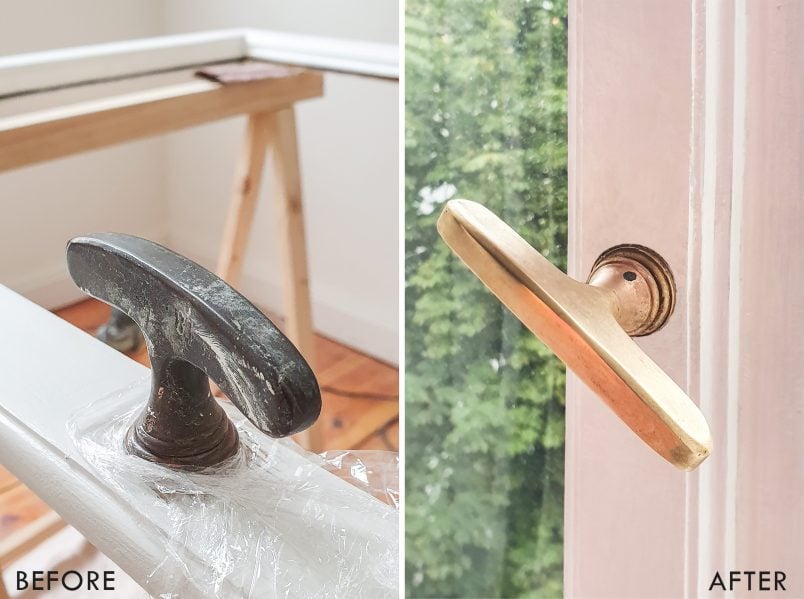
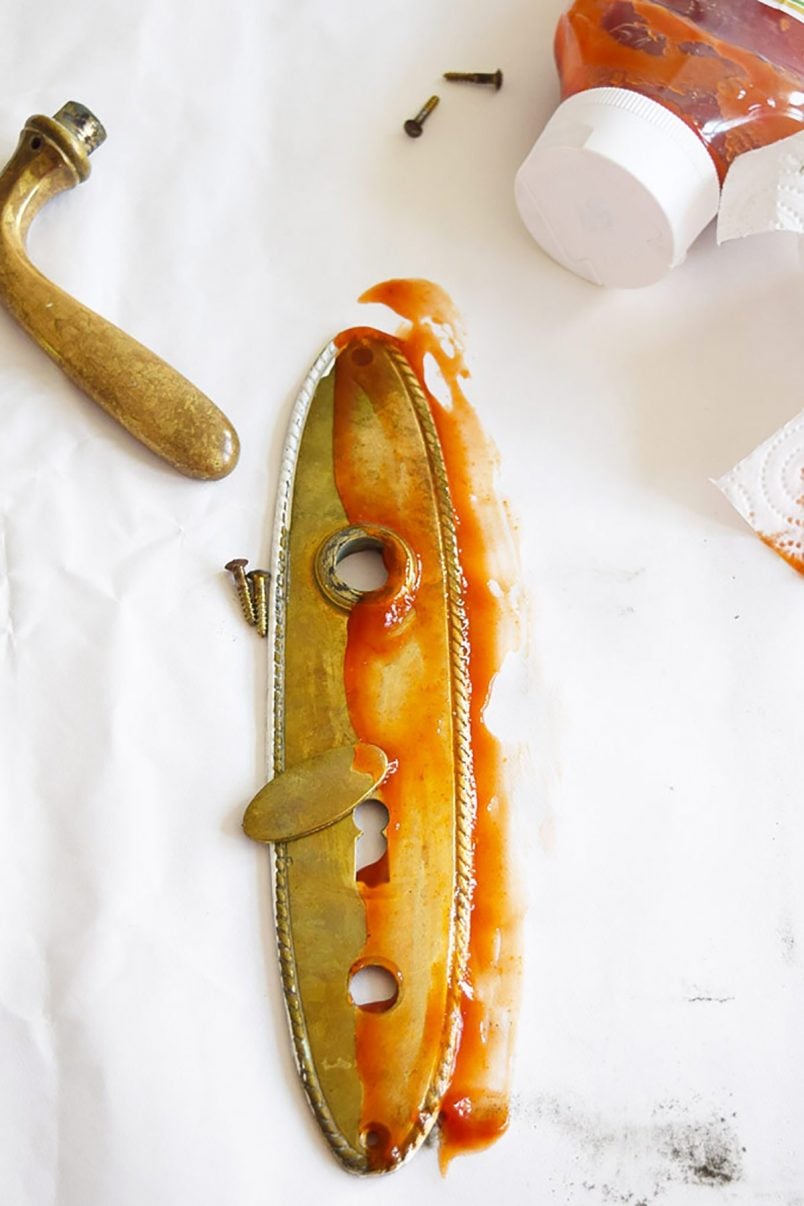
Oh, and if you have brass handles (or anything else made of brass for that matter), you will probably want to check out this post where we share our absolute favourite effort-free way to clean brass. It only took a couple of minutes to completely transform our brass window handles! Just take a look at the difference.
Although restoring this window took a lot longer than I would have liked, I am really happy that we decided to strip all paint and start from scratch. It feels perfectly smooth and, most importantly, you can open and close it again without it catching on the frame!
Only another 67 windows to go! But, that’s not a job we’ll be doing again (in this apartment at least) as we’ve sold our apartment! You can read about the exciting news and take a full video tour of our home here!
Have you ever restored a window? Are you a perfectionist, or are you more of a “done is good enough type of person”? Oh, and don’t forget to let us know if you have any questions about stripping paint!


Mindy Austin says
How to repair the ropes that are in the side and allow raising the window up & down. Right now all of ours are like guillotines!
Christine says
Repairing sash windows is a bit more difficult, Mindy. We have some in our new home and haven’t tackled them yet (they’re on a long list of things to sort). If you google “how to repair sash window cords” you’ll find lots of videos with advice.
Hope that helps & good lucj with your windows.
Cx
Ava says
You didn’t mention how to get new glass panes, esp. when you had broken one.
Christine says
I’m not exactly sure what you mean, Ava, but we just bought some new glass at our local glazier shop.
Hope that helps but let me know if you have any more specific questions and I’ll do my best to help.
Cx
George says
The paint is £85 a tin so the cost break-down is a joke
Christine says
The cost breakdown is based on what we actually used, George. The amount of paint in one tin is more than enough to cover multiple windows. If you only have to paint one or two windows you can always buy a smaller pot of paint. :) Please remember that prices have also been fluctuating dramatically over the past year. When we painted our windows the same paint was around £60 a tin.
Cx
Gerry says
I was always told to paint over putty withing a few days, to slow down the drying process that makes it crack.
Christine says
Maybe it depends on the putty, Gerry? Our putty took months to dry and we didn’t have any cracks on any of the windows we tackled. On one window, we painted the putty not long after reglazing it and the paint ended up flaking off because of the moisture in the putty.
Cx
gary parker-smith says
Once the putty has a skin, paint putty using top coat acrylic paint no undercoat is required.
Brianne says
Really gorgeous job! I’ve been stripping an old cabinet and it’s very draining work.
Question: is there a way to spruce up an old wooden window without completely stripping the paint? I’d like to avoid dealing with the lead paint on our window…hoping to find a way to seal it up without peeling/sanding, despite current paint chipping.
Christine says
Thank you, Brianne! If it’s something that’s not built-in, I’d definitely recommend taking it to be stripped as that’s the safest way to remove any lead paint. They basically drop the whole cabinet into a huge bath of a chemical stripper and it removes all of the old paint and it’s surprisingly affordable, too (we paid about £15 per door). Generally, if you have lead paint, the best advice is always to seal it with some additional coats of paint but if it’s already flaking, it’s probably safest to remove it. You shouldn’t sand lead paint because it’ll set lots of particles free but a chemical stripper will bind the particles making it much safer. We shared a post about how to deal with lead paint that you might find useful, too.
Hope that helps and good luck restoring your cabinet!
Cx