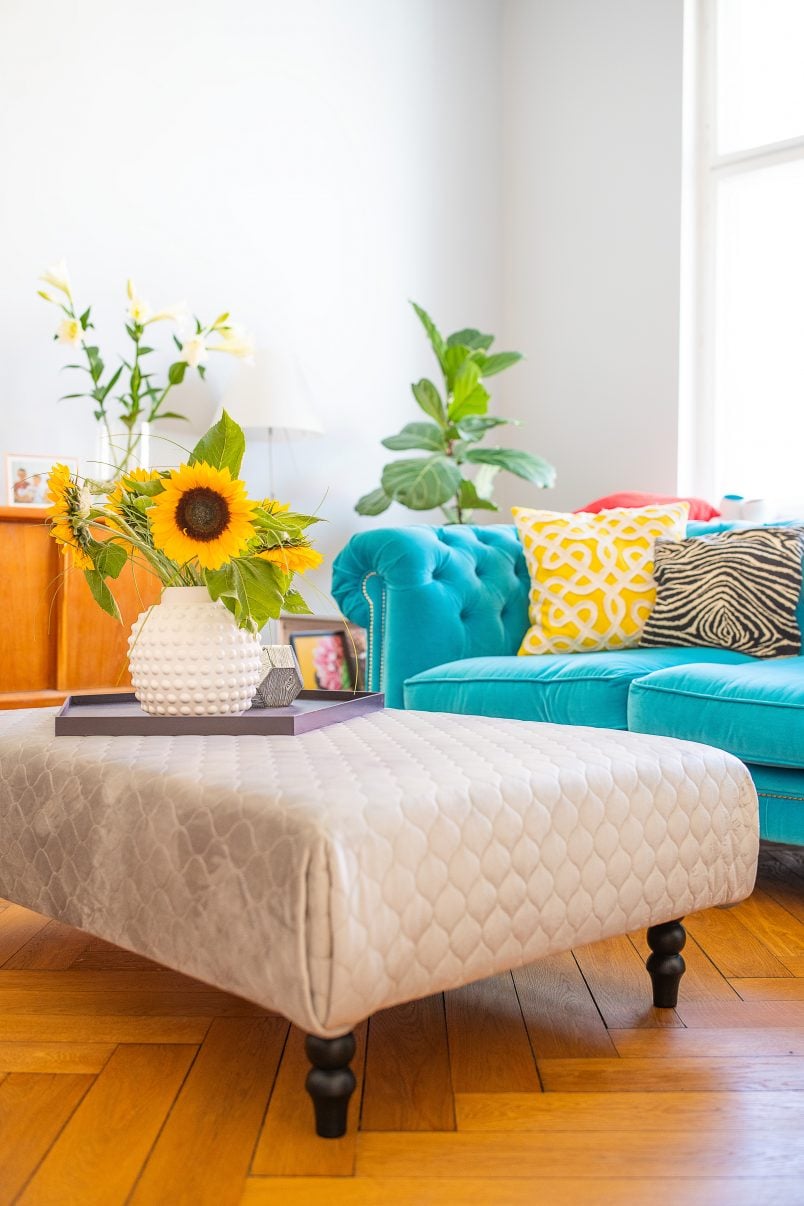
Have you already spotted our new DIY upholstered Ottoman? We’ve already shared a couple of images of it over on Instagram but we’ve never shared the finished DIY project!
But, the wait is over as we’re sharing the finished ottoman along with all details of how we built it right here today!
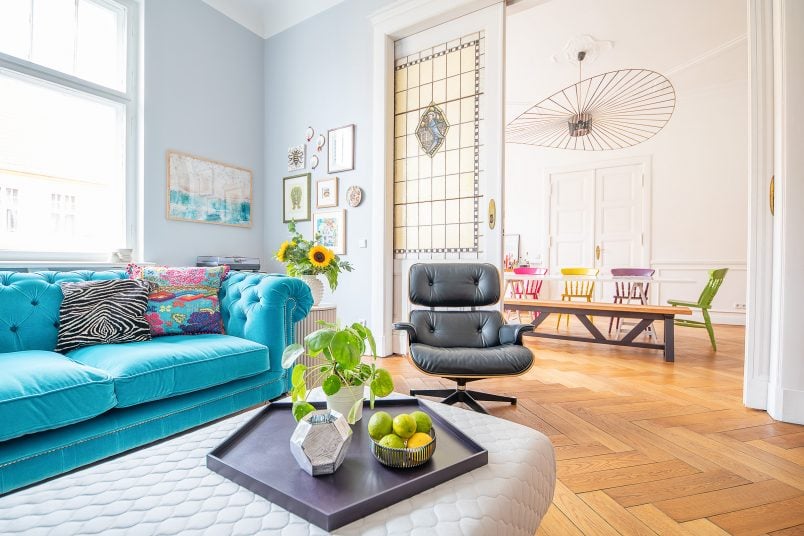
Doesn’t it look great? It looks like something from a high-end store that we spent a lot of money on, but it was a really affordable and, more importantly, surprisingly easy to build!
I know that building your own furniture seems like something only an experienced DIYer can do, but it’s often much easier than you expect. Promise! You could even build this project with just one power tool!
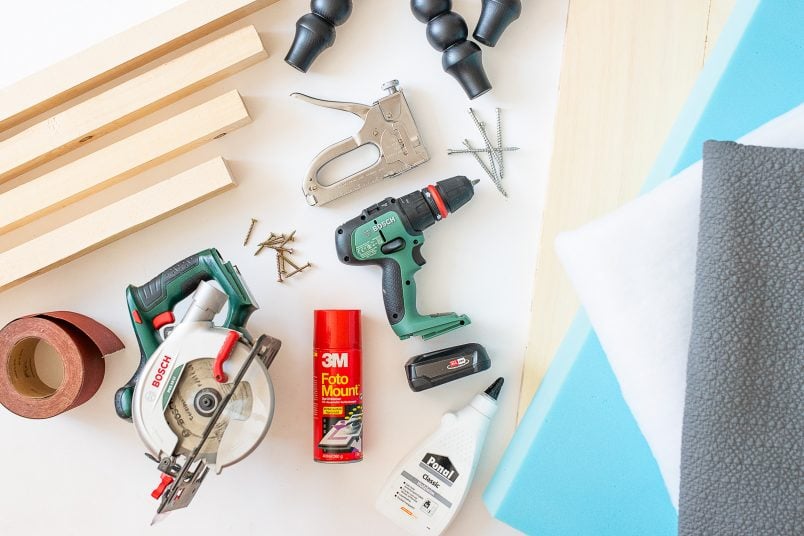
This is what you’ll need to build an upholstered ottoman:
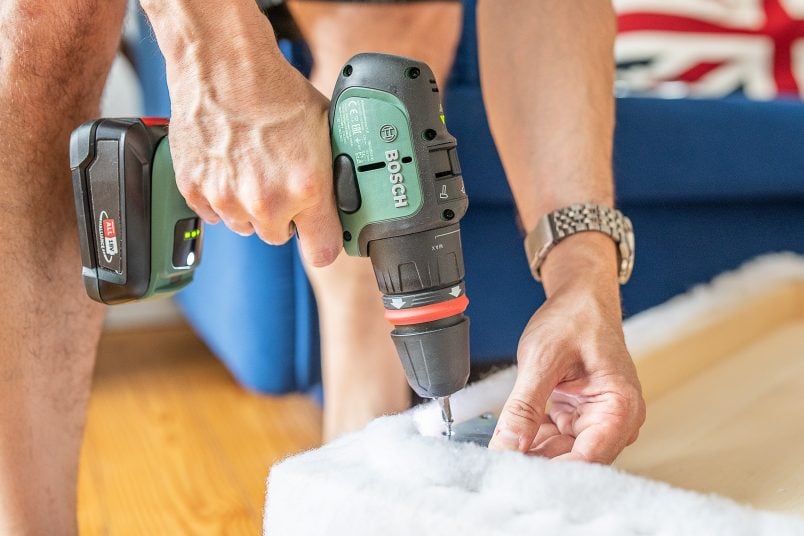
The cordless drill we used was a loan as part of a previous collaboration with Bosch Home & Garden. This post isn’t sponsored but we really liked it and used it for this project, too! This post contains affiliate links. As always, we only recommend products we love and think that you will, too! You can read our full disclaimer here.
Tools:
- Cordless drill
- Mitre saw
- Stapler & staples (a staple gun specifically for upholstery would be better but this is what we used)
- Tape measure, pencil & scissors
Supplies:
- Upholstery foam – our foam is 15cm thick
- Wadding – ours is 180g/m²
- Upholstery fabric – we used this quilted Amsterdam Lemon fabric by Mercis
- 4 x Feet – we used these gorgeous Siri feet by Pretty Pegs
- Timber battens – 4cm x 6cm – you’ll need a total of 4m (roughly 2 x 120cm and 2 x 80cm)
- Plywood board – 120cm x 80cm (or however large you want your ottoman to be!)
- Sandpaper
- 4 x Long screws – about 10cm long (to assemble the frame)
- 10x Short screws – about 4-5cm long (to attach the base to the frame)
- Spray glue
- Wood glue
Here’s how to build a DIY upholstered ottoman:
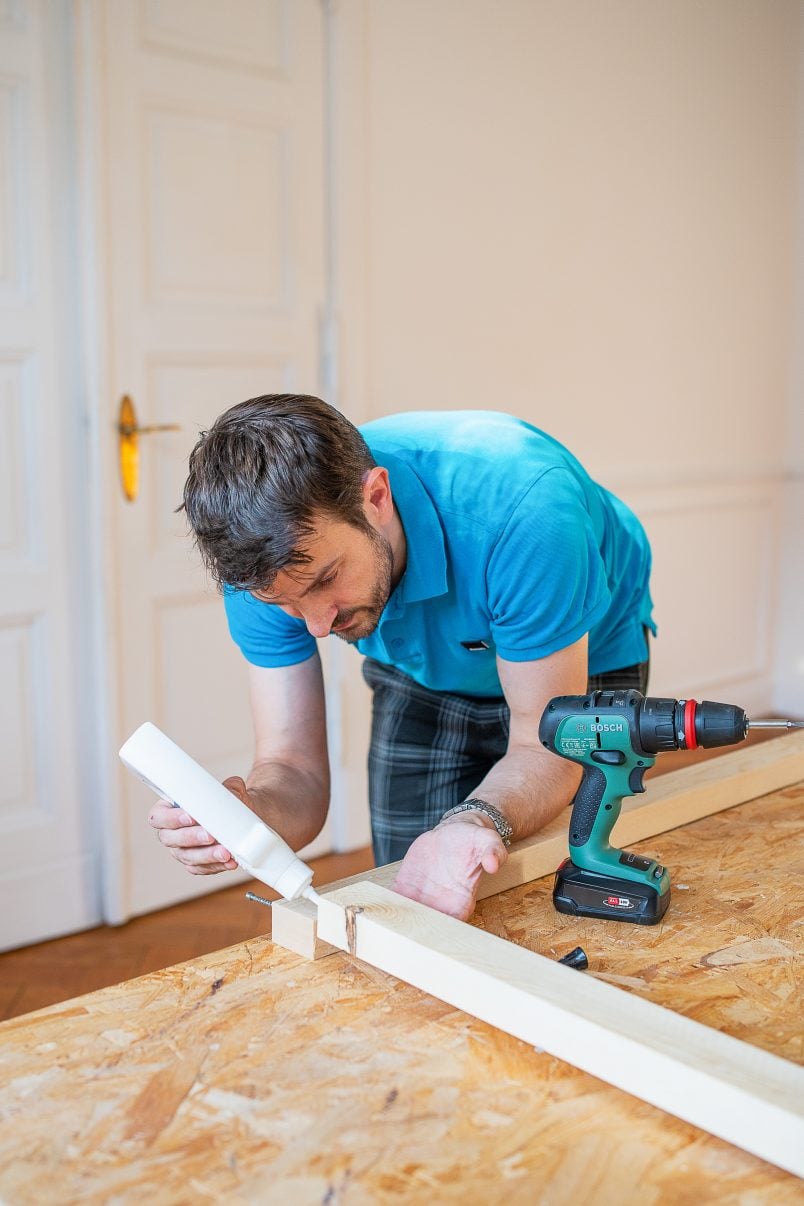
1. Gather your supplies and cut everything to size
We had the base of our upholstered ottoman cut to size at the DIY store where we bought it so all we had to cut was the timber battens for the supporting frame.

You’ll need to cut two pieces of timber that are 120cm long and two pieces that are 68cm long. Measure and mark where you have to cut and then chop the timber into pieces with your mitre saw.
As always, the supplies and measurements are based on the ottoman we built. The beauty of DIY is that you can adjust anything you build to suit your home and can base it on the supplies you can easily get hold of.
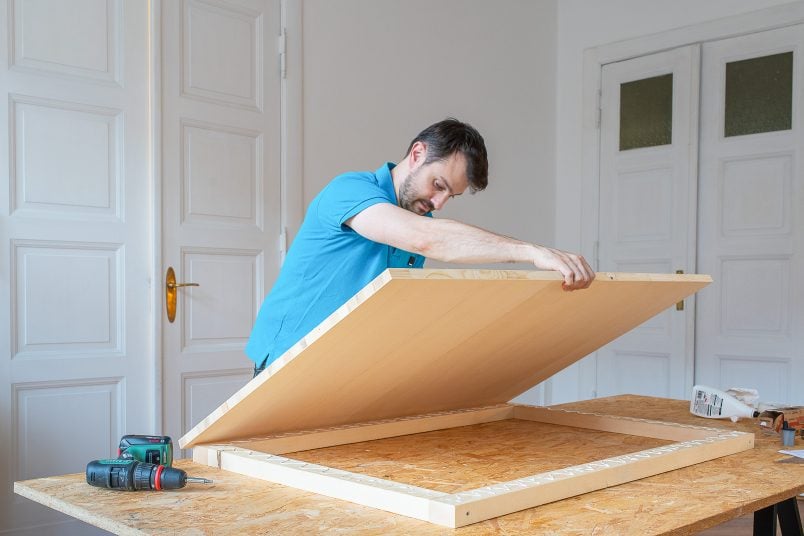
2. Build the base
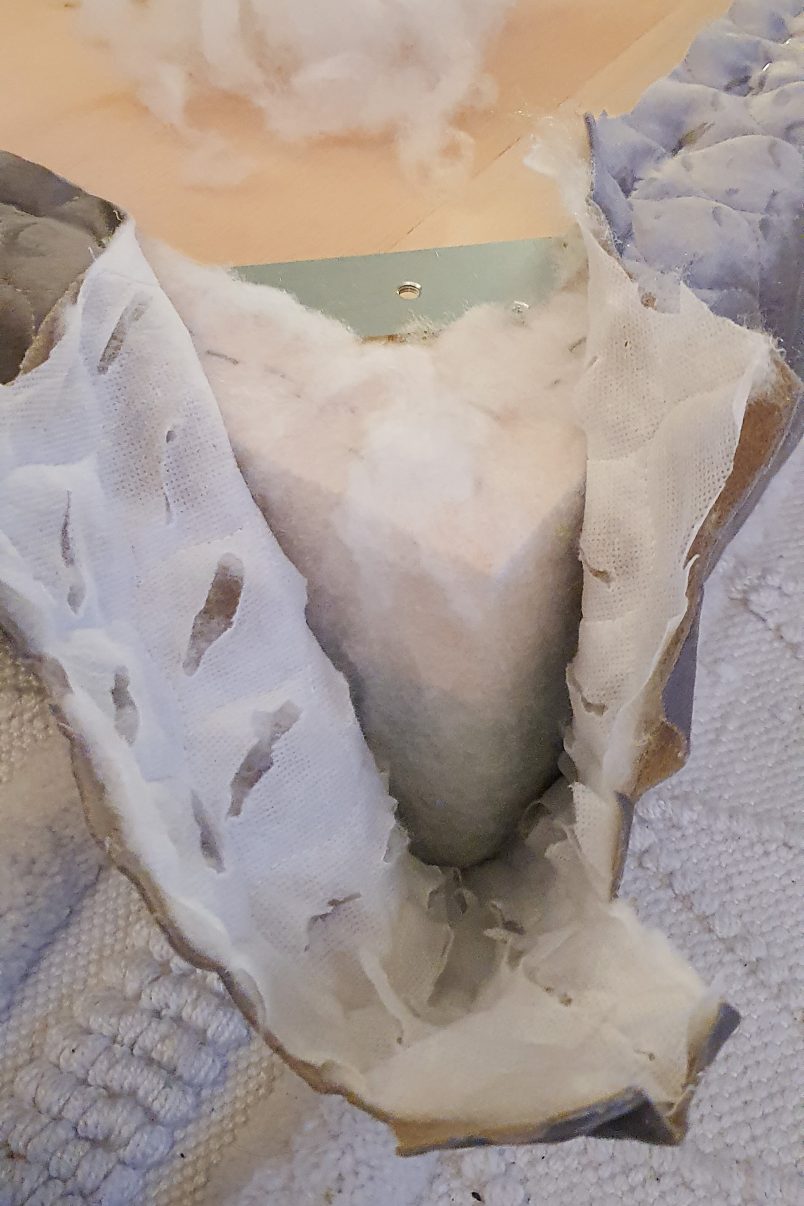
Apply some wood glue to the ends of the shorter battens and screw them to the longer ones with some long wood screws making sure to countersink the heads of the screws so that everything is completely flush.
Then attach this frame to the plywood base. Apply some wood glue to the top of the frame and place the plywood base on top.
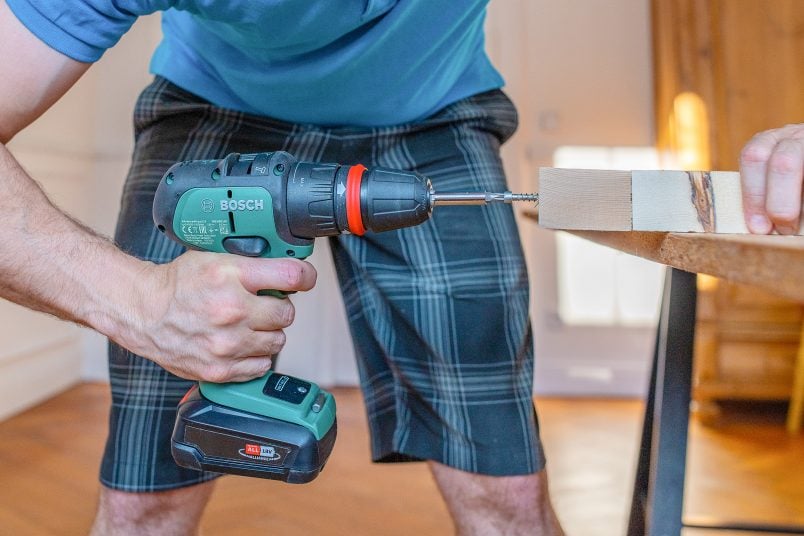
Add some screws around the edge of the plywood base and frame to make sure the two are firmly connected and flush with the surface.
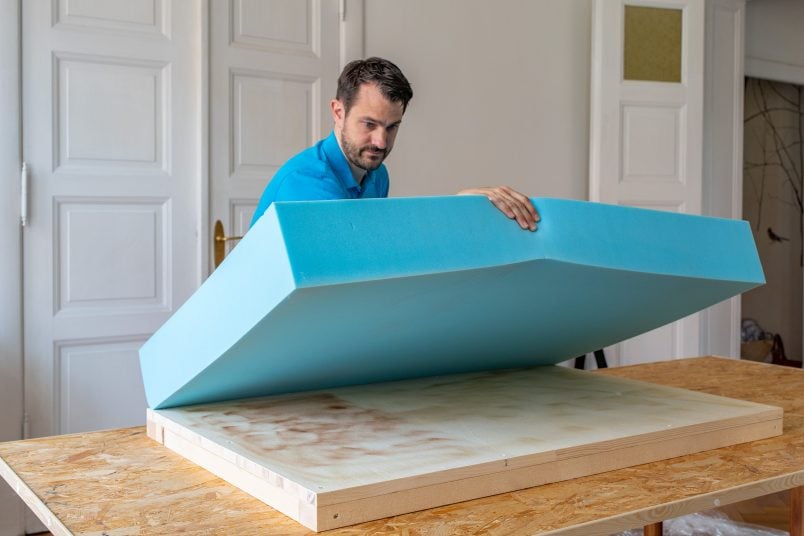
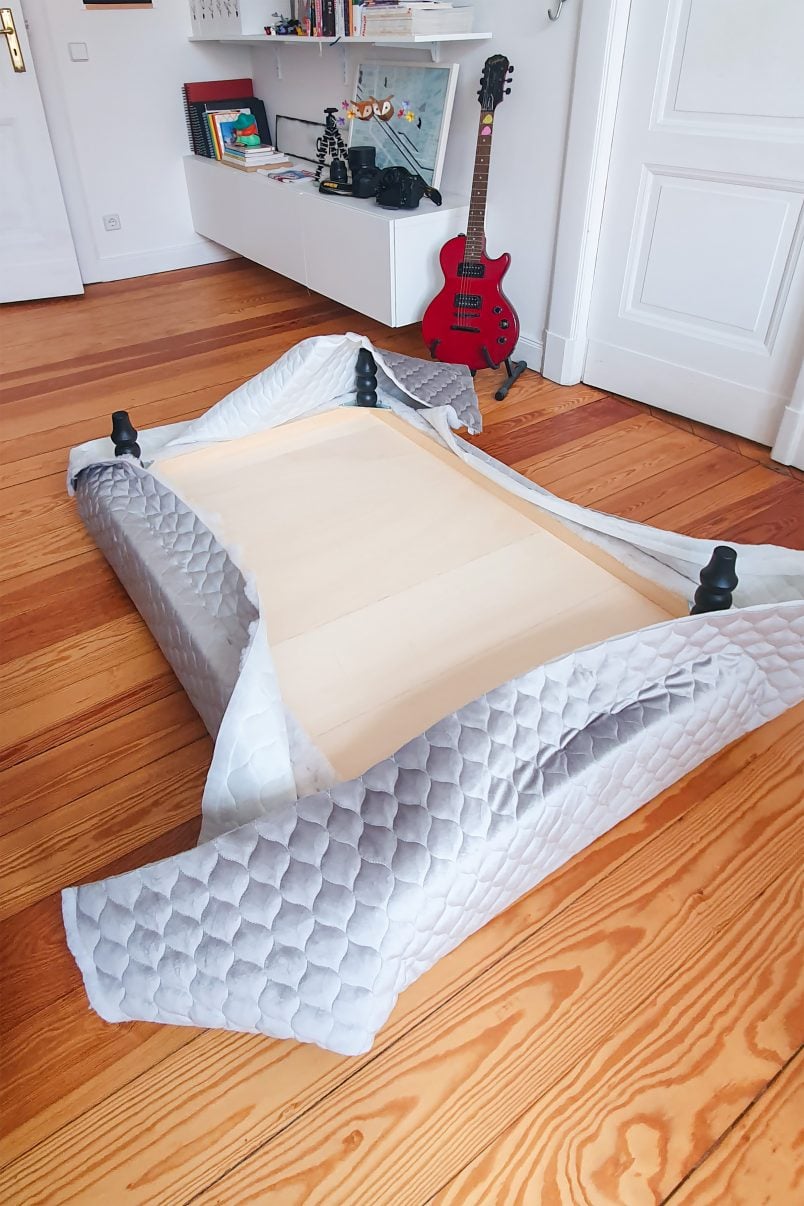
3. Add the upholstery foam and wadding
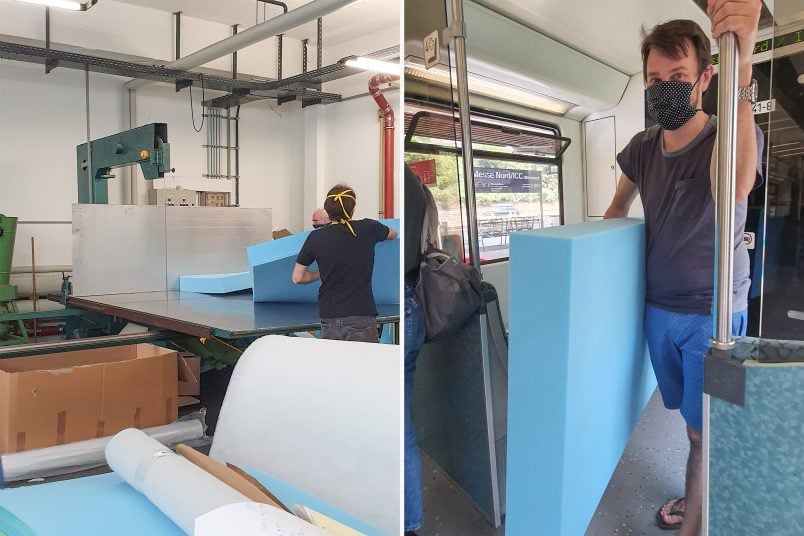
We bought our upholstery foam at a local upholstery shop. They cut it to the exact measurements you require and you can choose from loads of different types of foam depending on the quality and how firm you’d like it (ours is medium firmness).
Apply a thin layer of spray glue to the foam and stick it to the base.
Tip: Upholstery foam is really expensive. A great, and much more affordable solution, would be to use a mattress instead. I annoyingly only thought about this option after we’d already spent a lot of money on our upholstery foam. It is great but I would have opted for a much more budget-friendly mattress option like these mattresses from Ikea if I’d had the idea beforehand.
4. Add the wadding
After glueing the foam to the base of the ottoman, place the wadding on top and staple it to the underside of the base.
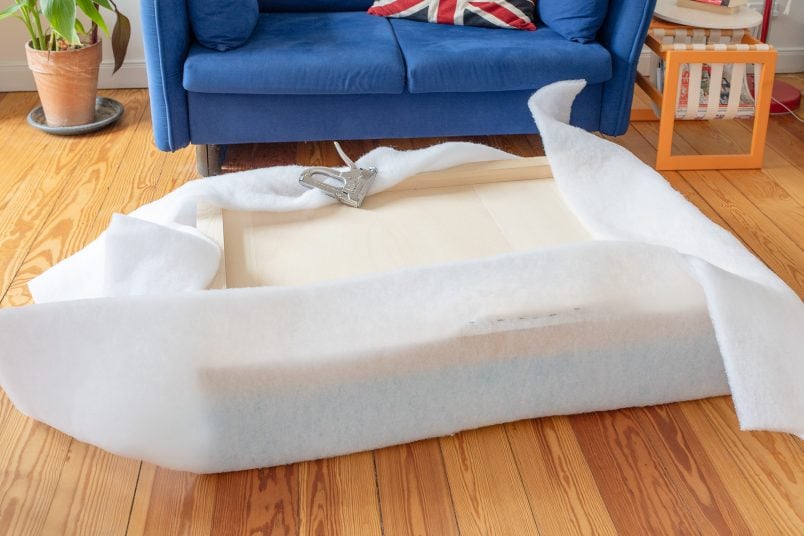
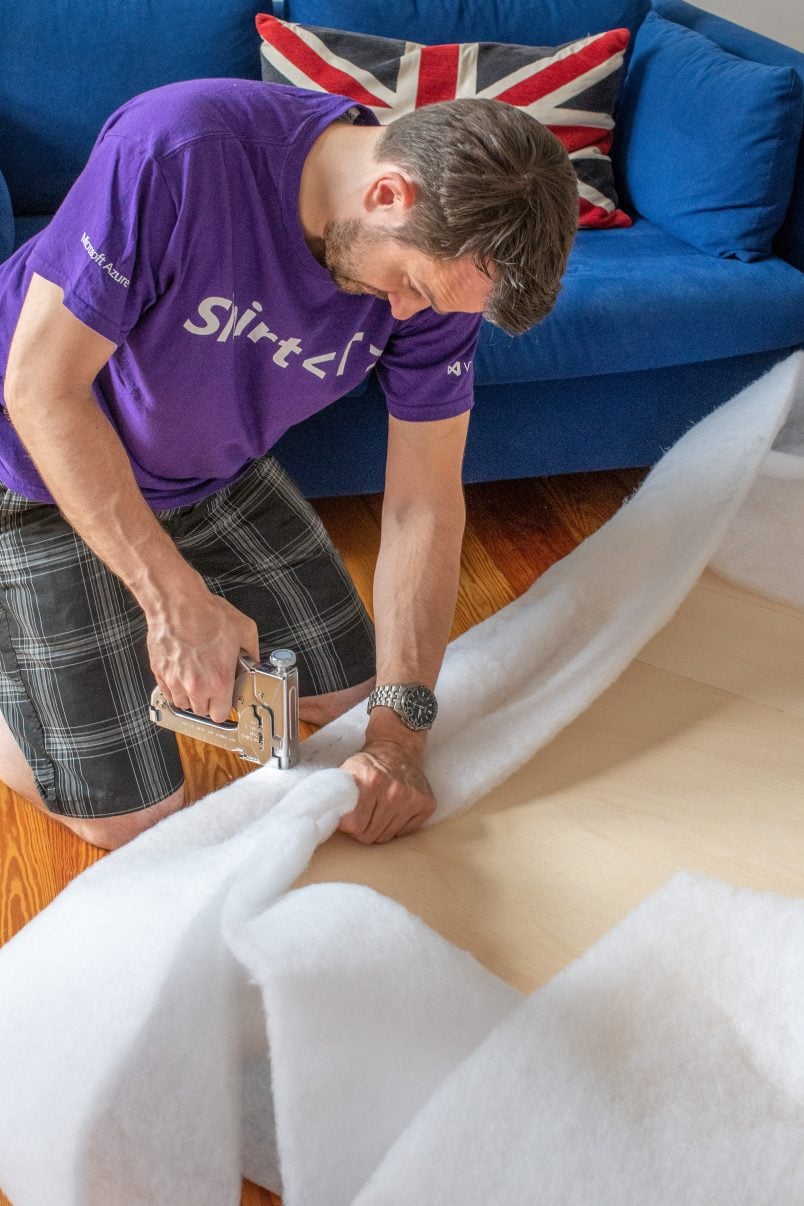
It’s always best to start stapling in the middle of each side and then work outwards, stretching and pulling as you go to make sure that the wadding is even.
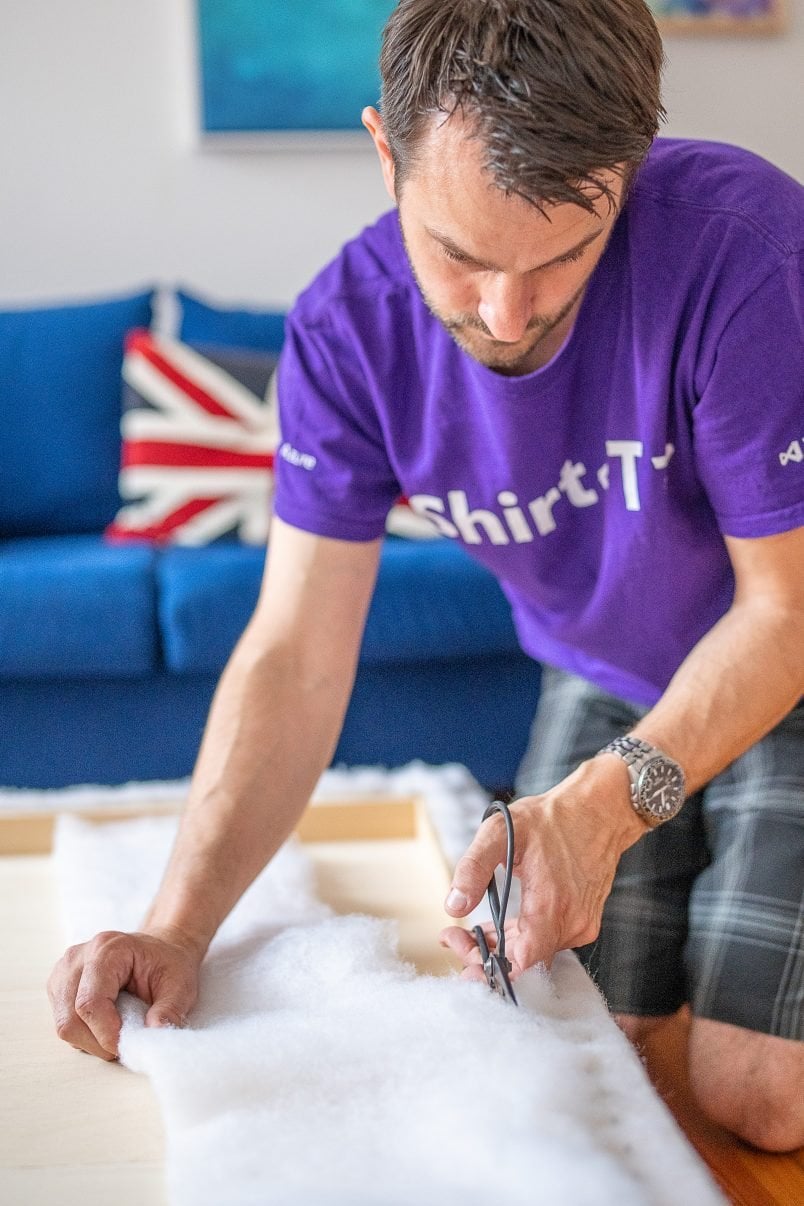
When you’ve finished stapling it to the underside of the frame, cut off any excess with some scissors.
5. Add the upholstery fabric
Place your fabric on a flat surface with the patterned side down and place your ottoman base on top with the foam/wadding side touching the fabric.
Using a stapler, attach the fabric to the underside of the ottoman. To get an even finish with no waves and bumps in the fabric, you should start stapling in the middle of each of the four sides and work your way outwards stapling as you go and making sure that everything is equally taught – exactly as you did with the wadding.
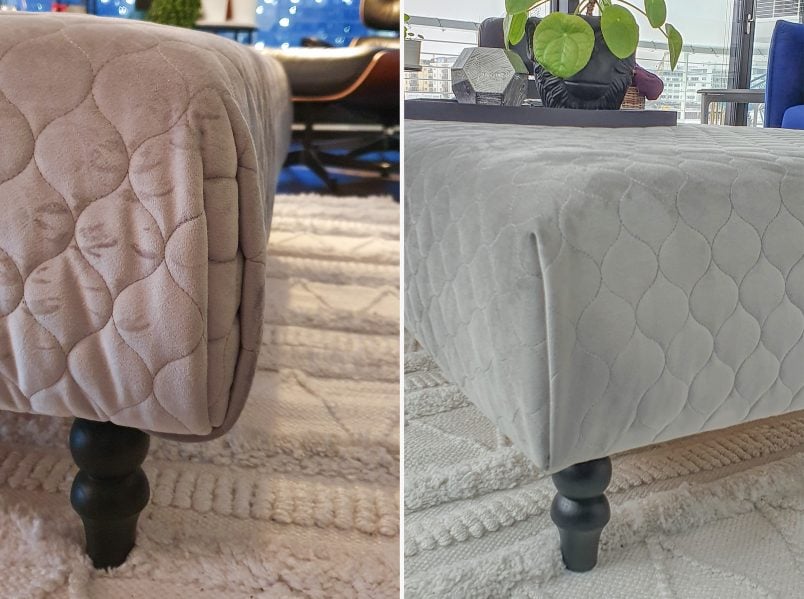
Stretching and stapling the straight sides of the upholstered ottoman is easy but the corners are a bit more tricky, especially if you’re using padded fabric.
You have two main options when finishing the upholstered corners:
Option 1 – Fold one triangle and tuck it under one side
All you have to do is fold the fabric into a triangle before folding it over to one side and pushing it under the remaining fabric. Then, staple it into place on the underside of the ottoman – think of it like you are wrapping a present.
Option 2 – Fold two triangles and tuck one under each side
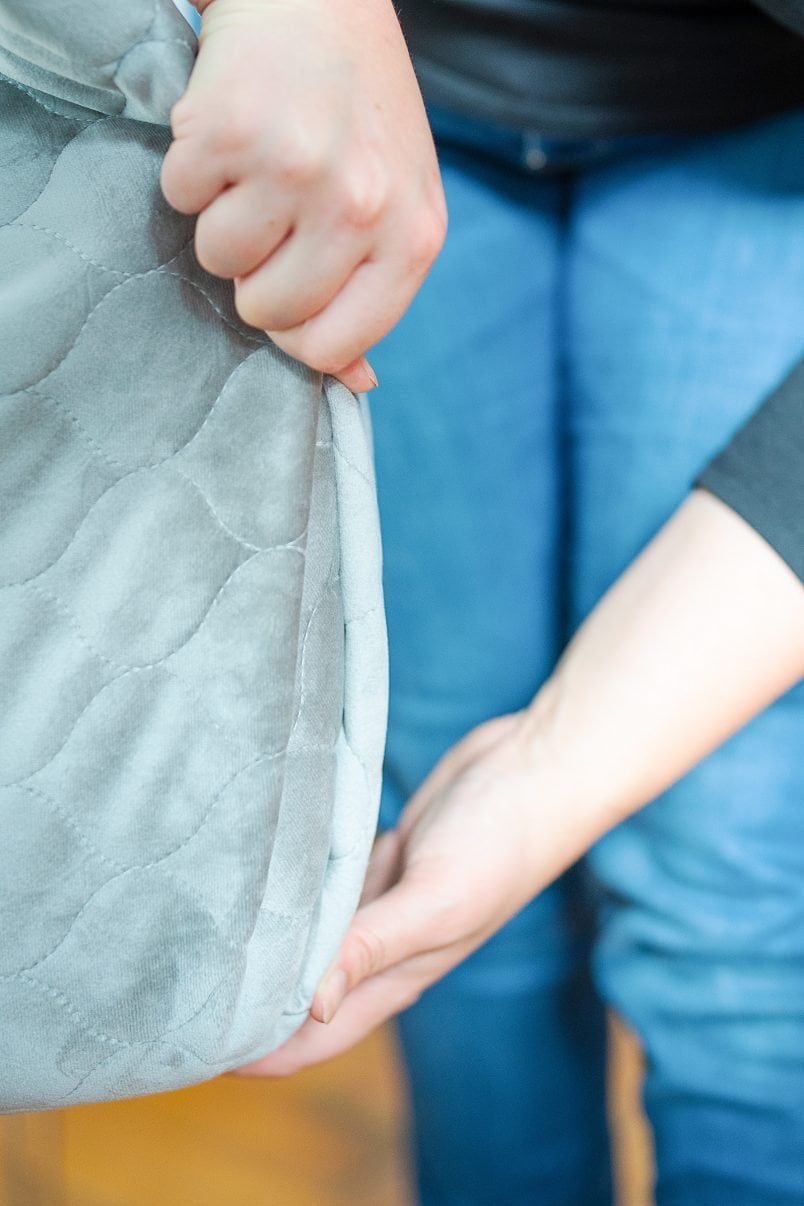
Fold the fabric over the point of the corner, pull it tight and then secure it to the underside of the bench. The remaining excess fabric is then tucked, folded and pulled around each side of the corner and stapled neatly into place on the underside of the upholstered ottoman.
Both of these options would be fairly straightforward if you’re using a normal fabric but because ours was so thick and padded, I struggled to fold a corner I was happy with.
Although we initially opted for the two-fold option, I really wasn’t happy with the result and eventually unpicked the corners and redid them. The corners still aren’t perfect but they are a lot better than they were!
If you are using a fabric that’s padded, I’d definitely recommend removing as much of the wadding in the corner area as possible as it will make it so much easier to work with!
I admit that it wasn’t as straightforward as I would have liked and my choice of fabric definitely made things more complicated than it had to be. Having said that, I am now happy with the result even if it involved a bit more pfaffing than I would have liked.
Here’s the before and after to help you decide what kind of corner is right for you.
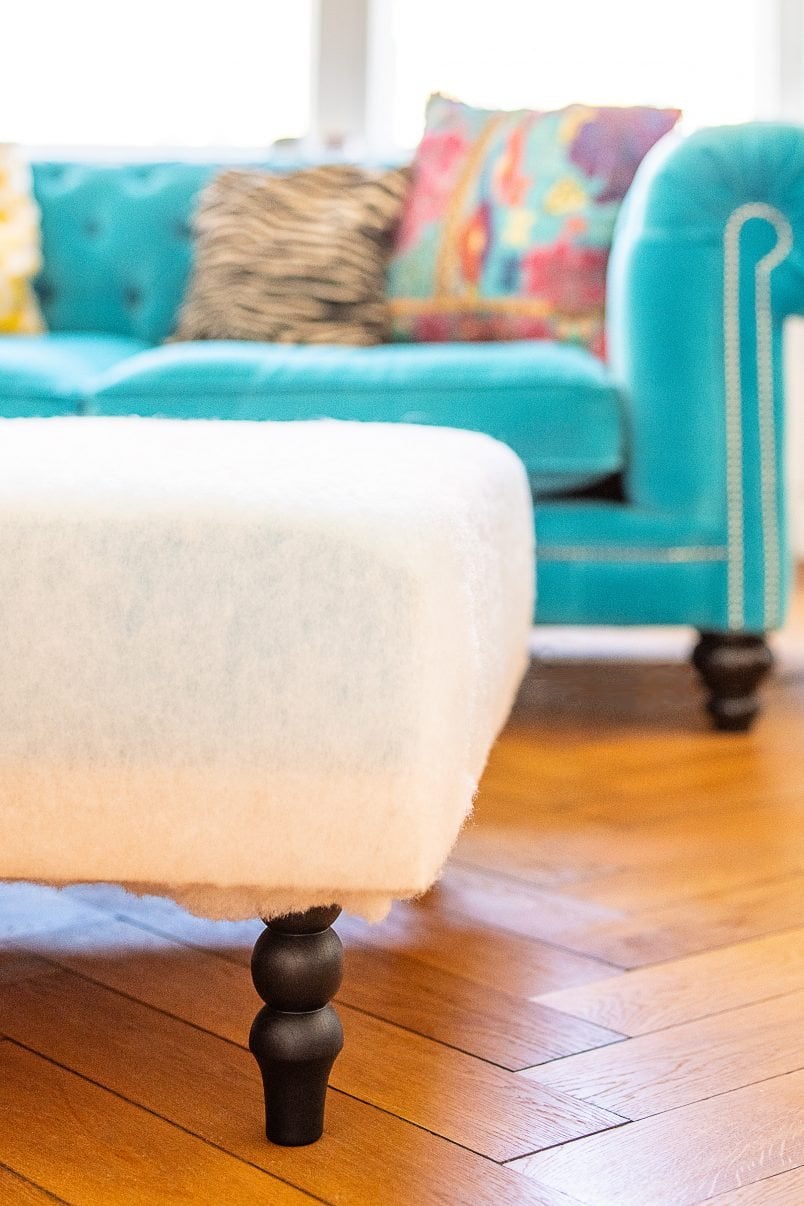
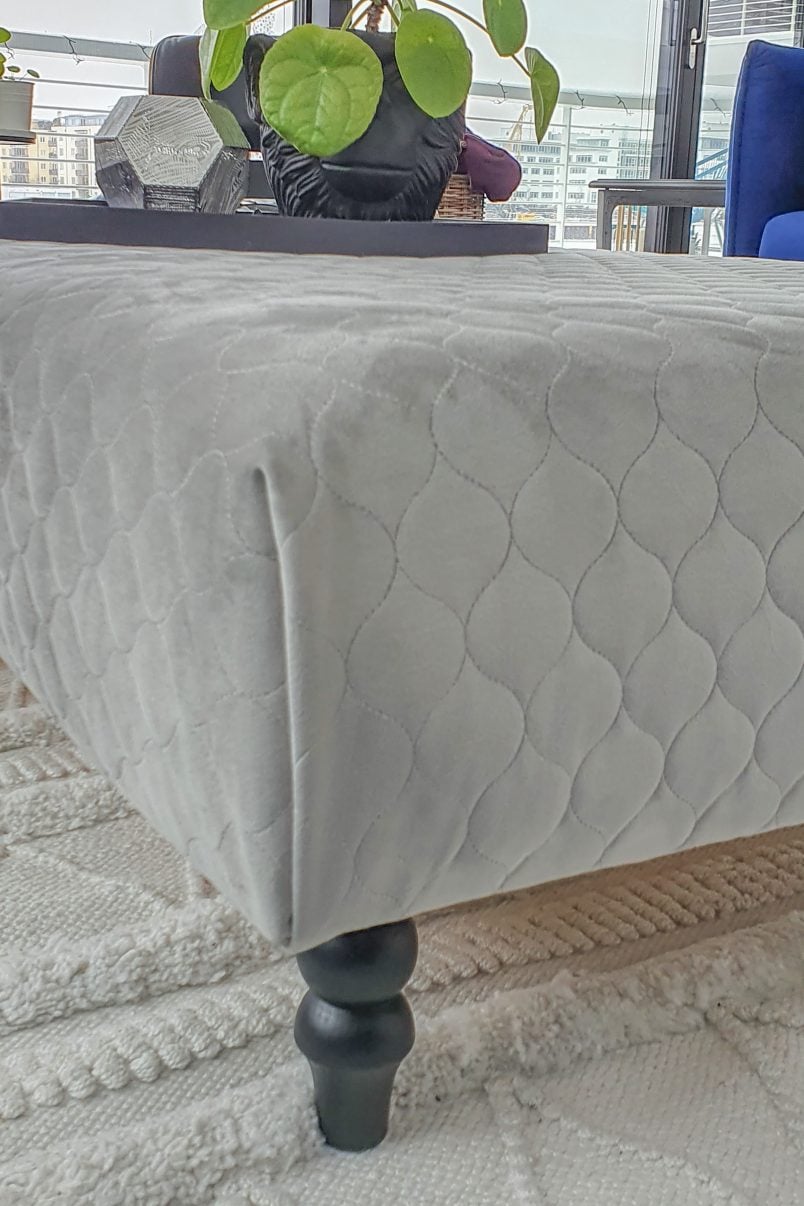
6. Attach the feet
After covering the ottoman, the last thing to do is attach the feet. We used these gorgeous ones which we bought at Pretty Pegs. They look great and finish off the project perfectly.
The Pretty Pegs feet are designed for Ikea furniture but you can order them with a universal mounting plate which worked perfectly for our DIY upholstered ottoman.

Overall this was a really easy project, even if I ended up spending about 70% of the time it took to build trying to get the upholstered corners right. I totally admit that I’m still not 100% happy with them but overall the ottoman turned out great. And, depending on where we end up living next, I can always easily reupholster it to suit our new home!
Whilst this project was easy to build it wasn’t the cheapest of projects we’ve ever done. As I already mentioned, the upholstery foam was really expensive and a much more affordable option would be to use a cheap mattress.
The fabric we ended up using was also expensive, so that’s another area where you could opt for a budget friendlier alternative.
How much does it cost to build an ottoman coffee table?
Cost Breakdown:
Upholstery foam: 97€
Wadding: 6€
Fabric: 108€
Plywood base: 31€
Timber Batten: 5€
Staples: 2€
Feet: 76€
Screws, sandpaper, spray glue & wood glue: 3€
Total: 328€
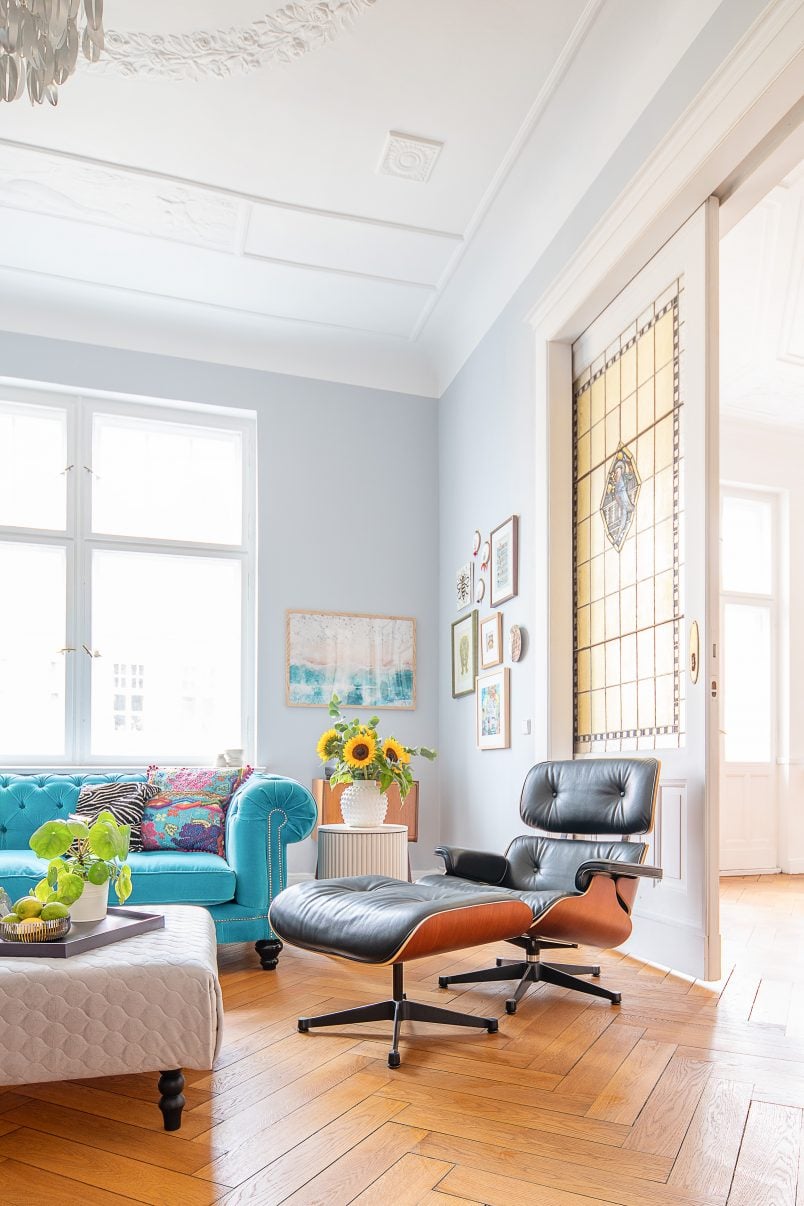
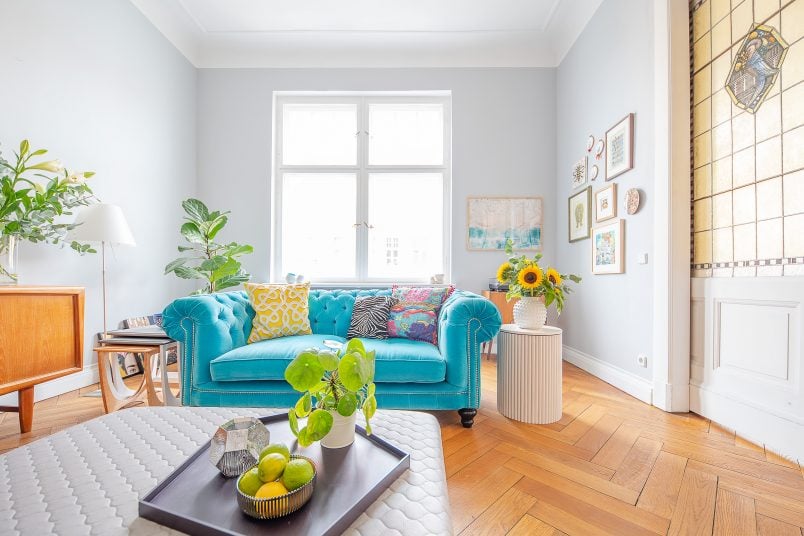
I love how the ottoman has a softer and more relaxed vibe than the coffee table we had before.
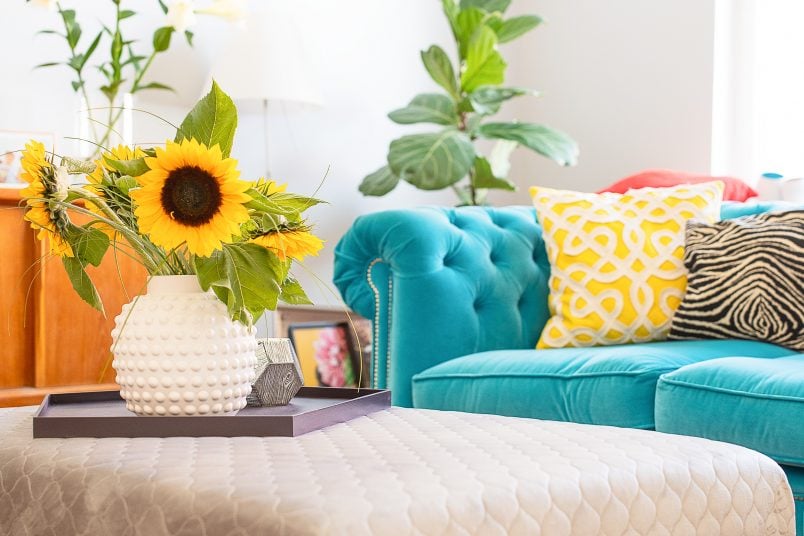
We don’t find it any less practical than having a coffee table. Yes, you can’t place a glass of wine directly on it but it doubles up as seating and, with the addition of our large DIY geometric serving tray, we have more than enough space to place things on the ottoman without having to worry about them falling over.
The corners really looked a bit messy before (as you can see in the picture above) as the fabric we used was just too thick to fold neatly. Picking out the wadding and refolding them was definitely the right thing to do as they look so much better now!
Would you prefer an upholstered ottoman or a coffee table in your living room? Do you have any tips on creating the perfect upholstered corner? Have you ever tried to upholster anything? We’d love to hear about your experiences so leave us a comment below!

Judy A Elliott says
I believe sewing each corner with the padded fabric would be the best finish for this fabric. It’s just a little bit of straight stitching.
Also, you may consider putting a dust cover to cover the bottom (use black cambric dust cover material material, it’s very inexpensive.) All you have to do is cut to size, plus 1/2 inch. Fold the edges under and staple. If you don’t like the silver staples showing, use a felt marker to blacken.
Thanks for the frame info, it’s just what I needed.
Christine says
You’re completely right, Judy – I’m just not very good at sewing but it’s on the list of things I’d like to learn! The dust cover is a good point, too – I’ll add it to my (very long) list of things to do. Thanks for the tips!
Cx