Ad | Thank you to Bosch for supporting us with this project
If you’ve been following us for a while, you’ll already know that there’s not much I love more than a good power tool!
So, when Bosch Home & Garden got in touch to see if we’d be interested in trying out a few of their cord-free tools and building one of the fun projects they have on their website we, of course, jumped at the chance!
There are so many amazing projects to choose from that it was really difficult to decide on just one! You can check out all of the amazing Bosch projects here!
(Psst… Jan and I couldn’t agree on just one project so will be building some more over the next few months!)
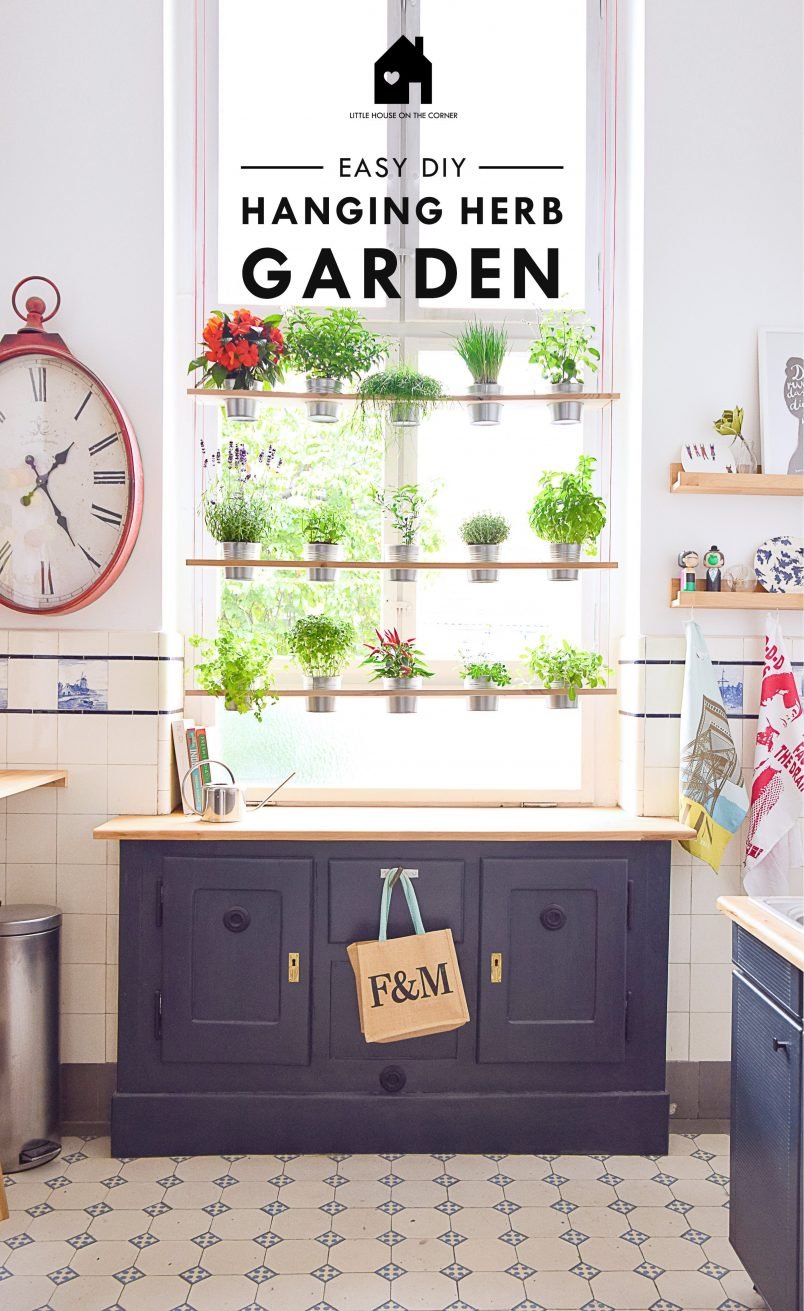
So, which of their fun projects did we finally agree on? We built this fun DIY hanging herb garden!
For us, the best thing about DIY is that you can personalise and adapt things to suit your space which is why we slightly modified the original Bosch tutorial so that the DIY hanging herb garden fits perfectly in our kitchen.
You can see the full original tutorial here.
This vertical herb garden is a really easy and quick project to build and it’s perfect if you have limited space to grow your own herbs!
If you’re wondering how to make a hanging herb garden, we’re sharing all details with you so that you can make your own vertical garden.
This is what you will need to make an indoor herb garden:
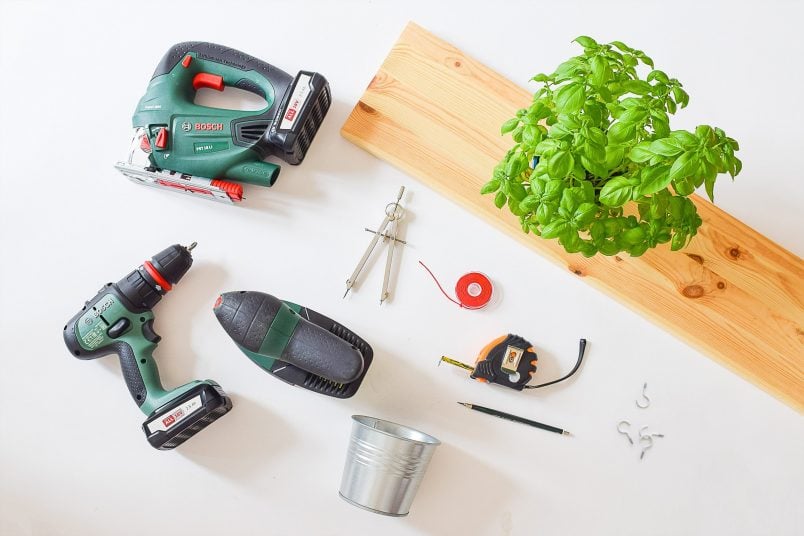
Tools:
- Cordless Drill AdvancedImpact 18 & drill bits
- Jigsaw PST 18LI
- Palm Sander PSM 18LI & sandpaper
- Compass
Supplies:
- Timber board 1200 x 180 x 18mm
- Wire & cable clamps or thick cord (which is what we used)
- Sandpaper
- Hooks
- Wallplugs
- Planters (we used these plant pots from Ikea)
- Plants or Herbs
This is how to make a DIY hanging herb garden:
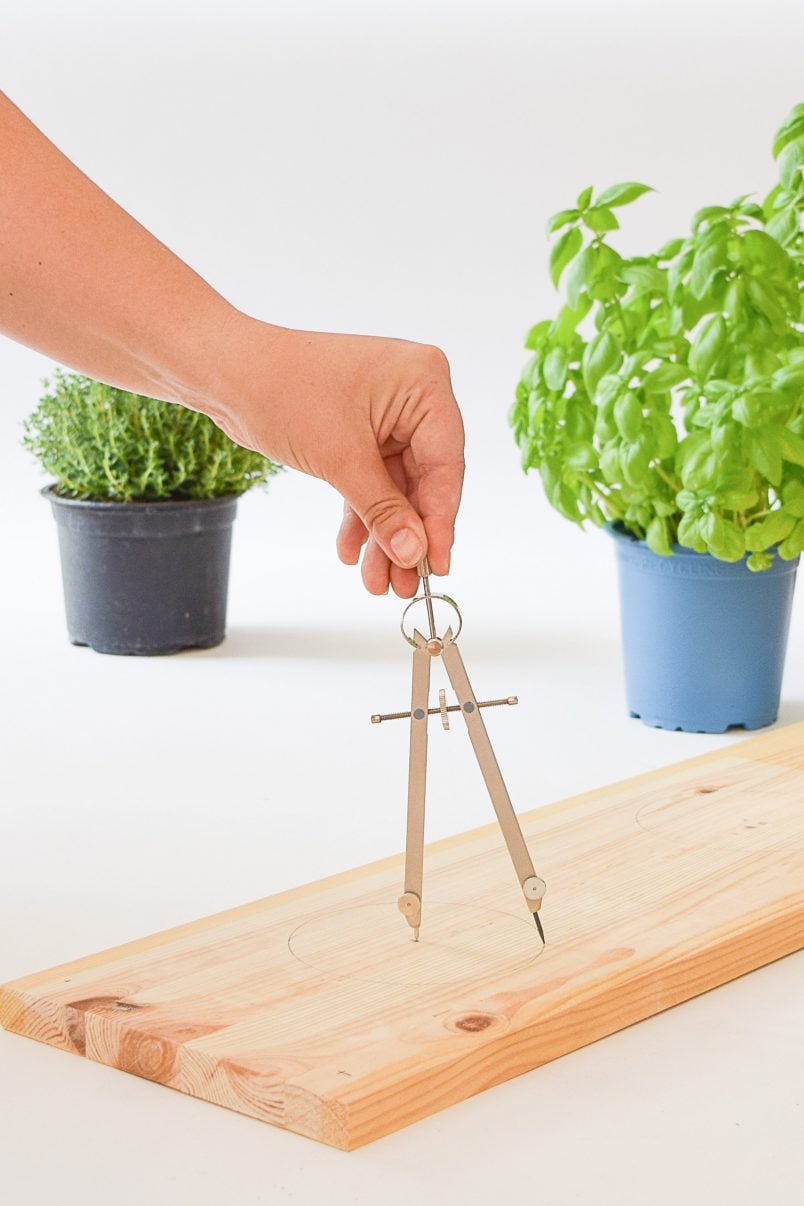
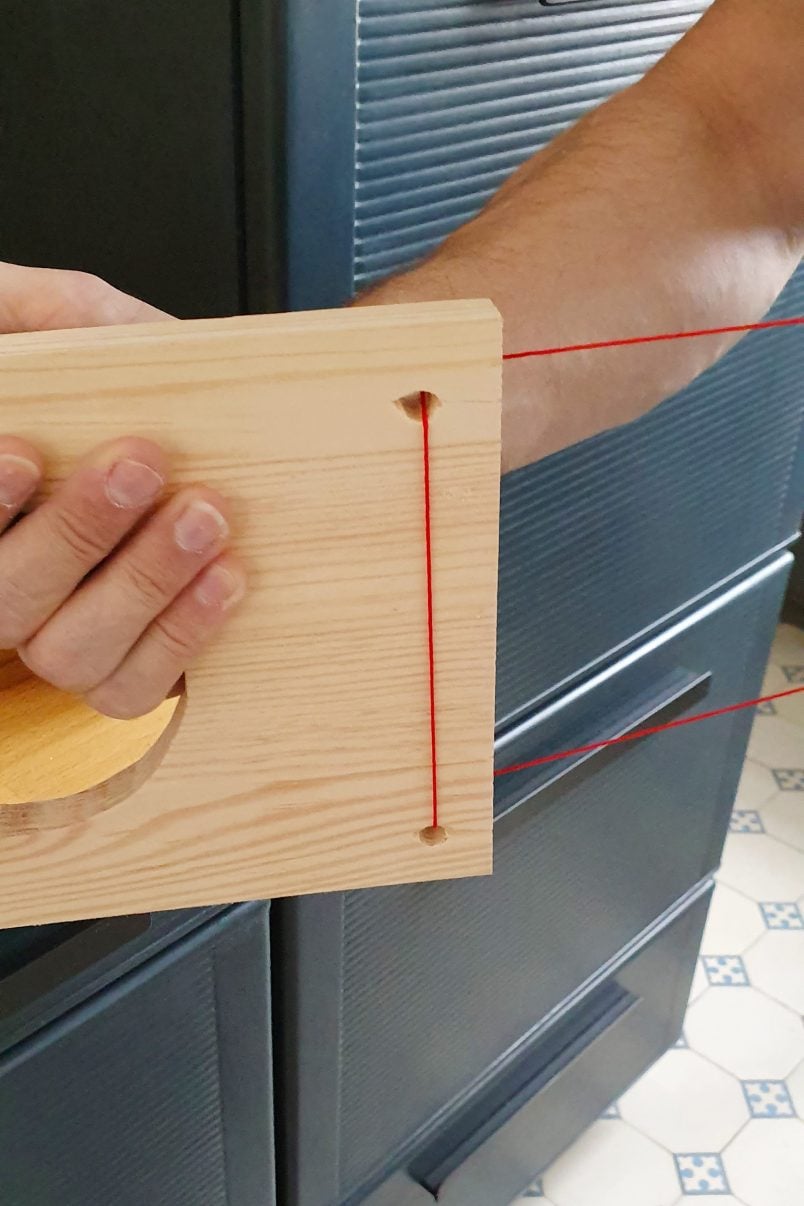
1. Measure & Mark
As with most DIY projects, start by measuring and marking where you have to cut and drill. These are the measurements we used.

Mark the centre of each of the holes you’ll be cutting out and use a compass to draw a circle with a 10cm diameter around each of the centre marks.
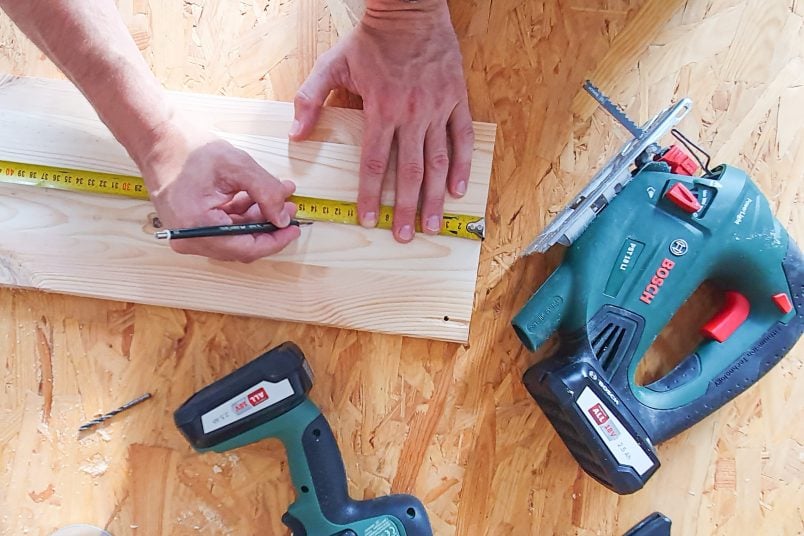
You’ll also have to make a mark roughly 2cm in from each of the corners of the board. This is where you’ll later be drilling holes to be able to hang up the herb garden.
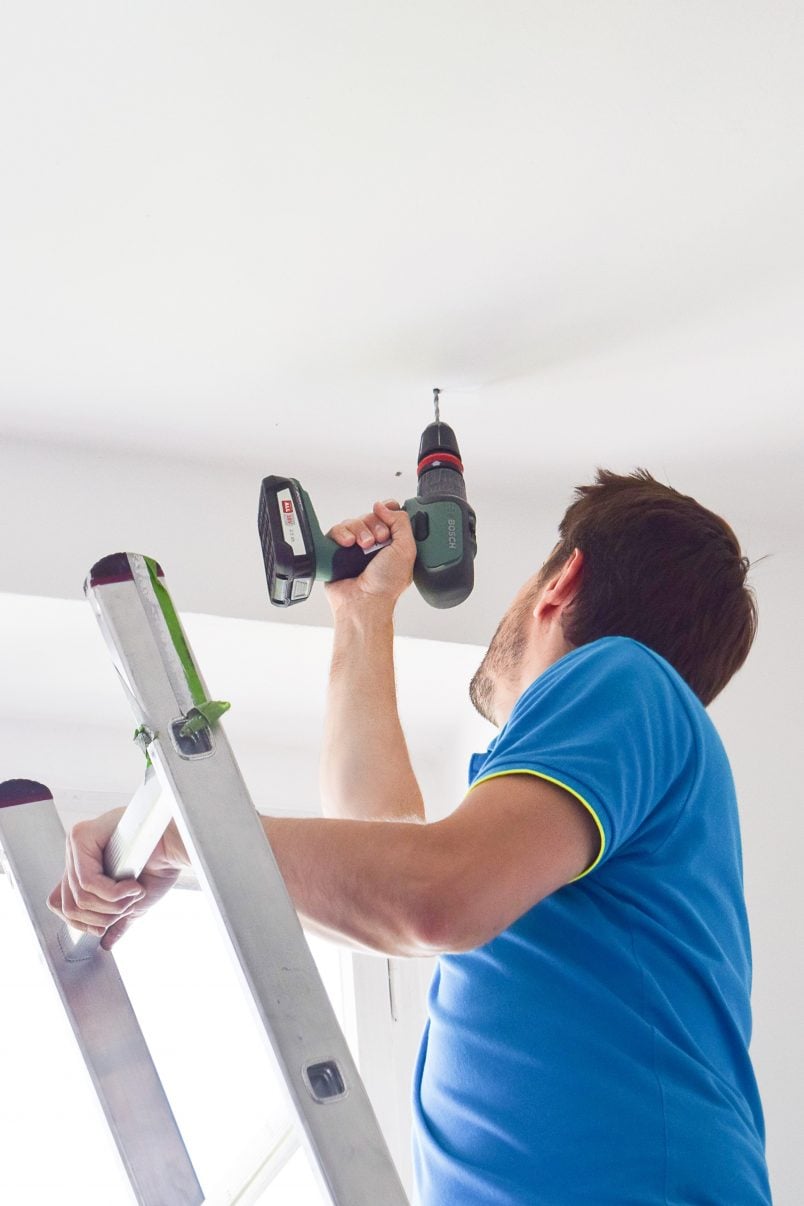
2. Drill & Cut
Double check your measurements and then drill a hole into the 4 corners of the board. We predrilled the holes with a 4mm wood drill bit and then used a 10mm drill bit to make the hole slightly larger.
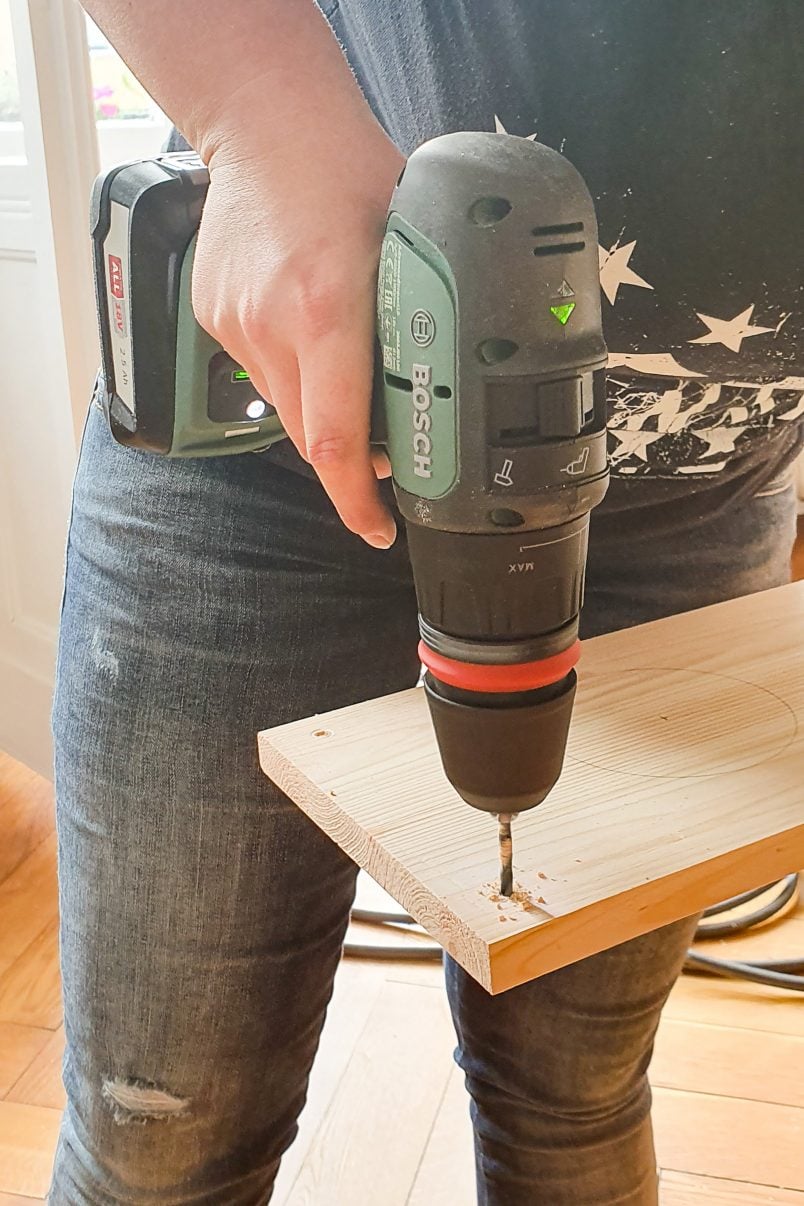
You’ll also have to drill a hole into each of the circles you’ve drawn. This is so that you can insert the jigsaw blade.
All in all, you should have drilled nine holes – four to hang up your shelf and one in each circle that you’ll be cutting out (assuming you’re using five plant pots as we did).
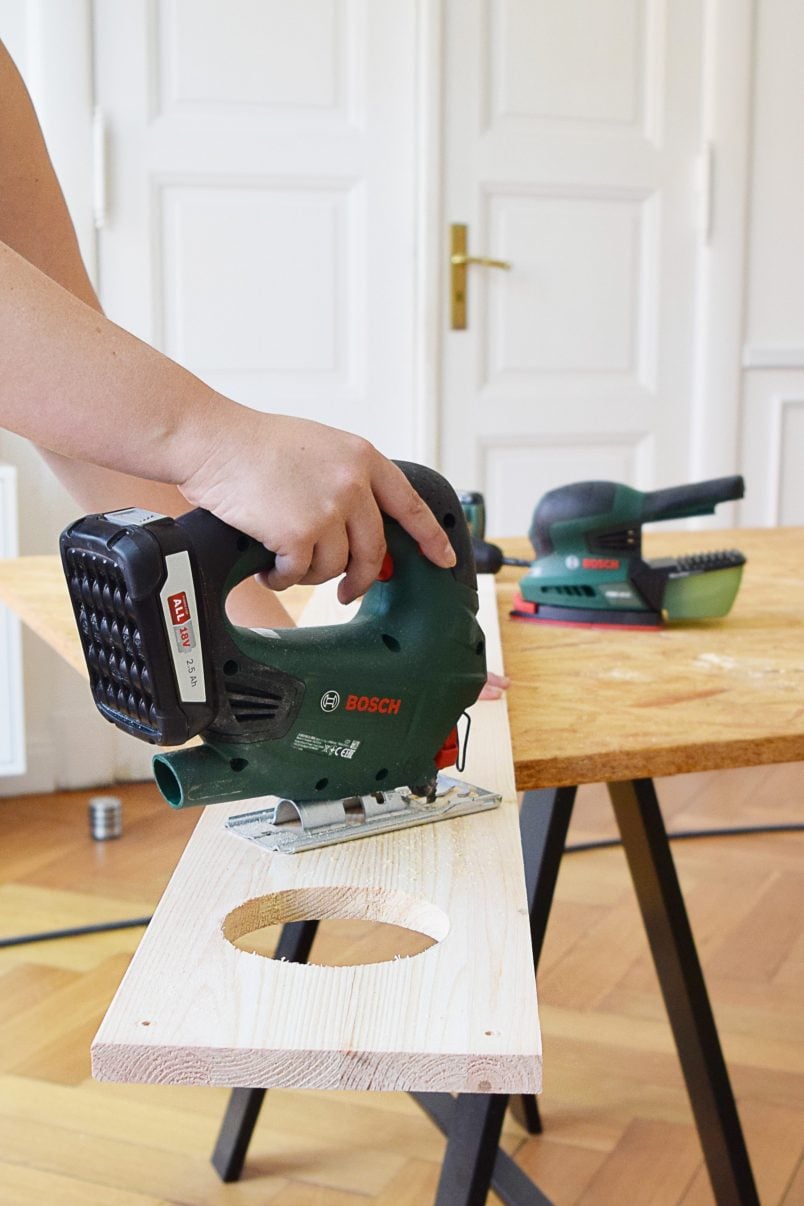
Next, insert the jigsaw blade into your first hole and cut out your circle. Cutting out circles can be tricky so take your time and try to follow the line exactly. Using the Bosch cordless jigsaw made cutting out the holes really easy and it was great not to have to worry about cutting through a cable!
As you can see, some of the holes we cut out aren’t perfect but it’s nothing to worry about as the plant pots will hide small imperfections.
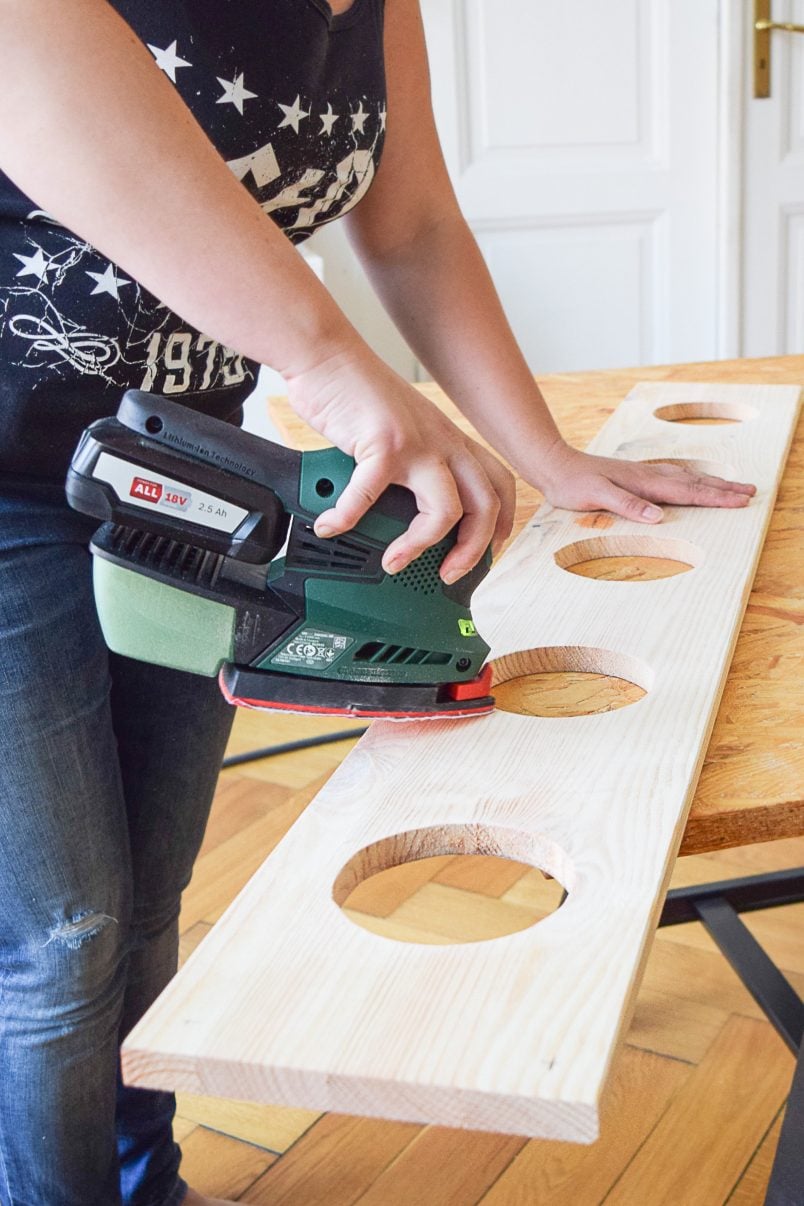
3. Sand
When you’ve cut out all of the circles give the whole board a sand to remove any sharp edges and make sure that it’s lovely and smooth. You don’t want to risk getting a splinter when you’re watering your kitchen herb garden!
4. Attach
Your indoor hanging herb garden is almost complete – all that’s left to do is hang it from your ceiling.
For this, you will have to drill 4 holes into the ceiling and attach a hook into each of them. The type of wall plug you need to use for your hooks will depend on your type of ceiling.
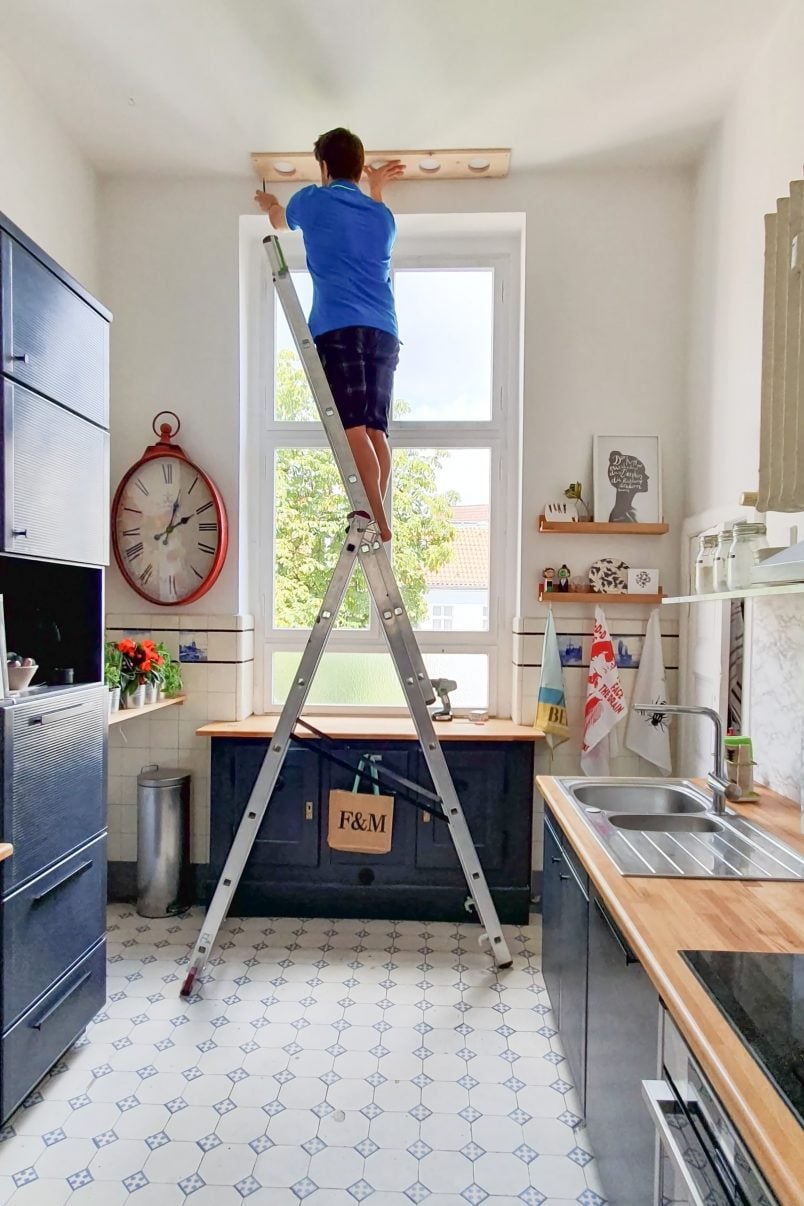
As the hooks in the ceiling have to line up with the holes that you drilled in the corner of the boards, we used the board as a template by holding it against the ceiling and marking the exact positions of the holes we’d already drilled into it.
Bosch recommends hanging the rack with some wire (which is probably a good idea) but we decided to use some thick colourful cord instead.
Just thread the cord through each of the holes in the corners of the board and tie a loop at each end. Then just push each loop over one of the hooks in your ceiling.
5. Add Fresh Herbs & Plants & Enjoy!
All that’s left to do is add your herbs and your new DIY hanging herb garden is complete.
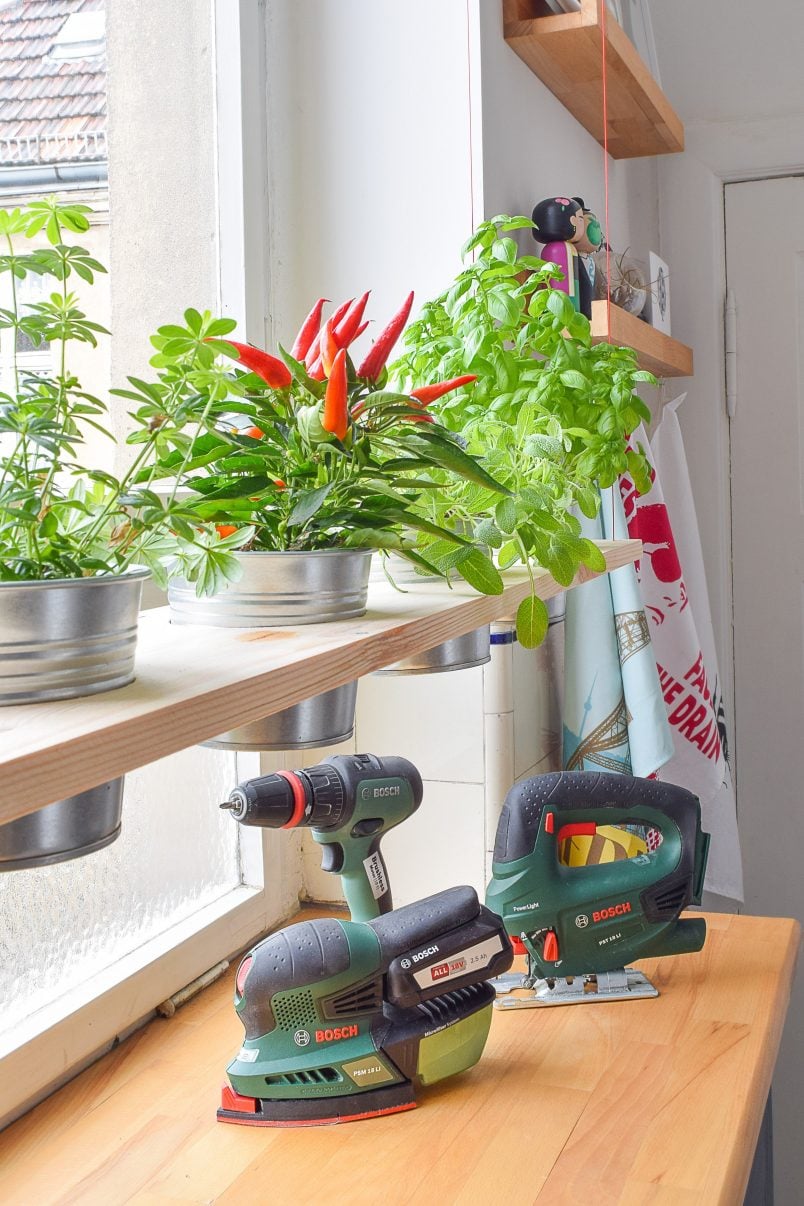
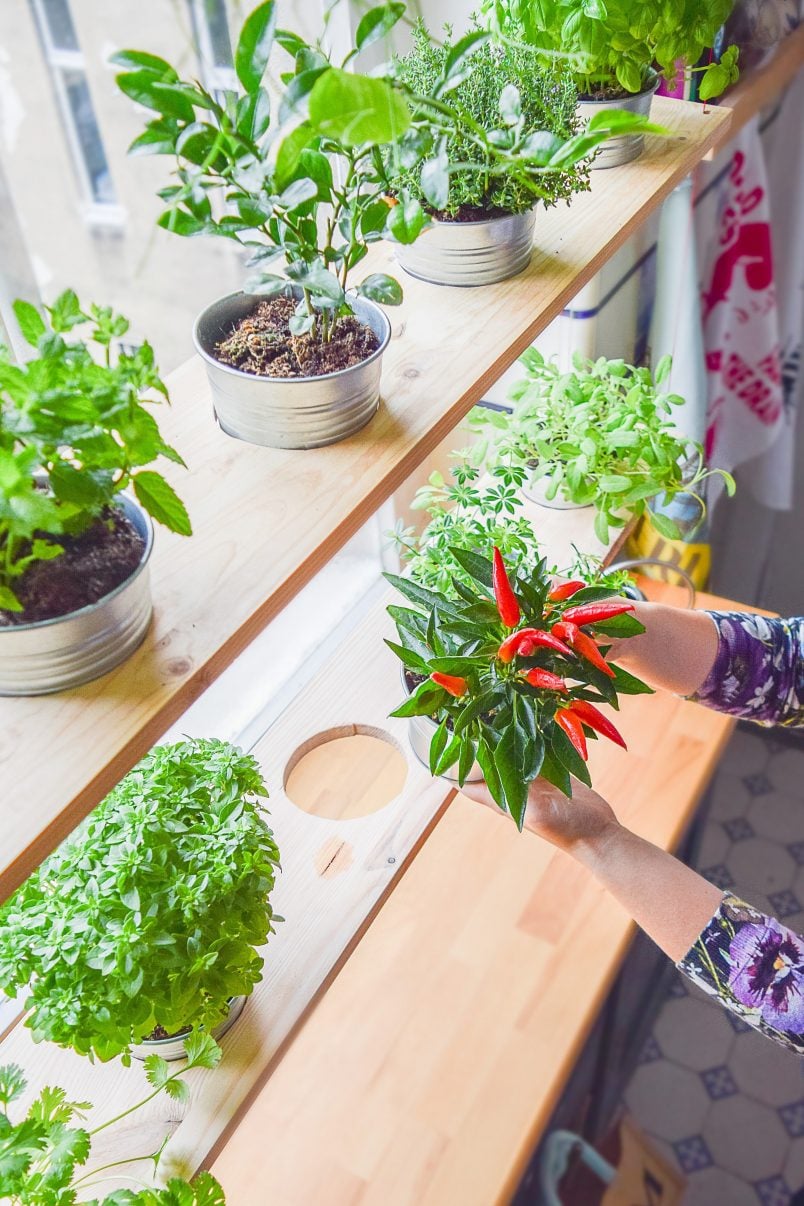
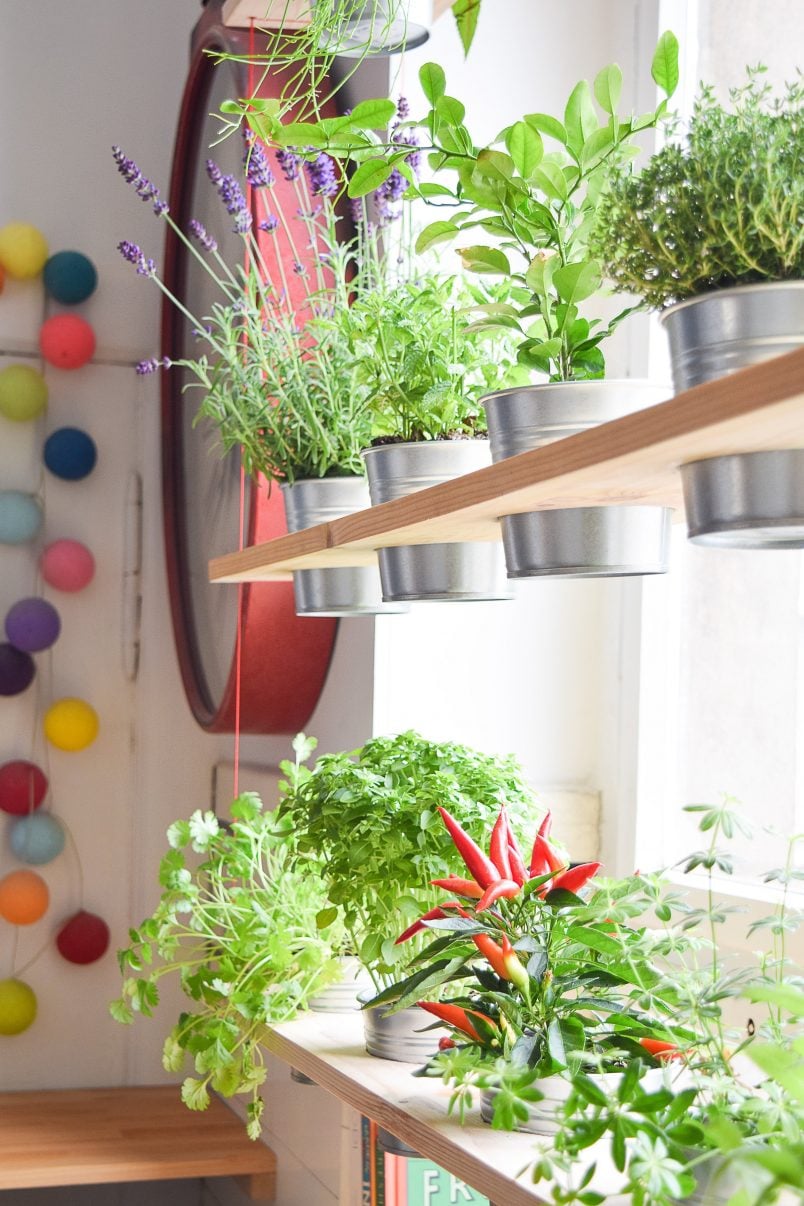
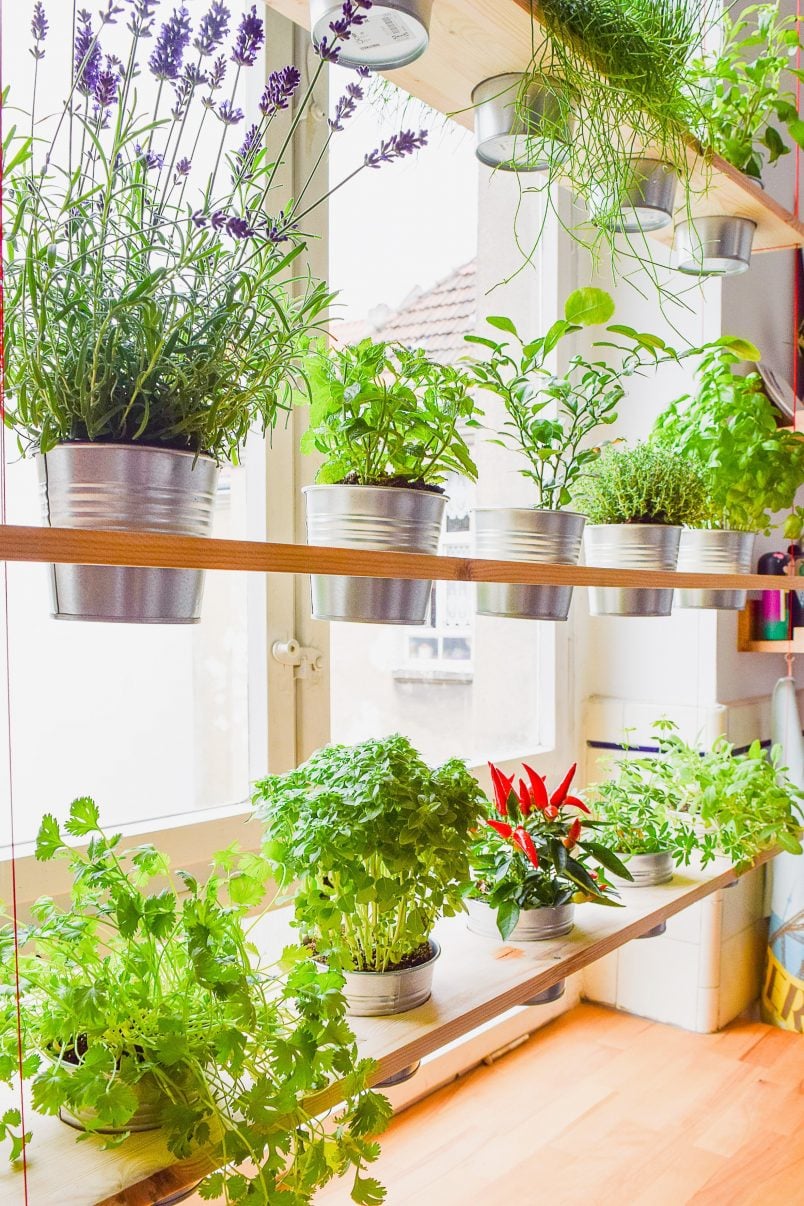
We love how the DIY hanging garden turned out and makes growing herbs in our kitchen so easy. In fact, we love it so much that we decided to make a couple more of them and now have a hanging herb garden wall!
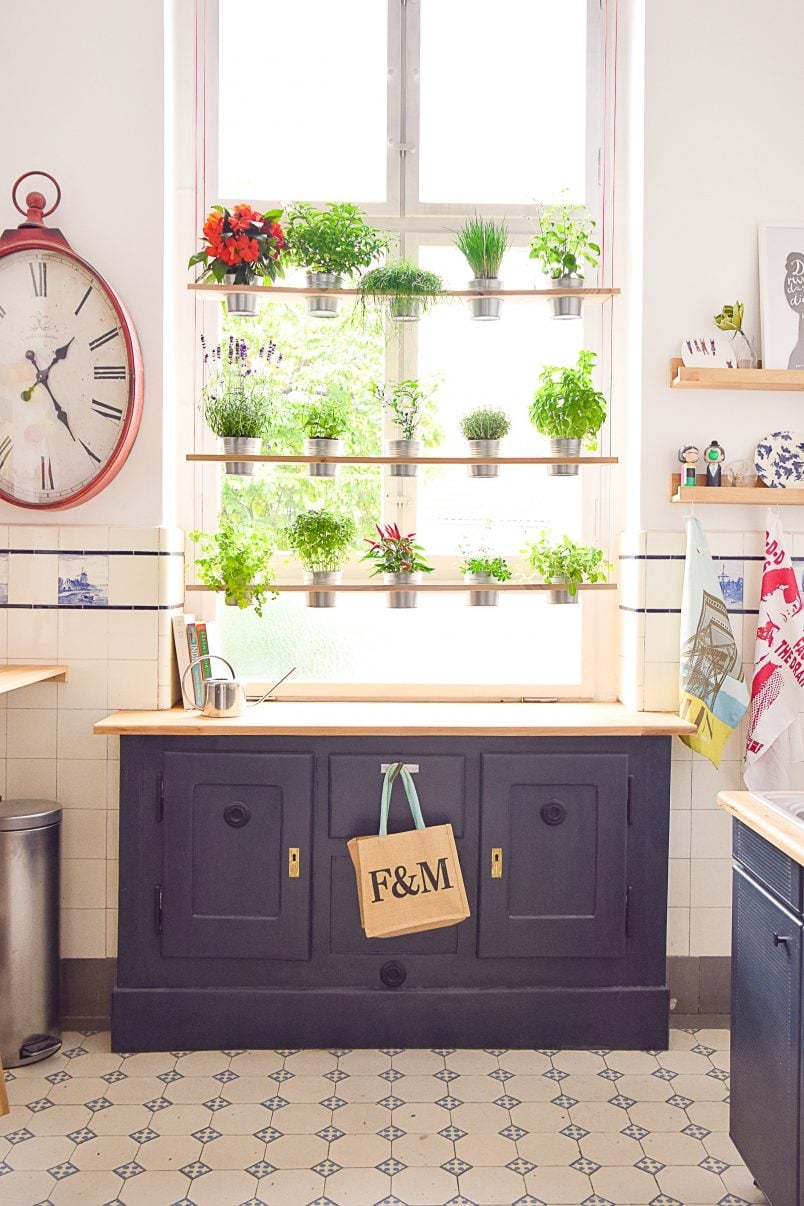
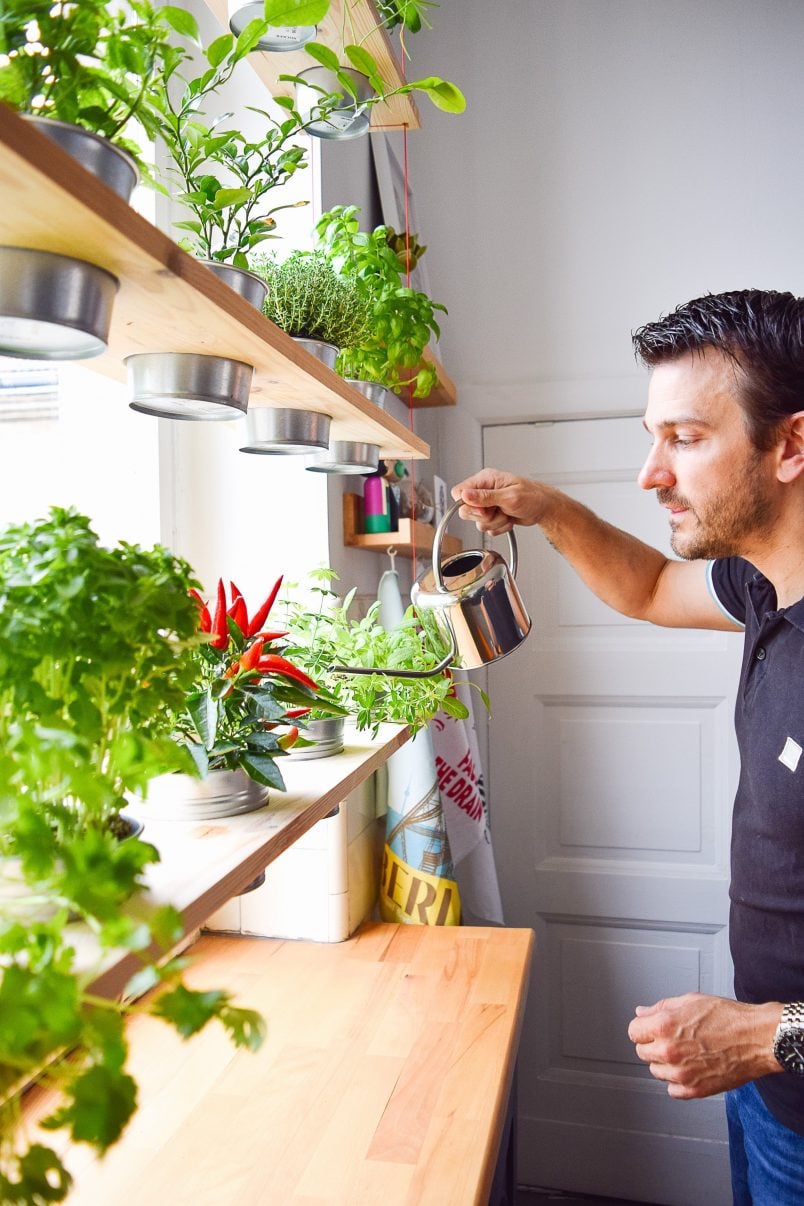
As fun as this project looks and was to build, it has another bonus that you can’t see. It smells amazing! Now, all we have to do is remember to water our new plants which is definitely going to be harder than building the herb garden!
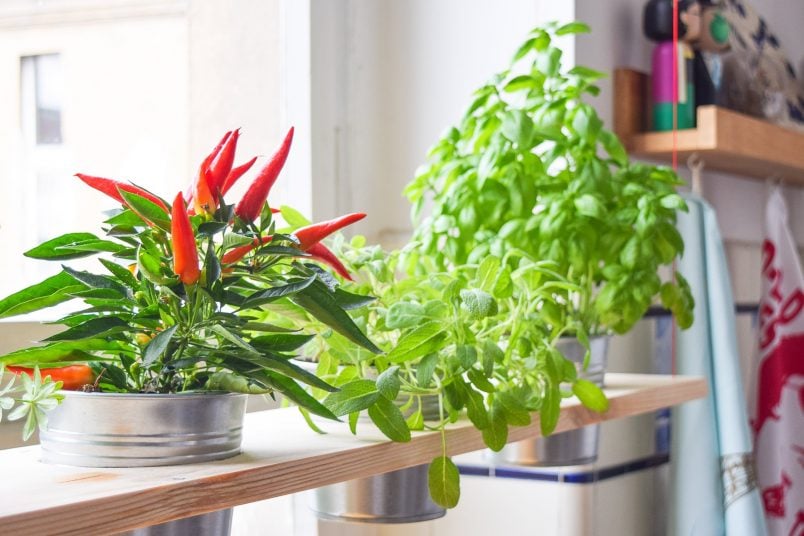
In case you’re wondering which plant’s we now have, here’s what we planted.
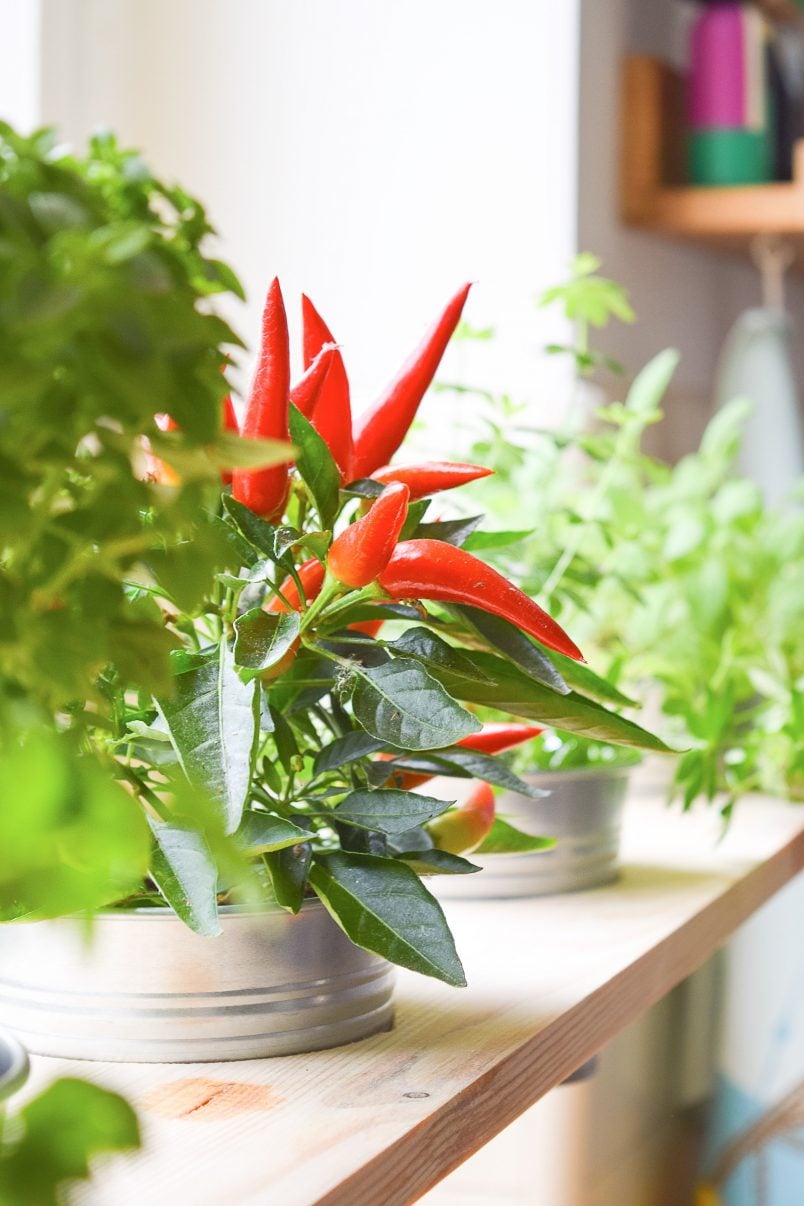
Bottom row: Coriander, bush basil, chillies, woodruff, sage
Middle row: Lavender, mojito mint, kaffir lime, thyme, basil
Top row: new guinea Impatiens, jasmine, a plant I can’t remember the name of as we’ve had it a while, chives & sage.
Don’t forget to head over to the Bosch website for lots more inspiration and creative DIY ideas!
Let me know what you think of this DIY hanging herb garden in the comments below! Do you also struggle to remember to water your plants? Do you have any favourite plants or herbs? Do you have a vertical garden in your home?
PS. You can read about our full kitchen makeover here! Next up on our project list is sorting the pantry – you can see how we’re planning on transforming the space here!
If you liked this DIY hanging herb garden, click the images below to save it to Pinterest!
If you like this project, you will love these ones, too!


DIY Hanging Indoor Herb Garden

Materials
- Timber boards (1200 x 180 x 18mm)
- Thick cord
- Hooks
- Wallplugs
- Planters
- Plants or Herbs
Tools
- Cordless Drill
- Jigsaw
- Sandpaper
- Compass
Instructions
- Measure and mark the circles for your plant pots.
- Drill a hole into each hole to be able to insert your jigsaw blade. Then cut out each hole with the help of your jigsaw.
- Drill holes into each corner of the boards and thread through the cord to be able to hang them from the ceiling.
- Give everything a sand to remove any sharp edges and make sure everything is smooth.
- Screw hooks into your ceiling and hang the board from them.
- Place a plant pot with fresh herbs into each hole to always have a fresh supply of herbs in your kitchen.
Recommended Products
As an Amazon Associate and member of other affiliate programs, I earn from qualifying purchases.
Ashley says
How do your herbs drain, after watering?
I wouldnt want them to drain on my windowsill.
Christine says
That’s a great question, Ashley! The plants are still in the original pots that they came in and just sit in the silver ones that you can see. Any excess water drains into the outer pot and if there’s too much water in it you can just take it out and empty it.
Cx