There’s a reason that we only show one side of our bedroom. It’s because the rest of it is still a bit of a mess.
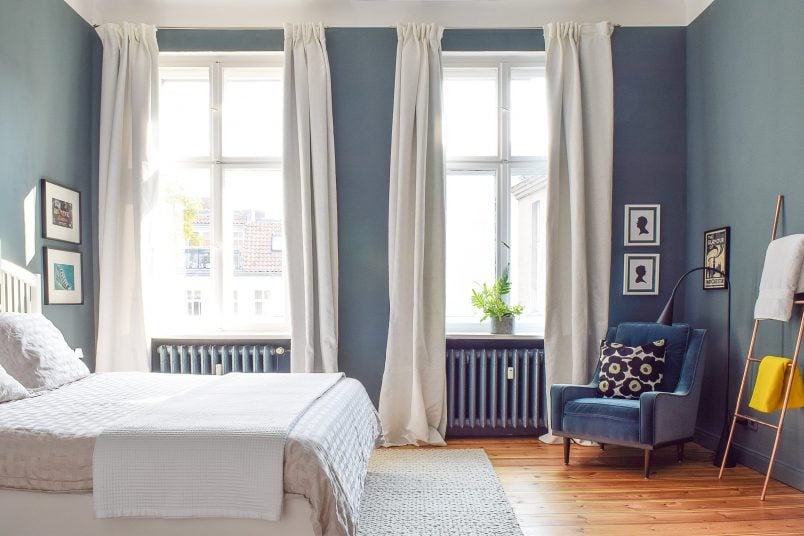
Okay, so that’s probably a bit harsh but there’s really not much there to show you! I know all bloggers are meant to portray a perfect lifestyle in a perfect home but it’s real-life around here and, if you’ve been following us for a while, you’ll already know that we’re definitely not perfect (just don’t tell anyone)!
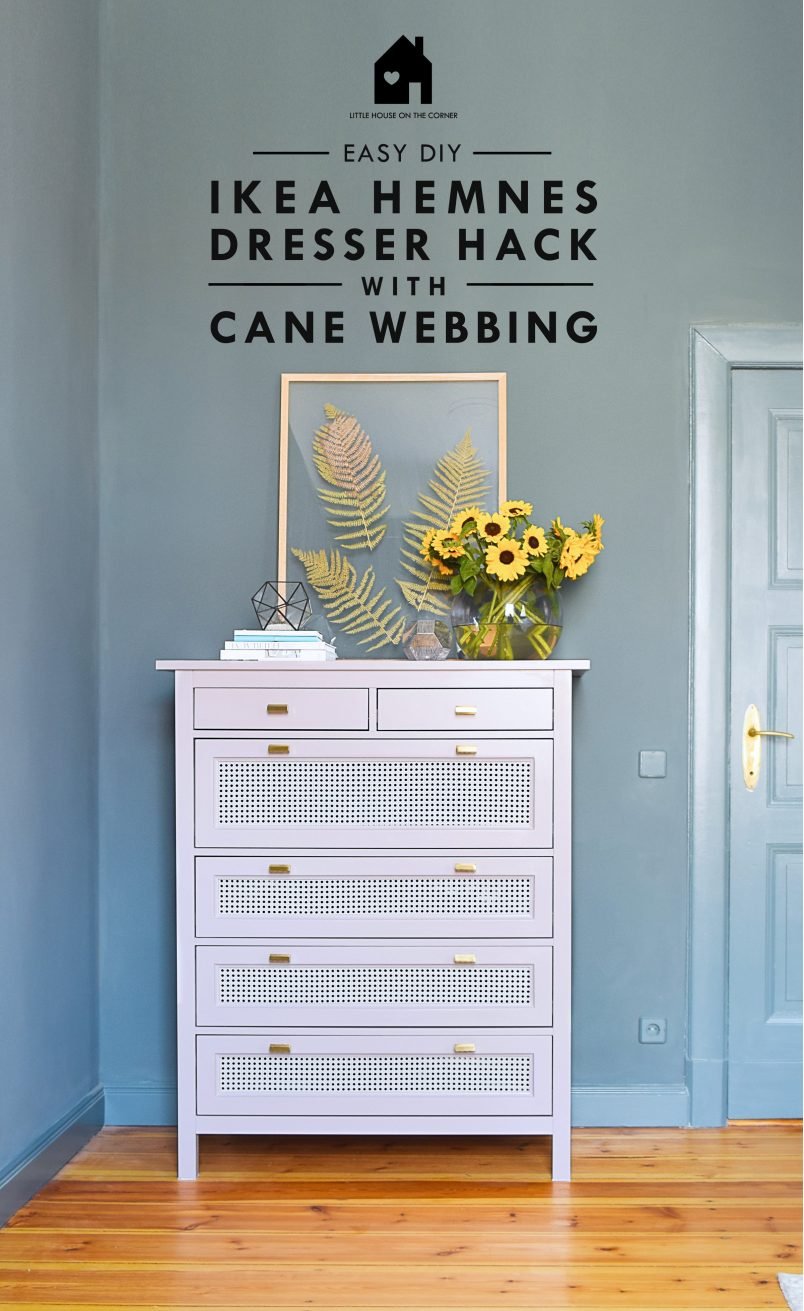
So, in an attempt to improve our storage situation and make our bedroom a bit more attractive, we popped to Ikea and now have a lovely new chest of drawers.
Now, if you’re thinking “I’ve not seen that at Ikea” you’d be right as we’ve Ikea hacked the s**t out of it!

I’m not going to lie, this Ikea Hemnes hack ended up taking a bit more time than I’d anticipated but I think it was totally worth it for the end result.
And yes, I obviously couldn’t help being influenced by all of the gorgeous pink tones and cane webbing I’m seeing over on Instagram.
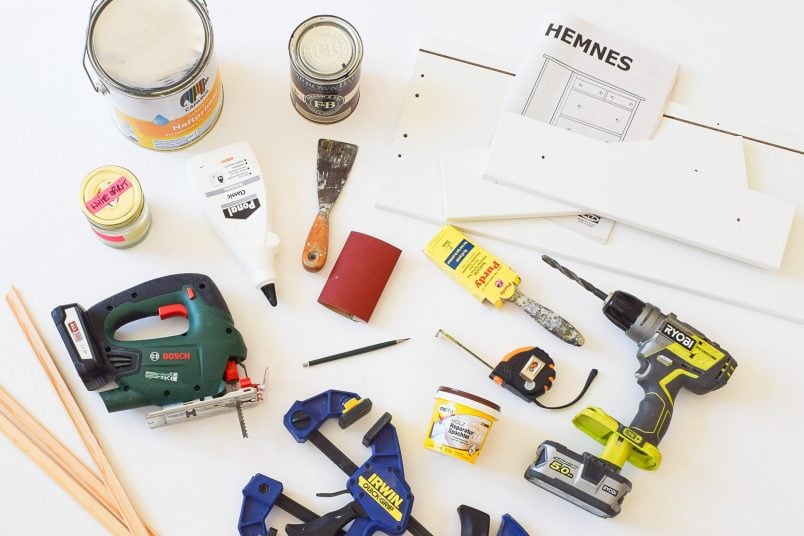
If you’d like to recreate our Ikea Hemnes dresser with cane webbing, this is what you will need:
* This post contains affiliate links to the exact products and tools we used for this project as well as gifted items. As always, we only share products we love and think that you will, too!
Tools:
- Cordless drill & drill bit
- Jigsaw
- Mitre Saw (Alternatively: Fine saw & mitre block)
- Stapler & staples
- Paintbrush
- Clamps (or tape to hold the moulding in place while the glue dries)
Supplies:
- Ikea Hemnes Chest of Drawers
- Handles – our gorgeous handles were a generous gift from lovely guys at Pushka Home
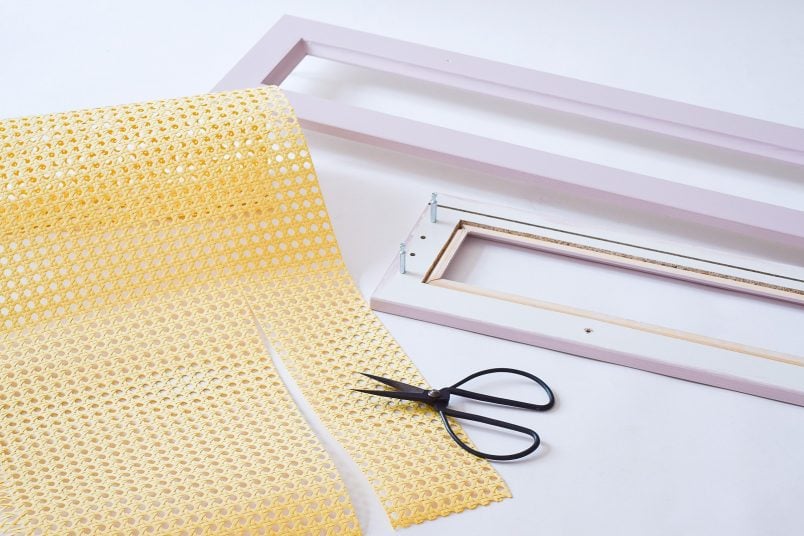
- Cane Webbing (the finished cutouts on our Hemnes drawers are 12cm wide on the smaller drawers and 16cm on the larger one, so 60cm x 100 cm of webbing is just the right amount needed)
- 4 x 2.4.m of 15mm Scotia moulding or Quadrant moulding (depending on which you prefer)
- Sandpaper (about 120 grit)
- Wood filler
- Glue – this is our favourite wood glue
- White spirit
- Dust mask
- Adhesion Primer – we used the same primer to paint our kitchen cabinets
- Paint – our chest of drawers is painted in a colour-matched version of Dorchester Pink by Little Greene

This is how to update your Hemnes dresser with cane webbing:
Step 1
Assemble The Chest Of Drawers
Get the most boring part of this project out of the way first and assemble the chest of drawers as per the Ikea instructions. Don’t assemble the drawers just yet as they need a bit of Ikea hacking TLC before you can assemble them!
Step 2
Measure, Mark & Cut
Next, cut the square holes into the drawers. Our cutouts are 81.2 x 12 cm (81.2 x 19cm in the larger drawer) leaving an edge of 4 cm. You don’t want the edge to be too thin otherwise it could leave the drawer too weak and don’t forget that you also still have to have enough space to attach your new handles, too.

Draw the square you’ll be cutting out onto the drawer front and make sure that it’s exactly the size and position it should be.
Then score along the lines that you’ll be cutting with a craft knife to cut through the laminate surface. This will help avoid the surface chipping when you cut it.
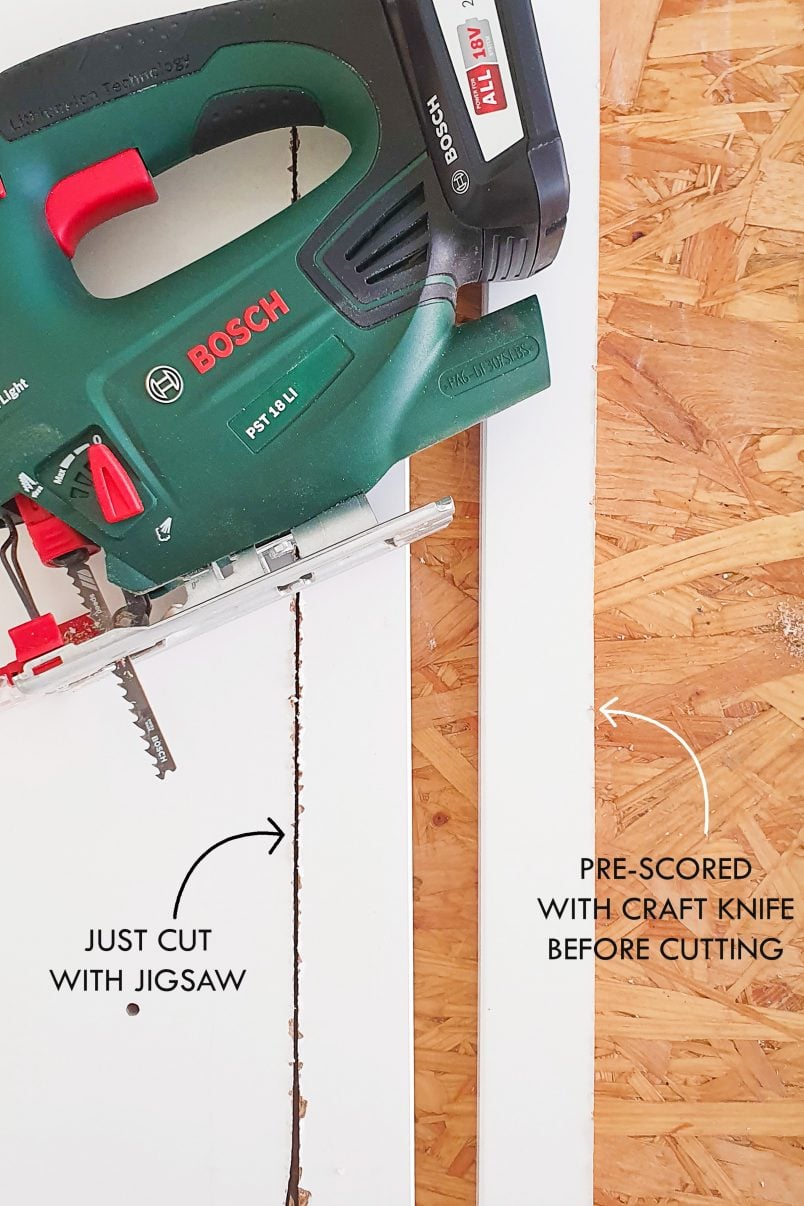
Next, drill a hole that’s big enough for you to insert your jigsaw blade, into the area of the drawer you’ll be removing. Carefully cut out the square and try to follow the lines exactly.
It’s really worth taking your time with this step as it’ll make all the difference in the finished result. !
Tip: Cutting laminated particleboard with a jigsaw isn’t ideal. Laminated particleboard chips easily when you cut it so it’s not something we’d recommend doing unless you’re planning on painting everything.
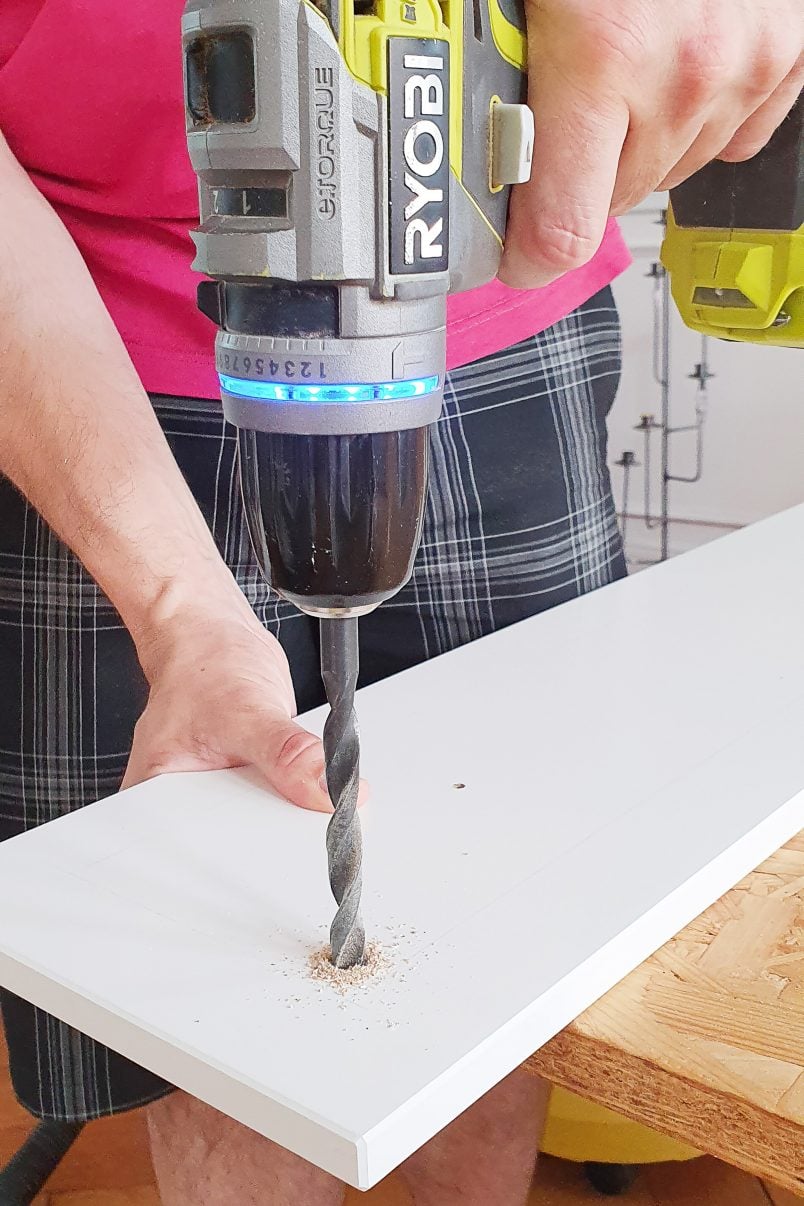
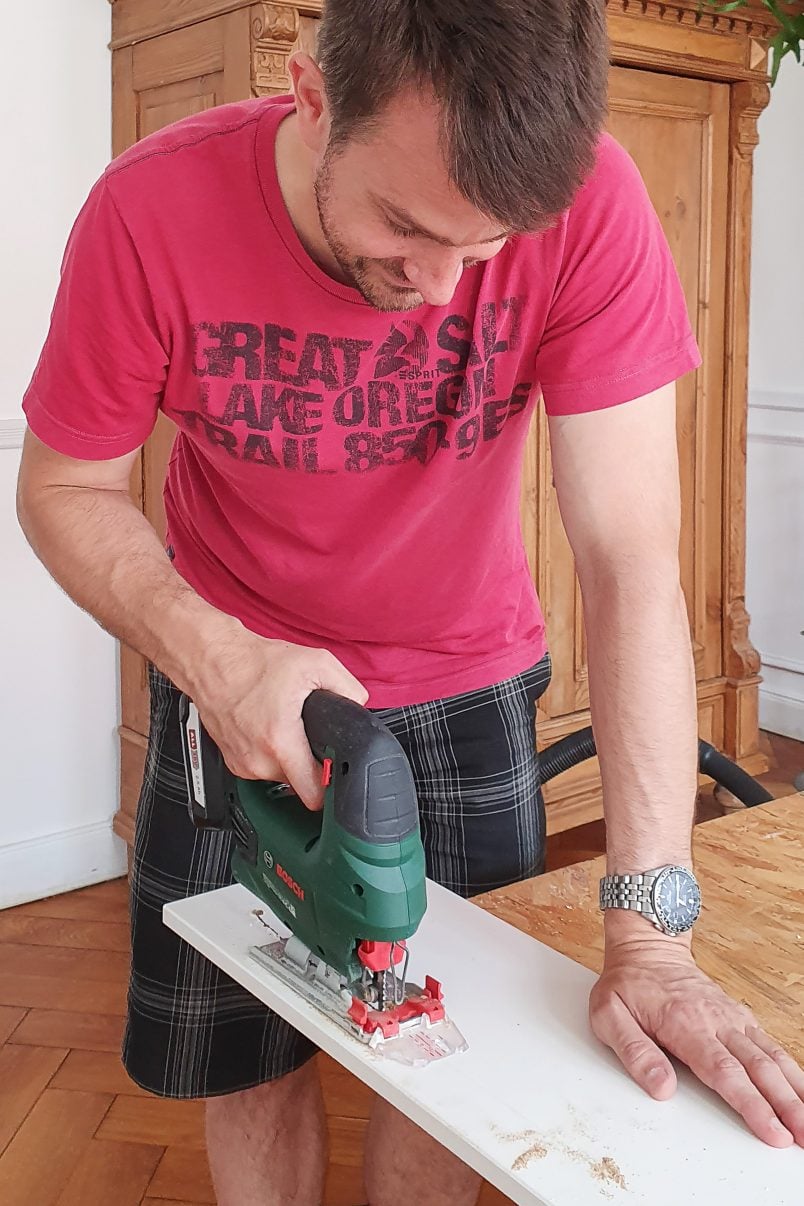
Next, drill the holes for your new handles. We used these gorgeous hexagonal knobs by Pushka Home which meant that we had to drill two holes into each of the larger drawers and one each in the smaller drawers.
Step 3
Smooth The Edges & Attach The Moulding
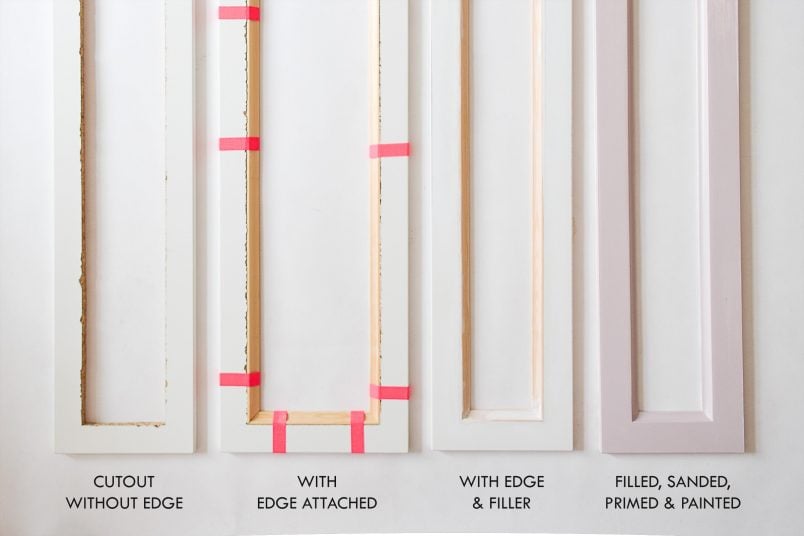
Sand all edges with some 120 grit sandpaper and make sure everything is as smooth and chip-free as possible.
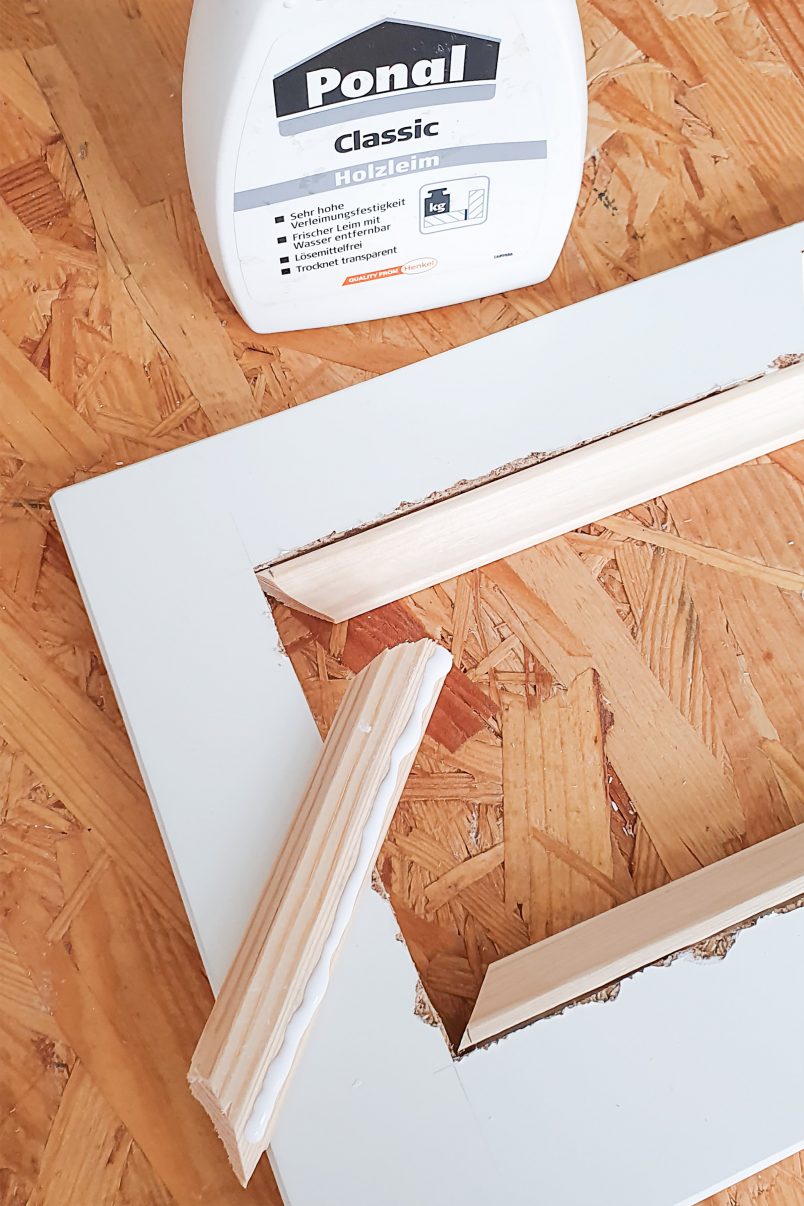
To hide the edge of the particleboard and add a lovely curved transition between the front of the drawer and the cane webbing you’ll have to install some moulding.
Cut the moulding to the length of the cutout with a 45° angle at each end with a mitre saw. We opted for scotia moulding (you could just as easily use quadrant moulding if you’d prefer the curve the other way)
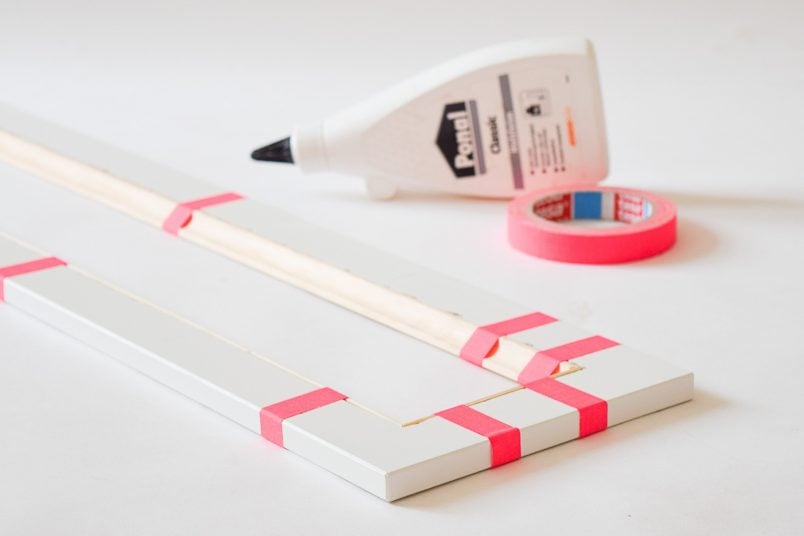
Double-check that it fits into the cutout and then glue it firmly into place with some wood glue. Use a couple of clamps (or as we did some strong tape) to hold the moulding in place while the glue dries.
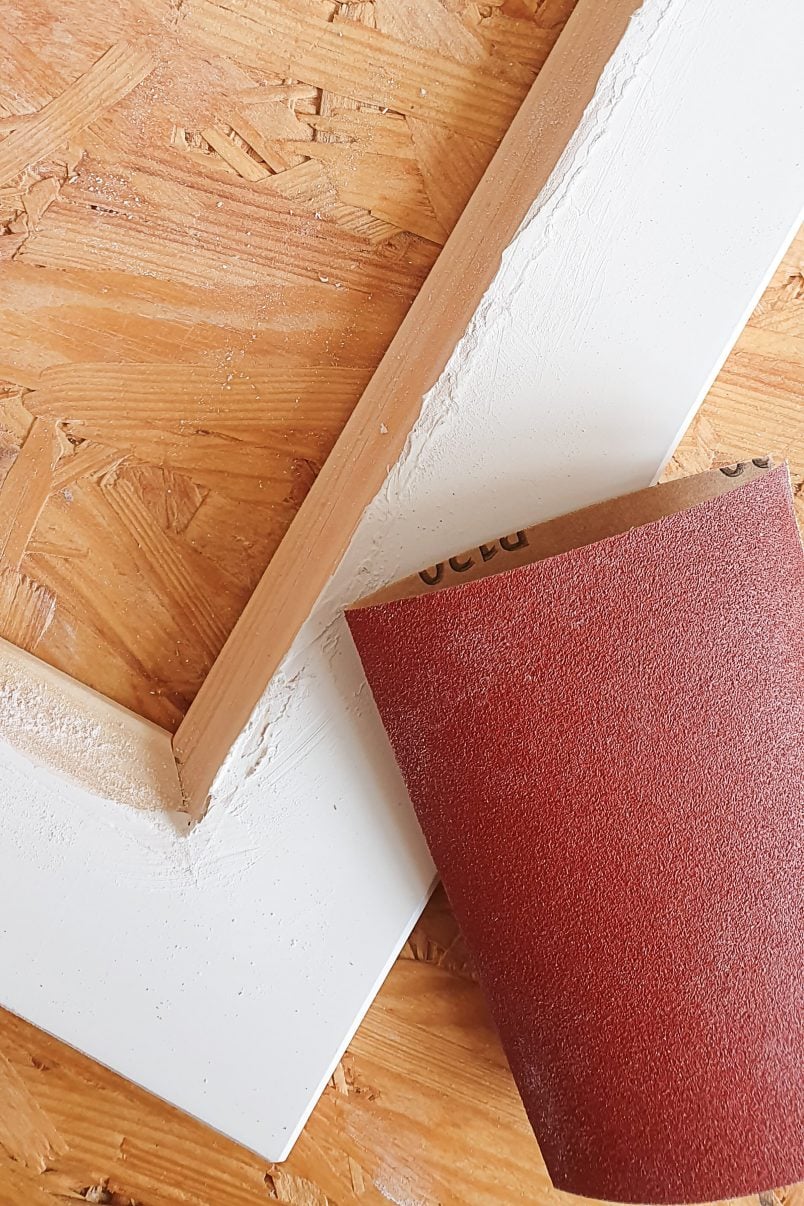
When it’s dried, fill any gaps and uneven bits where the laminate has chipped away with some wood filler and let it dry before sanding everything so that it’s smooth and ready to prime and paint.
Step 4
Sand, Prime & Paint Everything
When you’ve finished all cutting, glueing and filling it’s time to give everything, including the chest of drawers that you assembled in step one, a sand with some 120 grit sandpaper.
I prefer to do this by hand but you could use a palm sander if you prefer.
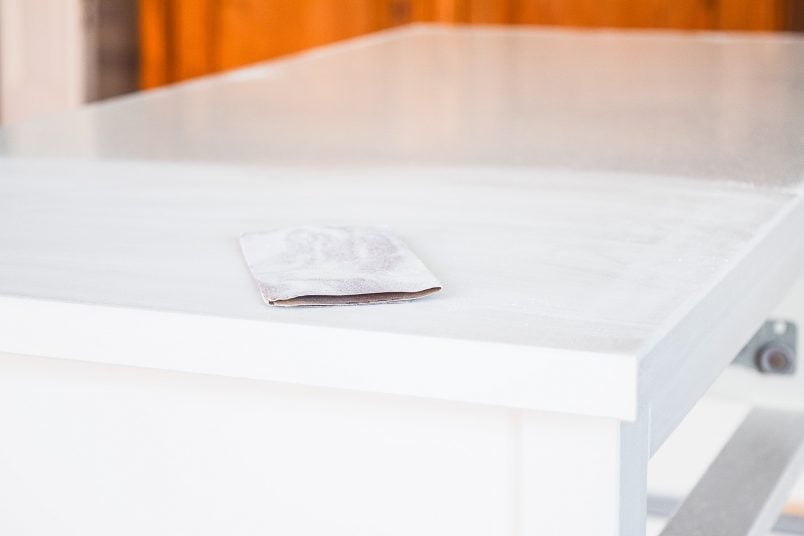
Sanding the surface will roughen it up ever so slightly and provide a good base for the paint to stick to.
If you’d like to know more about how best to sand wood, check out our guide which includes a free cheat sheet to help you decide which sandpaper you’ll need for your project!
Give everything a wipe down with some white spirit to make sure that it’s completely clean and dust-free before applying your first coat of primer.
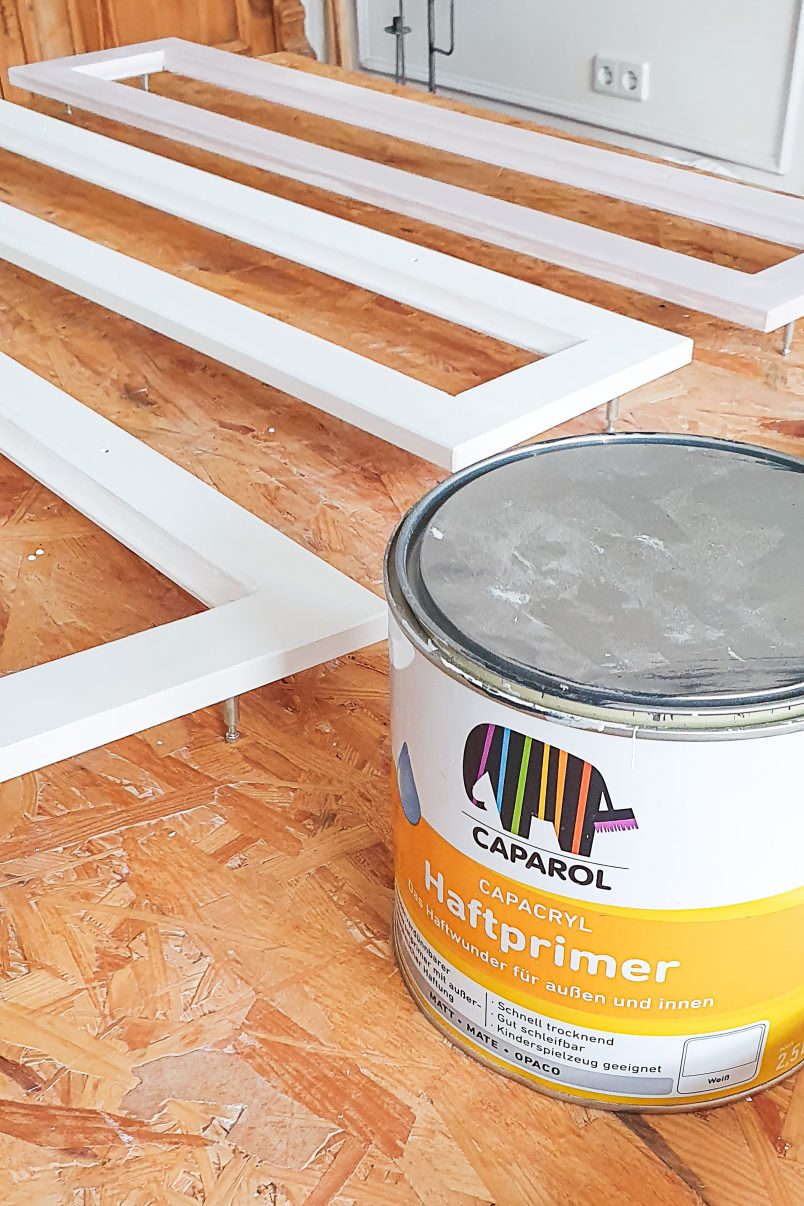
We used this adhesion primer which is the same one we used on our laminate kitchen cabinets, our fridge and even on our fridge and washing machine!
It’s not cheap but it really does work and so far everything we’ve painted is holding up really well without a chip or scratch in sight!
The primer is specifically for painting on smooth surfaces and provides the perfect high-grip base for your chosen finish. As always when painting furniture, sanding is the key to achieving a flawless finish.
Tip: As you can see, we already attached the screws of the front of the drawers (that you’ll need to for the assembly later on). It makes painting them much easier as they’re raised up and you can easily reach all edges.
You can read our full guide on how to paint furniture here.
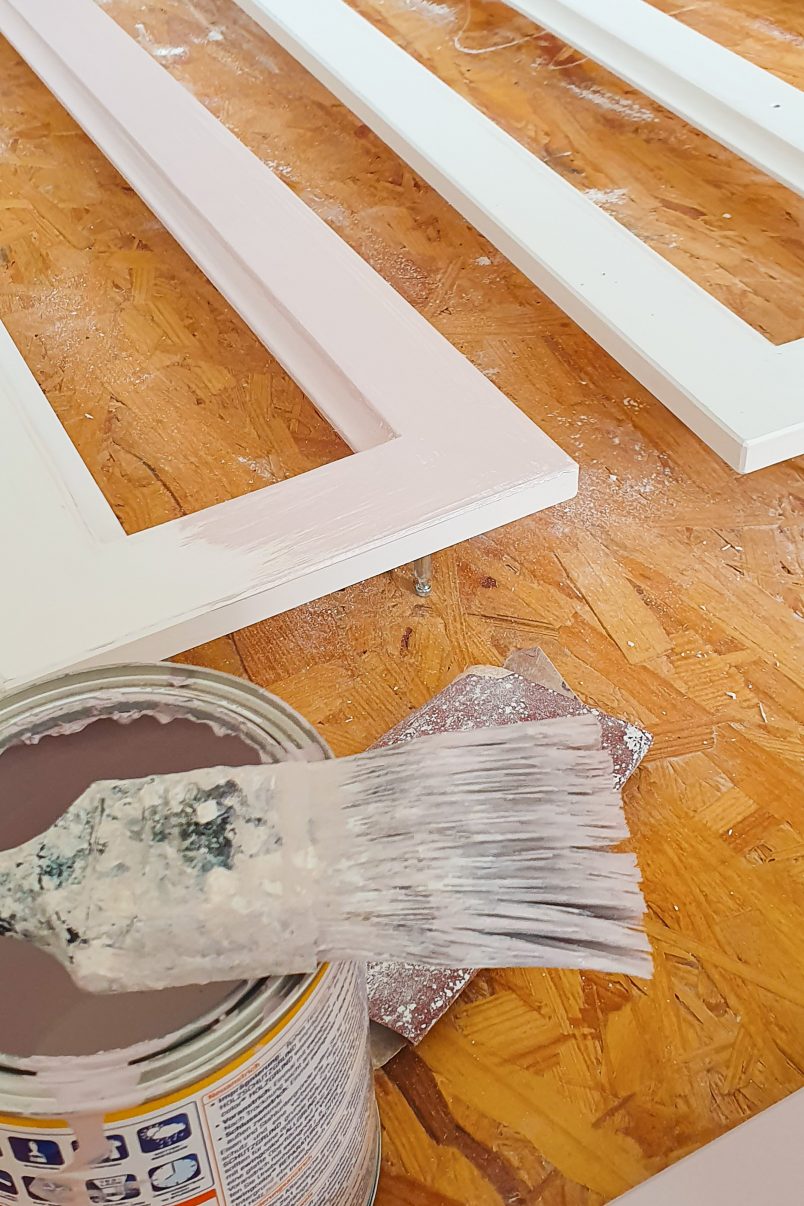
When the primer has dried, give everything another very light sand (definitely by hand this time) and then paint everything a couple of times in your chosen colour.
Don’t forget that you also have to sand between every coat of paint to remove any imperfections, air bubbles and provide more little grooves for the next coat of paint to stick to.
Step 5
Attach The Webbing
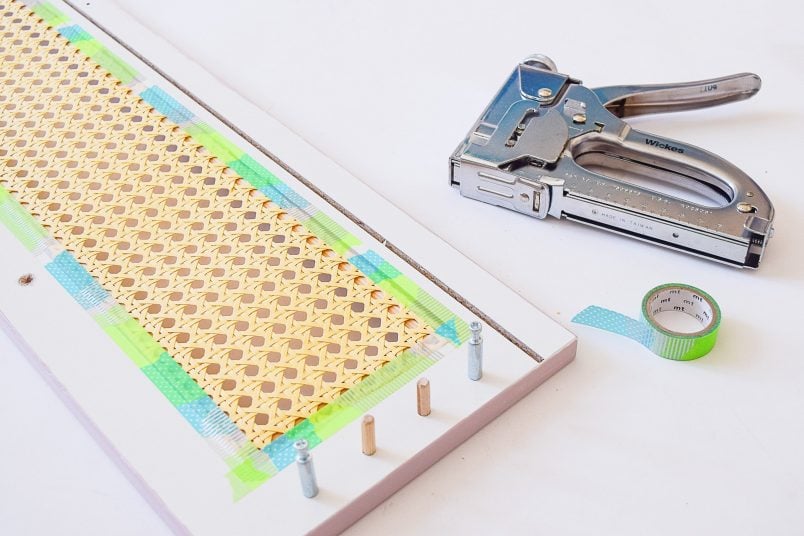
When you’ve finished painting and everything has thoroughly dried you can start to update your Hemnes dresser with cane webbing. Flip over the front of your drawers and staple a piece of webbing over the opening.
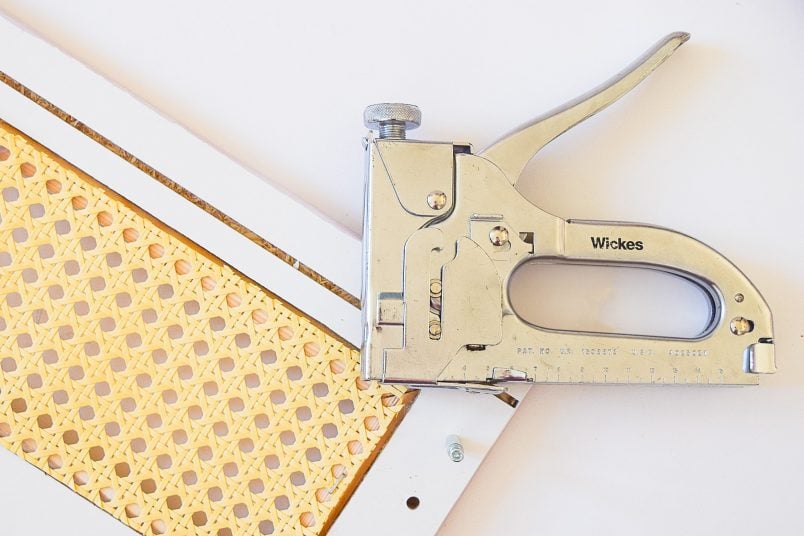
To hide the messy edges where the webbing meets the timber, cover them with some ribbon or tape. We just used some washi tape that we stuck over the edges.
Step 6
Assemble The Drawers & Add Handles
The last step is to assemble the drawers as per Ikea’s instructions. Even if the paint has dried completely it will still take a couple of weeks for it to fully cure so you’ll have to be careful not to chip or scratch it while building your drawers.
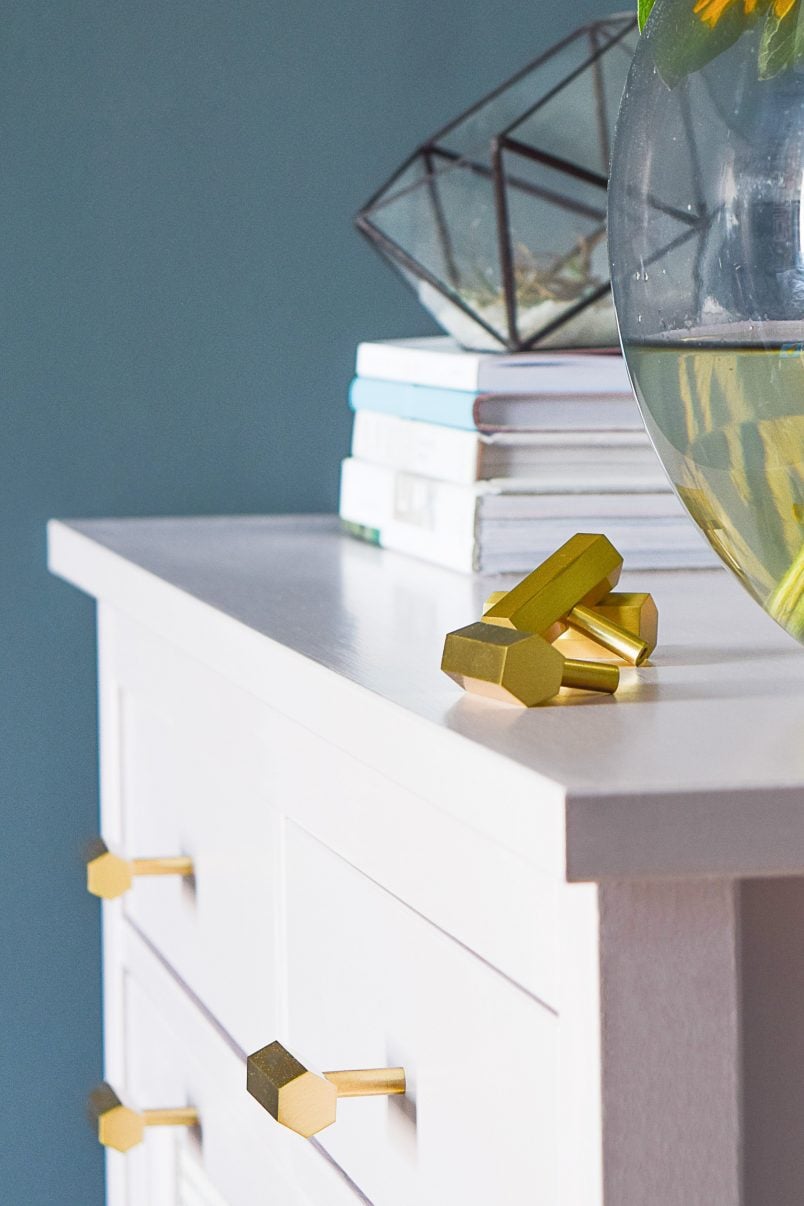
To finish off the chest of drawers, add some gorgeous handles to your finished drawers.
We were kindly gifted these absolutely stunning handles and knobs by Pushka Home. Aren’t they gorgeous?! They really finish off the chest of drawers and make them look much more high-end!
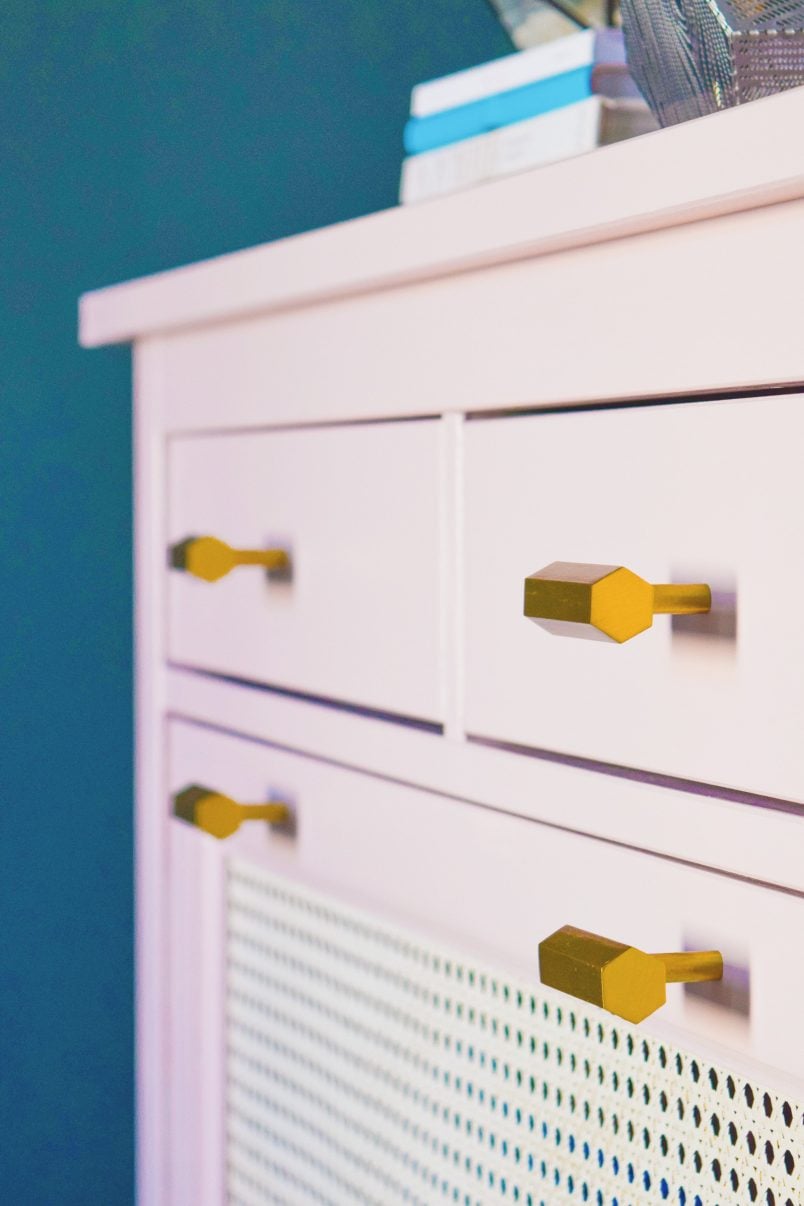
They’re great quality and really make this chest of drawers feel luxurious and high-quality. Our handles are from the brass range but Pushka Home have lots more designs and colours to choose from and I’d definitely recommend popping over there and checking out their amazing range!
Step 7
Fill & Enjoy!
All that’s left to do is fill your new chest of drawers and hide all of your junk!
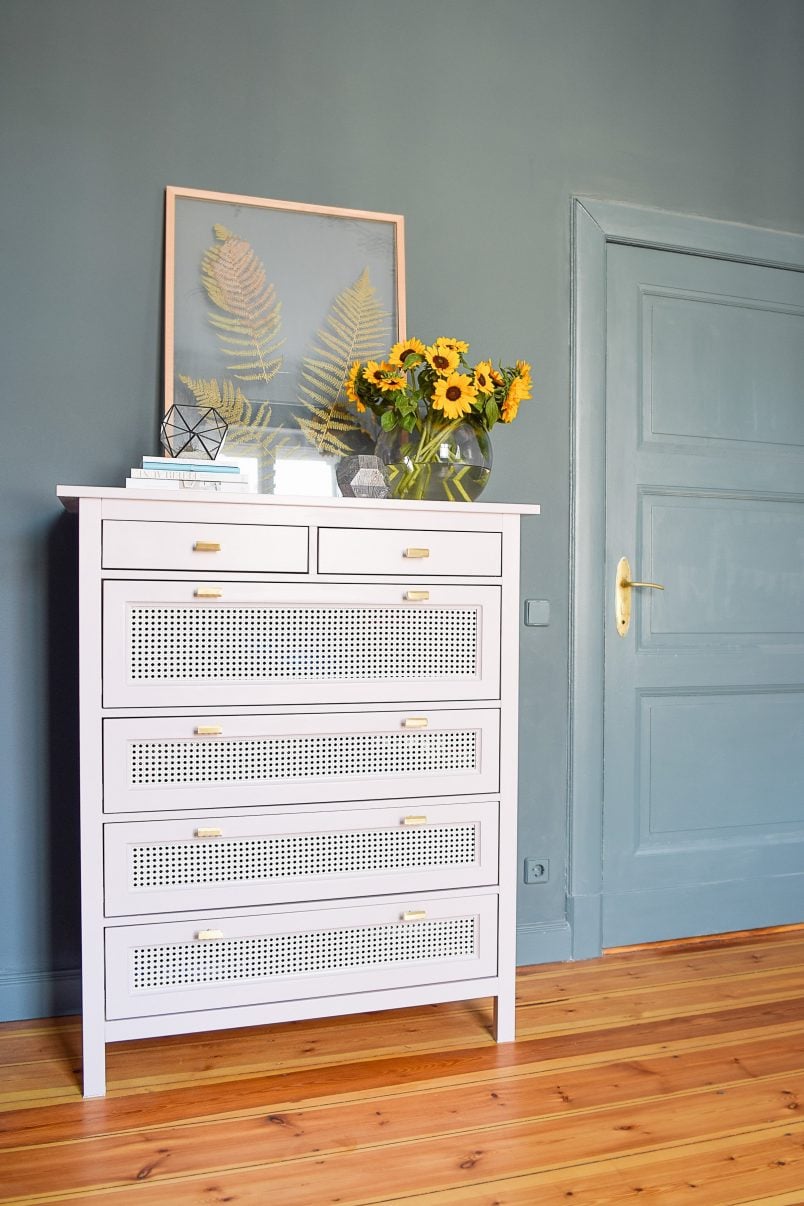
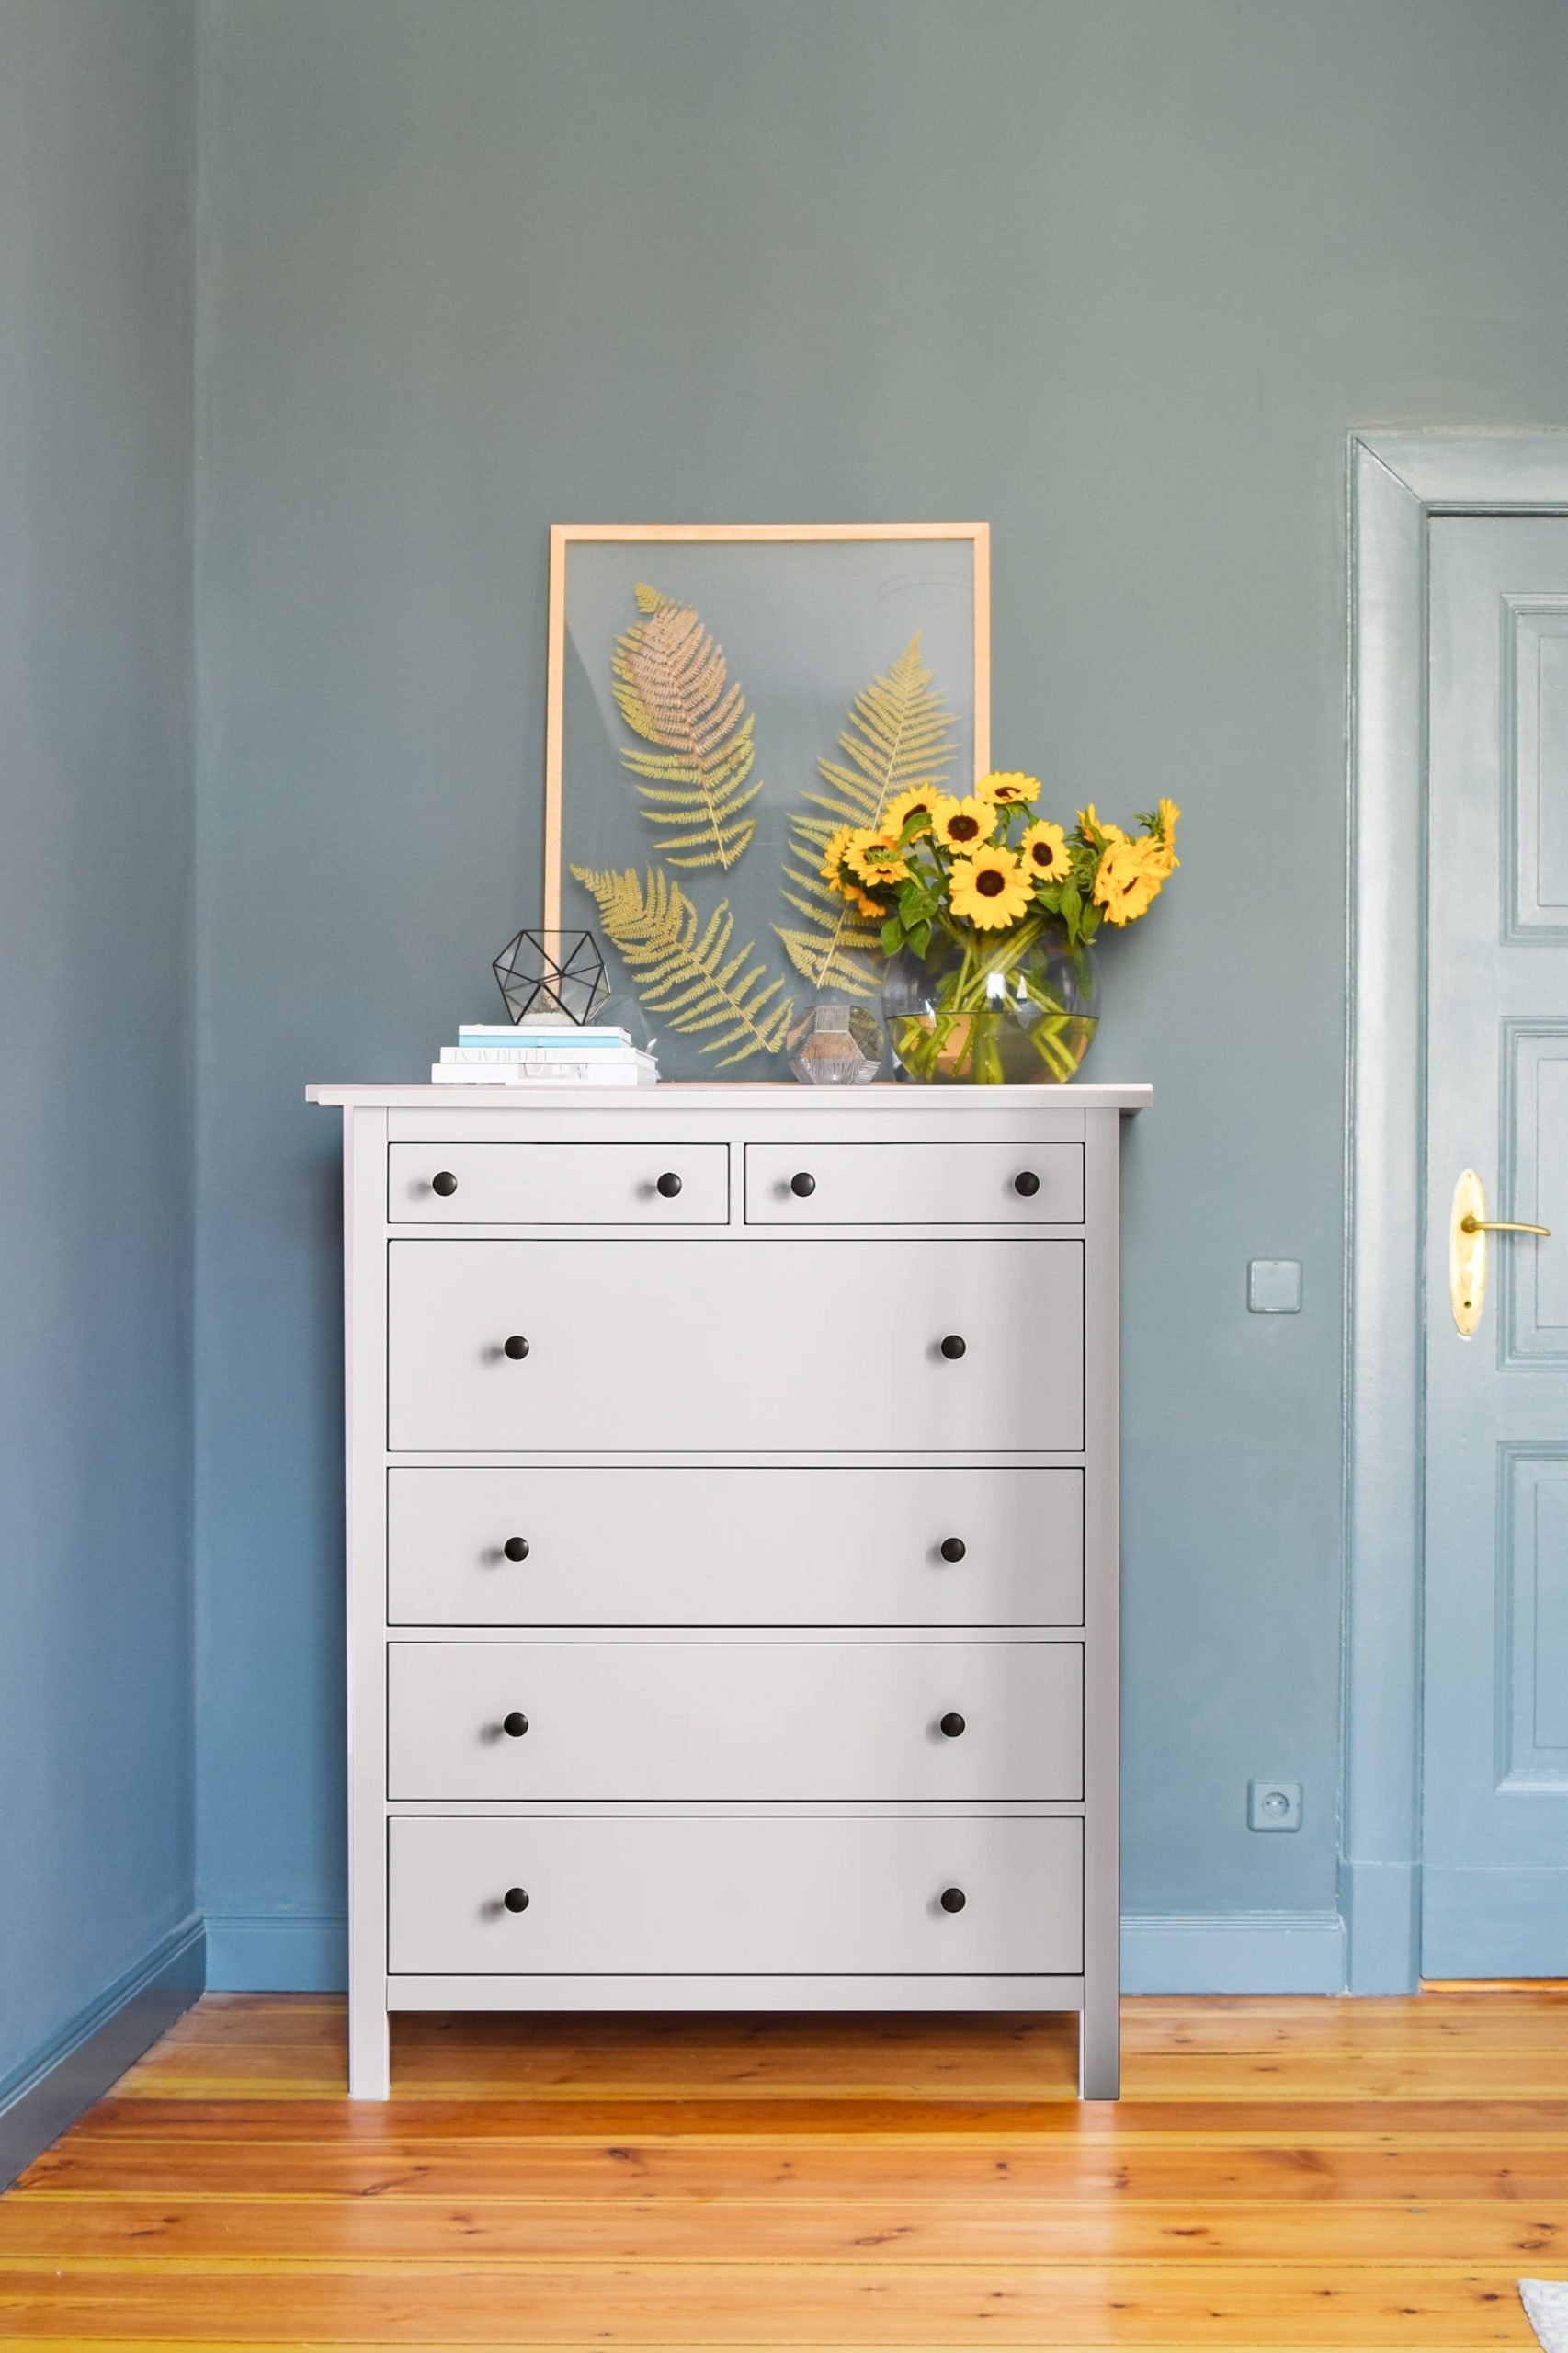
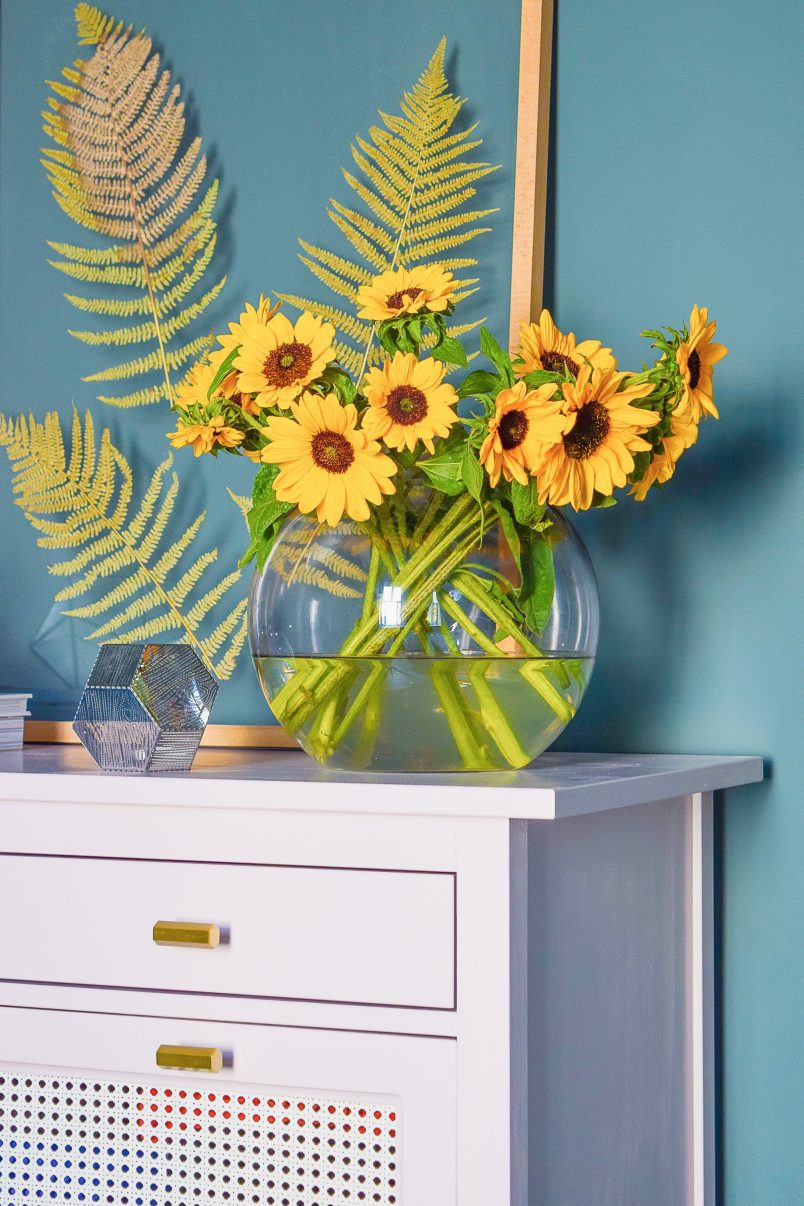
We’re absolutely in love with how this Ikea Hemnes dresser with cane webbing turned out! It gives us much-needed additional storage and looks great, too!
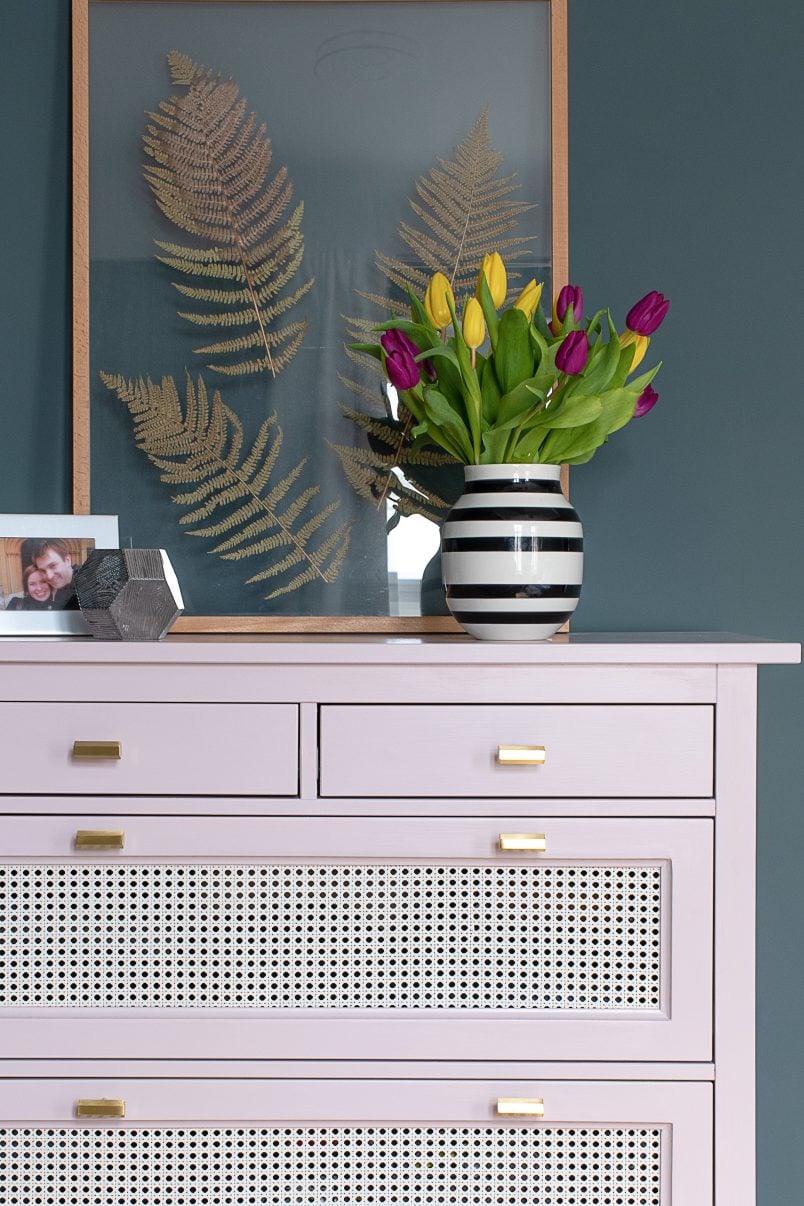
As you can see, we also changed the colour of the cane webbing. It just felt a bit too yellow so we gave it a coat of grey paint (Ammonite by Farrow & Ball). Even after over 8 years of DIYing, I’m still amazed at how much a bit of paint (and admittedly a bit of cutting & sanding) can transform something.
We’d love to know what you think of our Ikea Hemnes dresser with cane webbing! Let us know in the comments below!
Did you guess that this was originally an Ikea chest of drawers? Do you also find that you never seem to have enough storage?

Sigogneau says
Magnifique ! Une vraie réussite. Bravo à vous.
Christine says
Merci beaucoup!
Cx
Vicky says
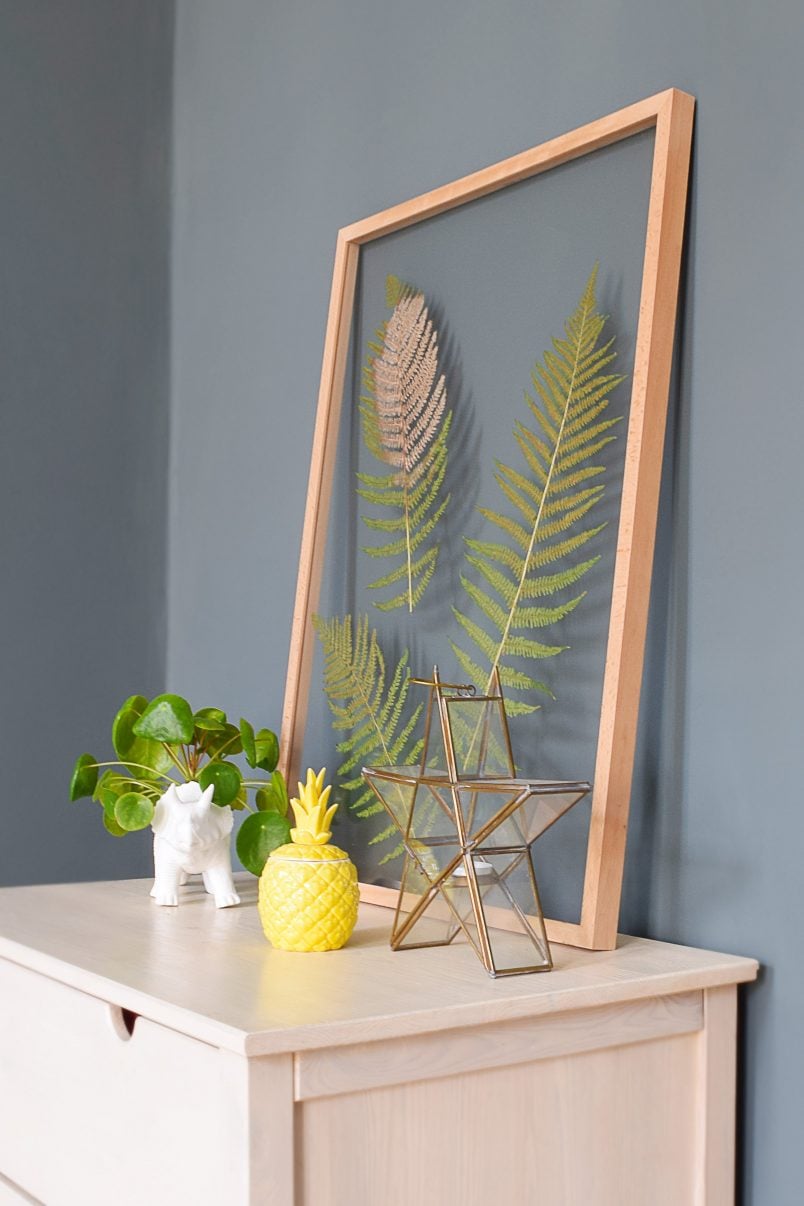
I love these drawers! May try to attempt this! May I ask where you got the gorgeous framed ferne leaves? I love that too!
Christine says
It was such an easy project, Vicky. I’d say go for it! We actually made the framed fern ourselves. It’s just a frame with two pieces of glass and a couple of bits of fern that I pinched out of the garden wedged between the two. If I made it again, I’d probably opt for one sheet of glass and a sheet of acrylic instead as it’s quite heavy.
Cx
Meredith says
MY GOSH! This looks beautiful, I need the patience to do this and boy if there was any aggravation with this it was totally worth it. You guys did an awesome job,
Christine says
Thank you so much, Meredith! It really wasn’t a difficult project to do!
Cx
Michelle says
This looks incredible! We are doing a master bedroom remodel and looking for new dressers. How did you paint the cane webbing? Just with a paintbrush or did you use spray paint? Can’t wait to give this a try!!
Christine says
Thank you so much, Michelle! We just placed the webbing on a flat surface and painted straight over it with a paintbrush. There really wasn’t anything to it. Just make sure to not use too much paint as you could clog the holes. We also stood it on its side while the paint dried so that it wouldn’t stick to anything.
Let us know if you need any help with anything – always happy to help if we can! Oh, and we’d love to see a picture of your finished dresser!
Happy DIYing!
Cx