[Ad – This post is in collaboration with Bosch Home & Garden and contains affiliate links. We only recommend products we love and think that you will, too! Read our full disclaimer here.]
Every year when the first rays of spring sunshine start to make an appearance, there are a few things that happen around here. I suddenly feel like our whole home needs a complete scrub from top to bottom, I always feel like I need to lead a healthier lifestyle, and we always start to plan fun outdoor DIY projects!
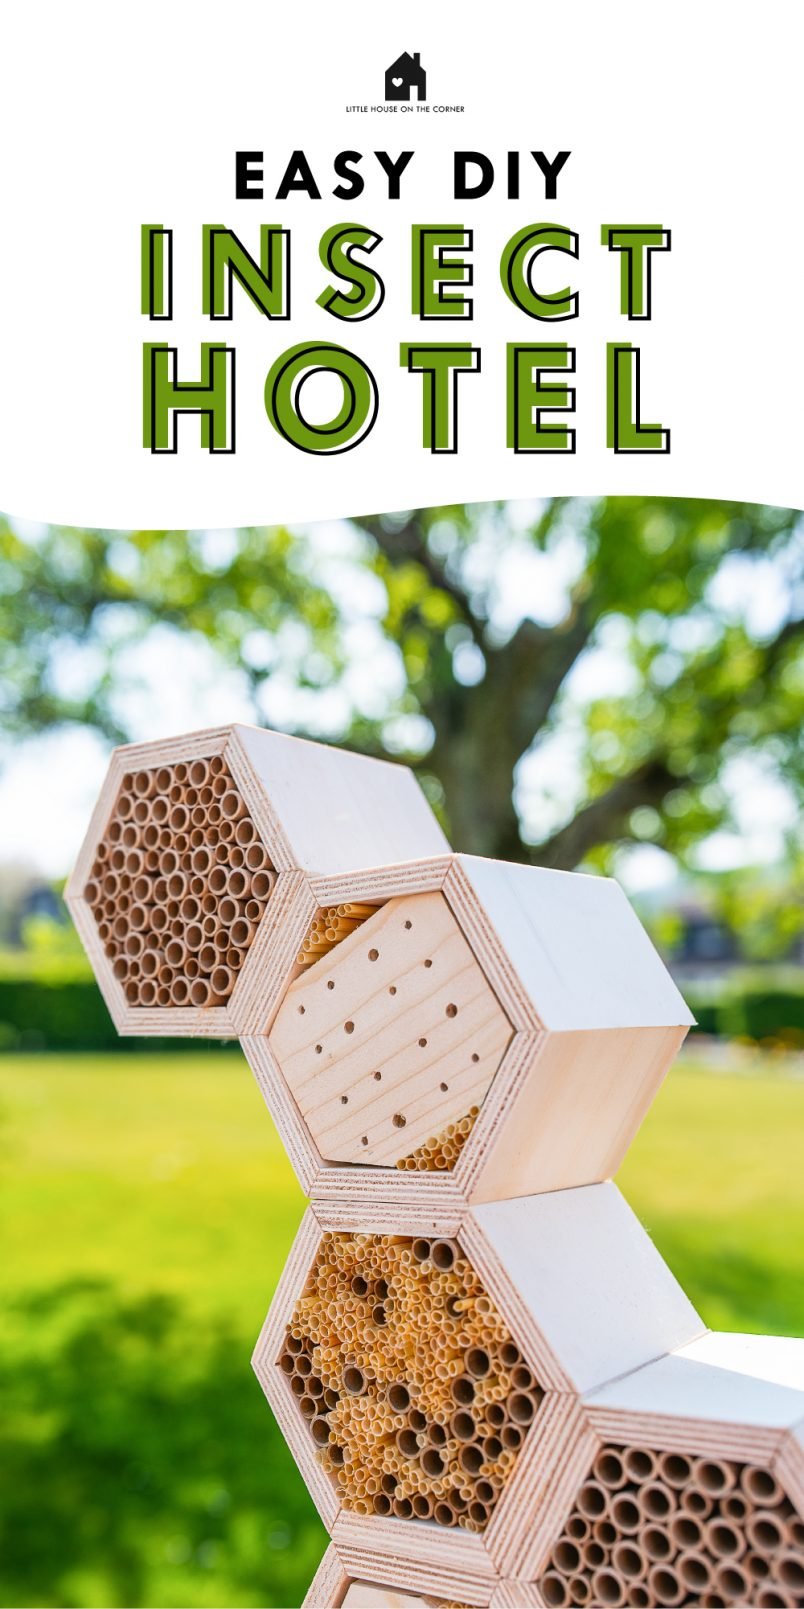
Now that spring is in full swing, what better time for a clean-up, sort out and a fun DIY project?! And, we’ve just finished our first outdoor project of the year – a DIY Bug Hotel!
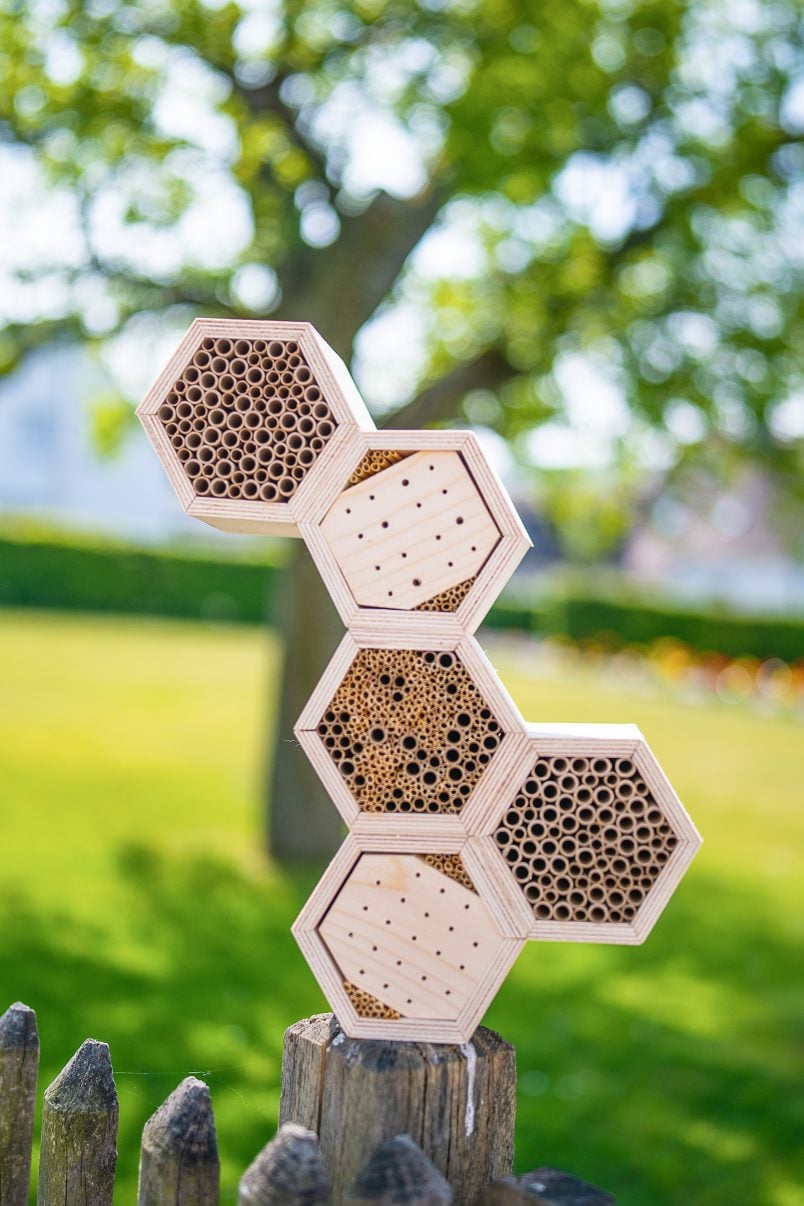
We only saw a handful of bees last summer and we definitely all need to do more to help the environment. This bug hotel is a really easy and quick way to help beneficial insects and bees while having some DIY fun!
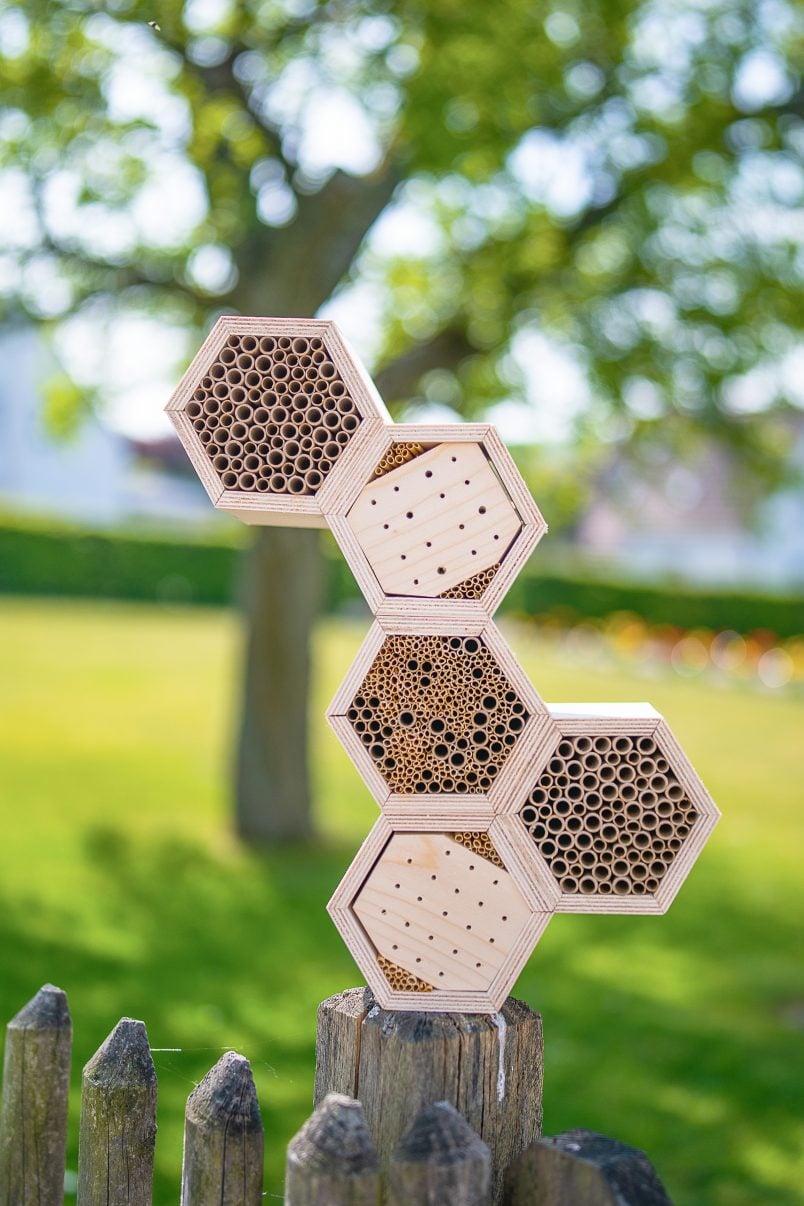
The best bit about this springtime project is that you can make it as small or as large as you want it to be by adding more honeycomb elements. You only need very few supplies for this project, and you can even forage for most of them making it super affordable!
This is what you will need to build a DIY bug hotel:

This post contains affiliate links. We only recommend products we love and think that you will, too! Read our full disclaimer here.
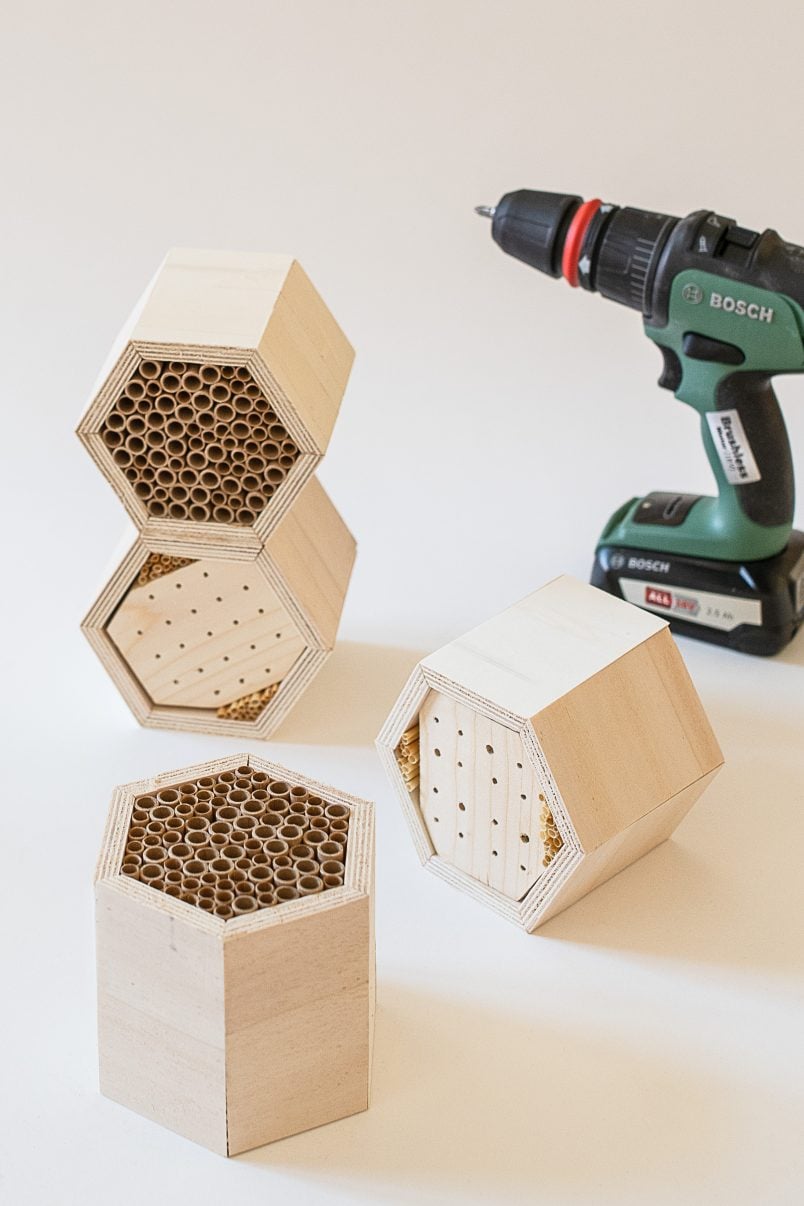
- 1 sheet of 1 x 60 x 60 cm plywood (cut into 11cm wide strips) – it’s enough to make 6 honeycombs
- Bosch Jigsaw PST 18 Li
- Bosch Cordless Drill Advanced Impact
- Tape measure
- 120 grit sandpaper
- Wood glue
- Clamps
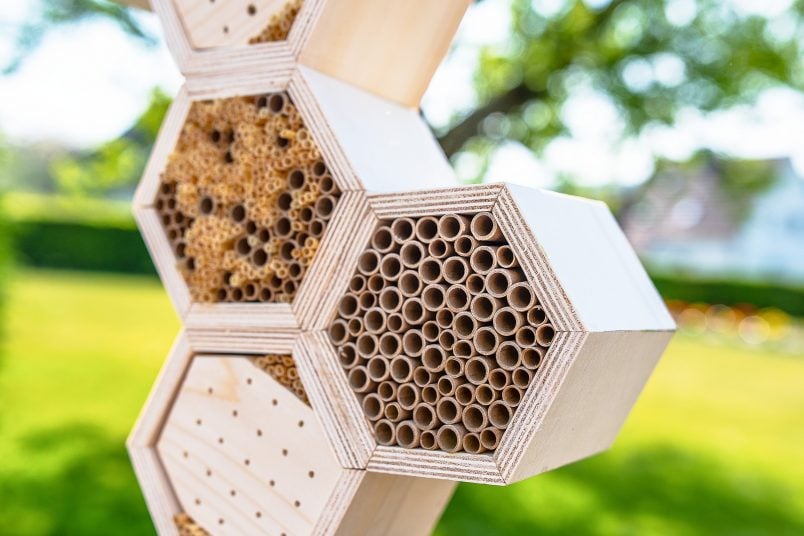
- A selection of natural materials like pine cones, twigs, sticks, hollow stems, small branches, offcuts of timber, etc, to fill your insect hotel. We used some timber blocks along with a selection of tubes
- Cardboard tubes for bees – different sizes are for different types of bees, like solitary bees
- Wheat Straws
- Hook for the back
- Some rope to tie it to a tree
This is how to build a DIY bug hotel:
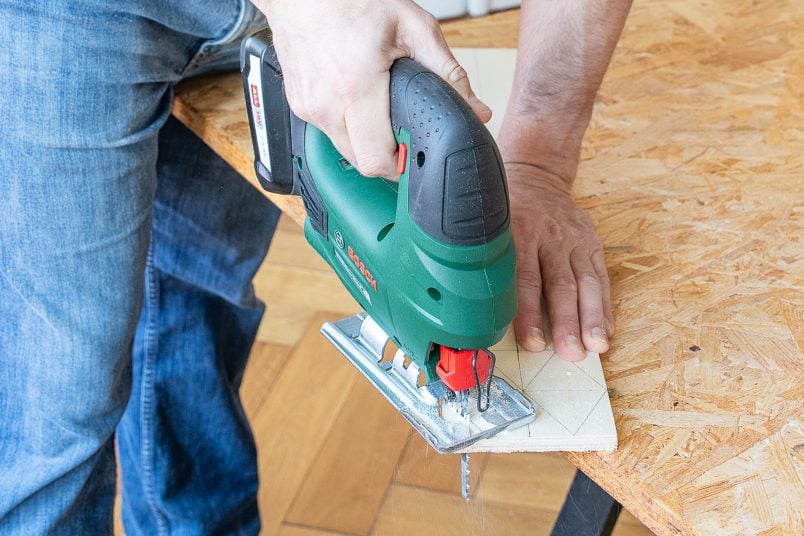
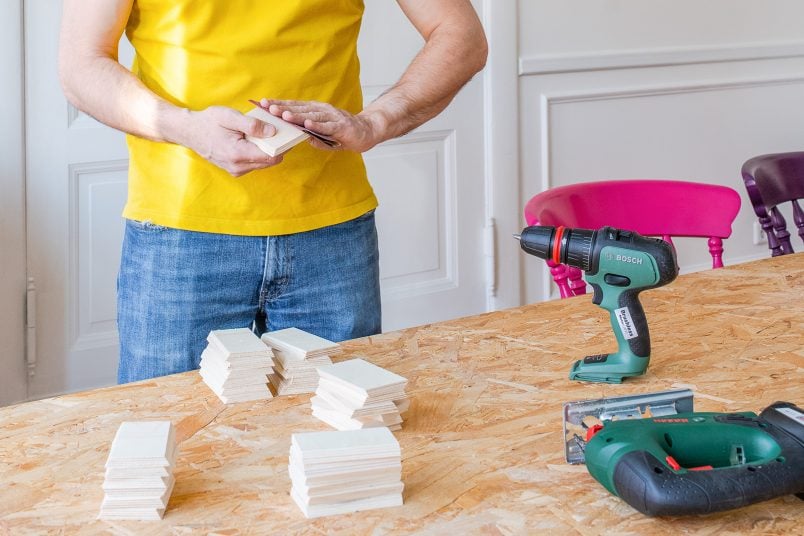
1. Cut & Sand
Start by preparing the outer honeycomb walls of your DIY bug hotel.
We had our plywood sheet cut into strips at our local DIY store when we purchased it, but you could easily cut it into 11cm wide strips yourself. I was just being lazy, and anything that saves time has got to be a good thing!
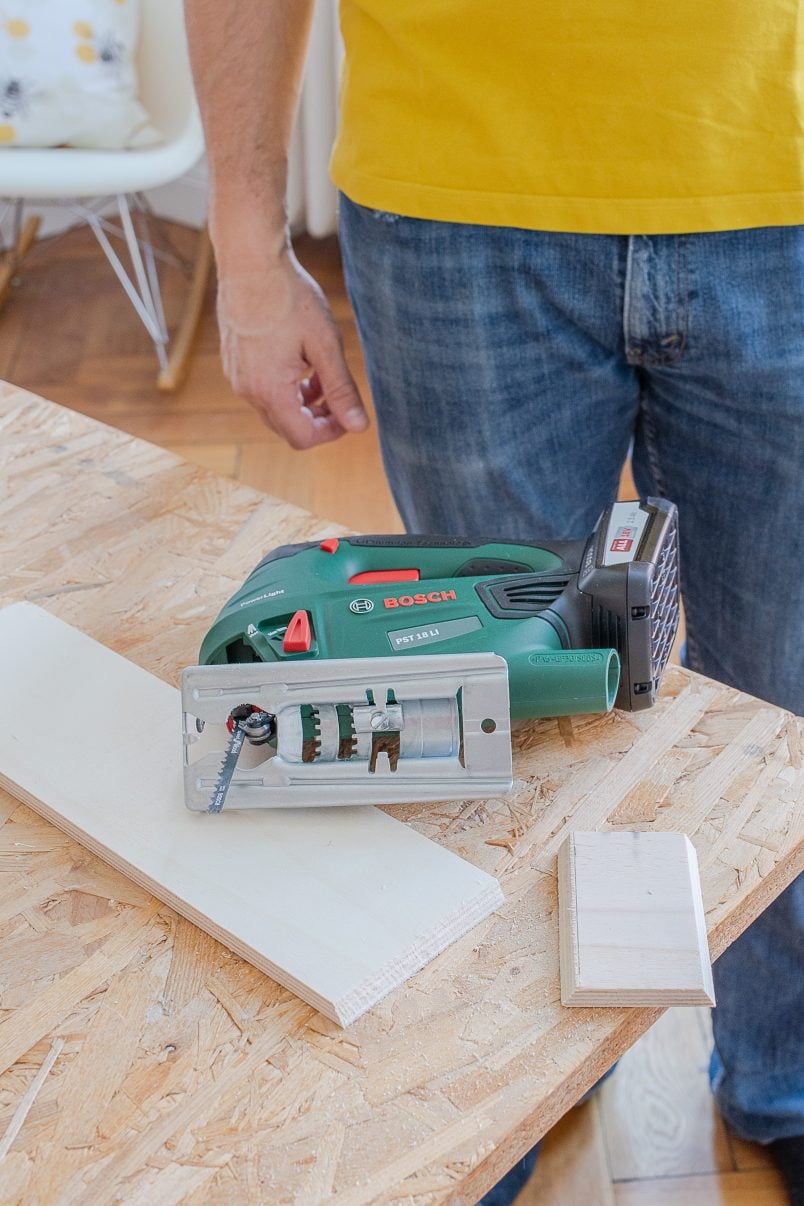
When you’ve got all of your strips prepared, you’ll have to cut them into lots of shorter pieces. For each honeycomb element, you’ll need 6 side pieces (which are all exactly the same) and one back hexagonal-shaped piece.
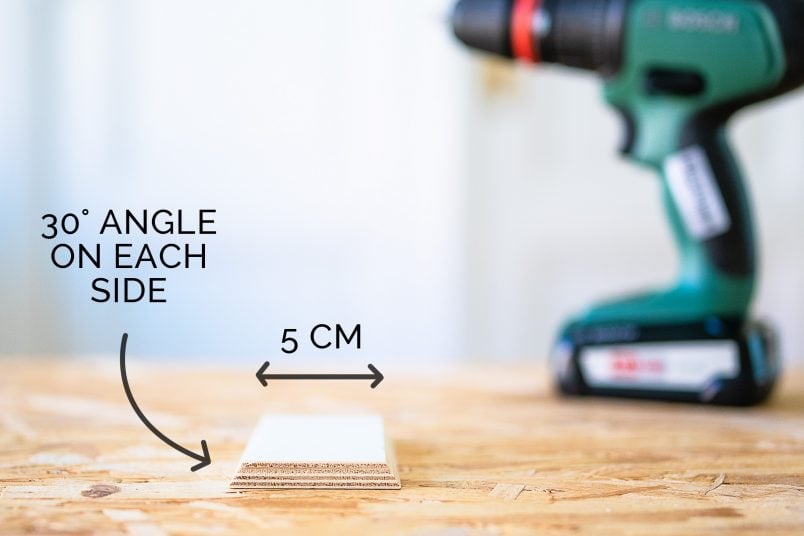
One of the great features of the Bosch PST 18li jigsaw is that you can adjust the angle of the blade, making it perfect for this project!
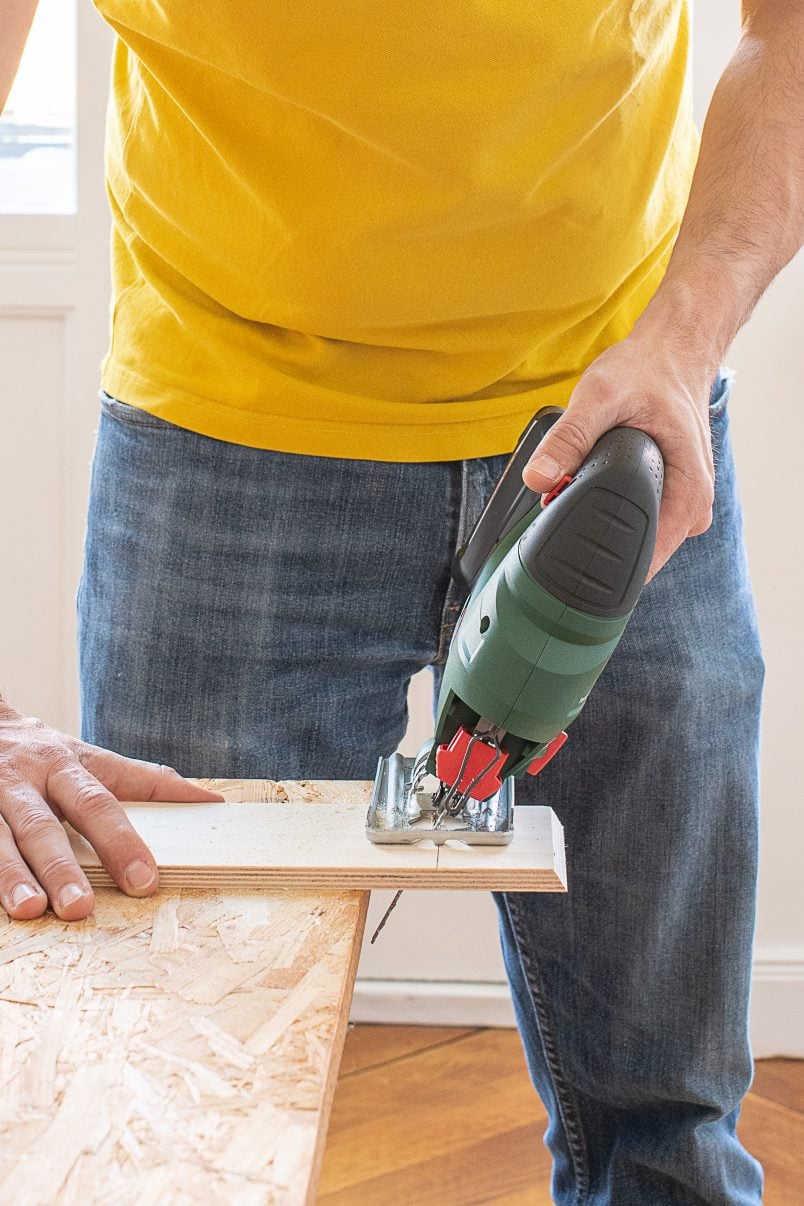
Adjust the jigsaw blade to a 30° angle and cut the plywood strips into 5cm long pieces, making sure that the angles are cut in the right direction.
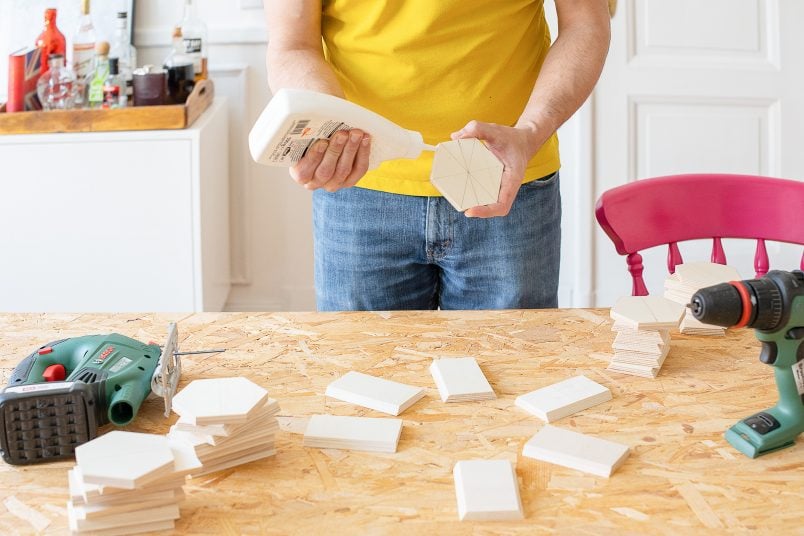
Each piece of plywood should look like this when you’ve finished.
When you’ve finished cutting the sides, all that’s left to do is cut the back pieces of the bug hotel.
For this, draw a hexagon onto the plywood and cut it out with your jigsaw. Drawing the hexagon can seem a bit tricky, but it’s not difficult to do. Just start by drawing one of the longest lines (which go from point to point and are 10cm long) and then add more diagonal lines at 60° angles before joining up all sides.
If this all sounds too complicated, I’ve drawn a hexagon shape the size you need for this bug hotel which you can download here and use to trace the shape onto your plywood).
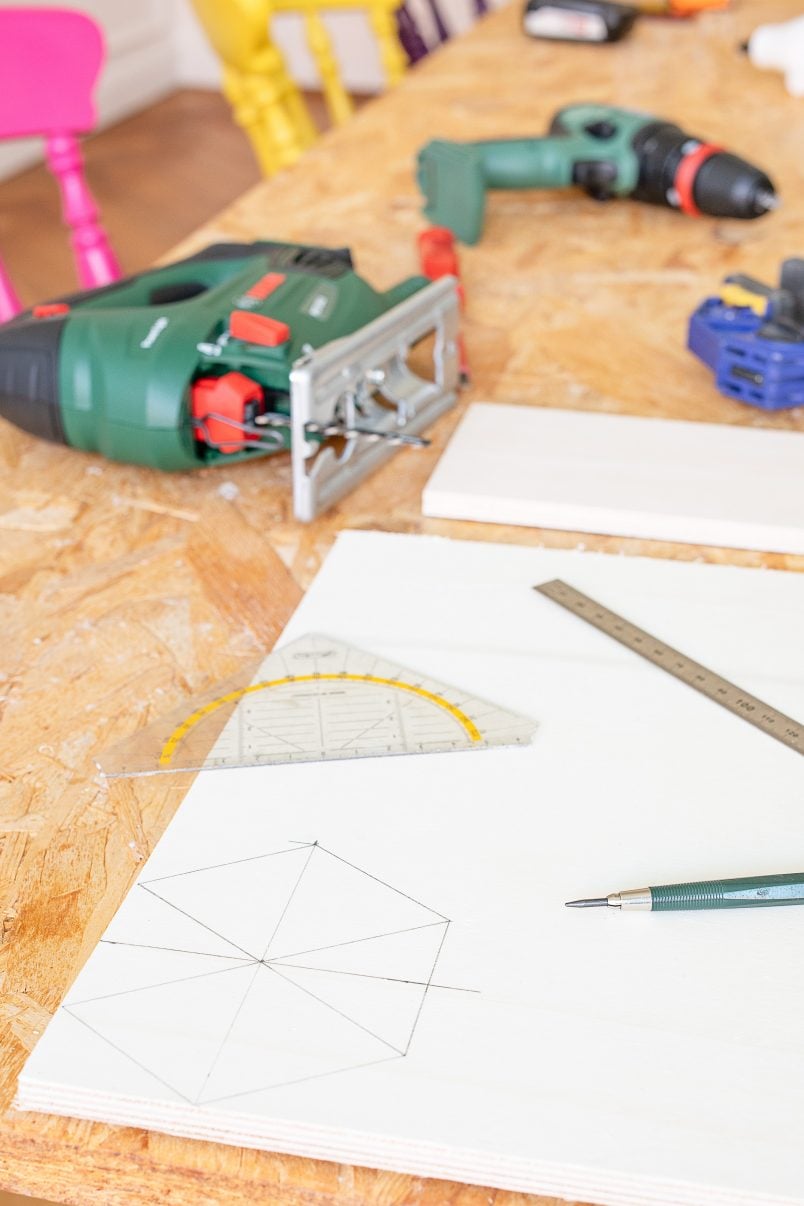
Set your jigsaw blade back to its original 90° setting and then cut out each hexagon. I love cordless tools like the Bosch jigsaw and cordless drill we used for this project, as you never have to worry about accidentally cutting through a cable!
When you’ve finished all cutting, give every piece of plywood a thorough sand to remove any sharp or rough edges. You want each piece to be completely smooth, as the insects could otherwise harm themselves!
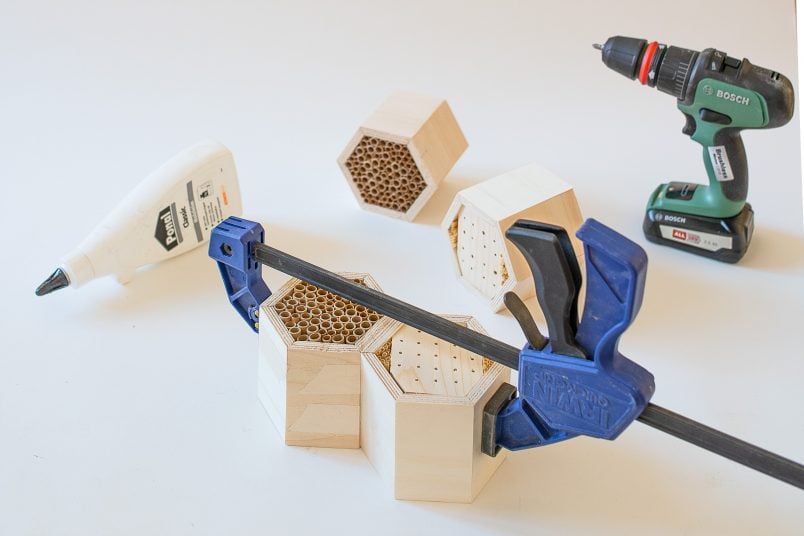
2. Assemble
Now that all pieces are prepared, you can start to assemble your DIY insect hotel.
Glue the walls around the edge of the base with some wood glue (don’t forget to add glue to the edges of each wall, too) and clamp them in place so that they are firmly pressed together while the glue dries.
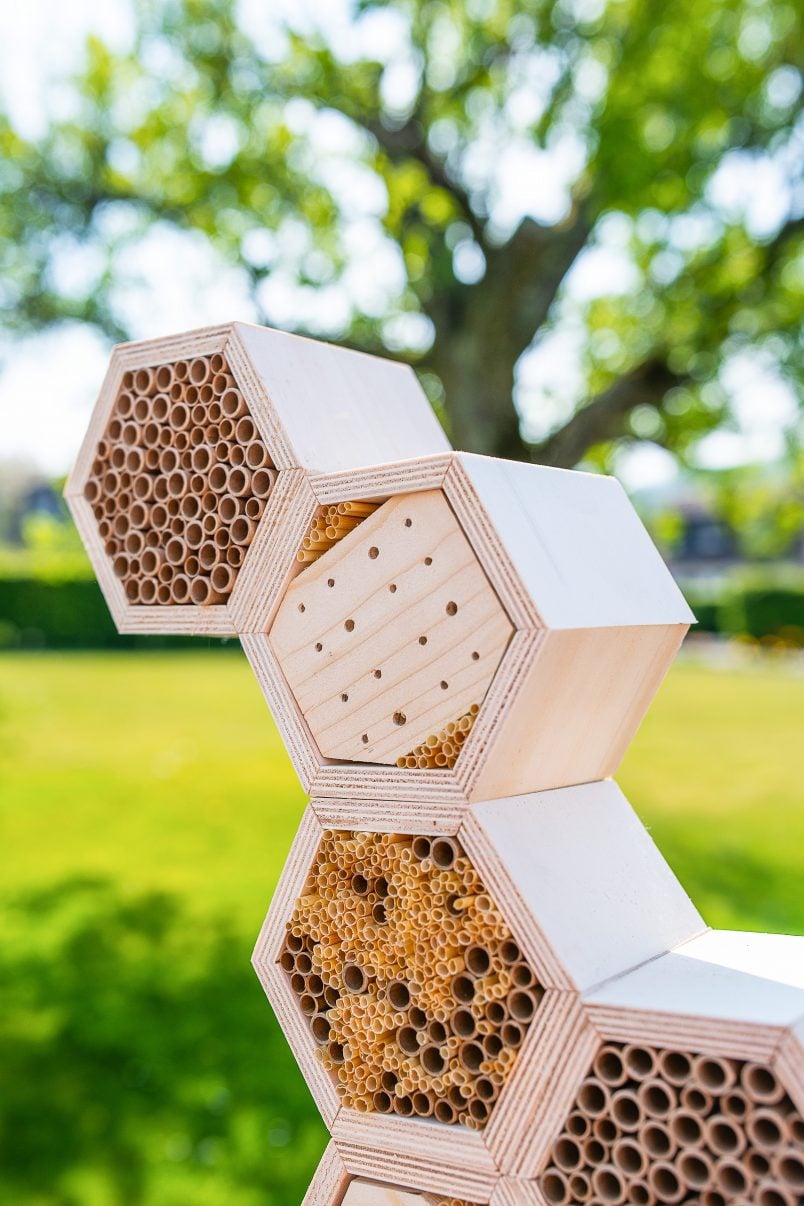
When you’ve finished assembling each honeycomb, you can start to assemble the insect boxes. For this, just glue the individual honeycomb elements together by applying some wood glue to the outer side of the honeycomb and clamping them together while the glue dries.
3. Fill
When you’ve built your hotel and the glue has dried, you can start to add the filling to create lots of little holes, grooves and pockets for the bugs to make their homes in.
Make sure it’s tightly packed so that the twigs and other bits can’t fall out.
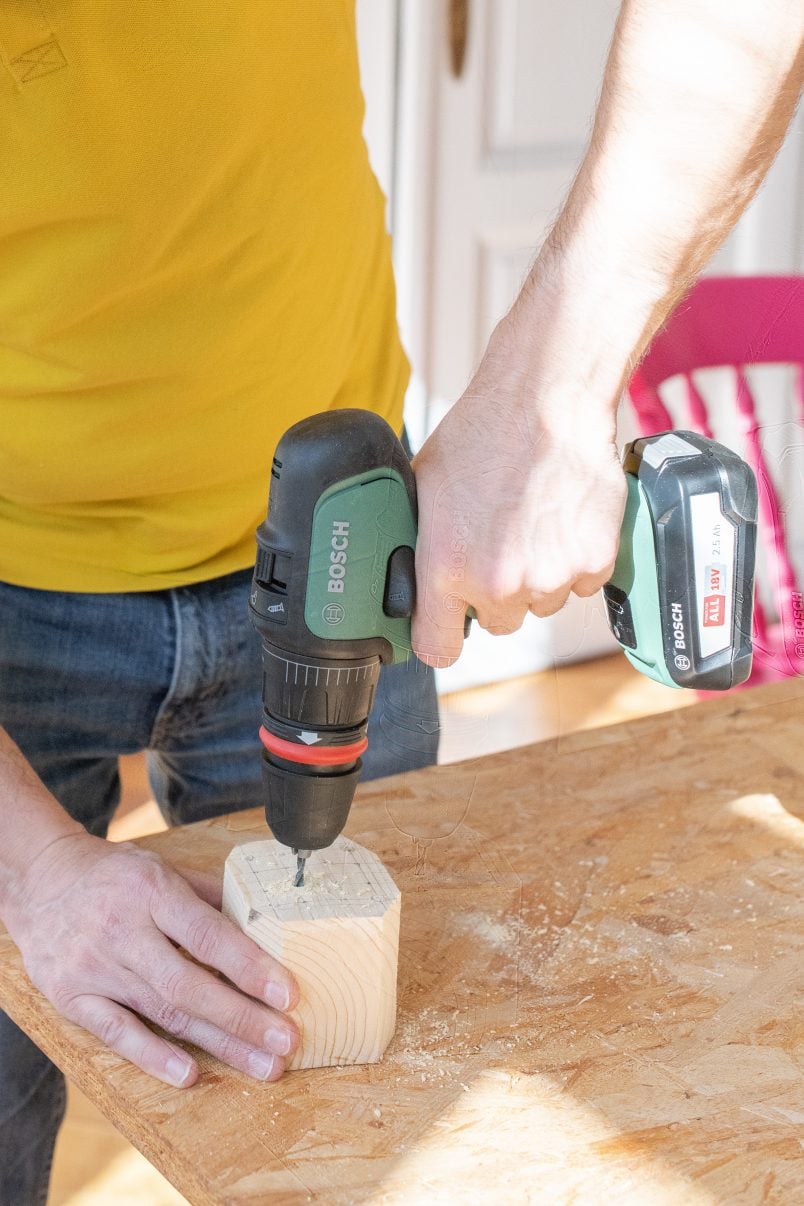
Another good idea is to use some timber blocks that you drill holes for the insects into. This was really easy to do with the help of the powerful Bosch cordless impact drill. Just use different-sized drill bits to create long and thin tubes for the bees (about 3mm to 6mm is ideal!)
Along with the timber blocks, we used a selection of cardboard tubes and straw straws to fill our insect hotel pods.
I actually did quite a bit of research on what’s the best filling for insect houses and it turns out that most of the bug hotels you see in DIY stores aren’t fit for purpose. Building your own DIY bug hotel is so easy to do and more helpful for the insects, too!
Here are some tips when it comes to filling your DIY bug hotel:
- Use natural, untreated wood that’s without chemicals like varnish, paint or wood protectant, as it could repel insects
- If you drill tubes into wooden blocks (like we did), make sure the tubes are completely smooth without splinters. In general, you don’t want rough edges anywhere, as the insects could harm themselves otherwise!
- Cardboard tubes are ideal for bees. Ideally use a selection of different sized tubes as each size is suitable for different insects and bees. Most shop-bought bug hotels have holes that are too large. Everything from about 2mm to 9mm is ideal, but the majority of your tubes should have a 3mm to 6mm diameter
- You should just use hardwood to build your insect hotel – something like birch, chestnut or oak would be ideal (we used a softwood, which isn’t ideal, and it’s why we’ll be placing the bug hotel somewhere where it’s protected from the rain)
- When you drill into a block of wood, don’t drill into the end grain, as this can cause the timber to split making it uninhabitable for the insects. Always drill at a 90° angle to the wood fibre.
- Consider where you put up the insect hotel tool. Make sure to place it somewhere sunny where it’s protected from the wind. Southeast or southwest-facing is ideal.
4. Hang & Enjoy
All that’s left to do is hang your DIY bug hotel outside on your balcony or in your garden. It’ll attract bugs and insects in no time, and they’ll have a lovely insect hotel to enjoy (we added a little hook at the back of the bee hotel to thread the rope through).
Insect hotels are a great way to help the environment and natural wildlife in your garden. We’ve always recycled everything that we possibly could. We had a compost bin & water butt in our last home, even when I was growing up it was totally normal to take any glass to the bottle bank or paper to be recycled and it’s something that has stuck with me.
Is a bug hotel going to save the world? Well, probably not, but I hope it helps, even if it is only in a tiny way.
And, if you’re looking for some other fun projects to try, head over to the Bosch DIY website where you can find loads of inspiration and a huge range of great projects!
Do you recycle? Do you have any tips for us to save/help/ do more for the environment? Have you ever tackled any projects to help the environment? Wouldn’t this be a great project to try with children? Do you have any fun spring DIY projects planned?

Josh says
I think you made a mistake on the plywood dimensions. I believe you meant 1 x 60 x 60 cm. Because 10 cm would be 4-inch thick plywood.
Christine says
You’re completely right, Josh! Thank you for letting me know – I’ve already updated the post.
Cx