Given that I can barely keep things alive about 90% of the time, cut flowers for me are always a great way to bring some greenery and colour into our home.
Don’t get me wrong, I love the few house plants we do have and they’re all holding up well enough so far but there’s something about fresh flowers that I can’t seem to resist, especially around this time of year when the first warm rays of sunshine start to make an appearance and I pretty much buy every tulip I can get my hands on.

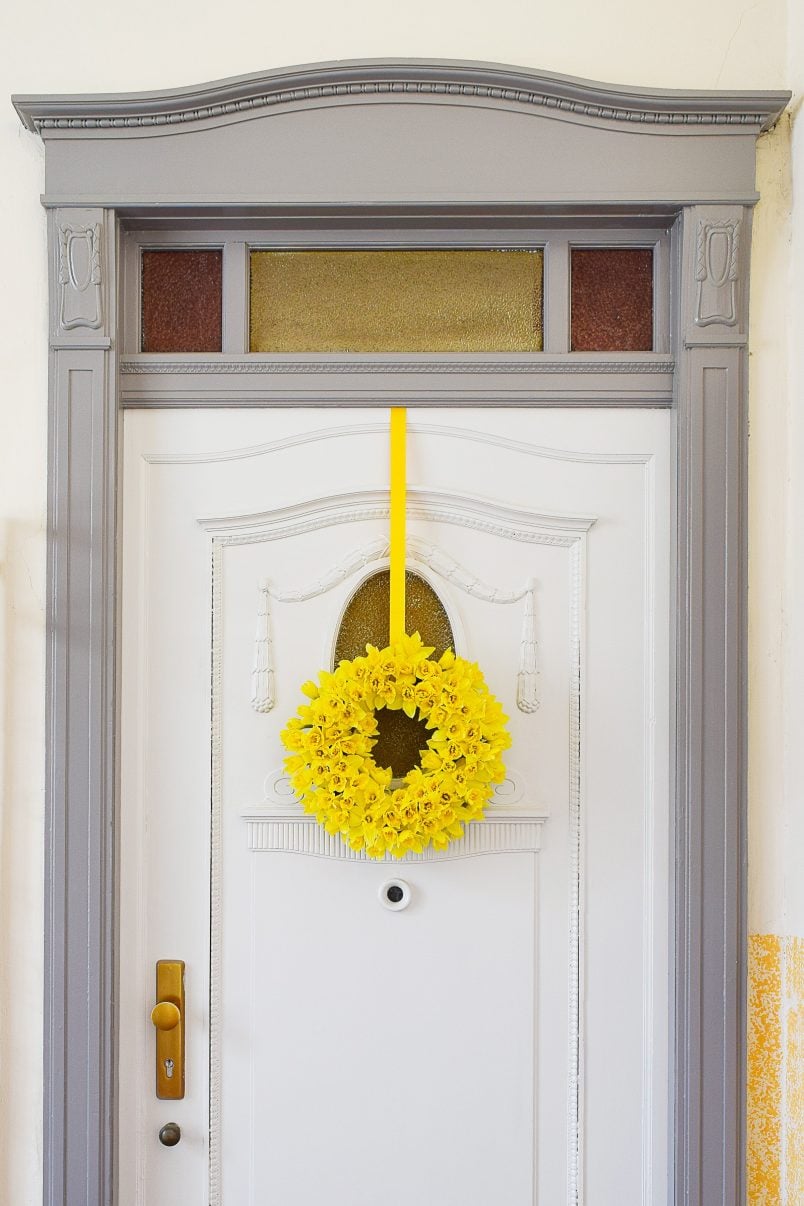
With our front door freshly painted and looking cleaner than it probably has done in the last 20 years, I figured it would be nice to introduce a bit of a spring feel to the outside of our home, too.
I should say, that I’m by no means an expert in anything to do with flowers or plants and I totally admit that I even had to google how to soak the oasis for the flowers before I started this project. But, as I got quite a few questions on how to make this wreath I thought I’d share this super easy guide. Seriously, it takes minutes and if I could make it, anyone can!

Here’s how we made our DIY spring daffodil wreath.
This is what you will need:
*This post contains affiliate links. As always, we only recommend products we love and use ourselves.
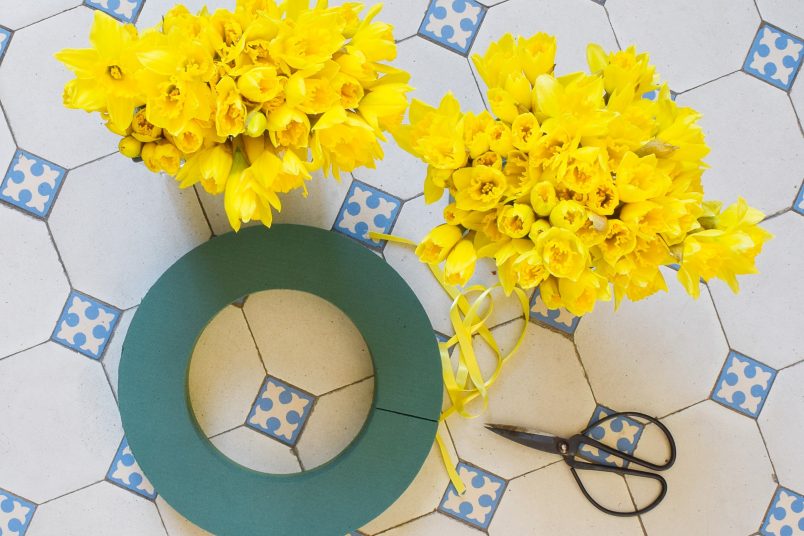
- Oasis wreath – I used this one with a 31cm diameter
- Lots of flowers – for our wreath I ended up using about 80 daffodils.
- Water (& ideally plant feed)
This is how to make a DIY spring wreath with daffodils:
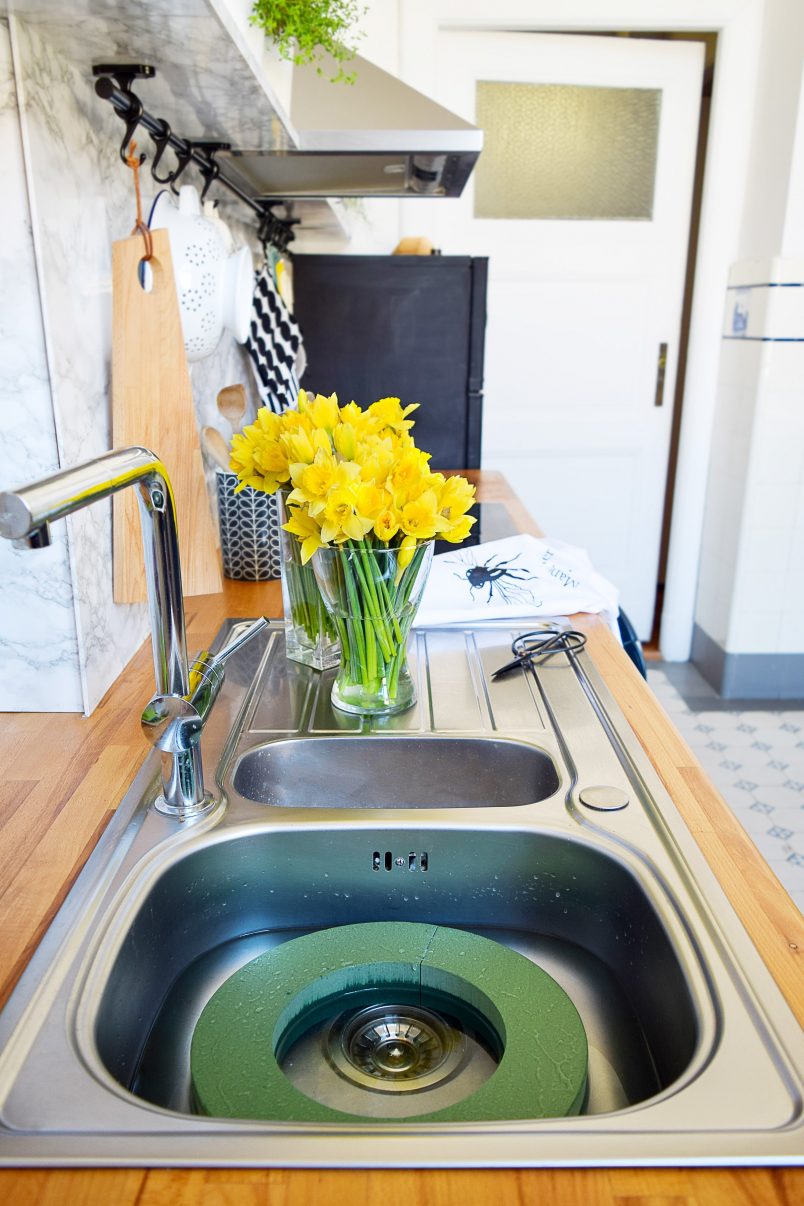
- Start by soaking your oasis in some water. Ideally, you’ll use water that’s enriched with some plant feed to make the flowers in your wreath last longer.
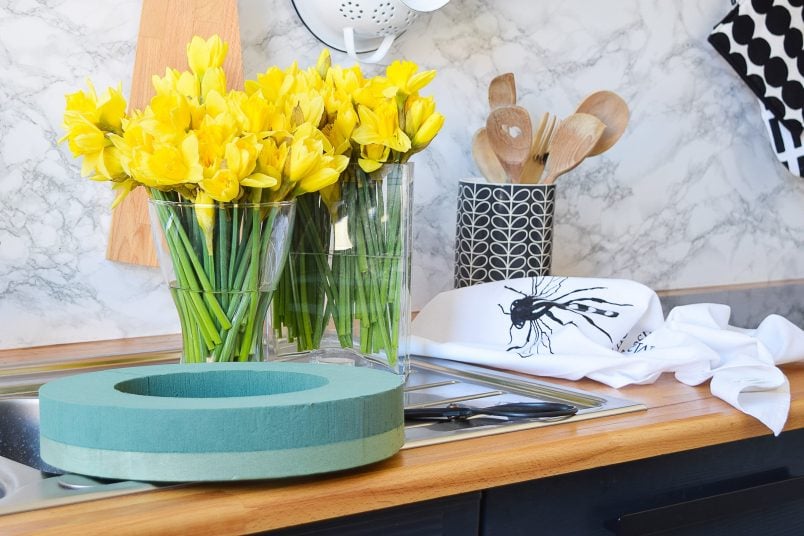
Just drop the oasis foam into the water and leave it to soak up all of the water on its own. Don’t be tempted to push it down otherwise it might not soak evenly. When it’s almost completely submerged and soaked up a lot of water it’s ready to decorate.
- Cut off the stems of the daffodils leaving about a centimetre long piece after the bud. Then just stick each stem into the oasis wreath. The oasis is soft so it’s really easy to push in the delicate flowers.
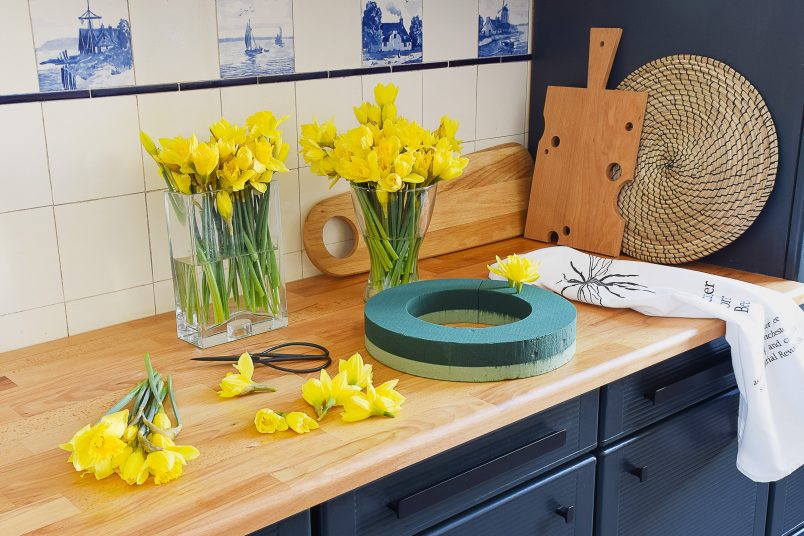
Then it’s just a matter of working your way around the wreath sticking in the flowers as you go. As you can see, our flowers were still semi-closed so I left a bit of distance between each of them to fully open and fill out without everything ending up too squashed.
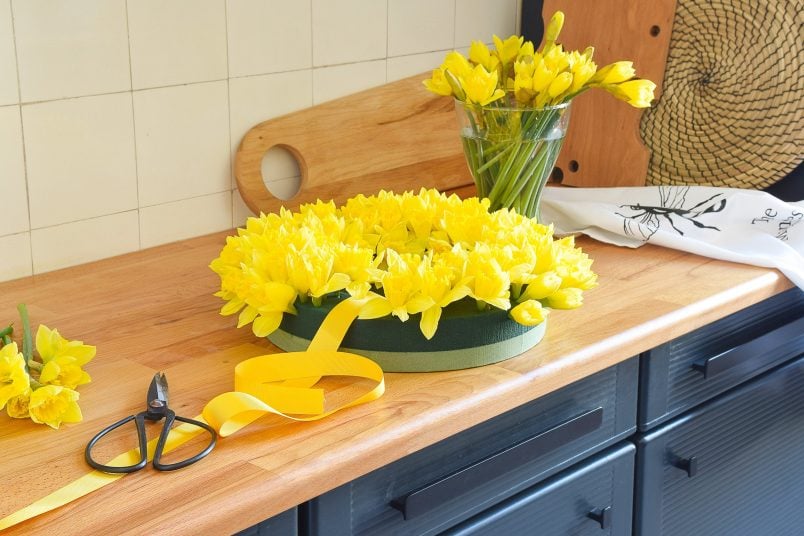
- Before you add the last daffodils, tie a ribbon around one side of the wreath so that you can hang it from your door. Then just fill the area around the ribbon so that it’s hidden before hanging from your door.
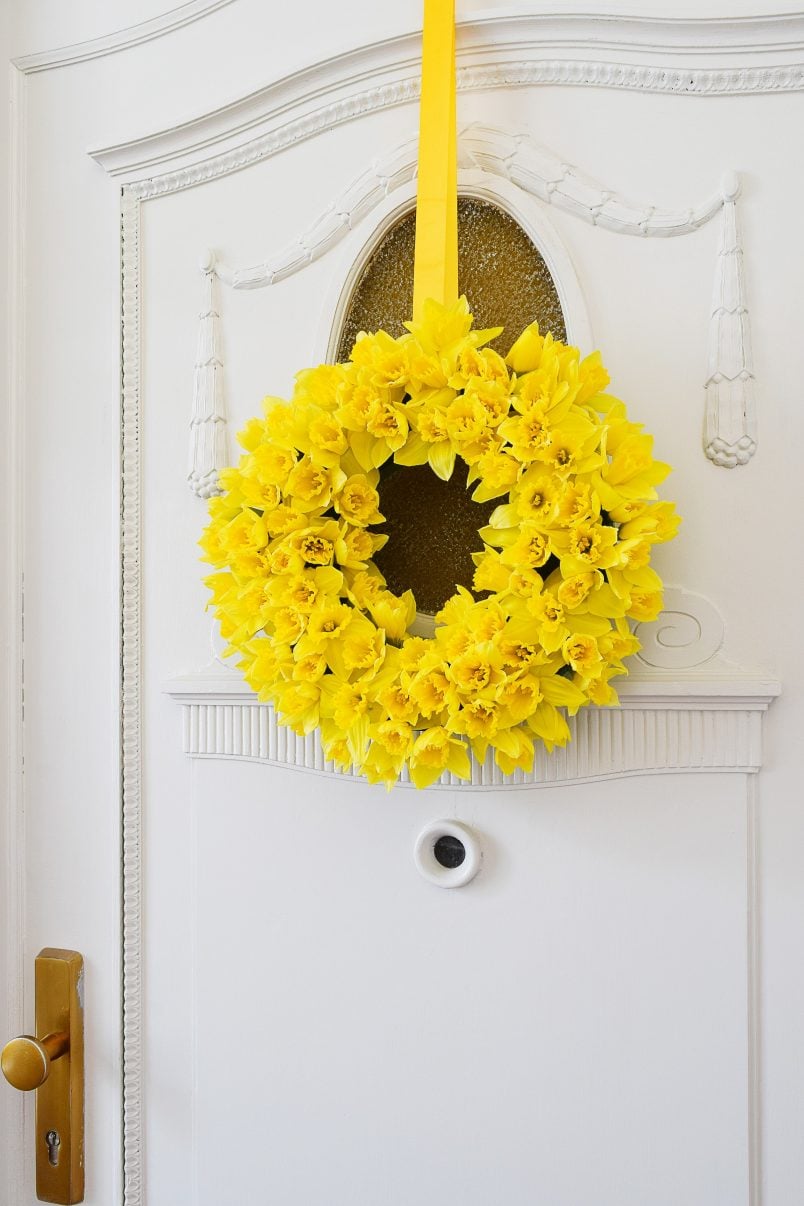
- I obviously wasn’t going to hammer a nail into our newly painted door to attach the wreath but there’s still a really easy way to attach it without wrecking your finish or making visible holes in your door. Just attach it from the top! Admittedly, this still involves making a hole in your door but I’m pretty sure that no one is ever going to notice it!

Ideally, you’ll use something like a clout nail to attach the ribbon as it has enough surface area to hold the ribbon firmly in place.
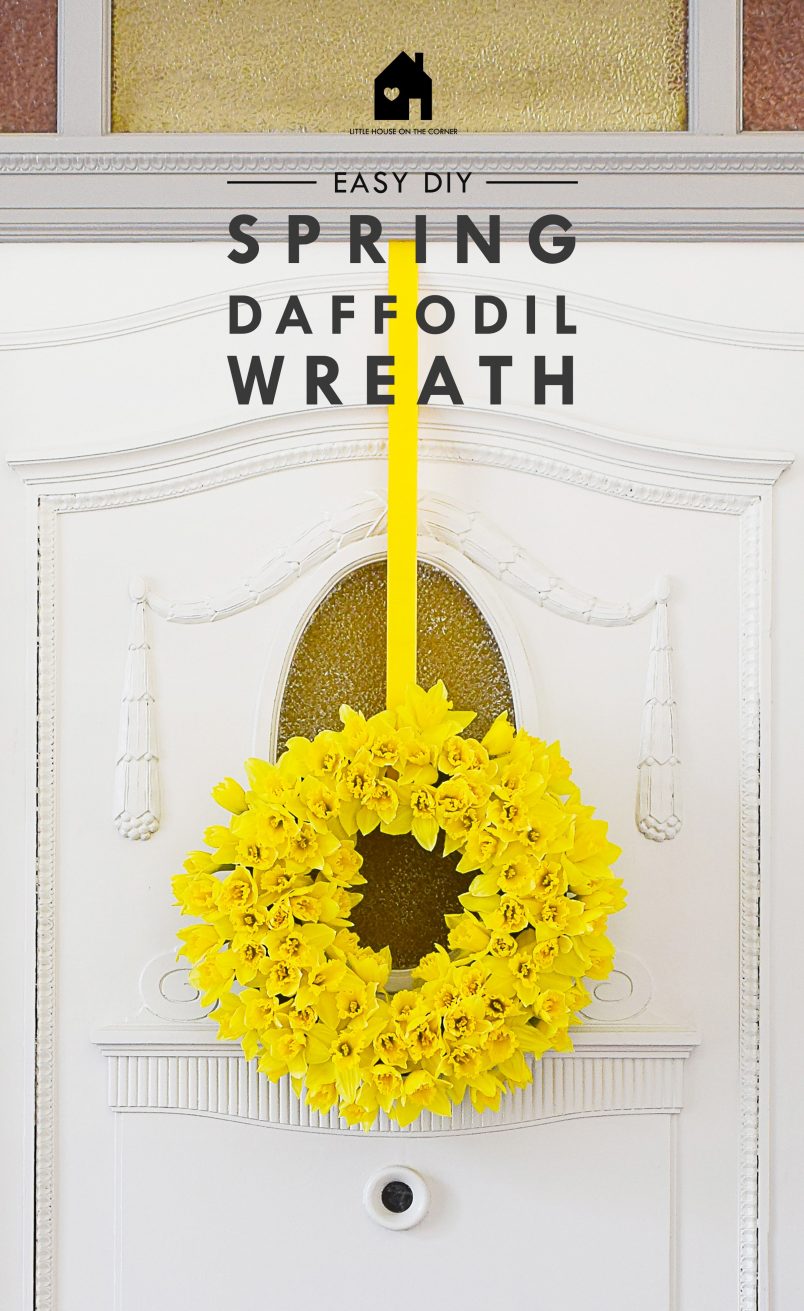
And there you have it, a super simple but effective DIY spring daffodil wreath that only took about 15 minutes to make.

Obviously, this isn’t a wreath that will last very long. Ours lasted about 5 days and I did give the whole thing a soak in water a couple of times as the flowers soaked up the water in the oasis foam very quickly.
Don’t forget that you can see our full front door makeover with lots of before and after pictures here.
Have you ever made a wreath to decorate your front door? Do you have any tips on how to make your flowers last longer?
Leave a Reply